

As the golden leaves begin to fall and the air turns crisp, a delightful challenge awaits in the kitchen: creating a show-stopping Halloween Layer Cake! This vibrant Hocus Pocus Halloween Layer Cake brings that essential festive flair to your celebrations, boasting colorful layers that are as thrilling as they are delicious. With just a few simple ingredients, this cake is not only easy to whip up but also a guaranteed crowd-pleaser, making it perfect for parties or cozy family movie nights. The best part? It’s a wonderful opportunity to get the whole family involved, turning baking into a fun bonding experience. Ready to transform your kitchen into a magical baking haven this Halloween? Let’s dive into the spellbinding process!
Why Is This Halloween Cake a Must-Make?
Irresistible Festivity: This Halloween Layer Cake is a vibrant centerpiece that captures the spirit of the season, making your gatherings come alive with color and fun.
Family Fun: Involve your loved ones in the baking magic! Kids will adore the colorful layers and decorating process, making it a memorable activity together.
Easy to Customize: Whether you prefer classic vanilla, chocolate, or something unique, you can easily switch up the cake flavors to suit everyone’s taste.
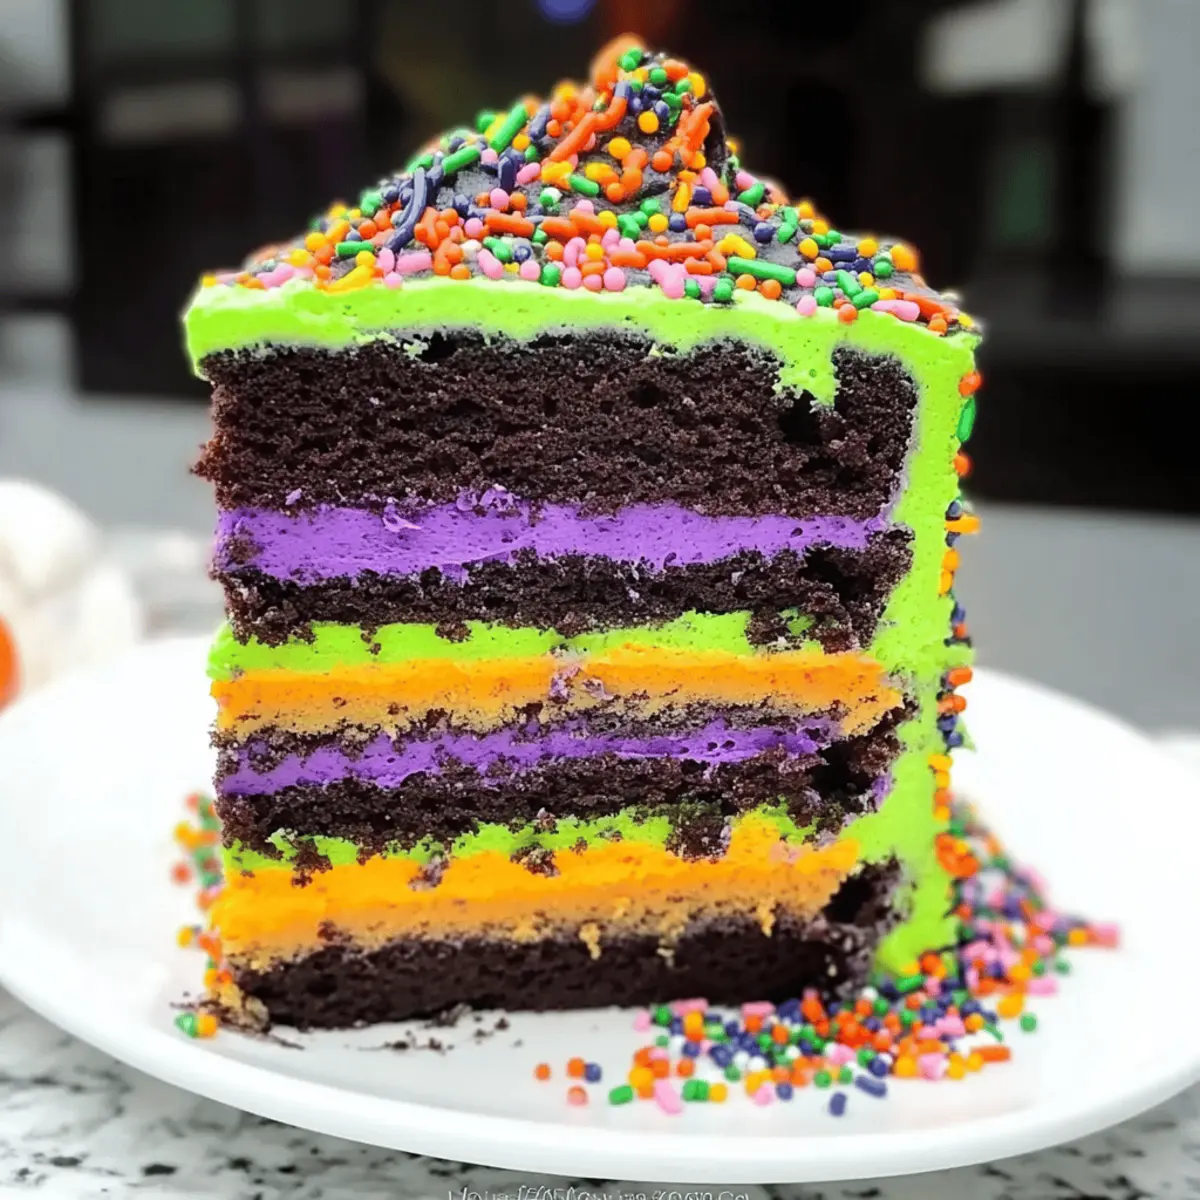
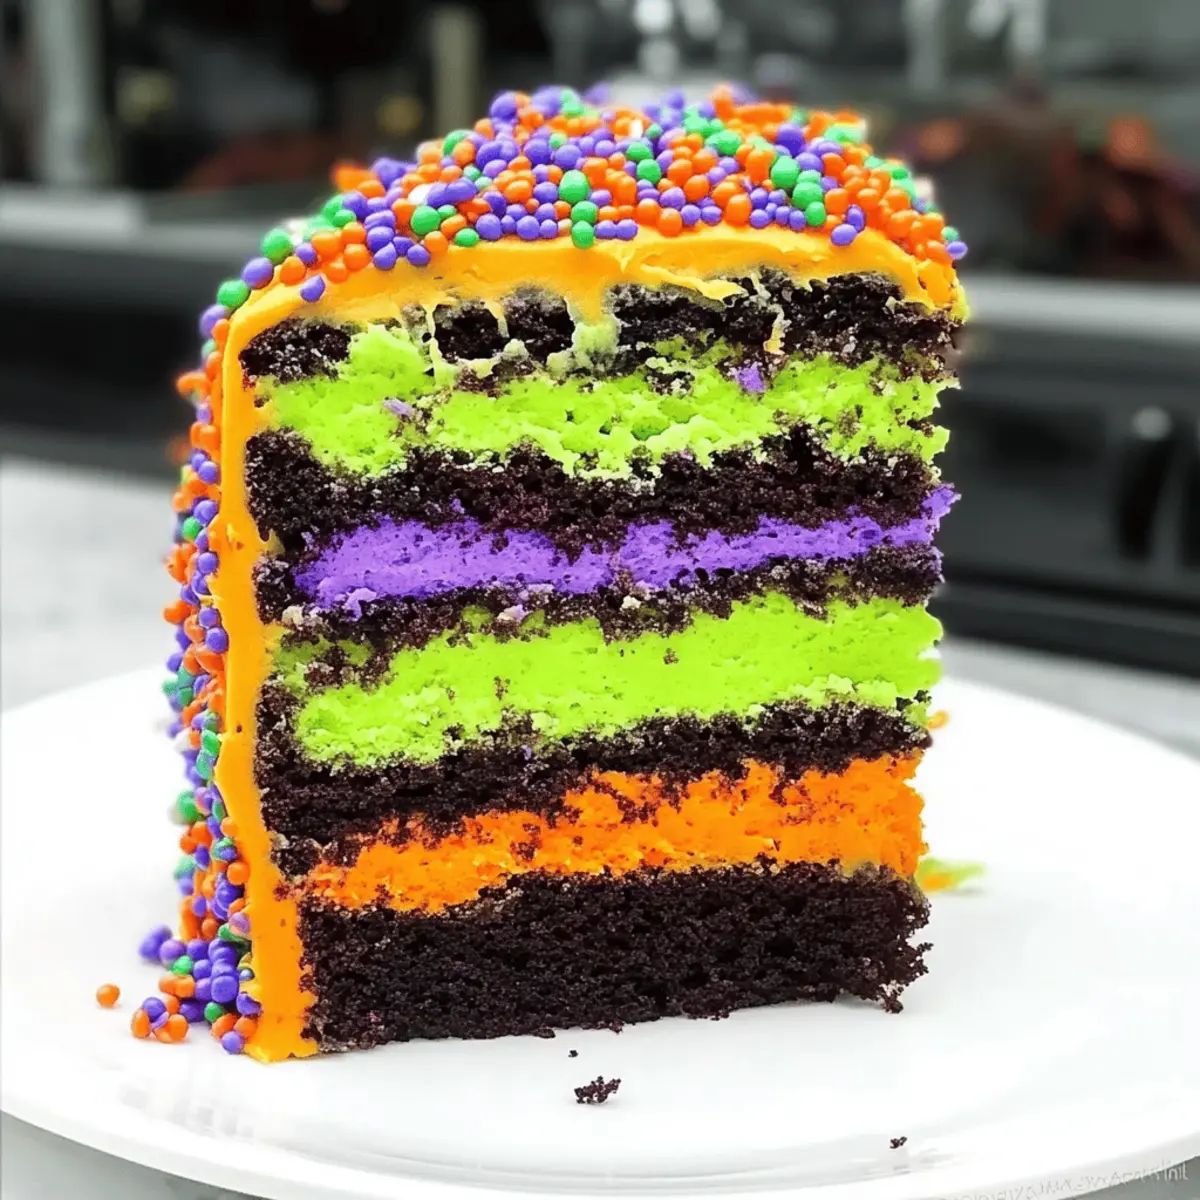
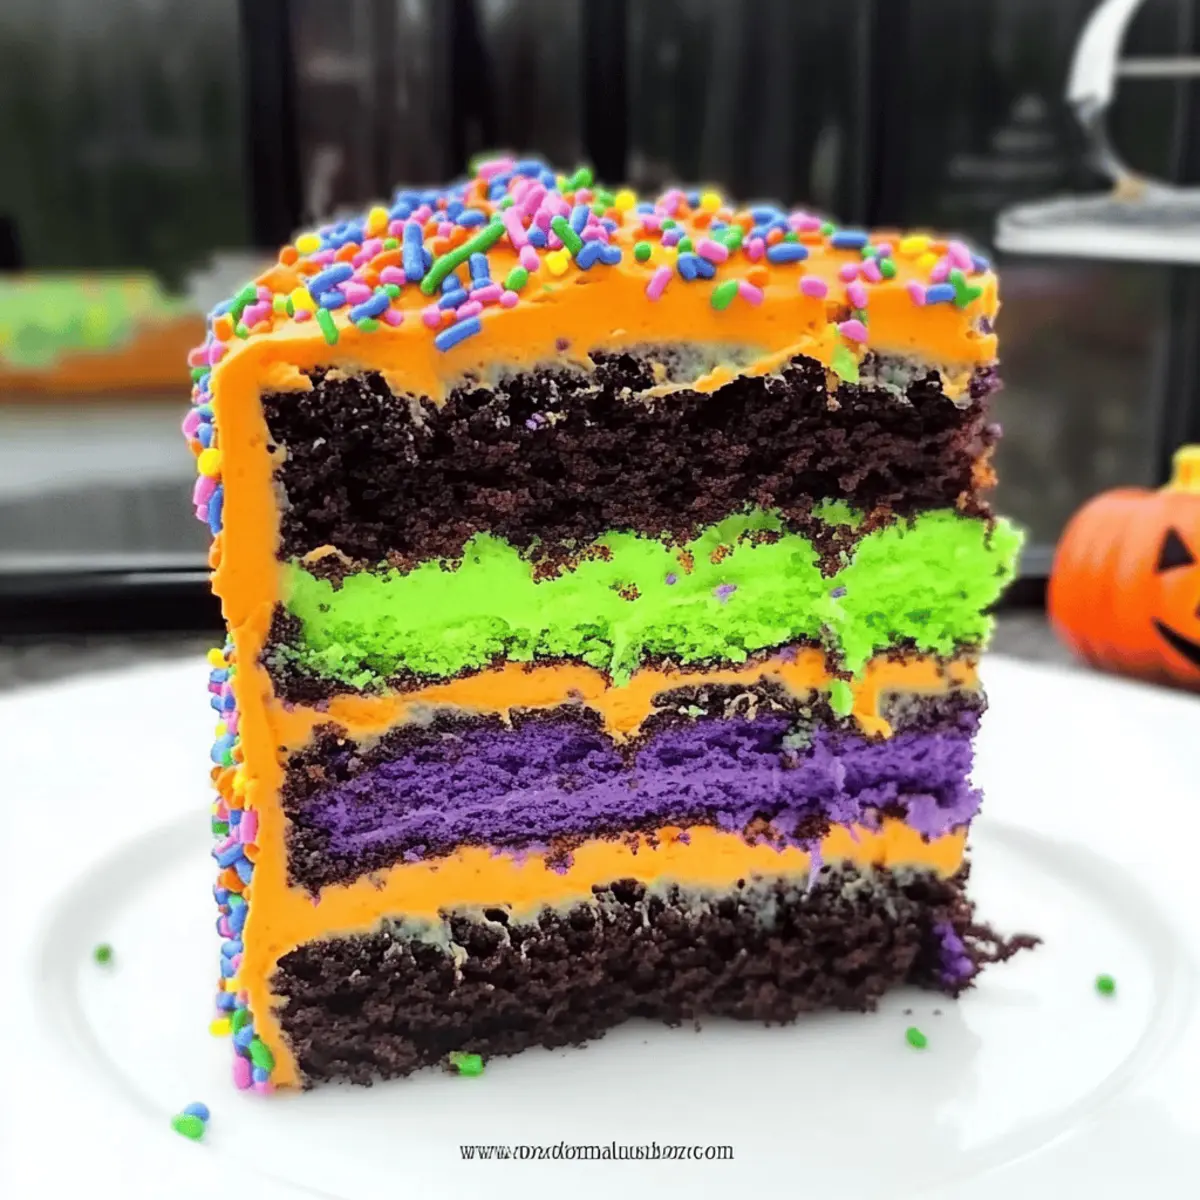
Visual Appeal: The striking green, purple, and orange frosting layers topped with festive Halloween sprinkles will mesmerize your guests, ensuring it’s the star of the dessert table.
Quick Preparation: With minimal ingredients and straightforward steps, you’ll spend less time baking and more time enjoying the festivities. Pair it with delightful snacks or a batch of Halloween cookies for an unforgettable spread!
Halloween Layer Cake Ingredients
For the Cake
• Cake Mix – The foundation of your Halloween Layer Cake, easily swapped for homemade batter for a personal touch.
• Clarified Butter – Brings incredible richness and moisture; consider using unsalted butter to manage salt levels.
For the Frosting
• Powdered Sugar – Essential for sweetness and structure; you can use confectioners’ sugar for a glossier finish.
• Cream (Heavy Whipping Cream) – Provides smooth aeration for the frosting; milk can be an alternative for a lighter texture.
For the Decorations
• Gel Food Colorings (Green, Purple, Orange) – These vibrant colors bring your cake to life; gel colorings deliver more intense hues than liquid.
• Halloween Sprinkles – Fun and festive, these sprinkles enhance your cake’s appearance; feel free to mix in any themed sprinkles you find!
Step‑by‑Step Instructions for Halloween Layer Cake
Step 1: Prepare the Oven and Pans
Preheat your oven to 350°F (175°C) while you prepare your cake pans. Grease three round cake pans with clarified butter, then line the bottoms with parchment paper to ensure easy removal after baking. This will help your Halloween Layer Cake come out perfectly and keep its lovely shape.
Step 2: Mix the Cake Batter
In a large mixing bowl, prepare your cake mix according to the package instructions. Once blended, divide the batter evenly into the three prepared cake pans. Use a spatula to smooth the tops, ensuring even layers that will bake beautifully.
Step 3: Bake the Cake Layers
Place the pans in the preheated oven, baking for about 25 to 35 minutes. The cakes are done when a toothpick inserted into the center comes out clean. Keep an eye on them after 25 minutes to prevent overbaking. Once baked, let the layers cool in the pans for 10 minutes before transferring them to wire racks.
Step 4: Make the Frosting
While your cake layers cool, prepare the frosting. In an electric mixer, cream together softened butter until light and fluffy, then gradually add powdered sugar. Pour in heavy whipping cream as needed to achieve a smooth, spreadable consistency for your Halloween Layer Cake.
Step 5: Color the Frosting
Divide the frosting into four separate bowls. Leave one portion dark green for the cake’s outer layer, then dye the remaining frosting batches with gel food colorings: one green, one purple, and one orange. Mix until the colors are vibrant and well incorporated.
Step 6: Assemble the Cake Layers
Start assembling your Halloween Layer Cake by placing the first cooled cake layer onto a serving plate. Pipe rings of the colored frosting on top, alternating between green, purple, and orange. Repeat this process for the second and third layers, allowing the colorful icing to create a delightful visual effect.
Step 7: Frost the Cake
Once all layers are stacked, cover the entire cake with the reserved dark green frosting. Use an offset spatula to create a smooth finish. This dark green layer will beautifully contrast with the vibrant colors and enhances the Halloween theme.
Step 8: Add Decorations
To enhance the festive flair, generously apply Halloween sprinkles to the top and sides of the frosted cake. You can press them lightly into the frosting to ensure they stick. The colorful sprinkles will add that magical touch to your Halloween Layer Cake.
Step 9: Final Touches
For an extra spooky effect, pipe decorative dollops on the top using any remaining frosting, and if desired, add piping gel for “oozy” drips around the edges. Chill the cake for about 30 minutes before serving to firm up the frosting and make cutting easier.
What to Serve with Halloween Layer Cake
As your party buzzes with excitement, presenting the vibrant Halloween Layer Cake sets the stage for a magical feast of flavors and textures.
-
Spooky Punch: A refreshing, fruit-flavored drink can intrigue your guests while balancing the sweetness of the cake. Consider adding floating gummy worms for added fun!
-
Candy Corn Parfaits: Layered with yogurt and topped with candy corn, these colorful treats echo the cake’s festive theme, creating a delightful visual and flavor contrast.
-
Pumpkin Spice Cookies: The warm spices of pumpkin cookies provide a cozy, autumnal touch, perfectly complementing the cake’s rich sweetness.
-
Sweet Potato Fries: Their crunchy texture and slightly sweet flavor offer a contrast to the softness of the cake, making a delightful savory-sweet combination.
-
Cheese Board: A selection of cheeses, nuts, and dried fruits can elevate the celebration, creating a gourmet touch and catering to savory cravings in between sweet bites.
-
Caramel Popcorn: This crunchy, buttery treat adds a whimsical note to your dessert table, echoing the playful essence of Halloween while providing a satisfying texture.
-
Cider Mill Float: A scoop of vanilla ice cream topped with warm apple cider offers a comforting treat that pairs beautifully with the cake, enhancing the festive vibe.
-
Chocolate Dipped Pretzels: Their salty crunch meets sweet chocolate, offering a delightful snack alongside the Halloween Layer Cake, creating a perfect balance of flavors.
Expert Tips for Halloween Layer Cake
-
Frosting Perfection: Ensure your butter is softened before creaming; this creates a smooth frosting consistency for your Halloween Layer Cake.
-
Color Control: Start with small amounts of gel food coloring to achieve desired shades. You can always add more if needed!
-
Layer Cooling: Allow each cake layer to cool completely before frosting. This prevents the frosting from melting, keeping your layers intact.
-
Consistent Baking: Rotate the cake pans halfway through baking to promote even cooking, especially if your oven has hot spots.
-
Storage Advice: If you’re not serving the cake immediately, store it covered in the fridge for up to 3 days to keep it fresh and delicious.
Storage Tips for Halloween Layer Cake
-
Room Temperature: Store the Halloween Layer Cake at room temperature for up to 2 hours, covered with a cake dome or a loose plastic wrap to prevent drying out.
-
Fridge: Keep the frosted cake in the fridge for up to 3 days, ensuring it’s covered to maintain moisture and prevent odors from mingling.
-
Freezer: If you wish to save some cake for later, unfrosted cake layers can be frozen for up to 2 months. Wrap each layer tightly in plastic wrap, then in aluminum foil to avoid freezer burn.
-
Reheating: For the best texture when serving leftovers, allow the slice to come to room temperature before enjoying, or gently warm in the microwave for about 10-15 seconds.
Make Ahead Options
These Halloween Layer Cake preparations are perfect for busy home cooks looking to save time! You can prepare the cake layers up to 24 hours in advance by baking them, allowing them to cool completely, and then storing them tightly wrapped in the refrigerator. The frosting can also be made ahead and stored in an airtight container in the fridge for up to 3 days; just give it a good stir before using to restore its creamy texture. When you’re ready to assemble, simply layer the cakes with chilled frosting and finish decorating for your spooktacular event. This way, you’ll have more time to enjoy the festivities while still serving an impressive treat that’s just as delicious as when freshly made!
Halloween Layer Cake Variations
Feel free to let your imagination run wild with these delightful twists on the classic Halloween Layer Cake!
-
Flavor Swap: Try using chocolate or red velvet cake mix for a rich, decadent taste that complements the festive colors beautifully. Each flavor adds its own unique magic to the party!
-
Custard Center: Replace the frosting filling between the layers with pastry cream or chocolate pudding. This creates a creamy surprise that tantalizes every bite, making it an even more exciting dessert choice.
-
Gluten-Free: Use a gluten-free cake mix to make this festive treat accessible for everyone. Your gluten-sensitive friends will love you for it, and the cake will still be just as vibrant and delicious!
-
Fruit Filling: Incorporate fresh fruit like strawberries or raspberries between your layers for a fresh burst of flavor. This twist not only enhances the taste but also adds a pop of color that complements the Halloween theme.
-
Dairy-Free: For a dairy-free option, swap out the butter and cream with plant-based alternatives. Coconut cream makes for a fabulous frosting that is both lush and indulgent.
-
Nutty Crunch: Add chopped nuts like walnuts or pecans to the batter for a delightful crunch. This texture contrast elevates the cake and makes every slice an adventure.
-
Spiced Sensation: Incorporate warming spices like cinnamon or pumpkin spice into the batter for a seasonal twist. It’s a perfect way to infuse the cozy flavor of fall into your Halloween festivities!
-
Peppermint Twist: For a minty twist, choose peppermint extract in your frosting. This adds a refreshing twist to each bite, creating a festive dessert that surprises and delights!
Experimenting with these variations will not only elevate your cake but also create lasting memories with every bite! If you’re looking for more inspiration, check out this Nutty Vanilla Cake or perhaps a cheerful Sky Jelly Cake. Let your creativity shine!
Halloween Layer Cake Recipe FAQs
How do I choose the best cake mix for my Halloween Layer Cake?
Absolutely! For the best results, choose a cake mix that has good reviews for flavor and texture. A classic vanilla or chocolate flavor pairs wonderfully with vibrant frosting colors. If you prefer from-scratch, I often recommend using high-quality flour and fresh baking powder to boost flavor and structure.
What is the best way to store my Halloween Layer Cake?
After you’ve enjoyed your delicious creation, cover the cake gently and store it in the refrigerator for up to 3 days. This will help keep the frosting fresh and prevent it from drying out. If you need to store it longer, unfrosted layers can be frozen for up to 2 months. Just wrap each layer tightly in plastic wrap, followed by aluminum foil.
Can I freeze the Halloween Layer Cake? If so, how?
Yes, you can absolutely freeze the unfrosted cake layers! To do this, once your baked layers have cooled completely, wrap each one tightly in plastic wrap to prevent freezer burn, then place them in a freezer-safe container. They’ll stay fresh for about 2 months. When you’re ready to enjoy them, simply let them thaw in the refrigerator overnight, then frost as desired.
What if my frosting turns out too thick or too runny?
Very common! If your frosting is too thick, you can blend in a little more heavy cream, one tablespoon at a time, until you reach the desired consistency. Conversely, if it’s too runny, gradually add powdered sugar until it thickens up. Remember to beat it on high speed for about 2 minutes for fluffy results!
Are there any dietary considerations I should keep in mind?
Absolutely! Be mindful of any allergies to dairy or gluten. If you’re making the cake for someone with dietary restrictions, you can find gluten-free cake mixes and dairy-free butter for frosting. Always double-check labels to ensure safety. If sharing, let your guests know the ingredients for peace of mind!

Festive Halloween Layer Cake to Delight Everyone
Ingredients
Equipment
Method
- Preheat your oven to 350°F (175°C) and prepare three round cake pans by greasing them with clarified butter and lining with parchment paper.
- In a large bowl, prepare the cake mix according to the package instructions. Divide the batter evenly into the three cake pans and smooth the tops.
- Bake for 25 to 35 minutes, or until a toothpick comes out clean. Cool in the pans for 10 minutes before transferring to wire racks.
- Cream softened butter until fluffy, then gradually add powdered sugar. Pour in cream as needed to achieve a smooth frosting consistency.
- Divide frosting into four bowls. Leave one portion dark green and dye the others with gel colorings until vibrant.
- Assemble the cake by placing the first layer on a plate, piping rings of colored frosting on top, alternating colors for the second and third layers.
- Cover the entire cake with the dark green frosting and smooth with an offset spatula.
- Apply Halloween sprinkles generously on the cake's top and sides.
- Pipe decorative dollops on top and chill the cake for about 30 minutes before serving.