

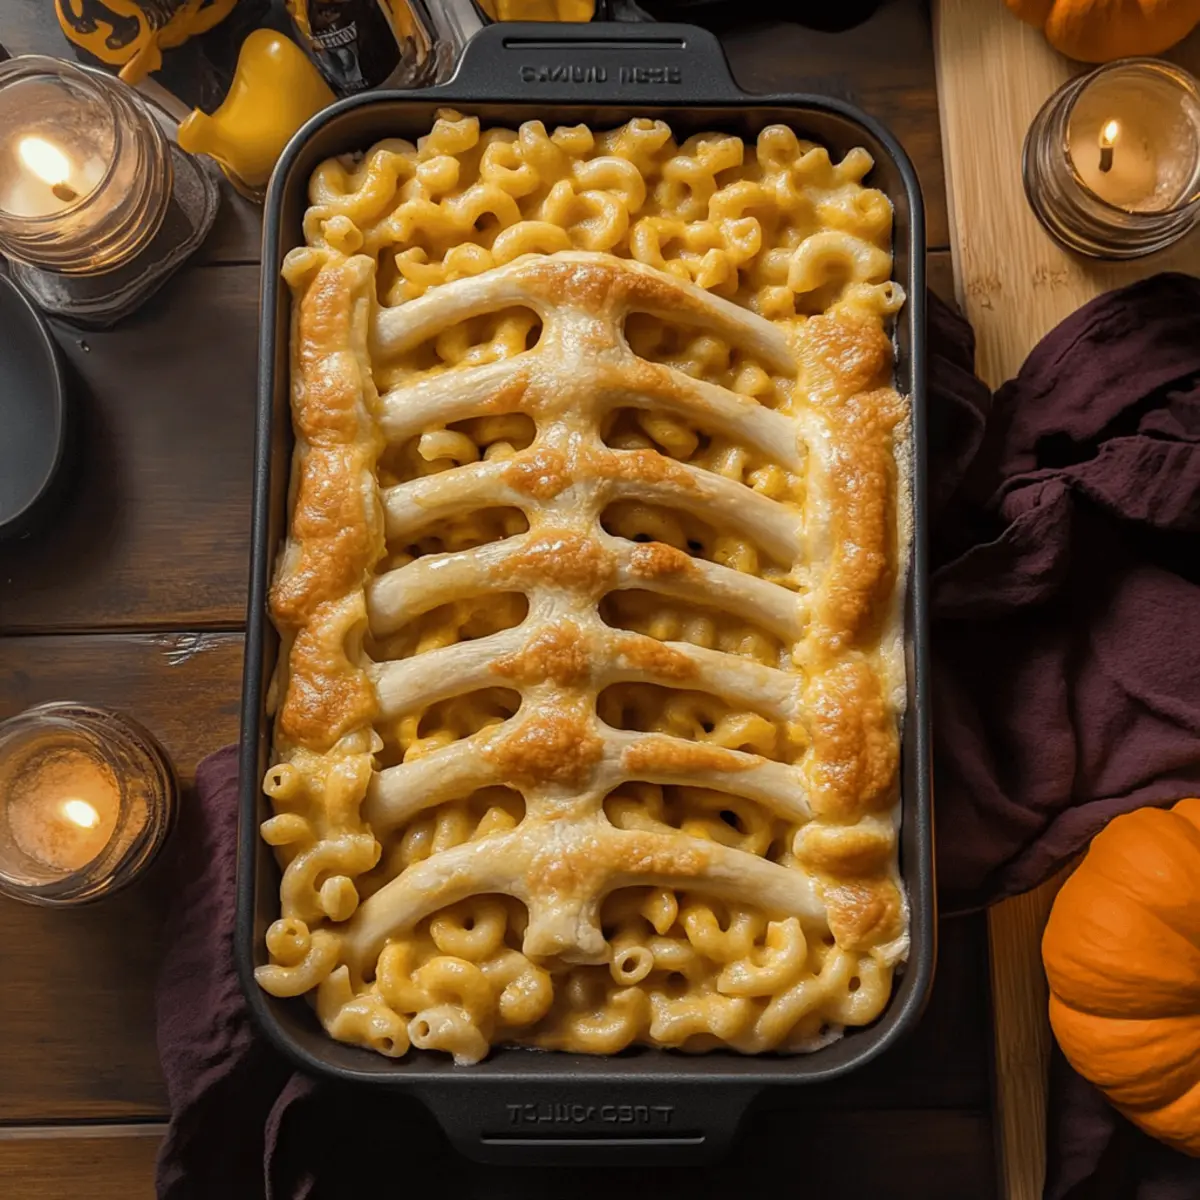
“Alright, folks, who’s ready for a spine-tingling twist on a classic?” As the Halloween season creeps in, it’s time to leave the fast food behind and whip up something that combines comfort and creativity. Enter my Rib Cage Mac & Cheese, a dish that’s bound to be the highlight of your Halloween potluck. With its creamy texture hugging each macaroni piece and the fun crescent roll “bones” creating a spooky rib cage, this playful recipe is sure to impress both the kids and the adult foodies at any gathering. Plus, it’s easy to make and a total crowd-pleaser! So, are you curious to see how to bring a bit of Halloween magic to your kitchen? Let’s dive in!
Why Is This Mac & Cheese Special?
Creepy Delight: This Halloween-inspired dish takes the classic mac & cheese to a whole new level with its fun rib cage presentation.
Ultra-Creamy Texture: Each bite bursts with comforting creaminess that pairs perfectly with the flaky crescent dough “bones.”
Family-Friendly Fun: The scare factor adds excitement for kids while still satisfying adults’ sophisticated palates.
Easily Customizable: Feel free to swap out cheeses or add veggies, like broccoli, making it versatile for everyone at your potluck!
Time-Saver: Whip this up in no time, allowing for more time to enjoy the festivities. Why not pair it with a refreshing green salad to balance that richness?
Rib Cage Mac & Cheese Ingredients
• Prepare to bring this spooky dish to life!
For the Mac & Cheese
- Macaroni – The classic base that holds all the creaminess together.
- Cheddar Cheese – Provides a rich, comforting flavor; try mixing in mozzarella and gouda for a milder touch.
- Cream Cheese – This secret ingredient adds incredible richness; use Neufchâtel for a lighter version.
- Milk – Gives the sauce its creamy consistency; almond milk can be a dairy-free alternative.
- Butter – Enhances flavor and helps create a silky sauce; substitute with olive oil for a lighter option.
For the “Bones”
- Crescent Roll Dough – Creates the spooky rib cage look; opt for homemade biscuit dough for a heartier texture.
Seasonings
- Salt – Essential for bringing out all the flavors of this Rib Cage Mac & Cheese.
- Pepper – A little kick goes a long way; adjust according to your taste.
- Optional Spices – Add spices or herbs to elevate the flavor profile as you wish!
Step‑by‑Step Instructions for Spooky Rib Cage Mac & Cheese
Step 1: Cook the Macaroni
Bring a large pot of salted water to a boil, then add the macaroni. Cook until al dente, typically around 7-8 minutes, ensuring it remains slightly firm, as it will cook more in the oven. Drain the macaroni and set it aside, allowing any excess water to evaporate while you prepare the cheese sauce.
Step 2: Prepare the Cheese Sauce
In a spacious pot, melt 4 tablespoons of butter over medium heat. Stir in 4 tablespoons of flour to form a roux, cooking for about 1-2 minutes until bubbly but not browned. Gradually whisk in 2 cups of milk, followed by 8 ounces of cream cheese and 2 cups of shredded cheddar cheese, stirring constantly until the mixture is smooth and creamy.
Step 3: Combine the Mac and Cheese
Once the cheese sauce is velvety and bubbling, add the drained macaroni to the pot. Gently mix the macaroni into the cheese sauce until every piece is enveloped in that luscious, creamy goodness. Preheat your oven to 375°F (190°C) as you prepare to shape the rib cage.
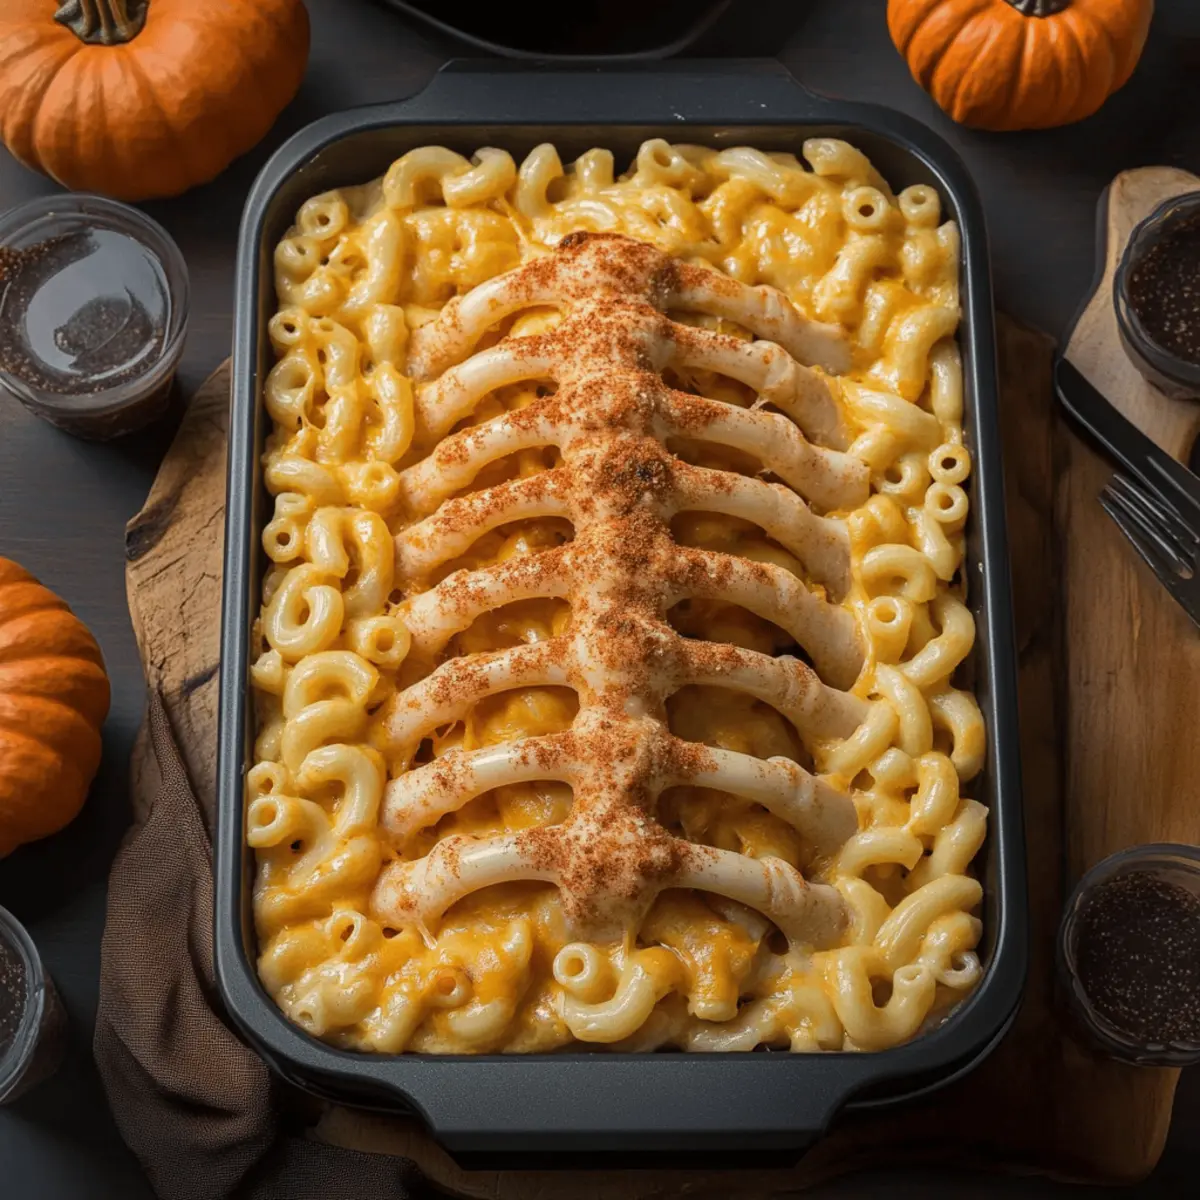
Step 4: Shape the Rib Cage
Roll out the crescent roll dough on a floured surface until it’s flat. Cut it into long strips, about 1 inch wide each. Arrange these strips in a rib cage shape inside a greased 9×13 baking dish, leaving space in the center for the mac and cheese. This fun design will give your Rib Cage Mac & Cheese a spooky appearance.
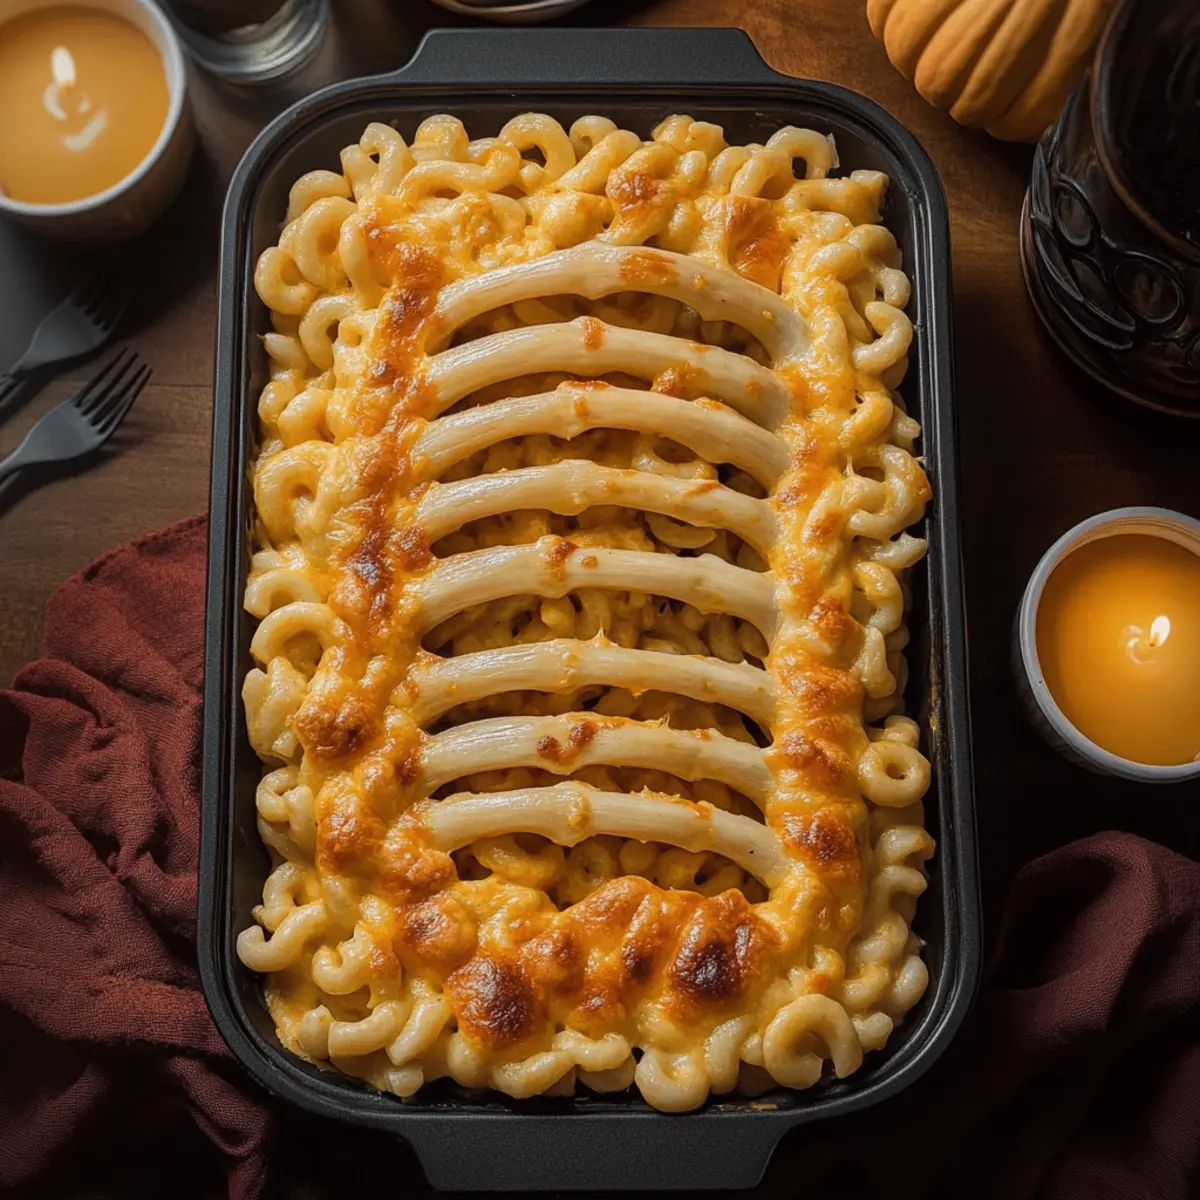
Step 5: Bake the Dish
Now, pour the cheesy macaroni into the center of your rib cage shape, ensuring it’s evenly spread. Carefully lay the remaining strips of crescent dough over the top to mimic rib bones. Bake in your preheated oven for 20-25 minutes, or until the dough is golden brown and the cheese is bubbling beautifully.
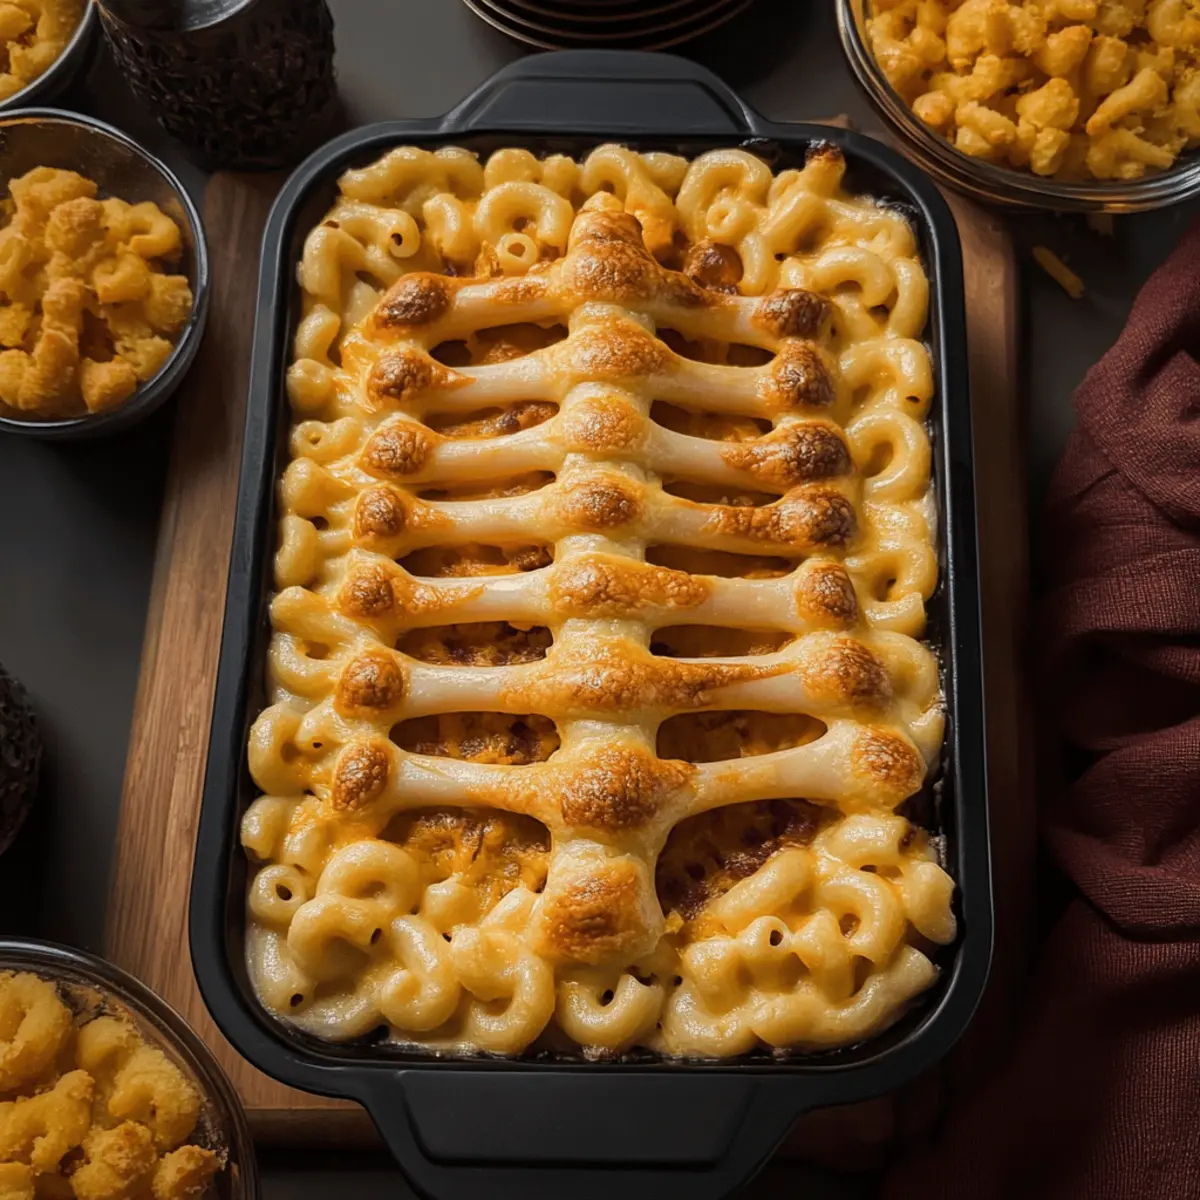
Step 6: Cool and Serve
Once baked, remove your Spooky Rib Cage Mac & Cheese from the oven and let it cool for about 5-10 minutes. This resting time will help the shape set, making it easier to serve. Enjoy this playful dish at your Halloween potluck, reveling in the delighted reactions from your family and friends!
How to Store and Freeze Rib Cage Mac & Cheese
Fridge: Store leftovers covered in the fridge for up to 3 days. Let it cool completely before sealing to maintain its creamy texture.
Freezer: For longer storage, freeze in an airtight container for up to 2 months. Thaw overnight in the fridge before reheating.
Reheating: To reheat, place in an oven-safe dish and cover with foil. Bake at 350°F (175°C) for 20-25 minutes or until heated through, ensuring the cheese stays melty.
Make-Ahead Tips: Prepare the Rib Cage Mac & Cheese a day in advance and store it in the fridge. Reheat before serving—it tastes just as delicious!
What to Serve with Spooky Rib Cage Mac & Cheese
A Halloween feast deserves an equally enchanting spread that will complement the creamy goodness of this thrilling dish.
-
Crispy Green Salad: A fresh salad with a tangy vinaigrette cuts through the richness, adding a lively crunch to your meal. Toss in some spooky-themed croutons to keep the fun alive!
-
Garlic Bread Fingers: Crunchy garlic bread crafted to resemble creepy fingers enhance the cozy vibe and provide a delightful contrast to the creamy mac and cheese.
-
Roasted Veggies: Colorful roasted vegetables bring a warm, earthy flavor to the table. They also add a touch of color, making your Halloween spread both festive and nutritious.
-
Pumpkin Soup: A rich pumpkin soup makes for a comforting starter that pairs beautifully with the rib cage theme while keeping the seasonal flavors in focus.
-
Spooky Spritzer: A refreshing drink, like a sparkling apple cider spritzer, can brighten the meal, offering a sweet, bubbly respite between bites of rich, cheesy pasta.
-
Caramel Apple Slices: For a sweet finish, serve fresh apple slices drizzled in caramel to create a fun, hands-on dessert that echoes the Halloween spirit.
-
Chocolate Mousse Eyeballs: For a showstopper dessert, whip up some chocolate mousse shaped like creepy eyeballs, elevating your potluck experience with a delicious spooky touch.
Make Ahead Options
These Spooky Rib Cage Mac & Cheese are perfect for meal prep! You can prepare the entire dish up to 24 hours in advance. To do this, simply cook the macaroni and make the cheese sauce as instructed, then combine them. Shape the rib cage with the crescent dough, and once assembled, cover the dish tightly with plastic wrap and refrigerate. For the best quality, avoid baking it until you’re ready to serve. When it’s time to impress your guests, preheat your oven to 375°F (190°C), bake the assembled dish from the refrigerator without thawing for 25-30 minutes, and enjoy the eerie yet delicious comfort of this classic that’s just as satisfying as when fresh!
Tips for the Best Rib Cage Mac & Cheese
Perfect Texture: Ensure macaroni is al dente: If overcooked, the pasta can become mushy in the oven, ruining the dish’s integrity.
Flavor Enhancements: Add bacon or jalapeños: For an extra kick, consider folding in crispy bacon bits or diced jalapeños to the cheese mixture.
Dough Monitoring: Watch the baking closely: Checking the rib cage near the end of baking can prevent the crescent dough from turning too brown or burning.
Make-Ahead Magic: Prepare in advance: This rib cage mac & cheese can be made a day ahead, just store it covered and reheat before serving.
Customize Wisely: Swap cheeses for variety: Experiment with different cheese combinations to suit your taste, ensuring everyone’s happy at the potluck!
Rib Cage Mac & Cheese Variations
Customize your spooky creation to suit your taste buds and dietary needs—let the Halloween fun begin!
-
Spicy Pepper Jack: Swap cheddar for pepper jack cheese for a thrilling kick that adds a fiery twist to your mac and cheese.
-
Veggie Boost: Mix in steamed broccoli or spinach for added nutrition and vibrant color. It’s a sneaky way to incorporate veggies that kids will love!
-
Chicken Delight: Incorporate shredded cooked chicken to make this dish heartier. This addition transforms it into a complete meal everyone will enjoy.
-
Crescent-Alteration: Use homemade biscuit dough instead of crescent rolls for a denser, more rustic texture that still captures that creepy rib cage look.
-
Cheese Variation: Experiment with a blend of mozzarella and gouda for a mellower flavor. Each bite will still be creamy but without the sharpness of cheddar.
-
Herb Infusion: Add a sprinkle of garlic powder or Italian seasoning to the cheese sauce for an aromatic twist. The extra flavor might just become your new favorite addition!
-
Sweet Surprise: Fold in roasted butternut squash for a mild sweetness that creates a delightful contrast to the savory cheese. This can add a festive fall flavor to your dish.
-
Boozy Fun: Consider adding a splash of white wine to the cheese sauce for an adult-friendly version. It elevates the flavors and gives a gourmet touch to your spooky mac and cheese.
Looking for more cheesy magic? Check out these delightful recipes: Savory Vegetable Cheese Pancakes or add a sweet twist with Milky Coconut Cheese Dessert to complete your Halloween feast!
Spooky Rib Cage Mac & Cheese Recipe FAQs
What type of macaroni should I use?
Absolutely! For this Rib Cage Mac & Cheese, standard elbow macaroni is the go-to choice due to its classic shape and ability to hold onto the cheese sauce. That said, you can also explore other pasta shapes like shells or cavatappi for a fun twist!
How should I store leftovers?
To store leftovers properly, let them cool completely before transferring to an airtight container. You can keep your spooky mac and cheese in the refrigerator for up to 3 days. To reheat, cover and warm it in the oven at 350°F (175°C) for about 20 minutes, so it stays creamy and delicious.
Can I freeze this dish?
Yes, you can! To freeze, place your cooked Rib Cage Mac & Cheese in an airtight container, ensuring it’s well-sealed to prevent freezer burn. It can last in the freezer for about 2 months. When you’re ready to enjoy it, simply thaw it in the fridge overnight, and then reheat in the oven as directed.
What can I do if the pasta is overcooked?
If you accidentally overcooked the pasta, don’t fret! A quick solution is to reduce the baking time. Bake for 15-20 minutes instead and keep a close eye to prevent it from turning too mushy. You can also fold in some fresh spinach or veggies for added texture!
Are there any dietary considerations for this recipe?
Very much! If you’re serving this dish to guests with dietary restrictions, you can easily customize it. Use gluten-free pasta to accommodate gluten sensitivities and swap the dairy cheeses with dairy-free alternatives like vegan cheese. Additionally, if anyone has nut allergies, be sure to choose non-almond milk or another suitable substitute.
Can I make this in advance?
Absolutely, you can whip this up a day ahead! Prepare the mac and cheese, shape the rib cage with the crescent rolls, then cover and chill it in the fridge. Just remember to let it sit out for about 30 minutes before popping it in the oven. Reheating will give you a freshly baked taste with the convenience of advance prep!
Spooky Rib Cage Mac & Cheese That Will Wow Your Guests
Ingredients
Equipment
Method
- Bring a large pot of salted water to a boil, then add the macaroni. Cook until al dente, around 7-8 minutes. Drain and set aside.
- In a pot, melt 4 tablespoons of butter over medium heat. Stir in 4 tablespoons of flour to form a roux, cooking for about 1-2 minutes. Whisk in 2 cups of milk, then add cream cheese and cheddar cheese, stirring until smooth.
- Once the cheese sauce is smooth, add the drained macaroni and mix well. Preheat the oven to 375°F (190°C).
- Roll out the crescent roll dough and cut it into 1-inch strips. Arrange strips in a rib cage shape inside a greased baking dish, leaving room for the mac and cheese.
- Pour the cheesy macaroni into the rib cage shape, cover with remaining dough strips, and bake for 20-25 minutes until golden brown and bubbling.
- Let cool for 5-10 minutes before serving to help shape set.