

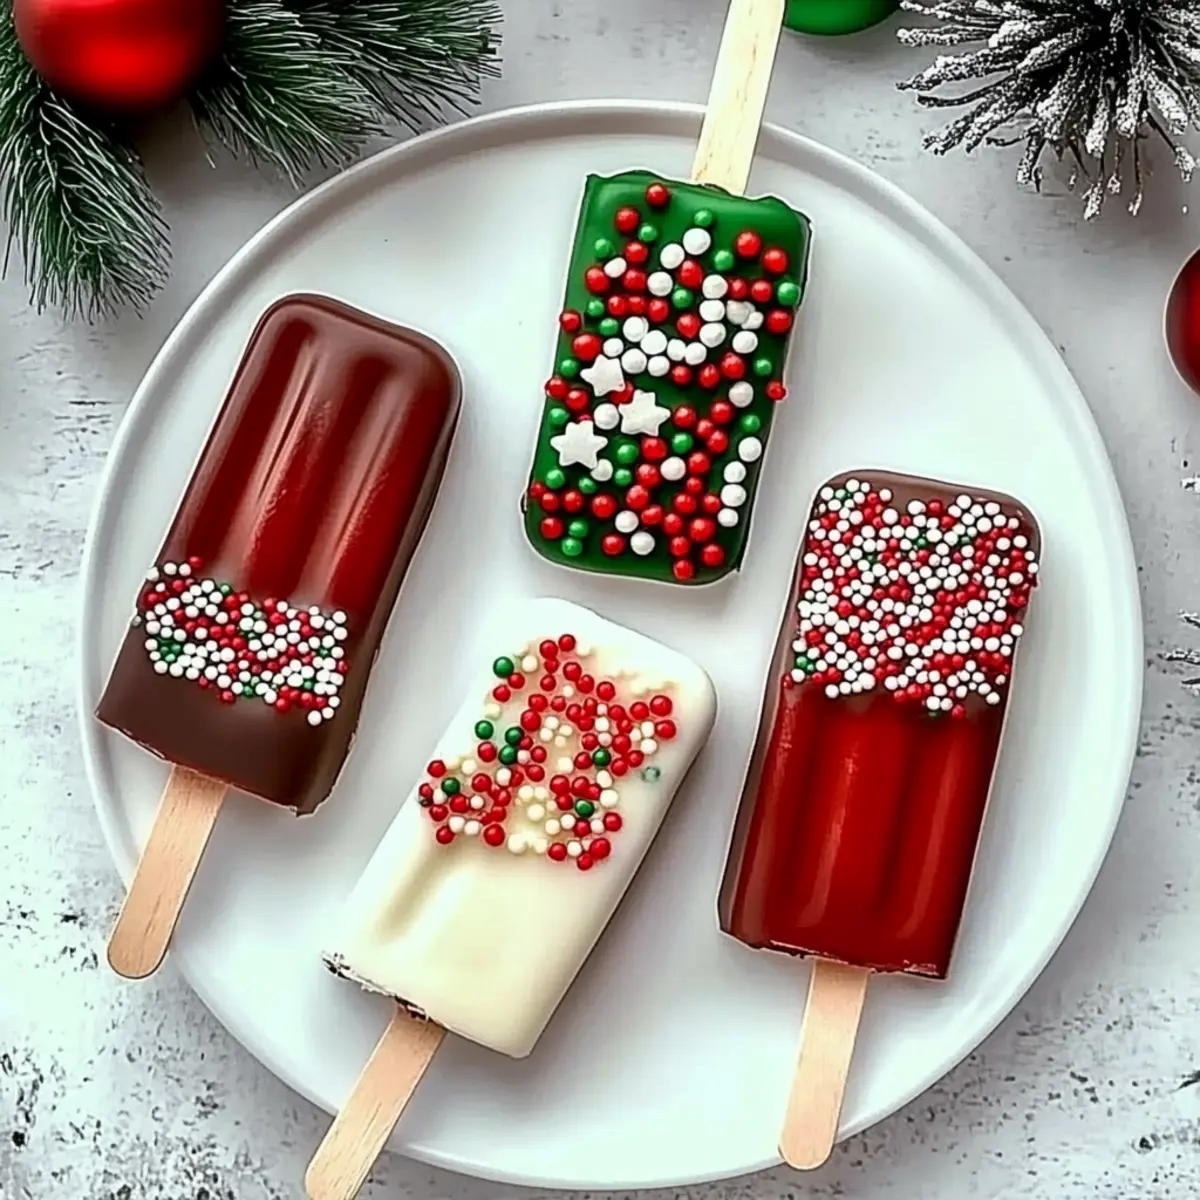
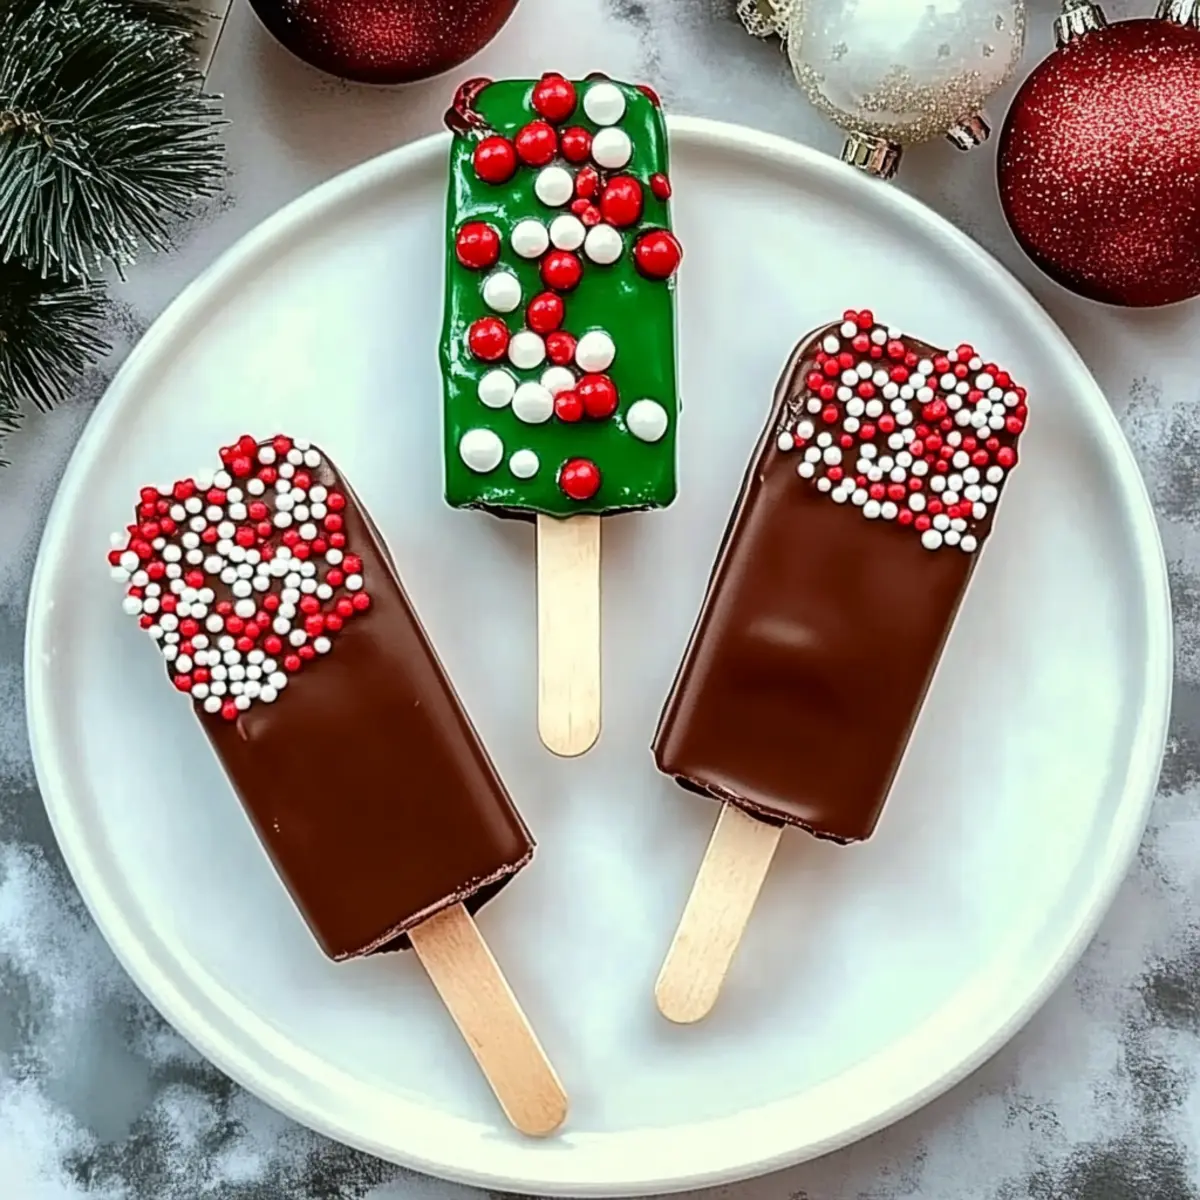
As the holiday season approaches, the scent of warm spices and sweet treats fills the air, signaling it’s time to get creative in the kitchen. One of my favorite festive delights to whip up are Christmas Cakesicles—these enchanting, chocolate-covered popsicles are an absolute joy to make! With just three ingredients, this recipe offers a quick way to turn leftover cake into a fun and irresistible dessert that everyone will adore. Not only are they perfect for holiday gatherings, but their vibrant colors can brighten up any celebration, making them a delightful homemade gift. Plus, I’ve got gluten-free and vegan variations so everyone can join in the festive fun! Are you ready to dive into this deliciously fun holiday treat?

Why are Christmas Cakesicles a Must-Try?
Simplicity: With just three ingredients, you can create these festive treats effortlessly, making them a perfect project for both novice and experienced bakers.
Festive Twist: Vibrant candy melts add a pop of color, transforming leftover cake into a joyful holiday dessert sure to impress your guests.
Customizable: Enjoy peace of mind with gluten-free and vegan options, so everyone can indulge in these delightful sweets.
Crowd Pleaser: Their unique popsicle shape and rich flavor make them a hit at any holiday gathering or as a thoughtful homemade gift.
Fast and Fun: These cakesicles require minimal prep time, letting you spend more time celebrating this joyous season with family and friends! Want to explore more festive ideas? Check out our guide to Holiday Treats for creative inspiration!
Christmas Cakesicles Ingredients
For the Cakesicles
- Crumpled Cake – Use any leftover cake to create a moist interior that acts as a base for your cakesicles.
- Frosting – Acts as a binding agent; it holds the cake together without making it overly wet.
- Colored Candy Melts – Add vibrant colors; use 1/4 cup each of white, red, and green for a festive look.
For the Coating
- Vegetable Oil or Coconut Oil – Mix with candy melts for a smooth, even coating that glides perfectly over the cakesicles.
For Assembly
- Popsicle Sticks – Choose wooden or paper sticks that allow for easy and fun handling.
- Ice Cream Silicone Molds – Essential for achieving the unique cakesicle shape and ensuring evenness.
For Decoration (Optional)
- Sprinkles – Use festive-colored sprinkles or swap them for crushed candy canes for a crunchy topping.
- Piping Bags – Handy for adding drizzled chocolate or intricate designs.
- Parchment Paper – A must-have for easy cleanup during your festive baking session.
Explore the joy of creating Christmas Cakesicles with these delightful and simple ingredients!
Step‑by‑Step Instructions for Christmas Cakesicles
Step 1: Prepare Dough
Begin by crumbling your leftover cake into a large mixing bowl until it’s fine in texture. Add a suitable amount of frosting to the crumbled cake, mixing well with your hands until you form a moist, dough-like consistency. This is crucial for your Christmas Cakesicles, as it ensures they hold together when molded.
Step 2: Melt Candy Coating
In a microwave-safe bowl, combine your colorful candy melts and a teaspoon of vegetable oil. Heat them in 30-second intervals, stirring until completely smooth and glossy, which should take about 1-2 minutes total. This melted coating will provide a festive and delicious shell for your cakesicles, so be careful not to overheat.
Step 3: Coat Molds
Pour a generous layer of the melted candy coating into each silicone mold, tilting to coat the insides evenly. Allow the molds to stand for about 5-10 minutes in the freezer until the candy sets firmly. This critical step ensures that the coating forms a robust outer layer for your Christmas Cakesicles.
Step 4: Insert Sticks
Once the initial layer of coating has set, carefully remove the molds from the freezer. Take your popsicle sticks and press them into the center of each mold, pushing down gently to keep them in place. Return the molds to the freezer for an additional 10-15 minutes to firm up the coating around the sticks.
Step 5: Add Dough
After the sticks have set, take your bowl of cake dough and fill each mold with it. Press it down gently, ensuring not to break the candy shell, filling to the top without overfilling. The filling should be packed enough to maintain the shape of your Christmas Cakesicles during the final assembly.
Step 6: Seal and Freeze
Cover the filled molds with the remaining melted candy coating, ensuring a complete seal over each cakesicle. Place them back in the freezer for about 25-30 minutes to allow the candy coating to harden thoroughly, trapping the cake dough securely inside.
Step 7: Unmold
Once fully set, gently flex the silicone molds to release the cakesicles. Carefully peel the molds away, revealing your beautifully shaped Christmas Cakesicles. If you feel any resistance, a light wiggle should help ensure they come out intact and ready for decorating.
Step 8: Decorate
To finish, drizzle any remaining melted candy coating over the cakesicles for added flair and sprinkle with festive decorations like sprinkles or crushed candy canes. This final touch not only enhances the appearance but also adds extra texture and flavor to your delightful Christmas Cakesicles!
Christmas Cakesicles: Endless Customization!
Feel free to personalize your Christmas Cakesicles with these delightful variations that enhance flavor and accommodate diets.
-
Gluten-Free: Use a gluten-free cake mix instead of regular cake to make your treats accessible for everyone. It’s just as moist and delicious but friendly for wheat-sensitive guests.
-
Vegan Delight: Opt for vegan frosting and candy melts, ensuring all ingredients are plant-based. This keeps the festive spirit alive for everyone at the table!
-
Flavor Infusion: Add a teaspoon of almond or vanilla extract to the cake dough for a flavor boost that will leave everyone guessing your secret.
-
Crunchy Texture: Mix in some crushed nuts or cookie crumbles into the cake dough for an exciting crunch that contrasts beautifully with the smooth candy coating.
-
Decadent Chocolate: Swap out colored candy melts for dark or white chocolate for a richer, more indulgent experience that will satisfy the chocoholics in your family.
-
Spiced Variation: Incorporate spices like cinnamon or nutmeg into the cake dough for a taste of holiday warmth that complements the festive vibe.
-
Fun Shapes: Use holiday-themed silicone molds for different shapes—think stars, gingerbread men, or Christmas trees! This adds an extra touch of cheer to your party spread.
-
Topping Options: Try using drizzled caramel or white chocolate instead of the candy coating for a unique twist that will surprise and delight your guests.
Ready to mix things up? Explore more exciting possibilities in our Holiday Treats or check out these fantastic Vegan Dessert Ideas for inspiration!
Make Ahead Options
These delightful Christmas Cakesicles are perfect for meal prep, allowing you to enjoy festive treats without the last-minute rush! You can prepare the crumbled cake and the frosting mixture up to 24 hours in advance; simply store it in an airtight container in the refrigerator to maintain moisture. You can also melt the candy coating and keep it cooled in the fridge for about 3 days, ensuring it remains smooth and ready to use. When you’re ready to assemble, just reheat the coating to make it workable again, and follow the final steps of coating and freezing the molds. This way, you’ll have a fun and delicious dessert without all the stress, saving precious time for holiday celebrations!
How to Store and Freeze Christmas Cakesicles
-
Room Temperature: Store unwrapped cakesicles at room temperature for up to 3 days. Keep them in a cool, dry place to maintain their texture.
-
Fridge: For longer freshness, place cakesicles in an airtight container in the refrigerator for up to 2 weeks. This helps preserve their delightful taste and moisture.
-
Freezer: Wrap cakesicles tightly in plastic wrap and place them in a freezer-safe container. They can be frozen for up to 3 months, retaining their festive flavor.
-
Reheating: To enjoy frozen cakesicles, simply remove them from the freezer and let sit at room temperature for a few minutes before serving. This ensures a delicious, soft bite!
What to Serve with Christmas Cakesicles?
These delightful treats usher in the holiday spirit and make every bite feel like a celebration!
-
Creamy Hot Chocolate: A cup of rich, velvety hot chocolate harmonizes perfectly with the sweetness of cakesicles, adding warm, comforting flavors to your dessert table. Imagine sipping on hot cocoa while indulging in these chocolate-covered delights—it’s pure bliss.
-
Spiced Sugar Cookies: The crisp texture and warming spices of sugar cookies complement the soft, moist interior of cakesicles, creating a delightful contrast that everyone will love. Paired together, they offer an array of flavors that evoke the essence of the holiday season.
-
Refreshing Fruit Platters: Brighten up your spread with colorful fruits like strawberries, kiwi, and mandarins. Their fresh, juiciness provides a light contrast to the richness of the cakesicles, making each bite refreshing and festive.
-
Gingerbread Cupcakes: Capture more holiday spirit by pairing these cakesicles with moist gingerbread cupcakes, adorned with cream cheese frosting. Their spiced sweetness enhances the overall festive experience and makes for a perfect dessert duo.
-
Eggnog Milkshakes: Pair your cakesicles with indulgent eggnog milkshakes for a festive twist! The creamy, spiced milkshake will elevate the enjoyment and create a nostalgic vibe reminiscent of holiday gatherings.
-
Chocolate Dipped Fruit: Try strawberries or banana slices dipped in chocolate as a fun side treat. Their delightful sweetness and slight crunch create layers of flavor that pair wonderfully with the chocolate-covered cakesicles.
-
Peppermint Bark: Crunchy, minty peppermint bark adds an extra layer of festive delight. The mix of textures and flavors will accompany the cakesicles beautifully, rounding off your holiday dessert spread.
Let your imagination run wild and create a memorable holiday feast with these scrumptious accompaniments!
Expert Tips for Christmas Cakesicles
-
Use Moist Cake: Make sure your leftover cake is moist. Dry cake can lead to crumbling, ruining the texture of your Christmas Cakesicles.
-
Opt for Silicone Molds: Silicone molds allow for easy removal and provide a better shape compared to rigid plastic molds. They’re a game-changer!
-
Melt in Intervals: When melting candy melts, do it in 30-second intervals to prevent burning. If it thickens, add a little oil to restore smoothness.
-
Avoid Overfilling: Don’t pack too much cake dough into the molds. Leave some space for sealing with the candy coating to prevent cracks.
-
Check Freeze Times: Ensure your layers are fully set before moving to the next step. It helps maintain the integrity of the cakesicle and avoids any unwanted surprises!

Christmas Cakesicles Recipe FAQs
What type of cake is best for making cakesicles?
Absolutely! The best cake for making Christmas Cakesicles is one that is moist and flavorful. I often recommend using leftover chocolate or vanilla cake since they complement the sweetness of the candy coating beautifully. If you’re looking to make a gluten-free version, opt for a gluten-free cake mix, which works just as wonderfully in this recipe.
How should I store my Christmas Cakesicles?
For optimal freshness, you can store your Christmas Cakesicles in an airtight container at room temperature for up to 3 days. If you want to prolong their life, store them in the refrigerator, where they will stay fresh for up to 2 weeks. When freezing, tightly wrap them in plastic wrap and place them in a freezer-safe container for up to 3 months. Just remember to let them sit at room temperature for a few minutes before enjoying!
Can I freeze Christmas Cakesicles?
Absolutely! To freeze your Christmas Cakesicles, wrap each one tightly in plastic wrap to prevent freezer burn, then place them in a freezer-safe container. This way, they can be preserved for up to 3 months! When you’re ready to enjoy them, just take them out of the freezer and let them thaw at room temperature for about 5-10 minutes before serving.
What if my candy coating is too thick or has hardened?
Very! If your candy coating becomes too thick or hard, don’t worry. Simply place the bowl in the microwave and heat in 10 to 15-second intervals, stirring in between, until it becomes smooth again. If it’s still too thick, add a teaspoon of vegetable oil or coconut oil, which helps restore its original texture and make it easier to coat your cakesicles.
Are Christmas Cakesicles safe for people with allergies?
The more the merrier! Keep in mind that the traditional recipe contains cake and frosting, which may include allergens like eggs, dairy, and gluten. For those with dietary restrictions, I highly recommend using gluten-free cake mixes and plant-based frosting to accommodate gluten and dairy allergies. Always check labels on candy melts too, as some brands may contain allergens.
Irresistible Christmas Cakesicles: Easy, Festive, and Fun!
Ingredients
Equipment
Method
- Begin by crumbling your leftover cake into a large mixing bowl until it's fine in texture. Add a suitable amount of frosting, mixing well until you form a moist, dough-like consistency.
- In a microwave-safe bowl, combine your colorful candy melts and a teaspoon of vegetable oil. Heat them in 30-second intervals, stirring until completely smooth and glossy.
- Pour a generous layer of the melted candy coating into each silicone mold, allowing to set for 5-10 minutes in the freezer.
- Remove the molds from the freezer. Press popsicle sticks into the center of each mold, then return to the freezer for an additional 10-15 minutes.
- Fill each mold with the cake dough, pressing down gently. Fill to the top without overfilling.
- Cover the filled molds with the remaining melted candy coating, sealing each cakesicle, and freeze for 25-30 minutes.
- Once set, gently flex the silicone molds to release the cakesicles.
- Drizzle remaining melted candy coating over the cakesicles and sprinkle with festive decorations.