

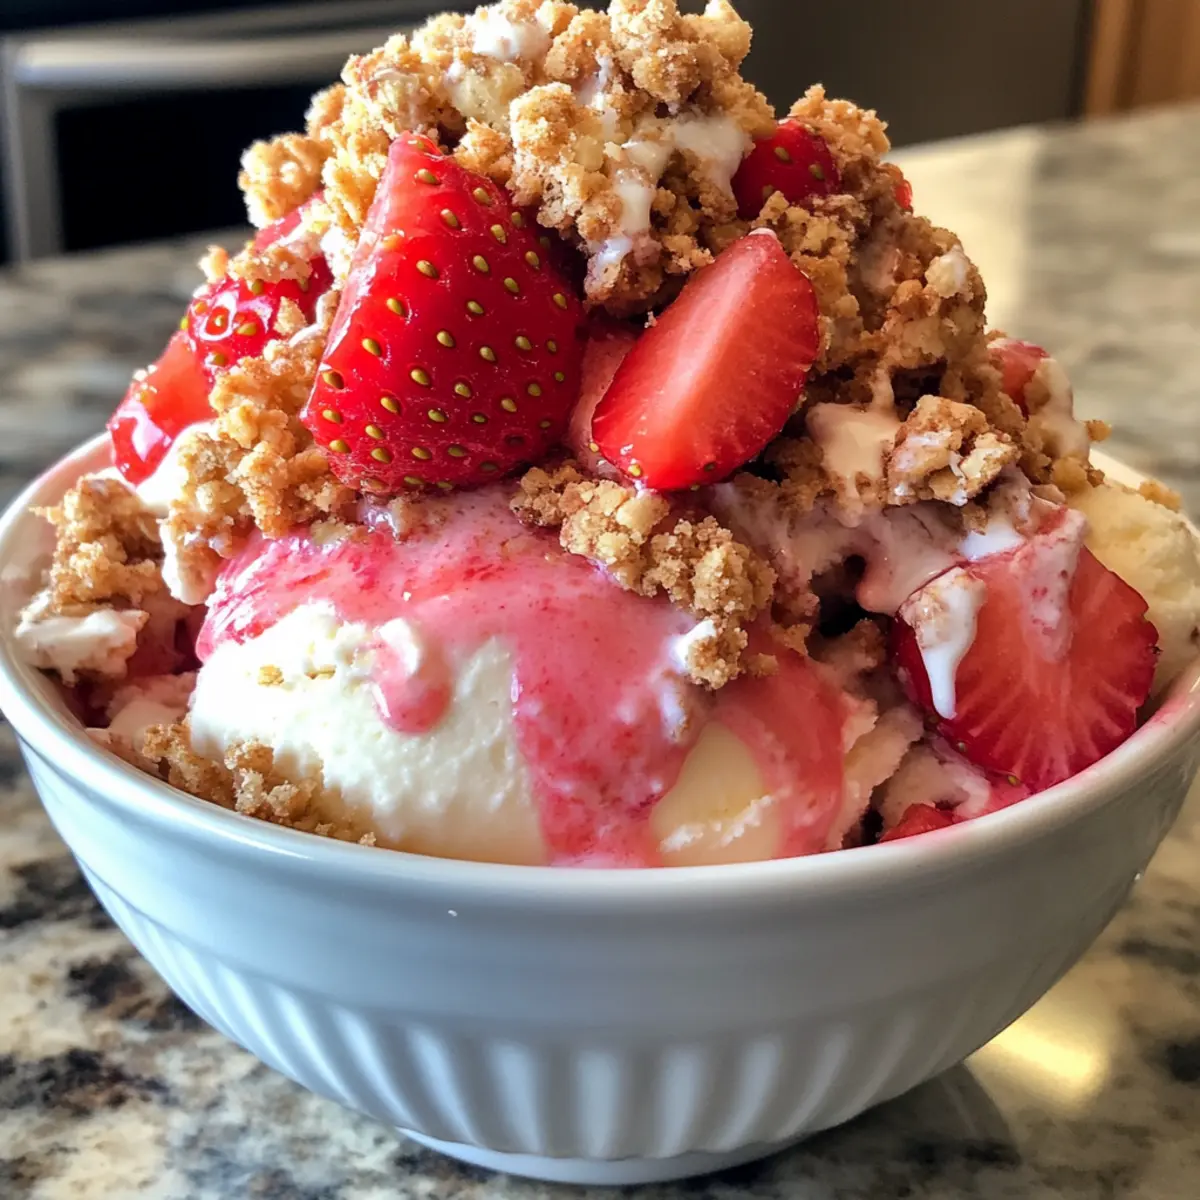
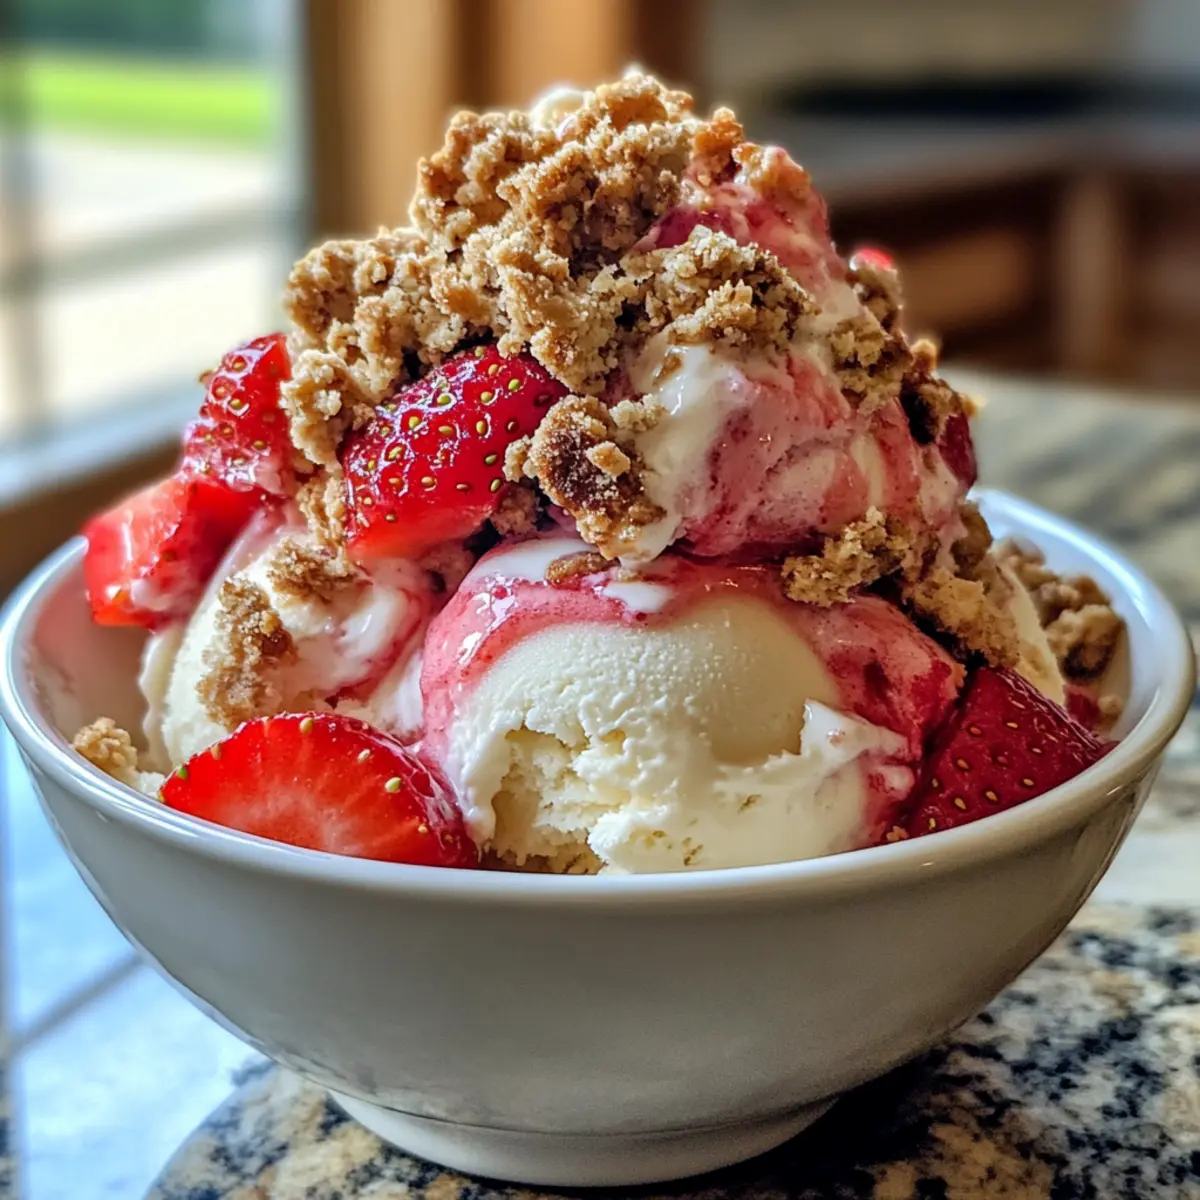
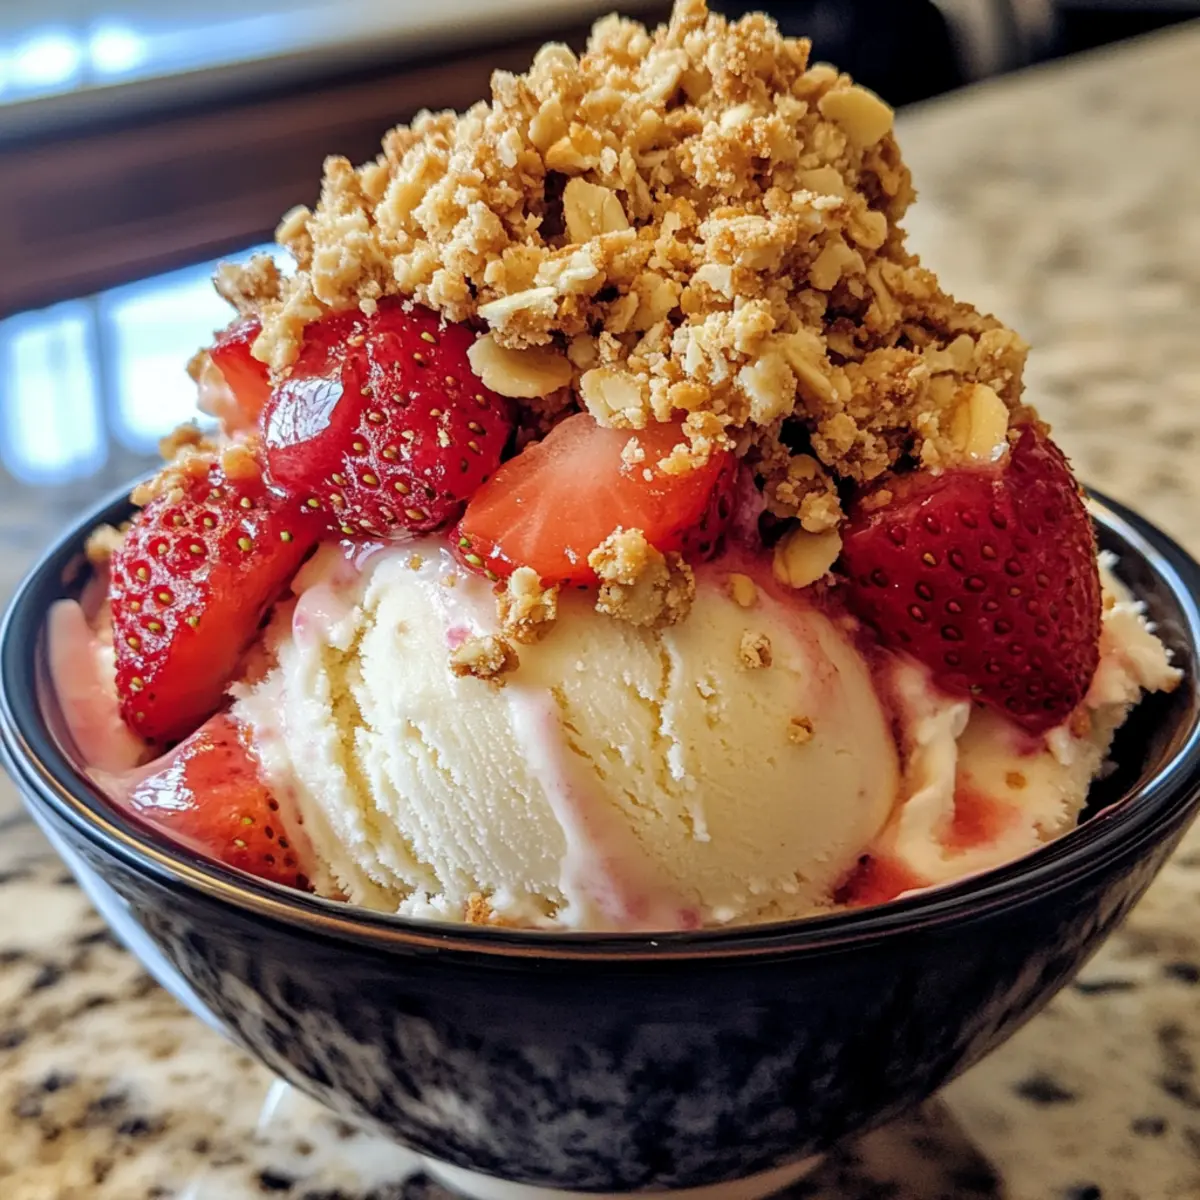
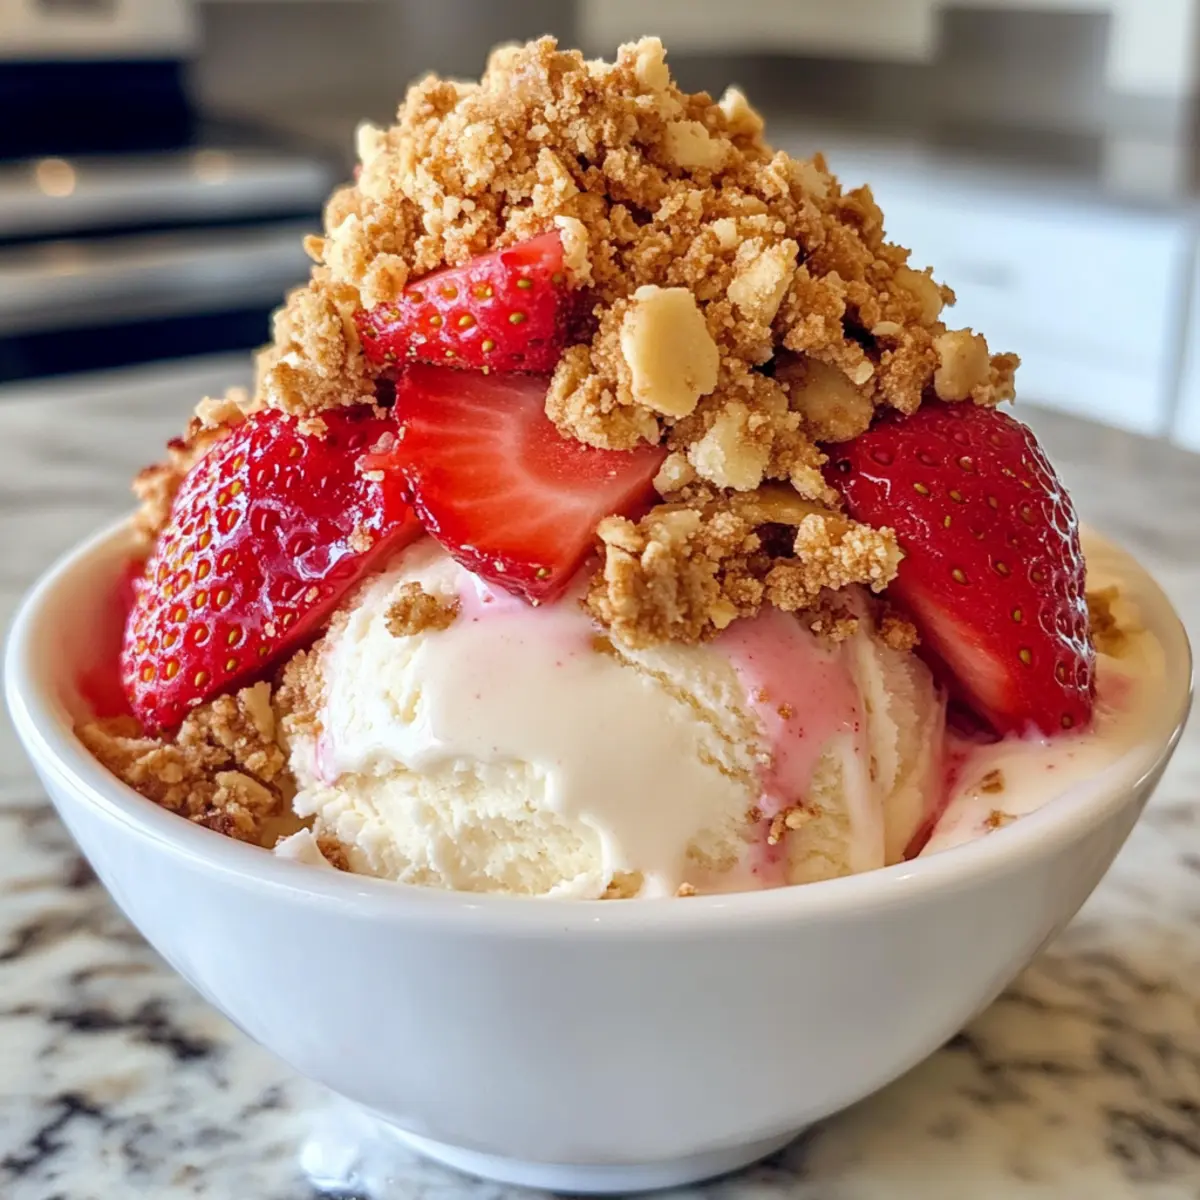
One delightful sunny afternoon, I found myself daydreaming about the sweet, nostalgic flavors of summer—those strawberry shortcake bars that always brought a smile to my face. That inspired me to create an Easy No Bake Strawberry Crunch Topping, a perfect blend of strawberry and vanilla that makes my heart sing. This incredibly simple recipe requires just two ingredients and is ready in only five minutes, making it an effortless solution for anyone craving a sweet treat without the fuss of baking. Whether you’re looking to elevate your ice cream game or transform last-minute desserts into showstoppers, this crunchy topping will do the trick. Plus, it’s budget-friendly, allowing you to savor a taste of summer without breaking the bank. Curious to see how this vibrant crumble can add magic to your favorite desserts? Keep scrolling for all the details!
Why is this recipe a must-try?
Simplicity at Its Best: This No Bake Strawberry Crunch Topping is incredibly easy to whip up with just two ingredients, perfect for busy afternoons.
Flavor Explosion: The delightful blend of strawberry and vanilla flavors brings a burst of nostalgia and bliss to every bite.
Versatile Delight: Use it to elevate any dessert, from ice cream sundaes to cheesecakes, or even sprinkle it on Veggie Crunch Cucumber salads for a surprise twist!
Quick and Effortless: Ready in just five minutes, this topping is ideal for last-minute gatherings or when you need a sweet fix.
Budget-Friendly: With a cost of around $4-$5, you won’t have to splurge to enjoy this delicious treat. Whether you’re hosting a summer barbecue or just indulging on a weekday, this topping is a delightful choice!
No Bake Strawberry Crunch Topping Ingredients
This vibrant topping requires just two easy ingredients!
For the Crunchy Base
- Strawberry Sugar Wafers – Provides a sweet, fruity flavor and eye-catching color; swap with pink sugar-free wafers for a lighter option.
- Vanilla Creme Filled Cookies – Adds richness and creaminess; consider using Golden Oreos or lemon-flavored cookies for a unique twist.
Now you’re just moments away from making your No Bake Strawberry Crunch Topping! Get ready to sprinkle joy onto your favorite desserts.
Step‑by‑Step Instructions for No Bake Strawberry Crunch Topping
Step 1: Crumble the Wafers
Begin by breaking the strawberry sugar wafers into smaller pieces for easier processing. Using a food processor, pulse these wafers until you achieve a chunky consistency, avoiding fine powder. This should take about 30 seconds. Transfer the crumbled wafers into a large mixing bowl, ready for blending with the cookies.
Step 2: Process the Cookies
Next, place the vanilla creme filled cookies in the food processor. Pulse them similarly for about 30 seconds, or until you have a desirable chunky texture. Just like the strawberry wafers, ensure they aren’t over-processed. The mixture should look crumbly but slightly coarse, adding a delightful texture to your No Bake Strawberry Crunch Topping.
Step 3: Combine the Crumbles
Pour the processed vanilla cookie crumbs into the bowl with the strawberry wafer crumbs. Gently mix the two crumbles together with a spatula until evenly combined. You’ll see the pretty pink and creamy white colors mingling, creating a tempting visual and flavor harmony. This combination is key for achieving a delightful crunch that elevates desserts.
Step 4: Store the Topping
Once your No Bake Strawberry Crunch Topping is mixed, transfer it to an airtight container. Seal tightly and store it in a cool, dry place for up to one month. Alternatively, for longer storage, refrigerate it for up to two months or freeze for six months. Having this vibrant topping at the ready ensures spontaneous dessert magic whenever you need it!
Make Ahead Options
These No Bake Strawberry Crunch Topping preparations are perfect for busy home cooks looking to save time! You can crumble both the strawberry sugar wafers and vanilla cookies up to 24 hours in advance. Just store them separately in airtight containers at room temperature to maintain their delightful crunch. When you’re ready to serve, simply mix the crumbles together, and your topping is good to go! This not only streamlines your dessert assembly but keeps everything fresh and just as delicious as when made on the spot. With these make-ahead tips, you can enjoy spontaneous sweet creations without any stress!
No Bake Strawberry Crunch Topping Variations
Feel free to get creative with this recipe and make it your own!
- Gluten-Free: Use gluten-free strawberry wafers and cookies to accommodate dietary needs while maintaining flavor.
- Toasted Almond Crunch: Add chopped toasted almonds to the mix for a nutty twist that complements the sweet strawberry flavor beautifully.
- Creamy Banana Twist: Substitute vanilla cookies with banana-flavored ones for a deliciously fruity crunch that reminds you of summertime treats.
- Chocolate Lover’s Delight: Incorporate chocolate sandwich cookies instead of vanilla for a rich, indulgent topping that will satisfy any chocolate craving.
- Coconut Dream: Mix in toasted coconut flakes for an exotic twist that pairs perfectly with tropical desserts or fruit salads.
- Sprinkle Magic: Add colorful sprinkles to the crumbles for a festive burst of color and fun, perfect for celebrating special occasions!
- Savory Spin: Try incorporating crushed pretzels for a unique sweet-and-salty flavor profile that adds contrast to your favorite desserts. A sprinkle of Zucchini Oatmeal Bake can enhance this flavor journey!
- Dairy-Free: Use dairy-free cream-filled cookies and vegan strawberry wafers to make this topping suitable for a dairy-free diet—deliciousness for everyone!
Each variation opens a world of delicious possibilities, inviting you to explore and enjoy every bite!
What to Serve with Easy No Bake Strawberry Crunch Topping
Imagine transforming your desserts into vibrant, dreamy delights with just a sprinkle of magic!
- Creamy Vanilla Ice Cream: The coolness of vanilla ice cream perfectly complements the crunchy sweetness, creating a delightful contrast of temperatures and textures.
- Fluffy Strawberry Shortcake: Add layers of this crunchy topping to your strawberry shortcake for an irresistible crunch that pairs beautifully with soft cake and whipped cream.
- Decadent Chocolate Mousse: The strawberry and vanilla flavors provide a refreshing twist, balancing the rich chocolate for a heavenly dessert experience.
- Smooth Yogurt Parfait: Layer it over yogurt with fresh fruit for a nutritious breakfast or snack, adding a delightful crunch and vibrant color.
- Tangy Lemon Cheesecake: The refreshing burst of strawberry complements the tanginess of lemon, making your cheesecake unforgettable.
- Frozen Yogurt Sundaes: Top off your frozen yogurt with this crumble, bringing texture and flavor that elevates your sweet treat.
- Refreshing Cucumber Salad: Surprise your guests by sprinkling some on a veggie crunch cucumber salad, adding unexpected sweetness and crunch.
- Chilled Fruit Salad: Enhance a mixed fruit salad by adding this topping, giving it that extra zing and making fruit even more delightful.
- Sparkling Wine: Pair your dessert with a glass of fizzy wine, as the bubbles will brighten the fruity flavors while offering a festive touch.
Expert Tips for No Bake Strawberry Crunch Topping
• Avoid Over-Blending: Ensure you pulse the wafers and cookies just enough to achieve a chunky texture; fine powder will result in a dense topping.
• Mix It Up: Feel free to experiment with different flavored cookies or add-ins like nuts or sprinkles, enhancing your No Bake Strawberry Crunch Topping’s appeal.
• Storage Matters: Keep the topping in an airtight container for optimal freshness. A cool, dry pantry is perfect, but refrigerating extends its life even more!
• Adapt for Dietary Needs: Need it gluten-free? Simply opt for gluten-free cookie alternatives or switch to freeze-dried strawberries for a safe, delicious twist.
• Serve Creatively: Use this crunchy topping not just on desserts, but also as a unique addition to salads or yogurt, adding texture and visible appeal!
How to Store and Freeze No Bake Strawberry Crunch Topping
• Room Temperature: Store your No Bake Strawberry Crunch Topping in an airtight container in a cool, dry place for up to 1 month.
• Fridge: For longer freshness, refrigerate your topping in an airtight container for up to 2 months. It will remain just as crunchy and flavorful!
• Freezer: Freeze your topping in a sealed container or freezer bag for up to 6 months. Thaw at room temperature before serving for the best texture.
• Reheating: This topping is best enjoyed cold; simply sprinkle over your desserts directly from the fridge or freezer for a delightful crunch!
No Bake Strawberry Crunch Topping Recipe FAQs
How do I choose the right strawberry sugar wafers?
Absolutely! Opt for strawberry sugar wafers with bright color and a fresh aroma. Avoid any wafers with dark spots or a stale smell, as these can indicate they are past their prime. If you’re aiming for a low-calorie alternative, pink sugar-free wafers are a great substitute.
What’s the best way to store No Bake Strawberry Crunch Topping?
For short-term storage, place your topping in an airtight container in a cool, dry pantry for up to 1 month. If you want to extend its freshness, you can keep it in the refrigerator for up to 2 months. Just make sure the container is sealed tightly.
Can I freeze my strawberry crunch topping?
Very! To freeze, transfer your No Bake Strawberry Crunch Topping into a sealed freezer bag or an airtight container. It can last up to 6 months in the freezer. When you’re ready to use it, simply thaw overnight in the refrigerator or leave it out at room temperature for a couple of hours for the perfect texture.
What if my topping is too powdery after processing?
No problem! If your No Bake Strawberry Crunch Topping turns out too powdery, you can still salvage it. Try adding a few more larger pieces of wafer or cookie and gently mix them in to create a better texture. If that doesn’t work, reintroducing it in the food processor for just a second or two can help combine the textures without going too fine.
Is this topping safe for those with allergies?
Definitely! However, please check the packaging of your strawberry wafers and cookies, as some may contain gluten or other allergens. For a gluten-free version, use decorations and cookies made specifically for that dietary need. Always check with those served about potential allergy issues.
Can I use different flavors of cookies?
The more the merrier! Feel free to experiment with different cookie flavors. Lemon or birthday cake-flavored cookies can add a delightful twist to your No Bake Strawberry Crunch Topping. Just remember to balance the flavors so they complement the strawberry nicely!
Delicious No Bake Strawberry Crunch Topping for Easy Treats
Ingredients
Equipment
Method
- Begin by breaking the strawberry sugar wafers into smaller pieces for easier processing. Pulse these wafers in a food processor until chunky, about 30 seconds. Transfer to a large mixing bowl.
- Place the vanilla creme filled cookies in the food processor. Pulse for about 30 seconds until a chunky texture is achieved. The mixture should be crumbly but slightly coarse.
- Pour the processed vanilla cookie crumbs into the bowl with the strawberry wafer crumbs. Gently mix with a spatula until evenly combined, creating a tempting visual and flavor harmony.
- Transfer the mixed topping to an airtight container. Store in a cool, dry place for up to one month, or refrigerate for up to two months, or freeze for six months.