

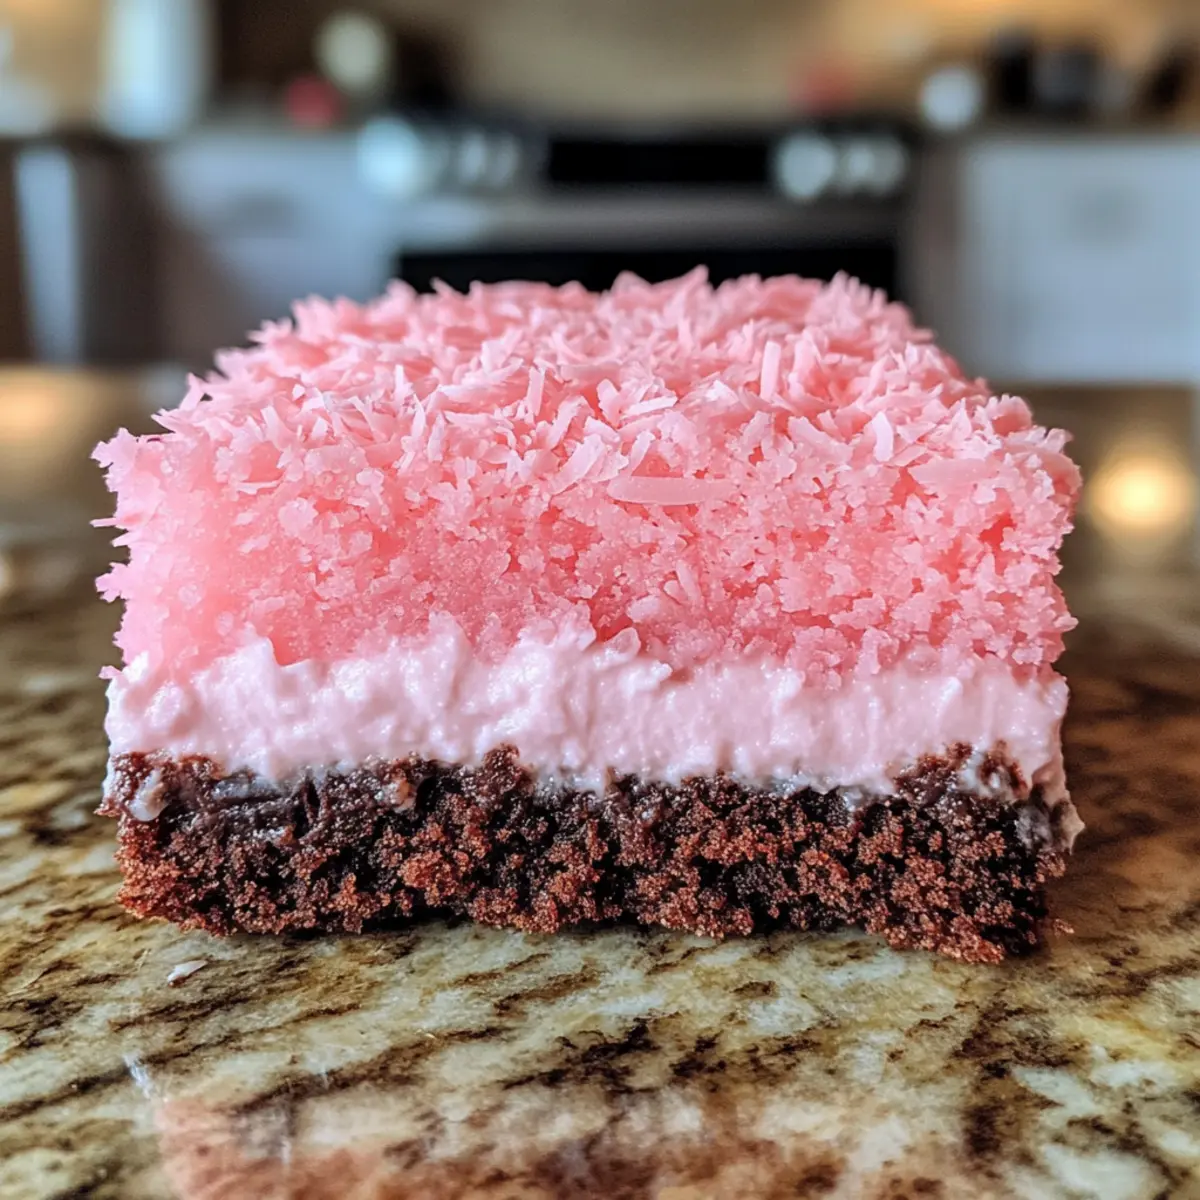
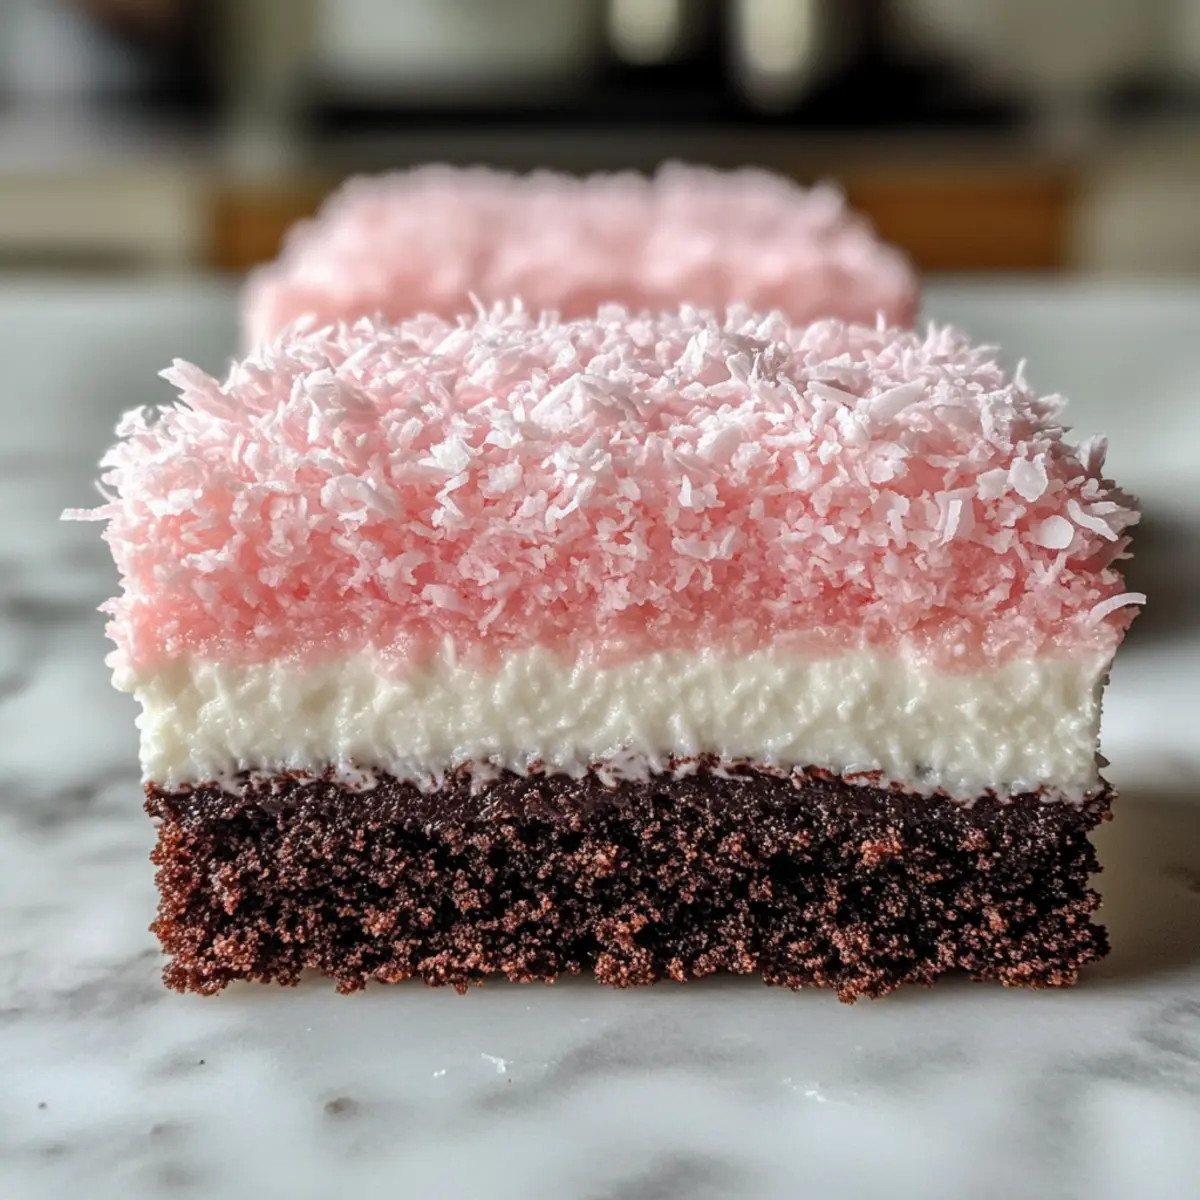
As I unwrapped a slice of these Pink Coconut Snowball Cake Bars, a wave of nostalgia washed over me. The inviting, festive colors and that heavenly sweet coconut topping are enough to make anyone feel at home. With a rich, fudgy chocolate base, these bars embody a delightful harmony of textures that’s simply irresistible. The beauty of this recipe lies in its effortless preparation—whipping up these delightful treats takes only about 30 minutes! Whether you’re hosting friends or simply craving a sweet escape from fast food, these easy dessert bars are your go-to solution. Plus, with gluten-free and dairy-free options available, there’s no excuse not to indulge! Ready to dive into this fun and vibrant recipe that’s sure to impress? Let’s get started!

Why Make Pink Coconut Snowball Cake Bars?
Quick and Easy: You’ll whip these bars up in no time, taking just 30 minutes from start to finish! Perfect for last-minute gatherings.
Crowd-Pleasing Appeal: With their vibrant colors and sweet coconut topping, these bars are bound to impress your guests and bring smiles all around.
Versatile Options: Need gluten-free or dairy-free? No problem! This recipe offers easy substitutions to cater to various dietary needs.
Decadent Flavor Combinations: Enjoy the rich, fudgy chocolate base paired with the light, fluffy coconut topping for a delightful treat that’s hard to resist.
Memorable Moments: Each slice is not just a dessert; it’s an experience that evokes nostalgia while satisfying your sweet cravings. Serve them alongside vanilla ice cream for an extra special touch!
Pink Coconut Snowball Cake Bars Ingredients
• Whip up these delightful Pink Coconut Snowball Cake Bars with ease by using the ingredients listed below!
For the Base
- All-purpose flour – Provides structure to the bars. Substitution: Use a gluten-free flour blend for a gluten-free option.
- Cocoa powder – Adds rich chocolate flavor to the base.
- Unsalted butter – Contributes moisture and richness. Ensure it’s softened, not melted, for the best texture.
- Granulated sugar – Sweetens the batter to balance flavors.
- Eggs – Binds ingredients together, lending tenderness to the bars. Use room temperature eggs for optimal results.
- Buttermilk – Adds moisture with a touch of tanginess. Substitution: Use coconut milk for a dairy-free and richer flavor.
- Hot water – Activates cocoa for deeper chocolate flavor.
For the Topping
- Heavy whipping cream – Creates a light and airy topping.
- Powdered sugar – Sweetens the whipped cream, helping it hold its shape.
- Vanilla extract – Adds warmth and complements coconut flavor.
- Shredded coconut – The star ingredient for the topping, providing texture and flavor. Use unsweetened for balanced sweetness.
- Pink food coloring – Adds a vibrant hue to the topping. Alternatives: Use blue or green for different occasions.
Step‑by‑Step Instructions for Pink Coconut Snowball Cake Bars
Step 1: Preheat Oven & Prepare Pan
Begin by preheating your oven to 350°F (175°C). While it heats up, grease a 9×13-inch baking pan thoroughly to prevent sticking. For an extra protective layer, consider lining the bottom with parchment paper, leaving some overhang, which will make lifting the bars out easier once they are baked.
Step 2: Mix Dry Ingredients
In a large mixing bowl, whisk together 1 cup of all-purpose flour, 1/2 cup of cocoa powder, and a pinch of salt. This step helps to evenly distribute the dry ingredients, ensuring no clumps remain. You want a smooth, uniform mixture that will be the foundation of your Pink Coconut Snowball Cake Bars.
Step 3: Cream Butter & Sugar
Using a hand mixer or stand mixer, beat 1/2 cup of softened unsalted butter and 1 cup of granulated sugar together until the mixture is light and fluffy, which should take about 2-3 minutes. This texture is crucial for creating tender bars. Next, add 2 room temperature eggs, one at a time, mixing well after each addition to fully incorporate them.
Step 4: Combine Wet Ingredients
Pour in 1/2 cup of buttermilk and 1/2 cup of hot water, mixing until the batter is smooth and consistent. The hot water helps activate the cocoa powder, intensifying the chocolate flavor in your base. Make sure everything is fully blended together before moving on to the next step for a delightful chocolatey treat.
Step 5: Combine Wet & Dry
Gently fold the dry mixture into the wet ingredients using a spatula. Be careful not to overmix; just combine until you see no dry flour remaining. This step ensures your Pink Coconut Snowball Cake Bars will have the right texture—soft and fudgy without being dense or tough.
Step 6: Bake
Pour the batter into your prepared baking pan, spreading it evenly. Bake in the preheated oven for 25-30 minutes, or until a toothpick inserted in the center comes out with a few moist crumbs. Keep an eye on them so they don’t overbake, as you want a rich, fudgy consistency.
Step 7: Whip Cream
While the chocolate base cools in the pan, prepare the whipped topping. In a clean mixing bowl, whip 1 cup of heavy whipping cream with 1/4 cup of powdered sugar and 1 teaspoon of vanilla extract until soft peaks form. This light, airy cream will beautifully complement the dense chocolate base, balancing flavors perfectly.
Step 8: Fold in Coconut & Color
Gently fold in 1 cup of shredded coconut and a few drops of pink food coloring to the whipped cream until fully incorporated. The mixture should be fluffy and vibrant, ready to add a festive touch to your bars. If you prefer different colors, get creative with blue or green food coloring for special occasions!
Step 9: Assemble
Once the chocolate base has cooled completely in the pan, spread the coconut topping evenly over the top using a spatula. Be gentle to maintain the fluffiness of the cream. This will create a beautiful contrast between the dark chocolate and the light coconut layer—an eye-catching feature of your Pink Coconut Snowball Cake Bars.
Step 10: Chill
Cover the assembled bars with plastic wrap and refrigerate for at least 30 minutes to allow the topping to set properly. Chilling not only firms up the cream but also melds the flavors together, creating a more enjoyable tasting experience once you slice them.
Step 11: Slice & Serve
After chilling, remove the bars from the refrigerator. Lift them out of the pan using the parchment paper overhang, if used, and slice into desired shapes. Serve these delightful Pink Coconut Snowball Cake Bars to your family and friends, and watch their faces light up with joy!
Make Ahead Options
These Pink Coconut Snowball Cake Bars are perfect for busy home cooks looking to save time! You can prepare the chocolate base up to 3 days in advance. Simply bake it, let it cool completely, and then cover it tightly in plastic wrap before refrigerating. The coconut topping can be made up to 24 hours prior; just keep it in an airtight container in the fridge to maintain its fluffy texture. When you’re ready to serve, simply spread the topping over the chilled base, let it set for about 30 minutes, and then slice into bars. You’ll have a delightful dessert ready to impress your family or guests with minimal effort!
How to Store and Freeze Pink Coconut Snowball Cake Bars
Fridge: Store the Pink Coconut Snowball Cake Bars in an airtight container for up to 5 days. This keeps them fresh while protecting the fluffy coconut topping.
Freezer: For longer storage, freeze the bars wrapped tightly in plastic wrap and then in aluminum foil for up to 2 months. Thaw in the fridge before serving for best results.
Serving Tips: If you plan to serve them after freezing, let them chill at room temperature for about 15-20 minutes before slicing for easier, cleaner cuts.
Reheating: While these bars are best enjoyed chilled or at room temperature, if you prefer a warm treat, microwave a slice for 10-15 seconds to slightly warm it up without melting the topping.
What to Serve with Pink Coconut Snowball Cake Bars?
Pairing these delightful bars with the right accompaniments can elevate your dessert experience to new heights. Create a full meal that’s both comforting and indulgent!
- Vanilla Ice Cream: The creamy, rich flavor of vanilla ice cream complements the fudgy chocolate base beautifully, adding a luxurious touch.
- Fresh Berries: Tart and juicy berries like strawberries or raspberries provide a refreshing contrast to the sweetness of the bars, balancing your palate.
- Chocolate Drizzle: A light drizzle of warm chocolate sauce enhances the chocolatey goodness while adding a touch of elegance to each slice.
- Coconut Macaroons: Serve alongside these for a coconut lover’s dream! The chewiness of macaroons mirrors the fluffy layer of the bars for a delightful duet.
- Lemon Sorbet: For a zesty contrast, a scoop of lemon sorbet offers a refreshing burst of citrus, brightening the dessert table.
- Nutty Crunch: Incorporating a side of roasted nuts, like chopped pecans or almonds, adds a satisfying crunch to balance the soft textures of the bars.
- Coffee or Tea: A warm cup of coffee or herbal tea pairs wonderfully, enhancing the flavors and providing a cozy finish to your dessert experience.
Expert Tips for Pink Coconut Snowball Cake Bars
Soften Butter: Use softened butter for a light and fluffy texture. Melted butter can lead to denser bars.
Avoid Overmixing: Be gentle when folding the dry mixture into wet ingredients. Overmixing can cause the bars to become tough.
Cool Completely: Ensure the chocolate base is fully cooled before adding the coconut topping for the best texture contrast.
Chill Well: After assembling, chill the bars thoroughly to allow the topping to set, enhancing both flavor and texture.
Vibrant Colors: Feel free to get creative with food coloring; try different colors for special occasions to make your Pink Coconut Snowball Cake Bars pop!
Pink Coconut Snowball Cake Bars Variations
Feel free to make these Pink Coconut Snowball Cake Bars your own! With a few simple swaps and twists, you can elevate the flavor and cater to different dietary needs.
-
Gluten-Free: Substitute all-purpose flour with a gluten-free blend for delicious bars everyone can enjoy.
-
Dairy-Free: Use dairy-free butter and coconut cream in the topping for a rich, creamy finish without dairy.
-
Flavor Twist: Mix in almond extract within the coconut layer for a fragrant nutty surprise. It adds a delightful depth to each bite.
-
Nutty Crunch: Sprinkle in chopped nuts like pecans or almonds into the chocolate base for an added texture that complements the softness of the bars.
-
Color Change: Experiment with vibrant hues by using blue or green food coloring in the coconut topping for festive occasions. It makes for beautiful presentations!
-
Extra Chocolate: Double the cocoa powder for a more intense chocolate experience. This modification helps satisfy serious chocolate cravings!
-
Spicy Kick: Add a pinch of cayenne to the chocolate base for an unexpected twist of heat that pairs surprisingly well with the sweetness.
Feeling inspired? If you love unique flavors and textures, you might also enjoy these smooth and creamy Nutty Vanilla Cake, or for something light and refreshing, try a slice of our Heavenly No-Bake Cake.
Pink Coconut Snowball Cake Bars Recipe FAQs
How do I select ripe ingredients for this recipe?
Absolutely! When choosing your ingredients, make sure the eggs are fresh and at room temperature for the best texture. For the butter, ensure it’s softened before creaming with sugar—this usually takes about 30 minutes out of the fridge. As for the shredded coconut, opt for unsweetened to avoid overpowering the bars’ natural sweetness.
What’s the best way to store the Pink Coconut Snowball Cake Bars?
Very! You can store the bars in an airtight container in the refrigerator for up to 5 days. This will keep them fresh and maintain the fluffiness of the coconut topping. If you want to keep them longer, you can freeze them wrapped tightly in plastic wrap and then in aluminum foil for up to 2 months.
Can I freeze the Pink Coconut Snowball Cake Bars?
Of course! To freeze these delectable bars, wrap them securely in plastic wrap and then place them in an airtight container or double-wrap in aluminum foil. This helps prevent freezer burn. When you’re ready to enjoy, simply thaw them in the refrigerator overnight for the best results.
What should I do if my cake bars turn out dense?
Don’t worry! If your Pink Coconut Snowball Cake Bars turn out denser than expected, it’s likely due to overmixing the batter after adding the dry ingredients. Make sure to fold the ingredients gently, just until combined. Additionally, using softened butter rather than melted butter can help achieve a lighter texture.
Are there any dietary considerations I should be aware of?
Yes! If you’re making these bars for someone with dietary restrictions, you can easily make them gluten-free by substituting all-purpose flour with a gluten-free blend. For a dairy-free option, use dairy-free butter and coconut cream in place of the heavy whipping cream. Always check the labels to ensure there are no hidden allergens.

Delight in Pink Coconut Snowball Cake Bars in Just 30 Minutes
Ingredients
Equipment
Method
- Preheat your oven to 350°F (175°C) and grease a 9x13-inch baking pan thoroughly.
- In a bowl, whisk together flour, cocoa powder, and a pinch of salt.
- Beat together softened butter and granulated sugar until light and fluffy, then add eggs one at a time.
- Mix in buttermilk and hot water until smooth.
- Fold the dry mixture into the wet ingredients until just combined.
- Pour batter into prepared pan and bake for 25-30 minutes.
- Whip cream with powdered sugar and vanilla until soft peaks form.
- Fold in shredded coconut and pink food coloring.
- Once cooled, spread the topping over the chocolate base.
- Refrigerate for at least 30 minutes.
- Slice into bars and serve.