

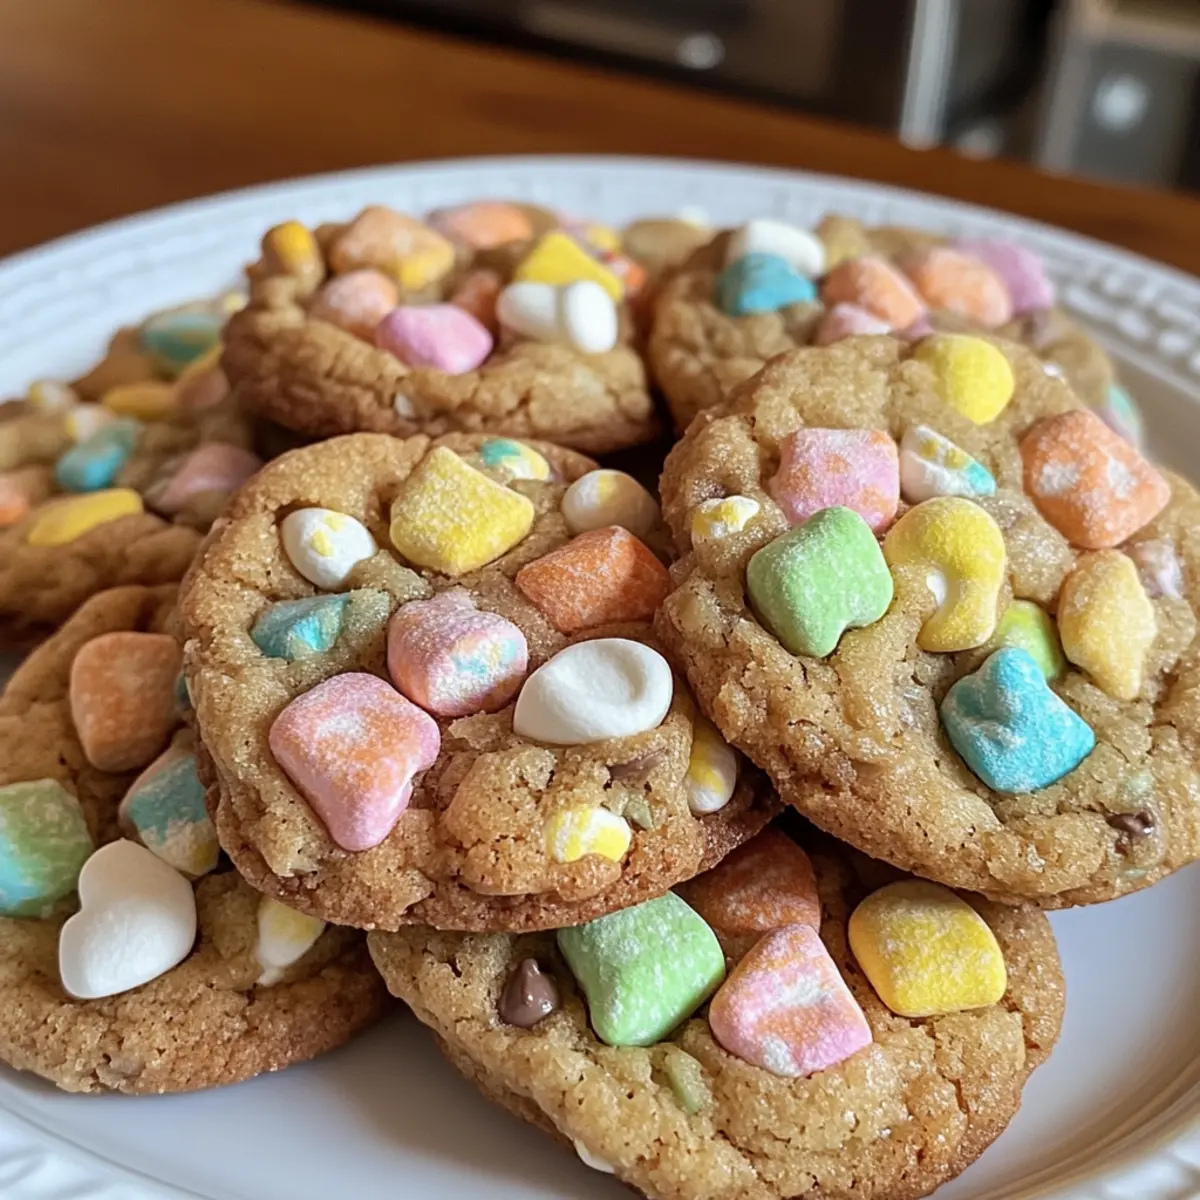
As I rummaged through my pantry, a surge of nostalgia washed over me when I spotted that iconic box of Lucky Charms. It immediately sparked the idea for a delightful twist: Lucky Charms Cookies. These whimsical treats combine a soft, buttery cookie base with colorful marshmallow morsels that will whisk you back to carefree childhood mornings. Not only are they incredibly quick to whip up—ready in under 20 minutes—but they also make for a fun, crowd-pleasing dessert for any occasion, from festive gatherings to simple family afternoons. With easy substitutions for a gluten-free version, you can share this joy with everyone. Are you ready to create some cookie magic that will brighten anyone’s day?
Why are Lucky Charms Cookies a must-try?
Nostalgic Delight: Each bite transports you back to childhood, blending memories with flavor.
Quick and Easy: Ready in under 20 minutes, making baking a breeze for all skill levels.
Customizable: Substitute with your favorite cereal or try a vegan twist using plant-based ingredients!
Crowd-Pleasing: Perfect for parties or casual get-togethers, these cookies are sure to put smiles on faces.
Textural Bliss: Enjoy a delightful contrast of soft cookie and crunchy marshmallows, making every bite exciting.
For more creative cookie ideas, check out my delightful Chocolate Date Cookies or Nutty Apricot Cookies.
Lucky Charms Cookies Ingredients
For the Cookie Base
• Butter – Provides richness and contributes to a soft texture. Substitution: Use vegan butter for a dairy-free option.
• Granulated Sugar – Adds sweetness and helps with cookie spread.
• Brown Sugar – Enhances flavor and moisture for a softer cookie. Substitution: Use more brown sugar for a deeper flavor.
• Egg – Binds ingredients and adds moisture.
• Vanilla Extract – Provides flavor depth and aroma.
• Vegetable Oil – Keeps the cookies moist and chewy.
• All-purpose Flour – Primary structure-building ingredient for the cookies. Substitution: Use a gluten-free flour blend for a gluten-free version.
• Baking Soda & Baking Powder – Leavening agents for proper texture.
For the Cookie Add-ins
• Lucky Charms Marshmallows – A key attraction that adds color and unique texture. Note: Use only the marshmallows for best results.
• White Chocolate Chips – Adds sweetness and creaminess. Optional: Can be omitted based on preference.
• Sprinkles – Optional for added festive flair.
Step‑by‑Step Instructions for Lucky Charms Cookies
Step 1: Preheat and Prep
Start by preheating your oven to 350°F (175°C). Prepare your baking sheets by lining them with parchment paper or silicone mats to prevent sticking. This small step is essential for achieving those perfect, chewy edges on your Lucky Charms Cookies. As the oven warms, gather all your ingredients for easy access.
Step 2: Cream the Butters and Sugars
In a large mixing bowl, combine softened butter and granulated sugar. Using an electric mixer, beat on medium speed until the mixture is creamy and smooth, about 2-3 minutes. This step is key for ensuring your cookies are soft and fully blended. Enjoy the sweet aroma as it begins to fill your kitchen.
Step 3: Incorporate Egg and Vanilla
Add in the egg and vanilla extract to your butter-sugar mix. Continue to blend on medium speed until the mixture becomes light and fluffy, roughly 2 minutes. This step enhances the flavor and adds moisture to your Lucky Charms Cookies, making them irresistibly delicious. Scrape down the sides of the bowl as needed to make sure everything is combined evenly.
Step 4: Add Brown Sugar and Oil
Next, mix in the brown sugar and vegetable oil until well combined. This will deepen the flavor profile and help keep the cookies moist. Continue to blend for another minute, making sure there are no clumps of sugar. The mixture should appear glossy and shaggy as you prepare to add the dry ingredients.
Step 5: Mix in the Dry Ingredients
Gently combine the all-purpose flour, baking soda, and baking powder into the wet mixture. Using a spatula or wooden spoon, fold the dry ingredients into the batter until just combined; be careful not to overmix. This ensures your Lucky Charms Cookies have the perfect texture—soft yet chewy with a slight crunch at the edges.
Step 6: Fold in Add-ins
Now it’s time for the fun part! Carefully fold in the colorful Lucky Charms marshmallows and optional white chocolate chips into the dough, keeping a few marshmallows aside for later. This step adds that vibrant, whimsical charm to your cookies. Make sure everything is evenly distributed throughout the dough to ensure every cookie has that delightful burst of marshmallow goodness.
Step 7: Scoop and Shape Dough
Using a tablespoon or a cookie scoop, portion out the dough and place the balls on the prepared baking sheets, spacing them about 2 inches apart. This ensures they have enough room to spread while baking. Don’t forget to press a few extra marshmallows on top of each dough ball for that extra special touch before baking.
Step 8: Bake to Perfection
Place the baking sheets in your preheated oven and bake for 9-11 minutes. Look for the edges to be set while the centers remain slightly soft. This visual cue is crucial for achieving the gooey texture that’s characteristic of Lucky Charms Cookies. The aroma will fill your kitchen, signaling their readiness!
Step 9: Cool Down
Once baked, remove the sheets from the oven and let the cookies cool on the baking sheets for 3-5 minutes. This will help them firm up slightly, making it easier to transfer them without breaking. Afterward, carefully move the cookies to a wire rack to cool completely. This final step sets the stage for enjoying your delightful, nostalgic treats!
How to Store and Freeze Lucky Charms Cookies
Room Temperature: Store your Lucky Charms Cookies in an airtight container at room temperature for up to 1 week to maintain their freshness and soft texture.
Fridge: For an extended shelf life, place the cookies in the fridge for up to 2 weeks. Allow cookies to come to room temperature before enjoying for the best flavor.
Freezer: If you want to save some for later, roll the dough into balls and freeze for up to 3 months. Simply bake straight from the freezer, adding an extra minute to the baking time.
Reheating: To revive the cookies’ softness, microwave them for about 10-15 seconds before serving, bringing back that warm, gooey goodness with each bite.
Expert Tips for Lucky Charms Cookies
Chill for Consistency: If your dough seems too warm or oily, chill it for 10 minutes before scooping to maintain the perfect texture.
Avoid Overmixing: Combine dry and wet ingredients until just mixed. Overmixing can lead to tough cookies, so be gentle!
Press for Presentation: Reserve some Lucky Charms marshmallows to press on top before baking to enhance visual appeal and retain their signature shape.
Monitor Baking Time: Keep a close eye on your cookies; they should be golden on the edges while soft in the center for the best chewy texture.
Customize Wisely: Feel free to mix and match cereals or substitute ingredients, but ensure you keep the balance to maintain the dough consistency for Lucky Charms Cookies.
What to Serve with Lucky Charms Cookies
Warm up your kitchen with delightful flavors and textures that perfectly complement these whimsical treats.
-
Cold Milk: A classic pairing, cold milk enhances the sweetness of the cookies and provides a delightful contrast to the chewy marshmallows.
-
Vanilla Ice Cream: Scoop up a generous portion of creamy vanilla ice cream on top for a nostalgic cookie sundae that will transport you back to childhood.
-
Fruit Salad: Fresh, bright fruits like strawberries and blueberries add a refreshing crunch, helping balance the sweetness of the cookies and offering a burst of freshness.
-
Chocolate Dipped Strawberries: These sweet bites provide a rich, indulgent flavor that contrasts beautifully with the lightness of the cookies. Serve them on the side for a decadent combo.
-
Caramel Sauce: Drizzling warm caramel sauce over a cookie will elevate the dessert experience, adding a rich and buttery flavor that pairs perfectly with the Lucky Charms marshmallows.
-
Bubble Tea: A unique drink choice, the chewy tapioca pearls complement the cookie’s texture, while a sweet tea base enhances the overall experience.
-
Mint Chocolate Chip Milkshake: Blend creamy mint, chocolate, and ice cream for a refreshing shake that adds herbaceous notes to the mix, making dessert even more playful.
-
S’mores Dip: This gooey addition brings familiar flavors with chocolate and marshmallows, providing a fun, interactive way to enjoy treats alongside the cookies.
-
Iced Lemonade: For a tangy counterpoint, serve a refreshing iced lemonade that brightens up the sweetness of the cookies, creating a delightful burst of flavor.
-
Chocolate Milk: An indulgent choice that rekindles childhood nostalgia, chocolate milk offers a rich, sweet accent to the cookie’s flavor profile for pure satisfaction.
Lucky Charms Cookies: Creative Twists
Feel free to get creative and make this recipe uniquely yours with these fun and delightful variations!
-
Gluten-Free: Use a gluten-free flour blend instead of all-purpose flour for a gluten-free version that everyone can enjoy.
-
Vegan-Friendly: Swap in coconut oil and a flax egg for a plant-based treat that delivers on flavor without compromising texture. You can enjoy the same delightful chewiness without any animal products!
-
Flavor Boost: Add a teaspoon of almond extract for an extra layer of nutty flavor that complements the sweetness of the marshmallows spectacularly.
-
Cereal Substitution: Try using different cereal marshmallows, such as Lucky Charms with a seasonal flavor, to make themed cookies for various holidays or celebrations.
-
Chocolatey Goodness: Incorporate chocolate chips or swap white chocolate with dark chocolate chips for a rich contrast against the bright marshmallows. Your cookies will have a delightful depth that everyone will crave!
-
Chunky Texture: Mix in crushed nuts like pecans or walnuts for a crunchy twist that perfectly balances the softness of the cookie and the chewiness of the marshmallows.
-
Hearty Addition: Fold in quick oats for a heartier cookie texture while keeping the fun colors and flavors intact, creating a chewy and satisfying bite.
-
Dessert Board Essential: These cookies would be fabulous as part of a spring-themed dessert board alongside my Apple Oatmeal Cookies and German Style Cookies!
Happy baking, and let your culinary creativity shine!
Make Ahead Options
These Lucky Charms Cookies are perfect for busy home cooks looking to save time without sacrificing flavor! You can prepare the cookie dough up to 24 hours in advance—simply scoop the dough into balls and store them in an airtight container in the refrigerator. If you want to prep even further, formed cookie dough can be frozen for up to 3 months. When you’re ready to bake, just place the refrigerated dough on a baking sheet and allow it to sit out for about 10 minutes before baking. This simple prep ensures your cookies keep their delightful texture and flavor, making them just as delicious as if they were baked fresh that day!
Lucky Charms Cookies Recipe FAQs
What’s the best way to choose the right Lucky Charms marshmallows?
Absolutely! Opt for a box that has vibrant marshmallows without any dark spots or stale-looking pieces. When selecting your cereal, check that the marshmallows are fresh and colorful, as they add both visual appeal and flavor to your cookies.
How should I store Lucky Charms Cookies to keep them fresh?
Store your Lucky Charms Cookies in an airtight container at room temperature for up to a week. This keeps them soft and chewy. If you want them to last longer, you can refrigerate them for up to two weeks. Just let them sit at room temperature for a bit before enjoying them for the best taste!
Can I freeze the cookie dough?
Certainly! To freeze Lucky Charms Cookies, shape the dough into balls and store them in a single layer on a baking sheet in the freezer until firm. Then, transfer the dough balls to an airtight container or freezer bag and keep them frozen for up to 3 months. When you’re ready to bake, simply add an additional minute or two to the baking time if baking from frozen.
What should I do if my cookie dough feels too oily?
Very good question! If you find your cookie dough appears oily, it’s best to chill it for about 10 minutes before scooping. This helps solidify the butter and make the dough easier to work with. The chilled dough will also bake up fluffier, giving you that perfect soft texture.
Are there any dietary considerations for Lucky Charms Cookies?
Absolutely! If you’re catering to those with dietary restrictions, you can easily make these cookies gluten-free by substituting all-purpose flour with a gluten-free flour blend. Additionally, using vegan butter and replacing the egg with a flax egg will create a delightful vegan version that everyone can enjoy. Just mix 1 tablespoon of flaxseed meal with 2.5 tablespoons of water and let it sit for 5 minutes to thicken.
How can I prevent my cookies from spreading too much during baking?
To control the spread of your Lucky Charms Cookies, ensure your butter is softened, not melted, when you cream it with the sugars. Additionally, chilling the dough before baking can help maintain their shape. If the dough appears too warm or sticky, chilling it for a short while before scooping can make a significant difference in the outcome!
Lucky Charms Cookies: The Joyful Treat You Can’t Resist
Ingredients
Equipment
Method
- Start by preheating your oven to 350°F (175°C). Prepare your baking sheets by lining them with parchment paper or silicone mats.
- In a large mixing bowl, combine softened butter and granulated sugar. Beat on medium speed until creamy and smooth, about 2-3 minutes.
- Add in the egg and vanilla extract, and continue to blend on medium speed until light and fluffy, roughly 2 minutes.
- Mix in the brown sugar and vegetable oil until well combined, blending for another minute.
- Gently combine the all-purpose flour, baking soda, and baking powder into the wet mixture and fold until just combined.
- Fold in the Lucky Charms marshmallows and optional white chocolate chips, distributing evenly.
- Scoop and shape dough into balls, placing them on the prepared baking sheets, spacing about 2 inches apart.
- Bake in the preheated oven for 9-11 minutes. Look for edges that are set while the centers remain slightly soft.
- Cool on baking sheets for 3-5 minutes before transferring to a wire rack to cool completely.