


Advertisement
There’s something incredibly nostalgic about the aroma of freshly baked bread filling the air. It takes me back to my grandmother’s kitchen, where the warmth of her homemade bread felt like a hug in edible form. She didn’t have a fancy oven—just a stovetop, a simple pot, and a whole lot of patience. Yet, every loaf she made was a masterpiece—soft, pillowy, and rich with the unmistakable flavor of love.
In today’s fast-paced world, baking bread often seems like a task best left to professionals or those with the luxury of high-end appliances. But what if I told you that you could achieve bakery-quality milk bread right on your stovetop? No oven, no complicated techniques—just simple ingredients and a bit of time. This recipe is proof that sometimes, the most comforting foods are also the easiest to make.
Whether you lack an oven or simply want to try something new, this super soft milk bread will surprise you with its fluffiness and depth of flavor. Let’s explore everything you need to know about this recipe, from why it works to commonly asked questions, so you can recreate the magic in your own kitchen.
Why This Milk Bread is Special
1. The Secret Behind Its Softness
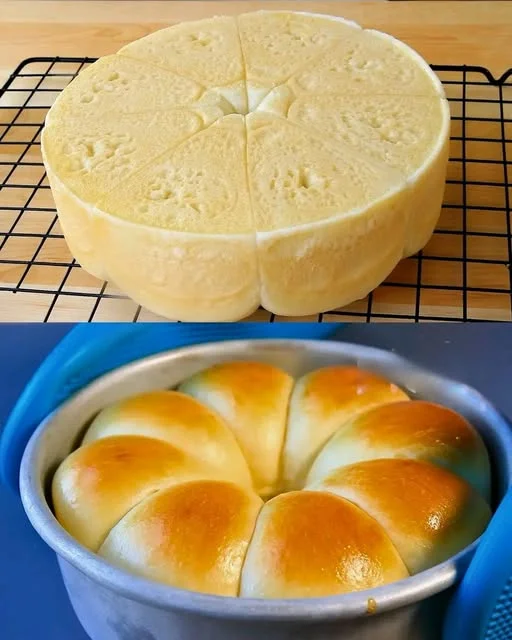
Unlike standard bread, which can sometimes be dense or dry, milk bread is known for its incredible softness. The use of milk instead of water enhances both the texture and flavor, making the bread richer and more tender. Butter adds a slight indulgence, while the egg contributes to a fine, airy crumb.
The magic also lies in the kneading process, which develops the gluten structure needed to create a light yet sturdy loaf. Even though this bread is made on the stovetop, the result is just as fluffy as anything baked in an oven.
2. No Oven? No Problem!
Not everyone has access to an oven, whether due to space constraints, high electricity costs, or simply a preference for alternative cooking methods. This recipe offers a creative solution by using a stovetop, ensuring that homemade bread is accessible to anyone with a pan and a lid. The gentle heat mimics the effect of baking, allowing the bread to cook evenly while staying incredibly soft.
Advertisement
3. A Versatile Bread for Any Occasion
Milk bread is wonderfully versatile. Enjoy it plain, toasted with butter and jam, or as a base for sandwiches. It also makes excellent French toast or bread pudding if you have leftovers (which is unlikely because it’s too delicious to last long).
Ingredients
| Ingredient | Amount |
|---|---|
| Warm milk | 150ml |
| White sugar | 25g / 2 tbsp |
| Active dry yeast | 3g / 1 tsp |
| Egg | 1 |
| All-purpose or bread flour | 300g |
| Salt | 3g / 0.5 tsp |
| Unsalted butter | 30g / 2 tbsp |
| Unsalted butter (for baking pan) | 5g |
Directions
Step 1: Activate the Yeast
- In a small bowl, combine warm milk, sugar, and active dry yeast. Stir gently and let it sit for about 5–10 minutes until it becomes frothy.
Step 2: Prepare the Dough
- In a large mixing bowl, whisk the egg, then add flour and salt. Pour in the yeast mixture and stir until a shaggy dough forms.
- Knead the dough for about 10 minutes until smooth and elastic. You can do this by hand or with a stand mixer.
Step 3: Incorporate the Butter
- Add the 30g of unsalted butter in small portions, kneading continuously until fully absorbed. The dough should become soft and slightly sticky.
Step 4: First Rise
- Place the dough in a greased bowl, cover it with a damp cloth, and let it rise in a warm place for about 60–90 minutes or until doubled in size.
Step 5: Shape the Dough
- Once risen, punch down the dough to release air. Divide it into equal portions and shape them into balls or rolls.
- Lightly grease a baking pan with the remaining 5g of butter and arrange the dough pieces inside.
Step 6: Second Rise
- Cover the pan and let the dough rise again for about 30–40 minutes until puffy.
Step 7: Cook on the Stovetop
- Place the pan on low heat and cover it with a lid. Cook for 15–20 minutes, checking occasionally.
- Flip the bread over and cook for another 10–15 minutes until golden brown and cooked through.
Step 8: Cool and Serve
- Remove from heat and let it cool slightly before serving. Enjoy the fluffy goodness!
Nutritional Information
| Nutrient | Per Serving (1 Roll) |
|---|---|
| Calories | ~180 kcal |
| Carbohydrates | ~28g |
| Protein | ~5g |
| Fat | ~5g |
| Sugar | ~4g |
| Fiber | ~1g |
Tips for the Perfect Stovetop Milk Bread
1. Choose the Right Pan
A heavy-bottomed pan or a cast-iron skillet works best for even heat distribution. If your pan is too thin, the bread might burn before the inside is fully cooked.
2. Keep the Heat Low and Steady
Patience is key. Cooking on high heat may cause the bottom to burn while the inside remains undercooked. A low, steady flame ensures a perfectly golden crust without compromising the softness inside.
3. Give the Dough Enough Time to Rise
Skipping or rushing the proofing process will result in dense bread. Allowing the dough to rise properly gives it that signature airy texture.
Advertisement
4. Use a Lid for Even Cooking
Trapping heat with a lid helps simulate the conditions of an oven. This allows the bread to cook through evenly without drying out.
Frequently Asked Questions
1. Can I Make This Bread Without Yeast?
Yeast is essential for achieving the fluffy texture of milk bread. However, if you’re looking for a quick alternative, you can try using baking powder as a leavening agent. The texture will be more like a biscuit or soda bread rather than classic milk bread.
2. How Do I Store This Bread?
This bread is best enjoyed fresh but can be stored in an airtight container at room temperature for up to two days. If you need to keep it longer, store it in the refrigerator for up to a week or freeze it for up to a month.
3. Can I Use Whole Wheat Flour Instead of All-Purpose Flour?
Yes, but the texture will be denser. Whole wheat flour absorbs more liquid and produces a heartier bread. To maintain softness, try using a mix of whole wheat and all-purpose flour.
4. My Bread Didn’t Rise. What Went Wrong?
If your bread didn’t rise properly, one of the following could be the issue:
Advertisement
- The yeast was expired or not activated correctly. Always proof your yeast in warm milk before adding it to the flour.
- The dough was placed in a cold environment. Bread dough needs warmth to rise effectively.
- Not enough kneading. Developing gluten is crucial for proper structure and rise.
5. How Do I Know If My Bread Is Fully Cooked?
You can test doneness by tapping the bread lightly—if it sounds hollow, it’s ready. Additionally, you can insert a toothpick or skewer into the center; if it comes out clean, the bread is fully cooked.
6. Can I Add Flavors or Fillings?
Absolutely! Feel free to mix in chocolate chips, cinnamon, or shredded cheese for a unique twist. You can also stuff the dough with sweet or savory fillings before cooking.
A Final Thought: The Joy of Simple Baking
Making bread from scratch, especially without an oven, is a deeply rewarding experience. It reminds us that great food doesn’t require fancy equipment—just patience, quality ingredients, and a love for cooking. This stovetop milk bread is proof that simplicity and tradition can create something truly special.
So, whether you’re baking for nostalgia, necessity, or simply to enjoy the magic of homemade bread, let this recipe be a reminder that the best things in life are often the simplest. Happy baking!