Nutty Apple Energy Bites – A Guilt-Free Sweet Treat

Growing up, my grandmother always had a way of turning simple ingredients into something magical. She believed that the best desserts didn’t need refined sugar, just a little creativity and a handful of wholesome ingredients. One of my fondest memories was watching her mix together apples, nuts, and dried fruits to make a naturally sweet treat that felt indulgent but was actually healthy.

As I got older, I realized that store-bought snacks often contained unnecessary preservatives and excessive sugar. I wanted a homemade alternative that could satisfy my sweet tooth without the guilt. That’s when I rediscovered my grandmother’s method and created these Nutty Apple Energy Bites—a delicious, nutrient-packed dessert made with simple, natural ingredients.

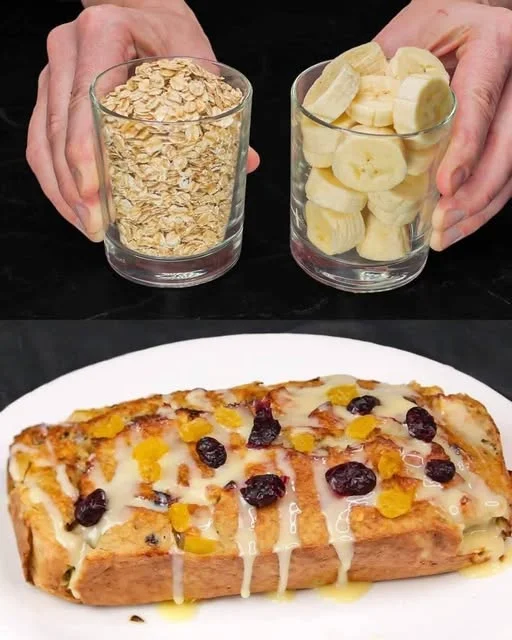
These bites are soft, chewy, and naturally sweetened by apples, apricots, and cranberries. With the crunch of walnuts and almonds, they offer a satisfying texture while providing essential nutrients. Whether you need a quick snack, a post-workout boost, or a light dessert, these energy bites are the perfect solution.

Why You’ll Love This Recipe

1. Naturally Sweet and Sugar-Free

Many desserts rely on added sugars, but this recipe gets its sweetness from nature. Apples, dried apricots, and cranberries provide just the right amount of sweetness without the need for refined sugar.

2. Quick and Easy to Make

With just a few ingredients and a food processor, you can have these energy bites ready in no time. There’s no baking required—just mix, shape, and chill!

3. Packed with Nutrients

Each ingredient brings its own health benefits:

  • Oats provide fiber to keep you full.
  • Walnuts and almonds offer healthy fats and protein.
  • Apples and dried fruits add natural sweetness, vitamins, and antioxidants.

4. Perfect for Any Occasion

These bites are great for:

  • A healthy afternoon snack
  • A quick pre- or post-workout energy boost
  • A light and satisfying dessert
  • A homemade gift for health-conscious friends

Ingredients

IngredientAmount
Oatmeal1 cup
Walnuts1 cup
Dried apricots50 grams
Almonds50 grams
Cranberries1/2 cup
Apples2 (peeled & diced)
Water50 ml
Olive oil2 tablespoons

Directions

Step 1: Prepare the Apples

  1. Peel and dice the apples. In a small pan, heat water and add the apples. Cook for about 5 minutes until soft.

Step 2: Blend the Ingredients

  1. In a food processor, combine the cooked apples, dried apricots, walnuts, almonds, cranberries, and oatmeal. Blend until you achieve a sticky, slightly chunky mixture.

Step 3: Shape the Bites

  1. With slightly wet hands, roll the mixture into small bite-sized balls or press into a flat dish and cut into squares.

Step 4: Chill and Serve

  1. Refrigerate for at least 30 minutes to set. Enjoy as a quick snack or a light dessert!

Nutritional Information

NutrientPer Serving (1 Bite)
Calories~120 kcal
Carbohydrates~15g
Protein~3g
Fat~6g
Fiber~2g
Sugar~7g (natural)

Tips for the Best Nutty Apple Energy Bites

1. Use Soft Dried Fruits

For the best texture, use soft dried apricots and cranberries. If they are too dry, soak them in warm water for 10 minutes before blending.

2. Adjust the Texture

If the mixture is too sticky, add more oats. If it’s too dry, add a bit of extra olive oil or a splash of water.

3. Experiment with Flavors

This recipe is versatile! Try adding:

  • Cinnamon for a warm, spiced flavor
  • Cocoa powder for a chocolaty twist
  • Coconut flakes for extra sweetness

4. Store Them Properly

Keep the energy bites in an airtight container in the refrigerator for up to a week. You can also freeze them for up to a month—just let them sit at room temperature for a few minutes before eating.

Frequently Asked Questions

1. Are These Energy Bites Really Healthy?

Yes! Unlike store-bought snacks, these bites are made with whole, natural ingredients. They contain fiber, healthy fats, and natural sugars, making them a balanced, nutritious choice.

2. Can I Make These Without Nuts?

Absolutely. If you have a nut allergy, you can replace the walnuts and almonds with sunflower seeds or pumpkin seeds for a similar texture and crunch.

3. What Can I Use Instead of Olive Oil?

You can substitute olive oil with coconut oil or almond butter for a slightly different flavor and texture.

4. Can I Make a Crunchier Version?

If you prefer a crunchier texture, try toasting the oats and nuts in a dry pan for a few minutes before blending them. This enhances their flavor and adds a bit of extra crunch.

5. How Many Calories Are in Each Bite?

Each energy bite contains approximately 120 calories, making it a great low-calorie snack or dessert option.

6. Can I Use Fresh Apples Instead of Dried Fruits?

While this recipe uses fresh apples, dried fruits help bind the mixture together. If you replace them entirely, the mixture may be too wet, so you’ll need to adjust by adding more oats.

7. Are These Suitable for Kids?

Yes! These bites are a great way to introduce kids to healthy snacks. They taste like a treat but are full of wholesome ingredients.

Conclusion: A Simple, Satisfying Dessert for All

These Nutty Apple Energy Bites prove that desserts don’t need to be loaded with sugar to be delicious. They are naturally sweet, packed with nutrients, and incredibly easy to make. Whether you’re looking for a healthy snack, a light dessert, or an energy boost, these bites are a perfect choice.

Just like my grandmother used to do, you can make something wonderful with just a few simple ingredients. Try this recipe, experiment with your favorite flavors, and enjoy a dessert that not only tastes great but also nourishes your body.

Golden Garlic Flatbread – A Rustic, Flavorful Classic

There’s something incredibly comforting about the smell of warm garlic bread filling the kitchen. It takes me back to family gatherings, where a simple flatbread would sit at the center of the table, ready to be torn apart and shared. My grandmother would always make her signature garlic flatbread, brushing it with olive oil and sprinkling fresh herbs on top. She never followed a recipe—just instinct, love, and whatever ingredients she had on hand.

Years later, I wanted to recreate that same experience, but with a twist. Instead of traditional flour, I turned to almond flour to make a lighter, low-carb version. What I discovered was a golden, garlicky, and incredibly flavorful flatbread that quickly became a household favorite. It’s crisp on the outside, soft on the inside, and infused with the rich taste of garlic and Parmesan. Whether served as a side, a base for pizza, or enjoyed on its own, this flatbread is the perfect blend of rustic simplicity and bold flavor.

If you love garlic bread but are looking for a healthier, grain-free alternative, this recipe is for you. Let’s dive into what makes this golden garlic flatbread special, along with some useful tips, variations, and frequently asked questions.

Why This Garlic Flatbread Stands Out

1. Low-Carb, Gluten-Free Goodness

This flatbread is made with almond flour, making it naturally gluten-free and lower in carbs than traditional wheat-based flatbreads. It’s a great alternative for those following a keto or low-carb diet while still delivering a satisfying, bread-like texture.

2. Packed with Garlic Flavor

Garlic lovers, rejoice! This flatbread is infused with fresh minced garlic, which deepens in flavor as it cooks. Paired with Parmesan and olive oil, the garlic creates an irresistible combination of rich, savory goodness.

3. Quick and Easy to Make

Unlike traditional bread recipes that require yeast and hours of rising time, this flatbread comes together in just minutes. It doesn’t require any special techniques—just mix, roll, and cook. Whether you bake it or cook it on the stovetop, it’s an effortless way to enjoy homemade bread.

4. Versatile and Customizable

One of the best things about this garlic flatbread is how adaptable it is. You can make it soft or crispy, add herbs and spices for extra flavor, or even use it as a base for mini pizzas. It pairs beautifully with soups, salads, or as an appetizer with dips like hummus or tzatziki.

Ingredients

IngredientAmount
Almond flour1 cup
Large eggs2
Garlic, minced2 cloves
Grated Parmesan cheese1/4 cup
Olive oil2 tablespoons
Baking powder1 teaspoon
Salt1/2 teaspoon
Dried oregano (optional)1/2 teaspoon
Dried basil (optional)1/2 teaspoon
Butter or olive oil for brushing (optional)As needed
Fresh parsley, chopped (optional)For garnish

Directions

Step 1: Prepare the Dough

  1. In a mixing bowl, whisk the eggs, then add almond flour, garlic, Parmesan cheese, olive oil, baking powder, salt, and herbs (if using).
  2. Stir until a thick dough forms.

Step 2: Shape the Flatbread

  1. Place the dough between two sheets of parchment paper and roll it out to about 1/4-inch thickness.
  2. Carefully transfer it to a lightly greased pan or baking sheet.

Step 3: Cook the Flatbread

  1. Heat a pan over medium-low heat and cook the flatbread for about 3–4 minutes per side until golden brown. Alternatively, bake at 350°F (175°C) for 10–12 minutes until firm and slightly crispy.

Step 4: Add Finishing Touches

  1. Brush with melted butter or olive oil for extra richness. Sprinkle with fresh parsley for added freshness.
  2. Serve warm and enjoy!

Nutritional Information

NutrientPer Serving (1 Piece)
Calories~150 kcal
Carbohydrates~3g
Protein~6g
Fat~12g
Fiber~2g
Sugar~1g

Tips for the Best Garlic Flatbread

1. Use Fresh Garlic for Maximum Flavor

While garlic powder can be used in a pinch, fresh minced garlic gives the best flavor. The natural oils in fresh garlic release as the flatbread cooks, creating a deep, aromatic taste.

2. Roll the Dough Evenly

For consistent cooking, roll the dough to an even thickness—about 1/4 inch. If it’s too thick, it may stay doughy in the middle; too thin, and it may become too crispy.

3. Choose the Right Cooking Method

  • Stovetop: Cooking the flatbread in a pan gives it a nice golden crust and a soft, chewy interior.
  • Oven: Baking at 350°F (175°C) creates a slightly crispier texture, perfect for those who prefer a crunchier bite.
  • Air Fryer: For an extra crispy version, air-fry at 350°F for about 8 minutes, flipping halfway through.

4. Brush with Butter or Olive Oil

After cooking, brushing the flatbread with melted butter or olive oil enhances its richness. For a more intense garlic flavor, mix minced garlic with the butter before brushing.

5. Add Herbs for Extra Flavor

Dried oregano and basil add depth, but you can also experiment with rosemary, thyme, or red pepper flakes for a spicy kick.

Frequently Asked Questions

1. Can I Make This Flatbread Without Eggs?

Yes! If you’re vegan or avoiding eggs, you can use a flax egg (1 tablespoon ground flaxseed mixed with 2.5 tablespoons water) as a substitute. It will slightly change the texture, making the flatbread a bit more crumbly.

2. How Do I Store Leftovers?

Store any leftover flatbread in an airtight container at room temperature for up to 2 days. For longer storage, refrigerate it for up to a week or freeze for up to a month. Reheat in a pan or toaster for the best texture.

3. Can I Use Coconut Flour Instead of Almond Flour?

Coconut flour absorbs more liquid and has a different texture, so it’s not a 1:1 substitute. If using coconut flour, reduce the amount to 1/3 cup and add an extra egg to help with binding.

4. Can I Make a Crispy Version of This Flatbread?

Yes! For a crispier flatbread, roll it thinner and bake it at a slightly higher temperature (375°F) for a few extra minutes. You can also air-fry it for a crunchy, cracker-like texture.

5. What Can I Serve with This Flatbread?

This garlic flatbread pairs well with many dishes, including:

  • Dips: Hummus, tzatziki, or spinach-artichoke dip
  • Soups: Tomato soup, creamy mushroom soup, or minestrone
  • Salads: A fresh Greek salad or Caesar salad
  • Toppings: Use it as a base for mini pizzas or top it with avocado and eggs for breakfast

6. Can I Double the Recipe?

Absolutely! If you’re serving a crowd, you can easily double or triple the ingredients. Just make sure to cook in batches to maintain an even texture.

Conclusion: A Flatbread for Every Occasion

Garlic flatbread is more than just a side dish—it’s a warm, flavorful experience that brings people together. Whether you’re looking for a quick and easy bread substitute, a low-carb alternative, or just a way to enjoy the rich flavors of garlic and Parmesan, this recipe is sure to become a favorite.

From my grandmother’s rustic kitchen to modern low-carb adaptations, this flatbread proves that great food doesn’t have to be complicated. It’s simple, versatile, and packed with flavor in every bite. Try it for yourself and experience the magic of homemade garlic flatbread!

Cauliflower Patties: A Nutritious and Flavorful Alternative to Meat

A few years ago, I found myself searching for new ways to enjoy meals that were both delicious and nourishing. As someone who has always loved hearty, filling foods, I wanted to find alternatives that could give me the same satisfaction but without compromising on my health. It was during this search that I stumbled upon cauliflower as a versatile ingredient, and to my surprise, it quickly became one of my favorite foods.

I remember the first time I decided to try making cauliflower patties. At first, I wasn’t sure what to expect. I had grown up enjoying the rich, savory flavors of meat dishes, so the idea of a plant-based patty seemed unfamiliar. However, the process of creating something new in the kitchen, combined with the excitement of discovering a new flavor, quickly turned this recipe into a staple in my diet. It wasn’t long before I realized just how satisfying these cauliflower patties could be. They provided that perfect balance of flavors and textures—crispy on the outside, tender on the inside—and they were packed with nutrients.

In this article, I’ll share how you can create these cauliflower patties in your own kitchen, offering a healthy alternative to meat-based options. Whether you’re a long-time vegetarian or simply looking to incorporate more vegetables into your meals, these patties will quickly become a go-to in your repertoire. Not only are they packed with fiber and vitamins, but they’re also a flavorful option for lunch, dinner, or even a snack.

Why Choose Cauliflower Patties?

Cauliflower has recently gained popularity as a health food due to its versatility and numerous health benefits. This vegetable is low in calories, rich in antioxidants, and a good source of vitamins and minerals. It is also known for its high fiber content, which can aid in digestion and promote a feeling of fullness, making it a great option for anyone looking to reduce calorie intake or manage weight.

What sets these cauliflower patties apart is their ability to deliver a satisfying meal without the heaviness of meat. Whether you’re reducing your meat consumption for health reasons or simply want to try something new, these patties provide all the comfort you need without the extra fat and cholesterol found in traditional meat patties. They also offer a great alternative for those following vegetarian, vegan, or gluten-free diets.

Ingredients

IngredientAmount
Cauliflower1 medium
Psyllium husk2 tbsp
Ground almonds1 cup (100g)

Directions:

  1. Prepare the Cauliflower: Begin by cutting the cauliflower into small florets. Steam or boil them for about 10-12 minutes until they become tender.
  2. Mash the Cauliflower: Once the cauliflower is cooked, drain any excess water and mash it until smooth using a potato masher or fork. The texture should be soft, yet firm enough to hold its shape.
  3. Combine Ingredients: In a large bowl, combine the mashed cauliflower, psyllium husk, and ground almonds. Stir the ingredients together until they are fully mixed. The psyllium husk will help bind the mixture, while the ground almonds will add texture and flavor.
  4. Form the Patties: Take small portions of the mixture and shape them into patties using your hands. If the mixture feels too wet, add a bit more ground almonds to help firm it up.
  5. Cook the Patties: Heat a non-stick frying pan over medium heat and add a small amount of oil or butter. Cook the patties for about 4-5 minutes on each side or until golden brown and crispy.
  6. Serve and Enjoy: Once cooked, serve the patties warm with your favorite dipping sauce or enjoy them with a side salad.

Nutritional Information (per serving):

NutrientAmount
Calories130
Protein4g
Carbohydrates10g
Fat9g
Fiber5g
Sugar3g

Health Benefits of Cauliflower

Cauliflower is a member of the cruciferous vegetable family, which also includes broccoli, cabbage, and Brussels sprouts. It’s a powerhouse of nutrients, making it an excellent addition to any diet. Here are some of the key benefits of incorporating cauliflower into your meals:

  1. Rich in Fiber: Cauliflower is an excellent source of dietary fiber, which is crucial for maintaining digestive health. It helps regulate bowel movements, prevents constipation, and supports a healthy gut microbiome. Fiber also promotes feelings of fullness, which can reduce overeating and support weight management.
  2. Packed with Vitamins and Minerals: This vegetable is loaded with essential vitamins such as Vitamin C, Vitamin K, and folate, as well as important minerals like potassium and manganese. Vitamin C is especially important for immune function, while Vitamin K plays a crucial role in bone health.
  3. Antioxidant Properties: Cauliflower is a great source of antioxidants, which protect the body from oxidative stress and damage caused by free radicals. These antioxidants can help reduce the risk of chronic diseases such as heart disease and cancer.
  4. Supports Detoxification: The compounds found in cauliflower, such as glucosinolates, help the liver detoxify the body by supporting its ability to neutralize harmful substances. This makes cauliflower a great vegetable to include in any detox diet.
  5. Anti-inflammatory: Cauliflower contains several bioactive compounds that have anti-inflammatory properties, which may help reduce the risk of inflammatory diseases such as arthritis and heart disease.

FAQs About Cauliflower Patties

  1. Can I make these cauliflower patties in advance?

Yes, you can easily make these cauliflower patties in advance. Simply prepare them as instructed and store them in an airtight container in the fridge for up to 2 days. When ready to eat, you can reheat them in a skillet for a few minutes on each side, or place them in the oven at 350°F (175°C) for 10-15 minutes.

  1. Can I freeze these cauliflower patties?

Absolutely! These patties freeze well. After cooking, allow them to cool completely, then place them in a single layer on a baking sheet. Freeze them for 1-2 hours until firm, then transfer them to a freezer-safe bag or container. They can be stored in the freezer for up to 3 months. To reheat, simply cook them from frozen in a skillet or oven until heated through.

  1. Can I make these patties without psyllium husk?

If you don’t have psyllium husk, you can substitute it with ground flaxseeds, chia seeds, or even breadcrumbs. These alternatives will help bind the mixture together and give the patties structure.

  1. What can I serve these cauliflower patties with?

These patties are incredibly versatile and can be served with a variety of side dishes. For a light meal, pair them with a fresh salad or roasted vegetables. You can also serve them with your favorite sauce or dip, such as tahini, yogurt, or a spicy tomato sauce. For a more filling option, try serving them in a whole grain bun as a cauliflower burger.

  1. Are cauliflower patties suitable for a vegan diet?

Yes, these patties can easily be made vegan by omitting the eggs and using a flax egg (1 tbsp ground flaxseeds + 3 tbsp water, let it sit for 5 minutes) as a binding agent instead. The psyllium husk and ground almonds will still provide great structure to the patties.

Conclusion: A Satisfying Meat Alternative

Incorporating cauliflower into your meals doesn’t mean sacrificing flavor or satisfaction. These cauliflower patties are proof that vegetables can be both filling and delicious. They provide all the texture and savory taste you expect from traditional meat patties, but with fewer calories and more nutrients. Whether you’re looking to eat more plant-based meals, reduce your meat consumption, or simply try something new, these cauliflower patties will not disappoint.

The beauty of this recipe lies in its simplicity. It uses just a few ingredients that are easy to find, and the result is a dish that is both satisfying and full of flavor. The combination of cauliflower, psyllium husk, and ground almonds creates a perfect balance of textures, while the crispy exterior and tender interior make each bite a joy. These patties can be enjoyed on their own, with a side dish, or even as a healthy snack.

The cauliflower patties are a reminder that embracing plant-based meals doesn’t have to be complicated. By making small, thoughtful changes in our diets, we can create meals that are not only good for our bodies but also good for the planet. Whether you’re new to plant-based eating or a seasoned pro, these patties offer a delicious and nutritious way to enjoy vegetables in a whole new way.

So, the next time you’re craving a hearty meal, skip the meat and give these cauliflower patties a try. You might just find that they taste even better than the traditional alternatives—and your body will thank you for it.

Decadent No-Bake Chocolate Biscuit Cake: The Ultimate Sweet Comfort

When I was growing up, desserts weren’t just treats—they were memories in the making. I’ll never forget the first time I walked into my grandmother’s kitchen after school. The warm, rich smell of melted chocolate filled the air, drawing me in like a magnet. There, on the counter, was a tray of the most decadent chocolate biscuit cake I had ever seen. The glaze was smooth, the cake looked rich and inviting, and my grandmother’s pride was evident as she carefully cut slices for everyone. As I bit into the cake, the crunch of the biscuits contrasted perfectly with the silky smooth chocolate. It was an indulgence I couldn’t resist.

Over the years, I’ve made this cake countless times, not only because it’s absolutely delicious, but because it connects me to those simple, joyful moments of my childhood. It’s one of those treats that you don’t need a special occasion to make—it’s comforting, quick, and it always brings people together. Every time I make it, I think back to those afternoons with my grandmother, and how a simple cake can bring so much happiness.

This no-bake chocolate biscuit cake is the epitome of convenience and indulgence, a quick fix when you want something sweet but don’t have the time for complicated baking processes. The best part? It’s made with ingredients you likely already have in your pantry, and it’s practically foolproof. With a rich chocolate flavor and the satisfying crunch of biscuits, it’s sure to become a staple in your kitchen, just like it has in mine.

The Magic of No-Bake Cakes

The appeal of a no-bake cake lies in its simplicity. With minimal ingredients and no oven required, it’s the perfect dessert to whip up even on a busy day. In a world where we’re constantly juggling work, family, and social commitments, the idea of creating something delicious without the need for long prep times or oven space is refreshing. No-bake cakes, like this chocolate biscuit cake, offer a quick and easy alternative to traditional cakes that require hours of mixing, baking, and cooling.

But don’t let the simplicity fool you. While this cake may not require a baking dish, its taste and texture are on par with any traditional dessert. The combination of crushed biscuits soaked in a rich, creamy chocolate mixture creates a satisfying contrast between the crunchy texture of the biscuits and the smoothness of the chocolate. It’s this unique contrast that makes this cake so irresistible.

Ingredients

For the Cake:

IngredientAmount
Digestive biscuits or graham crackers600g
Sugar120g
Cocoa powder60g
Milk250ml
Butter60g
Vanilla extractA pinch

For the Glaze:

IngredientAmount
Dark chocolate100g
Heavy cream (33% fat)130ml

Directions

  1. Prepare the Biscuit Mixture:
    Begin by crushing the biscuits (digestive or graham crackers) into small pieces or crumbs. You can use a rolling pin to crush them in a zip-lock bag or a food processor for quicker results.
  2. Make the Base:
    In a saucepan, melt the butter over medium heat. Add the milk, sugar, and cocoa powder, and stir until everything is fully combined and the mixture is smooth. Bring it to a gentle simmer for a couple of minutes.
  3. Combine the Mixture:
    Add the crushed biscuits to the chocolate mixture. Stir thoroughly until all the biscuit pieces are coated with the chocolate mixture. Add a pinch of vanilla extract for a hint of flavor.
  4. Set the Cake:
    Transfer the mixture to a cake tin or mold, pressing it down firmly to ensure it’s evenly packed. Refrigerate for at least 2-3 hours to allow the cake to set and firm up.
  5. Make the Glaze:
    While the cake sets, prepare the chocolate glaze. Heat the heavy cream in a saucepan until it begins to simmer. Remove it from the heat and add the dark chocolate. Stir until smooth and glossy.
  6. Top the Cake:
    Once the cake has set, pour the chocolate glaze over the top, spreading it evenly to cover the surface. You can let it drip down the sides for a rustic look or spread it out evenly.
  7. Chill and Serve:
    Refrigerate the cake for another hour to let the glaze set completely. Once ready, cut it into slices and enjoy!

Nutritional Information (Per Serving)

NutrientAmount (per serving)
Calories320 kcal
Protein3 g
Carbohydrates35 g
Sugars22 g
Fat18 g
Saturated Fat8 g
Fiber3 g
Sodium80 mg

Why This Cake is the Perfect Choice for Any Occasion

One of the things that makes this cake so special is its versatility. Whether you’re hosting a party, celebrating a special occasion, or just looking to indulge on a quiet evening, this cake has got you covered. The no-bake nature makes it ideal for summer months when turning on the oven seems less appealing. You can easily prepare it ahead of time, allowing the cake to chill and set in the fridge, freeing up your time for other things.

Its rich, velvety texture and dark chocolate glaze also make it suitable for more sophisticated gatherings, while its simplicity makes it a great option for casual family dinners. You can even make this cake with kids—they’ll have fun helping you crush the biscuits and pour the chocolate, creating a shared experience that will become its own tradition in your household.

The Ingredients That Make It Special

While the recipe may seem simple, it’s the combination of ingredients that gives this cake its signature flavor. Digestive biscuits or graham crackers are the perfect base, offering a mild sweetness and crumbly texture that pairs beautifully with the rich chocolate and creamy milk. The cocoa powder gives the cake its deep, chocolatey taste, while the sugar adds just the right amount of sweetness to balance the bitterness of the dark chocolate glaze. The butter brings everything together, creating a smooth and glossy finish that ensures every bite is rich and satisfying.

Dark chocolate and heavy cream make the perfect topping for this dessert. The creaminess of the glaze contrasts with the crunch of the biscuit base, and the dark chocolate provides a sophisticated, bittersweet flavor that elevates the whole dish. This glaze is smooth, glossy, and irresistible—it’s the crowning glory that makes the cake feel like a luxurious treat.

FAQs: Everything You Need to Know

1. Can I make this cake ahead of time?
Yes! In fact, this cake is perfect for making ahead. Since it requires time to set in the fridge, you can prepare it the night before or even a day ahead of your gathering. It will hold up beautifully in the fridge and still taste amazing when you’re ready to serve it.

2. Can I use different types of biscuits?
While digestive biscuits are traditional, you can absolutely experiment with other types of biscuits or cookies. Graham crackers work wonderfully as well. You can even use oat biscuits, shortbread, or any other plain biscuits that have a good texture when crushed.

3. Can I make this cake with milk chocolate instead of dark chocolate?
Yes, you can! Milk chocolate will give the cake a sweeter, creamier flavor, but it will still be delicious. If you’re using milk chocolate, you may want to adjust the amount of sugar in the cake’s base since milk chocolate is already quite sweet.

4. How do I store the cake?
Store the cake in an airtight container in the fridge for up to 4-5 days. If you have leftovers, they make a great treat the following day, and the flavors will even develop more.

5. Can I add other toppings or flavors to this cake?
Absolutely! This cake is very customizable. You can add chopped nuts like walnuts or hazelnuts for a bit of crunch, or even sprinkle a little sea salt on top of the glaze to balance the sweetness. If you want to get creative, adding a splash of vanilla extract or a bit of coffee to the chocolate glaze can enhance the flavors.

Conclusion: A Sweet Tradition That Lasts

This no-bake chocolate biscuit cake is more than just a dessert; it’s a tradition. Whether you’re sharing it with family, making it for yourself, or passing it down to the next generation, this simple yet indulgent treat has the power to create lasting memories. Every time you bite into a slice, you’re not just enjoying the combination of chocolate and biscuits; you’re reconnecting with those moments of joy and simplicity that make life so sweet.

This cake has a way of bringing people together, whether around the kitchen table or at a family gathering. It’s the perfect reminder that the best desserts are often the simplest ones—easy to make, delicious to enjoy, and always satisfying.

So next time you’re craving something sweet, remember this cake. It’s quick, it’s delicious, and it’s guaranteed to make your day just a little bit sweeter. And who knows? Maybe one day you’ll pass it down to someone else and create your own tradition, just like I did with my grandmother’s recipe.

Crispy Zucchini and Potato Fritters: A Comforting Recipe with a Personal Touch

I remember one evening when I was a young child, sitting at my grandmother’s kitchen table, watching her work her magic in the kitchen. The smell of sizzling vegetables and freshly baked bread would always fill the air, making it impossible to focus on anything else. One particular dish that always stood out to me was her crispy fritters. She would make them with whatever vegetables were in season—sometimes zucchini, sometimes potatoes, or even carrots—always finding ways to mix and match. But what made her fritters special was the way she added just the right amount of cheese, seasoning them to perfection, and creating a golden crust that made them irresistible.

Over the years, I’ve learned that cooking isn’t just about following a recipe; it’s about connecting with the ingredients and bringing them to life. The joy of cooking fritters, just like my grandmother did, lies in the process of transforming simple, humble ingredients into something extraordinary. These crispy zucchini and potato fritters are a reflection of those moments spent in the kitchen, where love, patience, and a bit of creativity turn ordinary vegetables into something that can nourish both the body and the soul.

Whether you’re cooking for yourself or sharing a meal with loved ones, these fritters are the kind of dish that brings people together. There’s something about the crispy texture on the outside, the tender vegetables on the inside, and the subtle hint of cheese that makes them impossible to resist. They serve as a reminder that food is not just fuel; it’s a way of connecting with memories, traditions, and the ones we hold dear.

The Beauty of Simple Ingredients

Sometimes, the most magical dishes are made with the simplest ingredients. Zucchini, potatoes, and carrots are not only affordable and easily accessible but also incredibly versatile. When combined with eggs, semolina, and a little cheese, these vegetables are transformed into a dish that is both comforting and nutritious. What makes this fritter recipe special is that it’s easy to make, quick to prepare, and can be enjoyed by people of all ages.

Zucchini is a wonderfully mild vegetable, often underestimated for its versatility. It’s rich in water and has a light, slightly sweet flavor. This makes zucchini perfect for dishes like fritters, where it can absorb the seasonings and complement other vegetables like potatoes. Zucchini is also high in vitamins and antioxidants, making it a healthy addition to any meal.

Potatoes, on the other hand, are a staple in many homes around the world. They’re filling, easy to prepare, and can take on many textures, from soft and creamy to crispy and golden brown. In these fritters, potatoes provide the necessary starch to bind everything together and create a satisfying bite. Packed with potassium, fiber, and vitamin C, potatoes add not only flavor but also nutritional value to the dish.

Carrots, often seen as a supporting player in many recipes, bring a natural sweetness and vibrant color to the fritters. The orange hue they impart makes the fritters visually appealing, and their sweetness balances out the earthiness of the potatoes and zucchini. Carrots are a great source of beta-carotene, fiber, and vitamins, providing additional health benefits without overpowering the dish.

Cheese in this recipe adds a richness and depth of flavor. As the fritters cook, the cheese melts, creating pockets of gooey, savory goodness within the crispy exterior. Whether you opt for a sharp cheddar or a milder cheese, the addition of cheese enhances the overall flavor profile and makes the fritters even more irresistible.

Ingredients

IngredientAmount
Zucchini1
Carrot1
Potatoes2
Spring onion, chopped1 bunch
Cheese (grated)100 grams (3.5 oz)
Eggs3
Semolina4 tablespoons
SaltTo taste
Black pepperTo taste

Directions

  1. Prepare the Vegetables:
    Grate the zucchini, carrot, and potatoes. Place the grated vegetables in a clean kitchen towel or cheesecloth and squeeze out any excess moisture.
  2. Mix the Ingredients:
    In a large bowl, combine the grated vegetables with the chopped spring onion. Add the grated cheese, eggs, semolina, salt, and black pepper. Stir everything together until well mixed.
  3. Form the Fritters:
    Heat a bit of oil in a frying pan over medium heat. Take spoonfuls of the mixture and shape them into small patties. Fry the fritters for about 3-4 minutes on each side or until golden brown and crispy.
  4. Serve:
    Once cooked, remove the fritters from the pan and place them on a paper towel to drain any excess oil. Serve hot with your favorite dipping sauce or as a side dish.

Nutritional Information

NutrientAmount (per serving)
Calories180 kcal
Protein6 g
Carbohydrates20 g
Dietary Fiber3 g
Sugars4 g
Fat9 g
Saturated Fat3 g
Sodium250 mg
Calcium60 mg
Iron1.5 mg

Why This Recipe Is So Special

These crispy zucchini and potato fritters are the perfect example of how a few simple ingredients can come together to create something special. There’s an undeniable comfort in biting into a hot, golden fritter with a crispy exterior and a soft, savory interior. Whether enjoyed as a snack, side dish, or light main course, these fritters hit all the right notes.

But what truly sets this recipe apart is the combination of textures and flavors. The crispiness on the outside, the soft, tender vegetables on the inside, and the rich cheese all come together in perfect harmony. And with just a few seasonings—salt, pepper, and a sprinkle of fresh spring onions—each bite is packed with flavor without being overly complicated.

These fritters also offer flexibility. You can make them in advance and store them in the fridge for a quick meal later, or even freeze them for future use. They reheat beautifully in a skillet, maintaining their crispy texture and savory flavor. Whether you’re preparing them for a weeknight dinner or a special occasion, they’re sure to be a hit with anyone who tries them.

Frequently Asked Questions (FAQs)

Q: Can I substitute the semolina with something else?
A: Yes! If you don’t have semolina, you can use breadcrumbs or even all-purpose flour as a substitute. The semolina helps give the fritters a slightly crispier texture, but other ingredients will work just as well.

Q: Can I make these fritters vegan?
A: Absolutely! To make this recipe vegan, you can substitute the eggs with a flax egg or chickpea flour, which will help bind the vegetables together. You can also use plant-based cheese or simply leave it out for a lighter version.

Q: How do I make sure the fritters stay crispy?
A: The key to crispy fritters is to make sure the oil is hot enough before frying them. Also, be sure not to overcrowd the pan; fry them in batches if necessary. After frying, place them on a paper towel to absorb any excess oil.

Q: Can I use other vegetables in this recipe?
A: Yes, this recipe is very versatile! You can swap out the zucchini for other vegetables like spinach, cauliflower, or sweet potato. The beauty of fritters is that you can mix and match vegetables based on what you have on hand.

Q: Can I make these fritters ahead of time?
A: Yes, these fritters can be made ahead of time. Once cooked, let them cool, and store them in an airtight container in the fridge for up to 2 days. You can also freeze them for up to a month. To reheat, simply fry them again in a bit of oil for a few minutes until they’re crispy.

Conclusion: The Joy of Simple Comfort

The simplicity of Crispy Zucchini and Potato Fritters is what makes them so special. It’s a dish that brings together everyday ingredients, turns them into something golden and crispy, and reminds us that comfort doesn’t always need to come from complexity. This recipe not only satisfies your taste buds but also nourishes your soul, much like the dishes my grandmother used to make.

Whether you’re new to cooking or a seasoned pro, these fritters are a great way to embrace the joy of simple cooking. They’re the perfect dish for family dinners, gatherings with friends, or even as a quick snack when you’re craving something savory. And as you make them, remember that food is more than just fuel—it’s an experience, a memory, and a connection to the ones you love.

So, the next time you’re in the kitchen, take a moment to savor the process, just as I did all those years ago with my grandmother. And enjoy the simple pleasure of a crispy fritter, made with love and shared with those who matter most.

Fried Potatoes with Mushrooms: A Comforting Delight

The smell of fried potatoes fills the air, wrapping you in a sense of comfort and nostalgia. For me, this dish is more than just a meal; it’s a part of my childhood, a memory of cozy family gatherings and the warmth of my grandmother’s kitchen. Growing up, there was always something special about the way my grandmother prepared simple, hearty meals with just a few ingredients. One of her signature dishes was fried potatoes with mushrooms, and to this day, it remains a go-to comfort food for me.

I remember watching her carefully slice the potatoes, her hands steady and sure as she worked with the precision that only years of practice can bring. The kitchen was always filled with the sizzle of butter and the earthy aroma of mushrooms. As a child, I didn’t fully appreciate the beauty of these simple ingredients coming together. But now, as an adult, I’ve come to understand that it’s the simplicity and the love put into these meals that make them so special.

This recipe is one that anyone can recreate, no matter how much cooking experience they have. It’s a dish that celebrates the humble ingredients of mushrooms, potatoes, and onions, transforming them into something that brings people together. Whether you’re preparing it as a side dish for a larger meal or making it the star of a quiet evening, fried potatoes with mushrooms have the ability to create that same sense of warmth and comfort, just as it did in my grandmother’s kitchen.

The Beauty of Simple Ingredients

In today’s fast-paced world, we often overlook the value of simple, straightforward ingredients. We are constantly bombarded with elaborate recipes that call for exotic spices or expensive cuts of meat. However, some of the most satisfying and flavorful dishes are the ones that focus on the ingredients you already have at home—ingredients that are often taken for granted. Fried potatoes with mushrooms is a perfect example of this.

Potatoes, mushrooms, and onions are not only budget-friendly but are also versatile and nutrient-packed. The combination of these vegetables, when prepared correctly, results in a dish that’s rich in flavor, satisfying, and nourishing.

Potatoes:
Potatoes are a staple in many cuisines around the world, and for good reason. They are a good source of complex carbohydrates, which provide long-lasting energy. They also contain vitamins and minerals, including potassium, vitamin C, and B vitamins. When fried to perfection, potatoes take on a crispy texture on the outside, while staying soft and creamy on the inside. This contrast in texture is what makes fried potatoes so irresistible.

Mushrooms:
Mushrooms are often underestimated but are full of nutritional benefits. They are low in calories, high in fiber, and contain important vitamins such as vitamin D and B vitamins. Mushrooms also provide a savory umami flavor, which complements the potatoes perfectly. When sautéed, mushrooms release their natural moisture, becoming tender and flavorful, and adding a depth of flavor to the dish.

Onions:
Onions are a key component of many savory dishes, offering both sweetness and depth. When fried, onions become caramelized, bringing out their natural sugars and enhancing the overall flavor profile of the dish. They also provide a subtle, aromatic layer to the dish that balances the earthiness of the mushrooms and the richness of the potatoes.

Ingredients

IngredientAmount
Mushrooms250 g
Potatoes600 g
Onion1 pc
Butter20 g

Directions

  • Prepare the Ingredients:
    Start by peeling and slicing the potatoes into thin rounds or cubes, depending on your preference. Clean the mushrooms and slice them into thin pieces. Peel and finely chop the onion.
  • Cook the Potatoes:
    In a large skillet, melt the butter over medium heat. Once the butter is melted, add the sliced potatoes to the pan. Stir occasionally, frying the potatoes until they are golden brown and crispy on the outside, about 15 minutes. You can cover the pan to speed up the cooking process, but make sure to stir occasionally to prevent sticking.
  • Add the Mushrooms and Onion:
    Once the potatoes are cooked and crispy, add the chopped onion to the pan. Sauté for 3-4 minutes until the onion becomes translucent. Then, add the sliced mushrooms and cook for another 5-7 minutes, until they are soft and browned.
  • Season and Serve:
    Season with salt and pepper to taste. Stir everything together and cook for an additional 2 minutes to let the flavors meld. Serve hot as a side dish or a light main course.

Nutritional Information

NutrientAmount (per serving)
Calories210 kcal
Protein3 g
Carbohydrates30 g
Dietary Fiber4 g
Sugars2 g
Fat9 g
Saturated Fat5 g
Sodium250 mg
Calcium20 mg
Iron2 mg

Frequently Asked Questions (FAQs)

Q: Can I use different types of mushrooms for this recipe?
A: Absolutely! While white button mushrooms are the most common variety used in this recipe, you can experiment with different types of mushrooms. Shiitake, cremini, or portobello mushrooms can add unique flavors and textures to the dish. Feel free to mix and match, or use whatever mushrooms are available to you.

Q: Can I make this dish vegan?
A: Yes, you can easily make this dish vegan by substituting the butter with olive oil or another plant-based fat. The dish will still have plenty of flavor and will remain just as satisfying.

Q: What should I serve this dish with?
A: Fried potatoes with mushrooms can be served as a side dish or as a light main course. It pairs beautifully with a simple green salad, roasted vegetables, or grilled meats. You can also serve it alongside eggs for a hearty breakfast or brunch.

Q: Can I make this dish ahead of time?
A: While fried potatoes with mushrooms are best served immediately, you can make them ahead of time and store them in the refrigerator for up to two days. Reheat them in a pan over low heat, adding a bit of extra butter or oil to restore some of the crispness.

Q: How can I add more flavor to this dish?
A: If you want to add more flavor, consider adding fresh herbs such as thyme, rosemary, or parsley. A sprinkle of grated cheese, such as Parmesan, can also elevate the dish. For a bit of heat, you could add a pinch of red pepper flakes or a dash of hot sauce.

Why This Dish Remains Timeless

What makes fried potatoes with mushrooms such a timeless dish is its versatility. It’s a recipe that can be adapted to suit different tastes and dietary needs. Whether you prefer it spicy, garlicky, or with a touch of cheese, this dish can be easily customized.

In addition to its versatility, the dish is incredibly satisfying. The combination of crispy potatoes and tender mushrooms creates a balanced texture that is sure to please the palate. The rich, savory flavor of the mushrooms complements the mildness of the potatoes, making each bite more comforting than the last.

Fried potatoes with mushrooms is also a great option for those who are looking for a healthier alternative to more indulgent fried dishes. By using a moderate amount of butter and incorporating vegetables, you can enjoy a dish that is both flavorful and nourishing without feeling weighed down.

Conclusion: A Dish That Brings People Together

Fried potatoes with mushrooms is a recipe that transcends time and trends. It’s a dish that can be enjoyed by anyone, regardless of age or culinary experience. Whether you’re cooking it for yourself after a long day or serving it at a family gathering, this dish brings people together. It’s comforting, easy to prepare, and most importantly, it tastes like home.

The simple combination of potatoes, mushrooms, and onions, cooked to perfection with butter, creates a dish that not only satisfies your hunger but also nurtures your soul. There’s something deeply satisfying about sitting down to a warm plate of fried potatoes with mushrooms, knowing that you’ve created something with your own two hands, something that reminds you of all the simple joys in life.

Next time you’re looking for a dish that feels like a warm hug on a plate, consider making fried potatoes with mushrooms. It’s more than just a recipe; it’s a reminder of the importance of slowing down, enjoying the moment, and appreciating the beauty in the simplest things.

Bananas & Oats Energy Bites: The Perfect Healthy Snack

I have always been someone who struggles to keep up with the constant hustle and bustle of daily life. Between work, family responsibilities, and personal commitments, finding time to sit down for a meal has often felt impossible. Yet, I’ve discovered that maintaining a healthy lifestyle doesn’t have to be complicated or time-consuming. Some of the best meals and snacks can be made with minimal effort and time. That’s how I stumbled upon these Bananas & Oats Energy Bites—an easy, wholesome snack that has become a lifesaver during my busiest days.

It all began on one of those mornings when I woke up late, rushed to get ready, and realized I hadn’t eaten anything yet. I had a bunch of ripe bananas sitting on the counter, and a bag of oats in the pantry. I needed something that would get me through the morning, fuel my body, and give me the energy I desperately needed, but I didn’t have the time to make a full meal.

I quickly mixed the bananas with the oats, threw in some dried fruit I had lying around, and baked the mixture into small, bite-sized pieces. The result was a satisfying snack that tasted like something between a cookie and a granola bar. I couldn’t believe how something so simple could be so delicious and nutritious at the same time.

From that moment, these energy bites became my go-to snack. I started making them in large batches, storing them in the fridge, and having them ready for busy days when I needed something fast but healthy. They’re perfect for breakfast, a mid-afternoon snack, or even as a quick pick-me-up before or after a workout. What began as a rushed attempt to find a quick breakfast option evolved into a staple in my kitchen—a simple recipe that’s helped me stay energized and nourished.

Why These Energy Bites Are So Good for You

Bananas and oats are the stars of this recipe, and together, they provide a nutrient-rich, wholesome snack. But what makes these energy bites truly stand out is their perfect balance of fiber, natural sugars, and healthy fats. Let’s take a closer look at the nutritional benefits of the key ingredients:

Bananas:
Bananas are a powerhouse of nutrients. Rich in potassium, they help maintain proper heart and muscle function. Potassium also plays a role in balancing fluids in the body, which is essential for proper hydration. Additionally, bananas are an excellent source of vitamin B6, which helps with metabolism and brain function. They provide natural sweetness, making them a perfect ingredient for those who prefer not to add refined sugars to their snacks.

Oats:
Oats are another nutritional gem. They are a fantastic source of soluble fiber, which helps lower cholesterol and regulate blood sugar levels. They are also packed with antioxidants, vitamins, and minerals, including magnesium, iron, and zinc. Oats help promote fullness, making these energy bites a great option for a satisfying snack that won’t leave you hungry again in an hour.

Dried Cranberries and Raisins:
Dried cranberries and raisins bring a burst of natural sweetness to the energy bites. These dried fruits are packed with antioxidants and are excellent sources of fiber, which supports digestion and helps keep you feeling full. They also add a bit of tartness (cranberries) and a chewiness (raisins), which balances the texture of the bites and adds a flavor dimension that complements the bananas and oats perfectly.

Ingredients

IngredientAmount
Rolled oats2 cups (200 g)
Ripe bananas2 (approximately 200 g)
Dried cranberries1/2 cup (70 g)
Raisins1/2 cup (75 g)
Eggs2

Directions

  1. Mash the Bananas: In a large mixing bowl, mash the ripe bananas using a fork or potato masher until smooth. The bananas should be well mashed with a few small lumps for texture.
  2. Mix the Dry Ingredients: Add the rolled oats to the mashed bananas and stir until combined.
  3. Add the Eggs and Dried Fruits: Crack the eggs into the bowl and mix them thoroughly with the banana-oat mixture. Then, add the dried cranberries and raisins, stirring to evenly distribute the fruits throughout the batter.
  4. Form the Bites: Preheat your oven to 350°F (175°C). Line a baking sheet with parchment paper or grease it lightly. Using your hands or a spoon, form small spoonfuls of the batter into bite-sized portions and place them on the baking sheet, leaving space between each.
  5. Bake: Bake the bites for 12-15 minutes or until they turn golden brown around the edges and firm to the touch. Let them cool on the baking sheet for a few minutes before transferring to a wire rack to cool completely.

Nutritional Information

NutrientAmount (per serving)
Calories120 kcal
Protein3 g
Carbohydrates28 g
Dietary Fiber3 g
Sugars12 g
Fat1 g
Saturated Fat0.5 g
Sodium30 mg
Calcium20 mg
Iron1 mg

Frequently Asked Questions (FAQs)

Q: Can I use any other fruit instead of bananas?
A: While bananas are ideal for this recipe due to their natural sweetness and moisture, you can try other mashed fruits like applesauce or even pears. However, the texture and taste may vary slightly, so it’s always best to experiment to see what works for you.

Q: Are these energy bites gluten-free?
A: Yes, the energy bites are gluten-free as long as you ensure you’re using certified gluten-free oats. Many oats are processed in facilities that also handle wheat, so it’s important to check the packaging if you are gluten-sensitive.

Q: Can I make these energy bites vegan?
A: Absolutely! These energy bites can easily be made vegan by substituting the eggs with a flaxseed or chia seed egg. To make a flax egg, simply mix 1 tablespoon of ground flaxseed with 3 tablespoons of water and let it sit for a few minutes to thicken.

Q: How long do these energy bites last?
A: These energy bites will last up to a week when stored in an airtight container at room temperature. If you want them to last longer, you can store them in the refrigerator for up to two weeks or freeze them for up to three months.

Q: Can I add other mix-ins to the energy bites?
A: Definitely! These energy bites are highly versatile. You can add nuts, seeds, or even chocolate chips if you’d like to customize them to your taste. Just make sure to adjust the amount of oats or flour if you add extra ingredients to maintain the right consistency.

Making the Most of Your Bananas & Oats Energy Bites

One of the best things about these energy bites is how easy they are to adapt to your personal tastes and dietary needs. Whether you want to add protein powder for a post-workout snack or you prefer a more decadent treat with chocolate chips, this recipe provides the perfect base. You can also tweak the dried fruits to suit your preferences, using apricots, figs, or even mixed berries.

Perfect for Busy Mornings:
For those who don’t have time for a full breakfast, these energy bites are a lifesaver. You can make them the night before and grab one or two as you rush out the door in the morning. Pair them with a cup of tea or coffee for a quick, energizing start to your day.

Great for Meal Prep:
Since these energy bites keep well for several days, they make a great addition to your meal prep routine. Prepare a batch over the weekend, and you’ll have a healthy, homemade snack ready to go whenever you need it.

On-the-Go Snack:
These bites are perfect for busy individuals who need a snack that’s easy to take with them. Whether you’re at work, traveling, or running errands, these energy bites provide a nutritious pick-me-up that’s easy to store and carry in your bag.

Conclusion: A Snack That Supports a Busy Lifestyle

Bananas & Oats Energy Bites are a simple yet powerful snack that can be a real game-changer in your daily routine. Packed with natural ingredients and full of fiber, vitamins, and antioxidants, they provide long-lasting energy without the sugar crash that often comes from processed snacks. These bites are not only nutritious but also versatile, making them perfect for breakfast, a midday snack, or an after-workout treat.

What started as a quick solution to a busy morning turned into a recipe that I now rely on for both convenience and nourishment. It’s a reminder that healthy eating doesn’t have to be complicated. A few basic ingredients, a little creativity, and a dash of love can result in something that’s not only good for you but also delicious.

Whether you’re juggling work, family, or just the demands of daily life, these energy bites are a small but impactful way to stay on top of your health. Give them a try, and see for yourself how simple and satisfying homemade snacks can be.

Quick and Crispy Vegetable Fritters: A Delicious, Crunchy Treat

I vividly remember the first time I tried making vegetable fritters. I had a head of cabbage sitting in my kitchen, and it had been there for a few days, quietly waiting to be transformed into something delicious. It was a busy week, and I didn’t have much time to spend in the kitchen, but the idea of creating something that could be both quick and satisfying called to me. I wanted something warm, crispy, and full of flavor—a dish that could bring comfort without requiring too much time or effort.

As I chopped the vegetables and mixed them together, I realized that this wasn’t just a recipe; it was a way to nurture myself in a hectic world. The sound of the sizzling fritters in the pan, the golden-brown crust that began to form, and the smell of garlic and onion blending with the cabbage filled my kitchen with a sense of warmth and comfort. That simple act of creating something from scratch—no matter how humble—was a moment of peace in a chaotic day.

These fritters are more than just a meal; they’re a reminder of the joy that can be found in simple things. The crunch, the flavor, and the feeling of sitting down to a warm, homemade dish are all part of why I find cooking so comforting. And now, I want to share this simple, satisfying recipe with you, hoping it brings a little peace and joy to your own busy days.

Why These Fritters Are So Special

What makes these vegetable fritters so special? It’s not just the crispy exterior or the savory flavor—it’s the balance of ingredients that makes each bite an experience in texture and taste. The cabbage provides a mild, slightly sweet base that softens during frying, while the onion adds depth and a gentle kick. The egg and flour bind everything together, and when fried to perfection, the fritters develop a crispy, golden crust that’s simply irresistible.

But it’s not just about the flavor or texture—these fritters are also incredibly versatile. They can be enjoyed as a snack, side dish, or even as the main event in a light meal. They’re perfect for serving at family gatherings, potlucks, or casual dinners. The simplicity of the ingredients means they can be prepared at a moment’s notice, making them a great choice for busy days when you want to enjoy something homemade without spending hours in the kitchen.

Plus, the addition of yogurt not only enhances the flavor but also adds a creamy richness that complements the crispy texture of the fritters. A sprinkle of fresh dill brings a burst of freshness and a hint of herbaceousness, elevating these fritters from simple to extraordinary.

Ingredients

IngredientAmount
Cabbage17.5 ounces (500 grams)
Onion1
Salt1 teaspoon
Eggs3
All-purpose flour3-4 tablespoons
YogurtA few spoons
Garlic clove1
Salt and pepperTo taste
Fresh dill (optional)A few sprigs
OilFor frying

Directions

  1. Prepare the Vegetables: Finely shred the cabbage and place it in a large bowl. Grate the onion and garlic, adding them to the cabbage. If you like, chop the fresh dill and add it for extra flavor.
  2. Mix the Ingredients: In the bowl with the cabbage, add the salt, eggs, flour, and a few spoons of yogurt. Season with salt and pepper to taste. Mix everything well until the mixture holds together. If it feels too wet, add a little more flour.
  3. Fry the Fritters: Heat a generous amount of oil in a large skillet over medium heat. Once the oil is hot, spoon dollops of the cabbage mixture into the pan, flattening them slightly with the back of the spoon to form fritters.
  4. Cook Until Crispy: Fry the fritters for 3-4 minutes on each side, or until they turn golden brown and crispy. Flip them carefully to ensure they cook evenly on both sides.
  5. Drain and Serve: Remove the fritters from the skillet and place them on a plate lined with paper towels to drain any excess oil. Serve hot with a dollop of yogurt or your favorite dipping sauce.

Nutritional Information

NutrientAmount (per serving)
Calories150 kcal
Protein6 g
Carbohydrates15 g
Dietary Fiber3 g
Sugars3 g
Fat8 g
Saturated Fat1.5 g
Sodium450 mg
Calcium25 mg
Iron1.2 mg

Frequently Asked Questions

Q: Can I use other vegetables instead of cabbage?
A: Absolutely! While cabbage is the star of this recipe, you can easily swap it out with other vegetables. Grated zucchini, carrots, or even sweet potatoes work wonderfully in fritters. Just make sure to adjust the flour amount if the vegetables you choose release more moisture.

Q: Are these fritters gluten-free?
A: No, this recipe uses all-purpose flour, so it’s not gluten-free. However, you can make it gluten-free by substituting the flour with a gluten-free flour blend or chickpea flour. Keep in mind that the texture may vary slightly depending on the flour used.

Q: Can I make the fritters ahead of time?
A: Yes, you can make these fritters ahead of time! Once they are cooked, let them cool completely and store them in an airtight container in the refrigerator for up to 3 days. To reheat, simply place them in a hot pan for a few minutes on each side to restore their crispiness.

Q: Can I freeze the fritters?
A: Yes, these fritters freeze well! After frying, allow them to cool completely and then place them in a single layer on a baking sheet. Freeze them for a couple of hours, then transfer them to a freezer bag or airtight container. To reheat, bake them in the oven or heat them in a skillet until crispy.

Q: Can I substitute the yogurt?
A: If you don’t have yogurt on hand or prefer a dairy-free version, you can substitute the yogurt with sour cream, buttermilk, or even a plant-based yogurt. This will change the flavor slightly, but it will still add a creamy texture to the fritters.

How to Make These Fritters Your Own

One of the best things about these fritters is their adaptability. While the base recipe is already delicious, you can customize it to suit your taste preferences. Here are a few ideas to elevate your fritters:

  • Add Cheese: Grated cheese, such as cheddar, mozzarella, or feta, can be added to the fritter mixture for extra richness and flavor. Just sprinkle in about a half cup of cheese and mix it in well.
  • Spices and Herbs: Feel free to experiment with different spices to enhance the flavor. Try adding cumin, paprika, or even a pinch of cayenne pepper for a little heat. Fresh herbs like parsley, thyme, or oregano can also bring new flavors to the fritters.
  • Serve with Dips: These fritters are amazing on their own, but they can also be served with a variety of dips. A tangy tzatziki sauce, a creamy avocado dip, or even a spicy sriracha mayo would complement the fritters perfectly.
  • Make it a Meal: While these fritters are delicious as a snack or side dish, they can easily be turned into a complete meal. Serve them alongside a fresh salad or pair them with a soup for a light, satisfying dinner.

The Joy of Simple Ingredients

The beauty of this fritter recipe lies in its simplicity. With just a handful of ingredients—cabbage, onion, eggs, and flour—you can create something truly delicious. It’s a reminder that great meals don’t need to be complicated or fancy. Sometimes, the best dishes are the ones that use humble ingredients and bring out the natural flavors of the food.

This recipe is also a great way to use up vegetables that might otherwise go to waste. If you have a half head of cabbage or some leftover onion that needs to be used, these fritters are a perfect solution. They’re quick, easy, and a fantastic way to stretch your ingredients.

Conclusion: A Recipe That Brings Comfort

In today’s busy world, it’s easy to forget the joy of simple meals made with love. The act of cooking—of chopping, mixing, and frying—can be a form of self-care, a way to connect with the present moment and nourish both body and soul. These quick and crispy vegetable fritters embody that spirit. They are quick to prepare, full of flavor, and offer the kind of comfort that only a home-cooked meal can provide.

Whether you’re serving them for a weeknight dinner, sharing them with friends, or enjoying them as a snack, these fritters are a reminder that food doesn’t need to be complicated to be delicious. With just a few ingredients and a little time, you can create something that is not only satisfying but also deeply comforting. I hope this recipe brings as much joy to your kitchen as it has to mine.

This vegetable fritter recipe is a celebration of simplicity, flavor, and the joy of cooking. It proves that the best meals are often the ones that come together effortlessly, using the ingredients you already have in your kitchen. With its crispy, savory goodness, this dish is sure to become a staple in your culinary repertoire.

Onions Are More Delicious Than Meat: A Recipe for Fluffy Yeast Bread

I remember the first time I made homemade bread. The kitchen was warm, the dough was soft under my hands, and the air was filled with the scent of fresh-baked bread. There was something so satisfying about creating something from scratch that could nourish not just my body, but also my soul. It wasn’t just about the bread itself—it was about the feeling of home, the comfort of knowing that something simple and humble could bring people together.

Growing up, bread was a constant in my home. It wasn’t always fancy, and it wasn’t always fresh out of the oven, but it was always there, as a reminder of the care and love that went into preparing meals for the family. As I got older and moved away from home, I began to realize just how much I missed the taste of freshly baked bread—soft, warm, and comforting.

This recipe for fluffy yeast bread with a savory twist brings that same sense of warmth and comfort back into my kitchen. With a few simple ingredients and a bit of patience, you can create a loaf of bread that is not only delicious but also versatile. Whether you enjoy it with butter, jam, or a savory filling like caramelized onions, this bread is sure to remind you of the joys of homemade goodness.

Why This Bread is More Than Just a Recipe

There’s something inherently special about homemade bread. It has the power to transform an ordinary meal into something extraordinary. Bread is one of the oldest foods known to humanity, and it’s been a symbol of sustenance and community for centuries. It’s a staple in many cultures, often associated with the idea of sharing and togetherness.

For me, bread has always been more than just food. It’s a ritual. Kneading the dough, watching it rise, and finally pulling it out of the oven—it’s a process that connects you to centuries of bakers before you. And while we’ve come a long way with modern conveniences, there’s still something magical about baking bread by hand.

This particular recipe for yeast bread has a savory twist that makes it stand out from traditional bread recipes. With the addition of onions and the fluffy, soft texture of the dough, this bread can be served as a snack, a side dish, or even as the main event at a meal. The scent of onions as they caramelize and infuse the bread with flavor makes this recipe truly special. It’s a versatile bread that pairs perfectly with soups, salads, or even just a spread of butter.

Ingredients

IngredientAmount
Warm milk2 cups (400 ml)
Yeast1 pack (10 grams)
Egg whites2
Salt1 teaspoon (8 grams)
Butter, softened50 grams
Flour5 cups (add gradually)

Directions

  1. Activate the Yeast: Pour the warm milk into a bowl, ensuring it’s just warm to the touch, not hot. Sprinkle the yeast over the milk and let it sit for 5-10 minutes until it becomes frothy, signaling that it’s active.
  2. Combine Wet Ingredients: In a large mixing bowl, add the egg whites, salt, and softened butter. Gradually pour in the yeast mixture and stir until well combined.
  3. Add Flour: Slowly incorporate the flour into the mixture, one cup at a time, mixing well after each addition. Continue adding flour until the dough is smooth and elastic, but not too stiff.
  4. Knead the Dough: Turn the dough onto a lightly floured surface and knead for about 10 minutes, until it becomes soft and elastic. If the dough feels too sticky, sprinkle a little more flour, but be careful not to overdo it.
  5. Let it Rise: Place the dough in a lightly oiled bowl and cover it with a clean kitchen towel. Allow the dough to rise in a warm place for about 1-2 hours or until it doubles in size.
  6. Shape the Dough: Once the dough has risen, punch it down and turn it out onto a floured surface. Shape it into a loaf, rolls, or buns, depending on your preference. Place the shaped dough onto a baking sheet and cover it with a towel. Let it rest for 30 minutes.
  7. Prepare the Egg Yolk Glaze: In a small bowl, whisk the reserved egg yolks. Brush the yolk mixture onto the dough for a shiny, golden finish.
  8. Bake: Preheat the oven to 375°F (190°C). Bake the bread for 25-30 minutes or until it turns golden brown on top and sounds hollow when tapped on the bottom. Remove from the oven and let it cool before slicing.

Nutritional Information

NutrientAmount (per serving)
Calories200 kcal
Protein6 g
Carbohydrates35 g
Dietary Fiber2 g
Sugars3 g
Fat6 g
Saturated Fat3 g
Sodium230 mg
Calcium25 mg
Iron1.5 mg

The Secret to the Perfect Fluffy Bread

The key to this recipe lies in the dough. The use of yeast ensures that the bread rises to perfection, creating a light and airy texture that is both satisfying and comforting. One of the reasons why so many people shy away from baking bread is the fear of working with yeast. However, this recipe is simple and forgiving. The dough comes together quickly, and the rising time allows you to go about your day while the bread does its thing.

The secret to getting the perfect fluffy texture is to give the dough enough time to rise. Yeast needs warmth and patience to work its magic. The longer the dough rises, the more air pockets form, which results in a lighter and fluffier bread. This is where the beauty of this recipe shines—you don’t have to babysit the dough, and it doesn’t require constant attention. Let it rise, shape it, and bake it. The result? A golden, fluffy loaf of bread that’s perfect for any occasion.

Frequently Asked Questions

Q: Can I use whole wheat flour instead of all-purpose flour?
A: Yes, you can use whole wheat flour, but the bread will be denser. Whole wheat flour absorbs more moisture, so you may need to adjust the amount of liquid in the recipe. You can also try a blend of all-purpose and whole wheat flour to achieve a balance between lightness and the hearty texture of whole wheat.

Q: Can I add other herbs or spices to the dough?
A: Absolutely! This recipe is versatile, so feel free to experiment with different herbs, spices, or even garlic. Rosemary, thyme, or oregano would make great additions. If you prefer a sweeter twist, you could also add a touch of cinnamon or nutmeg.

Q: Can I make this bread in advance?
A: While fresh bread is always best, you can make this bread ahead of time. If you plan to make it in advance, allow the bread to cool completely before storing it in an airtight container. It should stay fresh for 2-3 days at room temperature. For longer storage, you can freeze the bread and reheat it later.

Q: What if my dough doesn’t rise properly?
A: If your dough doesn’t rise as expected, it could be due to a few factors. Ensure that your yeast is fresh and the milk is warm but not too hot, as extreme temperatures can kill the yeast. Also, make sure the dough is placed in a warm area to rise. If the dough still doesn’t rise after an hour, it may be due to inactive yeast, and you may need to start over with a new packet.

Q: Can I make this bread without egg whites?
A: Yes, you can make this bread without egg whites. The egg whites help give the bread a lighter texture, but if you prefer to avoid eggs, you can substitute them with a flaxseed meal mixture or simply omit them. The bread will still turn out delicious, though it may be slightly denser.

How to Customize This Recipe

While this recipe is delicious on its own, it’s highly customizable. If you want to make it a savory bread, try adding caramelized onions or roasted garlic to the dough before baking. The sweetness of the onions will pair beautifully with the fluffy bread, creating a satisfying and flavorful combination.

For a sweet version, you can add raisins, cinnamon, and a touch of brown sugar to the dough. This will give you a comforting, lightly sweet bread that’s perfect for breakfast or tea time.

If you’re looking for a healthier version, you can substitute some of the all-purpose flour with whole wheat flour and reduce the amount of butter. For added texture, consider incorporating seeds like sunflower or sesame.

Conclusion: A Simple Bread, A Big Impact

This bread recipe may seem simple, but it’s the little things that make it special. It’s the act of creating something from scratch that brings joy to the kitchen. It’s the warmth of the bread as it comes out of the oven, filling your home with a comforting aroma. It’s the satisfaction of sharing a meal with loved ones, knowing that the bread you’ve baked is the heart of the meal.

The beauty of this recipe lies not just in the final product but in the process—the kneading, the waiting, the shaping, and the joy of seeing it rise. Bread has the power to connect us to the past, to each other, and to the simple pleasures of life. Whether you’re making it for a special occasion or just as a treat for yourself, this bread will bring comfort to your kitchen and your heart.

So, next time you’re looking for a way to elevate your meals, reach for this simple, yet flavorful, recipe. It’s more than just bread—it’s a reminder of the warmth and love that can be found in the kitchen.

Bread in Minutes! The Ultimate 4-Ingredient Homemade Delight

Growing up, the smell of freshly baked bread was an invitation to gather around the table. In our home, bread was more than just a side—it was a symbol of warmth, connection, and nourishment. I remember my grandmother, who made everything from scratch, filling the house with the most delightful aromas as she kneaded dough with love and patience. There was something magical about that moment when she pulled the warm loaf from the oven, its golden crust crackling as we eagerly waited to slather it with butter.

As time passed, I found myself seeking that same joy of homemade bread, but with a modern twist. The busy pace of life left little room for lengthy preparation, yet I still craved that comforting, warm loaf. It was then that I discovered the secret to making bread in minutes, using just four ingredients. The idea seemed almost too simple, but as soon as I tried it, I realized that sometimes, the best things come from simplicity.

This recipe is not just about bread; it’s about bringing back the warmth of home, the joy of creating something from scratch, and the satisfaction of enjoying a fresh, homemade loaf in no time at all. This quick and easy bread can be made in a matter of minutes, without the need for complex ingredients or hours of waiting. Whether you’re looking for a companion to your morning coffee or a warm addition to your evening meal, this bread delivers on all fronts.

The Allure of Homemade Bread: More Than Just Food

There’s something deeply satisfying about the act of making bread. For centuries, people have relied on bread as a staple food, providing nourishment and comfort in equal measure. Bread has been at the heart of every culture, every tradition. In fact, many of us can trace the history of our families back to the kitchen, where bread-making was an essential part of daily life.

What’s so special about this 4-ingredient bread is that it cuts through all the complexity. It’s a simple recipe that anyone can make, whether you’re an experienced baker or a complete beginner. In the past, bread making was a lengthy process—dough had to rise, kneading took time, and the oven had to be preheated for ages. But today, with just a few ingredients and a bit of effort, you can enjoy the same comforting satisfaction in a fraction of the time. It’s like reclaiming that sense of home and comfort with ease.

This bread isn’t just about convenience; it’s about bringing the feeling of a fresh-baked loaf to your kitchen without the hassle. It’s about sitting down with your family or friends and sharing a simple moment of joy, with a soft, fluffy piece of bread in hand. It’s these small moments that make all the difference in our busy lives.

Ingredients:

IngredientAmount
Flour450 grams (16 oz)
Vegetable oil2 tablespoons (30 ml)
Hot water240 ml (1 cup)
SaltTo taste

Directions:

  1. Combine Dry Ingredients: In a large mixing bowl, sift the flour and add salt to taste. Stir to ensure even distribution.
  2. Add Wet Ingredients: Gradually pour the vegetable oil into the flour mixture. Then, slowly add the hot water, stirring continuously until a dough begins to form.
  3. Knead the Dough: Transfer the dough onto a lightly floured surface and knead for 3-5 minutes, until smooth and elastic.
  4. Shape the Dough: Roll the dough into your preferred shape, whether round, oval, or smaller portions for rolls or flatbreads.
  5. Cook the Bread: Heat a skillet or frying pan over medium heat and lightly grease it with a bit of oil. Place the dough into the hot pan and cook each side for about 3-4 minutes until golden brown and fully cooked.
  6. Serve and Enjoy: Remove the bread from the pan, allow it to cool slightly, and serve. This simple bread pairs beautifully with breakfast spreads, butter, or as a delightful side for tea time.

Nutritional Information:

NutrientAmount (per serving)
Calories140 kcal
Protein3 g
Carbohydrates28 g
Dietary Fiber1 g
Sugars0 g
Fat3.5 g
Saturated Fat0.5 g
Sodium250 mg
Calcium10 mg
Iron1.5 mg

Why This Simple Bread Is Perfect for Any Occasion

This bread recipe is incredibly versatile. It’s perfect for breakfast, a snack, or as a side dish at dinner. There are few things as comforting as enjoying a slice of fresh bread with a steaming cup of tea or coffee. The texture is light and fluffy, making it the perfect companion for spreads like butter, jam, or honey. Whether you choose to keep it plain or get creative with toppings, this bread adapts to your preferences, elevating any meal.

The beauty of this recipe lies in its simplicity. It requires only four common ingredients that are likely already in your pantry, making it a perfect solution when you’re pressed for time but still want to enjoy something homemade. No yeast, no long rising times, just a quick, easy dough that you can shape and cook right away.

Another great thing about this bread is that it’s quick to make but doesn’t compromise on flavor or texture. The vegetable oil gives it a soft, tender crumb, while the hot water helps bring everything together smoothly. The result is a light, airy bread with a subtle richness that pairs perfectly with just about anything. Whether you use it to soak up your favorite soup or serve it with a savory meal, it’s bound to become a household favorite.

Frequently Asked Questions (FAQs)

Q: Can I use different types of flour for this recipe?
A: Absolutely! While this recipe works best with all-purpose flour, you can experiment with whole wheat flour or gluten-free flour if you prefer. Keep in mind that different flours may change the texture slightly, so you may need to adjust the amount of water or oil slightly.

Q: Can I make this bread ahead of time?
A: This bread is best served fresh, as it tends to dry out a bit after a day or two. However, you can store any leftovers in an airtight container for up to 2 days. To revive the bread, simply reheat it in the oven for a few minutes.

Q: How can I add extra flavor to this bread?
A: This bread is quite neutral, making it perfect for both sweet and savory pairings. To add more flavor, you can mix in herbs like rosemary or thyme, or grated cheese for a savory twist. For a sweet version, consider adding a touch of cinnamon or nutmeg to the dough.

Q: Can I make this bread into rolls?
A: Yes, absolutely! Simply divide the dough into smaller portions and shape them into rolls before cooking. Keep in mind that smaller rolls will cook faster, so check them after 10-12 minutes of cooking.

Q: Do I need to let the dough rise?
A: No, this recipe doesn’t require any rising time, which is one of the reasons it’s so quick and easy. The dough comes together quickly, and you can begin cooking it immediately.

The Beauty of Baking: How Simple Ingredients Create Something Special

Baking bread is an act of love. It’s one of the few ways we can take something simple—like flour, oil, and water—and transform it into something that nourishes both the body and soul. This simple bread recipe is a reminder that we don’t need extravagant ingredients or complicated techniques to create something that feels special. Sometimes, the most profound pleasures in life come from the simplest things, like sharing a warm loaf of bread with those we love.

Every time you make this bread, you’re participating in a tradition that spans generations. The method may be simpler now, but the satisfaction is the same. Whether you enjoy it as part of a family breakfast or as a quick snack during the day, this bread brings the joy of homemade goodness to your table in no time at all. It’s a recipe that’s perfect for any occasion, a delicious reminder that good things don’t always require a lot of time or effort.

Conclusion: A Simple Bread, a Big Impact

In our fast-paced world, we often forget the beauty of simplicity. This 4-ingredient bread recipe is a perfect reminder that not everything needs to be complicated to be enjoyable. It offers a way to bring the warmth and comfort of homemade bread into your home without spending hours in the kitchen.

Whether you’re looking to satisfy your hunger with something comforting or simply want a quick and easy recipe to impress guests, this bread delivers on both taste and convenience. It’s more than just food; it’s about creating moments of connection, warmth, and nourishment that will stay with you long after the last bite.

The next time you’re in need of a fresh, homemade bread that doesn’t require a lot of time or ingredients, turn to this simple recipe. It will become a go-to in your kitchen—just like the bread that brought my family together all those years ago. After all, bread has always been more than just a side dish; it’s the heart of the meal.