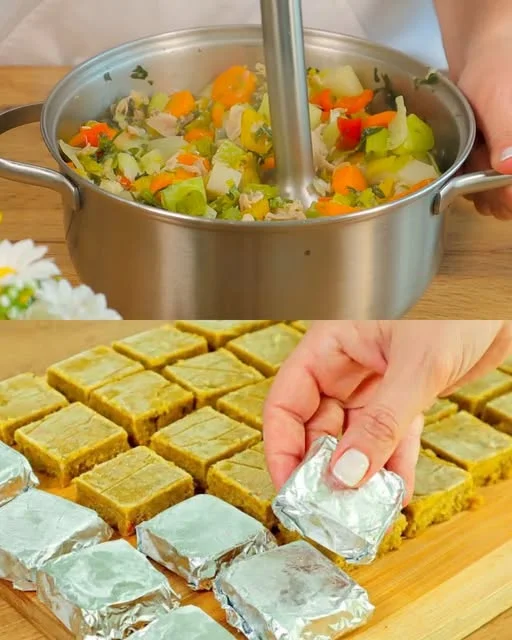
It Will Make the Neighbors Jealous: The Magic of a Super Delicious Beef Filling

When the Smell of Home Turns Heads

It started on a late summer evening in my little apartment kitchen, windows open, a slight breeze stirring the curtain. I wasn’t trying to impress anyone. I was just hungry. I had a pound of ground beef in the fridge and a few bell peppers that were just beginning to wrinkle. I diced what I had, added garlic, onion, a squeeze of tomato paste, and a dash of paprika—and within minutes, the aroma filled the room like a warm hug.

Then something funny happened. My neighbor, who lived across the hall and rarely spoke more than a polite hello, knocked on my door. He smiled awkwardly and said, “I was just wondering… what are you cooking? It smells incredible.”

That was the first time someone asked for a recipe I hadn’t even written down yet. That’s when I knew this dish was special. Simple ingredients, common pantry staples, but a flavor that turns heads—literally. Now, every time I make it, I remember that moment and smile. This isn’t just beef and peppers. This is the kind of food that builds community, starts conversations, and brings people together.

Bold Flavors, Simple Foundations

There’s something deeply satisfying about a meal that looks rustic but tastes like it came out of a street food stall in a busy city. This beef filling does exactly that. It’s not just food—it’s a celebration of texture, flavor, and aroma.

At its heart, this dish is about balance. The richness of ground beef meets the freshness of bell peppers, the sweetness of tomato sauce plays off the warmth of paprika, and a touch of garlic brings it all together. It’s the kind of meal you can serve in a wrap, spoon over rice, or even layer into a casserole.

And the best part? It’s fast. This is a 30-minute miracle you can whip up on a weeknight and still feel like a home-cooked hero.

Ingredients Table – For the Filling

IngredientQuantityNotes
Vegetable oil2 tablespoons (20 ml)For sautéing
Ground beef500 gUse lean for less grease
Onion, chopped1 mediumYellow or white onion
Green peppers, chopped3Adds freshness and texture
Red peppers, chopped3For sweetness and color
Garlic, minced3 clovesFresh is best
Tomato paste1 teaspoon (20 g)Adds depth and umami
Tomato sauce2 tablespoons (25 g)For richness
Paprika1 teaspoonSmoked or sweet based on taste

Directions – Bold Flavors in 6 Simple Steps

  1. Heat the Oil
    In a large skillet over medium heat, add the vegetable oil and let it warm up.
  2. Brown the Beef
    Add the ground beef and cook until browned, breaking it apart with a spoon. This should take about 5–7 minutes.
  3. Add the Aromatics
    Stir in the chopped onion and cook for 2–3 minutes until softened. Then add the garlic and sauté for another 30 seconds until fragrant.
  4. Add the Peppers
    Toss in the chopped green and red peppers. Cook for about 5–6 minutes, until they start to soften but still hold some crunch.
  5. Flavor it Up
    Stir in the tomato paste, tomato sauce, and paprika. Mix thoroughly and let everything simmer together for 5 more minutes, allowing the flavors to marry.
  6. Serve Hot
    Remove from heat and serve warm in wraps, stuffed into bread, over rice, or with roasted vegetables.

Nutritional Information (Per Serving, Approx. 1/4 of Recipe)

NutrientAmount
Calories~320 kcal
Protein24 g
Fat22 g
Carbohydrates10 g
Fiber3 g
Sugars5 g
Sodium~450 mg

Why This Recipe Works Every Time

The magic of this beef filling lies not in any fancy technique or exotic ingredient—but in how familiar, versatile, and deeply satisfying it is.

1. Flavor Development through Simplicity

By browning the meat first, you develop a rich, caramelized base that anchors the flavor of the whole dish. The vegetables then absorb that flavor while contributing their own sweetness and crunch.

2. Versatile Sauce Elements

A little tomato paste adds a concentrated burst of umami, while tomato sauce lends a soft richness. These ingredients blend seamlessly with the spices to create a saucy coating that clings to every bite.

3. Color and Crunch from Fresh Peppers

Using both green and red peppers provides visual appeal and flavor contrast. The green peppers are grassy and fresh, while the red peppers offer subtle sweetness. Their crunch also gives texture to every spoonful.

4. Aromatic Power

Garlic and onion form the backbone of any great savory recipe, and here, they shine. Together, they elevate the beef from simple to addictive.

Where This Dish Belongs on Your Table

One of the beauties of this beef filling is its adaptability. It’s not confined to one culture, meal, or time of day. Here are just a few ways you can bring it to life:

  • Stuffed into pita or flatbread with lettuce, pickles, and a drizzle of tahini or yogurt sauce
  • Wrapped in tortillas for a fusion-style taco or burrito
  • Spooned over rice or couscous with a side salad
  • Tucked into a baked potato for a hearty lunch
  • Served with eggs for a savory breakfast hash
  • Used as a filling for empanadas or hand pies

It’s the kind of filling that stretches a little meat a long way, making it budget-friendly and family-approved.

Healthier Comfort in Every Bite

Despite being hearty and indulgent in flavor, this dish is surprisingly balanced. Lean ground beef offers protein and iron, while bell peppers contribute vitamin C, antioxidants, and fiber. You’re using a minimal amount of oil, and there’s no sugar or dairy added, which makes it great for many dietary approaches.

You can even tweak it based on your health goals:

  • Lower the fat by using ground turkey or chicken.
  • Boost the veggies by adding mushrooms, zucchini, or spinach.
  • Make it spicier with chili flakes or cayenne.
  • Keep it low-carb by serving it in lettuce wraps or over cauliflower rice.

Frequently Asked Questions (FAQs)

Can I make this ahead of time?

Absolutely. In fact, the flavor gets better as it sits. You can make it up to 3 days ahead and store it in an airtight container in the refrigerator. Reheat gently on the stove or in the microwave.

Can I freeze this filling?

Yes. This beef filling freezes beautifully. Cool it completely, then portion into freezer-safe bags or containers. It will keep for up to 2 months. Thaw overnight in the fridge and reheat before serving.

What other vegetables can I use?

You can customize this recipe to use whatever’s in your fridge. Mushrooms, zucchini, corn, spinach, or even chopped kale work well. Just adjust the cooking time depending on how soft or firm you want your veggies.

Can I make this vegetarian?

Definitely. Substitute the ground beef with cooked lentils, finely chopped mushrooms, or a plant-based meat alternative. Keep the same spices and aromatics, and you’ll still get that irresistible depth of flavor.

Is this dish spicy?

Not inherently. The paprika gives warmth but not heat. If you love spice, add chili powder, cayenne, or diced jalapeños to kick it up a notch.

What’s the best way to serve this for a crowd?

This filling is perfect for a build-your-own meal setup. Set out a platter of tortillas, lettuce cups, rice, or baked potatoes, and let everyone assemble their own. Add bowls of toppings like shredded cheese, hot sauce, chopped herbs, or hummus for extra flair.

Can I double the recipe?

Yes! This recipe scales up easily. Just make sure to use a large enough pan so the beef browns instead of steaming. You may need to cook the meat in batches if your skillet is small.

Does it work for meal prep?

It’s ideal for meal prep. Cook a batch at the start of the week, portion it into containers with rice or veggies, and you’ve got lunch or dinner ready in minutes.

Flavor That Brings People Together

Food is more than nutrition. It’s memory, it’s connection, it’s emotion. And this dish? It delivers on all three.

There’s a reason it became a neighborhood legend in my building. The smell alone is an invitation. It says, “Come in, sit down, eat well.” It’s the kind of dish that gets passed down not because it’s fancy, but because it’s unforgettable.

You don’t need a gourmet kitchen. You don’t need exotic ingredients. You just need 30 minutes, a hot skillet, and a little faith in the magic of good food. Whether you’re feeding kids, hosting guests, or just trying to survive a long week—this recipe has your back.

Conclusion: A New Classic You’ll Return to Again and Again

In a world full of complex diets, trendy ingredients, and flashy food fads, it’s refreshing to come back to something simple. This beef filling is proof that you don’t need much to make something incredible. Just a handful of vegetables, quality meat, a few pantry staples, and a love for bold flavor.

So next time you’re standing in your kitchen, unsure of what to make, remember this recipe. Remember the sizzle, the aroma, and the way it makes your neighbors pause in the hallway. Cook it once, and you’ll understand why it’s earned its place at the table.

The Softest Bread You’ve Never Heard Of: A Baker’s Trick That Changed My Kitchen

A Lesson in Flavor from an Unexpected Place

Some of the most unforgettable recipes don’t come from fancy cookbooks or polished food blogs. Sometimes, they come from quiet moments, passed down over a counter, whispered from one cook to another with a twinkle in the eye and a bit of flour on the cheek.

Years ago, while traveling through a small town, I wandered into a modest neighborhood bakery. It smelled like childhood—yeast, butter, and something else I couldn’t quite place. The baker, an older man with a slow, practiced grace, noticed my curiosity. I asked him what gave his bread such a deep, savory aroma.

He smiled, cracked open one of the warm loaves, and revealed a swirl of chickpeas, garlic, and red bell pepper folded into the dough like a hidden treasure. “This,” he said, “is the trick I teach only to those who ask.”

He never gave me measurements. He didn’t write anything down. He just showed me—step by step—how something simple could become unforgettable. I went home, determined to recreate it. It took a few tries. But once I got it right, it became the kind of recipe that stops conversations and makes the whole kitchen smell like home.

Where Old-World Simplicity Meets Everyday Comfort

What makes this bread so special isn’t just the ingredients—it’s the intention behind it. It’s a humble dough, enriched slightly with milk and oil, nothing flashy. What transforms it into a showstopper is what’s hidden inside: a soft, buttery swirl of mashed chickpeas sautéed with garlic and red pepper.

It’s bread that feeds the soul.

The chickpea filling is rustic but brilliant. The texture is slightly creamy, the garlic adds warmth, the red pepper brings sweetness and color, and the butter ties it all together. When this mixture is layered into the dough and baked, the result is a golden loaf that’s tender, aromatic, and unlike anything most people have tasted.

It feels new, but it also feels old—like something your grandmother might have made if she had chickpeas and just the right kind of afternoon.

Ingredients Table

IngredientQuantityNotes
Warm water400 mlHelps activate the yeast
Warm milk200 mlAdds richness to the dough
Sugar10 gFeeds the yeast
Vegetable oil30 mlFor moisture in the dough
Instant yeast8 gFor a quick and reliable rise
All-purpose flour850 gMain structure of the bread
Soft butter150 gSpread into dough before filling
Cooked chickpeas200 gSlightly mashed for texture
Red bell pepper100 gFinely chopped
Garlic4 clovesMinced for aromatic depth
SaltTo tasteAdjust based on preference

Directions

  1. Activate the Yeast: In a large bowl, mix the warm water, warm milk, sugar, and instant yeast. Let it rest for 5–10 minutes until frothy.
  2. Make the Dough: Add vegetable oil and gradually incorporate the flour while mixing. Knead for 8–10 minutes until you have a soft, elastic dough. Cover with a cloth and let it rise in a warm place for 1 hour.
  3. Prepare the Filling: While the dough is rising, sauté the garlic and chopped red bell pepper in a bit of oil until fragrant. Add the mashed chickpeas and cook for a couple of minutes. Season with salt and let cool.
  4. Shape the Dough: Punch down the risen dough and divide into equal portions. Roll each into a flat rectangle.
  5. Layer with Butter and Filling: Spread a thin layer of soft butter over the surface of the dough, then evenly distribute the chickpea filling on top.
  6. Roll and Shape: Roll up the dough tightly into logs. Shape as loaves, rolls, spirals, or your preferred style. Place on a parchment-lined or greased baking tray.
  7. Final Proof: Let the shaped dough rise again for 30–45 minutes until noticeably puffy.
  8. Bake: Bake in a preheated oven at 180°C (350°F) for 25–30 minutes, or until golden brown and cooked through.
  9. Cool and Serve: Allow to cool slightly before serving. Best enjoyed warm, but keeps well for 1–2 days at room temperature.

Nutritional Information (Per Serving – Approx. 1/12 of Recipe)

NutrientAmount (Approx.)
Calories290 kcal
Protein7 g
Fat9 g
Carbohydrates42 g
Fiber3.5 g
Sugars1.5 g
SodiumVaries (based on added salt)

Why This Recipe Works So Well

1. A Soft Dough That Delivers

The base dough is enriched with both warm milk and a bit of oil, which ensures tenderness and elasticity. It’s soft to the touch and bakes up with a delicate crumb that’s perfect for soaking in flavor from the filling.

The combination of milk and water in the liquid base makes it more moist and rich than traditional lean doughs. This is essential when pairing it with a filling—you need structure, but you also need softness to let the layers melt together.

2. The Savory Filling That Surprises Everyone

Chickpeas may not be the first thing people expect to find inside bread, but once they taste this version, they’ll understand. Mashed slightly and sautéed with garlic and bell pepper, chickpeas become creamy, earthy, and hearty—without being heavy.

The peppers provide sweetness and freshness, balancing the richness of the butter. Garlic gives the entire loaf an irresistible aroma that wafts through the house while it bakes. Every bite becomes a layered experience of texture and taste.

3. The Buttery Binding Trick

Here’s where the baker’s wisdom really shines: before layering in the chickpea filling, you spread soft butter across the rolled-out dough. Not melted butter—softened. This little trick adds richness, but it also helps seal the dough, allowing the filling to stick and infuse each layer.

When baked, the butter creates just enough steam inside to puff the layers while binding the savory filling to the dough. The result is soft, layered perfection.

How to Serve It: Endless Possibilities

This bread is incredibly versatile. It’s satisfying enough to stand on its own but also plays beautifully alongside other dishes. Here are a few of the best ways to serve it:

  • Fresh out of the oven with a drizzle of olive oil or tahini
  • Sliced and served with a bowl of lentil soup or stew
  • Grilled into a pressed sandwich with fresh greens and tomatoes
  • Toasted and dipped into olive oil with za’atar or herbs
  • As a hearty breakfast alongside eggs or shakshuka

You can even use the same dough and filling method to shape the bread into spirals, braids, or pull-apart rolls for entertaining.

The Nutrition Bonus: A Smart Indulgence

Yes, it’s delicious—but it’s also surprisingly nourishing.

Chickpeas bring fiber, plant-based protein, and complex carbohydrates to the table. They help keep you full longer and stabilize blood sugar, especially when combined with the slow-digesting starches in the bread.

Garlic and bell pepper contribute antioxidants and anti-inflammatory compounds, while the butter (used in moderation) adds flavor and richness without overwhelming the dish.

If you want to go a little lighter, you can use less butter or substitute a plant-based spread. But honestly? Sometimes a little real butter goes a long way in making a dish feel complete.

Frequently Asked Questions (FAQs)

Can I use canned chickpeas?

Yes, canned chickpeas work perfectly. Just rinse and drain them well before mashing. If you have dried chickpeas and time to soak and cook them from scratch, go for it—they’ll offer a firmer texture and richer flavor.

What kind of flour should I use?

All-purpose flour works beautifully and keeps the texture soft. You can substitute up to 30% of the flour with whole wheat for added fiber and a slightly nuttier flavor, though the bread will be a bit denser.

Can I make this dairy-free?

Yes. You can replace the milk with any unsweetened plant-based milk (like oat or almond milk) and use a dairy-free butter substitute or olive oil instead of butter. Just note that it may slightly change the richness.

Can I freeze it?

Absolutely. After baking and cooling, you can slice the bread and freeze it in a sealed bag for up to 2 months. Toast slices straight from the freezer, or reheat the whole loaf at 160°C (325°F) wrapped in foil.

Can I add other ingredients to the filling?

Yes! This recipe is wonderfully flexible. Try adding finely chopped spinach, caramelized onions, crushed chili flakes, or even sun-dried tomatoes. The chickpea base can handle a variety of flavor profiles.

How long does it keep?

Stored at room temperature in an airtight container or wrapped in foil, the bread stays soft for up to 2 days. For longer storage, refrigerate for up to 5 days and reheat before serving.

Can I shape it differently?

Definitely. You can bake it as one large loaf, divide the dough into mini loaves, twist it into a braid, or roll it into pinwheels for a more decorative presentation.

Why This Bread Deserves a Place in Your Recipe Collection

Not every bread needs to be airy and delicate. Sometimes, the best bread is the one that fills your kitchen with the smell of garlic, makes your family look up from their phones, and leaves your guests asking for seconds.

This chickpea-stuffed bread is humble and hearty—but deeply satisfying. It’s the kind of recipe that builds memories. A recipe that you can make with your kids on a rainy day. A recipe that carries tradition in a new form. A recipe that quietly becomes your go-to when you want to feed and comfort at the same time.

Conclusion: A Hidden Gem You’ll Want to Share

Some recipes come and go. Others stay with you because they speak to something deeper than taste—they speak to care, to effort, to creativity. This savory bread is one of those recipes.

Whether you’re a seasoned baker or a weekend kitchen adventurer, this loaf will surprise you. Not because it’s difficult. But because something so simple, so honest, and so practical can still taste so unforgettable.

Give it a try, and don’t be surprised if your family gathers around the kitchen before it’s even out of the oven. Just smile and say, “It’s a trick I learned from a baker.”

And now, you’ve learned it too.

The Crispy Morning Stack: Two Potatoes, Two Eggs, and a Breakfast That Feels Like Home

It was one of those mornings. The kind where you wake up a little later than usual, the coffee takes too long to kick in, and your stomach reminds you—loudly—that it needs something comforting.

I remember opening the fridge, half-hoping there would be a breakfast miracle inside. But the shelves were nearly bare. A few eggs. A couple of potatoes. Some leftover bacon from the weekend. Half a block of cheddar that had seen better days. It wasn’t much, but it was enough.

I didn’t follow a recipe. I grated the potatoes, stirred in the cheese and bacon, added a bit of flour and milk, cracked in the eggs, and hoped for the best. The batter sizzled as it hit the pan, and within minutes, my kitchen filled with the smell of golden crust, melty cheese, and smoky bacon.

That was the first time I made what’s now become a weekend staple in my home. A quick, crispy, savory breakfast that never fails to satisfy—made from just two potatoes, two eggs, and a few simple extras.

Why This Recipe Works (and Why You’ll Come Back to It Again and Again)

You know a recipe is special when it’s not just delicious—it’s dependable. This one is just that. It’s the kind of breakfast that feels indulgent but comes together in under 30 minutes. It uses pantry staples. It’s flexible. And it works every time.

Whether you call them fritters, patties, pancakes, or savory breakfast cakes, the magic here is in the balance. The potatoes form the crisp outer shell, while the eggs and flour give structure and hold everything together. Cheese adds richness, bacon brings salt and texture, and the final product is golden on the outside and fluffy in the center.

It’s breakfast comfort food—but with enough structure and protein to actually keep you full.

Ingredients Table

IngredientQuantityNotes
Potatoes, peeled and grated2 medium (about 300 g)Squeeze out excess moisture before using
Bacon, cooked and crumbled6 stripsCooked crisp for texture
Cheddar cheese, shredded1 cup (100 g)Use sharp cheddar for more flavor
Parmesan cheese, grated¼ cup (25 g)Adds saltiness and crispiness
Eggs2 largeBinds the mixture
All-purpose flour¼ cup (30 g)Helps form structure
Milk½ cup (120 ml)Adds moisture to the batter
Butter, melted2 tablespoonsFor richness
Baking powder1 teaspoonHelps lighten the texture
Salt½ teaspoonAdjust to taste
Black pepper½ teaspoonAdds subtle spice
Green onions or chives2 tablespoons (optional)For freshness and color

Directions

  1. Preheat and Prepare
    Preheat a skillet over medium heat and lightly grease with butter or oil. In the meantime, squeeze the grated potatoes in a clean towel to remove excess moisture.
  2. Mix the Batter
    In a large bowl, combine the grated potatoes, crumbled bacon, cheddar, parmesan, flour, baking powder, salt, pepper, and optional green onions.
  3. Add Wet Ingredients
    In a separate bowl, whisk together the eggs, milk, and melted butter. Pour this into the dry mixture and stir until well combined.
  4. Cook the Fritters
    Scoop about 1/4 cup of the mixture into the hot skillet and flatten slightly with a spatula. Cook for 3–4 minutes per side, or until golden brown and crisp.
  5. Serve Warm
    Remove from pan and place on paper towels to drain. Serve hot on its own or with sour cream, hot sauce, or poached eggs on top.

Nutritional Information (Per Serving – Approx. 1 of 4 fritters)

NutrientAmount (Approx.)
Calories280 kcal
Protein12 g
Fat18 g
Carbohydrates18 g
Fiber1.5 g
Sugars1 g
Sodium~580 mg

A Closer Look: Why Each Element Matters

Potatoes: The Crunch and the Canvas

Grated potatoes serve as the foundation of the recipe. When wrung out properly, they crisp up beautifully on the skillet, creating a golden crust while keeping a soft bite inside. They carry the flavor of the cheese and bacon and add that beloved breakfast hash brown vibe.

Eggs: The Unsung Binder

Two eggs are all it takes to pull everything together. They bind the mixture without weighing it down, ensuring your fritters are light, moist, and easy to flip.

Bacon and Cheese: The Flavor Bomb

Let’s be honest—this wouldn’t be the same without the salty, smoky kick of bacon and the creamy melt of cheddar. These two ingredients bring depth to every bite. Parmesan adds a bonus umami edge and helps crisp the exterior even more.

Flour and Baking Powder: A Bit of Lift

Flour gives structure while baking powder adds a subtle lift, helping the fritters puff just enough to stay light and satisfying.

Butter and Milk: For Moisture and Richness

Melted butter infuses the batter with richness, while milk softens the mix and helps the interior stay tender.

Optional Herbs: That Fresh Finish

A sprinkle of chopped green onions or chives can transform the flavor, adding a bright contrast to the savory base. Optional—but highly recommended.

Why This Breakfast Recipe Stands Out

1. It’s Quick Enough for Weekdays, Special Enough for Weekends

You can prep and cook these in about 25 minutes. That’s faster than most brunch orders. But the result? Restaurant-quality texture and flavor. They look impressive, taste incredible, and feel like a treat—even when made in your pajamas.

2. It’s Budget-Friendly and Accessible

No fancy ingredients. No specialty tools. This recipe is built from staples you probably already have in your fridge and pantry. It’s a great way to use up leftover bacon, cheese, or herbs. And with just two eggs and two potatoes, it’s a full meal for a few dollars.

3. It’s Kid-Approved and Crowd-Pleasing

Whether you’re cooking for little ones, picky eaters, or brunch guests, this recipe hits all the right notes: cheesy, crispy, warm, and familiar. You can serve them plain, with a dipping sauce, or topped with a fried egg or sour cream.

Serving Ideas to Elevate Your Breakfast

  • With sour cream and chopped chives for a creamy, herby finish
  • Topped with poached eggs and hot sauce for a brunch-style dish
  • Served alongside a fresh salad or avocado slices for balance
  • Dipped in sriracha mayo, ranch, or yogurt-garlic sauce
  • With a side of fruit and coffee for the perfect weekend spread

Frequently Asked Questions (FAQs)

Can I make these ahead of time?

Yes. You can prepare the batter ahead and keep it in the fridge for up to 12 hours. You can also cook the fritters and reheat them in a skillet or oven. Avoid microwaving as it can soften the crispiness.

Can I bake them instead of frying?

Absolutely. While pan-frying gives you that golden crisp edge, you can bake them at 200°C (400°F) for about 20–25 minutes on a parchment-lined tray. Flip halfway through to ensure even browning.

What can I use instead of bacon?

Cooked sausage, chopped turkey, or even sautéed mushrooms work well. For a vegetarian version, omit the meat entirely and consider adding more cheese or veggies like spinach or zucchini.

Can I use sweet potatoes?

Yes. Sweet potatoes add a slightly sweeter note and work beautifully with cheese. Just be sure to squeeze out any extra moisture before mixing.

How do I keep them from falling apart?

Make sure to squeeze the grated potatoes dry and don’t overmix the batter. Also, ensure your skillet is properly preheated and don’t flip too early—let the underside get crisp before turning.

Can I freeze them?

Yes. Let the fritters cool completely, then store in a freezer-safe container with parchment between layers. Reheat from frozen in the oven or toaster oven for best results.

Are they gluten-free?

As written, this recipe contains flour, but you can easily make it gluten-free by swapping in a 1:1 gluten-free flour blend or oat flour. The structure remains solid, and the taste is just as good.

The Joy of Small Ingredients with Big Impact

The beauty of this recipe lies in its modesty. Two eggs. Two potatoes. A bit of cheese and bacon. Somehow, these simple ingredients come together to create something more than the sum of their parts.

It’s not just about what’s in the bowl. It’s about what it becomes: a warm, satisfying meal that fills the kitchen with comforting smells and gives you a quiet moment of joy before the day begins.

It’s about using what you have, not overthinking it, and ending up with something that feels intentional. Something that tells your family—or just yourself—that today is worth starting slowly and deliciously.

Conclusion: Your New Go-To Breakfast Staple

This recipe is more than just a quick breakfast. It’s a reminder that great food doesn’t have to be complicated. That creativity can live in simple ingredients. That comfort and satisfaction can come from the quiet crackle of a fritter hitting a hot pan.

Once you try this “Two Potatoes & Two Eggs” breakfast, it might just become your default. The thing you whip up when mornings feel cold, when guests drop by unexpectedly, or when you simply want to treat yourself to something warm, cheesy, and crisp.

Because the best meals aren’t always the most elaborate—they’re the ones that make you feel good. And this recipe? It delivers, every single time.

The Morning Melt: Why This Omelette Is My Go-To Comfort Food

I wasn’t always a morning person.

For years, I rushed through breakfast like it was a checkbox. A piece of toast here. Maybe cereal if I had time. Mornings felt mechanical—something to survive, not enjoy. That all changed one quiet weekend.

It was a gray Sunday. The kind where the house feels still and the light is soft. I opened the fridge without a plan. A quarter of an onion. A few bell peppers. Some ham left from last night’s dinner. And eggs. I cracked four into a bowl, whisked them absentmindedly, tossed the rest in a pan, and waited.

What came out wasn’t just an omelette—it was an awakening.

It was golden and fluffy, with melted cheese oozing through sautéed vegetables and savory ham. It was warm in my hands and comforting in a way I hadn’t expected from such simple ingredients. It wasn’t just breakfast. It was nourishment, rhythm, and pause.

From that day on, my mornings changed. And this omelette? It became a ritual.

What Makes This Omelette So Special?

We all know omelettes. They’re classic. Quick. Familiar. But when made well, they can become so much more than an everyday dish. They become a canvas—soft, warm, and versatile.

This particular recipe brings balance. It’s neither overly rich nor too simple. It’s just right—loaded with color, texture, and flavor in every bite.

1. Balanced Flavor in Every Forkful

The sweetness of the red bell pepper. The crunch of the green. The bite of chopped onion, softened in butter. All of it wrapped around tender ham and gooey cheese, embraced by soft, fluffy eggs.

No single ingredient dominates. Instead, they work together—like instruments in a kitchen symphony. And that’s the difference between a good omelette and a great one.

2. Customizable for Everyone at the Table

This recipe is a starting point. From here, you can take it anywhere. Want it spicier? Add jalapeños or chili flakes. Want it meat-free? Swap the ham for mushrooms or spinach. Looking for a breakfast-for-dinner moment? Add crispy potatoes on the side and a simple salad.

The beauty is in its adaptability. You can cater it to every taste, diet, or mood—without losing what makes it great.

3. Texture That’s Comforting and Satisfying

No rubbery eggs. No dry edges. When made right, this omelette is buttery, creamy, and just the right level of melt-in-your-mouth. The eggs form a soft shell, barely holding together the savory goodness inside. Every bite is a contrast—silky, crisp, stretchy, soft.

And yes, it’s ready in minutes—but it tastes like something you thought about all morning.

Ingredients Table

IngredientQuantityNotes
Butter1 tablespoonFor sautéing and flavor
Onion, chopped1/4Use white or yellow
Green bell pepper, chopped1/4Adds freshness and crunch
Red bell pepper, chopped1/4Adds sweetness and color
Minced ham1/2 cupCooked; can substitute with turkey ham
Eggs4Large; lightly beaten
Shredded cheese1/2 cupAny variety – cheddar, mozzarella, etc.

Directions

  1. Sauté the Veggies and Ham
    Heat a non-stick skillet over medium heat. Add butter and let it melt. Sauté the chopped onion, green and red bell peppers for 2–3 minutes until slightly softened. Add the minced ham and cook for another 1–2 minutes. Remove mixture from the pan and set aside.
  2. Cook the Eggs
    Wipe the skillet clean if necessary, reduce heat to medium-low, and pour in the beaten eggs. Swirl the pan to spread the eggs evenly. Cook without stirring until the eggs are mostly set but still slightly glossy on top.
  3. Add the Filling
    Spoon the sautéed vegetable and ham mixture onto one half of the omelette. Sprinkle shredded cheese over the top.
  4. Fold and Finish
    Carefully fold the omelette in half using a spatula. Cook for another 30 seconds to 1 minute to melt the cheese and finish cooking the eggs.
  5. Serve Hot
    Slide the omelette onto a plate and serve immediately. Add fresh herbs or a dash of hot sauce if desired.

Nutritional Information (Per Serving – 1 Omelette)

NutrientAmount
Calories~370 kcal
Protein25 g
Fat28 g
Carbohydrates4 g
Fiber0.8 g
Sugars1.5 g
Sodium~640 mg

Perfect for Every Occasion

You might think an omelette is just a quick breakfast fix, but this version wears many hats:

Weekday Breakfast

When mornings are rushed and you need something fast yet filling, this omelette delivers. You can prep the ingredients the night before, and have breakfast on the table in 10 minutes flat.

Brunch Showstopper

Hosting friends or family for brunch? Serve this alongside toast, roasted tomatoes, or even a mimosa bar. It’s visually impressive and endlessly customizable—making it a centerpiece without the fuss.

Post-Workout Refuel

Packed with protein and healthy fats, this omelette is a perfect recovery meal. Add some avocado or leafy greens and you’ve got a powerhouse plate.

Late-Night Comfort Food

We’ve all had those nights. This is the meal that satisfies without guilt. Quick, warm, and hearty—it’s what your body and mind need.

Common Questions About Omelettes, Answered

What’s the secret to a fluffy omelette?

The key is gentle heat and a light hand. Over-whisking the eggs or cooking them on high heat can lead to rubbery results. Let the eggs set slowly, and don’t overfill them—you want the fold to feel natural, not forced.

Can I use different vegetables or meats?

Absolutely. This recipe welcomes substitutions. Try mushrooms, zucchini, cherry tomatoes, or spinach. For meat, cooked bacon, turkey, sausage, or even leftover grilled chicken work well.

Is this recipe kid-friendly?

Yes. In fact, many parents use this as a gateway to introduce more vegetables to picky eaters. You can start with fewer ingredients or chop them finer for a smoother texture.

Can I make this omelette ahead of time?

While omelettes are best fresh, you can prep the filling ingredients in advance and store them in the fridge. Reheating a full omelette is possible but can slightly affect texture. If you need to make breakfast ahead, consider turning this into a baked egg casserole using the same ingredients.

Which cheese works best?

Cheddar is a classic choice, but mozzarella, Swiss, pepper jack, or feta all bring something different to the plate. It depends on the flavor you want—sharp, creamy, melty, or tangy.

Can I make it dairy-free?

Yes. Swap butter with olive oil or a plant-based margarine, and use a dairy-free cheese or omit it entirely. The veggies and ham will still give you plenty of flavor.

How do I know when the eggs are done?

The omelette should be set but still slightly glossy on top before folding. The residual heat will finish cooking the eggs after it’s off the stove. Overcooked eggs turn dry quickly, so aim for just-cooked rather than firm.

Tips for an Unforgettable Omelette Experience

  • Pre-cook fillings. Raw vegetables and meats release moisture and can make your omelette soggy. Sauté them first for better flavor and texture.
  • Don’t overcrowd. Less is more. Overloading the filling makes the omelette hard to fold and affects cooking.
  • Use a non-stick skillet. This gives you control, prevents sticking, and helps achieve a golden finish.
  • Let the eggs rest after cooking. Just a minute or two helps everything settle, making slicing and serving easier—and tastier.

A Staple That Never Gets Old

The reason I keep coming back to this omelette isn’t just how easy it is. It’s how consistently satisfying it feels. Some meals fill you up. This one lifts you up.

Maybe it’s the way the onions soften in butter. Maybe it’s the contrast between melted cheese and crisped ham. Or maybe it’s the simplicity. The sense that, no matter how busy life gets, you can always take a few minutes to feed yourself something real.

In a world of complicated recipes and 12-step dishes, this omelette is refreshingly honest. It says: “Here, this is enough.”

And more often than not, it truly is.

Conclusion: A Golden Standard Worth Holding Onto

There’s a reason the omelette has survived generations, cultures, and cuisines. It’s versatile. It’s quick. It’s delicious. But more than that—it’s personal.

Whether you’re folding it for yourself on a quiet morning or flipping a skillet full of flavor for a table of loved ones, you’re taking part in a timeless tradition. A ritual of nourishment, care, and creativity.

This perfect omelette isn’t about precision—it’s about presence. About waking up, slowing down, and making something with your own two hands. It’s about starting the day with intention, one skillet at a time.

So next time you find yourself with a few eggs, some vegetables, and a little cheese—don’t hesitate. Make the omelette. Savor it. And let it remind you how good simple things can be.

Rediscovering Sweetness: A Daily Dessert That Changed Everything

I still remember the day I hit a wall with sugar. I had just come home from a long, exhausting day and opened the pantry, eyes scanning for something sweet—something comforting. A familiar tug pulled me toward the usual: cookies, store-bought granola bars, or some kind of chocolate that promised relief. But that day was different. That day, I hesitated.

I had been trying for months to take care of myself—cleaner meals, more movement, less stress. But the sugar cravings would creep in like shadows just before sunset, catching me when my willpower was weakest. Every time I gave in, I felt a fleeting high, followed by that all-too-familiar crash. The cycle felt unbreakable, and I began to question if I would ever have a healthy relationship with sweet things.

That night, I promised myself I would find a better way. Not a compromise, but a true alternative—a dessert I could eat every day without guilt, without weight gain, and without feeling like I was missing out. What I discovered wasn’t just a recipe. It was freedom. A naturally sweet, rich, satisfying bite made from whole ingredients, free of sugar, oil, milk, or yogurt—yet indulgent enough to feel like a treat.

This recipe isn’t just something I make—it’s something that changed how I think about food, balance, and pleasure.

The Clean Indulgence Philosophy

Let’s be honest: we’ve been conditioned to believe that dessert equals “cheat.” In many diet cultures, sweetness is a forbidden pleasure—something to be earned or punished. But that narrative is tired. It doesn’t serve us anymore.

This dessert defies that logic. It’s sweetened only with nature’s candy—dates—and balanced with fiber, protein, and healthy fats from whole food sources like almond flour and coconut. The absence of sugar, oil, milk, and yogurt isn’t a limitation—it’s a liberation. By stripping away processed ingredients, we’re left with a dessert that’s nourishing, energizing, and safe for daily enjoyment.

This is the kind of treat you can eat at 3 PM without the sugar crash. It’s the kind of bite you sneak after dinner without remorse. And for anyone trying to adopt a cleaner diet, manage blood sugar, or simply stop the binge-restrict cycle, it’s a game changer.

Ingredients

IngredientQuantityDescription
Medjool dates1 cup (about 10)Pitted; naturally sweet and sticky
Unsweetened shredded coconut1/2 cupAdds texture and healthy fats
Almond flour1/2 cupGives structure and a subtle nutty flavor
Chia seeds (optional)1 tablespoonFor fiber, texture, and nutritional boost
Ground cinnamon1 teaspoonAdds warmth and depth
Vanilla extract (optional)1/2 teaspoonEnhances natural flavor
Sea saltA pinchBalances and elevates the sweetness
Water2 to 3 tablespoonsHelps with blending if needed

Directions

  1. Prepare the Dates
    If your dates are firm or dry, soak them in warm water for about 10 minutes. Drain well before using.
  2. Make the Dough
    In a food processor, combine the dates, almond flour, shredded coconut, cinnamon, vanilla extract (if using), and sea salt. Blend until a sticky dough forms. Add water one tablespoon at a time if the mixture is too dry.
  3. Add Chia Seeds (Optional)
    Pulse in chia seeds briefly for extra fiber and texture.
  4. Shape the Bites
    Roll the dough into bite-sized balls or press it into a lined dish and cut into bars.
  5. Chill and Store
    Refrigerate for at least 30 minutes to firm up. Store in an airtight container in the fridge for up to one week.

Nutritional Information (Per Serving – One Bite)

NutrientAmount
CaloriesApproximately 90 kcal
Protein1.5 grams
Fat4.5 grams
Carbohydrates11 grams
Fiber2.2 grams
Natural Sugars7 grams
Added Sugar0 grams

Why This Dessert Works: The Power of Each Ingredient

This isn’t just a mix-and-mash of healthy-sounding foods. Each ingredient was chosen with purpose—and that’s why this recipe works not only in flavor and texture, but also in function.

  • Dates: These are the soul of the recipe. They bring natural sweetness, sticky texture for binding, and a dose of fiber and potassium. They’re low on the glycemic index compared to refined sugar, meaning they provide steady energy without spikes.
  • Almond Flour: Soft, nutty, and naturally gluten-free, almond flour gives the dessert structure. It also adds healthy fats, vitamin E, and protein to keep you fuller longer.
  • Unsweetened Shredded Coconut: Light, flaky, and subtly sweet, coconut adds texture and depth. It’s a source of MCTs (medium-chain triglycerides), which have been linked to energy support and fat metabolism.
  • Chia Seeds (Optional): These tiny powerhouses are rich in fiber, omega-3s, and protein. They help absorb moisture and improve texture while offering digestive support.
  • Cinnamon and Vanilla: Not just for flavor—these two play an important sensory role. Cinnamon may help regulate blood sugar, while vanilla enhances natural sweetness without adding calories.
  • Water and Salt: Just enough to help blend and enhance taste without interfering with the clean profile.

Health Benefits That Go Beyond the Plate

Blood Sugar Stability

Unlike traditional desserts, which often spike insulin and lead to energy crashes, this dessert offers sustained energy. Dates, though sweet, are paired with fiber, protein, and fat, which slow digestion and stabilize blood sugar.

Gut-Friendly

The fiber from dates, chia seeds, and coconut helps promote healthy digestion and a happy gut microbiome. If you’re someone who experiences bloating or irregular digestion from sugary or dairy-laden desserts, this is a soothing alternative.

Weight Management Support

This treat is calorie-conscious but nutrient-dense. It satisfies cravings quickly thanks to its richness and fiber content. Most people find they’re satisfied with one or two bites—not because they’re forcing restraint, but because their bodies feel nourished.

Allergy and Intolerance-Friendly

No gluten, no dairy, no added sugar—this recipe is a safe haven for those with food sensitivities or autoimmune concerns. It’s also naturally vegan and paleo-friendly.

Frequently Asked Questions (FAQs)

Can I use other dried fruits instead of dates?

Dates are ideal because of their sticky texture and rich sweetness, but you can substitute with dried figs or raisins. Just note that the texture and flavor will change slightly, and you may need to adjust water levels to ensure it binds properly.

How should I store these?

These bites can be stored in an airtight container in the refrigerator for up to one week. For longer storage, freeze them for up to 2 months. They thaw quickly and taste just as fresh.

Are they safe for kids?

Absolutely. This recipe contains no refined sugar, artificial sweeteners, or allergens like dairy or gluten. It’s a great lunchbox addition or after-school snack for kids.

Can I add protein powder?

Yes. You can replace a portion of the almond flour with your favorite plant-based or whey protein powder. Just ensure the powder doesn’t contain added sugars or artificial ingredients to keep the recipe clean.

What if I don’t have a food processor?

A strong blender can work, though it may require more frequent scraping and small batch blending. If neither is available, try using date paste and mix by hand with the dry ingredients.

How many bites does this recipe make?

Depending on the size of each ball or bar, you’ll get around 12 to 15 servings. They’re rich and satisfying, so one or two pieces typically do the trick.

Is this dessert good for people with diabetes?

Always consult a healthcare professional, but generally speaking, the fiber and fat content in this dessert helps moderate the body’s glycemic response. It’s a better option than processed sweets, but portion control is still key.

Can I use this as a pre- or post-workout snack?

Definitely. The natural sugars in dates provide quick energy, while the fats and protein in almond flour and chia seeds offer sustained fuel. It’s a great bite before or after physical activity.

When Food Becomes a Form of Self-Respect

There’s something deeply healing about creating food that loves you back. In a world saturated with artificial sweeteners, crash diets, and constant calorie counting, this dessert feels like a quiet revolution. It’s not just a recipe—it’s a reminder that sweetness can exist in our lives without shame.

Making these treats has become a ritual in my own kitchen. Every time I roll the dough into little bites, I remember that first night of frustration and determination. I remember how small shifts—like choosing whole food ingredients—can have big emotional impact. And I remember that the best desserts aren’t the ones that leave us feeling bloated and guilty. They’re the ones that nourish us from the inside out.

Conclusion: Redefining Dessert for Good

The beauty of this daily dessert isn’t just in its flavor or nutrition profile—it’s in its simplicity and purpose. It invites us to enjoy sweetness on our own terms, without the baggage of restriction or regret.

So whether you’re on a journey toward cleaner eating, managing health conditions, or simply craving a treat that doesn’t fight your goals, this recipe belongs in your life. It’s more than a dessert—it’s a quiet act of self-care.

Make it once, and you’ll see. Make it often, and it just might change how you think about dessert forever.

Why I Stopped Buying Bread: The No-Knead Recipe That Changed Everything

There are certain days that seem to blur together—grocery bags in one hand, emails piling up, dinner half-planned. It was on one of those days that I realized I’d forgotten the bread. Again.

Too tired to head back out, too uninspired to start a complicated recipe, I opened my pantry hoping for a miracle. And there they were: water, flour, yeast, olive oil, salt, sugar. The usual suspects.

I remembered reading about a no-knead bread recipe that required nothing more than stirring and resting. I gave it a shot, unsure of what to expect. To my surprise, the dough came together effortlessly. It rose beautifully. It baked into something that looked—and smelled—like real bread. But the true magic happened when I sliced into it.

It was soft. Light. Warm. Slightly chewy with a golden crust. I slathered it with olive oil, handed a piece to my child, and we both looked at each other in disbelief.

Since that day, I haven’t bought bread.

The Easiest Bread You’ll Ever Make

This recipe isn’t revolutionary—it’s restorative. It reminds you that bread doesn’t have to be complicated. You don’t need eggs. You don’t need butter. You don’t even need to knead. All you need is a bowl, a spoon, and about an hour of rise time.

It’s a reminder that cooking can be gentle, forgiving, and wildly satisfying. It’s bread for people who think they’re too busy, too tired, or too intimidated to bake.

And it’s become one of the most reliable, affordable, and beloved recipes in my home.

What Makes This Bread Special?

1. No Kneading, No Problem

Traditional bread recipes rely on kneading to build gluten and give the bread structure. This dough, however, is soft and sticky enough that time does the work for you. As it rests, gluten strands form naturally, developing texture without any effort on your part.

The result? A surprisingly airy, tender crumb that rivals any bakery loaf—with none of the elbow grease.

2. No Eggs or Butter

This bread is naturally vegan and completely dairy-free. It gets its moisture and richness from olive oil, which not only keeps the loaf soft but also infuses it with a subtle depth of flavor.

Without eggs or butter, the recipe becomes both accessible and incredibly cost-effective—perfect for anyone on a budget, dealing with allergies, or simply aiming to simplify their pantry staples.

3. Pantry-Only Ingredients

There are no specialty flours or additives here. This is everyday bread made with everyday ingredients. It’s the kind of recipe that always feels close at hand, like a quiet comfort waiting on the shelf.

Ingredients Table

IngredientQuantityNotes
Water200 ml (0.85 cup)Lukewarm, helps activate yeast
Sugar25 g (2 tbsp)Feeds the yeast, adds subtle flavor
Yeast3 g (1 tsp)Instant or active dry
Bread/Wheat flour300 g (2 cups)Preferably bread or all-purpose
Salt3 g (1/2 tsp)Balances flavor
Olive oil20 g (2 tbsp)Adds moisture and depth

Directions

  1. Mix the Base
    In a mixing bowl, combine the lukewarm water, sugar, and yeast. Stir and let sit for 5 minutes until bubbles form.
  2. Add Dry Ingredients
    Add flour and salt into the mixture. Stir until a sticky, shaggy dough forms. No kneading required.
  3. Add Olive Oil
    Pour in the olive oil and mix it through the dough. Cover the bowl with a cloth or plastic wrap.
  4. Let It Rise
    Let the dough rest at room temperature for 1 hour, or until doubled in size.
  5. Prepare to Bake
    Preheat your oven to 190°C (375°F). Grease a small loaf pan or line it with parchment paper.
  6. Transfer & Rest Again
    Gently transfer the dough to the prepared pan. Let it rest uncovered for 10–15 minutes while the oven finishes heating.
  7. Bake
    Bake for 25–30 minutes, or until golden brown on top and hollow-sounding when tapped.
  8. Cool & Serve
    Let the bread cool on a rack for at least 15 minutes before slicing.

Nutritional Information (Per Slice – Approx. 1 of 10)

NutrientAmount (Approx.)
Calories145 kcal
Protein4 g
Carbohydrates25 g
Sugars2.5 g
Fat3.5 g
Fiber1.2 g
Sodium120 mg

A Reliable Recipe for Real Life

The best thing about this bread is how seamlessly it fits into daily routines. You don’t have to schedule your day around it. You don’t even need much space. Just mix, rest, and bake.

It’s the perfect loaf to make when you’re multitasking—checking emails, folding laundry, helping with homework. It doesn’t demand your full attention, but it rewards you with something wholesome and grounding at the end.

It’s also versatile. You can eat it fresh, toast it for breakfast, use it for sandwiches, or tear it apart for dipping into soup or olive oil. Once you get the hang of the base dough, you can build on it with herbs, seeds, or spices for variety.

Serving Suggestions

Here are some of our favorite ways to enjoy this bread once it’s cooled and sliced:

  • Toasted with olive oil and garlic for a quick bruschetta base
  • Topped with mashed avocado or hummus for a hearty plant-based snack
  • Dipped into lentil soup, tomato stew, or a bowl of spiced chickpeas
  • Grilled with cheese and tomato for a minimalist grilled sandwich
  • Torn into pieces and used for a rustic bread salad or stuffing

Because the loaf is so neutral and flexible, it can swing savory or sweet with ease. Spread it with peanut butter and honey or a thick slice of feta with a drizzle of lemon. It’s your canvas.

Frequently Asked Questions (FAQs)

How is it different from other homemade bread?

Most bread recipes require either kneading or long fermentation. This one skips both. It’s made for real life—fast, forgiving, and foolproof. And without butter, eggs, or dairy, it’s lighter but still deliciously soft.

Do I need any special equipment?

Not at all. No mixer. No bread machine. Just a bowl, a spoon, a measuring cup, and an oven. You can even mix the dough with your hands if you want a more tactile experience.

Can I use whole wheat flour?

You can, but not as a full replacement. Try substituting up to 30% of the flour with whole wheat for added fiber and a nutty flavor. Keep the rest all-purpose or bread flour to maintain softness.

Can I add herbs, seeds, or other mix-ins?

Absolutely. This recipe is a perfect base. Add rosemary, garlic powder, or dried oregano for an herby loaf. Mix in sesame or sunflower seeds for texture. You can even fold in chopped olives or caramelized onions for something more gourmet.

How long does it last?

Stored in an airtight container or wrapped in foil, the bread stays fresh for 2–3 days at room temperature. You can also refrigerate it for up to 5 days or freeze it (sliced or whole) for up to 2 months.

Is it suitable for people with dietary restrictions?

Yes! This bread is:

  • Vegan
  • Egg-free
  • Dairy-free
  • Nut-free
  • Budget-friendly

Just be sure to check your flour and oil for any additives if cooking for someone with severe allergies.

Can kids help make it?

They can—and they should! It’s one of the best starter recipes for kids in the kitchen. Since there’s no kneading or complex shaping, children can help stir, pour, and even transfer the dough to the pan. Watching the dough rise is also a wonderful science lesson in action.

Can I double the recipe?

Yes. This recipe scales beautifully. Simply double all the ingredients and divide the dough between two loaf pans or bake as one large round on a baking sheet.

Why This Bread Belongs in Every Home Baker’s Repertoire

Baking bread at home can feel intimidating. So many rules. So many steps. But this recipe strips away the noise and brings you back to what matters: flour, water, yeast, salt, and time.

It’s not artisan in the way that some sourdoughs are. It’s not crusty like a French baguette. But it’s comforting, simple, and real. It’s bread that doesn’t try to impress—but somehow does anyway.

It reminds us that food can be both easy and rewarding. That there’s power in mastering something so foundational. And that, even on the busiest days, there’s time to make something beautiful from scratch.

Conclusion: A Slice of Simplicity in a Complicated World

In a world full of complexity, this recipe offers relief. It’s gentle. It’s affordable. It’s satisfying. And it proves that the best things in the kitchen are often the simplest.

This no-knead, no-egg, no-butter bread has become a staple in my home—not because it’s fancy, but because it works. Because it makes mornings feel warmer and dinners feel fuller. Because it smells like home.

And once you make it, I think you’ll feel the same.

Let it be your go-to recipe. Let it surprise you. Let it feed more than just your hunger.

The Golden Comfort: A Homemade Chicken Broth That Nourishes from the Inside Out

I remember the first time I made chicken broth from scratch. Not from a box. Not from a cube. Just a single chicken leg, a few vegetables, and a bit of time.

It was the kind of day where everything felt heavy—the kind where your body is tired and your mind needs something quiet. I didn’t have the energy for a complicated meal, but I wanted something real. Something warm. Something that made the house smell like comfort.

I pulled out what I had: an onion, a few carrots, garlic, some herbs. I filled the pot, placed in a chicken leg, and let it simmer. That’s all. No fancy techniques. No long ingredient list. Just heat, water, and a little patience.

What came out of that pot surprised me. It was rich, golden, and full of flavor—more than any store-bought broth I had ever tasted. The aroma wrapped around the kitchen like a wool blanket. The taste reminded me of family dinners, slow Sundays, and the simple act of taking care of yourself.

Since that day, I’ve made this broth hundreds of times. And each time, it feels like pressing pause on a busy world.

Why This Broth Stands Out

Chicken broth has long been a culinary cornerstone—foundational, versatile, and deeply nourishing. But not all broths are created equal. The difference between a homemade broth and a packaged one is night and day. It’s not just about taste. It’s about texture, depth, and a kind of quiet satisfaction that can’t be replicated in a factory.

This recipe is designed to be minimal, approachable, and deeply flavorful, using just one piece of chicken and a rainbow of simple vegetables. It’s a broth that’s good enough to sip on its own and strong enough to build a soup around.

Ingredients Table

IngredientQuantityNotes
Chicken leg1 pieceSkin-on for richer flavor
Hot water150 ml (2/3 cup)For initial simmering
Onion, finely chopped1 mediumAdds depth and sweetness
Garlic, minced3 clovesAdds aroma and immune-boosting benefits
Kohlrabi, diced1Earthy and slightly sweet
Carrots, diced4Adds color and natural sweetness
Leek, sliced1Use white and light green parts
Bell peppers, diced2Any color; brings sweetness and body
Celery root, diced1Hearty and aromatic
Celery stalks, chopped2Classic broth flavor
Parsley, chopped2 tablespoonsStirred in at the end for freshness
Salt80 g (about 1/3 cup)Adjust to taste

Directions

  1. Prepare the Base
    Place the chicken leg in a large pot with the hot water. Bring to a simmer over medium heat. Skim off any foam that rises to the top.
  2. Add Vegetables
    Add all the chopped vegetables (onion, garlic, carrots, celery, leek, bell peppers, kohlrabi, and celery root) to the pot.
  3. Simmer Slowly
    Cover and simmer gently over low heat for 45–60 minutes, or until the vegetables are soft and the chicken is fully cooked and tender.
  4. Season and Finish
    Add salt to taste and stir in the chopped parsley. Remove the chicken leg, shred the meat (if desired), and return it to the broth or reserve it for another use.
  5. Serve or Store
    Serve hot as is, or strain to use the broth as a base for other soups and recipes. Store in the refrigerator for up to 4 days, or freeze for up to 3 months.

Nutritional Information (Per Serving – Approx. 1 cup)

NutrientAmount (Approx.)
Calories120 kcal
Protein9 g
Fat6 g
Carbohydrates8 g
Fiber2 g
Sugars3 g
SodiumVaries (based on salt added)

The Beauty of Building Flavor Slowly

At its core, broth is about extraction. Heat draws flavor from bones, vegetables, and herbs—layer by layer. In this recipe, even with just a single chicken leg, the combination of aromatic vegetables and a slow simmer results in a complex, multi-dimensional broth.

Carrots add sweetness. Onion and garlic build aromatic depth. Leek and celery bring a subtle bitterness that balances the sweetness. Kohlrabi and celery root give earthiness. And parsley finishes everything with a fresh, green lift.

Together, these ingredients don’t compete. They collaborate, giving you a broth that tastes like it took hours—but really only needed an hour or so of gentle simmering.

Why You’ll Love Making This at Home

1. It’s Simpler Than You Think

Many people think making broth is a laborious, all-day task. But this recipe proves that you don’t need a full chicken carcass, specialty equipment, or eight hours to make something wonderful. One chicken leg. A handful of vegetables. One pot. That’s it.

2. It’s Better for You

Homemade broth gives you total control. No additives. No preservatives. No excess sodium (unless you choose to add it). Just clean, whole ingredients that nourish you from the inside out.

It’s especially helpful during cold and flu season. Rich in vitamins, minerals, and collagen, this broth soothes sore throats, supports digestion, and hydrates the body better than plain water.

3. It Makes the Whole House Smell Like Home

There’s something timeless about the scent of broth simmering on the stove. It fills the air with comfort. It says someone is cooking with love. Even if you live alone, it makes you feel taken care of. That’s a powerful thing.

4. It’s Freezer-Friendly and Budget-Conscious

Use what you have. Stretch your ingredients. One chicken leg can yield several servings of deeply flavored broth. Make extra and freeze it in jars or ice cube trays for later use. It saves money, reduces waste, and gives future-you something to look forward to.

Ways to Use Homemade Chicken Broth

The possibilities are endless. Here are some of the many ways this broth can shine in your kitchen:

  • Sip it straight: Ladle it into a mug, sprinkle with sea salt and a squeeze of lemon.
  • Make a quick soup: Add noodles, rice, or chopped greens for an easy meal.
  • Use it to cook grains: Swap water for broth when making quinoa, couscous, or rice.
  • Deglaze pans: Add it to your skillet after searing meat or vegetables for a flavorful sauce.
  • Boost sauces and stews: Add depth to gravies, curries, and slow-cooked dishes.

Frequently Asked Questions (FAQs)

Can I use chicken breast or another cut instead of a leg?

Yes, but chicken legs or thighs are ideal because they contain both dark meat and bone, which give more flavor and body to the broth. A breast alone can work but will result in a lighter flavor and less richness.

Can I make it in a slow cooker?

Absolutely. Just add all the ingredients to your slow cooker, cover with water, and cook on low for 6–8 hours. You’ll get an even deeper flavor with virtually no effort.

What can I do with the cooked chicken?

Shred it and use it in sandwiches, salads, wraps, or return it to the broth with noodles or vegetables for a quick soup. Nothing goes to waste.

Can I make this broth vegetarian?

Yes. Simply omit the chicken leg and add extra vegetables like mushrooms, tomatoes, and an additional clove of garlic. You won’t get the same collagen or protein, but it will still be rich and flavorful.

How do I store it?

Cool the broth completely before transferring it to airtight containers. Store in the refrigerator for up to 4 days, or freeze for up to 3 months. Be sure to leave room at the top of jars if freezing to prevent cracking.

Can I reduce the salt?

Absolutely. Start with a smaller amount and adjust to your taste at the end. You can also add a splash of soy sauce, tamari, or lemon juice as alternative flavor enhancers without adding more sodium.

What if I want a clearer broth?

After simmering, strain the broth through a fine-mesh sieve or cheesecloth. For ultra-clear broth, avoid stirring while cooking and skim foam off the top during the first 10–15 minutes.

Tips for Perfect Broth Every Time

  • Use cold water to start (unless you’re pre-blanching bones). In this recipe, hot water works because it’s a small quantity and speeds things up. But starting cold usually draws out more flavor gradually.
  • Don’t boil—simmer. A gentle simmer allows flavors to develop without emulsifying fat into the broth, which can cloud it.
  • Let it rest before straining. After turning off the heat, let the broth sit for 10–15 minutes. This helps settle any particles and deepens the flavor.
  • Adjust seasoning at the end. Broth reduces as it cooks, which concentrates salt. Always taste and adjust after simmering, not before.

A Ritual in a Pot

Making broth might seem old-fashioned in a world of quick meals and convenience. But there’s something restorative about it—about taking the time to turn humble ingredients into something rich, nourishing, and deeply satisfying.

It’s not just about the food. It’s about slowing down. About listening to the soft bubbling of the pot. About filling your home with warmth and your body with comfort.

Whether you’re sipping it alone on a quiet afternoon or using it as the base for a hearty family meal, this broth has a way of anchoring you. Reminding you that good things take time—and that time in the kitchen is never wasted.

Conclusion: The Recipe That Brings You Home

In our fast-paced lives, we need more recipes like this one.

Recipes that don’t demand precision. That don’t require gadgets. That ask only for your presence and your patience. This simple chicken broth is more than a base—it’s a building block, a blank canvas, a cup of comfort.

Once you make it, you’ll see how something so small—a single chicken leg, a few chopped vegetables—can become something far greater. A meal. A medicine. A memory.

So next time your body craves warmth or your kitchen feels a little too quiet, put a pot on the stove. Fill it with what you have. Let it simmer. Let it soothe.

This is the kind of recipe you don’t just make—you live with.

Cloud Loaf: The Soft Milk Bread That Feels Like a Warm Hug

Some recipes don’t just feed the body—they feed the soul. For me, soft milk bread is one of those rare dishes.

I still remember the smell of warm, sweet bread wafting through the air as a child. My grandmother used to make a simple milk bread on Sunday afternoons. She didn’t measure with scales or cups—just by feel, from memory, and always with care. It wasn’t fancy. There were no complicated folds, no glossy cookbook pages guiding the way. Just flour, milk, a bit of sugar, and her patient hands.

When I finally learned to bake on my own, milk bread was the first thing I tried to recreate. I wanted to relive that memory, to replicate the softness, the delicate sweetness, the warmth that made a slice of bread feel like a hug. After a few trials (and a couple of flat loaves), I found this version—and it brought everything back.

This is not just bread. It’s comfort. It’s simplicity. It’s a little piece of home you can bake in under two hours.

What Makes This Soft Milk Bread So Special?

Soft milk bread is known for its pillowy texture, subtle sweetness, and rich flavor. Unlike rustic sourdough or hearty whole wheat loaves, this bread leans into tenderness. It’s slightly sweet, golden on top, and almost cloud-like inside.

It’s often referred to as “Japanese milk bread” or “Hokkaido milk bread” in its fluffier iterations, but the version here is streamlined and accessible for every kitchen—no tangzhong, no kneading machines required.

Let’s explore what sets this recipe apart.

1. The Perfect Texture Without Fuss

This bread delivers a soft, almost melt-in-your-mouth crumb thanks to a combination of milk, powdered sugar, and butter. The addition of milk powder deepens the dairy flavor, and the use of warm milk as the liquid base gives the dough a head start toward becoming beautifully elastic.

You don’t need to be an expert baker to make this dough work. It’s forgiving, easy to handle, and a joy to shape. Once baked, the loaf pulls apart like a dream—no crumbling, no dry center. Just softness in every bite.

2. Balanced Sweetness

The flavor of this bread is gently sweet—not overly sugary like a dessert bread, but enough to make it feel indulgent even when eaten plain. That makes it versatile. You can serve it with jam and butter for breakfast, alongside soup for dinner, or even turn it into a base for sweet buns or French toast.

3. That Golden, Shiny Top

Brushing the top with egg yolk before baking gives the loaf a beautiful, golden-brown finish that feels straight out of a bakery window. It’s one small step that transforms a homemade bread into something that looks and tastes professional.

Ingredients Table – For the Bread

IngredientQuantityNotes
Warm milk150 ml (⅔ cup)Around 38–40°C (100°F), not hot
Yeast6 g (2 teaspoons)Instant or active dry
Wheat flour250 g (2 cups)Use bread flour or all-purpose if needed
Powdered sugar50 g (¼ cup)Adds subtle sweetness
Salt¼ teaspoonEnhances flavor
Milk powder10 g (1 tablespoon)Optional, but adds richness
Unsalted butter15 g (1 tablespoon)Softened
Egg yolk1For brushing the top before baking

Directions

  1. Activate the Yeast
    Mix warm milk and yeast in a bowl. Let sit for 5–10 minutes until foamy (if using active dry yeast).
  2. Form the Dough
    In a large bowl, combine flour, powdered sugar, salt, and milk powder. Add the yeast mixture and mix until a soft dough forms. Knead until smooth and elastic (about 8–10 minutes by hand or 5 minutes with a stand mixer).
  3. Add the Butter
    Knead in the softened butter until fully absorbed and the dough is smooth and slightly tacky.
  4. First Rise
    Cover the dough and let it rise in a warm place for about 1 hour, or until doubled in size.
  5. Shape and Proof
    Punch down the dough, shape into a loaf or rolls, and place into a greased pan. Cover and let rise again for 30–45 minutes.
  6. Brush and Bake
    Preheat oven to 180°C (350°F). Brush the top with egg yolk. Bake for 20–25 minutes until golden brown and hollow-sounding when tapped.
  7. Cool and Serve
    Let cool on a wire rack before slicing. Best enjoyed warm or lightly toasted.

Nutritional Information (Per Slice – Approx. 1 of 10 slices)

NutrientAmount (Approx.)
Calories~160 kcal
Protein4 g
Carbohydrates26 g
Sugars5 g
Fat4 g
Fiber0.8 g
Sodium~90 mg

How to Use It: From Breakfast to Dessert

One of the best things about soft milk bread is how many ways you can use it. It’s neutral enough to go sweet or savory, but always feels special. Here are a few ideas to get the most from your loaf:

Breakfast

  • Toasted and slathered with butter and honey
  • Topped with avocado and a poached egg
  • As the base for a breakfast sandwich with scrambled eggs and cheese

Lunch

  • Sliced thick for grilled cheese
  • Served with tomato soup or chowder
  • Pressed into paninis with deli meats and veggies

Snack or Dinner

  • Used as dinner rolls or buns for sliders
  • Dipped into olive oil and herbs
  • Paired with a cheese board or soft dips

Dessert

  • Made into sweet milk bread pudding
  • Turned into French toast or stuffed French toast
  • Layered with whipped cream and fruit for a trifle base

The possibilities are endless. And because this bread stays soft for a couple of days, it’s perfect for making ahead or gifting.

Why It Belongs in Every Home Baker’s Recipe Box

If you’ve ever been intimidated by bread baking, this is the loaf to try. There’s no sourdough starter to feed, no hours-long fermentation to track, and no complicated shaping technique. It’s quick, reliable, and delightfully satisfying.

This is the kind of recipe you’ll reach for again and again—when you want to fill your home with the scent of fresh bread, when you need something soft and lovely for your kids’ lunches, or when you just want to slow down and make something warm with your hands.

It teaches the joy of baking without the stress. And that’s something every kitchen can use.

Frequently Asked Questions (FAQs)

Can I make this bread without milk powder?

Yes. Milk powder is optional, though it adds a rich, creamy note to the dough. If you don’t have it, simply leave it out—your bread will still be soft and flavorful.

Can I use all-purpose flour instead of wheat flour?

Yes, you can use all-purpose flour or bread flour. Whole wheat flour can also be used for a heartier version, but it will make the loaf slightly denser. For the softest crumb, stick with refined wheat or bread flour.

Do I have to use egg yolk on top?

Not necessarily. The egg yolk gives the bread its golden, glossy finish. If you’re avoiding eggs, you can brush the top with milk or a milk + oil mixture instead. It won’t be as glossy, but it will still brown nicely.

How do I know when the bread is done?

The loaf should be golden brown on top and sound hollow when tapped. If using a thermometer, the internal temperature should be about 190°F (88°C). Let it cool on a wire rack before slicing for the best texture.

How long does this bread stay fresh?

Soft milk bread stays fresh for 2–3 days at room temperature when stored in an airtight container or wrapped in a towel. For longer storage, slice and freeze the bread. Reheat in the toaster or oven as needed.

Can I add flavors or fillings?

Yes! This dough is very versatile. Here are a few ideas:

  • Sweet versions: Add cinnamon, raisins, chocolate chips, or swirl in jam before shaping.
  • Savory versions: Add shredded cheese, herbs, or chopped olives.
  • Filled rolls: Divide the dough into smaller pieces and fill with custard, red bean paste, Nutella, or cream cheese for stuffed buns.

Can I knead the dough by hand?

Definitely. It may take a bit more effort—about 8–10 minutes of hand kneading—but it’s a satisfying process and works beautifully. Just knead until the dough is smooth, elastic, and slightly tacky.

Tips for the Best Soft Milk Bread Every Time

  • Warm your milk, not hot. If it’s too hot, it can kill the yeast. Aim for lukewarm—just warm to the touch.
  • Let the dough rise fully. Don’t rush it. Wait until the dough has doubled in size during both rises. This is key to the bread’s soft texture.
  • Use fresh yeast. Expired yeast can prevent your dough from rising properly. Always test if unsure.
  • Brush just before baking. Applying the egg yolk right before placing the loaf in the oven ensures a rich, shiny finish.

Why I Keep Coming Back to This Recipe

There are days when we crave complexity—multi-step meals, layered flavors, culinary challenges. But there are also days when we just want something pure and comforting. Something that reminds us of warmth and care and home.

This bread is for those days.

It’s the recipe I make when I want my house to feel like a bakery. When I need something soft and grounding. When I want to slow down without stopping completely.

It’s my quiet rebellion against the rush of everyday life.

And it’s also really, really delicious.

Conclusion: Bread That Feeds More Than Hunger

Soft milk bread isn’t just about food—it’s about feeling. It’s about connection, memory, and nourishment in every sense of the word.

This recipe is simple enough for beginners, rewarding enough for seasoned bakers, and comforting enough to become a household staple. Whether you’re baking for your family, your friends, or just for yourself, this loaf brings a little joy with every slice.

So if you’ve ever thought, “I don’t have time to bake,” or “I’m not a bread person,” let this recipe change your mind.

Because once you taste what a handful of ingredients and a warm oven can create—you may never go back to store-bought bread again.

The Skillet Bread That Changed My Mornings: No Oven, No Fuss, Just Real Flavor

There’s something deeply satisfying about fresh bread—warm, soft, and slightly chewy. The kind that fills the kitchen with that unmistakable homemade aroma and turns an ordinary meal into something memorable.

But let’s be honest. Making bread from scratch often sounds like a project. Rising times, kneading, preheating the oven, hours of waiting—it can feel intimidating or impractical, especially on a busy day.

I used to feel the same. I thought homemade bread was reserved for special occasions, weekends, or people with sourdough starters and a lot of free time.

Then one afternoon, with barely anything in the pantry and no bread in the house, I stumbled upon something that changed the way I cook.

I had flour. I had yogurt. I had a skillet.

And 10 minutes later, I had bread.

The Discovery: Bread in a Skillet?

I didn’t believe it until I tasted it. A simple mix of ingredients—flour, yogurt, water, salt, baking powder—brought together in a bowl, rolled out, and cooked like pancakes. The dough puffed and browned in the pan, transforming into soft, golden rounds with the slightest crisp edge.

I tore off a piece, steam curling up from the middle, and took a bite.

It was soft, slightly tangy from the yogurt, with a warm chew and just the right saltiness. I dipped it in olive oil, then wiped the pan clean with the last piece. That was it. I was hooked.

From that day forward, this skillet bread became my go-to—on lazy mornings, with soups and salads, as a wrap, or just slathered with butter and herbs.

Ingredients Table – For the Bread

IngredientQuantityNotes
Flour4 cups (480 g)All-purpose works best
Yogurt1 cup (220 g)Plain, unsweetened
Water1 cup (200 ml)Room temperature
Baking powder1 packet (10 g)For lift and light texture
Salt1 teaspoon (8 g)Adjust to taste
Vegetable oil1 tablespoon (10 ml)For moisture and soft crumb

Directions

  1. Mix the Dough
    In a large mixing bowl, combine the flour, baking powder, and salt. Add yogurt, water, and vegetable oil. Stir until a soft dough forms.
  2. Divide and Shape
    Divide the dough into equal portions (about 6–8 balls). Roll each piece into a flat round, about 1/4-inch thick.
  3. Preheat Your Pan
    Heat a non-stick skillet or cast iron pan over medium heat. Lightly oil if needed.
  4. Cook the Bread
    Place one round of dough into the hot pan. Cook for 2–3 minutes on each side, or until golden spots appear and the bread puffs slightly. Repeat with the remaining dough.
  5. Serve Warm
    Enjoy immediately, or keep warm wrapped in a clean kitchen towel. Pairs beautifully with soups, stews, dips, or as a sandwich wrap.

Nutritional Information (Per Piece – Approx. 1 of 8)

NutrientAmount
Calories~180 kcal
Protein5 g
Fat3 g
Carbohydrates33 g
Fiber1.2 g
Sodium~220 mg

Why This Bread Works So Well

This recipe isn’t just a “quick fix.” It’s a genius shortcut that still delivers everything we love about fresh bread—without yeast, without rising time, and without the oven. Let’s break down why it works.

1. No Yeast, No Waiting

The baking powder replaces yeast as the leavening agent, providing just enough rise and airiness without any proofing. The result is a light, pillowy dough that cooks in minutes rather than hours.

2. Yogurt Adds Moisture and Flavor

Yogurt brings moisture, slight tang, and tenderness to the bread. It also helps activate the baking powder and contributes to a more elastic dough, making it easier to roll out and handle.

3. Water and Oil for Balance

Water helps form a soft, pliable dough, while just a touch of oil keeps it moist and enhances the texture. It also prevents the bread from drying out while cooking on the stovetop.

4. Versatile and Forgiving

The beauty of this recipe is its adaptability. You can swap the yogurt for sour cream or buttermilk. You can add garlic, herbs, cheese, or even cinnamon sugar. It’s the kind of recipe that makes you feel like a better cook just by how easily it comes together.

When to Make This Bread (Spoiler: Anytime)

One of the best things about this skillet bread is that it’s not tied to a single meal. It works across breakfast, lunch, dinner, and everything in between.

Breakfast

Serve warm with butter, jam, or honey. Add a side of eggs and fresh fruit for a complete plate.

Lunch

Use as a wrap or flatbread for sandwiches—filled with roasted vegetables, grilled chicken, or hummus.

Dinner

Perfect alongside stews, curries, soups, or grilled meats. It’s also excellent for mopping up sauces.

Snacks or Appetizers

Cut into wedges and serve with dips like tzatziki, baba ganoush, or guacamole. You can even brush with garlic butter or sprinkle with za’atar.

Why This Bread Belongs in Every Kitchen

It’s Foolproof

You don’t need baking skills. You don’t need special tools. You don’t even need an oven. If you can mix, roll, and flip—you can make this bread.

It’s Budget-Friendly

With ingredients you likely already have, this bread is one of the most affordable homemade items you can make. No fancy flour or specialty products required.

It’s Crowd-Pleasing

Everyone loves it. Kids, adults, picky eaters—it’s warm, chewy, and endlessly customizable.

It’s Fast

From start to finish in under 15 minutes. That’s faster than ordering takeout. And a lot more satisfying.

Frequently Asked Questions (FAQs)

Can I make this bread without yogurt?

Yes. You can substitute plain yogurt with an equal amount of sour cream or buttermilk. If you don’t have either, mix milk with a teaspoon of lemon juice or vinegar and let it sit for 5 minutes as a quick buttermilk alternative.

What kind of flour works best?

All-purpose flour is ideal, but you can substitute part of it with whole wheat flour for a nuttier flavor. Just be aware it may result in a slightly denser bread.

Can I make the dough ahead of time?

It’s best when fresh, but you can prepare the dough and store it in the refrigerator (wrapped) for up to 24 hours. Bring it back to room temperature before rolling and cooking.

How do I store leftovers?

Wrap cooled bread in a clean towel or place in an airtight container. It will stay soft for up to 2 days at room temperature. To reheat, place in a warm skillet or toaster oven.

Can I freeze the cooked bread?

Yes! Let the bread cool completely, then wrap and freeze. Reheat from frozen on a skillet or in the oven until warm.

Can I make it gluten-free?

Yes, use a 1:1 gluten-free flour blend. The texture may be slightly different, but it still works well. Add a touch more moisture if the dough feels dry.

What can I add for more flavor?

Try mixing in:

  • Minced garlic or garlic powder
  • Chopped fresh herbs like parsley, dill, or rosemary
  • Grated cheese
  • Spices like cumin, za’atar, or chili flakes
  • Sesame or nigella seeds for topping

Tips for Perfect Skillet Bread Every Time

  • Rest the dough for 5–10 minutes before rolling. This makes it easier to handle and gives the baking powder time to activate.
  • Don’t over-flour your surface. Too much flour can toughen the dough. Use just enough to keep it from sticking.
  • Use medium heat. Too hot and it burns before cooking through; too low and it won’t brown properly.
  • Keep them warm. Stack the cooked breads in a clean kitchen towel to keep them soft until ready to serve.

The Joy of Simple Bread, Made Fast

There’s something empowering about making your own bread. It feels like reclaiming a little piece of tradition—one that’s been passed down through generations, in kitchens with far less equipment than we have today.

This skillet bread takes that heritage and makes it accessible. It honors the act of making bread from scratch but removes the barriers. No yeast. No rising. No waiting. Just warmth, comfort, and something you made with your own hands.

It’s the kind of recipe that brings you back to the basics—in the best way.

Conclusion: No Oven, No Problem—Just Good Bread

In a world full of complicated recipes, fussy ingredients, and fancy techniques, this bread is a breath of fresh air. It reminds us that cooking doesn’t have to be perfect. It just has to be honest.

You don’t need to be a baker. You don’t need hours. You don’t even need an oven.

You just need a skillet, a few simple ingredients, and 10 minutes.

So the next time you find yourself craving bread—or just want to make something that feels warm, real, and surprisingly easy—remember this recipe.

It may just become the tastiest thing you’ve ever eaten.

I Have Never Eaten Such Delicious Apple Pie

There are recipes you try once, and there are recipes you carry with you forever. This apple pie—the one that stopped me in my tracks the first time I tasted it—firmly belongs in the second category.

I remember the exact moment it happened. A rainy autumn afternoon, the kind where everything outside is gray and damp, and the only thing that feels right is staying in the kitchen with something warm in the oven. I had just pulled the pie out—its golden meringue peaks glowing under the oven light, the scent of apples and honey curling through the air like a hug.

I wasn’t expecting magic. It was just another attempt to make something comforting. But when I sliced into that pie and took a bite—tender crust, juicy apple filling, the crunch of toasted walnuts, and that airy cloud of sweet meringue—I knew I had found something extraordinary. Something worth remembering, worth sharing.

This isn’t just a dessert. It’s a story. A feeling. A recipe that reminds us why we bake at all.

A Pie Like No Other

So, what makes this apple pie stand out from the hundreds of others?

It starts with the dough—a buttery, delicate base that’s part shortbread, part tart crust. It crumbles just enough to feel luxurious without overpowering the filling. It’s not overly sweet, making it the perfect companion for the richly flavored center.

Then comes the filling. Instead of the usual cinnamon-heavy mix, this version leans into natural apple flavor. Cubed apples are gently cooked down with sugar and honey, bringing out their juices and caramelized sweetness. And just when you think it couldn’t get better, in come the roasted walnuts—adding a nutty crunch that elevates every bite.

Finally, the star of the show: a soft, glossy meringue. Whipped to stiff peaks and baked until golden, it creates a marshmallow-like cloud atop the pie. The result is something between a rustic fruit tart and a patisserie-style showstopper.

It’s elegant. It’s comforting. It’s unforgettable.

Ingredients

For the Dough:

IngredientAmount
All-purpose flour300 g (2 cups)
Sugar30 g (2 tbsp)
Baking powder1 tsp
Vanilla sugar8 g (1 tsp)
Cold butter150 g (⅔ cup)
Egg1 large

For the Filling:

IngredientAmount
Apples5 medium (850–900 g), cubed
Sugar120 g (½ cup + 1 tbsp)
Honey2 tbsp
Butter35 g (1½ tbsp)
Roasted walnuts50 g, chopped

For the Meringue:

IngredientAmount
Egg whites4 large
SaltA pinch
Sugar170 g (¾ cup + 1 tbsp)

Method: How to Bake This Remarkable Apple Pie

1. Prepare the Dough

In a large bowl, whisk together flour, sugar, baking powder, and vanilla sugar. Add the cold butter in cubes and rub it into the flour with your fingertips until the mixture resembles breadcrumbs. Add the egg and knead just until the dough comes together. Wrap it in plastic wrap and refrigerate for 30 minutes.

2. Make the Apple Filling

While the dough is chilling, peel and core the apples, then cut them into small cubes. Melt butter in a skillet over medium heat, then add the apples, sugar, and honey. Cook for 10–12 minutes, stirring occasionally, until the apples soften slightly and release their juices. Remove from heat and stir in chopped walnuts. Let it cool.

3. Pre-Bake the Crust

Preheat your oven to 180°C (350°F). Roll out the dough on a floured surface and transfer it to a tart or springform pan (about 9 inches/23 cm). Press it evenly into the bottom and sides. Prick the base with a fork and bake for 12–15 minutes or until just golden. Remove and set aside.

4. Add the Filling

Spread the cooled apple mixture evenly over the baked crust. Return to the oven and bake for another 15 minutes to help the flavors meld.

5. Whip the Meringue

In a clean bowl, whisk the egg whites with a pinch of salt until soft peaks form. Gradually add sugar while continuing to beat until stiff, glossy peaks form.

6. Add the Meringue Topping

Spread or pipe the meringue over the hot apple layer, creating peaks or swirls on top. Bake for another 10–12 minutes, or until the meringue is golden brown on the tips.

7. Cool and Serve

Allow the pie to cool completely before slicing. This helps the layers set properly and enhances the overall texture.

Baking Details

CategoryDetails
Prep Time45 minutes
Cook Time35–40 minutes
Total Time1 hour 20 minutes
Yield10–12 slices
MethodBaking
CuisineEuropean-Inspired
DifficultyIntermediate

Nutritional Information (Per Slice, Approximate – Based on 12 Servings)

NutrientAmount
Calories290 kcal
Carbohydrates38 g
Protein4 g
Fat14 g
Saturated Fat7 g
Sugar24 g
Fiber2 g
Sodium60 mg

Why This Pie Works

This recipe isn’t just about flavor—it’s about balance, technique, and a touch of artistry. Each layer serves a purpose:

  • The crust is chilled before baking to keep it tender and crumbly.
  • The apples are lightly cooked with honey for a golden, syrupy bite that still retains their shape.
  • The meringue is added at the end and baked until beautifully golden, giving the dessert a final, luxurious flourish.

It’s a dessert that hits every note: sweet, tart, soft, crisp, light, rich. No one flavor or texture overwhelms the others. Instead, they come together like a symphony.

Frequently Asked Questions

Can I make this pie ahead of time?

Yes—and it’s actually better that way. The pie can be baked the day before and kept at room temperature for several hours (if your kitchen is cool) or stored in the fridge. Let it come to room temperature before serving. The meringue may lose a bit of its texture after refrigeration, but the flavor remains divine.

What apples work best for this recipe?

Use firm, slightly tart apples that hold their shape during cooking. Granny Smith, Honeycrisp, or a mix of Jonagold and Golden Delicious work beautifully. Avoid soft apples like Red Delicious—they’ll turn to mush.

Can I skip the meringue?

While the meringue is a showstopper, you can absolutely skip it for a more rustic take. Simply bake the crust with the apple-walnut filling and dust the cooled pie with powdered sugar before serving. Still delicious—just less dramatic.

Is the pie overly sweet?

Surprisingly, no. The sugar is balanced out by the tartness of the apples and the lightness of the meringue. If your apples are particularly sweet, you can reduce the sugar in the filling slightly to suit your taste.

Can I add spices like cinnamon or nutmeg?

Absolutely. While this version focuses on the natural flavors of apple and honey, a hint of cinnamon or cardamom would work beautifully—especially if you want a more autumnal feel.

Tips for Success

Here are a few secrets I’ve learned after making this pie more times than I can count:

  • Toast the walnuts. A few minutes in a dry skillet transforms their flavor and adds richness to the filling.
  • Cool the filling before adding it to the crust. This prevents the crust from getting soggy and helps the layers bake evenly.
  • Use a glass or ceramic tart pan. It helps ensure even baking and makes for a beautiful presentation.
  • Watch the meringue. Once it goes into the oven, don’t walk away. A few minutes too long can take it from golden to burned.

Variations to Try

This pie is stunning as-is, but here are a few ideas to adapt it for other seasons and occasions:

  • Pear and Walnut: Substitute apples with ripe pears for a softer, more floral variation.
  • Apple-Cranberry: Add a handful of cranberries to the filling for a tart burst of color and flavor.
  • Apple-Almond: Swap walnuts for slivered almonds and add a dash of almond extract to the crust.
  • Rustic Version: Instead of a pie pan, press the dough into a sheet pan and build the pie as a slab. It’s perfect for serving a crowd.

Storage and Serving Suggestions

  • Room Temperature: If you plan to eat the pie the same day, let it sit at room temperature, lightly covered.
  • Refrigerator: For longer storage, keep it covered in the fridge for up to 3 days. The meringue will soften, but the flavor holds beautifully.
  • Freezing: This pie isn’t ideal for freezing due to the delicate meringue. However, you can freeze the crust and filling separately, then assemble fresh when needed.

Serve slices plain, or with a dollop of whipped cream or vanilla ice cream if you’re feeling indulgent.

When to Serve This Apple Pie

This pie is wonderfully versatile and fits a range of occasions:

  • Holiday gatherings: It brings elegance to the dessert table without the need for complex decoration.
  • Tea-time treat: A thin slice with a hot cup of tea is a match made in heaven.
  • Birthday alternative: For those who don’t love cake, this pie is a welcome and memorable surprise.
  • Sunday baking projects: It’s a bit more involved than a basic pie, but absolutely worth the effort.

A Sweet Conclusion

There are few things more comforting than the scent of baked apples in the kitchen. But this pie goes beyond comfort—it’s a celebration of texture, a layering of flavors, a tribute to simplicity done exceptionally well.

If you’ve made plenty of apple pies in your life, this one will still surprise you. And if you’ve never made one before, what a place to start. It’s impressive but approachable, elegant but homey.

The best part? It’s more than just delicious—it creates moments. The kind where someone takes a bite, pauses, and looks at you with wide eyes, asking, “What is this?” That’s the power of a pie like this.

Bake it for someone you love—or for yourself. Either way, don’t be surprised if this becomes the apple pie your family talks about for years to come.

Amal

I Have Never Eaten Such Delicious Apple Pie

This is not your average apple pie. With a tender, buttery crust, a luscious filling of honey-glazed apples and roasted walnuts, and a crown of golden meringue, this dessert is a true showstopper. Light, elegant, and bursting with real fruit flavor, it’s the kind of pie that turns an ordinary afternoon into a warm memory.
Prep Time 45 minutes
Cook Time 35 minutes
Total Time 1 hour 20 minutes
Servings: 10 –12 servings
Course: Dessert
Cuisine: European-inspired

Ingredients
  

For the Dough:
  • 2 cups all-purpose flour 300g
  • 2 tablespoons sugar 30g
  • 1 teaspoon baking powder
  • 1 teaspoon vanilla sugar or ½ tsp vanilla extract
  • 2/3 cup cold butter cubed (150g)
  • 1 large egg
For the Filling:
  • 5 medium apples 850–900g, peeled, cored, and cubed
  • 1/2 cup + 1 tablespoon sugar 120g
  • 2 tablespoons honey
  • 1.5 tablespoons butter 35g
  • 50 g roasted walnuts chopped
For the Meringue:
  • 4 large egg whites
  • A pinch of salt
  • 3/4 cup + 1 tablespoon sugar 170g

Method
 

  1. Make the Dough: In a large mixing bowl, combine flour, sugar, baking powder, and vanilla sugar. Add cold cubed butter and work it into the flour mixture using your fingertips until it resembles coarse crumbs. Add the egg and mix until a soft dough forms. Wrap the dough in plastic and refrigerate for 30 minutes.
  2. Prepare the Filling: In a large pan, melt the butter. Add the chopped apples, sugar, and honey. Cook over medium heat for 10–12 minutes until the apples are soft but still hold their shape. Stir in the chopped roasted walnuts and set aside to cool.
  3. Blind Bake the Crust: Preheat your oven to 350°F (180°C). Roll out the chilled dough on a floured surface and press it into a tart or pie pan (about 9 inches). Prick the base with a fork and bake for 12–15 minutes or until lightly golden.
  4. Add the Filling: Evenly spread the cooled apple and walnut mixture over the pre-baked crust. Return the pie to the oven and bake for another 15 minutes.
  5. Make the Meringue: In a clean mixing bowl, beat the egg whites with a pinch of salt until soft peaks form. Gradually add sugar and continue beating until stiff, glossy peaks are achieved.
  6. Top and Finish Baking: Spread or pipe the meringue over the apple filling. Bake for an additional 10–12 minutes until the meringue is golden brown on top. Let the pie cool completely before slicing.

Notes

  • You can toast the walnuts in a dry skillet for 5 minutes to deepen their flavor.
  • For a more traditional taste, feel free to add 1/2 teaspoon of cinnamon or cardamom to the filling.
  • The pie is best served the day it’s made, but leftovers can be refrigerated for up to 3 days.
  • Let the pie cool fully before slicing to help the filling set.
  • A springform pan also works well for clean edges and easy removal.