When Simplicity Wins: A Humble Potato Bake That Steals the Show

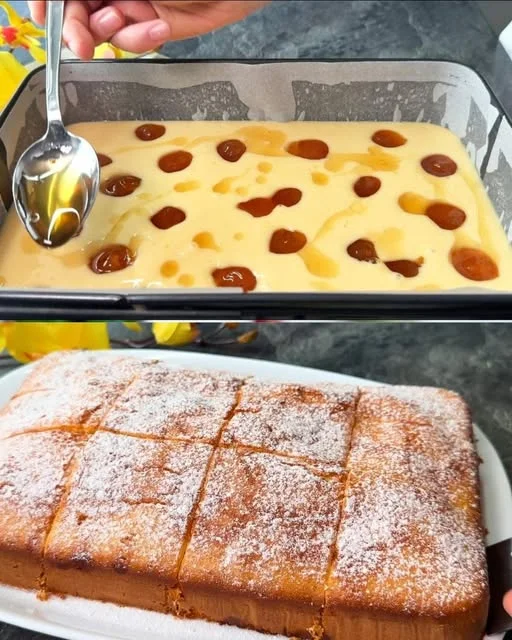
My love for this recipe didn’t start in a professional kitchen, or in the glossy pages of a cookbook. It began on a gray afternoon, in a small tiled kitchen with steamed windows and music humming softly from the radio. My grandmother, who never measured a single thing in her life, grated potatoes with a rhythm only she understood — her hands steady, her smile quiet.

She would nod toward me to crack the eggs. She always said that a dish tasted better when two people made it together. There wasn’t much to the recipe — potatoes, eggs, something smoky from the fridge, and always a handful of cheese. But when it came out of the oven, golden and bubbling, it felt like something more than food. It was comfort. It was nourishment. It was, in its purest form, home.

This recipe is my interpretation of that memory — a simple and brilliant dish that anyone can make, from any kitchen, no matter how small or quiet. And best of all, it still tastes like home.

Why This Recipe Works So Well

We’ve seen endless potato casseroles, but there’s something timeless about the combination of golden potatoes, fluffy eggs, melted cheese, and savory sausage. Here’s why this one stands out:

1. It’s Incredibly Versatile

This is one of those recipes that works for breakfast, brunch, lunch, or even dinner. Serve it alongside a fresh salad for a light lunch or with a warm bowl of soup for something heartier. It’s flexible, adaptable, and never fussy.

2. Minimal Ingredients, Maximum Flavor

With just six core ingredients, this dish proves you don’t need a long shopping list to make something special. The key lies in balance — the earthy richness of the potatoes, the umami from smoked sausage, the silkiness of baked eggs, and the boldness of melted cheese.

3. Crowd-Pleaser Appeal

Whether you’re feeding a family, hosting brunch, or preparing weekday meal prep, this dish delivers. It’s naturally gluten-free (when using gluten-free sausage), easy to portion, and satisfying enough to keep everyone happy — from picky kids to flavor-seeking adults.

Ingredients

IngredientAmount
Potatoes6 large, peeled and grated
Eggs4
SaltTo taste
Black PepperTo taste
Smoked Sausage100 grams, diced
Green OnionsChopped, to taste
Cheese100 grams, grated (any type)

Directions

  1. Preheat your oven to 180°C (350°F) and lightly grease a baking dish.
  2. Grate the potatoes and squeeze out any excess moisture using a clean towel or cheesecloth.
  3. In a large bowl, whisk the eggs and season with salt and black pepper.
  4. Add the grated potatoes, diced smoked sausage, chopped green onions, and grated cheese to the bowl. Mix everything until well combined.
  5. Pour the mixture into the prepared baking dish and spread it evenly.
  6. Bake for 35–40 minutes or until golden brown and the top is crispy.
  7. Let it cool slightly before slicing and serving warm.

Nutritional Information (Per Serving – Approx. 6 servings)

NutrientAmount
Calories~290 kcal
Protein~13 g
Carbohydrates~22 g
Fats~16 g
Fiber~2.5 g
Sodium~500 mg

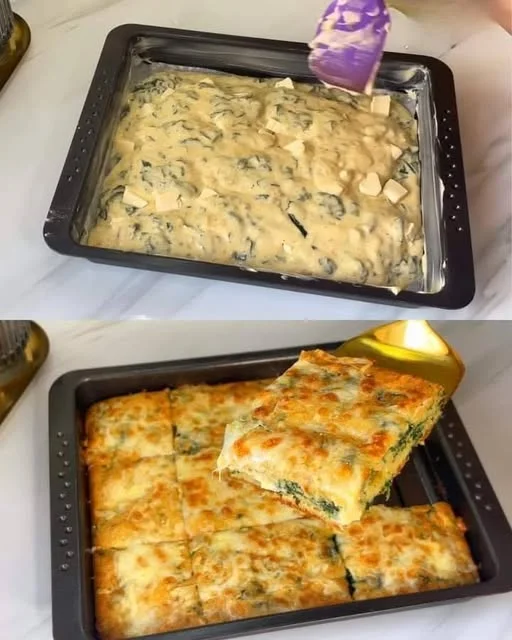
The Genius is in the Texture

A great bake like this one should hit every note. You want the edges slightly crisp, the center custardy but firm, the cheese melty and bubbling, and the sausage providing little bursts of smoky flavor. That’s why the method — especially removing moisture from the potatoes before baking — is so important. It allows the eggs to bind everything together without becoming soggy.

The result? A beautifully unified dish that slices cleanly but still melts in your mouth.

Toppings, Mix-ins, and Variations

Once you’ve mastered the base version, you can start riffing on it depending on what you have in your kitchen. Here are a few fun twists:

– Herbs for Freshness

Add chopped parsley, chives, or dill for a fresh lift. These herbs don’t overpower the core flavors but do brighten them.

– Spice it Up

If you like heat, a pinch of paprika, chili flakes, or diced jalapeños goes a long way. The spice contrasts beautifully with the richness of the cheese and eggs.

– Cheese Options

Mozzarella makes for a subtle melt, but don’t hesitate to swap it out for sharper cheeses like cheddar, gouda, or a smoked provolone. Each brings a new dimension to the dish.

– Vegetarian-Friendly

Leave out the sausage entirely and bulk up the dish with sautéed mushrooms, bell peppers, or even a handful of spinach.

– Mini Muffin Version

Portion the mixture into muffin tins instead of a casserole dish. You’ll end up with individual egg-potato bites that are great for breakfast on the go.

Storage, Reheating, and Meal Prep Tips

This bake is not just delicious — it’s practical. That makes it ideal for meal planning or making ahead.

  • To Store: Keep leftovers in an airtight container in the fridge for up to 4 days.
  • To Freeze: Wrap slices tightly and freeze for up to 2 months. Thaw overnight in the fridge.
  • To Reheat: Use an oven or toaster oven to reheat, which will preserve the crispy edges. Microwave works too but may soften the texture slightly.

Frequently Asked Questions (FAQs)

Can I prepare it the night before and bake in the morning?

Absolutely. Prepare the full mixture, pour it into your baking dish, cover, and refrigerate overnight. Let it sit at room temperature for 15–20 minutes before baking.

What kind of potatoes work best?

Starchy potatoes like Russets or Yukon Golds are ideal. They shred easily and bake up soft with crispy edges.

Can I make this dairy-free?

Yes, you can omit the cheese or use a dairy-free cheese alternative. The eggs still provide plenty of structure and richness.

Do I have to peel the potatoes?

Not at all. If you’re using thin-skinned potatoes and enjoy the rustic texture, feel free to leave them unpeeled. Just be sure to wash them thoroughly.

How can I make it more protein-packed?

Add extra eggs, diced chicken breast, or even lentils for a meat-free protein source. This dish adapts easily.

Is this recipe kid-friendly?

Very much so. The flavors are mild, the texture is soft, and the cheesy goodness is always a win with little ones.

A Dish That Belongs at Every Table

There’s something deeply satisfying about a recipe that delivers warmth, nourishment, and familiarity without stress or complication. This cheesy potato bake does all of that — and more. It’s the kind of dish that lives in rotation, one that never feels tired even after the fifth or sixth time you’ve made it.

Maybe it’s the simplicity. Maybe it’s the memory of it baking in the oven while the house slowly fills with scent and anticipation. Or maybe it’s the joy of sharing something made with so little — yet giving so much.

Conclusion: The Beauty of Everyday Ingredients

This “Simple and Brilliant” bake is more than just another casserole — it’s a love letter to home cooking. It reminds us that the best meals don’t always require fancy tools, hard-to-pronounce ingredients, or hours of preparation. Sometimes all you need is a handful of honest ingredients, a warm oven, and a little bit of care.

Serve it to loved ones, freeze it for busy days, or enjoy it straight from the baking dish at midnight — this is the kind of recipe that becomes a regular in your kitchen and a quiet favorite at your table.

Amal

When Simplicity Wins: A Humble Potato Bake That Steals the Show

This comforting potato bake is pure genius in its simplicity — a golden, cheesy, and savory delight made with just a handful of everyday ingredients. Packed with smoky sausage, fluffy eggs, and melted cheese, it’s the perfect crowd-pleaser for any time of day. No fuss, no fancy tools — just honest, delicious flavor.
Prep Time 15 minutes
Cook Time 40 minutes
Total Time 55 minutes
Servings: 4 –6 servings
Course: Main Dish
Cuisine: Comfort Food

Ingredients
  

  • 6 large potatoes
  • 4 eggs
  • Salt to taste
  • Black pepper to taste
  • 100 grams smoked sausage diced
  • Green onions chopped (to taste)
  • 100 grams cheese grated (cheddar, mozzarella, or your favorite)

Method
 

  1. Preheat your oven to 180°C (350°F) and grease a baking dish.
  2. Peel and grate the potatoes, then squeeze out excess moisture using a clean towel or cheesecloth.
  3. In a large bowl, beat the eggs and season with salt and black pepper.
  4. Add grated potatoes, smoked sausage, green onions, and cheese to the eggs. Mix well to combine.
  5. Pour the mixture into the prepared baking dish and spread evenly.
  6. Bake for 35–40 minutes, or until the top is golden brown and set.
  7. Let cool slightly before slicing and serving.

Notes

  • Feel free to substitute the smoked sausage with cooked bacon, turkey sausage, or a vegetarian option.
  • For a spicier twist, add chopped jalapeños or a pinch of chili flakes.
  • This dish reheats beautifully and can be made ahead for busy mornings or easy meal prep.
  • Use starchy potatoes like Russets for the best texture and binding.

From Dough to Delight: The Magic of Simple Cheese-Stuffed Bread

There’s a kind of quiet magic in baking bread at home. The soft hum of warm water meeting flour, the satisfying feel of dough under your palms, the comfort of rising yeast — it’s an experience that awakens something ancient and nurturing in us. For me, this bread in particular is tied to one of my earliest food memories: my grandmother, flour-dusted from head to toe, shaping small balls of dough and tucking tiny cubes of cheese into the center like precious gifts.

Back then, I didn’t know anything about gluten development or fermentation. I only knew that a golden crust meant we were close to pulling something wonderful out of the oven. And when that something was cheese-stuffed, my joy was doubled. It was warm, stretchy, buttery — and perfectly simple.

This recipe is a homage to that memory. With just a few pantry staples, no special equipment, and mozzarella cheese tucked inside each roll, it’s a go-to comfort recipe that invites hands-on moments, shared meals, and the unbeatable scent of fresh bread wafting through your kitchen.

Why This Bread Is Loved by Everyone Who Tries It

In the world of elaborate loaves and artisan fermentation, it’s easy to forget how satisfying simple bread can be. This recipe brings us back to basics — in the best way.

1. Foolproof and Beginner-Friendly

Even if you’ve never baked a loaf in your life, this recipe welcomes you. It doesn’t rely on advanced techniques or long rises. Everything is straightforward, from kneading to shaping.

2. Melty Cheese Surprise

Each bite offers a gentle pull of mozzarella hidden in the soft center — satisfying and comforting. It transforms a plain roll into something magical, without much effort at all.

3. Flexible and Adaptable

You can shape it into rounds, braid it, make a pull-apart ring, or even turn it into filled breadsticks. The dough is versatile and forgiving, and it works beautifully with different cheeses, too.

4. Pantry Staples, No Fuss

This recipe uses ingredients you probably already have: flour, yeast, sugar, milk, oil. No eggs needed, and you can use any milk you have on hand — even plant-based in a pinch.

Ingredients

IngredientAmount
Warm Water½ cup (120 ml)
Warm Milk½ cup (120 ml)
Dry Yeast1 teaspoon
Sugar1 tablespoon
Salt½ teaspoon
Vegetable Oil1 tablespoon
All-Purpose Flour3 cups (approx. 360 g)
Mozzarella Cheese100 g, shredded or cubed
Sesame SeedsAs desired, for topping

Directions

  1. Activate the Yeast
    In a mixing bowl, combine the warm water, warm milk, dry yeast, and sugar. Let it rest for about 5–10 minutes, until foamy.
  2. Make the Dough
    Add salt, oil, and flour gradually into the yeast mixture. Mix until a soft dough forms. Knead for 8–10 minutes until smooth and elastic.
  3. First Rise
    Cover the dough and let it rise in a warm spot for 1 hour, or until doubled in size.
  4. Shape and Fill
    Divide the dough into portions. Flatten each piece slightly and place a bit of mozzarella cheese in the center. Fold the dough over the cheese and seal tightly to form balls or desired shapes.
  5. Second Rise
    Place the shaped dough on a baking tray lined with parchment paper. Cover and let rise again for 15–20 minutes.
  6. Top and Bake
    Brush the tops with milk or egg wash (optional) and sprinkle with sesame seeds. Bake in a preheated oven at 180°C (350°F) for 20–25 minutes, or until golden brown.
  7. Cool and Serve
    Let the bread cool slightly before serving. Enjoy warm while the cheese is still melty.

Nutritional Information (Per Piece, Approx. 10 Servings)

NutrientAmount
Calories~210 kcal
Carbohydrates~30 g
Protein~7 g
Fat~7 g
Saturated Fat~2.5 g
Fiber~1 g
Sugar~2 g
Sodium~200 mg

Cultural Connections: Bread as a Universal Language

Bread has long been a staple across cultures — from French baguettes to Turkish pide, from Middle Eastern manakish to Indian naan. What unites all these varieties is their role in daily life. Bread feeds families, brings people to the table, and accompanies everything from soups to stews.

Stuffed breads are particularly beloved in many cuisines. Think Georgian khachapuri, Italian panzerotti, or Middle Eastern cheese-filled fatayer. This simple cheese-stuffed bread draws from those inspirations but adapts them into a weeknight-friendly form. It’s a hybrid between the softness of dinner rolls and the indulgence of cheese pastries — and it’s universally satisfying.

Ways to Make It Your Own

One of the beauties of this bread is how open it is to customization. Here are some ideas to tailor it to your taste or occasion:

Switch Up the Cheese

  • Mozzarella melts beautifully, but you can also try cheddar for a sharper flavor, feta for a salty bite, or even a cube of cream cheese with herbs.
  • Mixing cheeses adds depth — mozzarella and parmesan together work wonderfully.

Add Herbs or Spices to the Dough

  • Try adding dried oregano, basil, or garlic powder directly into the dough for an aromatic twist.
  • A sprinkle of paprika on top before baking gives a warm, golden hue and a touch of smokiness.

Make It a Full Meal

  • Add cooked and crumbled sausage or sautéed mushrooms with the cheese for a heartier filling.
  • Serve it with a warm bowl of tomato soup, lentil stew, or even alongside a fresh salad.

Shape Variations

  • Roll it flat, spread the cheese, and roll it up like a log before baking.
  • Shape into a ring for a pull-apart party bread.
  • Cut into sticks and bake as cheesy bread fingers for dipping.

FAQs About This Simple Cheese-Stuffed Bread

Q: Can I make the dough in advance?
Yes. You can prepare the dough and let it rise in the refrigerator overnight. Just bring it to room temperature before shaping and baking the next day.

Q: What type of yeast should I use?
Instant or active dry yeast both work well. If using active dry yeast, activate it in warm water and milk with sugar and wait for it to foam before proceeding.

Q: My dough isn’t rising — what went wrong?
Double-check the water temperature (it should be warm, not hot), and make sure your yeast isn’t expired. A draft-free, slightly warm space helps the dough rise faster.

Q: Can I freeze the bread?
Absolutely. Once baked and cooled, you can freeze the bread for up to 2 months. Reheat it in a warm oven to bring back the soft texture and melted cheese.

Q: Can I make it dairy-free?
Yes. Use plant-based milk and swap the cheese for a dairy-free alternative. The texture will be slightly different, but still tasty.

Q: Is this bread sweet or savory?
It’s lightly savory — the sugar helps activate the yeast but doesn’t make it sweet. The sesame seeds and cheese give it a subtle, salty character.

Why You’ll Make This Again and Again

Sometimes, it’s the simple things that linger in memory the longest. This bread doesn’t shout for attention. It doesn’t need glossy icing or dramatic layers. It rises slowly, bakes to a soft golden brown, and quietly wins you over with its warm heart of cheese.

You’ll find yourself turning to this recipe on rainy days, when guests are coming unexpectedly, or when your soul just needs something homemade and honest. It’s a reminder that not everything delicious has to be difficult.

Conclusion: A Recipe That Feels Like Home

There are recipes you try once and move on from, and then there are those that become part of your kitchen’s rhythm. This simple cheese-stuffed bread is the latter. It’s unfussy, welcoming, and comforting — the kind of food that belongs on any table, in any season, with anyone you love.

More than just a recipe, it’s a ritual. It’s warm dough under your palms, the smell of baking bread curling through the air, and the quiet joy of watching something rise into golden perfection. It’s the invitation to slow down, to savor, and to find happiness in a handful of humble ingredients.

So go ahead. Make the dough. Tuck in the cheese. Let the oven do the rest. You’re not just baking bread — you’re making something meaningful, one swirl at a time.

Amal

From Dough to Delight: The Magic of Simple Cheese-Stuffed Bread

Soft, golden, and gently crisped on the outside, this cheese-stuffed bread is a simple yet irresistible treat. With a melty mozzarella center and a sprinkle of sesame on top, it’s the kind of recipe that turns pantry staples into something warm, comforting, and deeply satisfying. Perfect for beginners and seasoned bakers alike.
Prep Time 15 minutes
Cook Time 25 minutes
Total Time 1 hour 55 minutes
Servings: 8 rolls
Course: Bread
Cuisine: International

Ingredients
  

  • ½ cup warm water
  • ½ cup warm milk
  • 1 teaspoon dry yeast
  • 1 tablespoon sugar
  • ½ teaspoon salt
  • 1 tablespoon vegetable oil
  • 3 cups all-purpose flour
  • 100 g mozzarella cheese shredded or cubed
  • Sesame seeds as needed for topping

Method
 

  1. In a mixing bowl, combine warm water, warm milk, yeast, and sugar. Let sit for 5–10 minutes until foamy.
  2. Add salt, oil, and flour gradually. Mix until a soft dough forms. Knead for 8–10 minutes until smooth.
  3. Cover and let the dough rise in a warm place for 1 hour or until doubled in size.
  4. Divide dough into equal portions. Flatten each piece, place some mozzarella cheese in the center, and seal to form a ball.
  5. Place the filled dough pieces on a parchment-lined baking tray. Let rise again for 15–20 minutes.
  6. Preheat oven to 180°C (350°F). Brush the tops with milk or egg wash (optional) and sprinkle with sesame seeds.
  7. Bake for 20–25 minutes or until golden brown. Let cool slightly before serving.

Notes

  • Best served warm when the cheese is melty and gooey.
  • You can add herbs like oregano or thyme into the dough for added flavor.
  • Swap mozzarella for feta, cheddar, or even cream cheese for a variation.
  • These rolls freeze well — reheat in the oven for a fresh-baked feel.

A Slice of Sweet Simplicity: The Magic of a 5-Minute Jam Cake

There’s something irresistibly nostalgic about a jam cake. For me, it traces back to late afternoons in my grandmother’s cozy kitchen. I’d come home from school, the scent of something sweet already wafting through the hallway. It wasn’t elaborate or adorned with frosting — just a humble golden cake with ruby streaks of raspberry or cherry running through it like soft ribbons. It was never about impressing anyone. It was about care, comfort, and love poured into a mixing bowl.

That simplicity is what inspired this 5-minute jam-swirled cake. No fancy tools. No complicated steps. Just pantry staples, a swirl of your favorite jam, and a bit of quiet joy. It’s the kind of recipe that holds a memory in every bite — one that reminds you how beautiful the ordinary can be.

Why This Cake is a Keeper

In a world filled with layered desserts and gourmet techniques, there’s something deeply refreshing about a cake that takes five minutes to prepare and still tastes like a hug. The beauty of this jam cake lies in its balance — between sweetness and ease, between soft texture and sticky jam pockets. You’re never too far away from creating something delightful.

Here are just a few reasons why this cake earns a permanent spot in your baking rotation:

1. It’s Perfectly Uncomplicated

No electric mixer, no separate bowls, no creaming butter and sugar. You simply whisk, swirl, and bake.

2. Versatile and Seasonal

This cake shines with any jam — cherry, strawberry, apricot, fig, or even a medley. You can also use homemade preserves or marmalade for a personalized touch.

3. Pantry-Friendly

All ingredients are likely already in your kitchen. It’s the ideal last-minute dessert when guests pop over or when your sweet tooth refuses to wait.

4. Kid-Friendly

Both in taste and in process. Little hands can help swirl the jam or whisk the batter, making it a family activity as much as a treat.

Ingredients

(Measurements using a 200 ml glass)

IngredientAmount
Eggs3
SaltA pinch
Sugar150 g (approx. 4/5 cup)
Milk120 ml (½ cup + 2 tablespoons)
Vegetable Oil120 ml (½ cup + 1 tablespoon)
Vanilla Extract2 teaspoons
All-Purpose Flour250 g (1 cup + 2/3 cup)
Baking Powder15 g (3 teaspoons)
Jam (your choice)150 g (e.g., cherry, strawberry)

Directions

  1. Preheat Oven: Preheat your oven to 180°C (350°F). Grease or line a loaf or square baking pan with parchment paper.
  2. Whisk Wet Ingredients: In a large bowl, whisk the eggs with a pinch of salt. Add the sugar and continue whisking until lightly frothy. Stir in the milk, vegetable oil, and vanilla extract.
  3. Incorporate Dry Ingredients: Sift in the flour and baking powder. Stir with a spatula or whisk until the batter is smooth and lump-free.
  4. Add the Jam Swirl: Pour the batter into the prepared baking pan. Spoon the jam over the top in small dollops. Use a knife or skewer to gently swirl the jam through the batter — don’t overmix.
  5. Bake: Bake in the preheated oven for 30–35 minutes, or until a toothpick inserted into the center comes out clean.
  6. Cool and Serve: Allow the cake to cool slightly in the pan before slicing. Serve warm or at room temperature with tea, coffee, or a dusting of powdered sugar if desired.

Nutritional Information (Per Serving – approx. 10 slices)

NutrientAmount
Calories~210 kcal
Carbohydrates~29 g
Sugars~14 g
Protein~3.5 g
Fat~9 g
Fiber~0.7 g
Saturated Fat~1.2 g
Sodium~75 mg

The Visual and Textural Charm

When baked, the cake puffs up lightly, becoming golden on top with slightly crisp edges. The jam bubbles gently, creating glistening streaks and small caramelized pockets that burst with flavor. Cut into slices, you’ll see the swirls — uneven, organic, and utterly beautiful.

The crumb is soft but sturdy. It doesn’t crumble too easily, making it great for lunchboxes, picnics, or teatime spreads. It tastes rich without being heavy, thanks to the balance of eggs, milk, and oil.

How to Make It Your Own

This cake is a blank canvas for creativity. Whether you want to elevate it with flavor variations or simplify it even further, here are some ideas:

Flavor Variations:

  • Citrus Zest: Add grated lemon or orange zest to the batter for a bright, fragrant twist.
  • Spiced Up: Mix in a pinch of cinnamon or cardamom to complement darker jams like plum or blackberry.
  • Nutty Finish: Sprinkle chopped walnuts, almonds, or pistachios on top before baking for added texture.
  • Creamy Touch: Dollop spoonfuls of cream cheese alongside the jam before swirling for a cheesecake-like effect.

Jam Choices:

  • Apricot: Subtle and not too sweet.
  • Blackberry or Blueberry: Slightly tart with a deep purple swirl.
  • Fig or Date Jam: Earthy, rich, and extra comforting in colder months.
  • Strawberry & Rhubarb: Tangy-sweet and vibrant.

Presentation Tips:

  • Dust with powdered sugar for a charming finish.
  • Serve with whipped cream or ice cream for a more indulgent dessert.
  • Use mini loaf tins for personal-sized cakes or gifting.

Baking Tips from Experience

  • Don’t overmix the jam: Swirl it gently. Over-stirring will mix it into the batter completely, losing the visual and flavor contrast.
  • Let it rest: Though it’s tempting to slice right in, letting the cake cool slightly helps it set and slice more cleanly.
  • Storage: Wrap tightly and store at room temperature for 2–3 days, or refrigerate for up to a week. It also freezes well — just thaw and reheat slightly before serving.

Frequently Asked Questions

Can I use any type of jam or preserve?

Yes! Any thick fruit jam or preserve will work beautifully. Just make sure it’s not too runny, as overly watery jam can sink or cause uneven baking.

What if I don’t have vanilla extract?

You can skip it, but a pinch of cinnamon or citrus zest will add a lovely flavor boost in its place.

Can I make this cake dairy-free?

Absolutely. Use any plant-based milk (like almond, oat, or soy), and replace the milk with the same amount. Make sure your jam doesn’t contain dairy additives.

Can I reduce the sugar?

Yes, especially if your jam is on the sweeter side. You can reduce the sugar by 20–30g without affecting the texture too much. Just note it may slightly impact the rise.

Does it work as muffins or cupcakes?

Definitely. Pour the batter into lined muffin tins (fill ¾ of the way), add a swirl of jam to each, and bake for 18–20 minutes or until a toothpick comes out clean.

Can I double the recipe?

Yes — simply double all the ingredients and bake in a larger pan. Add 5–10 extra minutes to the baking time, keeping an eye on doneness.

From Ordinary to Extraordinary

This jam-swirled cake may be simple, but it delivers something that goes beyond flavor — a quiet kind of joy. It’s the cake you make when the day feels long. It’s what you bake with your kids on a rainy afternoon, what you gift to a neighbor just because. It reminds us that comfort doesn’t have to be complicated, and that a good dessert doesn’t need to be fancy to feel special.

And in a world that often asks us to rush or impress, this cake invites you to slow down — if only for the time it takes to swirl jam into batter, and to watch it rise in the oven.

Conclusion: A Recipe You’ll Come Back To

Whether you’re a seasoned baker or just starting out, this 5-minute jam cake will quickly find a home in your kitchen. It’s unfussy, endlessly flexible, and filled with that familiar, warm-from-the-oven magic. Keep a jar of jam in the pantry and this recipe in your heart — you’ll be surprised how often it saves the day, sweetens a moment, or brings people together.

After all, the best recipes aren’t the ones that just impress — they’re the ones you turn to, time and time again.

Amal

A Slice of Sweet Simplicity: The Magic of a 5-Minute Jam Cake

A soft, fluffy, golden cake swirled with sweet jam — ready in minutes and made with simple pantry staples. This jam-swirled cake is the perfect last-minute dessert or cozy treat with coffee or tea. No fancy equipment, no hassle — just sweet satisfaction in every bite.
Prep Time 5 minutes
Cook Time 35 minutes
Total Time 40 minutes
Servings: 8 -10 servings
Course: Dessert
Cuisine: International

Ingredients
  

  • 3 eggs
  • A pinch of salt
  • 150 g sugar about 4/5 cup
  • 120 ml milk ½ cup + 2 tablespoons
  • 120 ml vegetable oil ½ cup + 1 tablespoon
  • 2 teaspoons vanilla extract
  • 250 g all-purpose flour 1 cup + 2/3 cup
  • 15 g baking powder 3 teaspoons
  • 150 g jam of your choice e.g., cherry, strawberry, apricot

Method
 

  1. Preheat the oven to 180°C (350°F). Grease or line a loaf pan or square baking dish.
  2. In a large bowl, whisk the eggs with a pinch of salt until lightly frothy.
  3. Add sugar, milk, oil, and vanilla extract. Mix well until smooth.
  4. Gradually add flour and baking powder, stirring just until combined and the batter is smooth.
  5. Pour the batter into the prepared baking pan.
  6. Spoon dollops of jam over the surface and use a skewer or knife to swirl it gently through the batter.
  7. Bake for 30–35 minutes or until a toothpick inserted in the center comes out clean.
  8. Let cool slightly before slicing. Serve warm or at room temperature.

Notes

  • You can use any jam or preserve you love — from classic strawberry to tangy apricot or even marmalade.
  • For added texture, sprinkle chopped nuts or shredded coconut over the top before baking.
  • This cake stays moist for up to 3 days when stored in an airtight container at room temperature.
  • It also works well with gluten-free flour blends.

Layers of Comfort: The Story Behind This Easy Spinach and Cheese Casserole

There’s something about casseroles that feels like a warm hug on a plate. They don’t shout for attention or ask for flashy presentation. They simply sit in the center of the table, golden and fragrant, holding the promise of comfort.

I first made this spinach and cheese casserole on a rainy evening, when everything outside felt a bit too gray. I was low on energy but still wanted to create something nourishing for my family. I had a bunch of fresh spinach, a few pantry staples, and just enough cheese to make it work. It wasn’t a planned dish — more of a quiet experiment born out of tired hands and a hopeful heart.

I remember how my daughter took her first bite and looked up with surprise. “This tastes like something special,” she said. It wasn’t fancy, but it was real. Wholesome, warm, and made with care.

Since then, it has become a regular part of our weekly rhythm. Sometimes we eat it for dinner with a bowl of soup, other times it becomes the main attraction for a weekend brunch. I’ve shared it with friends, sent it along to new moms, and reheated leftovers when I needed something to remind me that simple things can still be extraordinary.

Why This Recipe Works

What makes this casserole so loved — and so practical — is its balance between flavor, texture, and nutrition. You get the earthiness of spinach, the soft richness of cream cheese, and the irresistible pull of melty triangular cheese slices baked to golden perfection.

But beyond the flavors, it’s also about ease. You don’t need complicated steps or specialty tools. Everything comes together in one bowl, pours into a dish, and transforms in the oven into a savory, fluffy, cheese-dappled bake.

This dish works for:

  • Weeknight dinners when you want something filling but not heavy.
  • Brunch gatherings where you need a make-ahead crowd-pleaser.
  • Lunchbox leftovers that taste just as good reheated.
  • Sneaky veggie moments when feeding picky eaters.

It’s vegetarian-friendly and highly adaptable — which makes it a staple worth keeping in your back pocket.

The Nutritional Nudge

Let’s talk health. This casserole is hearty but not overindulgent. It leans on protein-rich eggs, iron-packed spinach, and calcium from the cheese — making it a nutrient-dense dish disguised as comfort food.

It’s also lower in oil and skips the frying altogether, which is a bonus if you’re trying to keep meals on the lighter side. The addition of garlic powder adds flavor depth without overpowering, while the creamy base holds everything together without needing extra cream or butter.

Want to make it even more nutritious? You can:

  • Swap half the flour for oat or whole wheat flour.
  • Add in shredded zucchini or finely chopped mushrooms for more veggies.
  • Use reduced-fat cheese if you’re looking to cut calories.
  • Turn it gluten-free with a simple flour swap.

Ingredients:

IngredientAmount
Onion1, finely chopped
Spinach2 cups, chopped
Eggs3
Salt1 teaspoon
Black PepperTo taste
Garlic PowderTo taste
Oil¼ cup (50 ml)
Milk½ cup (80 ml)
Cream Cheese1 tablespoon
All-Purpose Flour150 g
Baking Powder1 teaspoon (8 g)
Triangular Cheese SlicesAs needed for topping

Directions:

  1. Preheat the Oven: Set your oven to 180°C (350°F).
  2. Sauté the Onion: In a skillet, lightly sauté the chopped onion until translucent. Add the chopped spinach and cook for 1–2 minutes until wilted. Set aside to cool.
  3. Prepare the Batter: In a large mixing bowl, whisk together the eggs, salt, black pepper, garlic powder, oil, milk, and cream cheese until smooth.
  4. Add Dry Ingredients: Gradually stir in the flour and baking powder until fully incorporated into a thick batter.
  5. Combine: Fold the sautéed spinach and onion mixture into the batter.
  6. Pour and Top: Pour the mixture into a greased baking dish. Top with triangular cheese slices, gently pressing them into the surface.
  7. Bake: Bake for 25–30 minutes or until the top is golden and a toothpick comes out clean.
  8. Cool and Serve: Let rest for 5 minutes before slicing. Serve warm or at room temperature.

Nutritional Information (Per Serving):

NutrientAmount
Calories210 kcal
Carbohydrates15 g
Protein7 g
Fat13 g
Fiber2 g
Sugars2 g
Sodium320 mg

FAQs: Everything You Wanted to Know

Can I use frozen spinach instead of fresh?
Absolutely. Just thaw it first and squeeze out as much water as possible to avoid a soggy casserole. Use about 1 cup of thawed, drained spinach in place of the fresh version.

What kind of cheese works best?
This casserole is flexible. You can use any cheese that melts well — mozzarella, gouda, cheddar, or even a mix. The triangular cheese slices on top are for that gooey, golden finish, but feel free to switch them out with shredded cheese if that’s what you have.

Can I prepare it ahead of time?
Yes. You can mix everything, pour it into the dish, cover it, and refrigerate for up to 12 hours before baking. It’s perfect for prepping the night before a brunch or busy dinner.

Can I freeze this casserole?
You can freeze it after baking. Let it cool completely, wrap tightly in foil or freezer-safe wrap, and store for up to 2 months. Thaw in the fridge overnight and reheat in the oven.

What can I serve it with?
It’s excellent with a fresh salad, tomato soup, or roasted vegetables. For brunch, pair it with fresh fruit or yogurt.

Is it kid-friendly?
Yes, very. The soft texture, mild cheese, and gentle seasonings make it an easy win with little ones — especially if they’re on the fence about leafy greens.

Can I make it dairy-free?
You can try using a plant-based milk and dairy-free cheese alternatives. The cream cheese could be swapped with a vegan cream cheese or a spoonful of silken tofu blended with lemon juice and nutritional yeast.

What’s the texture like?
Think of it like a cross between a crustless quiche and a savory cake. It’s tender, moist, and slices cleanly — great for plating and leftovers.

Serving Suggestions & Variations

This casserole is adaptable to your cravings and pantry:

  • Add spice: A pinch of red pepper flakes or chopped green chili gives it a gentle kick.
  • Add herbs: Try fresh dill, basil, or thyme for aromatic depth.
  • Make it heartier: Add sautéed mushrooms or a handful of corn kernels for texture.
  • Make it elegant: Drizzle with a garlic yogurt sauce or serve with sun-dried tomato chutney.

And if you’re entertaining, cut it into neat squares and serve warm with toothpicks — it’s a crowd-pleaser even in bite-sized form.

The Soul of the Recipe

At its heart, this spinach and cheese casserole is more than just a recipe. It’s about nourishing others — without stress or extravagance. It’s the kind of meal you can rely on, the one you make with one eye on the oven and the other on the people you’re feeding. It’s versatile, forgiving, and full of gentle flavor — like comfort food dressed in simplicity.

You won’t need a reason to make it again. You’ll find yourself craving it when you’re tired, when guests are coming over, or when your fridge looks uninspired. Because it’s not just the taste that brings people back — it’s how it makes them feel.

Conclusion: The Kind of Dish You Keep Coming Back To

In a world full of complicated recipes and over-the-top meals, this casserole is a breath of fresh, herb-scented air. It reminds us that good food doesn’t have to be fussy. That even humble ingredients — a few eggs, a handful of spinach, a bit of cheese — can create something deeply satisfying.

Whether you’re feeding family, friends, or just yourself, this easy spinach and cheese casserole is a dish that fits seamlessly into your routine. It’s not just easy, it’s reliable. Not just healthy, but indulgent in the way only homemade food can be.

So go ahead — make it once. Then see how often you find yourself making it again.

Amal

Layers of Comfort: The Story Behind This Easy Spinach and Cheese Casserole

This spinach and cheese casserole is everything you love in a cozy bake — creamy, fluffy, and perfectly savory. It’s a no-fuss, one-bowl wonder filled with spinach, melty cheese, and aromatic spices. Whether for brunch, lunch, or dinner, it’s a satisfying comfort dish that’s as easy to make as it is to love.
Prep Time 15 minutes
Cook Time 30 minutes
Total Time 45 minutes
Servings: 4 –6 servings
Course: Main Dish
Cuisine: Mediterranean-Inspired

Ingredients
  

  • 1 onion
  • 2 cups chopped spinach fresh or thawed from frozen, well-drained
  • 3 eggs
  • 1 teaspoon salt
  • Black pepper to taste
  • Garlic powder to taste
  • 1/4 cup oil 50 ml
  • 1/2 cup milk 80 ml
  • 1 tablespoon cream cheese
  • 150 grams all-purpose flour
  • 1 teaspoon baking powder 8 g
  • Triangular cheese slices for topping, as desired

Method
 

  1. Preheat your oven to 180°C (350°F).
  2. In a pan, sauté the chopped onion until translucent. Add the chopped spinach and cook for 1–2 minutes just to wilt it. Remove from heat and set aside.
  3. In a large bowl, whisk together the eggs, salt, pepper, garlic powder, oil, milk, and cream cheese until well combined.
  4. Stir in the flour and baking powder to form a smooth, thick batter.
  5. Fold in the sautéed spinach and onion mixture.
  6. Pour the batter into a greased baking dish and smooth the top.
  7. Place triangular cheese slices on top, pressing them lightly into the surface.
  8. Bake for 25–30 minutes or until golden brown and a toothpick inserted comes out clean.
  9. Let the casserole rest for 5–10 minutes before slicing. Serve warm or at room temperature.

Notes

  • Frozen spinach works just as well as fresh — just be sure to squeeze out all excess water.
  • You can add chopped herbs like dill, parsley, or green onion for extra flavor.
  • This casserole stores well in the fridge and can be reheated in the oven or microwave.
  • For a spicier version, add a pinch of chili flakes or paprika to the batter.

Golden Veggie Sticks: A Guilt-Free Comfort Snack

Some of the best recipes aren’t born out of fancy ingredients or hours spent flipping through cookbooks — they emerge from necessity and a dash of creativity. This was one of those recipes.

It started on a chilly afternoon when the fridge looked a little bare. We had potatoes, a carrot, a nub of cheese, and not much else. I was craving something savory, warm, and comforting — but I didn’t want to stand over a frying pan or deal with the aftermath of oil splatter. So I boiled, mashed, and mixed. I shaped them into logs, popped them in the oven, and waited.

What came out was a surprise. These golden veggie sticks were soft on the inside, lightly crisped on the edges, and full of flavor from the simple but hearty ingredients. I handed one to my youngest, who took a bite, then immediately reached for another. That moment turned this humble creation into a regular request in our home — the kind of comfort food that feels indulgent, yet is as light and nourishing as it is satisfying.

And now, it’s yours to enjoy, too.

A Dish Rooted in Simplicity

There’s something undeniably comforting about dishes made from pantry staples — especially when they turn out surprisingly delicious. Potatoes, carrots, and cheese are the stars of this recipe, with parsley adding a hint of freshness. No oil, no frying, and absolutely no fuss.

These veggie sticks are perfect for:

  • After-school snacks that feel like a treat but offer real nutrition
  • Lunchbox additions that can be eaten warm or cold
  • Lazy weekend sides when you want something satisfying without hovering over the stove
  • Healthy appetizers for gatherings or casual get-togethers

Because they’re baked, not fried, they offer that homey, indulgent taste without weighing you down.

Ingredients:

IngredientAmount
Potatoes600 grams (about 4 medium)
Carrot1, grated
WaterAs needed for boiling
Butter2 tablespoons
ParsleyChopped, to taste
Any Hard Cheese or Mozzarella½ cup, grated
SaltTo taste
Black PepperTo taste

Directions:

  1. Boil the Potatoes: Peel and chop the potatoes. Boil them in lightly salted water until fork-tender, about 15–20 minutes. Drain well.
  2. Mash and Mix: While still warm, mash the potatoes with butter until smooth. Stir in the grated carrot, chopped parsley, cheese, salt, and black pepper. Mix until well combined.
  3. Shape the Sticks: Take spoonfuls of the mixture and shape into rectangular sticks or logs using your hands. Place them on a parchment-lined baking tray.
  4. Bake to Perfection: Bake in a preheated oven at 200°C (390°F) for 15–20 minutes, or until the edges are slightly golden and the sticks are firm to the touch.
  5. Cool Slightly and Serve: Let them cool for a few minutes before serving. They’re great on their own or paired with a simple dip like Greek yogurt or tomato sauce.

Nutritional Information (Per Serving):

NutrientAmount
Calories130 kcal
Carbohydrates17 g
Protein4 g
Fat5 g
Fiber2 g
Sugars1.5 g
SodiumDepends on salt/cheese used

Healthier Comfort, Without Compromise

Baking instead of frying cuts out a lot of unnecessary fats, making these veggie sticks a healthier choice. The butter adds richness, but it’s kept minimal. The grated carrot blends seamlessly into the potato, sneaking in a serving of vegetables and a mild sweetness that balances beautifully with the cheese.

Here’s why these sticks are a win for your health:

  • Lower in fat than fried alternatives
  • Good source of fiber thanks to the potatoes and carrot
  • Kid-approved but veggie-packed
  • No additives or preservatives like store-bought snacks often contain

Add to that the versatility of the recipe — you can swap in sweet potatoes, mix in herbs like chives or dill, or even use a dairy-free cheese alternative if needed — and you’ve got a flexible, nourishing recipe that suits almost any lifestyle.

Texture and Taste: What to Expect

These baked veggie sticks have a soft, creamy interior with a gently crisped outer layer from oven baking. The cheese melts into the mashed potatoes, giving them a smooth texture with savory depth. The carrot adds a slightly sweet note without overpowering, and the parsley brings a subtle brightness that makes them feel fresh and balanced.

Want them crispier? Try these tweaks:

  • Brush lightly with milk before baking
  • Chill the shaped sticks before baking for a firmer exterior
  • Place on the top rack of the oven in the final few minutes

Serving Suggestions

Though they’re fantastic on their own, you can level up your veggie sticks with simple pairings:

  • Greek yogurt dip with herbs
  • Homemade marinara or tomato sauce
  • Avocado-lime mash
  • Hummus or tahini drizzle
  • Garlic aioli or mustard yogurt sauce

They also work beautifully as a side dish to soups, baked proteins, or salad bowls.

Frequently Asked Questions (FAQs)

Q: Can I make these ahead of time?
Absolutely. These veggie sticks can be prepped, shaped, and stored in the fridge for up to 24 hours before baking. You can also freeze them raw — just bake directly from frozen, adding 5–7 extra minutes to the baking time.

Q: Can I make them dairy-free?
Yes. Use a plant-based butter alternative and your favorite dairy-free cheese. Nutritional yeast is a great add-in for that cheesy flavor without the dairy.

Q: Can I add other vegetables?
Definitely. Grated zucchini (squeezed dry), mashed peas, finely chopped spinach, or corn can all be added. Just keep moisture content in mind and adjust the consistency if needed.

Q: Can I use instant mashed potatoes instead of fresh?
You can, but the texture won’t be quite the same. Freshly boiled and mashed potatoes give these sticks their soft, natural bite.

Q: How do I store leftovers?
Once baked and cooled, store in an airtight container in the fridge for up to 3 days. Reheat in the oven or toaster oven to bring back their texture. They can also be enjoyed cold or at room temperature.

Q: Are these gluten-free?
Yes, naturally — as long as your cheese and seasonings are certified gluten-free. No flour or breadcrumbs needed.

Q: How do I get them to hold their shape better?
Make sure your mashed potato base isn’t too wet. If it is, add a tablespoon of grated cheese or a bit of flour/starch to bind. Chilling before baking also helps.

Small Twists to Make It Your Own

Part of the charm of this recipe is how easily it welcomes variation. Try these twists:

  • Add smoked paprika or garlic powder for an extra flavor kick
  • Mix in chopped sun-dried tomatoes or green onions for bold accents
  • Use sweet potatoes for a richer, earthier profile
  • Add a sprinkle of parmesan on top before baking for extra crisp

This recipe is a great base — feel free to get creative!

A Comforting Conclusion

These golden veggie sticks are more than just a no-fry snack — they’re an invitation back to the basics. They remind us that comfort food doesn’t have to be complicated, and that some of the best meals start with a few humble ingredients and a bit of inspiration. Whether you’re a busy parent, a home cook on a budget, or simply someone who loves finding joy in the little things, this recipe will earn a regular spot in your rotation.

In a world full of noise and fast-paced meals, this recipe invites you to slow down, savor the smell of something warm in the oven, and enjoy a bite of something that feels like home.

Amal

Golden Veggie Sticks: A Guilt-Free Comfort Snack

These baked veggie sticks are soft on the inside, lightly crisp on the outside, and bursting with the comforting flavors of potato, cheese, and fresh herbs. Made without a drop of oil or frying, they’re the perfect healthy comfort food — great for snacking, sharing, or adding to your meal.
Prep Time 15 minutes
Cook Time 20 minutes
Total Time 35 minutes
Servings: 12 –14 sticks
Course: Snack
Cuisine: European-inspired

Ingredients
  

  • 600 grams potatoes about 4 medium
  • 1 carrot grated
  • Water as needed for boiling
  • 2 tablespoons butter
  • Chopped parsley to taste
  • ½ cup grated hard cheese or mozzarella
  • Salt to taste
  • Black pepper to taste

Method
 

  1. Peel and chop the potatoes. Boil them in salted water until tender, then drain well.
  2. Mash the potatoes with the butter while still warm.
  3. Add the grated carrot, chopped parsley, grated cheese, salt, and black pepper. Mix everything together until fully combined.
  4. Shape the mixture into sticks or logs using your hands.
  5. Place the sticks on a baking tray lined with parchment paper.
  6. Bake in a preheated oven at 200°C (390°F) for 15–20 minutes, or until the sticks are lightly golden and hold their shape.
  7. Let cool slightly before serving. Serve warm or at room temperature with a dip of your choice.

Notes

  • You can use any firm cheese — cheddar, gouda, or even parmesan work well.
  • These sticks can be made ahead of time and reheated in the oven.
  • Add a pinch of chili flakes for a spicier version.
  • Feel free to experiment with herbs like dill, chives, or thyme for a flavor twist.

The Warmth of Home: Apple Pie, a Timeless Classic

Growing up, my kitchen was always filled with the comforting scents of fresh baked goods, but none held the same nostalgic charm as the apple pie. I remember the sound of apples being peeled, the steady stirring of butter and sugar, and the anticipation of that first warm bite. My grandmother, who had a way of making everything feel magical, would pull her famous apple pie out of the oven just as we’d walk through the door. The combination of sweet, cinnamon-spiced apples and buttery, flaky crust made it a family favorite, and for good reason.

As I’ve gotten older, I’ve made my own variations of her recipe, always keeping that feeling of home and togetherness at the heart of it. Apple pie, after all, is more than just a dessert. It’s a reflection of the simple joy in sharing a meal, of laughter around a table, and of the memories that are created when we pause to enjoy the small things. Whether you’re baking for a special occasion, a quiet night in, or just because you crave that comforting sweetness, this apple pie recipe will bring you back to those warm, cherished moments.

Apple Pie: More Than Just a Dessert

Apple pie has been a beloved staple of American kitchens for centuries. It is an iconic dessert, a symbol of comfort, warmth, and tradition. When you think of apple pie, it’s not just about the ingredients or the method of preparation— it’s about what it represents. From its roots in colonial times to its place on modern dessert tables, the apple pie has always been a favorite. It brings people together, evokes memories, and often becomes the centerpiece of family gatherings, holidays, and casual get-togethers alike. There is something universally comforting about a slice of freshly baked apple pie paired with a scoop of vanilla ice cream or a dollop of whipped cream.

But why is apple pie such a fixture in kitchens around the world? Part of it lies in its simplicity— apples, sugar, butter, and a flaky crust— ingredients that come together in a perfect harmony. It’s also a recipe that offers endless possibilities for creativity, allowing home bakers to experiment with spices, sweetness levels, and textures, resulting in variations that are uniquely their own. Whether you prefer your apples tart or sweet, your crust golden and crisp, or your filling gooey and spiced, apple pie offers a delicious blank canvas for every baker.

Ingredients:

IngredientAmount
Apples5–6 medium-sized (Golden Delicious or your favorite variety)
Water50 ml (¼ cup)
Butter50 g (¼ cup)
Semolina (Manna)2 tbsp
Sugar3 tbsp (adjust to taste)

Directions:

  1. Prepare the Apples: Peel, core, and slice the apples into thin wedges. Set them aside in a large bowl.
  2. Create the Apple Filling: In a medium saucepan, melt the butter over medium heat. Add the sliced apples and stir to coat them in the butter.
  3. Cook the Apples: Pour in the water and cook the apples for about 10 minutes, stirring occasionally until they begin to soften.
  4. Add Semolina and Sugar: Stir in the semolina and sugar, adjusting the sweetness to your liking. Let the mixture cook for another 5 minutes until the apples are tender and the sauce thickens.
  5. Cool and Use: Remove from heat and allow the apple filling to cool before using it in your pie crust.

Nutritional Information:

NutrientAmount (per serving)
Calories150 kcal
Carbohydrates35 g
Protein1 g
Fat4 g
Fiber5 g
Sugars20 g

What Makes This Apple Pie Special?

While there are many apple pie recipes, this version sets itself apart with its slightly different approach to the filling. By using semolina (or manna), the filling takes on a creamy, luscious texture while still allowing the apples to shine through. Semolina helps thicken the filling without altering the natural flavors of the apples, allowing the combination of butter, water, and sugar to create a perfectly balanced filling.

Another secret to this pie’s charm lies in the method used to prepare the apples. The apples are cooked in butter until they soften and caramelize slightly before the sugar and semolina are added. This technique brings out the natural sweetness of the apples, infusing them with a deeper, more robust flavor. This is not just any apple pie; it’s a pie with layers of flavor that enhance the essence of the apples and create an indulgent yet comforting dessert.

The Art of Perfecting the Pie Crust

The crust of an apple pie is just as important as the filling— it provides the perfect balance to the sweet, spiced apples. For many, creating the ideal pie crust can be a source of frustration. It can be too thick, too dry, or too tough. However, the key to a perfect pie crust lies in technique, and once you’ve mastered it, you’ll be able to create a golden, flaky crust every time.

The best pie crusts are made with a combination of cold butter and ice-cold water, both of which contribute to the flakiness of the dough. The butter should be cut into small pieces and incorporated into the flour until the mixture resembles coarse crumbs. It’s essential not to overwork the dough; handling it too much can cause it to become tough. Once the dough has come together, it should be chilled before being rolled out to ensure that the butter stays cold and that the crust bakes to a perfect, flaky texture.

Personalizing Your Apple Pie: Creative Variations

Apple pie is wonderfully versatile, and you can easily adapt it to suit your tastes. Here are some ideas to make this classic dessert even more unique:

  1. Add Spice for Extra Flavor: While cinnamon is the traditional spice for apple pie, adding a bit of nutmeg, allspice, or even cardamom can create a more complex flavor profile. A dash of ginger can also add a bit of warmth and depth to the filling, perfect for cozy fall nights.
  2. Try Different Apple Varieties: The type of apple you use can significantly affect the flavor and texture of your pie. Some apples, like Granny Smith, are tart and firm, while others, like Fuji or Gala, are sweeter and softer. Mixing different apple varieties is a great way to create a filling with both sweet and tangy notes.
  3. Incorporate Other Fruits: Adding fruits like pears, cranberries, or even dried apricots to your apple pie can offer an exciting twist. These fruits pair wonderfully with apples and will add layers of flavor to the filling.
  4. Glaze Your Crust: For an extra touch of sweetness and visual appeal, brush your pie crust with a mixture of egg wash and a sprinkle of sugar before baking. This will give the crust a glossy finish and a light sweetness that enhances the overall pie.
  5. Make It Gluten-Free: If you’re looking for a gluten-free version, simply substitute the regular flour with a gluten-free flour blend. Be sure to check the pie crust and filling for hidden gluten-containing ingredients, like certain pre-made products or additives in the sugar.

Frequently Asked Questions (FAQs)

1. Can I use a store-bought pie crust? Yes, store-bought pie crusts are a convenient option when you’re short on time. They can save you the effort of making the crust from scratch while still allowing you to enjoy the flavors of a homemade apple pie. However, for the best results, homemade pie crust often yields the flakiest and most flavorful results.

2. Can I make this apple pie in advance? Absolutely! You can prepare the apple filling and refrigerate it for up to two days. The pie dough can also be prepared ahead of time and frozen for up to three months. When you’re ready to bake, simply assemble the pie and bake as instructed. This is especially useful for busy holidays or when you’re entertaining guests.

3. Can I freeze apple pie? Yes, you can freeze apple pie before baking it. Wrap the pie tightly in plastic wrap and aluminum foil and freeze for up to 3 months. To bake, remove the pie from the freezer and bake it directly from frozen, adding a few extra minutes to the baking time.

4. What’s the best type of apple for apple pie? The best apples for pie are those that hold up well during baking and provide a good balance of sweetness and tartness. Some popular choices include Granny Smith, Honeycrisp, Braeburn, and Golden Delicious. Many bakers prefer a mix of sweet and tart apples for a well-rounded flavor.

5. How can I prevent my pie crust from getting soggy? To avoid a soggy bottom crust, you can bake the pie on the lowest rack in the oven to ensure even heat distribution. Another tip is to brush the bottom crust with a layer of egg wash before adding the filling— this creates a barrier that helps keep the crust crisp. Additionally, pre-baking the crust for 5–10 minutes before filling it can also help prevent sogginess.

6. Can I make this apple pie dairy-free or vegan? Yes, you can easily make this pie dairy-free or vegan by substituting butter with plant-based butter or coconut oil. You can also substitute the egg wash with a vegan option like almond milk or a mixture of cornstarch and water for brushing the crust.

7. How do I know when my apple pie is done? The best way to know when your apple pie is ready is by looking for a golden, flaky crust and bubbling filling. You should see the filling slightly bubbling out from the edges of the crust. A toothpick inserted into the filling should come out soft and tender, indicating that the apples are cooked through.

Conclusion: A Slice of Comfort and Tradition

Apple pie is more than just a dessert; it’s a symbol of warmth, family, and tradition. Whether you’re making it for a special occasion, a holiday gathering, or simply to bring a little sweetness into your day, it’s a recipe that never fails to deliver comfort and joy. The beauty of apple pie lies in its simplicity— a few basic ingredients come together to create a dish that is both nostalgic and timeless. So, the next time you’re in the mood for something sweet, take a moment to bake a classic apple pie. You might just find that it’s more than just a dessert—it’s a way to create memories, one slice at a time.

Amal

The Warmth of Home: Apple Pie, a Timeless Classic

This classic apple pie recipe takes a delicious twist with a creamy semolina filling that enhances the natural sweetness of the apples. The buttery, flaky crust and gooey apple center, spiced with cinnamon and sugar, create a comforting dessert perfect for any occasion. Whether you’re baking for a holiday gathering, a family dinner, or just because you need a slice of warmth, this apple pie is sure to bring smiles to the table.
Prep Time 15 minutes
Cook Time 55 minutes
Total Time 1 hour 10 minutes
Servings: 8 -10 servings
Course: Dessert
Cuisine: American

Ingredients
  

  • 5 –6 medium-sized apples Golden Delicious or your favorite variety
  • 50 ml ¼ cup water
  • 50 g ¼ cup butter
  • 2 tbsp semolina manna
  • 3 tbsp sugar adjust to taste

Method
 

  1. Prepare the Apples: Peel, core, and slice the apples into thin wedges. Set them aside.
  2. Cook the Apples: In a medium saucepan, melt butter over medium heat. Add the apple slices and stir to coat them in the butter. Cook for about 10 minutes until the apples start to soften.
  3. Add Semolina and Sugar: Stir in the water, semolina, and sugar, and cook for another 5 minutes, allowing the mixture to thicken and the apples to become tender. The semolina will give the filling a creamy consistency.
  4. Cool and Fill the Pie Crust: Remove the apple mixture from the heat and let it cool slightly before transferring it to a pre-baked pie crust. Spread the filling evenly, then top with a second layer of pie crust or a lattice crust.
  5. Bake: Bake the pie in a preheated oven at 180°C (350°F) for 40–45 minutes, or until the crust is golden and the filling is bubbly.
  6. Serve: Let the pie cool before serving, allowing the filling to set. Serve with whipped cream or vanilla ice cream for an extra treat.

Notes

  • For a more complex flavor, try using a combination of apple varieties such as Granny Smith and Fuji.
  • Feel free to add a pinch of cinnamon or nutmeg to the filling for an added spice kick.
  • Make sure to let the pie cool before cutting to ensure the filling firms up.
  • If you’re using a store-bought pie crust, this recipe becomes even quicker and easier to prepare.

A Delicious Vegetable Zucchini Pizza Recipe for the Whole Family

As a child, I was never particularly fond of vegetables. My mother tried every trick in the book to make them more appealing — from hiding them in sauces to offering them with extra butter and cheese. But it wasn’t until she introduced me to the magic of the vegetable bake that I truly understood the full potential of vegetables. One summer evening, after a long day of playing outside, my mom pulled out a fragrant, golden vegetable bake from the oven. It was her take on a pizza, but with a twist: it was filled with zucchini, carrots, peppers, and the gooey goodness of mozzarella cheese.

That first bite changed everything. The flavors of the roasted vegetables paired so perfectly with the creamy mozzarella that I no longer saw vegetables as a chore but as a delightful and satisfying part of my meals. That simple moment — sharing a meal with family, surrounded by the smells of fresh ingredients — became a cherished memory that I carry with me today. Over the years, I’ve made variations of this vegetable bake for my own family, and it’s become a go-to dish for everyone, from picky eaters to veggie lovers.

What I love most about this recipe is how versatile it is. It can easily be adjusted to suit different tastes, and it’s an ideal way to sneak in some extra veggies without sacrificing flavor. Whether it’s for a weeknight dinner or a special occasion, this vegetable zucchini pizza bake has become a staple in our home, and I’m excited to share it with you.

Why This Recipe Works

The vegetable zucchini pizza bake is a brilliant blend of simplicity and flavor. It takes the essence of a traditional pizza, with its cheesy, savory profile, but swaps out the usual dough base for fresh, nutritious vegetables and a light flour batter. This not only makes it healthier but also gives it a unique texture that sets it apart from any other pizza you’ve tried before.

Zucchini, often overlooked in favor of other more popular vegetables, shines in this dish. Its mild flavor and ability to soak up the tastes of the other ingredients make it the perfect base for this bake. Combined with carrots, peppers, and onions, the dish becomes a powerhouse of nutrition, providing a variety of vitamins, fiber, and antioxidants. The inclusion of eggs and milk helps bind the vegetables together, while the mozzarella cheese brings that rich, comforting melty texture we all crave.

The best part? It’s incredibly easy to make. With just a few fresh ingredients and minimal prep, you can have a wholesome meal that’s not only nutritious but also delicious.

Ingredients

IngredientQuantity
Zucchini (courgettes)3 medium-sized, grated
SaltTo taste
Onion1 medium, finely chopped
Olive oil2 tbsp
Carrot1 medium, grated
Red pepper1, diced
Parsley2 tbsp, chopped
Black pepperTo taste
Eggs3 pcs
Milk300 ml (1¼ cups)
Flour240 g (2 cups)
Mozzarella cheese150 g (5.3 oz), grated

Directions

  1. Preheat the Oven:
    Preheat your oven to 180°C (350°F). Grease a baking dish with a little olive oil or line it with parchment paper to prevent sticking.
  2. Prepare the Vegetables:
    Grate the zucchini and carrot, and dice the red pepper. Place the grated zucchini in a clean kitchen towel or cheesecloth and squeeze out any excess moisture to avoid a soggy bake. Chop the onion finely and set aside.
  3. Cook the Vegetables:
    Heat the olive oil in a large skillet over medium heat. Add the chopped onion, grated carrot, and diced red pepper. Sauté for about 5 minutes, until the vegetables are soft and fragrant.
  4. Mix the Wet Ingredients:
    In a large bowl, crack the eggs and beat them lightly. Add the milk, salt, and black pepper to taste, and whisk to combine.
  5. Add the Dry Ingredients:
    Stir the flour into the wet ingredients and mix until the batter is smooth. Add the sautéed vegetables to the mixture, followed by the grated zucchini. Stir in the chopped parsley and half of the mozzarella cheese.
  6. Assemble the Bake:
    Pour the vegetable mixture into your prepared baking dish, spreading it evenly. Sprinkle the remaining mozzarella cheese on top for a cheesy, golden finish.
  7. Bake and Serve:
    Bake for 30-35 minutes, or until the top is golden and a toothpick comes out clean when inserted into the center. Allow the vegetable bake to cool slightly before serving.

Nutritional Information (per serving)

NutrientAmount
Calories250 kcal
Protein10 g
Carbohydrates20 g
Fat15 g
Fiber3 g
Sodium350 mg

Frequently Asked Questions (FAQs)

1. Can I make this recipe gluten-free?

Yes, absolutely! To make this vegetable zucchini bake gluten-free, simply substitute the regular flour with a gluten-free flour blend or rice flour. The texture may be slightly different, but the flavor will still be delicious.

2. Can I use other vegetables in this recipe?

Yes! This recipe is very versatile, and you can swap out the zucchini, carrots, and peppers for other vegetables of your choice. Try adding spinach, mushrooms, or even sweet potatoes for a different flavor profile. The key is to make sure the vegetables are grated or finely chopped so they blend seamlessly into the batter.

3. Can I make this dish ahead of time?

Absolutely! You can prepare the vegetable mixture and assemble the bake the night before, then refrigerate it until you’re ready to cook. Just be sure to allow the bake to come to room temperature before popping it into the oven for even cooking. Leftovers also keep well in the fridge for up to two days.

4. How can I make this recipe vegan?

To make this recipe vegan, simply substitute the eggs with a flaxseed meal egg replacement or a chickpea flour mixture. For the milk, you can use almond milk or any other plant-based milk of your choice. For the cheese, there are plenty of dairy-free cheese options available that will melt and work well in this dish.

5. How do I make the bake crispy?

For a crispy crust, ensure that you drain any excess moisture from the zucchini before mixing it with the other ingredients. You can do this by grating the zucchini, then squeezing out the water with a clean kitchen towel. Also, baking the vegetable bake on a preheated baking dish or a pizza stone can help achieve that crispy, golden-brown crust.

6. Can I make this recipe in a different pan?

While a rectangular or round baking dish is ideal, you can also make this vegetable zucchini bake in a cast-iron skillet or even on a baking sheet. Just adjust the cooking time slightly if you’re using a different pan size to ensure the bake cooks evenly.

The Benefits of Incorporating Vegetables Into Your Diet

This vegetable zucchini bake is not just a tasty dish — it’s also a nutritious one. It’s a great way to increase your vegetable intake without compromising on flavor. Vegetables like zucchini and carrots are rich in vitamins A and C, while peppers are packed with antioxidants that promote healthy skin and eyes. This dish also provides a good amount of fiber, which is essential for digestion and overall health.

In addition to the nutritional value, this vegetable bake is an excellent way to get creative in the kitchen and experiment with different combinations of fresh produce. Whether you’re trying to get more veggies into your children’s diet or simply looking for a new recipe to add to your meal rotation, this dish is sure to satisfy.

Tips for Success

  1. Don’t skip draining the zucchini: Zucchini has a high water content, and if you don’t remove the excess moisture, your bake might become too soggy. After grating the zucchini, squeeze it in a clean towel to remove as much water as possible.
  2. Customize the seasonings: The beauty of this recipe is that you can easily tweak the seasoning to match your preferences. Add garlic powder, basil, oregano, or even chili flakes for a kick of heat.
  3. Use fresh mozzarella: While pre-shredded mozzarella is convenient, fresh mozzarella will melt more beautifully and give you that rich, creamy texture. If possible, try to use fresh cheese for the best result.
  4. Add a side salad for a complete meal: Pair this vegetable zucchini pizza bake with a crisp, fresh salad for a well-rounded meal. A simple green salad with a vinaigrette dressing works beautifully as a side.

Conclusion: A Dish Worth Sharing

This vegetable zucchini pizza bake is more than just a recipe — it’s an experience. It’s about gathering with loved ones, sharing a meal made with fresh, wholesome ingredients, and creating memories around the table. With its ease of preparation, versatility, and delicious flavor, it’s a dish that anyone can enjoy, regardless of age or dietary preference.

So, the next time you’re looking for a meal that’s both comforting and nutritious, give this vegetable zucchini pizza bake a try. It’s the perfect blend of health and taste, and I’m sure it will become a favorite in your home, just as it has in mine. Whether you’re enjoying it as a light dinner or serving it to a crowd, this dish is guaranteed to impress. So gather your ingredients, preheat the oven, and get ready to enjoy a flavorful and healthy twist on pizza.

Paul

A Delicious Vegetable Zucchini Pizza Recipe for the Whole Family

This vegetable zucchini pizza bake is a perfect way to enjoy a pizza without the guilt! Packed with fresh veggies, cheesy goodness, and a light, crispy base, it’s a nutritious and satisfying meal for the whole family. A great way to sneak in those veggies while still indulging in all the flavors of a pizza.
Prep Time 15 minutes
Cook Time 35 minutes
Total Time 50 minutes
Servings: 4 –6 servings
Course: Main Dish
Cuisine: Italian-inspired

Ingredients
  

  • 3 medium zucchinis grated
  • Salt to taste
  • 1 medium onion finely chopped
  • 2 tbsp olive oil
  • 1 medium carrot grated
  • 1 red pepper diced
  • 2 tbsp fresh parsley chopped
  • Black pepper to taste
  • 3 eggs
  • 300 ml 1¼ cups milk
  • 240 g 2 cups flour
  • 150 g 5.3 oz mozzarella cheese, grated

Method
 

  1. Preheat the oven: Set your oven to 180°C (350°F) to preheat.
  2. Prepare the vegetables: Grate the zucchini and carrot. Place the grated zucchini in a clean kitchen towel and squeeze out the excess moisture. Finely chop the onion and red pepper, and set them aside.
  3. Cook the vegetables: In a large pan, heat the olive oil over medium heat. Add the onion and cook for 3-4 minutes, until softened. Then, add the grated carrot and diced red pepper. Cook for another 3 minutes, stirring occasionally.
  4. Mix the batter: In a large mixing bowl, combine the grated zucchini, cooked vegetables, fresh parsley, eggs, milk, flour, salt, and black pepper. Stir well to combine.
  5. Add cheese: Fold in the grated mozzarella cheese into the mixture.
  6. Bake: Pour the vegetable mixture into a greased baking dish and spread evenly. Bake in the preheated oven for 30-35 minutes, or until golden brown on top and cooked through.
  7. Serve: Allow the bake to cool for a few minutes before slicing. Serve warm and enjoy!

Notes

  • You can substitute mozzarella with any cheese of your choice, such as cheddar or a dairy-free option for a vegan version.
  • Feel free to experiment with other vegetables like spinach, mushrooms, or eggplant for a different flavor profile.
  • Make sure to squeeze out as much moisture as possible from the zucchini to avoid a soggy bake.
  • This recipe can be made ahead of time and stored in the refrigerator for up to 2 days. Reheat before serving.

Zucchini Rice Fritters: The Recipe That Brings Back Childhood Memories

There are certain recipes that become a part of your memories, always carrying a sense of nostalgia that makes them even more special. For me, zucchini fritters are one of those dishes that take me back to my childhood, when my grandmother used to make them every summer. Her kitchen was always filled with the smell of fresh vegetables and sizzling oil, and no matter how many fritters she made, they never lasted long.

Every time I make these zucchini rice fritters, I feel like I’m right back there, standing in her kitchen, eagerly waiting for the first batch to come out of the pan. There’s something so comforting about the combination of tender zucchini, fluffy rice, and crispy, golden edges. These fritters are not just food – they are a piece of my heart, connecting me to my past and filling me with warmth.

If you’ve ever struggled to get your family to eat their vegetables, or if you’re just looking for a creative way to use zucchini, these fritters are the perfect solution. They’re easy to make, full of flavor, and can be enjoyed by even the pickiest eaters. In fact, they might just become a new family favorite, just like they did in mine.

Why Zucchini Rice Fritters Are a Must-Try

Zucchini is often underrated in the kitchen. It’s a vegetable that can blend seamlessly into a variety of dishes, adding moisture and texture without overpowering other flavors. When combined with rice, onion, and a touch of flour, it transforms into something magical. These fritters are crispy on the outside, tender on the inside, and packed with nutrients. They are not only a great way to use up leftover zucchini but also a healthy alternative to fried snacks.

What’s more, these fritters are incredibly versatile. Whether you’re looking for a quick and easy appetizer, a side dish for dinner, or a snack for a gathering, these zucchini rice fritters will never disappoint. The flavor profile is mild enough for young children to enjoy but also satisfying for adults who appreciate a simple, wholesome meal.

Ingredients

IngredientAmount
Zucchini2
Rice180 grams (6.3 oz)
Water300 ml (10 fl oz)
Onion1, finely chopped
Egg1
Flour3 tablespoons
Fresh parsley, choppedTo taste
Salt and black pepperTo taste
Sunflower oilFor frying

Directions

  1. Cook the Rice:
    Begin by rinsing the rice thoroughly. In a saucepan, bring 300 ml of water to a boil, add the rice, and cook according to package instructions. Once cooked, set it aside to cool.
  2. Prepare the Zucchini:
    Grate the zucchini using a coarse grater. Place the grated zucchini in a clean kitchen towel or cheesecloth and squeeze out the excess moisture.
  3. Mix the Ingredients:
    In a large bowl, combine the cooked rice, grated zucchini, chopped onion, egg, flour, fresh parsley, salt, and black pepper. Stir well until the mixture is thoroughly combined. The flour helps to bind the ingredients together.
  4. Form the Fritters:
    Heat a generous amount of sunflower oil in a frying pan over medium heat. Take small spoonfuls of the mixture and shape them into patties or fritters. Place them gently into the hot oil, making sure not to overcrowd the pan.
  5. Fry the Fritters:
    Fry the fritters for about 3-4 minutes on each side, or until they are golden brown and crispy. Be careful when flipping, as the fritters can be delicate.
  6. Drain and Serve:
    Once fried, place the fritters on a plate lined with paper towels to drain excess oil. Serve hot with a dollop of yogurt or your favorite dipping sauce.

Nutritional Information (Per Serving)

NutrientAmount
Calories150 kcal
Protein4g
Carbohydrates22g
Sugars3g
Fat6g
Saturated Fat0.5g
Fiber2g
Sodium100mg

Frequently Asked Questions

Can I use other types of vegetables in this recipe?

Yes, absolutely! While zucchini is the star ingredient, you can easily substitute or add other vegetables like carrots, sweet potatoes, or even spinach. Grated carrots, for example, would complement the zucchini beautifully, adding a natural sweetness to the fritters.

Can I make this recipe vegan?

Yes, you can make this recipe vegan by substituting the egg with a flaxseed meal or chia egg replacement. To do this, mix 1 tablespoon of flaxseed meal or chia seeds with 3 tablespoons of water and let it sit for 5 minutes to form a gel-like consistency.

Can I make these fritters gluten-free?

Of course! To make this recipe gluten-free, simply swap the wheat flour for a gluten-free flour blend, rice flour, or almond flour. This will allow you to keep the fritters light and crispy while accommodating those with gluten sensitivities.

How can I make these fritters crispier?

If you prefer extra crispy fritters, you can lightly coat them with breadcrumbs before frying. Another option is to shallow fry them in a bit more oil, ensuring that they are golden and crispy on all sides.

What’s the best way to store leftover fritters?

Leftover fritters can be stored in an airtight container in the refrigerator for up to 2 days. To reheat them, place them on a baking sheet and warm them in the oven at 180°C (350°F) for about 10 minutes to restore their crispiness. Alternatively, you can reheat them in a skillet over medium heat.

Can I freeze these fritters?

Yes! These fritters freeze wonderfully. After frying, allow them to cool completely, then place them in a single layer on a baking sheet and freeze. Once frozen, transfer them to a freezer bag or container. To reheat, simply bake them in the oven or fry them again.

What should I serve with these fritters?

These fritters are incredibly versatile and can be served with a variety of dips and sides. You could pair them with a tangy yogurt dip, a simple avocado salsa, or even a dollop of sour cream. For a more substantial meal, serve them with a light salad or alongside grilled chicken or fish.

Can I bake these fritters instead of frying them?

Yes, baking is a great alternative to frying. To bake, preheat your oven to 200°C (400°F) and line a baking sheet with parchment paper. Lightly grease the fritters with oil and bake them for about 20-25 minutes, flipping them halfway through to ensure even browning.

Tips for Perfect Zucchini Rice Fritters

  1. Squeeze Out Excess Water from the Zucchini:
    Zucchini contains a lot of water, and if you don’t squeeze it out, your fritter mixture may become too soggy, making it difficult to form patties. Use a clean kitchen towel or cheesecloth to remove the moisture before mixing it with the rice.
  2. Don’t Overcrowd the Pan:
    When frying the fritters, make sure not to overcrowd the pan. Fry in batches if necessary. Overcrowding can cause the fritters to steam instead of crisping up.
  3. Add Fresh Herbs:
    Fresh herbs like basil, mint, or dill can elevate the flavor of your fritters. Chopped parsley is a classic choice, but feel free to experiment with your favorite herbs.
  4. Experiment with Spices:
    While salt and pepper are essential, feel free to add other spices like garlic powder, cumin, or paprika to enhance the flavor. If you prefer a little kick, a pinch of chili flakes works wonders.

Conclusion: A Recipe That Will Stand the Test of Time

These zucchini rice fritters are more than just a recipe – they are a tradition, a connection to simpler times and comforting memories. They remind me of the joy of cooking with loved ones and the beauty of sharing a meal together. As I fry the fritters, I can’t help but think of my grandmother and the countless hours she spent in the kitchen, filling the house with the warmth of love and food.

The beauty of this recipe lies in its simplicity. It’s a humble dish that requires only a few basic ingredients but delivers big on flavor. Whether you’re making them for a quick weeknight dinner or preparing them as a snack for a gathering, these fritters are sure to be a hit. They’re crispy, satisfying, and versatile, and they serve as a reminder that the best meals often come from the heart.

I encourage you to try this recipe and make it your own. Play around with different vegetables and spices, or enjoy it just as it is. Either way, you’ll be creating something that’s not just delicious but also deeply personal. After all, food has a way of connecting us to the past, to our family, and to the love that goes into every bite.

Amal

Zucchini Rice Fritters: The Recipe That Brings Back Childhood Memories

These zucchini rice fritters are the perfect balance of crispy and tender, combining the mild flavor of zucchini with the hearty texture of rice. They’re a simple, yet satisfying dish that can be enjoyed as an appetizer, side dish, or snack. With a light crunch on the outside and a soft interior, these fritters are sure to become a family favorite.
Prep Time 15 minutes
Cook Time 20 minutes
Total Time 35 minutes
Servings: 4 –6 servings
Course: Appetizer
Cuisine: Mediterranean-Inspired

Ingredients
  

  • 2 zucchinis grated
  • 180 grams 6.3 oz rice
  • 300 ml 10 fl oz water
  • 1 onion finely chopped
  • 1 egg
  • 3 tablespoons flour
  • Fresh parsley chopped (to taste)
  • Salt and black pepper to taste
  • Sunflower oil for frying

Method
 

  1. Cook the Rice: Rinse the rice well, then cook it according to the package instructions, using 300 ml of water. Once cooked, set the rice aside to cool.
  2. Prepare the Zucchini: Grate the zucchinis using a coarse grater. Squeeze out the excess moisture using a clean kitchen towel or cheesecloth to prevent the fritter mixture from becoming too soggy.
  3. Mix the Ingredients: In a large bowl, combine the cooked rice, grated zucchini, chopped onion, egg, flour, parsley, salt, and black pepper. Stir until well combined.
  4. Form the Fritters: Heat sunflower oil in a frying pan over medium heat. Take small spoonfuls of the mixture and form them into small patties.
  5. Fry the Fritters: Fry the fritters for about 3-4 minutes on each side until golden brown and crispy. Be sure to flip them carefully to avoid breaking.
  6. Drain and Serve: Once fried, remove the fritters from the oil and place them on paper towels  to absorb any excess oil. Serve them hot with your favorite dip or as a side dish.

Notes

  • Storage: Leftover fritters can be stored in an airtight container in the refrigerator for up to 2 days. Reheat in a skillet or the oven to restore their crispiness.
  • Gluten-Free Option: Use rice flour or a gluten-free flour blend instead of regular flour to make these fritters gluten-free.
  • Baking Option: If you prefer to bake these fritters instead of frying, place them on a parchment-lined baking sheet, lightly brush them with oil, and bake at 200°C (400°F) for about 20-25 minutes, flipping halfway through.

A Dish of Comfort: Why This Potato Bake Is Better Than Pizza

There’s something magical about comfort food that brings us back to our roots. For me, this dish evokes memories of family dinners on lazy Sundays, when the kitchen was filled with the sweet smell of roasted vegetables and the air buzzed with chatter. As a child, I would eagerly wait for the moment when the casserole dish was pulled out of the oven, golden and crisp on top, hiding a warm, soft interior that promised both comfort and nourishment. Over time, this potato bake has become more than just a meal—it’s a reminder of home, of laughter, and of the simple joys of life.

When I was growing up, pizza was the go-to choice for family gatherings or celebrations. However, over time, I started craving something different—something that still captured that warm, comforting essence but without the heaviness of traditional pizza. That’s when I began experimenting with baked potato dishes, combining the flavors I loved from pizza and creating something even better. This potato bake, with its combination of fresh vegetables, creamy textures, and crispy top, quickly became my family’s new favorite.

This dish has since become a staple in our home, often served on cozy nights when everyone needs a bit of comfort. The crispy crust, the soft interior, and the gooey cheese—each bite feels like a hug from the inside. I’ve made this recipe countless times, adjusting the flavors and ingredients, but it always brings back that feeling of warmth and family. Now, as an adult, I realize that food isn’t just about sustenance; it’s about the memories it creates and the connections it fosters. This potato bake is my tribute to that, and it’s a recipe that has stood the test of time.

Why This Potato Bake Is Better Than Pizza

At first glance, this potato bake may seem like a simple alternative to pizza, but don’t let its humble appearance fool you. This dish takes the best aspects of pizza—cheese, vegetables, and hearty satisfaction—and elevates them into something unique. With grated potatoes forming the base, combined with carrots, onions or leeks, eggs, and kefir, it’s a delicious, hearty meal that can be made without the need for a pizza dough base.

This recipe offers multiple benefits over traditional pizza. First and foremost, it’s a healthier option—especially for those looking to reduce their carb intake. The base of this bake is made from grated potatoes, which is lower in calories compared to traditional pizza dough. The addition of fresh vegetables like carrots and tomatoes provides a nutrient boost, making the dish both satisfying and healthy.

Second, this potato bake is extremely versatile. While pizza toppings are often limited by the dough base and the sauce, this recipe allows you to get creative. You can add different vegetables, experiment with various cheeses, or even throw in some cooked chicken or sausage to suit your preferences. It’s a dish that can easily adapt to different dietary needs and can be enjoyed by the whole family.

Ingredients

IngredientAmount
Potatoes4-5
Carrot1
Leek or Onion1
Eggs2
Kefir or Plain Yogurt1 glass
Wheat Flour200g (7 oz)
Tomatoes3
CheeseAs desired (Grated)

Directions

  1. Prepare the Vegetables:
    Grate the potatoes and carrot. Finely chop the leek or onion. Set the vegetables aside.
  2. Mix the Ingredients:
    In a large mixing bowl, combine the grated potatoes, carrot, and leek or onion. Add the eggs, kefir or plain yogurt, and wheat flour. Mix everything well to form a thick batter.
  3. Add Tomatoes:
    Dice the tomatoes into small pieces and add them to the mixture, stirring them in gently.
  4. Prepare the Pan:
    Preheat the oven to 180°C (350°F). Grease a baking dish with a little oil and pour the potato mixture into the dish, spreading it out evenly.
  5. Top with Cheese:
    Grate your favorite cheese and sprinkle it generously on top of the potato mixture.
  6. Bake:
    Place the dish in the oven and bake for about 40-45 minutes, or until the top is golden and crispy, and the center is fully cooked.
  7. Serve:
    Once baked, allow it to cool for a few minutes before slicing and serving. This dish is great on its own or served as a side to your favorite main course!

Nutritional Information (Per Serving)

NutrientAmount
Calories220 kcal
Protein6g
Carbohydrates30g
Sugars5g
Fat10g
Saturated Fat4g
Sodium350mg

The Nutritional Benefits of This Potato Bake

While comfort food can sometimes get a bad rap for being indulgent and unhealthy, this potato bake strikes the perfect balance between delicious and nutritious. Here are some of the key nutritional benefits of the ingredients in this dish:

  1. Potatoes:
    Potatoes are often underestimated when it comes to their nutritional value, but they are a great source of vitamins, particularly vitamin C and B6, which are important for maintaining a healthy immune system and promoting brain health. They are also high in fiber, which aids in digestion and helps keep you feeling full for longer.
  2. Carrots:
    Carrots are loaded with beta-carotene, a powerful antioxidant that supports eye health and boosts the immune system. They also provide a good dose of vitamin A, which is important for maintaining healthy skin and promoting growth and development in the body.
  3. Onions and Leeks:
    These flavorful vegetables are rich in antioxidants and contain a compound called allicin, which is known for its anti-inflammatory properties. They also contribute to heart health by helping to regulate cholesterol levels.
  4. Eggs:
    Eggs are an excellent source of high-quality protein and contain essential vitamins and minerals such as vitamin D, vitamin B12, and iron. They help support muscle repair and immune function.
  5. Kefir or Yogurt:
    The inclusion of kefir or plain yogurt in this recipe adds a creamy texture while also boosting the dish with probiotics. These beneficial bacteria are essential for gut health and can help with digestion and immunity.

By using these wholesome ingredients, this potato bake not only satisfies your cravings for comfort food but also nourishes your body, making it a balanced option for a hearty meal.

Frequently Asked Questions (FAQs)

Can I Make This Potato Bake Ahead of Time?

Yes, you can prepare this dish ahead of time. The potato bake can be assembled the day before and stored in the refrigerator. When you’re ready to serve, simply pop it into the oven and bake it until it’s golden and crispy on top. This makes it an excellent choice for busy days when you want to enjoy a home-cooked meal with minimal effort.

Can I Use Sweet Potatoes Instead of Regular Potatoes?

Absolutely! Sweet potatoes can be used as a substitute for regular potatoes in this recipe. They will add a slightly sweeter flavor and provide additional nutrients like beta-carotene and fiber. The texture will remain similar, so feel free to experiment with this substitution for a slightly different twist on the dish.

What Are Some Variations I Can Try?

This recipe is incredibly versatile! Here are a few variations you can try:

  • Add proteins: Try adding cooked chicken, sausage, or bacon to the mix for an extra protein boost.
  • Switch up the cheese: Experiment with different types of cheese, such as mozzarella, cheddar, or even a tangy blue cheese, for a variety of flavors.
  • Add herbs and spices: Season the dish with herbs like thyme, rosemary, or oregano to enhance the flavor.

Can This Be Made Gluten-Free?

Yes! The recipe can easily be made gluten-free by substituting the wheat flour with a gluten-free flour blend or potato flour. This makes the dish suitable for those with gluten sensitivities while maintaining its delicious texture and flavor.

Can I Freeze This Potato Bake?

Yes, you can freeze this dish. Once it has cooled, cut it into individual portions and store it in an airtight container or freezer-safe bag. When you’re ready to enjoy it, simply reheat it in the oven until hot and crispy.

Conclusion: A Dish That Brings People Together

There’s something inherently comforting about the food we eat and the memories it brings. This potato bake is more than just a meal—it’s a reflection of the love and care that goes into cooking for those you care about. Whether it’s a casual weeknight dinner or a special family gathering, this dish has a way of bringing people together.

It’s easy to see why this potato bake has replaced pizza in our household—it’s heartwarming, full of flavor, and offers the same satisfaction without the guilt. With its simple yet delicious ingredients, it has the power to bring comfort and joy in every bite.

So next time you’re craving something hearty and satisfying, but want to try something new, skip the pizza and give this potato bake a try. Not only will it fill your stomach, but it will also fill your heart with the same warmth and joy I’ve always found in the simple act of sharing a meal with loved ones.

Amal

A Dish of Comfort: Why This Potato Bake Is Better Than Pizza

This grated potato bake is a perfect alternative to pizza, offering crispy edges and a soft, flavorful interior. Packed with grated potatoes, carrots, and cheese, it’s a simple yet satisfying dish for any meal.
Prep Time 15 minutes
Cook Time 45 minutes
Total Time 1 hour
Servings: 4 –6 servings
Course: Main Dish
Cuisine: European-inspired

Ingredients
  

  • 4-5 potatoes grated
  • 1 carrot grated
  • 1 leek or onion finely chopped
  • 2 eggs
  • 1 glass of kefir or plain drinking yogurt
  • 200 g 7 oz wheat flour
  • 3 tomatoes diced
  • Cheese grated, as desired

Method
 

  1. Prepare the Vegetables: Grate the potatoes and carrot. Finely chop the leek or onion and set everything aside.
  2. Mix the Ingredients: In a large mixing bowl, combine the grated potatoes, grated carrot, chopped leek or onion, eggs, kefir (or yogurt), and wheat flour. Stir everything well to form a thick batter.
  3. Add Tomatoes: Dice the tomatoes and add them to the mixture, gently folding them in.
  4. Prepare the Pan: Preheat the oven to 180°C (350°F). Grease a baking dish with oil and pour the mixture into the dish, spreading it evenly.
  5. Top with Cheese: Grate your choice of cheese and sprinkle it generously over the top of the potato mixture.
  6. Bake: Place the dish in the oven and bake for about 40-45 minutes, or until the top is golden brown and crispy, and the center is cooked through.
  7. Serve: Once done, let it cool for a few minutes, then slice and serve. Enjoy!

Notes

  • Storage: Leftovers can be stored in the fridge for up to 2 days. Reheat in the oven for best results.
  • Cheese Variations: Feel free to use any type of cheese you prefer. Cheddar, mozzarella, or even a bit of feta will work wonderfully.
  • Additions: For a protein boost, you can add cooked chicken, sausage, or even some beans to the mixture.

A Salad That Feels Like Home: My Journey to the Perfect Bowl of Freshness

Salads have always held a special place in my heart, not because they’re just nutritious, but because they remind me of family gatherings and the comfort of simple, wholesome food. Growing up, we would spend weekends at my grandmother’s house. She didn’t need much to create a feast; a few fresh vegetables from the garden, some avocado, and a drizzle of olive oil were all it took to bring us together.

One memory that always stands out was a summer afternoon when I was about 12. The air was warm, the kitchen was filled with chatter, and my grandmother was preparing her version of a veggie salad, always with a bit of her own touch. I remember the moment I tasted that avocado salad for the first time—smooth, creamy avocado combined with crisp cucumbers, sweet tomatoes, and a tangy dressing. I was hooked. That salad became a staple of every gathering, its fresh, vibrant flavors always bringing the family together.

Now, as an adult, I’ve made this recipe my own, adding a little twist here and there. The memories of my grandmother and the simple joy of sharing a meal with loved ones remain a constant inspiration. This Fresh & Flavorful Avocado Veggie Salad is my tribute to those moments. It combines the best of what I remember—crunchy veggies, creamy avocado, and a light, zesty dressing. It’s a salad that’s as much about nostalgia as it is about nourishing your body.

Why This Avocado Veggie Salad Is So Special

There are countless salad recipes out there, but this one has something different—it’s a perfect balance of textures, flavors, and nutrients. The creamy avocado acts as the base, complementing the crispness of the cucumber and bell peppers. The cherry tomatoes burst with sweetness, while the canned corn adds an unexpected crunch. The dressing is light but flavorful, with just the right amount of mustard and honey to tie everything together.

But what truly sets this salad apart is its versatility. It can be a refreshing side dish at a summer barbecue or a light meal on its own for a healthy lunch. The combination of fresh ingredients makes it ideal for any time of day. It’s also a wonderful recipe to experiment with—add extra herbs, swap out the honey for agave syrup, or even toss in some roasted nuts for added crunch. The base of this salad is simple, yet it offers endless possibilities.

Ingredients

IngredientAmount
Avocados2
Cherry tomatoes150-200 grams
Canned corn100 grams
Cucumber1
Green bell peppers2
Onions1 (small)
Sunflower oil220 grams
Milk100 ml
SaltTo taste
Black pepperTo taste
Mustard1 teaspoon
Garlic cloves2 (minced)
Honey1 teaspoon

Directions

  1. Prepare the Vegetables:
    Begin by washing and slicing the avocados in half, removing the pit, and scooping the flesh into a large salad bowl. Dice the cherry tomatoes, cucumber, and green bell peppers. Thinly slice the onion.
  2. Combine Ingredients:
    Add the diced tomatoes, cucumber, bell peppers, onions, and canned corn into the bowl with the avocado.
  3. Make the Dressing:
    In a small bowl, combine the sunflower oil, milk, mustard, minced garlic, honey, salt, and black pepper. Whisk everything together until the dressing is smooth and well combined.
  4. Toss the Salad:
    Pour the dressing over the vegetables and avocado. Gently toss to combine everything, ensuring the vegetables are coated with the dressing.
  5. Serve:
    Serve the salad immediately, or refrigerate it for 30 minutes to allow the flavors to meld. Enjoy it as a side dish or a light meal!

Nutritional Information (Per Serving)

NutrientAmount
Calories280 kcal
Protein4g
Carbohydrates14g
Sugars7g
Fat23g
Saturated Fat2g
Sodium120mg

The Health Benefits of This Salad

While this salad is incredibly delicious, it also packs a punch when it comes to nutrition. Here’s why it’s a healthy choice for anyone looking to incorporate more nutrient-dense foods into their diet:

  • Avocados:
    Avocados are a fantastic source of healthy fats, particularly monounsaturated fat, which is known for supporting heart health. They are also high in fiber, which aids digestion and keeps you feeling full longer. Additionally, avocados are loaded with vitamins and minerals, including potassium, which helps regulate blood pressure.
  • Tomatoes:
    Tomatoes are rich in antioxidants, particularly lycopene, which has been shown to reduce the risk of certain types of cancer. They are also an excellent source of vitamin C, which supports a healthy immune system.
  • Cucumbers and Bell Peppers:
    These vegetables are low in calories and packed with water, making them great for hydration. They’re also full of vitamins A and C, both of which are essential for maintaining healthy skin and immune function.
  • Corn:
    While often thought of as a starchy vegetable, corn provides a good amount of fiber and essential nutrients like B vitamins and magnesium.

By combining these healthy ingredients into one salad, you get a dish that’s not only satisfying but also provides your body with a range of essential nutrients. Whether you’re looking to boost your energy levels, improve digestion, or just enjoy a meal that’s good for you, this salad has you covered.

FAQs: Everything You Need to Know About This Salad

Can I make this salad ahead of time?

Yes, you can prepare this salad ahead of time, but there are a few things to keep in mind. To prevent the avocado from browning, it’s best to add it just before serving. You can, however, prepare the other vegetables and the dressing in advance, then toss them together when you’re ready to eat. If you store the salad in the fridge for a few hours before serving, the flavors will meld together, making it even more delicious.

Is this salad suitable for vegan diets?

Yes, this salad is naturally vegan-friendly, as long as you use a plant-based milk and avoid using honey. You can replace honey with agave syrup or maple syrup to keep the sweetness while making it fully vegan.

Can I add protein to this salad?

Absolutely! If you’re looking to turn this salad into a more filling meal, you can add grilled chicken, shrimp, or even chickpeas for a plant-based protein option. For a lighter version, you can keep it vegetarian, and the healthy fats from the avocado will keep you feeling satisfied.

How can I make the dressing dairy-free?

The dressing for this salad is already dairy-free, as it’s made with sunflower oil and milk. If you prefer a richer dressing, you can substitute the milk with coconut milk or another plant-based milk of your choice.

Can I use fresh corn instead of canned corn?

Yes, fresh corn would work perfectly in this salad. Just make sure to cook and cool the corn before adding it to the salad. Grilled corn can also add a smoky flavor that complements the freshness of the other vegetables.

What are some variations of this salad?

This salad is incredibly versatile, and you can customize it to suit your taste. Here are a few ideas:

  • Herbs: Add fresh cilantro or parsley for a burst of fresh flavor.
  • Nuts or Seeds: Add roasted almonds, sunflower seeds, or pumpkin seeds for extra crunch.
  • Cheese: A sprinkle of crumbled feta cheese or goat cheese would add a creamy, salty flavor.

Conclusion: A Salad That’s More Than Just a Meal

This Fresh & Flavorful Avocado Veggie Salad isn’t just about the ingredients; it’s about creating something that nourishes both the body and the soul. With each bite, you can taste the freshness of the vegetables, the creaminess of the avocado, and the tangy sweetness of the dressing. It’s a salad that brings back memories of simpler times, of family gatherings, and of the joy found in sharing a meal with those you love.

Whether you’re enjoying it on a warm afternoon or making it a part of a larger meal, this salad is sure to impress. It’s a recipe that’s easy to make, full of vibrant flavors, and packed with health benefits. It’s a reminder that food is more than just sustenance—it’s a way to connect, to share, and to create moments that last.

So, the next time you’re looking for a dish that’s as refreshing as it is delicious, remember this avocado veggie salad. It’s a celebration of simple ingredients and the power of home-cooked meals. Enjoy the taste of freshness, and let every bite take you back to those moments that made you smile.

Amal

A Salad That Feels Like Home: My Journey to the Perfect Bowl of Freshness

This Fresh & Flavorful Avocado Veggie Salad is a refreshing mix of creamy avocado, crunchy veggies, and a tangy dressing. A perfect balance of flavors and textures, it’s ideal as a light lunch, a side dish, or a satisfying snack.
Prep Time 15 minutes
Total Time 15 minutes
Servings: 4 –6 servings
Course: Salad
Cuisine: Mediterranean-Inspired

Ingredients
  

  • 2 ripe avocados
  • 150-200 grams cherry tomatoes halved
  • 100 grams canned corn drained
  • 1 cucumber diced
  • 2 green bell peppers diced
  • 1 small onion thinly sliced
  • 220 grams sunflower oil
  • 100 ml milk
  • Salt to taste
  • Black pepper to taste
  • 1 teaspoon mustard
  • 2 garlic cloves minced
  • 1 teaspoon honey

Method
 

  1. Prepare the Vegetables: Slice the avocados, remove the pit, and scoop the flesh into a large bowl. Dice the cherry tomatoes, cucumber, and bell peppers. Thinly slice the onion.
  2. Combine the Veggies: Add the diced tomatoes, cucumber, bell peppers, and onions into the bowl with the avocado. Stir gently to mix.
  3. Make the Dressing: In a small bowl, whisk together sunflower oil, milk, mustard, minced garlic, honey, salt, and black pepper. Whisk until smooth and well combined.
  4. Toss and Serve: Pour the dressing over the vegetables and toss gently to combine. Ensure all the ingredients are coated with the dressing.
  5. Serve: Serve immediately or refrigerate for 30 minutes to let the flavors meld together. This salad can be served as a light meal or side dish.

Notes

  • Storage: This salad is best served fresh. If you need to store leftovers, place the avocado and dressing in separate containers to prevent the avocado from browning.
  • Dairy-Free Option: Substitute the milk with a plant-based alternative to make the dressing fully dairy-free.
  • Add-Ins: Feel free to add proteins such as grilled chicken or chickpeas for a more substantial meal.