

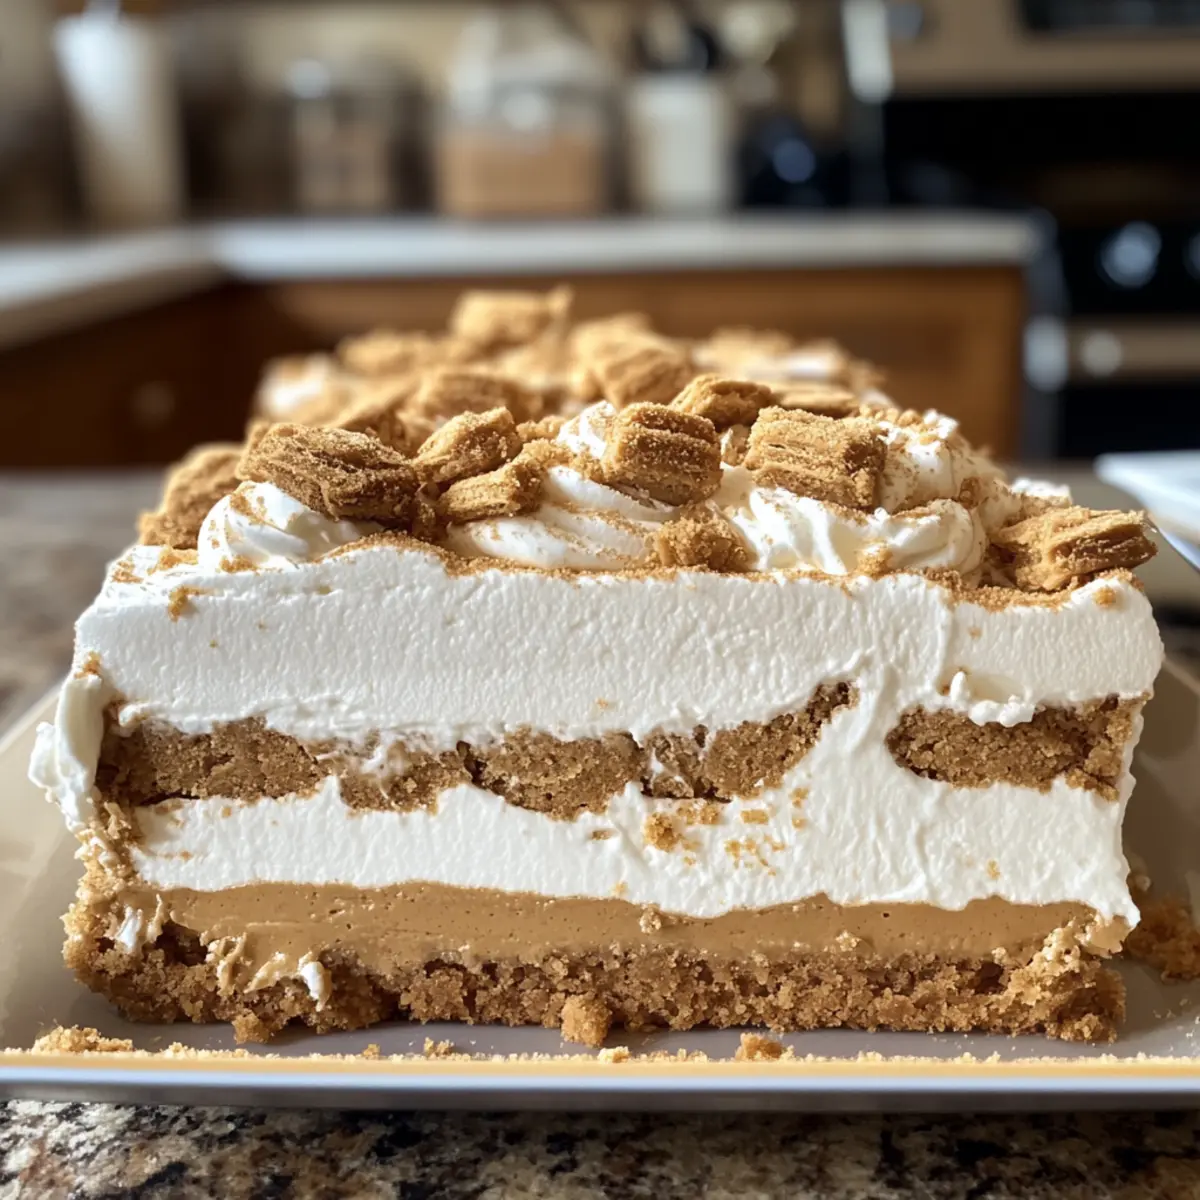
As the summer heat creeps in, a delightful discovery awaits in my kitchen: the Biscoff Icebox Cake. This no-bake wonder requires just four ingredients, making it an effortless dessert for those sweltering days when turning on the oven feels like a mini crisis. With creamy layers of sweet cookie butter mingling with crunchy Biscoff biscuits, this cake is not only simple to whip up but also a guaranteed crowd-pleaser for any gathering. Plus, it’s the perfect make-ahead treat that can sit in your freezer until it’s time to impress. What flavor twist will you be tempted to try in your own Biscoff Icebox Cake?
Why is the Biscoff Icebox Cake a must-try?
Simplicity: With only four ingredients, this cake requires minimal effort for maximum enjoyment!
No Baking Required: Perfect for hot summer days, avoid heating up the kitchen while still indulging in a delightful dessert.
Crowd-Pleasing: Friends and family will rave about its creamy texture and crunchy layers; it’s an instant showstopper at any gathering.
Versatile Customizations: Feel free to swap in your favorite flavored cookie butters or add crushed nuts for a personalized touch.
Make-Ahead Delight: Prepare in advance and keep it in the freezer for those spontaneous gatherings—always have a treat at the ready!
Discover more indulgent dessert ideas like the Nutty Vanilla Cake or try a refreshing Strawberry Cheesecake Dump Cake to mix things up!
Biscoff Icebox Cake Ingredients
• To create this delightful Biscoff Icebox Cake, gather these essential ingredients to ensure a truly tasty treat!
For the Cream Filling
- Heavy Cream – Cold heavy cream is key for achieving that perfect, airy texture.
- Sweetened Condensed Milk – This ingredient adds luscious sweetness and creaminess to your filling.
- Lotus Biscoff Spread – The star of this recipe, it gives that delectable spiced cookie flavor that makes the cake irresistible.
For the Layering
- Lotus Biscoff Biscuits – These crunchy biscuits provide delightful texture and structure for your icebox cake.
Step‑by‑Step Instructions for Biscoff Icebox Cake
Step 1: Whip the Cream
In a large, chilled mixing bowl, combine cold heavy cream and sweetened condensed milk. Using an electric mixer, whip the mixture on medium-high speed for about 3-5 minutes until stiff peaks form and the cream is fluffy and thick. This base will create the light texture that is key to the delightful Biscoff Icebox Cake.
Step 2: Incorporate Biscoff Spread
Gently fold in the Lotus Biscoff spread into the whipped cream mixture using a rubber spatula. Make sure the spread is fully incorporated without deflating the cream. You should achieve a smooth, well-blended mixture that showcases the rich, spiced flavor of Biscoff, setting the stage for the next layers of your cake.
Step 3: Prepare Biscoff Spread
To enhance the layering, microwave an additional 1/4 cup of Lotus Biscoff spread for about 10-15 seconds until it becomes runny and pourable. This step will make it easier to drizzle into the layers, adding a burst of flavor. Just be careful not to overheat it; you want it warm but not hot.
Step 4: Line the Pan
Line a 9×5 loaf pan with overlapping plastic wrap, ensuring there’s enough excess on each side to cover the cake later. This will help with easy removal once the Biscoff Icebox Cake sets. Make sure the wrap covers the corners and edges securely to prevent any spills.
Step 5: Layer the Cream and Biscuits
Spread a thin layer of the fluffy Biscoff cream on the bottom of your lined loaf pan. Then, place a layer of Biscoff biscuits evenly over the cream, ensuring they are snugly arranged. This creates a delightful crunch that complements the creamy texture, setting the foundation for your dessert.
Step 6: Add the First Layer of Cream
Top the layer of biscuits with one-third of the remaining Biscoff cream mixture. Drizzle some of the warmed Biscoff spread over the cream for added sweetness and flavor. Smooth out the top with a spatula, creating a visually appealing layer, and prepare for the next round of layering.
Step 7: Repeat the Layering
Repeat the layering process two more times with the remaining Biscoff cream and biscuits. Make sure to finish the final layer with a decorative top of biscuits and any remaining cream. This method builds a contrasting structure of creamy and crunchy, essential for mastering the Biscoff Icebox Cake.
Step 8: Freeze
Garnish the top with additional biscuit crumbs and whole Biscoff biscuits for a beautiful presentation. Cover the cake with the plastic wrap and freeze for a minimum of 2 hours, or ideally overnight. This freezing step helps the cake set beautifully, allowing all the flavors to meld together.
Step 9: Slice and Serve
Once frozen, carefully slice the Biscoff Icebox Cake while it’s still cold. Let the slices sit at room temperature for about 15 minutes before serving, allowing them to soften just a bit. Serve chilled, and watch friends and family delight in every bite of this decadent treat!
How to Store and Freeze Biscoff Icebox Cake
Fridge: Store the Biscoff Icebox Cake in the refrigerator for up to 3 days covered in an airtight container. However, freezing is recommended for longer freshness.
Freezer: Wrap the cake tightly in plastic wrap or foil before placing it in the freezer. It can be stored for up to 2 weeks, maintaining its delicious flavor and texture.
Thawing: To serve, remove individual slices from the freezer and let them sit at room temperature for about 15 minutes to soften. This ensures a more enjoyable eating experience.
Leftovers: If you have leftover cream mixture, store it in the fridge for up to 2 days, but it’s best enjoyed fresh alongside your Biscoff Icebox Cake.
Expert Tips for Biscoff Icebox Cake
Chill Your Tools: Ensure your mixing bowls and utensils are cold; this helps achieve fluffy peaks for the cream mixture.
Taste and Adjust: Before layering, taste the Biscoff cream and feel free to add more condensed milk or sugar if you prefer a sweeter flavor.
Layer with Care: Avoid overfilling each layer, as the Biscoff Icebox Cake will be more stable if layers are thin, preventing any spills.
Cover Well: Wrap the cake tightly in plastic wrap before freezing to prevent freezer burn and retain its creamy texture.
Thawing Time: Don’t rush the slicing process! Let the cake soften at room temperature for about 15 minutes before serving; it enhances every bite.
What to Serve with Biscoff Icebox Cake
Imagine a sumptuous dessert experience, perfectly designed to entice your taste buds and create wonderful memories.
- Whipped Cream: A cloud of airy whipped cream adds an extra touch of sweetness that beautifully contrasts the rich Biscoff flavors.
- Vanilla Ice Cream: The creamy, cold ice cream pairs wonderfully with the cake, enhancing its overall indulgence while providing a refreshing chill.
- Fresh Berries: Juicy strawberries or raspberries offer a bright, tangy burst that balances the sweetness of the cake, making each bite vibrant and refreshing.
- Chocolate Sauce: Drizzling some warm chocolate sauce adds a decadent twist, creating a combination that’s utterly irresistible as it complements the Biscoff spread.
- Coffee: A cup of freshly brewed coffee can heighten the flavors of the cake, adding a comforting warmth that transforms dessert into an elegant affair.
- Mint Leaves: A sprinkle of fresh mint leaves elevates the dessert visually and provides a fresh, herbal note that lightens the rich layers of flavor.
- Nutty Biscotti: As a crunchy side treat, nutty biscotti offers a delightful contrast in texture when enjoyed alongside each creamy slice of the cake.
Keep these delightful pairings in mind to make your Biscoff Icebox Cake experience a true celebration of flavors and textures!
Make Ahead Options
These Biscoff Icebox Cakes are a fantastic dessert to prepare ahead of time, saving you precious minutes on busy days! You can whip together the creamy filling and layer the biscuits up to 24 hours in advance. To maintain their quality, store the uncut, wrapped cake in the freezer until you’re ready to serve. The flavors meld beautifully during this time, making each bite just as delightful as fresh! When it’s time to indulge, simply slice the frozen cake and let it sit at room temperature for about 15 minutes before serving, ensuring it softens to perfection for your loved ones to enjoy.
Biscoff Icebox Cake Variations
Feel free to unleash your creativity and customize your Biscoff Icebox Cake with these delightful twists!
-
Nutty Crunch: Add a layer of crushed almonds or hazelnuts for extra texture and a nutty flavor that complements the Biscoff spread beautifully. The added crunch takes this dessert to a whole new level!
-
Dairy-Free Delight: Substitute the heavy cream with coconut cream for a dairy-free option, while still achieving a rich and creamy texture. You won’t even miss the traditional dairy—just pure bliss!
-
Chocolate Indulgence: Incorporate a layer of whipped chocolate ganache between the cookie layers. This decadent addition will elevate your icebox cake and satisfy any chocolate lover’s cravings.
-
Fruity Freshness: Add a layer of fresh or frozen berries, like raspberries or sliced strawberries, between the cream and biscuits. The tartness from the fruit balances the sweetness perfectly, creating a refreshing spin on this dessert.
-
Spicy Surprise: Mix in a touch of cinnamon or ginger to the cream filling for a hint of warmth and spice. This subtle twist enhances the flavor profile and adds a delightful depth to every bite.
-
Flavorful Cookie Swap: For a fun twist, use other flavored cookie spreads like speculoos or peanut butter, creating a whole new take on your icebox cake. It’s a great way to experiment with different tastes!
-
Heat It Up: For those who love a little spice, sprinkle chopped jalapeños into the cream mixture. This unexpected combination will give you a sweet-heat sensation that’s sure to wow guests!
Each of these variations will uplift your Biscoff Icebox Cake experience, ensuring that every occasion feels special. Don’t forget to check out the Sky Jelly Cake or a luscious Matcha Sponge Cake for even more delectable dessert ideas!
Biscoff Icebox Cake Recipe FAQs
What should I look for when selecting ingredients for my Biscoff Icebox Cake?
Absolutely! For the heavy cream, ensure that it is cold; this is key to whipping it into stiff peaks. When picking the Lotus Biscoff spread, look for a smooth texture without any dark spots, which can indicate spoilage. As for the Biscoff biscuits, choose a package that’s intact and not broken; this will make layering much easier.
How should I store my Biscoff Icebox Cake after making it?
You can store the Biscoff Icebox Cake in the refrigerator for up to 3 days in an airtight container. However, for optimum freshness and flavor, I recommend keeping it in the freezer, tightly wrapped in plastic wrap or foil for up to 2 weeks. This way, you can enjoy those luscious layers even longer!
Can I freeze individual slices of Biscoff Icebox Cake?
Yes, indeed! To freeze individual slices, wrap them well in plastic wrap and then place them in a freezer-safe container. This will ensure they stay fresh for up to 2 weeks. When you’re ready to enjoy a slice, simply take it out and let it sit at room temperature for about 15 minutes before serving. This extra time allows it to soften, making each bite even more delightful!
What if my Biscoff cream mixture doesn’t whip up properly?
Ah, that can happen! If your cream mixture isn’t whipping, it might be because either the heavy cream wasn’t cold enough or the bowl wasn’t chilled. Always start with cold mixing tools. If your mixture feels too runny, try whipping it a little longer. Just be cautious not to over-whip, or you might end up making butter instead of a fluffy cream. If it remains a challenge, adding a touch more heavy cream can sometimes help stabilize the mixture as you whip.
Can I substitute ingredients if I have dietary restrictions?
Very much so! The Biscoff Icebox Cake is quite flexible. If you need a dairy-free option, you can use coconut cream instead of heavy cream. For the Biscoff spread, any nut-free cookie butter can be a great alternative. Just be sure to double-check the labels if you’re accommodating allergies or dietary needs!
Is Biscoff Icebox Cake suitable for pets?
Unfortunately, it’s best to keep this treat away from pets. The sugar and chocolate found in the Biscoff biscuits could be harmful to dogs and cats. Always opt for pet-friendly treats and enjoy your cake without worrying about fur babies sneaking a bite!
Delicious Biscoff Icebox Cake: The Ultimate No-Bake Treat
Ingredients
Equipment
Method
- In a large, chilled mixing bowl, combine cold heavy cream and sweetened condensed milk. Whip on medium-high speed for 3-5 minutes until stiff peaks form.
- Gently fold in Lotus Biscoff spread into the whipped cream mixture using a rubber spatula until well-blended.
- Microwave 1/4 cup of Lotus Biscoff spread for 10-15 seconds until it becomes runny.
- Line a 9x5 loaf pan with overlapping plastic wrap, making sure to cover corners and edges securely.
- Spread a layer of the Biscoff cream at the bottom of the lined loaf pan, then add a layer of Biscoff biscuits.
- Top the biscuits with one-third of the remaining Biscoff cream mixture and drizzle warmed Biscoff spread over the cream.
- Repeat the layering process two more times, finishing with a decorative top of biscuits.
- Garnish the top with biscuit crumbs, cover with plastic wrap and freeze for a minimum of 2 hours or overnight.
- Once frozen, slice the cake while still cold and let sit at room temperature for 15 minutes before serving.