

Introduction to Butterfinger Balls Recipe
What are Butterfinger Balls?
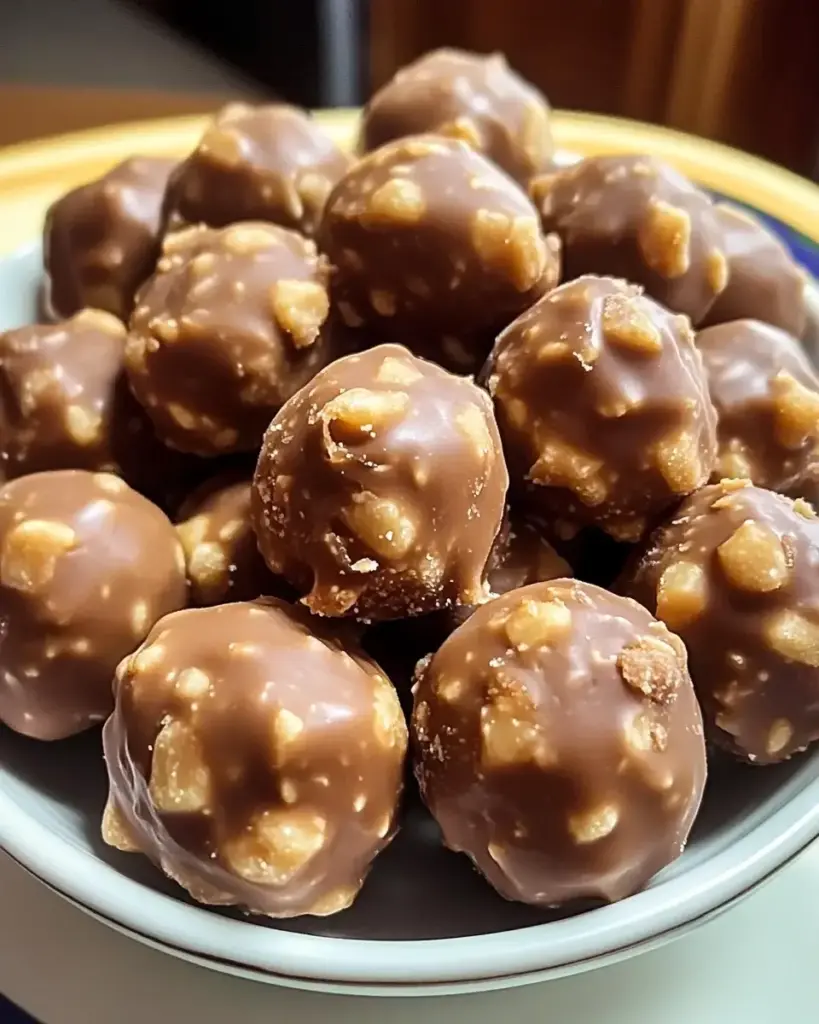
Butterfinger Balls are delightful treats that combine the rich flavors of creamy peanut butter and crunchy Butterfinger candy bars. These no-bake snacks are rolled into bite-sized balls, coated in smooth chocolate, and are perfect for satisfying your sweet tooth. Each bite offers a wonderful mix of textures, from the creamy center to the crispy candy bits, making them a favorite among both kids and adults. They are easy to make and require minimal ingredients, making them a go-to recipe for parties, holidays, or just a fun afternoon treat.
Why You Should Try This Butterfinger Balls Recipe
If you’re looking for a quick and delicious dessert, this Butterfinger Balls recipe is a must-try! Not only is it simple to prepare, but it also requires no baking, which means less mess in the kitchen. The combination of peanut butter and Butterfinger bars creates a flavor explosion that is hard to resist. Plus, you can customize the recipe by adding your favorite candy bars or nuts for a unique twist. Whether you’re hosting a gathering or just want a sweet snack, these treats are sure to impress. So, roll up your sleeves and get ready to indulge in a delightful treat that everyone will love!
Ingredients for Butterfinger Balls Recipe
To create these scrumptious Butterfinger Balls, you’ll need a few simple ingredients that are likely already in your pantry. Here’s what you’ll need:
- 1 cup creamy peanut butter
- 1 cup powdered sugar
- 1 cup crushed Butterfinger candy bars (about 4 full-size bars)
- 1 teaspoon vanilla extract
- 1 ½ cups milk chocolate chips
- 1 tablespoon vegetable oil
These ingredients come together to form a deliciously sweet and crunchy treat. The creamy peanut butter provides a rich base, while the crushed Butterfinger bars add that signature crunch and flavor. The powdered sugar helps bind everything together, making it easy to roll into balls. Finally, the melted chocolate coating adds a smooth finish that perfectly complements the filling.
Feel free to get creative! You can add chopped peanuts for extra crunch or swap out the Butterfinger bars for your favorite candy bars. This flexibility allows you to tailor the recipe to your taste, making it even more enjoyable. Gather these ingredients, and let’s move on to the next step in making your Butterfinger Balls!
Step-by-Step Preparation of Butterfinger Balls Recipe
Step 1: Gather Your Ingredients
Before you start making your Butterfinger Balls, it’s important to gather all your ingredients. This will make the process smoother and more enjoyable. Make sure you have:
- 1 cup creamy peanut butter
- 1 cup powdered sugar
- 1 cup crushed Butterfinger candy bars (about 4 full-size bars)
- 1 teaspoon vanilla extract
- 1 ½ cups milk chocolate chips
- 1 tablespoon vegetable oil
Having everything ready will help you stay organized. Plus, it’s always fun to see all the ingredients laid out, waiting to be transformed into a delicious treat!
Step 2: Prepare the Butterfinger Mixture
Now that you have your ingredients, it’s time to make the Butterfinger mixture. In a mixing bowl, combine the creamy peanut butter, powdered sugar, crushed Butterfinger bars, and vanilla extract. Use a spatula or a wooden spoon to mix everything together. Keep stirring until the mixture is well combined and forms a dough-like consistency. This step is crucial, as it ensures that all the flavors blend perfectly. The sweet aroma of peanut butter and candy will fill your kitchen, making it hard to resist tasting!
Step 3: Form the Balls
Once your mixture is ready, it’s time to shape it into balls. Using your hands, take a small amount of the mixture and roll it into a ball about 1 inch in diameter. Place each ball on a parchment-lined baking sheet. This step can be a bit messy, but that’s part of the fun! You should end up with about 12 balls, depending on how big you make them. If you find the mixture sticking to your hands, a little dusting of powdered sugar can help.
Step 4: Chill the Butterfinger Balls
After forming the balls, it’s important to chill them. Place the baking sheet in the refrigerator for about 30 minutes. Chilling helps the balls firm up, making them easier to coat in chocolate later. While you wait, you can clean up your workspace or even sneak a taste of the leftover mixture—just be careful, it’s addictive!
Step 5: Coat the Balls in Chocolate
Once the Butterfinger Balls are chilled, it’s time for the best part—coating them in chocolate! In a microwave-safe bowl, combine the milk chocolate chips and vegetable oil. Melt them together in 30-second intervals, stirring in between until the mixture is smooth and creamy. This will create a lovely chocolate coating. Now, take each chilled ball and dip it into the melted chocolate, allowing any excess to drip off. Return the coated balls to the baking sheet. Repeat this process until all the balls are covered in chocolate. The sight of these shiny treats will make your mouth water!
Variation of Butterfinger Balls Recipe
Alternative Coatings for Butterfinger Balls
If you want to switch things up, there are plenty of alternative coatings for your Butterfinger Balls. While the classic milk chocolate coating is delicious, you can experiment with different types of chocolate for a unique twist. For instance, try using dark chocolate for a richer flavor. The slight bitterness of dark chocolate pairs wonderfully with the sweetness of the filling.
Another option is white chocolate, which adds a creamy sweetness that contrasts nicely with the crunchy Butterfinger bits. You can also sprinkle crushed nuts, like almonds or peanuts, on top of the chocolate coating for added texture and flavor. If you’re feeling adventurous, consider using colored candy melts for a fun and festive look. This is especially great for parties or holidays!
Flavor Variations to Try
Don’t hesitate to get creative with the flavors in your Butterfinger Balls! While the original recipe is fantastic, you can easily customize it to suit your taste. For a different flavor profile, try adding a pinch of sea salt to the peanut butter mixture. This will enhance the sweetness and create a delightful contrast.
You can also mix in other types of candy bars, like Snickers or Reese’s, to create a new flavor experience. If you love coconut, consider adding shredded coconut to the mixture for a tropical twist. For a hint of spice, a dash of cinnamon or even a splash of maple syrup can elevate the flavor. The possibilities are endless, so feel free to experiment and find your favorite combination!
Cooking Note for Butterfinger Balls Recipe
When making Butterfinger Balls, there are a few cooking notes to keep in mind to ensure your treats turn out perfectly. First, make sure to use creamy peanut butter for the best texture. Chunky peanut butter can make it difficult to roll the mixture into smooth balls. If you prefer a crunchier texture, consider adding chopped peanuts to the mixture, but keep in mind that this will change the overall consistency.
Additionally, when melting the chocolate, be patient. Melting in 30-second intervals helps prevent the chocolate from burning. Stirring in between is crucial, as it allows the heat to distribute evenly. If you find the chocolate too thick, adding a little more vegetable oil can help achieve a smoother consistency for dipping.
Lastly, remember that chilling the balls is essential. This step not only helps them hold their shape but also makes the chocolate coating process easier. If you’re in a hurry, you can place the baking sheet in the freezer for about 15 minutes instead of the refrigerator. Just be sure to keep an eye on them to avoid freezing!
By following these cooking notes, you’ll create delicious Butterfinger Balls that are sure to impress your family and friends. Enjoy the process and have fun making these delightful treats!
Serving Suggestions for Butterfinger Balls Recipe
Once your Butterfinger Balls are ready, it’s time to think about how to serve them! These treats are not only delicious but also versatile, making them perfect for various occasions. Here are some fun serving suggestions to elevate your Butterfinger Balls experience:
- Party Platter: Arrange the Butterfinger Balls on a decorative platter. You can add some colorful sprinkles or drizzle extra melted chocolate on top for a festive touch. This makes for an eye-catching centerpiece at any gathering.
- Gift Treats: Package the Butterfinger Balls in small treat bags or boxes. Tie them with a ribbon for a sweet homemade gift. They make great presents for birthdays, holidays, or just to show someone you care.
- Ice Cream Topping: Crumble some Butterfinger Balls over a scoop of vanilla or chocolate ice cream. This adds a delightful crunch and flavor that will take your dessert to the next level.
- Snack Time: Serve the Butterfinger Balls as a quick snack for kids after school or as a sweet treat during movie night. They are easy to grab and enjoy, making them a perfect on-the-go option.
- Holiday Treats: For special occasions like Halloween or Christmas, consider decorating the Butterfinger Balls with themed toppings. Use colored chocolate melts or edible glitter to match the holiday spirit.
These serving suggestions will not only enhance the presentation of your Butterfinger Balls but also make them more enjoyable for everyone. Whether you’re hosting a party or simply indulging at home, these treats are sure to be a hit!
Tips for Perfecting Your Butterfinger Balls Recipe
Creating the perfect Butterfinger Balls is all about attention to detail and a few handy tips. Here are some suggestions to help you achieve the best results:
- Use Room Temperature Ingredients: Make sure your peanut butter is at room temperature. This makes it easier to mix with the powdered sugar and other ingredients, resulting in a smoother dough.
- Measure Accurately: For the best outcome, measure your ingredients carefully. Too much or too little of any ingredient can affect the texture and flavor of your Butterfinger Balls.
- Chill Between Steps: Don’t skip the chilling steps! Chilling the mixture before rolling and after coating helps the balls maintain their shape and ensures the chocolate coating sets properly.
- Experiment with Dipping Techniques: When dipping the balls in chocolate, try using a fork or a toothpick for better control. This can help you achieve an even coating and make it easier to handle the balls.
- Customize Your Coating: Feel free to add toppings to the chocolate coating. Sprinkles, crushed nuts, or even a drizzle of white chocolate can add a fun twist to your Butterfinger Balls.
- Store Properly: To keep your Butterfinger Balls fresh, store them in an airtight container in the refrigerator. This will help maintain their texture and flavor for up to a week.
- Get Creative: Don’t hesitate to try different candy bars or mix-ins. The beauty of this recipe is its versatility, so let your imagination run wild!
By following these tips, you’ll be well on your way to making the most delicious Butterfinger Balls. Enjoy the process and share your tasty creations with friends and family!
Breakdown of Time for Butterfinger Balls Recipe
Prep Time
The prep time for making Butterfinger Balls is quite short, making this recipe perfect for those who are short on time. You’ll need about 15 minutes to gather your ingredients and prepare the mixture. This includes mixing the peanut butter, powdered sugar, crushed Butterfinger bars, and vanilla extract until well combined. It’s a quick and easy process that anyone can manage!
Cooking Time
Since Butterfinger Balls are a no-bake treat, the cooking time is minimal. The only time you’ll spend cooking is when you melt the chocolate chips and vegetable oil together. This should take about 2-3 minutes in the microwave, depending on your microwave’s power. Just remember to melt in 30-second intervals and stir in between to avoid burning the chocolate.
Total Time
In total, you can expect to spend about 1 hour on this Butterfinger Balls recipe. This includes the 15 minutes of prep time, 30 minutes of chilling time for the balls, and an additional 15 minutes for the chocolate coating to set. It’s a quick and delightful treat that you can whip up in no time, making it perfect for last-minute gatherings or a sweet snack at home!
Nutritional Information for Butterfinger Balls Recipe
Calories in Butterfinger Balls
When indulging in Butterfinger Balls, it’s good to know the calorie content. Each serving contains approximately 180 calories. This makes them a sweet treat that can fit into your daily calorie allowance without too much guilt. However, moderation is key! Enjoying one or two Butterfinger Balls can satisfy your sweet tooth while keeping your calorie intake in check.
Protein Content
Butterfinger Balls also provide a decent amount of protein. Each serving contains about 4 grams of protein. The creamy peanut butter is the main source of this protein, contributing to the overall nutritional value of the treat. While they are not a primary source of protein, they can still be a fun way to add a little extra to your diet, especially when enjoyed as a snack after a workout or during the day.
Sodium Levels
In terms of sodium, Butterfinger Balls are relatively low. Each serving contains around 100 milligrams of sodium. This is a reasonable amount, especially considering that many snacks can be much higher in sodium. Keeping an eye on sodium levels is important for maintaining a healthy diet, and these treats can be enjoyed without significantly impacting your daily intake.
FAQs about Butterfinger Balls Recipe
Can I make Butterfinger Balls ahead of time?
Absolutely! Butterfinger Balls are perfect for making ahead of time. You can prepare them a day or two in advance and store them in the refrigerator. This makes them a great option for parties or gatherings. Just remember to let them chill properly after coating them in chocolate. This way, they’ll be ready to serve when you need them!
How should I store Butterfinger Balls?
To keep your Butterfinger Balls fresh, store them in an airtight container. Place them in the refrigerator, where they can last for up to one week. If you want to keep them for a longer period, you can freeze them. Just make sure to separate the balls with parchment paper to prevent them from sticking together. When you’re ready to enjoy them, simply thaw them in the fridge for a few hours.
Can I use different types of chocolate for coating?
Yes, you can definitely use different types of chocolate for coating your Butterfinger Balls! While milk chocolate is the classic choice, dark chocolate and white chocolate are also delicious options. Each type of chocolate will give a unique flavor to the treats. Feel free to experiment and find your favorite chocolate coating!
Are Butterfinger Balls gluten-free?
Yes, Butterfinger Balls can be gluten-free! The main ingredients in this recipe, such as peanut butter, powdered sugar, and chocolate, are naturally gluten-free. However, it’s important to check the labels of the specific products you use, especially the chocolate chips and Butterfinger bars, to ensure they are certified gluten-free. This way, you can enjoy these treats without any worries!
Conclusion on Butterfinger Balls Recipe
In conclusion, the Butterfinger Balls recipe is a delightful and easy treat that everyone can enjoy. With just a few simple ingredients, you can create a sweet snack that combines the rich flavors of peanut butter and Butterfinger candy bars. Whether you’re making them for a party, a holiday gathering, or just for yourself, these no-bake treats are sure to impress.
Not only are they quick to prepare, but they also offer endless possibilities for customization. You can experiment with different coatings, flavors, and mix-ins to create your own unique version of Butterfinger Balls. Plus, they are perfect for sharing with friends and family, making them a great addition to any occasion.
So, gather your ingredients, roll up your sleeves, and get ready to indulge in these scrumptious treats. With their creamy center and crunchy coating, Butterfinger Balls are bound to become a favorite in your household. Enjoy making and sharing them, and don’t forget to savor every delicious bite!
Butterfinger Balls Recipe: A Quick and Easy Delight
Ingredients
Method
- Mix the Base:In a large bowl, use a hand or stand mixer to cream together the peanut butter and softened butter until smooth. Add vanilla extract and mix until combined.
- Add Sweetness and Crunch:Gradually mix in the powdered sugar at low speed, scraping the sides of the bowl as needed. Fold in graham cracker crumbs and crushed Butterfingers until the mixture is evenly combined.
- Form the Balls:Line a baking sheet with parchment paper. Scoop about 1 to 1½ tablespoons of the dough and roll into balls. Place them spaced apart on the sheet.
- Chill to Set:Freeze the formed balls for 30 minutes or until completely firm.
- Melt the Chocolate:In a microwave-safe bowl, melt the chocolate bark or chips in 30-second intervals at 50% power, stirring between bursts until smooth. Be careful not to overheat.
- Dip and Decorate:Dip each chilled ball in the melted chocolate—either fully or halfway. Immediately top with additional crushed Butterfingers, sea salt, or sprinkles before the chocolate sets.
- Let Them Set:Allow the chocolate coating to harden completely before serving or storing.
Notes
- Use regular peanut butter (like Jif or Skippy) for best consistency.
- For a deeper chocolate flavor, use dark chocolate chips or bark.
- These freeze beautifully—great for make-ahead treats during holidays or special occasions.
- Try dipping only halfway for a two-tone look or drizzle extra chocolate over the tops once set.