

As I stood in my kitchen, the scent of melting chocolate filled the air, instantly transporting me to the heart of the holiday season. This quick and festive Christmas Puffcorn recipe brings together the light crunch of puffed corn and the indulgent sweetness of rich chocolate coatings. It’s the perfect solution for last-minute party snacks or delightful gifts for neighbors and teachers, making it easy to spread holiday cheer without a fuss. Not only is this treat a guaranteed crowd-pleaser, but it’s also simple to whip up in no time, leaving you more moments to enjoy the festivities. So, are you ready to dive into this delightful holiday confection?
Why is Christmas Puffcorn a Must-Try?
Simplicity at Its Best: This festive treat requires minimal effort, making it a great choice for anyone, even novice bakers.
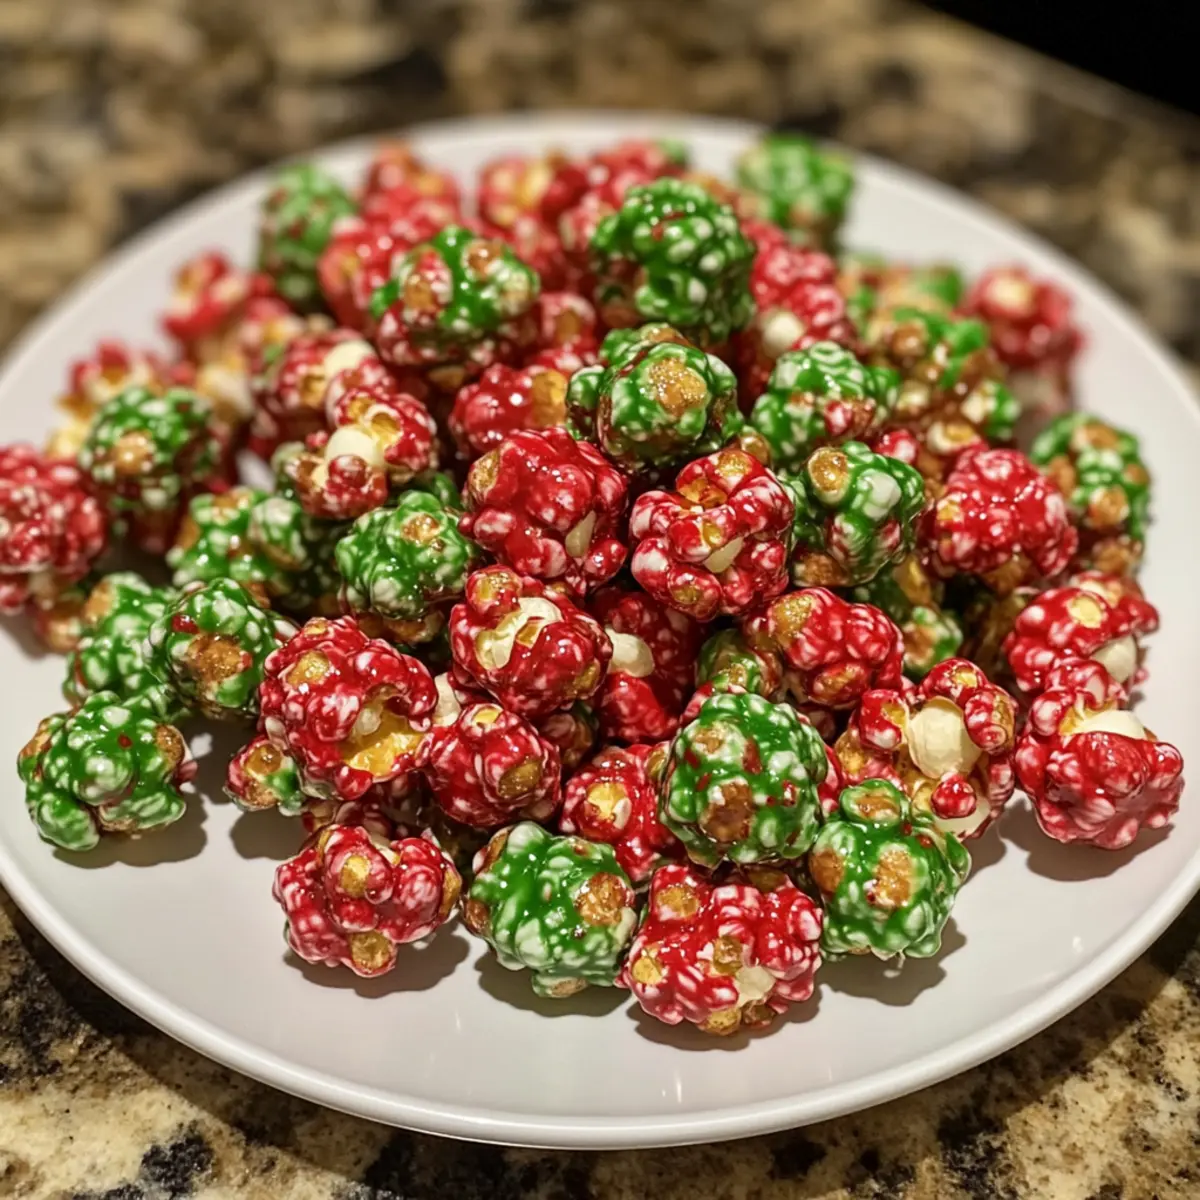
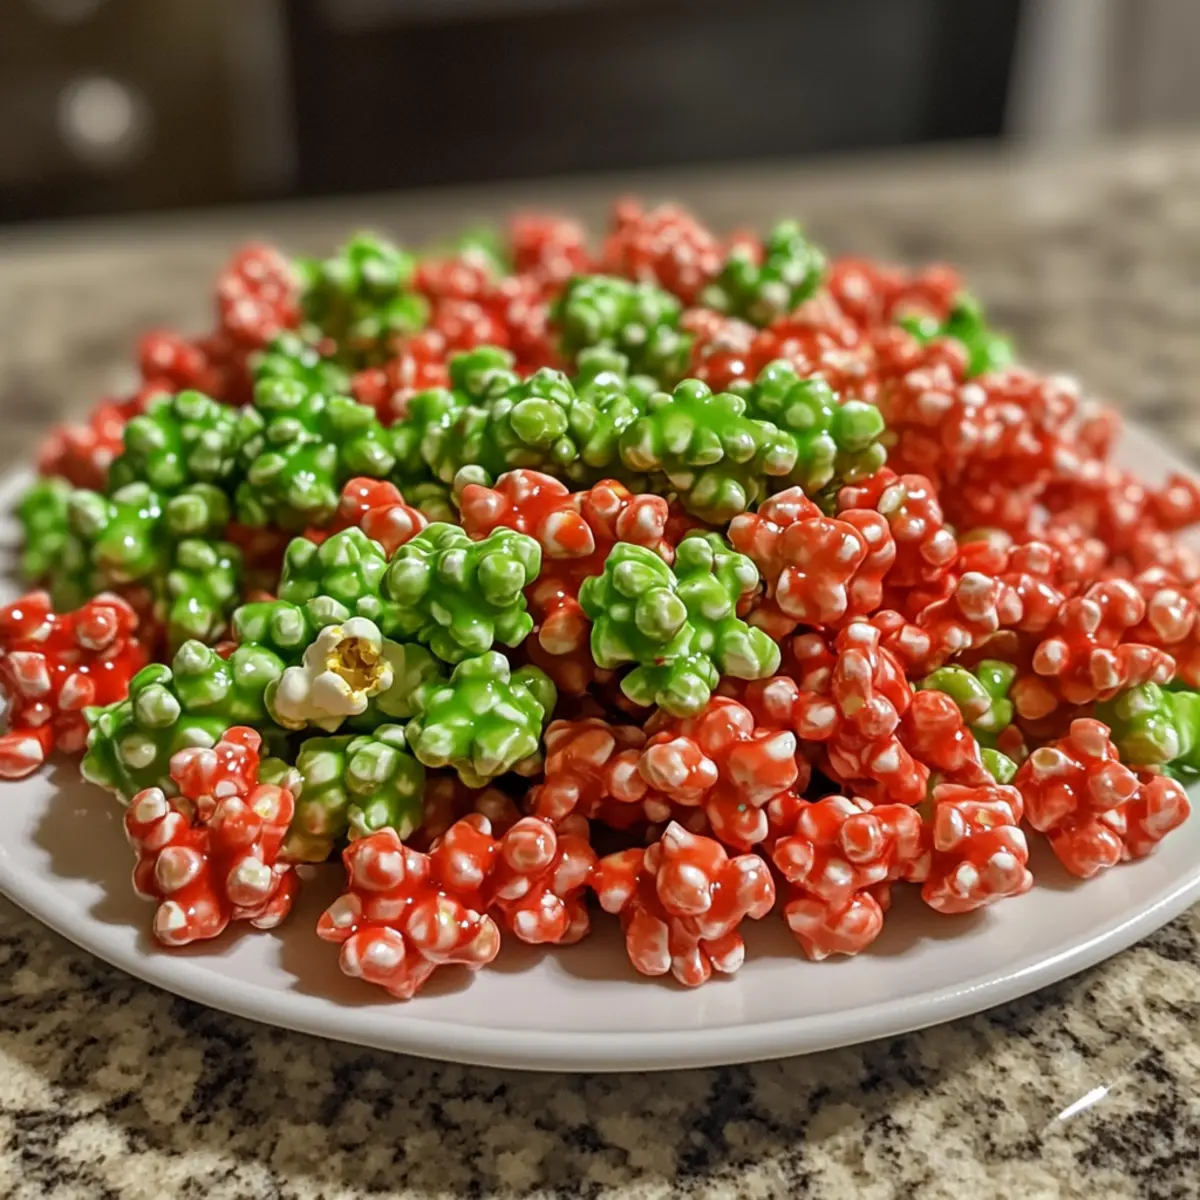
Vibrant Presentation: The red and green candy coats create a stunning visual, perfect for any holiday gathering.
Endless Versatility: Feel free to experiment with different flavors by using various colored candy melts or adding toppings like sprinkles.
Quick and Easy: Prepared in just a few steps, you’ll have a delightful snack ready in no time—ideal for holiday parties and gift-giving.
Crowd-Pleasing Delight: Its sweet, crunchy texture guarantees that everyone—from kids to adults—will love this indulgent snack. For even more easy festive treats, check out our favorite holiday snacks.
Christmas Puffcorn Ingredients
• Perfect for festive gatherings!
For the Base
- Puffcorn (9 ounces) – This light, airy base is essential for that delightful crunch without any substitutions needed.
For the Coating
- Red Candy Melts (12 ounces) – Adds a sweet, festive touch; feel free to switch with any color to match your holiday theme.
- Green Candy Melts (12 ounces) – Complements the red perfectly for visual appeal; other types of chocolate can be used as well.
- Coconut Oil (2 teaspoons, divided) – Ensures a smooth melting process and provides a glossy finish; vegetable oil is a possible substitute, but expect slight flavor changes.
Step‑by‑Step Instructions for Christmas Puffcorn
Step 1: Divide the Puffcorn
Begin by dividing the 9 ounces of puffcorn equally into two large bowls. This separation will prepare you for the festive layers of deliciousness that await. Make sure to keep the bowls spacious enough to allow for easy mixing later on.
Step 2: Melt the Red Candy Melts
In a microwave-safe bowl, combine 12 ounces of red candy melts with 1 teaspoon of coconut oil. Microwave in 30-second intervals, stirring in between, until the mixture is smooth and fully melted, typically about 1-2 minutes. The mixture should be glossy for a perfect coating that enhances your Christmas Puffcorn.
Step 3: Coat the First Bowl of Puffcorn
Pour the melted red chocolate over the first bowl of puffcorn, and gently stir to ensure every piece is evenly coated. Keep stirring until the candy melts fully embrace the puffcorn, creating a vibrant festive hue. Aim for complete coverage, which should take about 2-3 minutes.
Step 4: Spread to Dry
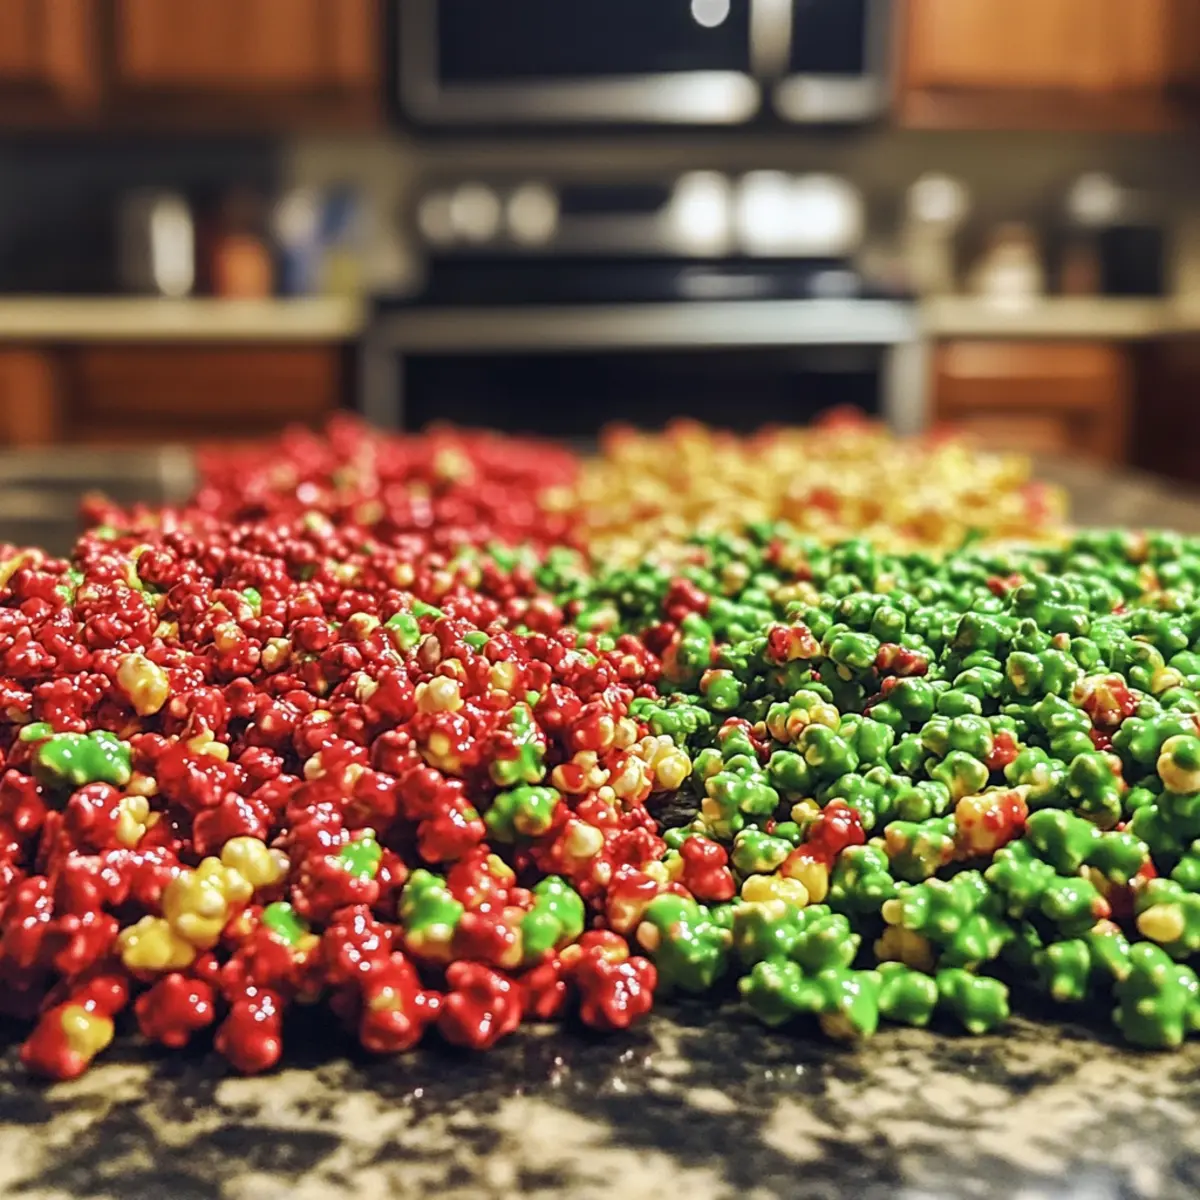
Line a cookie sheet with parchment paper and spread the red-coated puffcorn evenly across it. Ensure the pieces aren’t stacked on top of one another to promote even drying. Let it sit at room temperature for about 10-15 minutes or until the chocolate has set and feels firm to the touch.
Step 5: Melt the Green Candy Melts
While the red puffcorn is drying, repeat the melting process with the green candy melts. Combine 12 ounces of green candy melts with the remaining 1 teaspoon of coconut oil in a microwave-safe bowl. Melt in short 30-second bursts, stirring thoroughly until completely smooth and glossy, usually taking around 1-2 minutes.
Step 6: Coat the Second Bowl of Puffcorn
Once the green candy melts are ready, pour them over the second bowl of puffcorn. As before, stir gently but thoroughly to coat each piece, ensuring that the bright green color wraps around the puffcorn, providing a festive contrast to the red. This step should also take about 2-3 minutes for even coating.
Step 7: Spread the Green Puffcorn to Dry
Transfer the green-coated puffcorn onto another parchment-lined cookie sheet, spreading it out to avoid clumping. Allow this batch to dry for 10-15 minutes, ensuring the chocolate has set to a nice glossy finish, perfect for mixing later.
Step 8: Combine the Puffcorn Flavors
Once both the red and green puffcorn have dried and can be handled, gently mix them together in a large serving bowl. This step creates a festive blend of colors and textures in your Christmas Puffcorn. Aim for an even distribution of both types for a delightful presentation.
Step 9: Store the Christmas Puffcorn
To keep your delicious Christmas Puffcorn fresh, transfer it to an airtight container. It can be stored at room temperature for up to three days. This will ensure that its crunchy texture and delightful flavors stay intact, ready to share with family and friends.
How to Store and Freeze Christmas Puffcorn
Room Temperature: Store your Christmas Puffcorn in an airtight container at room temperature for up to 3 days. This keeps it fresh while maintaining its delightful crunch.
Fridge: Though not necessary, if you prefer a cooler treat, you can refrigerate the puffcorn in an airtight container for up to 5 days. Just allow it to come back to room temperature before serving for the best texture.
Freezer: For longer storage, freeze the Christmas Puffcorn in an airtight container or freezer bag for up to 2 months. Thaw at room temperature before enjoying to return its crispy texture.
Reheating: There’s no need to reheat; simply enjoy your puffcorn straight from the container. For added fun, warm it slightly in the microwave for a few seconds if you prefer a softer treat!
What to Serve with Quick and Festive Christmas Puffcorn
As the holidays approach, it’s time to create a joyful spread alongside this sweet, crunchy delight that everyone will adore.
- Hot Cocoa: A warm bowl of rich hot cocoa pairs perfectly, balancing the sweetness of the puffcorn with its creamy texture. Imagine cozying up with friends, savoring the delightful combination!
- Cheese Platter: A selection of sharp cheeses, like cheddar and gouda, add a savory contrast that enhances the sweet flavors of the puffcorn, making for a delightful flavor experience.
- Seasonal Fruits: A mix of fresh oranges and pomegranates brings a burst of juicy freshness, cutting through the sweetness while adding a vibrant splash of color.
- Spiced Nuts: Crunchy, spiced nuts provide a fantastic textural variation with their savory seasoning, making them an appealing contrast to the sweet, chocolatey puffcorn.
- Mini Cupcakes: Festively decorated mini cupcakes create a fun and whimsical touch to your dessert table, pairing well with the color palette of the puffcorn.
- Holiday Punch: A sparkling cranberry or ginger ale punch adds a fizzy, refreshing element to your holiday gatherings, elevating the festive vibe.
These accompaniments will beautifully complement your Christmas Puffcorn, making your holiday treats even more memorable!
Expert Tips for Christmas Puffcorn
-
Short Melting Intervals: Melt candy melts in 30-second bursts to avoid burning; frequent stirring ensures a smooth, even consistency.
-
Full Drying Time: Allow the puffcorn to dry completely before mixing the red and green flavors to prevent clumping and preserve individual texture.
-
Non-Stick Surface: Use a non-stick cookie sheet for easy cleanup and to prevent the puffcorn from sticking, making your baking experience smoother.
-
Flavor Variations: Don’t hesitate to experiment with different candy melt flavors or add festive sprinkles on top for an extra pop of festive joy—just remember, it’s all about enjoying your Christmas Puffcorn!
-
Storage Tips: Keep your Christmas Puffcorn in an airtight container to maintain its freshness and crunchiness for up to three days, ensuring every bite is as good as the first!
Make Ahead Options
These Christmas Puffcorn treats are perfect for meal prep, allowing busy home cooks to save time during the holiday rush! You can easily prepare the puffcorn up to 24 hours in advance by melting and coating the puffcorn as usual, then allowing it to dry completely. Afterward, store the coated puffcorn in an airtight container at room temperature for up to three days to maintain its delightful crunch. When you’re ready to serve, simply mix the red and green versions together in a festive bowl, and you’ll have an enchanting, ready-to-go treat that’s just as delicious as when it was freshly made!
Christmas Puffcorn: Customize It!
Feel free to get creative and personalize your Christmas Puffcorn with these delicious variations that will make your festive treat even more special!
-
Flavorful Melts: Try using flavored candy melts, like vanilla or butterscotch, to create a unique twist on classic puffcorn. Each flavor adds its own flair and can make your treat extra festive with new taste experiences.
-
Decorative Sprinkles: Add a joyful touch by tossing some festive sprinkles on the melted chocolate before it sets. Not only will they make your puffcorn brighter, but that extra crunch and color bring cheer to every bite.
-
Sweet and Salty: Sprinkle a bit of sea salt on the melted chocolate for a delightful contrast that balances sweetness with a savory bite. This unexpected twist elevates the flavors, making your Christmas Puffcorn unforgettable.
-
Nutty Crunch: Incorporate chopped nuts like almonds, pecans, or walnuts to introduce a delightful crunch alongside the creamy chocolate. The nutty flavor pairs beautifully with the sweet coating and enhances the texture, making each mouthful a delightful surprise!
-
Cherry on Top: Add freeze-dried fruits like strawberries or raspberries to the mix for an added pop of color and a tangy flavor burst. This twist not only looks charming but also introduces a refreshing element that complements the sweetness brilliantly.
-
Double Chocolate Delight: Switch some of the candy melts for chocolate chips, like dark or milk chocolate, for a richer experience. Melting them creates a luscious layer that pairs perfectly with the puffcorn’s airy crunch.
-
Kick it Up a Notch: For those who enjoy a bit of spice, add a sprinkle of cayenne pepper or chili powder to the chocolate before coating the puffcorn. This intriguing heat transforms your beloved treat into an adventurous snack that excites the taste buds!
-
Vegan Version: Choose dairy-free candy melts and substitute coconut oil with a solid plant-based shortening for a vegan-friendly option that everyone can enjoy during the holidays. Your thoughtful adaptations will make sure every guest feels included!
Dive into these variations and make your Christmas Puffcorn truly your own! If you’re interested in more festive homemade treats, check out our guide on easy holiday desserts. Happy cooking!

Christmas Puffcorn Recipe FAQs
What type of puffcorn should I use?
Absolutely! Regular puffcorn is ideal for this recipe, adding that light and airy texture. While there are no essential substitutions, you can experiment with flavored puffcorn for an extra twist!
How should I store the Christmas Puffcorn?
Store your Christmas Puffcorn in an airtight container at room temperature for up to 3 days. This keeps it nice and crunchy. For a cooler option, feel free to refrigerate it for up to 5 days; just let it return to room temperature before serving for the best experience!
Can I freeze Christmas Puffcorn?
Of course! To freeze your Christmas Puffcorn, place it in an airtight container or a freezer bag, making sure to remove as much air as possible. It can be stored for up to 2 months. When you’re ready to enjoy, simply thaw it at room temperature—no need to reheat, just dive in!
How can I prevent the candy melts from burning?
Very important! Melt candy melts in 30-second intervals in the microwave, stirring frequently. It usually takes about 1-2 minutes total to achieve a smooth consistency without burning, ensuring your Christmas Puffcorn gets that perfect coating.
Are there any dietary considerations for Christmas Puffcorn?
Definitely! This recipe involves candy melts that may contain allergens like soy or dairy. If you’re serving guests with dietary restrictions, check the ingredient labels carefully. You can also consider using colored candy melts that are vegan or allergen-free to accommodate safety.
Delightful Christmas Puffcorn: A Festive Treat to Share!
Ingredients
Equipment
Method
- Begin by dividing the 9 ounces of puffcorn equally into two large bowls.
- In a microwave-safe bowl, combine 12 ounces of red candy melts with 1 teaspoon of coconut oil. Microwave in 30-second intervals, stirring in between, until the mixture is smooth.
- Pour the melted red chocolate over the first bowl of puffcorn and gently stir to coat.
- Line a cookie sheet with parchment paper and spread the red-coated puffcorn evenly across it. Let it sit at room temperature for about 10-15 minutes to set.
- Repeat the melting process with the green candy melts. Melt 12 ounces of green candy melts with the remaining 1 teaspoon of coconut oil.
- Pour the melted green candy melts over the second bowl of puffcorn and stir to coat.
- Spread the green puffcorn onto another parchment-lined cookie sheet and allow to dry for 10-15 minutes.
- Once both red and green puffcorn have dried, gently mix them together in a large serving bowl.
- Transfer the Christmas Puffcorn to an airtight container for storage.