

As the bustling holiday season approaches, I can almost hear the laughter of family and the sweet sound of joy mingling in the kitchen. A delightful way to capture that festive spirit is with these Easy Christmas Tree Oreo Cookies. Not only are they an incredibly fun no-bake project, but they’re also a perfect opportunity for everyone to get involved, making them a joyful family activity. With each crunchy bite topped with vibrant candy melts and sparkly sprinkles, these cookies are sure to be a hit at your holiday gatherings. Plus, they make for fantastic gifts, beautifully packaged and ready to spread cheer! So, are you ready to transform a simple Oreo into a whimsical holiday treat? Let’s get started!
Why are these cookies a holiday must-have?
Fun, No-Bake Creativity: These Easy Christmas Tree Oreo Cookies allow everyone to unleash their artistic flair without the need for baking. Vibrant Decorations: The combination of green candy melts and colorful sprinkles makes each cookie a delightful festive masterpiece. Family Bonding Activity: Gather your loved ones and make memories while decorating—everyone can join in on the fun! Perfect for Gifting: Impress friends and family by gifting these whimsical cookies in decorative boxes. Looking for more holiday inspiration? Check out my Nutty Apricot Cookies and Apple Oatmeal Cookies that will bring even more joy to your celebrations! Crowd-Pleasing Delight: These cookies are sure to be the highlight of any holiday party, bringing smiles to all!
Christmas Tree Oreo Cookies Ingredients
For the Cookies
• Oreo Cookies – These are the star of the show and provide the needed crunch and sweetness.
For the Coating
• White Candy Melts – Perfect for the base, giving a creamy coating; other white chocolates can be substituted but may not have the same melt quality.
• Green Candy Melts – Essential for the tree decoration; opt for colored chocolate melts if preferred.
For the Decoration
• Star Sprinkles – Add a touch of whimsy to the top of your Christmas trees; feel free to swap with any small edible glitter.
• Nonpareils Sprinkles – Use these for extra festive flair and color; any colorful sprinkles can do the trick!
Ready to transform your Oreos into holiday cheer? Let’s dive in!
Step‑by‑Step Instructions for Easy Christmas Tree Oreo Cookies
Step 1: Melt the White Candy Melts
Begin by melting the white candy melts according to the package instructions, typically in a microwave-safe bowl. Heat in 30-second intervals, stirring gently in between, until smooth and creamy, roughly 1 to 2 minutes total. This will be your base coating for the cookies, so ensure it has a nice, glossy finish.
Step 2: Melt the Green Candy Melts
Next, in a separate bowl, melt the green candy melts using the same microwave method. Heat these in 30-second increments as well, stirring until fully melted and soft. The vibrant green will serve as your tree topping, so strive for a fluid consistency that will easily pipe onto your Oreo cookies.
Step 3: Coat the Oreo Cookies
Take each Oreo cookie and dip the bottom into the melted white candy melts, covering only the base. Make sure to tap off any excess coating to keep it from dripping. Place the coated Oreos, flat side down, on a lined baking sheet, allowing them to set for a short moment while you prepare for decoration.
Step 4: Pipe the Green Candy Melts
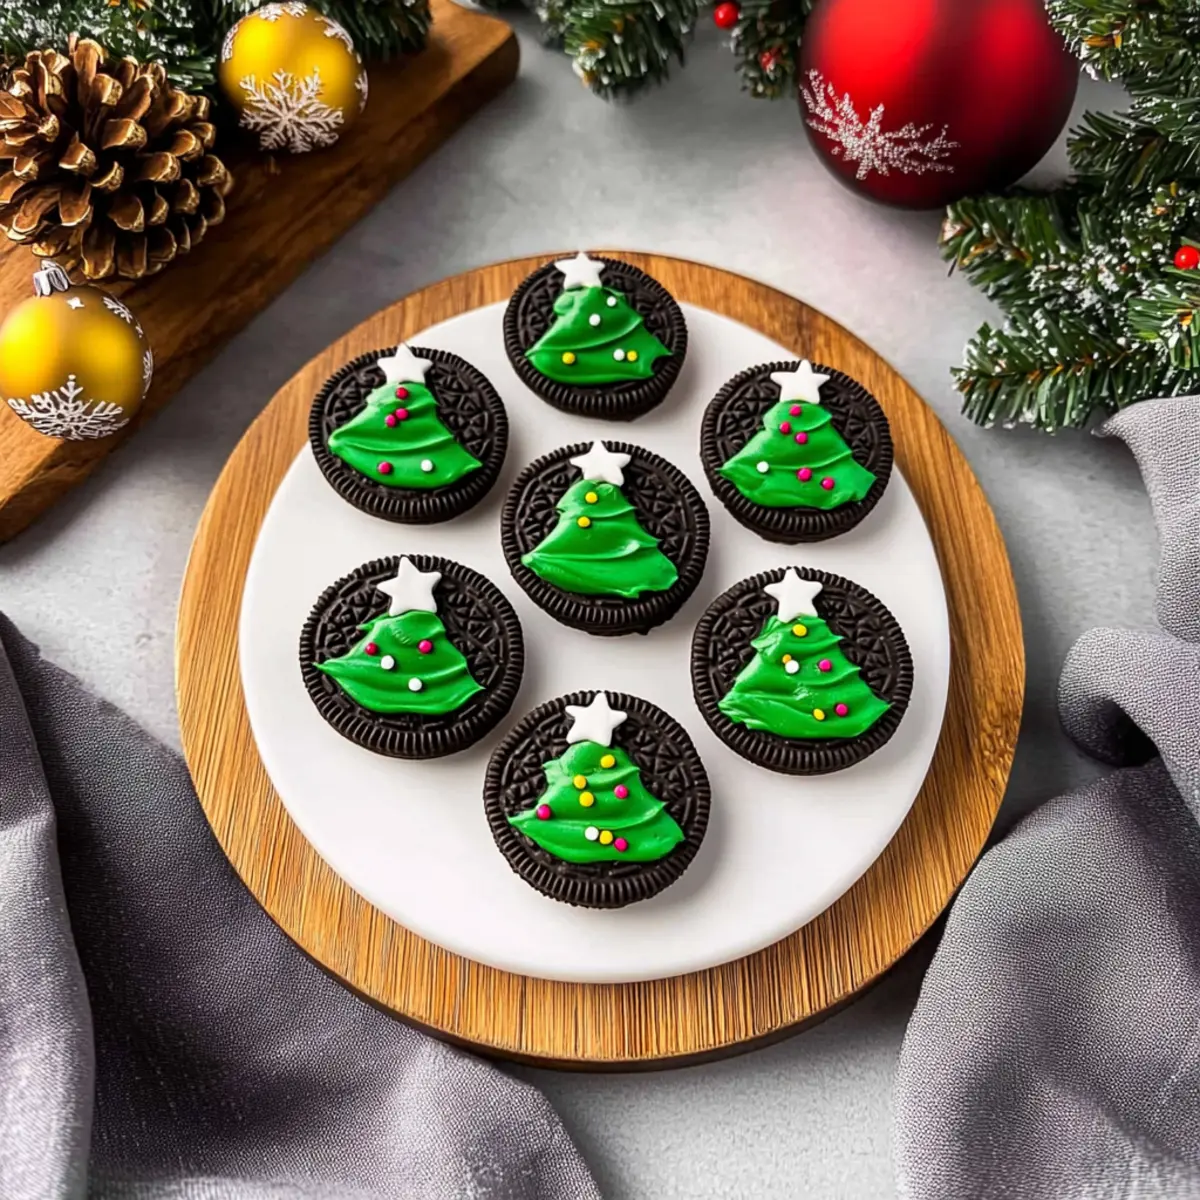
Once the white candy melts have set slightly, transfer the melted green candy melts into a piping bag. Pipe the green melts over each Oreo in a zigzag pattern, resembling a Christmas tree shape. Aim for a generous layer that creates a festive look, covering the top portion of each cookie.
Step 5: Add the Star Sprinkles
While the green candy melt coating is still soft, gently add a star sprinkle to the top of each tree. This adornment not only enhances the festive appearance but also gives your Easy Christmas Tree Oreo Cookies a joyful finishing touch. Place them back on the baking sheet to allow the decorations to set.
Step 6: Sprinkle Nonpareils for Flair
With the star sprinkles in place, this is the perfect time to sprinkle nonpareils over the green frosting while it’s still tacky. These colorful accents act like ornaments on your edible trees, adding a fun and vibrant touch. Don’t be shy—scatter the sprinkles generously for that holiday flair!
Step 7: Let Them Set
Finally, let your Christmas Tree Oreo Cookies set completely at room temperature, which may take about 30 minutes. If you’re in a hurry, chill them in the fridge for about 10 minutes to speed up the process. Once firm, these delightful cookies are ready to be showcased at your holiday gatherings!

Helpful Tricks for Christmas Tree Oreo Cookies
• Smooth Coatings: Ensure that your candy melts are fully melted and smooth to achieve an even coating, preventing clumps from spoiling the look of your Christmas Tree Oreo Cookies.
• Piping Precision: For cleaner lines while piping the green candy melts, use a small piping tip or trim the corner of the piping bag. This will help produce that beautiful zigzag tree design.
• Texture Trap: If you notice your melted candy melts starting to harden, gently reheat them in the microwave for a few seconds to restore fluidity—this is crucial for easy piping.
• Sprinkle Smart: Wait until the green coating is slightly tacky before adding nonpareils and star sprinkles. This ensures that they stick well and don’t fall off later.
• Storage Secrets: For the best freshness, store your cookies in an airtight container at room temperature. Add sprinkles just before serving to keep them looking vibrant and festive!
Make Ahead Options
These Easy Christmas Tree Oreo Cookies are perfect for busy home cooks looking to save time during the bustling holiday season! You can prepare the cookies up to 24 hours in advance by coating the Oreo bases with white candy melts and then refrigerating them. Just ensure they’re stored in an airtight container to maintain their freshness. When you’re ready to finish, simply pipe the green melts and add the sprinkles right before serving for that festive touch. This way, you’ll have delicious holiday treats that are just as delightful and beautiful while minimizing last-minute stress!
Storage Tips for Christmas Tree Oreo Cookies
Room Temperature: Store your Christmas Tree Oreo Cookies in an airtight container at room temperature for up to 1 week. This keeps them fresh and enjoyable for holiday snacking.
Fridge: If you’re in a warmer climate, consider refrigerating the cookies to maintain their quality. They can last up to 10 days in the fridge; just let them come to room temperature before serving.
Freezer: For longer storage, freeze the cookies for up to 3 months. Layer them between parchment paper in an airtight container to prevent sticking. Thaw them in the fridge overnight before serving.
Reheating: There’s no need to reheat these cookies, but if they appear hard after freezing, let them sit at room temperature for a little while to soften before enjoying!
Christmas Tree Oreo Cookies Variations
Feel free to unleash your creativity by customizing these festive cookies with these delightful twists!
-
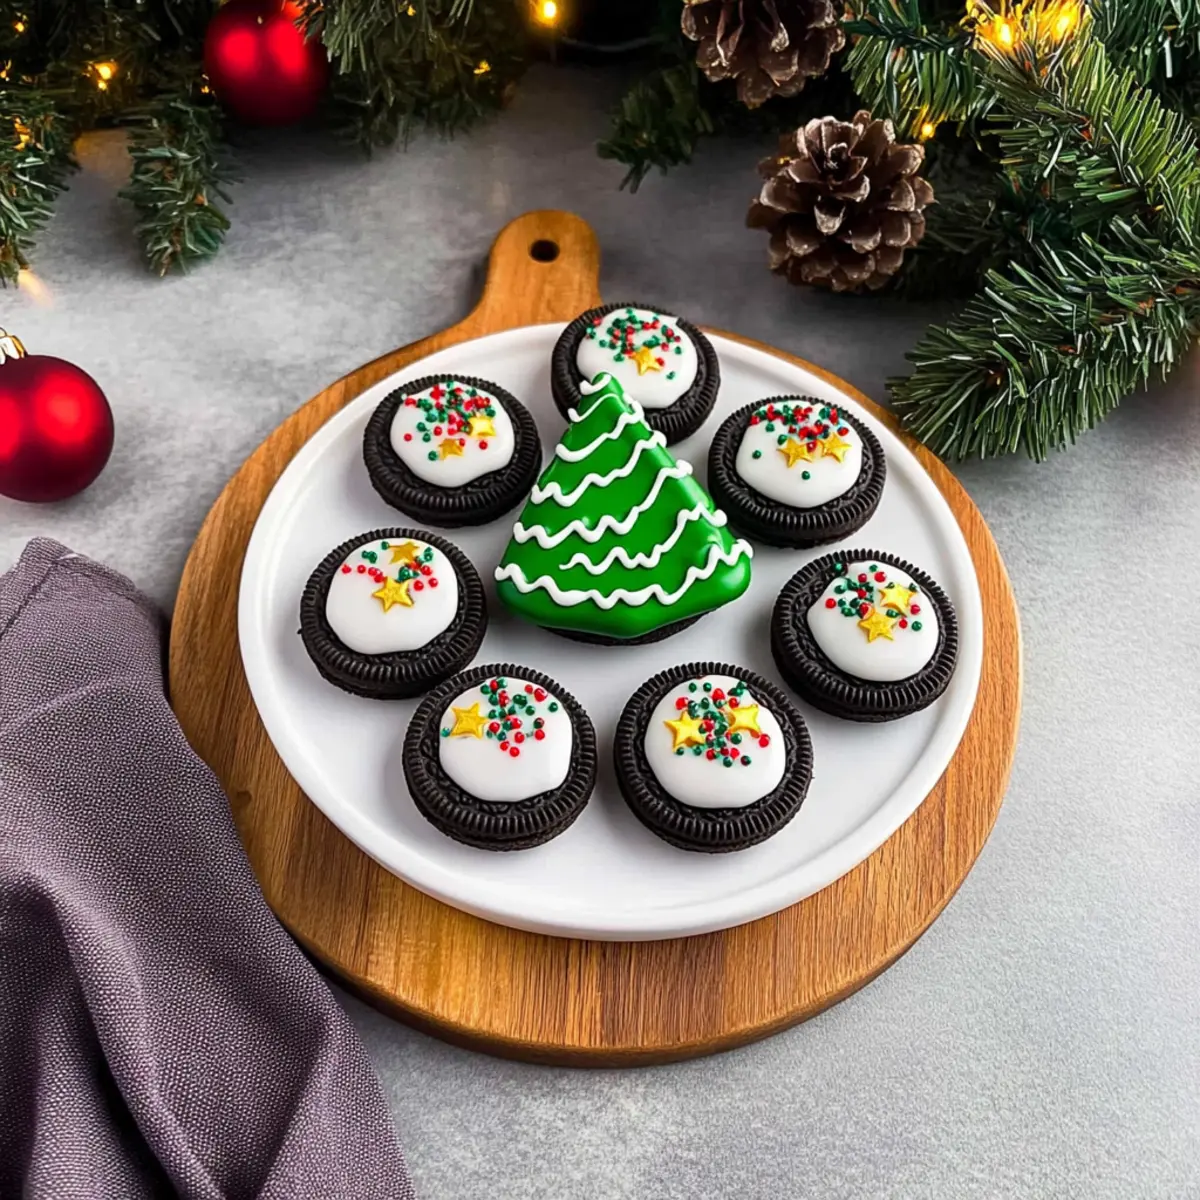
Colorful Melts: Try using different candy melt colors like red or blue to create a vibrant striped tree effect. Each cookie can be a mini work of art!
-
Chocolate Delight: Swap out regular Oreos for chocolate-covered Oreos for a rich and decadent variation. The combination of chocolate and candy melts is irresistible!
-
Nutty Crunch: Add crushed nuts like walnuts or pecans on top of the frosted cookies for an extra crunchy texture. The nutty flavor pairs beautifully with the sweet melts!
-
Peppermint Twist: Stir crushed peppermint candies into the white candy melts for a refreshing minty flavor. This adds a delightful holiday twist and a festive crunch.
-
Fruitful Addition: Incorporate small pieces of candied fruit or dried cranberries as ornaments on your trees. This not only adds color but also a fruity burst in every bite!
-
Gluten-Free Version: Use gluten-free Oreos for a delicious alternative that everyone can enjoy. These cookies still maintain the same delightful taste, perfect for holiday gatherings.
-
Layered Surprise: Create a layered treat by adding a layer of peanut butter or frosting between the Oreo cookies before coating them. It’s an unexpected yet delicious surprise!
-
Spiced Up: Add a pinch of cinnamon or nutmeg to the melted candy coating for a warm, spiced flavor that complements the holiday season. Each bite will be a cozy treat!
No matter which variation you choose, these Easy Christmas Tree Oreo Cookies are sure to spread cheer! For more festive inspiration, consider making my Nutty Apricot Cookies or Chocolate Date Cookies!
What to Serve with Easy Christmas Tree Oreo Cookies
These delightful treats are a charming addition to any festive spread, perfect for sweetening up your holiday gatherings.
-
Creamy Hot Chocolate: Rich chocolate paired with creamy marshmallows enhances the sweet experience, making every bite feel like a warm hug.
-
Gingerbread Men: The spiced flavors of gingerbread cookies offer a wonderful contrast to the sweetness of the Oreo cookies, enhancing the holiday spirit.
-
Festive Fruit Salad: A mixture of colorful fruits brings a fresh balance, adding vibrant colors and a refreshing taste that brightens up the dessert table.
-
Christmas Sugar Cookies: These classic cookies add a delightful crunch and familiarity to the festive spread, creating a nostalgic atmosphere that everyone will love.
-
Milk Punch: A creamy, spiced drink that pairs beautifully with the sweetness of the cookies, providing a delicious contrast that warms the heart.
-
Peppermint Bark: This crunchy treat adds a delicious minty freshness that enhances the festive flavors, perfect for a holiday dessert platter.
-
Chocolate Eggnog: Combining the rich flavors of chocolate and traditional eggnog creates an indulgent drink that perfectly complements the sweetness of these cookies.
-
Buttery Popcorn: A savory contrast to the sweet cookies, this treat adds a delightful crunch, creating a fun and balanced snack.
Christmas Tree Oreo Cookies Recipe FAQs
How do I know if my Oreos are fresh enough to use?
Absolutely! Fresh Oreos should be firm and have no visible signs of moisture or dark spots. If they feel soft or have dark spots all over, it’s best to get a new package to ensure your cookies taste their absolute best!
What’s the best way to store my Christmas Tree Oreo Cookies?
For optimal freshness, keep your Christmas Tree Oreo Cookies in an airtight container at room temperature for up to 1 week. If you live in a particularly warm climate, consider refrigerating them, where they can last for about 10 days. Just remember to let them come to room temperature before serving!
Can I freeze the cookies, and if so, how?
Absolutely! To freeze your cookies, layer them between pieces of parchment paper in an airtight container to prevent sticking. They can remain in the freezer for up to 3 months. When you’re ready to enjoy them, just thaw them in the fridge overnight, and let them sit at room temperature for a bit to soften before serving.
What if my candy melts aren’t melting properly?
Very! If your candy melts appear lumpy or aren’t melting smoothly, try reheating them in the microwave at 10-15 second intervals, stirring well each time until creamy. Make sure to avoid overheating, as this can cause them to seize up. If they harden too quickly while decorating, gently reheat in the microwave for a few seconds to bring back their flow!
Are there any allergy considerations for these cookies?
Of course! Keep in mind that Oreos may contain allergens such as wheat and dairy. If you’re making these cookies for someone with food allergies, check the packaging or opt for allergy-friendly versions of cookie and candy melts. Also, be cautious about sprinkles as they may contain gluten or other allergens.
Can I customize the colors of the chocolate melts?
Absolutely! Get creative! You can certainly use different colors of candy melts to create a beautiful multi-colored tree effect. This not only adds variety but also makes a fun visual display that everyone will love!

Delightful Christmas Tree Oreo Cookies for Festive Fun
Ingredients
Equipment
Method
- Melt the white candy melts according to the package instructions, stirring gently until smooth, roughly 1 to 2 minutes total.
- Melt the green candy melts using the same microwave method until fully melted and soft.
- Dip the bottom of each Oreo cookie into the melted white candy melts, then place them flat side down on a lined baking sheet.
- Transfer the melted green candy melts into a piping bag and pipe over each Oreo in a zigzag pattern.
- While the green candy melt coating is still soft, add a star sprinkle to the top of each tree.
- Sprinkle nonpareils over the green frosting while it's still tacky for extra color.
- Let your Christmas Tree Oreo Cookies set completely at room temperature for about 30 minutes or chill them in the fridge for 10 minutes.