

A Cake That Brings Back Childhood Memories
When I think of Easter, I’m instantly transported back to my grandmother’s cozy kitchen, where the scent of vanilla, chocolate, and freshly toasted coconut filled the air. As children, my siblings and I would gather around her large wooden table, eyes wide with excitement, waiting for our turn to help decorate the Easter cake. It wasn’t just any cake—it was a masterpiece, a tradition, and a symbol of the joy that Easter brought to our family.
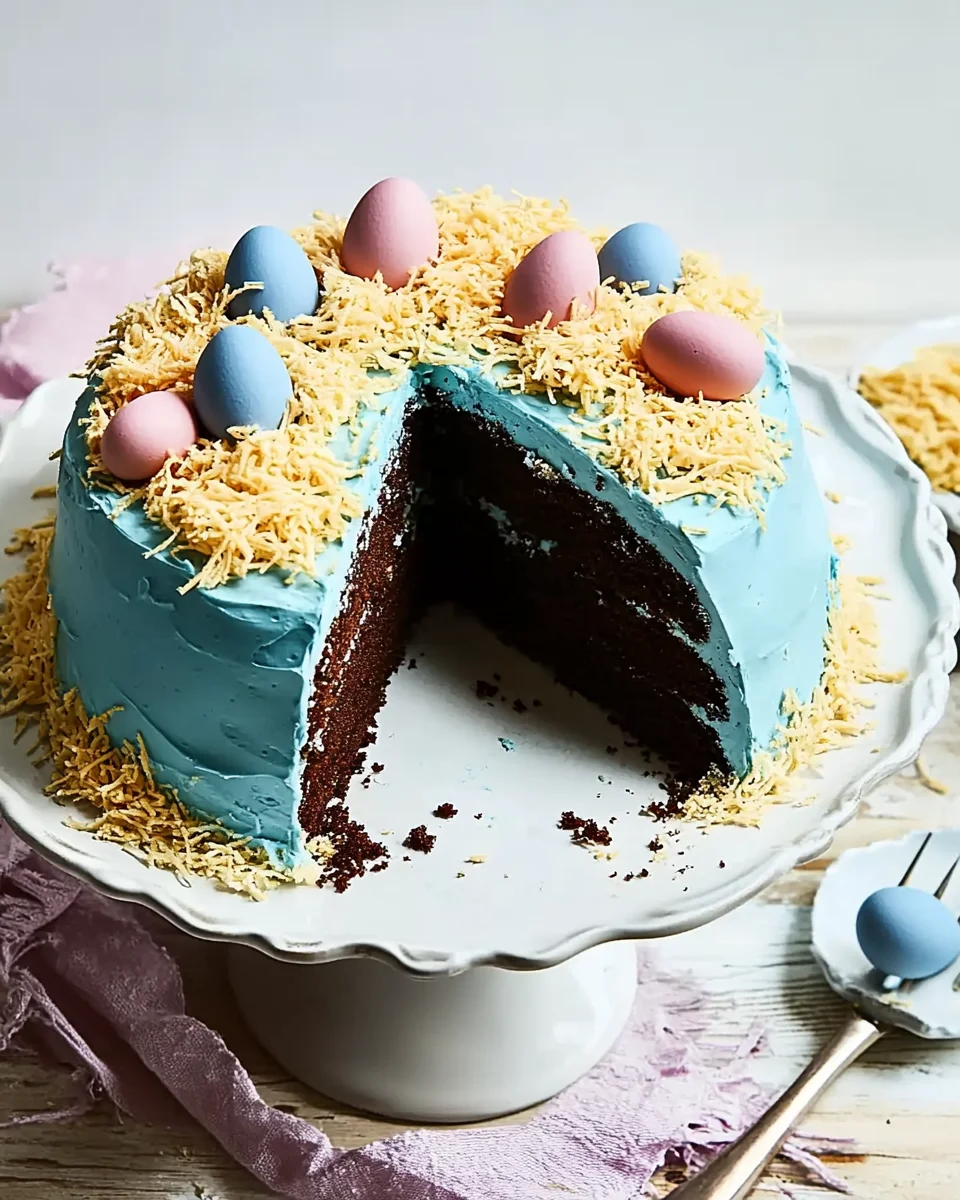
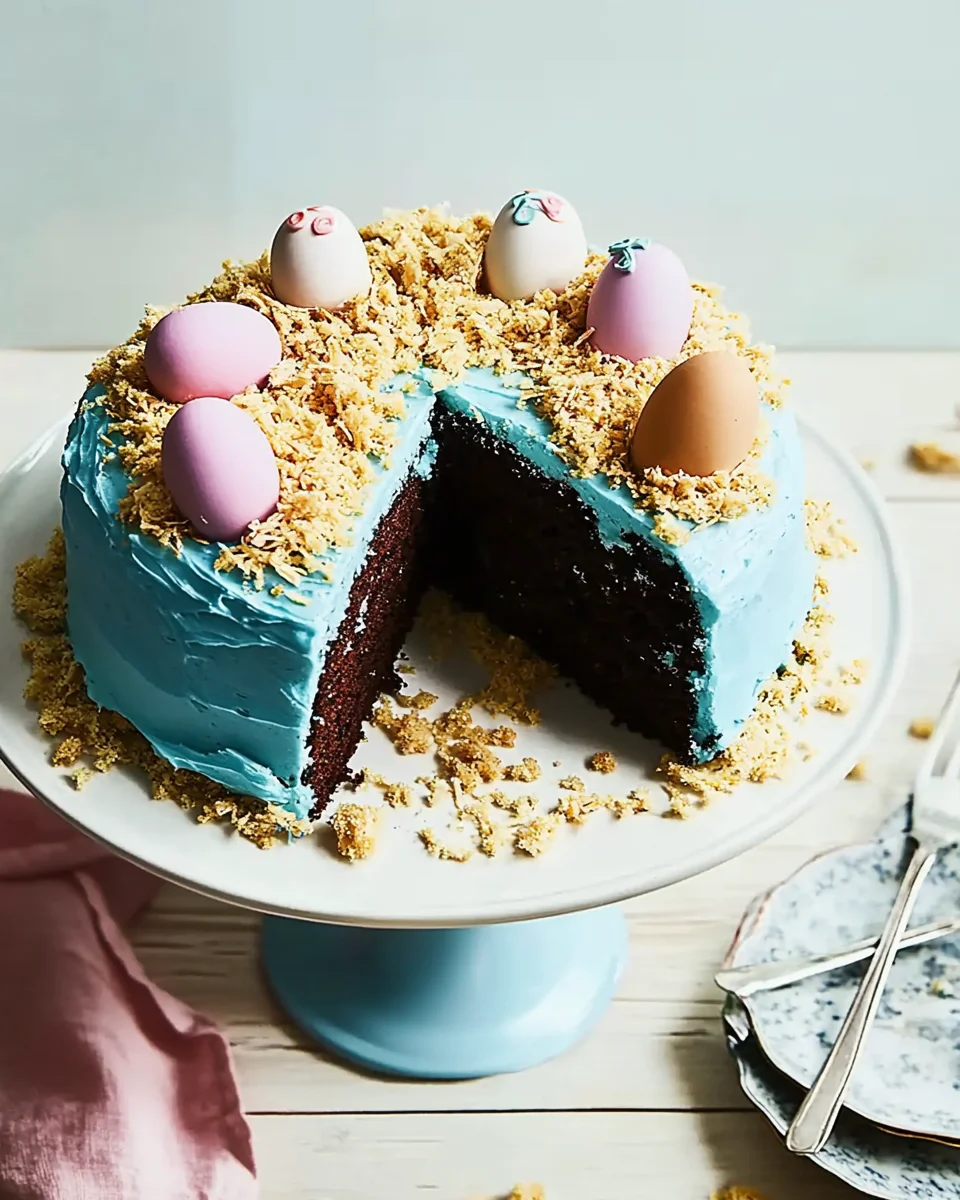
We’d watch in awe as she layered the soft, chocolate cake with rich cream cheese frosting, carefully smoothing each layer with the precision only years of experience could perfect. Then came the magic—she would tint the frosting the perfect shade of sky blue, sprinkle toasted coconut to form a nest, and finally, let us place colorful candy eggs on top. It wasn’t just about baking; it was about creating something beautiful together, a tradition we cherished year after year.
Now, every time I bake an Easter Egg Cake, I relive those moments. It’s more than a dessert—it’s a celebration of love, family, and the simple joys of spring.
Why the Easter Egg Cake Stands Out
Easter baking is a tradition that goes back centuries. While carrot cake and coconut cake often take center stage during Easter celebrations, this Easter Egg Cake offers something truly unique—a whimsical, festive, and visually stunning dessert that’s surprisingly easy to make.
What makes this cake special?
- A Feast for the Eyes: The delicate blue frosting, coconut nest, and pastel candy eggs make it a centerpiece-worthy creation.
- Flavor Perfection: A rich, moist chocolate cake paired with a smooth, tangy cream cheese frosting creates the perfect balance of sweetness.
- A Symbol of the Season: Eggs have long been associated with Easter as a symbol of renewal and new beginnings. Incorporating them into the cake design adds meaning to the celebration.
- Beginner-Friendly Elegance: Despite its intricate appearance, the use of a high-quality cake mix makes it a stress-free yet show-stopping dessert.
The Art of Decorating: Tips for the Perfect Easter Egg Cake
Creating an Easter Egg Cake is as much about the artistry as it is about the baking. Here are some tips to make your cake truly special:
1. Achieving the Perfect Shade of Blue
The frosting’s dreamy blue hue is created using food coloring gel, which provides a more vibrant and smooth color than liquid dyes. Mix sky blue and royal blue for a soft, Easter-appropriate tone. If you want a more pastel look, start with a tiny amount of food coloring and gradually add more.
2. Toasting the Coconut for a Nest-Like Texture
Lightly toasting shredded coconut brings out a nutty aroma and a golden-brown color that perfectly mimics a bird’s nest. Spread the coconut on a baking sheet and toast it in the oven at 325°F for 5-7 minutes, stirring occasionally.
3. Creative Easter Egg Decorations
While Whoppers Robin Eggs are a classic choice, you can mix in different textures and colors by using:
- Speckled candy eggs for a realistic look
- Mini chocolate eggs for a rich indulgence
- Jelly beans for a pop of bright color
4. Smooth Frosting for a Professional Finish
To get a bakery-style smooth finish, chill the cake in the refrigerator for 30 minutes after the first layer of frosting. Then, apply the final coat to create a flawless look. A bench scraper or an offset spatula helps achieve a polished appearance.
Ingredients: Chocolate Bliss Base
- Cooking spray
- 4 large eggs
- 1 1/3 cups water
- 2/3 cup vegetable oil
- 2 (12.75-oz.) packages double chocolate cake mix (such as Ghirardelli)
Ingredients: Dreamy Frosting & Decorations
- 2 (8-oz.) packages cream cheese, softened
- 1/2 cup (4 oz.) unsalted butter, softened
- 8 cups (about 32 oz.) powdered sugar
- 2 teaspoons vanilla extract
- 3 drops sky blue food coloring gel
- 2 drops royal blue food coloring gel
- 1 cup unsweetened shredded coconut, toasted
- Candied egg-shaped malted milk balls (such as Whoppers Robin Eggs)
Directions: Crafting the Masterpiece
Step 1: Bake the Cake Layers
- Preheat oven to 350°F. Lightly grease three 8-inch round cake pans with cooking spray, line with parchment paper, and grease again.
- In a stand mixer, beat eggs, water, and vegetable oil on medium speed for 1 minute.
- Add cake mix and beat on low until combined, then increase speed to medium-high for 2 minutes until smooth.
- Divide batter evenly into prepared pans and bake for 18-22 minutes, until a toothpick inserted comes out clean.
- Let cakes cool in pans for 5 minutes, then transfer to wire racks to cool completely (about 30 minutes).
Step 2: Whip Up the Frosting
- In a stand mixer, beat cream cheese and butter on medium-high until fluffy (about 3 minutes).
- Reduce speed to medium-low and gradually add powdered sugar, ½ cup at a time, mixing well after each addition (about 4 minutes total).
- Add vanilla and food coloring, then beat on medium-high for 2 more minutes until smooth and airy.
Step 3: Assemble the Cake
- Place one cake layer on a serving plate or stand and spread 1 cup frosting evenly on top.
- Repeat with the second cake layer and another cup of frosting.
- Place the final cake layer on top and cover the top with 1 cup frosting.
- Spread 2 cups frosting evenly around the sides, smoothing it out.
- Refrigerate for 30 minutes, then apply the remaining frosting for a smooth finish.
Step 4: Add the Easter Magic
- Arrange ¼ cup shredded coconut in the center of the cake to create a “nest.”
- Sprinkle the remaining ¾ cup coconut around the cake base.
- Nestle the candied eggs inside the coconut nest on top.
Nutritional Info (Per Slice, Approximate)
- Calories: 520
- Total Fat: 24g
- Saturated Fat: 10g
- Carbohydrates: 72g
- Sugar: 60g
- Protein: 5g
This cake is a festive treat that will have everyone at your Easter gathering reaching for seconds. Enjoy!
FAQs About Easter Egg Cake
1. Can I Make This Cake in Advance?
Absolutely! You can bake the cake layers a day or two in advance and store them wrapped in plastic wrap at room temperature. The frosting can also be prepared ahead and stored in the refrigerator. Simply bring it to room temperature and re-whip before frosting the cake.
2. Can I Use a Different Cake Flavor?
While the recipe uses a rich double chocolate cake mix, you can experiment with other flavors like:
- Vanilla cake for a lighter option
- Lemon cake for a fresh, citrusy twist
- Coconut cake to enhance the tropical notes
3. What If I Don’t Have a Stand Mixer?
No problem! A hand mixer works just as well. If mixing by hand, ensure you beat the frosting until it’s light and fluffy to achieve the perfect consistency.
4. How Do I Store the Cake?
Since this cake contains cream cheese frosting, it should be stored in the refrigerator. Cover it with plastic wrap or place it in an airtight container. Let it sit at room temperature for 20-30 minutes before serving to soften the frosting.
5. Can I Make It Gluten-Free?
Yes! Simply use a gluten-free chocolate cake mix and ensure all other ingredients are gluten-free. The texture and taste remain just as delicious.
How to Elevate Your Easter Egg Cake Presentation
If you want to make your cake stand out even more, here are a few ways to enhance its presentation:
- Gold Dust Accents: Lightly brush edible gold dust onto some of the candy eggs for a touch of elegance.
- Fresh Flowers: Decorate the base of the cake stand with fresh spring flowers like tulips, daisies, or baby’s breath.
- Cake Topper: A small “Happy Easter” sign or bunny figurines can add charm to the final presentation.
- Layered Coconut: Use different shades of toasted coconut to create an ombré effect around the cake.
The Joy of Easter Baking
There’s something truly special about baking for the holidays—it’s not just about the food but the memories created along the way. Whether you’re making this cake for a family gathering, a church celebration, or simply as a way to welcome spring, the Easter Egg Cake is a reminder of the simple joys of baking and the beauty of tradition.
As you whip up this cake, take a moment to embrace the experience. Let the scent of chocolate and vanilla fill your kitchen. Laugh as you frost the layers and carefully place each candy egg. Share the joy with your loved ones, just as I did in my grandmother’s kitchen all those years ago.
Because in the end, the best part of baking isn’t just the cake—it’s the love and tradition baked into every bite.
Happy Easter and happy baking!
Easter Egg Cake: A Festive Delight for Your Spring Celebration
Ingredients
Method
- Step 1: Bake the Cake Layers
- Preheat oven to 350°F (175°C). Lightly grease three 8-inch round cake pans with cooking spray, line with parchment paper, and grease again.
- In a stand mixer, beat eggs, water, and vegetable oil on medium speed for 1 minute.
- Add cake mix and beat on low until combined, then increase speed to medium-high for 2 minutes until smooth.
- Divide batter evenly into prepared pans and bake for 18-22 minutes, until a toothpick inserted comes out clean.
- Let cakes cool in pans for 5 minutes, then transfer to wire racks to cool completely (about 30 minutes).
- In a stand mixer, beat cream cheese and butter on medium-high until fluffy (about 3 minutes).
- Reduce speed to medium-low and gradually add powdered sugar, ½ cup at a time, mixing well after each addition (about 4 minutes total).
- Add vanilla and food coloring, then beat on medium-high for 2 more minutes until smooth and airy.
- Place one cake layer on a serving plate or stand and spread 1 cup frosting evenly on top.
- Repeat with the second cake layer and another cup of frosting.
- Place the final cake layer on top and cover the top with 1 cup frosting.
- Spread 2 cups frosting evenly around the sides, smoothing it out.
- Refrigerate for 30 minutes, then apply the remaining frosting for a smooth finish.
- Arrange ¼ cup shredded coconut in the center of the cake to create a “nest.”
- Sprinkle the remaining ¾ cup coconut around the cake base.
- Nestle the candied eggs inside the coconut nest on top.
Notes
- Want extra flavor? Add a teaspoon of almond extract to the frosting for a delightful twist.
- Prefer a different color? Swap the blue food coloring for pastel pink, purple, or green for a different festive look.
- Make ahead! Bake the cake layers a day in advance and refrigerate before frosting.
- Storage Tip: Keep leftover cake covered in the fridge for up to 3 days.