

As I stood in my kitchen, the warm, nutty aroma of sizzling oil welcomed me, and I realized today was all about perfecting a Southern staple: Fried Okra. This crispy treat transforms humble, fresh vegetables into a crunchy delight that’s both comforting and satisfying. Whether you’re looking for a quick appetizer to impress guests or simply a delicious side to elevate your weeknight dinner, this fried okra recipe has you covered. Not only is it a beloved comfort food, but it also adapts beautifully to different dietary needs with its gluten-free options. So, are you ready to dive into the art of frying and discover why this dish is a must-try for every home chef?

Why is Fried Okra a Must-Try?
Crispy Perfection: Each bite of fried okra delivers an irresistible crunch that will have everyone reaching for more. Versatile Serving: Enjoy it as a snack, side, or appetizer, making it perfect for any occasion. Adaptable Ingredients: With gluten-free options and exciting variations, you can customize this dish to suit your taste. Family Favorite: This Southern classic welcomes all at the table, sparking joy and nostalgia. Easy Preparation: Simple steps ensure even beginner cooks can achieve restaurant-quality fried okra. Discover more delightful comfort food ideas with our Southern recipes to keep your meals exciting!
Fried Okra Ingredients
• Here’s everything you need to make delicious fried okra.
For the Coating
- Fresh Okra – Use small to medium-sized, firm pods for the best texture; avoid woody large ones.
- Cornmeal – Creates that signature crispy coating we all love; can substitute with panko for a unique crunch.
- All-Purpose Flour – This adds structure to the breading; gluten-free flour works well if needed.
- Garlic Powder – Enhances flavor depth; feel free to swap for fresh garlic, adjusting the amount to your taste.
- Onion Powder – Adds savory notes; using fresh onions may change texture slightly but offers great flavor.
- Paprika – Provides mild heat and vibrant color; opt for cayenne for more spice or omit it for a milder version.
- Ground Black Pepper – Freshly ground is preferred for a burst of warmth in every bite.
- Salt – Essential for boosting all flavors; adjust according to your preference.
For the Binding
- Egg – Binds the coating perfectly to the okra; try a flax egg for a vegan alternative.
- Buttermilk – Helps the breading adhere and gives a tangy flavor; mix milk with lemon juice or vinegar if you don’t have buttermilk.
For Frying
- Vegetable Oil – Vital for frying; opt for high-heat oils like canola or peanut oil to achieve that golden crispiness.
Dive into the crunchy goodness of fried okra that not only satisfies your taste buds but also connects you with cherished Southern traditions!
Step‑by‑Step Instructions for Crispy Fried Okra
Step 1: Prepare the Okra
Begin by rinsing 1 pound of fresh okra under cold water, then thoroughly pat it dry with a clean kitchen towel. Slice the okra into uniform ½-inch thick rounds, ensuring even cooking and a pleasing presentation. The vibrant green color will be your first signal that you’re on the right track to making delightful fried okra.
Step 2: Mix the Wet Ingredients
In a shallow dish, whisk together 1 egg and ½ cup of buttermilk until smooth and slightly frothy. This mixture will help the coating adhere beautifully to the okra. The comforting aroma of the buttermilk and egg blend will get you excited for the crunchy fried goodness ahead.
Step 3: Combine the Dry Ingredients
In a separate bowl, whisk together 1 cup of cornmeal, ½ cup of all-purpose flour, 1 teaspoon of garlic powder, 1 teaspoon of onion powder, ½ teaspoon of paprika, ½ teaspoon of ground black pepper, and salt to taste. This mixture creates the amazing crispy coating that defines your fried okra. It should look bright and inviting, ready to carry all those delicious flavors.
Step 4: Bread the Okra
Dip each okra slice into the buttermilk mixture, making sure it’s completely coated. Let the excess drip off before transferring the okra to the dry mixture. Toss the okra in the dry mixture until evenly coated, ensuring each piece has a generous layer of crunch. Shake off any excess breading as you prepare it for frying.
Step 5: Heat the Oil
In a deep skillet or heavy pot, heat about 2 inches of vegetable oil over medium-high heat until it reaches approximately 350°F (175°C). You can test the oil’s readiness by dropping a small piece of bread; if it sizzles and browns, you’re good to go. This step is crucial for achieving perfectly crispy fried okra that everyone will love.
Step 6: Fry the Okra
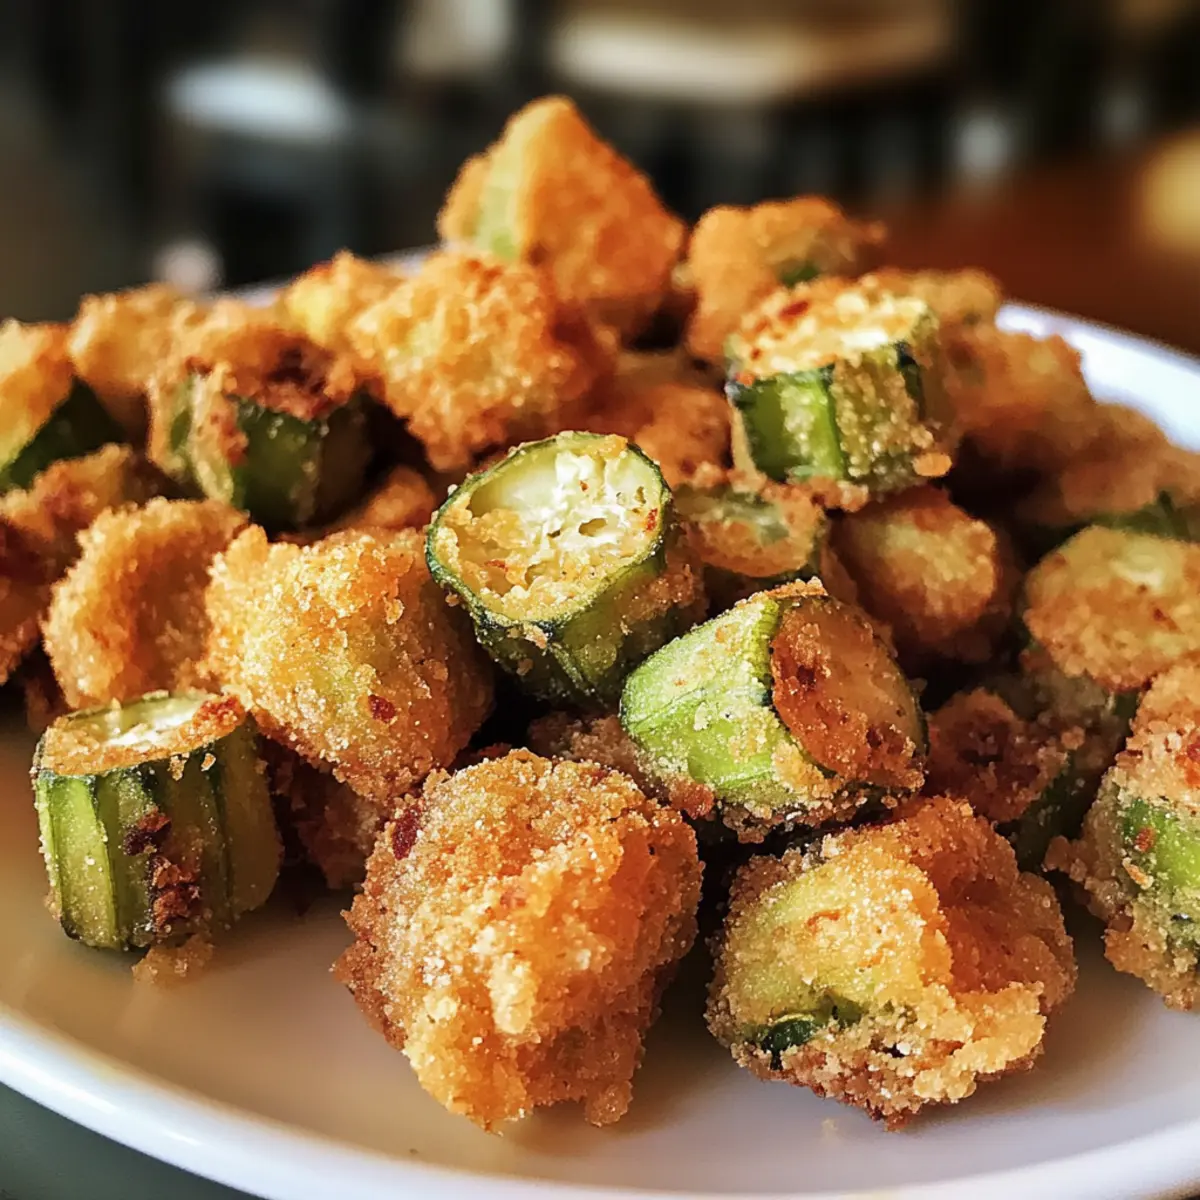
Carefully add small batches of the coated okra to the hot oil, ensuring not to overcrowd the pan. Fry the okra for about 3-4 minutes, turning occasionally with a slotted spoon until they turn a beautiful golden brown. The enticing smell and golden color will signal that your fried okra is nearing perfection.
Step 7: Drain the Okra
Once golden and crispy, use a slotted spoon to remove the fried okra from the oil, allowing excess oil to drain off. Place the okra on a plate lined with paper towels, which will soak up any remaining oil and keep them extra crispy. The sight of your perfectly fried okra will surely bring smiles all around the table.
Step 8: Serve Immediately
Serve your crispy fried okra hot, either as a standalone snack or as a complement to your favorite Southern meal. You might even want to provide some dipping sauces like ranch or spicy mayo for that extra zing. This delightful dish will become a cherished comfort food for you and your loved ones in no time!

Expert Tips for Perfect Fried Okra
-
Choose Fresh Okra: Always select small to medium-sized, firm pods to ensure a tender and flavorful bite; avoid large ones that may be woody.
-
Dry Thoroughly: To achieve maximum crunch, make sure the okra is completely dry before breading; excess moisture can lead to soggy layers.
-
Maintain Oil Temperature: Keep the frying oil at around 350°F for optimal crispiness; use a thermometer or test with a small piece of bread.
-
Don’t Overcrowd the Pan: Fry in small batches to prevent lowering the oil temperature, ensuring each piece of fried okra gets that perfect golden brown finish.
-
Reheat Wisely: For leftovers, avoid microwaving; instead, use an oven or air fryer to retain that delightful crunch.
What to Serve with Crispy Fried Okra
Fried okra creates a symphony of textures and flavors, transforming your meal into a sumptuous Southern feast that beckons everyone to the table.
-
Creamy Coleslaw: This cool and refreshing side brings balance to the crunchy okra, adding a satisfying crunch and zesty flavor.
-
BBQ Ribs: The smoky, tender meat pairs exquisitely with the crispy fried okra, creating a complete comfort food experience that everyone will love.
-
Cornbread Muffins: Their slightly sweet flavor and crumbly texture make these muffins a delightful companion to fried okra, embracing the Southern theme beautifully.
-
Spicy Remoulade: A rich dipping sauce that adds a zesty kick, the creaminess of remoulade complements the crunchy okra perfectly, elevating snack time.
-
Grilled Corn on the Cob: The sweetness of fresh corn enhances the dish while keeping the meal light and satisfying. This pairing brings summertime vibes to your table!
-
Lemonade or Sweet Tea: A classic Southern drink to wash it all down; the refreshing citrus or sweet tea refreshes your palate after every delightful bite of fried okra.
-
Chocolate Pie: For dessert, this rich and decadent treat provides a sweet end to a savory Southern meal, creating a perfect balance of flavors.
Fried Okra Variations & Substitutions
Now that you’re all set to make your fried okra, let your creativity shine by exploring delightful twists on this classic dish!
-
Spicier Option: Add cayenne pepper or chili powder to the breading mixture for a delicious kick. The heat will transform your fried okra into a fiery treat that excites the palate!
-
Herb-Infused: Incorporate dried herbs like thyme or oregano in the dry mix for an aromatic flavor. A sprinkle of herbs can really lift this dish and transport your taste buds to the Southern countryside.
-
Cheesy Delight: Mix in grated Parmesan cheese with the dry ingredients for an extra layer of flavor. This little addition will enhance the crispiness, making each bite even more indulgent.
-
Vegan-Friendly: Substitute the egg with a flax egg or aquafaba to keep it plant-based. This way, everyone can enjoy the comfort of fried okra without compromising their dietary preferences.
-
Different Coatings: For a twist, swap out cornmeal for crushed tortilla chips or panko breadcrumbs. These alternatives create unique textures that add exciting crunch to your dish—perfect for both texture enthusiasts and the adventurous eater!
-
Sweet Twist: Try adding a pinch of sugar to the breading for a subtle sweetness that balances the okra’s earthiness. This unexpected flavor combo can make the dish stand out on any table.
-
Smoky Flavor: Use smoked paprika instead of regular paprika for a deep, smoky note that rounds out the taste. This swap adds a fascinating smokiness that pairs wonderfully with grilled meats.
-
Sliced Vegetables: Mix in thinly sliced zucchini or eggplant with the okra for a medley of crunchy vegetable goodness. This variation will not only enhance the visual appeal but offer a delightful combo of flavors too!
Explore these variations while making it your own! And if you’re eager for more comforting recipes, check out our collection of Southern recipes that embrace the spirit of home-cooked goodness.
Make Ahead Options
These crispy fried okra pieces are perfect for meal prep enthusiasts! You can slice and coat the okra up to 24 hours in advance, allowing you to skip that step when you’re ready to cook. Simply follow the initial steps of rinsing, drying, slicing, and breading the okra. Store the prepared pieces in an airtight container in the refrigerator to maintain their crunch. When it’s time to serve, heat your oil and fry the coated okra as directed, ensuring a golden-brown crisp that’s just as delightful as fresh. This planning not only saves time but also delivers deliciousness to your dinner table with minimal effort!
Storage Tips for Fried Okra
Room Temperature: Best enjoyed fresh, fried okra can remain at room temperature for up to 2 hours. After that, it’s best to refrigerate to ensure safety.
Fridge: Store leftover fried okra in an airtight container lined with paper towels for up to 3 days. The towels help absorb moisture, keeping your okra crispy longer.
Freezer: For longer storage, freeze in a single layer on a baking sheet before transferring to a freezer bag. Fried okra can last up to 2 months in the freezer while retaining its delicious crunch.
Reheating Method: To bring back that crispy texture, reheat fried okra in an oven or air fryer until hot. This method avoids sogginess, making every bite as delightful as the first!
Fried Okra Recipe FAQs
What should I look for when selecting fresh okra?
When choosing fresh okra, opt for small to medium-sized pods that feel firm and smooth. Avoid large okra as it tends to be woody and less enjoyable. Good okra should have a vibrant green color with no dark spots, signaling freshness.
How should I store leftover fried okra?
To store fried okra, keep it in an airtight container lined with paper towels for up to 3 days in the refrigerator. The paper towels absorb moisture, which helps maintain the crunch. Remember, it’s best enjoyed fresh, so try to reheat it soon after storing.
Can I freeze fried okra, and if so, how?
Absolutely! To freeze fried okra, first, let it cool completely. Then, arrange it in a single layer on a baking sheet to freeze. Once frozen, transfer the okra to a freezer-safe bag, ensuring you remove as much air as possible. You can store it for up to 2 months.
What are some common troubleshooting tips for frying okra?
If your fried okra isn’t getting that crispy texture, it may be due to excess moisture. Ensure the okra is completely dry before breading. Additionally, if the oil temperature is too low (under 350°F), it can cause sogginess. Use a thermometer to maintain the right temperature. Fry in small batches to avoid overcrowding!
Is fried okra suitable for those with allergies or dietary restrictions?
Fried okra can be easily adapted for people with dietary needs. For gluten-free diets, substitute the all-purpose flour with gluten-free flour and cornmeal can remain as a crunchy coating. Additionally, you can replace the egg with a flax egg or aquafaba for a vegan option. Always check ingredient labels, especially for seasonings!
Can my pet eat fried okra?
While fried okra is not toxic to pets, the added oil and seasoning can upset their stomachs. It’s best to avoid giving fried food to pets. Instead, try offering them plain, cooked okra in moderation as a healthy treat!

Crispy Southern Fried Okra for Perfect Comfort Food Nights
Ingredients
Equipment
Method
- Begin by rinsing the fresh okra under cold water, then thoroughly pat it dry with a clean kitchen towel. Slice the okra into uniform ½-inch thick rounds.
- In a shallow dish, whisk together the egg and buttermilk until smooth and slightly frothy.
- In a separate bowl, whisk together cornmeal, all-purpose flour, garlic powder, onion powder, paprika, black pepper, and salt to taste.
- Dip each okra slice into the buttermilk mixture, allowing excess to drip off before transferring to the dry mixture to coat evenly.
- In a deep skillet, heat about 2 inches of oil over medium-high heat until it reaches approximately 350°F (175°C).
- Carefully add small batches of the coated okra to the hot oil, frying for about 3-4 minutes until golden brown.
- Once golden and crispy, use a slotted spoon to remove the fried okra from the oil and place it on a plate lined with paper towels.
- Serve your crispy fried okra hot, either as a standalone snack or alongside your favorite Southern meal.