

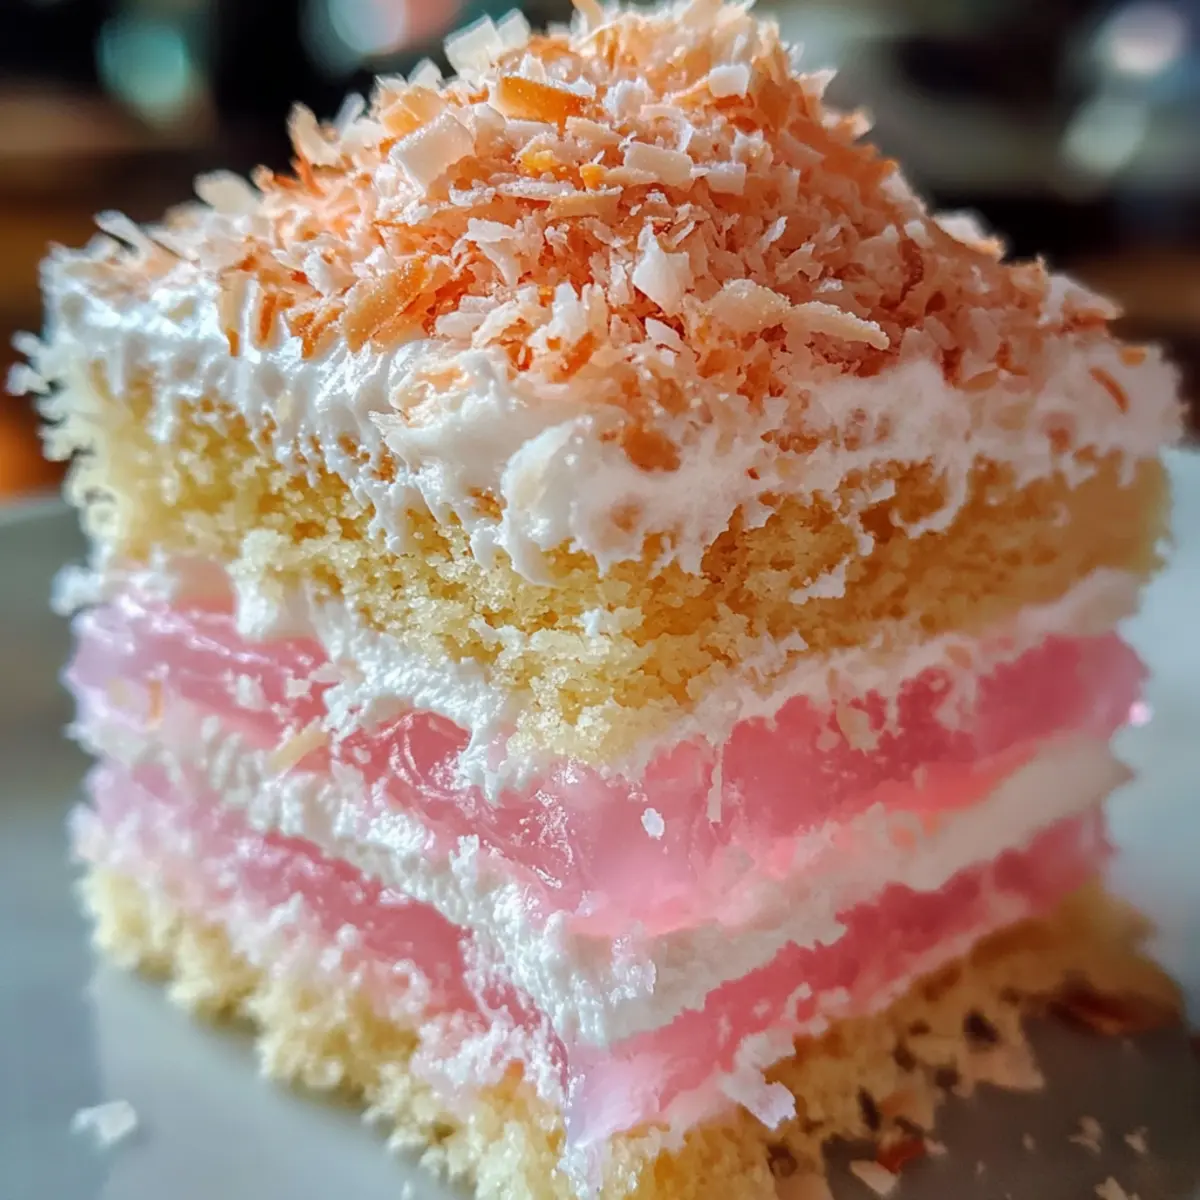
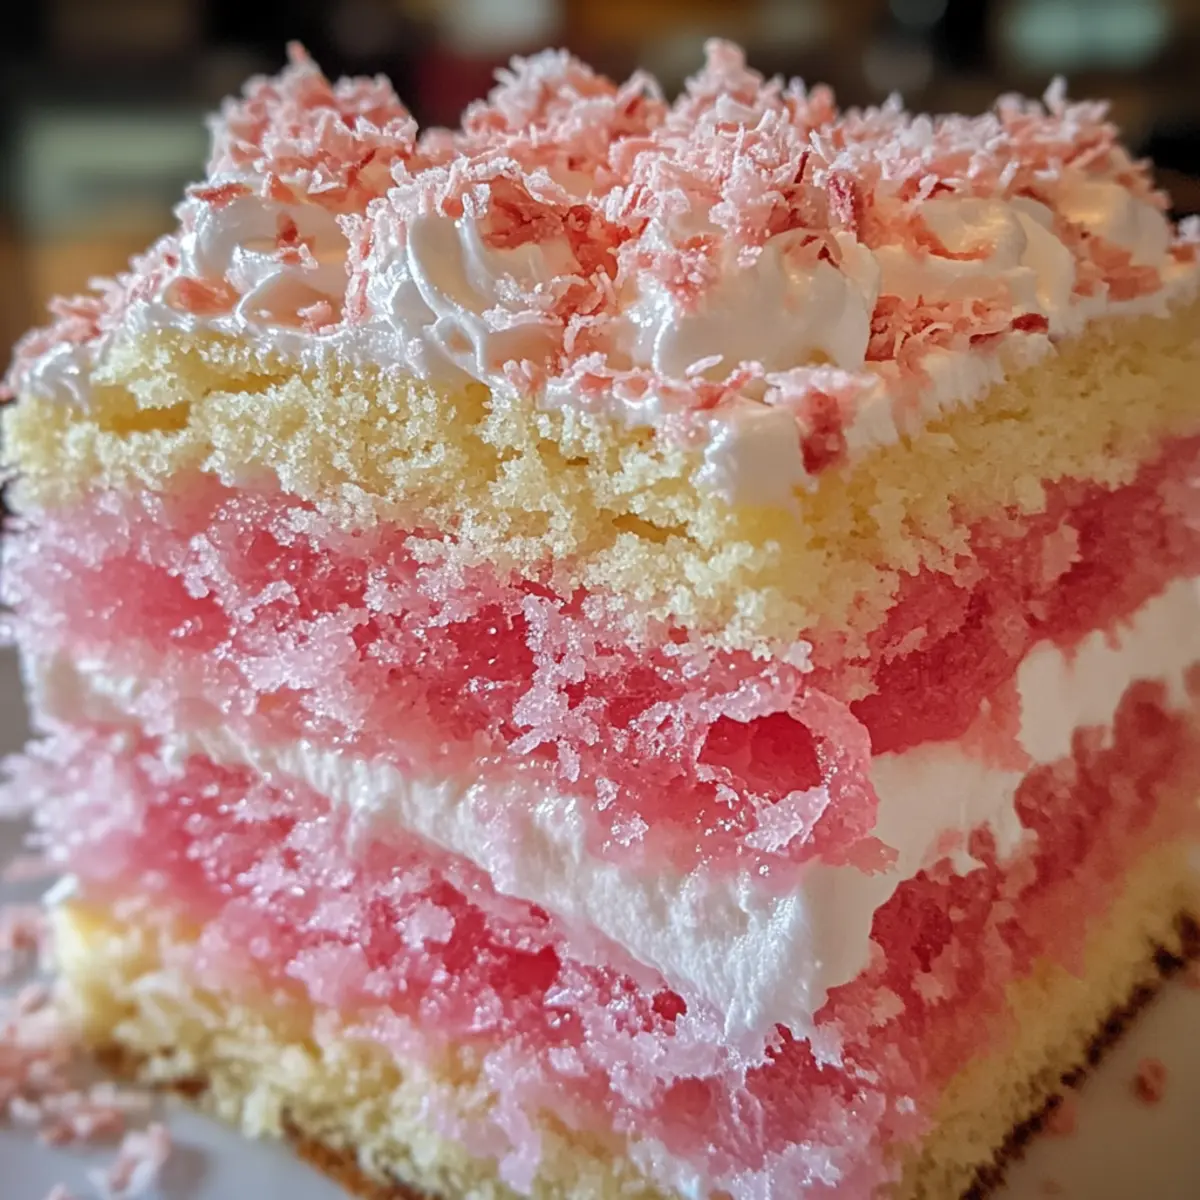
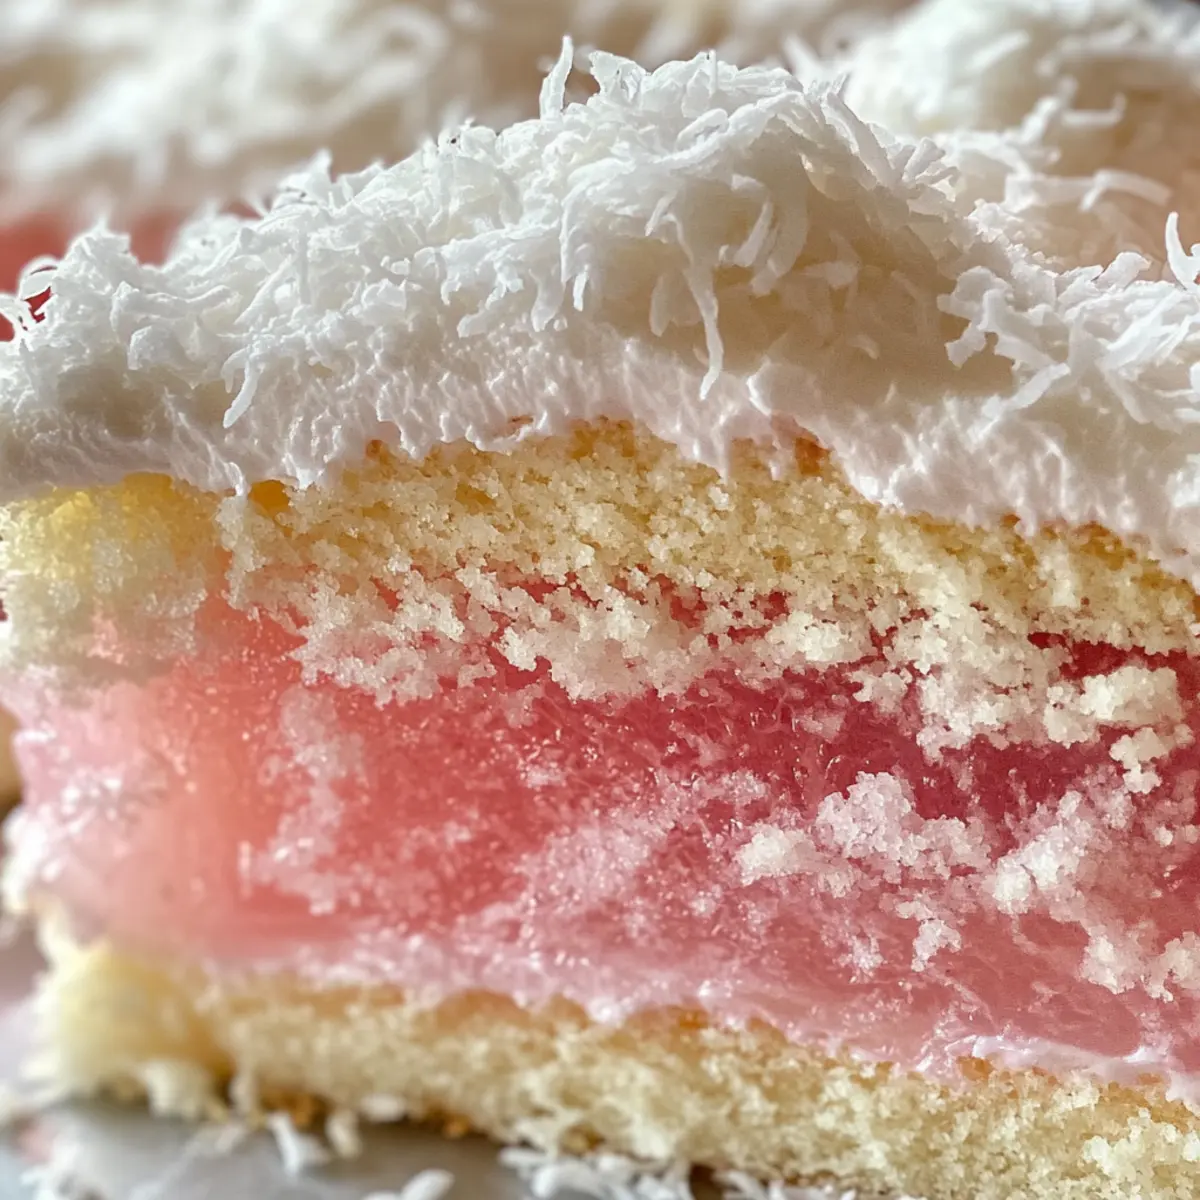
Stepping into my kitchen, I was hit by the sweet scent of nostalgia swirling around me like a warm hug. Today, I’m excited to share a beloved recipe for Old-Fashioned Pink Jelly Cakes—an Australian classic that brings back all the charm of traditional baking. These delightful treats feature a soft, fluffy vanilla sponge dipped in luscious strawberry jelly, then rolled in a layer of desiccated coconut and thoughtfully sandwiched with creamy whipped goodness. Whether you’re celebrating a special gathering or simply indulging in a cozy afternoon tea, these Pink Jelly Cakes are sure to impress and evoke smiles. Plus, they’re a breeze to whip up, making them the perfect crowd-pleaser in a pinch. Curious about how to make these sweet gems and dive into a bit of culinary history? Let’s get started!
Why are Old-Fashioned Pink Jelly Cakes irresistible?
Nostalgic Charm: These cakes evoke memories of childhood and family gatherings, making them a heartwarming treat.
Effortless Preparation: With simple steps, even novice bakers can create these stunning desserts in no time.
Versatile Flavors: Swap the strawberry jelly for alternatives like raspberry or orange to keep things fresh and exciting.
Textural Delight: The airy vanilla sponge combined with the sticky jelly and crunchy coconut offers a delightful variety of bites.
Perfect for Any Occasion: Whether it’s an afternoon tea or a festive gathering, these cakes are guaranteed to impress! If you’re interested in exploring more delightful desserts, check out Savory Zucchini Pancakes with Fresh Herbs for another crowd-pleaser or consider trying our Cloudy Sky Jelly for a fun twist!
Old-Fashioned Pink Jelly Cakes Ingredients
For the Vanilla Sponge
• All-purpose flour – a key ingredient for a light texture; sift before measuring for the best results.
• Granulated sugar – helps to sweeten the base; you can substitute with a sugar alternative for a lighter option.
• Baking powder – provides lift and helps the sponge rise; essential for achieving that fluffy texture.
• Butter – adds richness; always use unsalted butter to control the salt level in the cake.
• Eggs – bind the ingredients and add moisture; ensure they are at room temperature for better mixing.
• Vanilla extract – enhances the flavor of the sponge; opt for pure extract over imitation for depth.
• Milk – contributes moisture; substitute with a non-dairy milk for a vegan option.
For the Jelly Coating
• Strawberry jelly – provides the signature flavor and sweetness; other fruit jellies like raspberry can also be used for variety.
For the Coating
• Desiccated coconut – adds crunch and a tropical feel; you can skip this for a more minimalist treat.
For the Filling
• Whipped cream – adds a rich, creamy layer; using real cream lends a much creamier taste than substitutes.
These Old-Fashioned Pink Jelly Cakes are bound to become a cherished recipe in your kitchen, captivating hearts and taste buds with each delightful bite!
Step‑by‑Step Instructions for Old-Fashioned Pink Jelly Cakes
Step 1: Preheat the Oven and Prepare the Muffin Tin
Begin by preheating your oven to 350°F (175°C). While it warms up, grease a standard muffin tin with butter or non-stick spray, ensuring each cup is well-coated to prevent sticking. This preparation sets the stage for your Old-Fashioned Pink Jelly Cakes, giving them a fluffy and perfect rise.
Step 2: Make the Vanilla Sponge Batter
In a mixing bowl, cream together 1/2 cup of unsalted butter and 1 cup of granulated sugar until light and fluffy—about 4-5 minutes. Gradually add 2 eggs, one at a time, mixing well before each addition. Combine 1 teaspoon of vanilla extract with 1 cup of milk, then alternate adding sifted flour and baking powder into the mixture until just combined to create a smooth batter.
Step 3: Fill the Muffin Tin and Bake
Carefully pour the batter into the prepared muffin tin, filling each cup halfway to allow for rising. Place the muffin tin in the preheated oven and bake for 15-20 minutes, or until the cakes are golden brown and spring back when lightly touched. Once baked, remove from the oven and let the cakes cool in the tin for about 10 minutes before transferring them to a wire rack.
Step 4: Prepare the Strawberry Jelly
While your cakes are cooling, prepare the strawberry jelly according to package instructions. Stir until the jelly has a syrupy consistency, ensuring it is not fully set. This will create a perfect coating for your Old-Fashioned Pink Jelly Cakes. Set the jelly aside for a few moments to cool to room temperature.
Step 5: Dip Cakes in Jelly
Once the sponge cakes are completely cool, gently dip the top of each cake into the prepared strawberry jelly. Allow any excess jelly to drip off, ensuring a lovely, even layer covering the top. This step is crucial for infusing your cakes with that delightful sweetness and moisture that defines Old-Fashioned Pink Jelly Cakes.
Step 6: Coat with Desiccated Coconut
Immediately after dipping in jelly, roll the tops of the cakes in desiccated coconut, coating them generously. The coconut adds a wonderful texture and a slight crunch, enhancing the overall experience of your treat. Make sure to cover all exposed jelly surfaces for the best flavor and presentation.
Step 7: Whip the Cream for Filling
In a clean mixing bowl, whip 1 cup of heavy cream until soft peaks form, adding a tablespoon of sugar for sweetness if desired. This creamy filling complements the fruity jelly perfectly. Be careful not to over-whip, as you want the cream to remain smooth and airy for the best experience in your Old-Fashioned Pink Jelly Cakes.
Step 8: Assemble the Cakes
Take one jelly-coated cake and spread a generous layer of whipped cream on the top. Place a second jelly-coated cake on top to create a delightful sandwich. Repeat this process until all cakes are filled. Ensure each cake is carefully assembled, and admire your handiwork for a moment before setting them aside.
Step 9: Chill to Set the Jelly
Refrigerate the assembled cakes for at least 30 minutes to allow the jelly to set slightly and the flavors to meld beautifully. Chilling also helps to firm up the whipped cream, giving your Old-Fashioned Pink Jelly Cakes a fantastic texture and making them easier to slice and serve later.
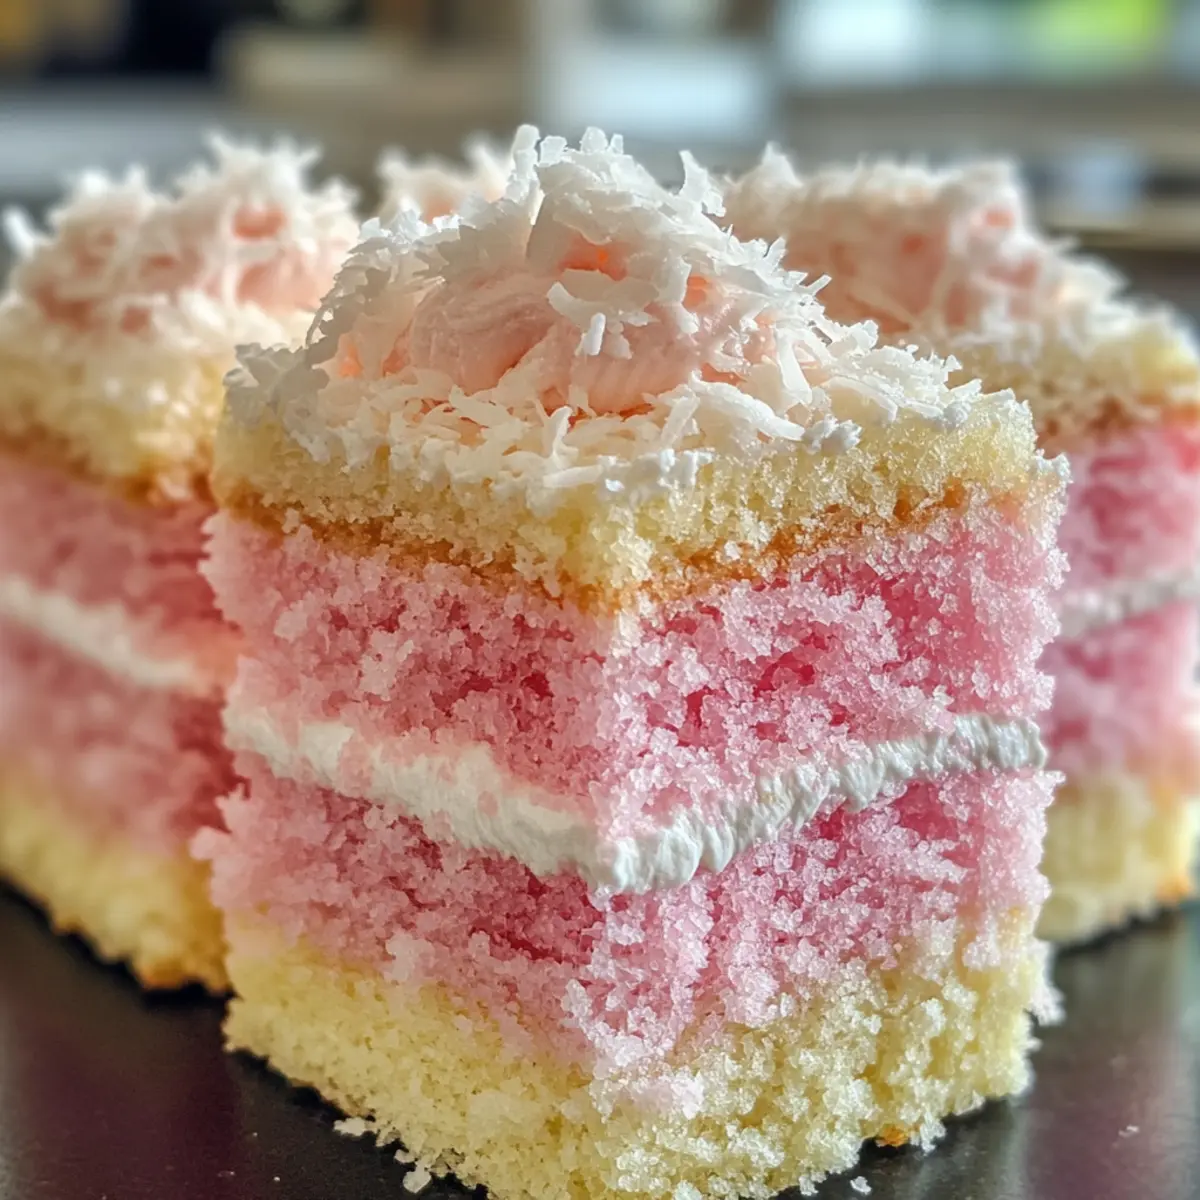
Step 10: Serve and Enjoy
Once chilled, your Old-Fashioned Pink Jelly Cakes are ready to be served! Slice them carefully, revealing the lovely layers within. They’re perfect for sharing at afternoon tea or during festive gatherings. Enjoy the sweet memories they evoke with each delightful bite!
Make Ahead Options
These Old-Fashioned Pink Jelly Cakes are perfect for busy home cooks looking to save time! You can prepare the vanilla sponge cakes and the strawberry jelly up to 24 hours in advance; just be sure to let the cakes cool completely before dipping them in jelly to prevent any sogginess. The whipped cream filling can also be whipped and stored in the refrigerator for up to 2 days. When you’re ready to serve, simply assemble the cakes by sandwiching the whipped cream between the jelly-coated sponges, then return them to the fridge for an additional chill to set the jelly. This prep-ahead strategy ensures you can enjoy deliciously fresh and delightful Old-Fashioned Pink Jelly Cakes without the last-minute rush!
How to Store and Freeze Old-Fashioned Pink Jelly Cakes
Fridge: Store assembled Old-Fashioned Pink Jelly Cakes in an airtight container in the fridge for up to 3 days to keep them fresh and moist.
Freezer: For longer storage, freeze unassembled sponge cakes in an airtight container for up to 2 months. Thaw in the fridge before dipping in jelly and assembling.
Reheating: If using previously frozen cakes, allow them to come to room temperature before dipping in jelly. Avoid reheating as it may alter the texture of the cake.
Assembly Tip: For optimal flavor and texture, assemble Old-Fashioned Pink Jelly Cakes on the day you plan to serve them. This ensures the jelly remains vibrant and the sponge stays fluffy.
Expert Tips for Old-Fashioned Pink Jelly Cakes
-
Jelly Consistency is Key: Ensure the strawberry jelly has a syrupy texture, thicker than a liquid but not fully set, for optimal coating.
-
Cooling Time Matters: Allow the sponge cakes to cool completely before dipping them. This prevents the jelly from sliding off and ensures a nice even coat.
-
Coat Evenly: When rolling in desiccated coconut, ensure all exposed jelly is covered for maximum flavor and a lovely presentation.
-
Whip Cream Wisely: Whip the cream to soft peaks for best results. Over-whipping can lead to a grainy texture, diminishing the creamy filling of your Old-Fashioned Pink Jelly Cakes.
-
Chill for Best Texture: Refrigerate the assembled cakes for at least 30 minutes before serving. This helps the jelly set and firms up the whipped cream for easier slicing.
What to Serve with Old-Fashioned Pink Jelly Cakes?
Indulging in these delightful treats opens up a world of delicious pairings that elevate your dessert experience even further.
- Classic Black Tea: The robust flavors complement the sweetness of the cakes perfectly, making it a traditional pairing for afternoon tea.
- Fresh Fruit Salad: The vibrant mix of seasonal fruits adds a refreshing contrast to the rich textures of the Pink Jelly Cakes. A burst of tangy citrus or juicy berries will enhance your dessert spread.
- Vanilla Ice Cream: Creamy ice cream served alongside is a wonderful contrast to the airy sponge, offering a luscious melting experience with every bite.
- Chocolate Ganache Drizzle: For a touch of decadence, drizzle warm chocolate ganache over the jelly cakes, enhancing both flavor and visual appeal.
- Sparkling Lemonade: This bubbly refreshment adds brightness and a zesty pop that cuts through the sweetness, balancing the dessert beautifully.
- Mini Pavlovas: These light meringues contrast beautifully with the cakes while keeping the dessert presentation delightful and colorful. Serve with fresh whipped cream and fruit to tie it all together.
- White Wine Spritzer: A chilled spritzer brings a fragrant and refreshing note, ideal for warm sunny days with a garden gathering filled with laughter and joy.
- Coconut Macaroons: These chewy treats echo the coconut coating of the jelly cakes, providing a harmonious blend of flavors and textures on your dessert table.
- Chocolate-Covered Strawberries: A sumptuous addition that offers a luxurious touch and pairs well with the strawberry jelly used in the cakes.
Each of these delightful pairings enhances the charm of your Old-Fashioned Pink Jelly Cakes, making your gathering even more special. Enjoy!
Old-Fashioned Pink Jelly Cakes Variations
Feel free to explore and create your own unique spin on these nostalgic treats, and let your taste buds lead the way!
- Fruit-Infused: Add fresh fruit slices like strawberries or peaches to the whipped cream for a delightful burst of flavor.
- Coconut-Free: Skip the desiccated coconut for a lighter texture; these cakes will still taste heavenly just dipped in jelly.
- Alternative Jellies: Swap the strawberry jelly for raspberry, orange, or even passionfruit jelly for a refreshing twist. Each fruit brings a unique sweetness that can transport you back in time.
- Vegan Version: Use non-dairy milk, coconut cream for the filling, and a vegan jelly to create a plant-based delight for everyone to enjoy!
- Chocolate Drizzle: Drizzle melted chocolate over the assembled cakes for a decadent finish that adds a rich flavor—perfect for chocolate lovers.
- Spiced Whip: Incorporate a dash of cinnamon or nutmeg into the whipped cream for a warm, autumnal twist to balance the sweetness.
- Layered Dessert: Instead of sandwiches, layer sponge, jelly, and cream in small cups for a cute and fun presentation—ideal for parties!
- Heat it Up: Add a pinch of cayenne or chili powder to the whipped cream for a surprising kick that complements the sweetness beautifully.
For more delightful recipes, don’t forget to check out our Vegetable Cheese Pancakes for a savory option, or treat yourself with our scrumptious Cloudy Sky Jelly!
Old-Fashioned Pink Jelly Cakes Recipe FAQs
What are the best ingredients for making the vanilla sponge?
Absolutely! For the fluffiest sponge, always use room temperature eggs and sift your flour before measuring. Stick to quality ingredients, like real vanilla extract rather than imitation, and opt for unsalted butter for more control over flavor.
How should I store my Old-Fashioned Pink Jelly Cakes?
To keep your cakes fresh and moist, store them in an airtight container in the fridge for up to 3 days. If you’re not going to eat them right away, it’s best to keep the sponge and jelly separate until the day you plan to serve them.
Can I freeze my Old-Fashioned Pink Jelly Cakes?
Definitely! For longer storage, freeze the unassembled sponge cakes in an airtight container for up to 2 months. When you’re ready to enjoy them, simply thaw them in the fridge. Once they’re thawed, you can dip them in jelly and assemble for maximum freshness.
What should I do if my jelly isn’t setting properly?
Very! If your jelly isn’t thickening, ensure you follow the package instructions accurately, and let it cool to room temperature before dipping your cakes. If it’s too runny, try adding more jelly powder to achieve the desired consistency. Just make sure it has that nice, syrupy texture.
Can I make these cakes vegan or accommodate allergies?
Absolutely! To make a vegan version, substitute the eggs with flax eggs (1 tablespoon of flaxseed meal mixed with 2.5 tablespoons of water per egg), use a dairy-free milk, and swap out the cream for coconut cream or a vegan whipped topping. Always check the jelly for animal-derived ingredients, as some brands may use gelatin.
How long can I keep the sponge cakes before assembling?
I often recommend making the sponge cakes a day in advance. They’ll store in an airtight container at room temperature for up to 2 days, which allows for better texture. Just be sure to assemble the cakes on the day you plan to serve them for that perfect balance of fluffiness and sweetness!
Delightful Old-Fashioned Pink Jelly Cakes for Sweet Nostalgia
Ingredients
Equipment
Method
- Preheat your oven to 350°F (175°C) and grease a standard muffin tin.
- Cream together the unsalted butter and granulated sugar until light and fluffy, then add eggs one at a time. Alternate adding milk and vanilla extract with sifted flour and baking powder until combined.
- Pour the batter into the muffin tin, filling each cup halfway. Bake for 15-20 minutes until golden brown. Cool in the tin for 10 minutes before transferring to a wire rack.
- Prepare the strawberry jelly according to package instructions until it reaches a syrupy consistency and allow to cool.
- Dip the tops of cooled sponge cakes into the strawberry jelly, allowing excess to drip off.
- Roll the tops of the cakes in desiccated coconut, ensuring all exposed jelly is covered.
- Whip the cream in a mixing bowl until soft peaks form and add sugar if desired.
- Spread whipped cream on one jelly-coated cake, sandwich with another jelly-coated cake, and repeat for all cakes.
- Chill the assembled cakes for at least 30 minutes to set the jelly.
- Serve chilled, slicing carefully to reveal the layers.