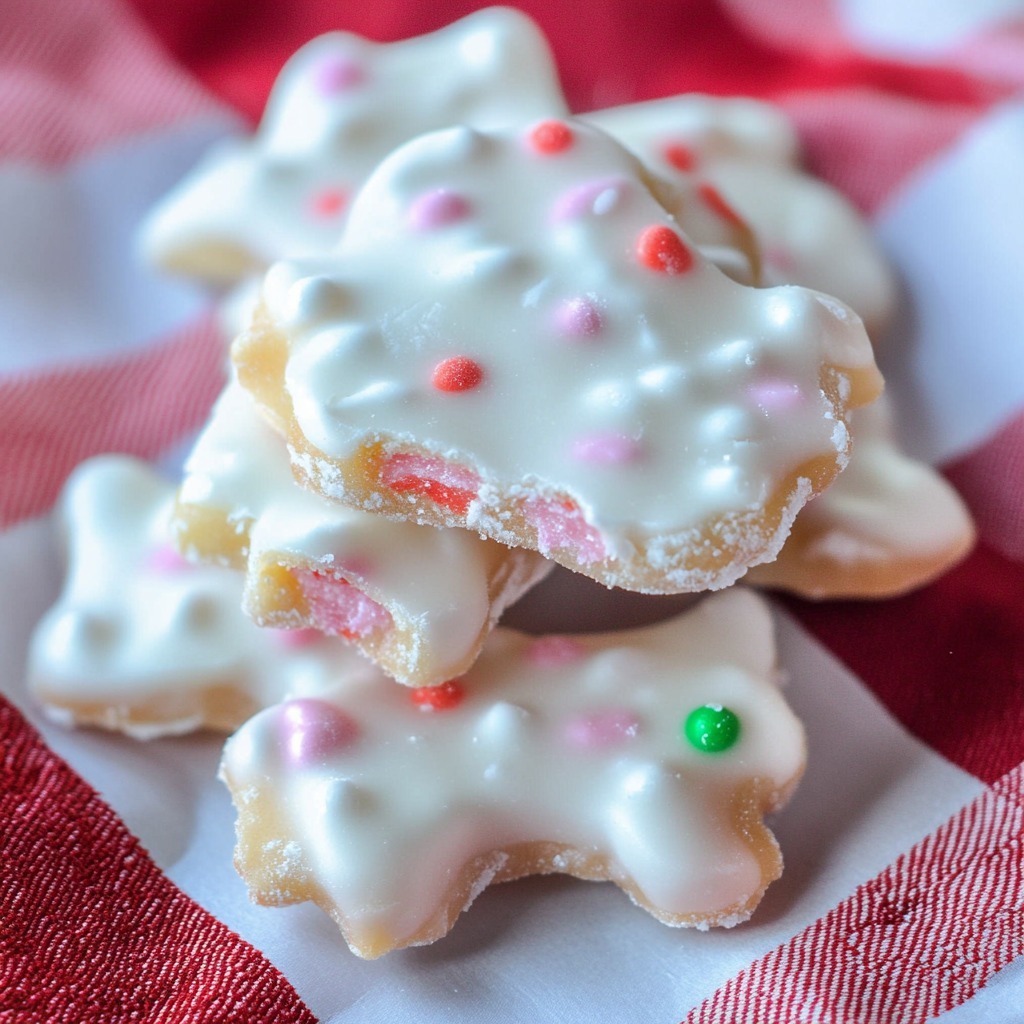
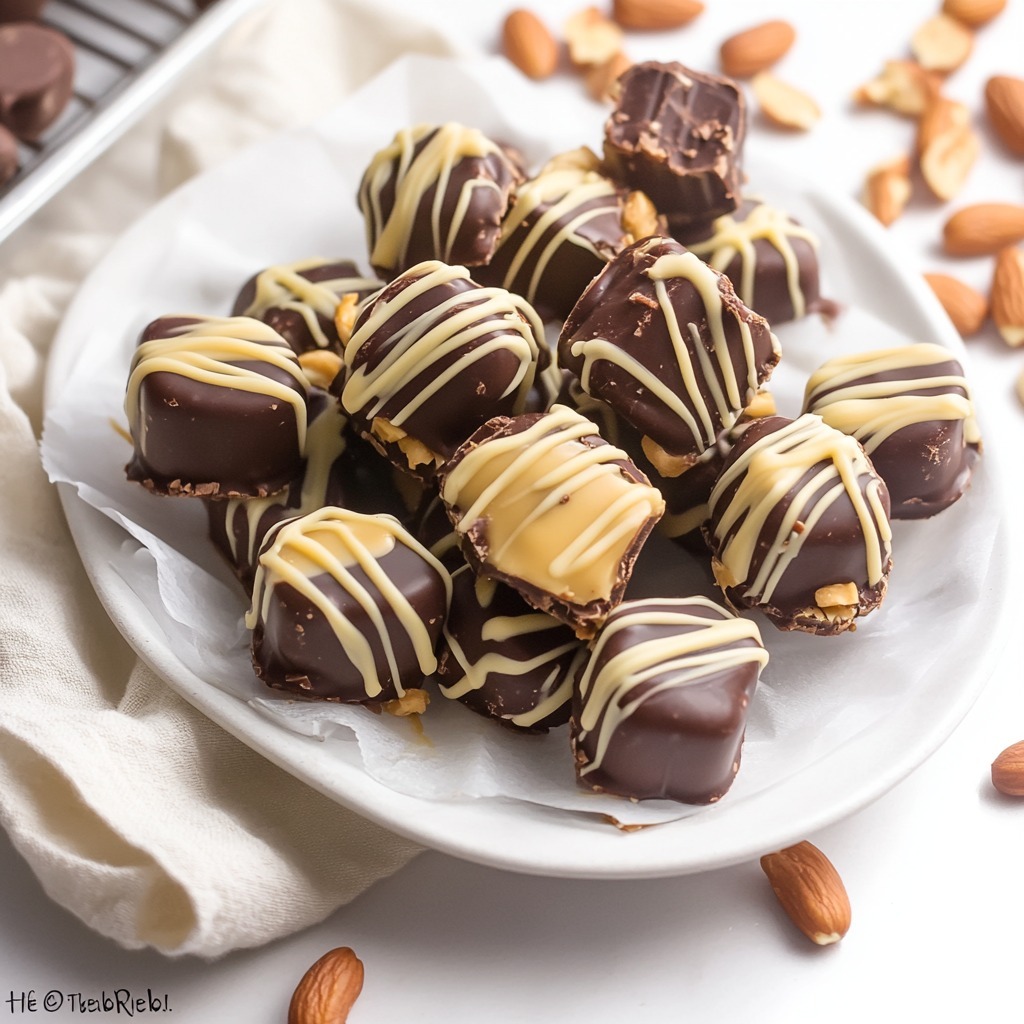
Decadent Dulce de Leche Mousse: A Creamy Delight

This Dulce de Leche Mousse is the epitome of elegance and simplicity. With its rich caramel flavor and light, airy texture, this dessert is a luxurious treat for any occasion. Whether you’re hosting a dinner party or simply craving something indulgent, this mousse comes together effortlessly with just four ingredients. Topped with an extra swirl of dulce de leche, it’s a dessert that’s sure to impress.

Ingredients:

  • 200 grams dulce de leche (plus extra for drizzling, optional)
  • 300 millilitres double cream (fridge-cold)
  • ½ teaspoon cornflour (or 1 teaspoon for a firmer texture)
  • Pinch of salt (optional)

Instructions:

  1. Prepare the Mousse Base: Place the dulce de leche in a mixing bowl. Add a pinch of salt for a balanced caramel flavor, if desired.
  2. Whip the Cream: In a separate bowl, pour the cold double cream. Using an electric mixer, whip the cream until it begins to thicken but is still soft (do not overwhip).
  3. Combine the Ingredients: Add the cornflour to the whipped cream and mix gently for 10-15 seconds to combine. The cornflour helps stabilize the mousse. Gradually fold the whipped cream into the dulce de leche using a spatula. Be gentle to maintain the light, airy texture. Fold until fully incorporated and smooth.
  4. Chill the Mousse: Spoon the mousse into serving glasses, ramekins, or bowls. Smooth the tops with the back of a spoon. Place the mousse in the refrigerator and chill for at least 1 hour to set. For a firmer texture, chill for up to 2 hours.
  5. Serve and Garnish: Before serving, drizzle extra dulce de leche over the top for added indulgence. You can also garnish with a sprinkle of sea salt, chocolate shavings, or a dollop of whipped cream for an elegant presentation.

Conclusion:

This Dulce de Leche Mousse is the perfect blend of richness and lightness, making it a dreamy dessert for any occasion. With its silky texture and irresistible caramel flavor, it’s a treat that comes together in minutes but tastes like it took hours. Serve it chilled and watch as it melts in your mouth, leaving you craving more.
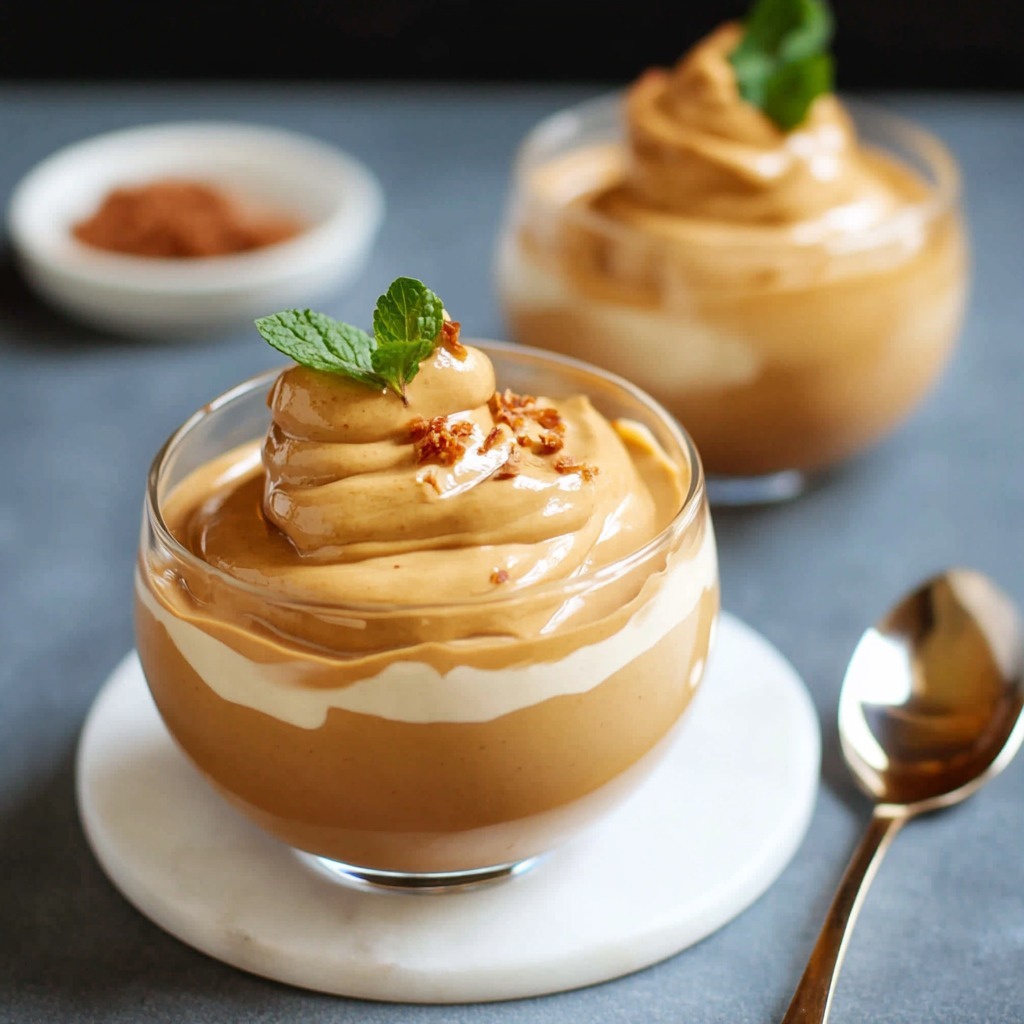
Decadent Dulce de Leche Mousse: A Creamy Delight

A creamy, airy mousse made with rich dulce de lecheand whipped cream, perfect for a simple yet indulgent dessert.
Prep Time 10 minutes
Resting Time 1 hour
Total Time 1 hour 10 minutes
Servings: 4
Course: Dessert
Cuisine: Latin American-inspired
Calories: 320

Ingredients
  

  • 200 grams dulce de leche plus extra for drizzling, optional
  • 300 millilitres double cream fridge-cold
  • ½ teaspoon cornflour or 1 teaspoon for a firmer texture
  • Pinch of salt optional

Method
 

  1. Prepare the Mousse Base: Place the dulce de leche in a mixing bowl. Add a pinch of salt for a balanced caramel flavor, if desired.
  2. Whip the Cream: In a separate bowl, pour the cold double cream. Using an electric mixer, whip the cream until it begins to thicken but is still soft (do not overwhip).
  3. Combine the Ingredients: Add the cornflour to the whipped cream and mix gently for 10-15 seconds to combine. The cornflour helps stabilize the mousse. Gradually fold the whipped cream into the dulce de leche using a spatula. Be gentle to maintain the light, airy texture. Fold until fully incorporated and smooth.
  4. Chill the Mousse: Spoon the mousse into serving glasses, ramekins, or bowls. Smooth the tops with the back of a spoon. Place the mousse in the refrigerator and chill for at least 1 hour to set. For a firmer texture, chill for up to 2 hours.
  5. Serve and Garnish: Before serving, drizzle extra dulce de leche over the top for added indulgence. You can also garnish with a sprinkle of sea salt, chocolate shavings, or a dollop of whipped cream for an elegant presentation.
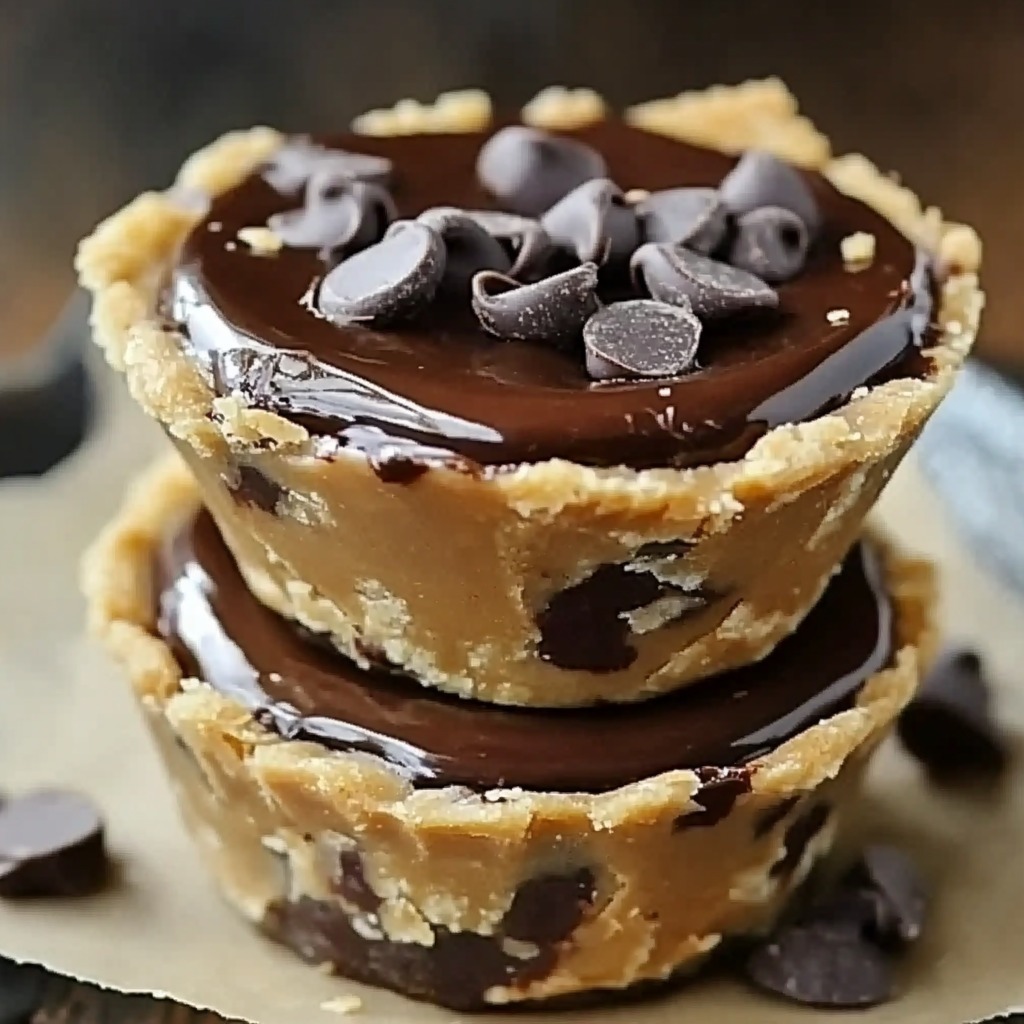
Mini Chocolate Peanut Butter Pies: The Perfect Bite-Sized Treat

Indulge in the perfect combination of rich chocolate and creamy peanut butter with these Mini Chocolate Peanut Butter Pies. These no-bake treats are not only delicious but also incredibly easy to make. With a buttery graham cracker crust, smooth peanut butter filling, and a luscious chocolate topping, they’re ideal for parties, gatherings, or whenever you need a sweet fix. These individual pies are a guaranteed crowd-pleaser and will satisfy even the most intense dessert cravings.

Ingredients:

For the Crust:

  • 1 1/2 cups graham cracker crumbs
  • 1/2 cup butter, melted

For the Peanut Butter Filling:

  • 1 cup creamy peanut butter
  • 8 oz cream cheese, softened
  • 1/2 cup powdered sugar
  • 1 teaspoon vanilla extract
  • 1 pinch salt

For the Chocolate Ganache Topping:

  • 1 cup semi-sweet chocolate chips
  • 1/2 cup heavy cream

For Garnish (Optional):

  • Extra chocolate chips or shavings
  • A sprinkle of powdered sugar
  • Chopped peanuts

Instructions:

  1. Prepare the Crust: In a medium bowl, combine the graham cracker crumbs and melted butter. Mix until the crumbs are evenly coated. Divide the mixture evenly between mini pie tins, muffin cups, or silicone molds, pressing it firmly into the bottom and slightly up the sides to form a crust. Place the crusts in the refrigerator to chill while preparing the filling.
  2. Make the Peanut Butter Filling : In a large bowl, beat the softened cream cheese and powdered sugar until smooth and creamy. Add the creamy peanut butter, vanilla extract, and a pinch of salt. Beat until fully combined and smooth. In a separate bowl, whip the heavy cream until soft peaks form. Gently fold the whipped cream into the peanut butter mixture until light and fluffy. Spoon the peanut butter filling evenly over the chilled crusts, smoothing the tops with a spatula. Place them back into the refrigerator to set.
  3. Prepare the Chocolate Ganache: In a small saucepan, heat the heavy cream over medium heat until it just begins to simmer. Remove the saucepan from heat and pour the cream over the chocolate chips in a bowl. Let it sit for 2 minutes, then stir until the chocolate is completely melted and smooth. Allow the ganache to cool slightly for 5 minutes before pouring.
  4. Assemble the Pies : Spoon or drizzle the cooled chocolate ganache evenly over the peanut butter filling in each mini pie. Use a spatula or spoon to spread the chocolate smoothly. Place the mini pies in the refrigerator for at least 1 hour to fully set.
  5. Garnish and Serve: Once the pies are set, garnish with chocolate shavings, chopped peanuts, or a light dusting of powdered sugar for an elegant touch. Serve chilled and enjoy the creamy, chocolaty goodness!

Conclusion:

These Mini Chocolate Peanut Butter Pies are the ultimate bite-sized indulgence for chocolate and peanut butter lovers alike. With their creamy filling, crunchy crust, and rich ganache topping, they’re a delightful dessert perfect for any occasion. Simple, no-bake, and bursting with flavor, these mini pies are guaranteed to impress your family, friends, or party guests.

Mini Chocolate Peanut Butter Pies: The Perfect Bite-Sized Treat

No-bake mini pies with a graham cracker crust,creamy peanut butter filling, and silky chocolate ganache topping.
Prep Time 20 minutes
Cook Time 1 hour
Total Time 1 hour 20 minutes
Servings: 12 mini pies
Course: Dessert
Cuisine: American
Calories: 350

Ingredients
  

For the Crust:
  • 1 1/2 cups graham cracker crumbs
  • 1/2 cup butter melted
For the Peanut Butter Filling:
  • 1 cup creamy peanut butter
  • 8 oz cream cheese softened
  • 1/2 cup powdered sugar
  • 1 teaspoon vanilla extract
  • 1 pinch salt
For the Chocolate Ganache Topping:
  • 1 cup semi-sweet chocolate chips
  • 1/2 cup heavy cream
For Garnish Optional:
  • Extra chocolate chips or shavings
  • A sprinkle of powdered sugar
  • Chopped peanuts

Method
 

  1. Prepare the Crust: In a medium bowl, combine the graham cracker crumbs and melted butter. Mix until the crumbs are evenly coated. Divide the mixture evenly between mini pie tins, muffin cups, or silicone molds, pressing it firmly into the bottom and slightly up the sides to form a crust. Place the crusts in the refrigerator to chill while preparing the filling.
  2. Make the Peanut Butter Filling : In a large bowl, beat the softened cream cheese and powdered sugar until smooth and creamy. Add the creamy peanut butter, vanilla extract, and a pinch of salt. Beat until fully combined and smooth. In a separate bowl, whip the heavy cream until soft peaks form. Gently fold the whipped cream into the peanut butter mixture until light and fluffy. Spoon the peanut butter filling evenly over the chilled crusts, smoothing the tops with a spatula. Place them back into the refrigerator to set.
  3. Prepare the Chocolate Ganache: In a small saucepan, heat the heavy cream over medium heat until it just begins to simmer. Remove the saucepan from heat and pour the cream over the chocolate chips in a bowl. Let it sit for 2 minutes, then stir until the chocolate is completely melted and smooth. Allow the ganache to cool slightly for 5 minutes before pouring.
  4. Assemble the Pies : Spoon or drizzle the cooled chocolate ganache evenly over the peanut butter filling in each mini pie. Use a spatula or spoon to spread the chocolate smoothly. Place the mini pies in the refrigerator for at least 1 hour to fully set.
  5. Garnish and Serve: Once the pies are set, garnish with chocolate shavings, chopped peanuts, or a light dusting of powdered sugar for an elegant touch. Serve chilled and enjoy the creamy, chocolaty goodness!

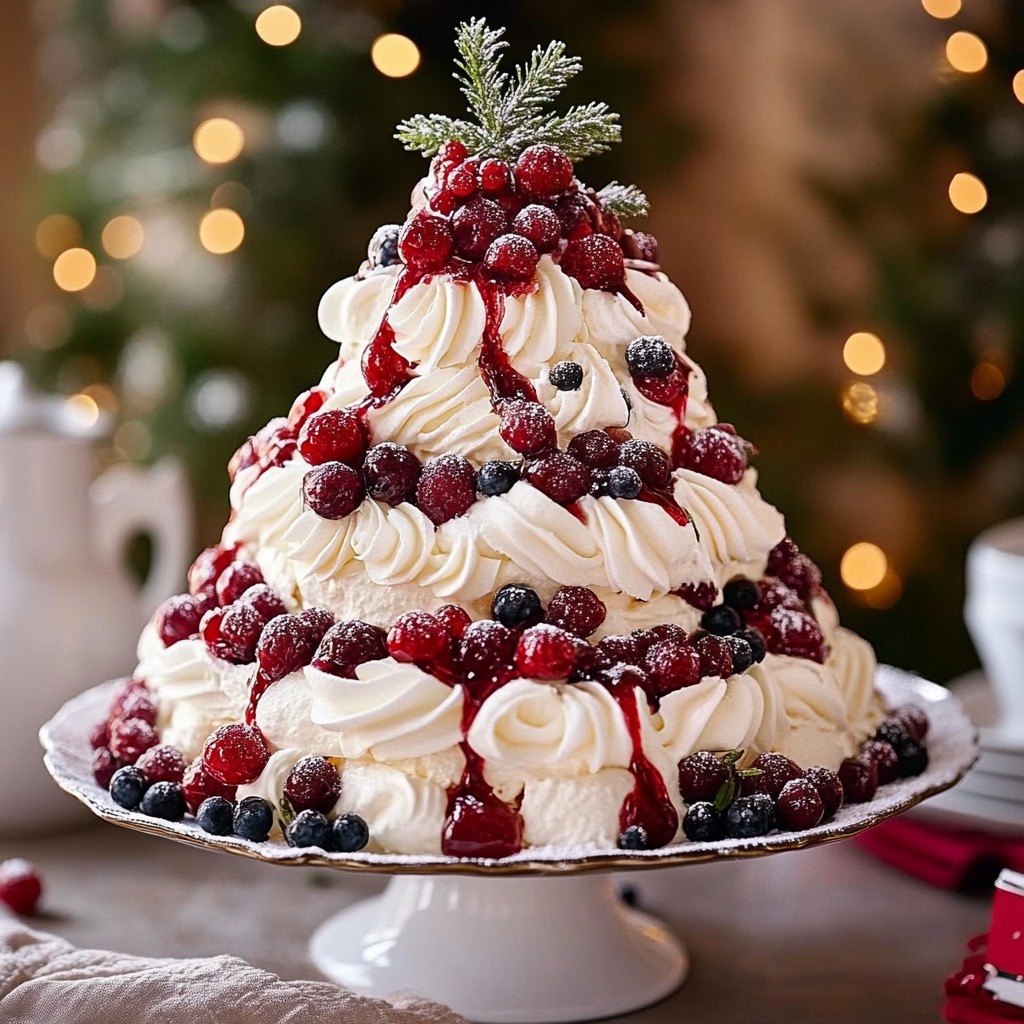
Festive Christmas Tree Pavlova Delight

Celebrate the holiday season with this stunning Christmas Tree Pavlova! A light, airy meringue base is topped with fluffy whipped cream and adorned with fresh berries to resemble a beautiful Christmas tree. This elegant dessert is as delightful to look at as it is to eat, making it the perfect centerpiece for your festive table. It’s a showstopper that combines texture, sweetness, and vibrant flavors to bring joy to every bite.

Ingredients:

For the Pavlova Base:

  • 6 extra-large egg whites (room temperature)
  • 1/2 teaspoon cream of tartar
  • 1 1/2 cups caster sugar
  • 2 teaspoons corn flour

For the Topping:

  • 600ml thickened cream
  • 1 tablespoon icing sugar
  • 2 x 125g punnets of fresh raspberries
  • 250g fresh strawberries, sliced

Optional Decoration:

  • Fresh mint leaves
  • A dusting of icing sugar for a snowy effect

Instructions:

  1. Preheat and Prepare: Preheat your oven to 120°C (250°F). Line a large baking tray with baking paper. Draw a large circle (about 25cm) and two smaller circles (15cm and 10cm) on the paper as a guide for stacking your pavlova layers.
  2. Make the Meringue: In a clean, dry mixing bowl, add the egg whites and cream of tartar. Beat on medium-high speed with an electric mixer until soft peaks form. Gradually add the caster sugar, one tablespoon at a time, beating continuously until the mixture becomes thick, glossy, and holds stiff peaks. This may take 6-8 minutes. Sift in the corn flour and gently fold it into the meringue with a spatula until just combined.
  3. Shape and Bake the Meringue: Spoon the meringue onto the prepared baking paper, forming three distinct circles (large, medium, and small) as drawn earlier. Smooth the tops slightly to make them level. Bake the meringue layers in the oven for 1 hour and 15 minutes, or until crisp but still soft inside. Turn off the oven, leave the door slightly ajar, and allow the meringue to cool completely in the oven (this prevents cracking).
  4. Prepare the Whipped Cream: In a large bowl, whip the thickened cream and icing sugar until soft peaks form. Be careful not to overwhip.
  5. Assemble the Pavlova Tree: Place the largest meringue circle on a serving platter. Spread a layer of whipped cream evenly on top. Add the medium-sized meringue layer and spread more whipped cream. Finally, place the smallest meringue layer on top and spread the remaining whipped cream generously over the top and sides to create a snowy effect.
  6. Decorate: Arrange the raspberries and strawberry slices around the pavlova layers to resemble ornaments and garlands. For a festive touch, add fresh mint leaves and lightly dust the pavlova with icing sugar to mimic fresh snow.
  7. Serve and Enjoy: Serve immediately for a crisp texture or store in the fridge for up to 2 hours before serving.

Conclusion:

This Christmas Tree Pavlova is a visually stunning and irresistibly delicious dessert perfect for the holidays. The crisp meringue, soft whipped cream, and fresh berries come together to create a festive treat that’s light, flavorful, and ideal for any Christmas celebration. A dessert that looks as good as it tastes—guaranteed to impress your guests and make the season even sweeter!

Festive Christmas Tree Pavlova Delight

A festive pavlova shaped like a Christmas tree,with layers of meringue, whipped cream, and fresh berries for the perfectholiday centerpiece.
Prep Time 20 minutes
Cook Time 1 hour 15 minutes
Resting Time 25 minutes
Total Time 2 hours
Course: Dessert
Cuisine: Australian Holiday
Calories: 250

Ingredients
  

For the Pavlova Base:
  • 6 extra-large egg whites room temperature
  • 1/2 teaspoon cream of tartar
  • 1 1/2 cups caster sugar
  • 2 teaspoons corn flour
For the Topping:
  • 600 ml thickened cream
  • 1 tablespoon icing sugar
  • 2 x 125g punnets of fresh raspberries
  • 250 g fresh strawberries sliced
Optional Decoration:
  • Fresh mint leaves
  • A dusting of icing sugar for a snowy effect

Method
 

  1. Preheat and Prepare: Preheat your oven to 120°C (250°F). Line a large baking tray with baking paper. Draw a large circle (about 25cm) and two smaller circles (15cm and 10cm) on the paper as a guide for stacking your pavlova layers.
  2. Make the Meringue: In a clean, dry mixing bowl, add the egg whites and cream of tartar. Beat on medium-high speed with an electric mixer until soft peaks form. Gradually add the caster sugar, one tablespoon at a time, beating continuously until the mixture becomes thick, glossy, and holds stiff peaks. This may take 6-8 minutes. Sift in the corn flour and gently fold it into the meringue with a spatula until just combined.
  3. Shape and Bake the Meringue: Spoon the meringue onto the prepared baking paper, forming three distinct circles (large, medium, and small) as drawn earlier. Smooth the tops slightly to make them level. Bake the meringue layers in the oven for 1 hour and 15 minutes, or until crisp but still soft inside. Turn off the oven, leave the door slightly ajar, and allow the meringue to cool completely in the oven (this prevents cracking).
  4. Prepare the Whipped Cream: In a large bowl, whip the thickened cream and icing sugar until soft peaks form. Be careful not to overwhip.
  5. Assemble the Pavlova Tree: Place the largest meringue circle on a serving platter. Spread a layer of whipped cream evenly on top. Add the medium-sized meringue layer and spread more whipped cream. Finally, place the smallest meringue layer on top and spread the remaining whipped cream generously over the top and sides to create a snowy effect.
  6. Decorate: Arrange the raspberries and strawberry slices around the pavlova layers to resemble ornaments and garlands. For a festive touch, add fresh mint leaves and lightly dust the pavlova with icing sugar to mimic fresh snow.
  7. Serve and Enjoy: Serve immediately for a crisp texture or store in the fridge for up to 2 hours before serving.

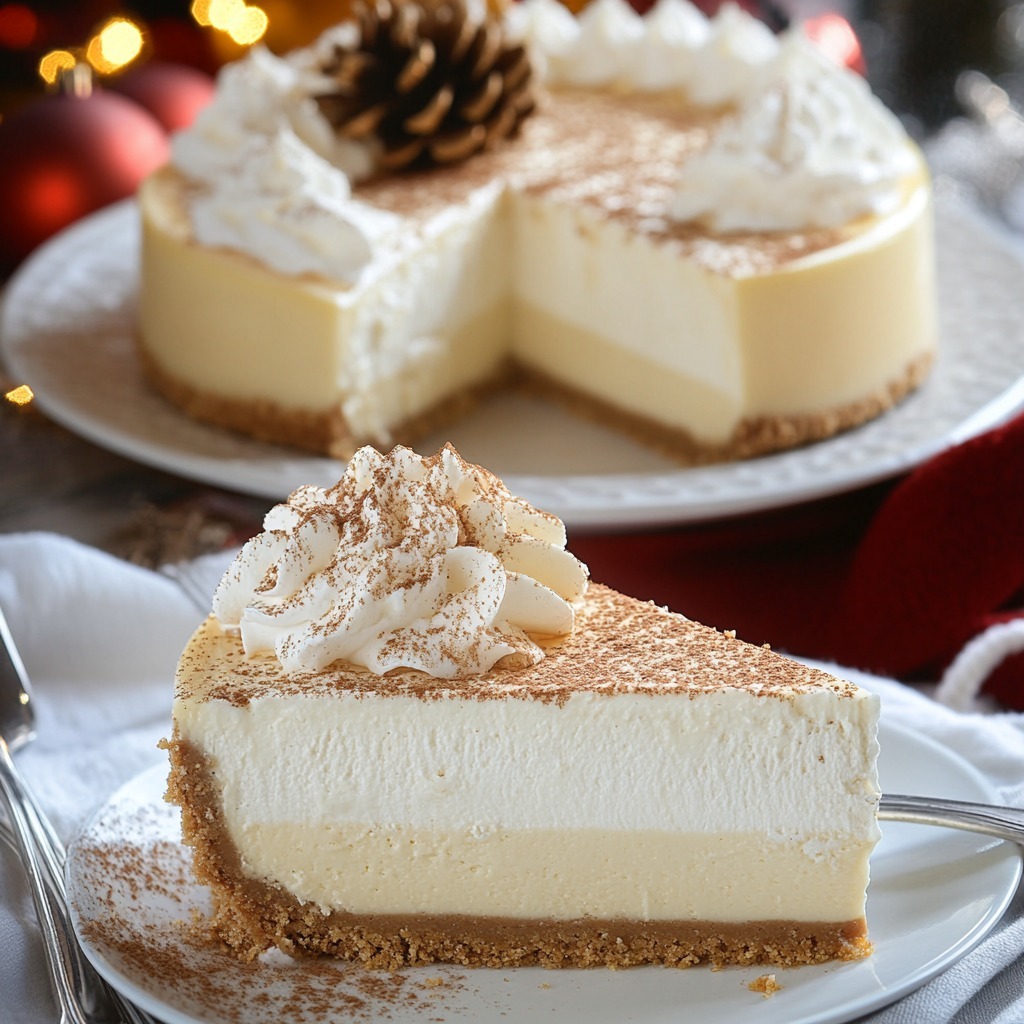
Creamy Holiday Eggnog Cheesecake Delight

Embrace the flavors of the holiday season with this smooth and decadent Eggnog Cheesecake. This creamy dessert combines the rich, spiced flavors of classic eggnog with the velvety texture of cheesecake. Perfect for festive gatherings, it’s a show-stopping treat that will leave your guests craving more. Whether you’re looking to impress at a Christmas dinner or just satisfy your sweet tooth, this cheesecake is a unique addition to your dessert table.

Ingredients:

For the Crust:

  • 2 cups graham cracker crumbs
  • 1/2 cup unsalted butter, melted

For the Filling:

  • 24 ounces cream cheese, softened (3 blocks)
  • 1 cup granulated sugar
  • 4 large eggs
  • 1 cup eggnog
  • 1 teaspoon vanilla extract
  • 1/2 teaspoon ground nutmeg
  • 1/4 teaspoon salt

Optional Garnish:

  • Freshly grated nutmeg
  • Whipped cream
  • Cinnamon sticks for decoration

Instructions:

  1. Prepare the Crust: Preheat your oven to 325°F (160°C). In a mixing bowl, combine the graham cracker crumbs and melted butter. Stir until the crumbs are fully coated and resemble wet sand. Press the mixture evenly into the bottom of a 9-inch springform pan. Use the back of a spoon or the bottom of a glass to compact it firmly.Bake the crust for 8-10 minutes. Remove and set aside to cool slightly.
  2. Make the Filling: In a large mixing bowl, beat the softened cream cheese until smooth and creamy (about 2 minutes). Gradually add the sugar, mixing until fully incorporated. Scrape down the sides of the bowl as needed. Beat in the eggs, one at a time, ensuring each egg is well-mixed before adding the next. Slowly pour in the eggnog, vanilla extract, nutmeg, and salt. Mix on low speed until the batter is smooth and evenly combined.
  3. Assemble and Bake: Pour the cheesecake filling over the prepared crust, spreading it evenly with a spatula. Place the springform pan in a larger baking pan and pour about 1 inch of hot water into the outer pan to create a water bath (this helps prevent cracks). Carefully transfer to the oven and bake for 50-55 minutes. The edges should be set, but the center will have a slight jiggle.
  4. Cool the Cheesecake: Turn off the oven and crack the door slightly, allowing the cheesecake to cool gradually for 1 hour. Remove from the oven, then run a knife gently around the edges to prevent sticking. Let it cool to room temperature. Cover the cheesecake and chill in the refrigerator for at least 4 hours or overnight for best results.
  5. Serve and Garnish: Before serving, garnish with a dollop of whipped cream, a sprinkle of freshly grated nutmeg, and optional cinnamon sticks for a festive touch.

Conclusion:

This Creamy Holiday Eggnog Cheesecake is a perfect harmony of rich, spiced eggnog and indulgent cheesecake. With its silky-smooth texture and festive flavor, this dessert will quickly become a holiday favorite for years to come. Serve it at your next gathering, and watch as everyone falls in love with this seasonal treat!

Creamy Holiday Eggnog Cheesecake Delight

A creamy and decadent eggnog-infused cheesecakewith a buttery graham cracker crust, perfect for holiday celebrations.
Prep Time 20 minutes
Cook Time 55 minutes
Resting Time 5 hours
Total Time 6 hours 15 minutes
Course: Dessert
Cuisine: American
Calories: 380

Ingredients
  

For the Crust:
  • 2 cups graham cracker crumbs
  • 1/2 cup unsalted butter melted
For the Filling:
  • 24 ounces cream cheese softened (3 blocks)
  • 1 cup granulated sugar
  • 4 large eggs
  • 1 cup eggnog
  • 1 teaspoon vanilla extract
  • 1/2 teaspoon ground nutmeg
  • 1/4 teaspoon salt
Optional Garnish:
  • Freshly grated nutmeg
  • Whipped cream
  • Cinnamon sticks for decoration

Method
 

  1. Prepare the Crust: Preheat your oven to 325°F (160°C). In a mixing bowl, combine the graham cracker crumbs and melted butter. Stir until the crumbs are fully coated and resemble wet sand. Press the mixture evenly into the bottom of a 9-inch springform pan. Use the back of a spoon or the bottom of a glass to compact it firmly.Bake the crust for 8-10 minutes. Remove and set aside to cool slightly.
  2. Make the Filling: In a large mixing bowl, beat the softened cream cheese until smooth and creamy (about 2 minutes). Gradually add the sugar, mixing until fully incorporated. Scrape down the sides of the bowl as needed. Beat in the eggs, one at a time, ensuring each egg is well-mixed before adding the next. Slowly pour in the eggnog, vanilla extract, nutmeg, and salt. Mix on low speed until the batter is smooth and evenly combined.
  3. Assemble and Bake: Pour the cheesecake filling over the prepared crust, spreading it evenly with a spatula. Place the springform pan in a larger baking pan and pour about 1 inch of hot water into the outer pan to create a water bath (this helps prevent cracks). Carefully transfer to the oven and bake for 50-55 minutes. The edges should be set, but the center will have a slight jiggle.
  4. Cool the Cheesecake: Turn off the oven and crack the door slightly, allowing the cheesecake to cool gradually for 1 hour. Remove from the oven, then run a knife gently around the edges to prevent sticking. Let it cool to room temperature. Cover the cheesecake and chill in the refrigerator for at least 4 hours or overnight for best results.
  5. Serve and Garnish: Before serving, garnish with a dollop of whipped cream, a sprinkle of freshly grated nutmeg, and optional cinnamon sticks for a festive touch.

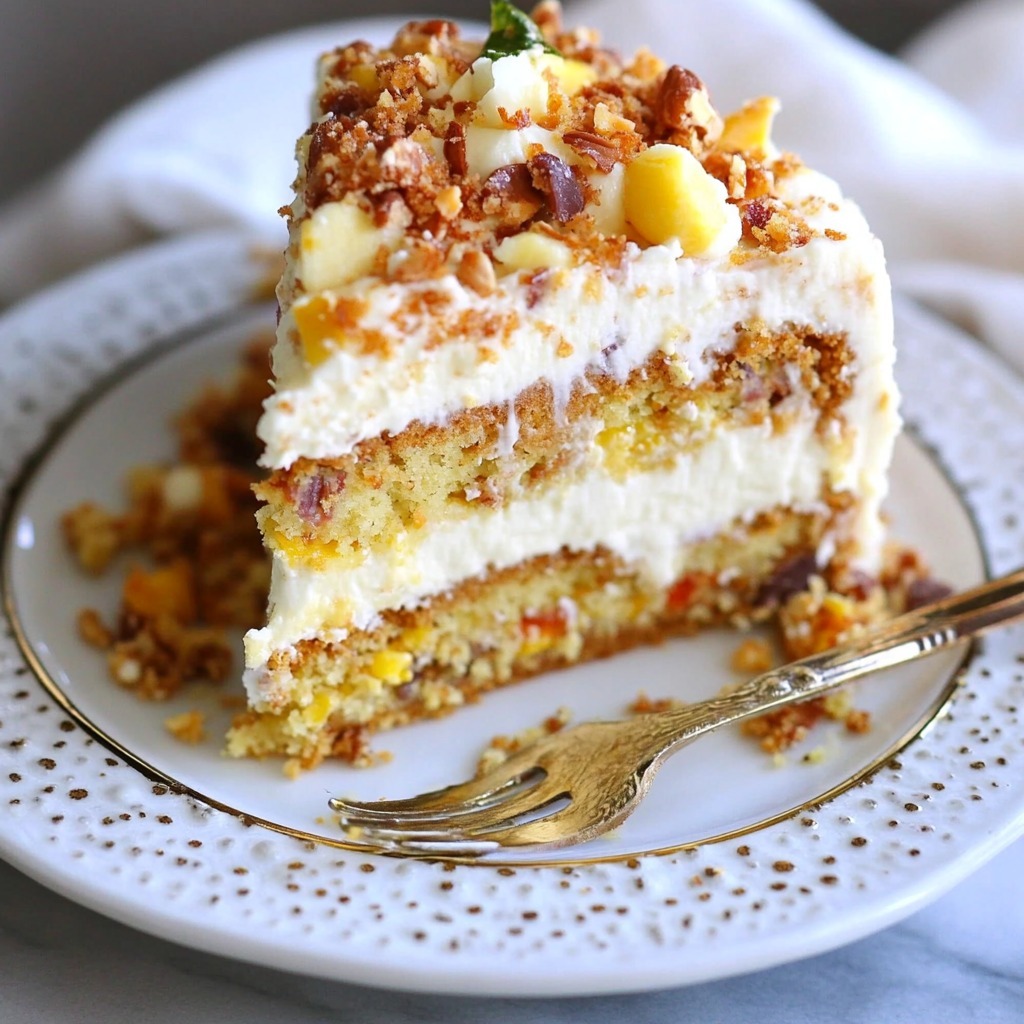
Irresistible Carrot Cake with Cream Cheese Frosting

This “To Die For Carrot Cake” is a classic dessert packed with flavor and texture. Moist and tender, it’s brimming with freshly grated carrots, sweetened coconut, and juicy pineapple, with the perfect balance of spice. Topped with a velvety cream cheese frosting, it’s a treat worthy of every celebration or a cozy afternoon indulgence. Whether you’re a carrot cake connoisseur or a first-timer, this recipe is guaranteed to become a household favorite.

Ingredients

For the Cake :

  • 1 ¼ cups unsweetened applesauce or oil (traditional choice)
  • 2 cups granulated sugar
  • 3 large eggs, room temperature
  • 2 cups all-purpose flour
  • 1 teaspoon baking soda
  • 1 ½ teaspoons baking powder
  • ½ teaspoon salt
  • 1 teaspoon cinnamon
  • 2 cups grated carrots
  • 1 cup shredded sweetened coconut
  • 1 cup chopped nuts (optional)
  • 1 teaspoon vanilla extract
  • 1 cup crushed pineapple (not drained; use pineapple in juice, not syrup)

For the Cream Cheese Frosting:

  • ½ cup butter, softened
  • 8 ounces cream cheese, softened
  • 1 teaspoon vanilla extract
  • 1 pound (16 oz) powdered sugar

Optional Toppings:

  • Toasted pecans
  • Toasted coconut

Instructions

  1. Prepare the Cake Batter : Preheat your oven to 350°F (175°C). Grease and lightly flour two 9-inch round cake pans or a 9×13-inch baking dish.In a large mixing bowl, whisk together the applesauce (or oil), granulated sugar, and eggs until well combined and creamy. In a separate bowl, sift together the flour, baking soda, baking powder, salt, and cinnamon. Gradually add the dry ingredients to the wet mixture, stirring just until combined. Avoid overmixing.Gently fold in the grated carrots, shredded coconut, nuts (if using), vanilla extract, and crushed pineapple, including its juice. Mix until evenly distributed.
  2. Bake the Cake : Pour the batter evenly into the prepared pans. Smooth the tops with a spatula. Bake for 30-35 minutes (round pans) or 40-45 minutes (9×13 pan), or until a toothpick inserted in the center comes out clean. Remove from the oven and let the cake cool in the pans for 10 minutes. Transfer to a wire rack to cool completely before frosting.
  3. Make the Cream Cheese Frosting : In a large bowl, beat the softened butter and cream cheese together until smooth and creamy. Add the vanilla extract and gradually mix in the powdered sugar, beating on low speed until fully incorporated and fluffy.
  4. Frost and Decorate the Cake : If using round pans, level the cake layers if necessary. Place one layer on a serving plate and spread a generous layer of frosting on top. Add the second cake layer and frost the top and sides evenly. For a 9×13 cake, simply frost the top. Sprinkle toasted pecans or coconut on top for added crunch and decoration.

Conclusion

This irresistible carrot cake strikes the perfect balance of moistness, sweetness, and spice. The layers of flavor from the carrots, coconut, and pineapple combined with the creamy frosting create a dessert that’s hard to beat. Whether served at a special occasion or as a delightful everyday treat, this carrot cake is sure to wow everyone who takes a bite.

Irresistible Carrot Cake with Cream Cheese Frosting

The layers of flavor from the carrots, coconut,and pineapple combined with the creamy frosting create a dessert that’s hard tobeat.
Prep Time 20 minutes
Cook Time 40 minutes
Total Time 1 hour
Servings: 12 Slice
Course: Dessert
Cuisine: American
Calories: 450

Ingredients
  

For the Cake :
  • 1 ¼ cups unsweetened applesauce or oil traditional choice
  • 2 cups granulated sugar
  • 3 large eggs room temperature
  • 2 cups all-purpose flour
  • 1 teaspoon baking soda
  • 1 ½ teaspoons baking powder
  • ½ teaspoon salt
  • 1 teaspoon cinnamon
  • 2 cups grated carrots
  • 1 cup shredded sweetened coconut
  • 1 cup chopped nuts optional
  • 1 teaspoon vanilla extract
  • 1 cup crushed pineapple not drained; use pineapple in juice, not syrup
For the Cream Cheese Frosting:
  • ½ cup butter softened
  • 8 ounces cream cheese softened
  • 1 teaspoon vanilla extract
  • 1 pound 16 oz powdered sugar
Optional Toppings:
  • Toasted pecans
  • Toasted coconut

Method
 

  1. Prepare the Cake Batter : Preheat your oven to 350°F (175°C). Grease and lightly flour two 9-inch round cake pans or a 9×13-inch baking dish. In a large mixing bowl, whisk together the applesauce (or oil), granulated sugar, and eggs until well combined and creamy. In a separate bowl, sift together the flour, baking soda, baking powder, salt, and cinnamon. Gradually add the dry ingredients to the wet mixture, stirring just until combined. Avoid overmixing. Gently fold in the grated carrots, shredded coconut, nuts (if using), vanilla extract, and crushed pineapple, including its juice. Mix until evenly distributed.
  2. Bake the Cake : Pour the batter evenly into the prepared pans. Smooth the tops with a spatula. Bake for 30-35 minutes (round pans) or 40-45 minutes (9×13 pan), or until a toothpick inserted in the center comes out clean. Remove from the oven and let the cake cool in the pans for 10 minutes. Transfer to a wire rack to cool completely before frosting.
  3. Make the Cream Cheese Frosting : In a large bowl, beat the softened butter and cream cheese together until smooth and creamy. Add the vanilla extract and gradually mix in the powdered sugar, beating on low speed until fully incorporated and fluffy.
  4. Frost and Decorate the Cake : If using round pans, level the cake layers if necessary. Place one layer on a serving plate and spread a generous layer of frosting on top. Add the second cake layer and frost the top and sides evenly. For a 9×13 cake, simply frost the top. Sprinkle toasted pecans or coconut on top for added crunch and decoration.

Decadent German Chocolate Cheesecake

If you’re a fan of rich, chocolatey desserts, this German Chocolate Cheesecake is the ultimate indulgence. Combining a creamy chocolate cheesecake filling with a buttery Oreo crust and a luxurious coconut-pecan topping, this dessert takes the classic German Chocolate Cake to a whole new level. Perfect for celebrations or to satisfy your sweet tooth, this show-stopping cheesecake will leave everyone asking for seconds.

Ingredients

For the Coconut-Pecan Topping:

  • 4 large egg yolks
  • 12 oz can evaporated milk
  • 1 1/2 tsp vanilla extract
  • 1 1/2 cups sugar
  • 3/4 cup unsalted butter, cubed
  • 2 2/3 cups sweetened shredded coconut
  • 1 1/4 cups pecans, toasted and chopped

For the Crust:

  • 2 1/2 cups Oreo crumbs (about 24 Oreos, finely crushed)
  • 1/4 cup unsalted butter, melted

For the Cheesecake Filling:

  • 24 oz cream cheese, softened to room temperature
  • 1 cup sugar
  • 1 tbsp all-purpose flour
  • 3 tbsp unsweetened cocoa powder
  • 1 cup sour cream, room temperature
  • 1/2 tsp vanilla extract
  • 8 oz German chocolate, melted and cooled
  • 4 large eggs, room temperature

Optional for Garnish:

  • Chocolate ganache or chocolate sauce

Instructions

  1. Prepare the Coconut-Pecan Topping : In a medium saucepan, whisk together the egg yolks, evaporated milk, and vanilla extract. Add the sugar and cubed butter. Cook over medium heat, stirring constantly, until the mixture thickens (about 10 minutes). Remove from heat and stir in the shredded coconut and toasted pecans. Allow the topping to cool completely before using.
  2. Make the Oreo Crust : Preheat the oven to 325°F (163°C). In a medium bowl, mix the Oreo crumbs and melted butter until evenly combined. Press the mixture into the bottom of a 9-inch springform pan, creating an even layer. Bake for 8-10 minutes, then set aside to cool.
  3. Prepare the Cheesecake Filling : In a large mixing bowl, beat the cream cheese and sugar on medium speed until smooth and creamy. Add the flour and cocoa powder, mixing until well combined.Mix in the sour cream and vanilla extract, followed by the melted German chocolate. Add the eggs one at a time, mixing on low speed after each addition. Be careful not to overmix to prevent air bubbles.
  4. Assemble and Bake the Cheesecake : Pour the cheesecake filling over the cooled Oreo crust in the springform pan. Place the pan in a water bath by setting it in a larger baking dish and filling the dish with 1 inch of hot water. This prevents cracks in the cheesecake. Bake at 325°F (163°C) for 75-85 minutes, or until the edges are set and the center has a slight jiggle. Turn off the oven, crack the door slightly, and let the cheesecake cool inside for 1 hour. Remove the cheesecake from the water bath and allow it to cool to room temperature. Refrigerate for at least 4 hours, preferably overnight.
  5. Add the Coconut-Pecan Topping : Once the cheesecake is fully chilled, spread the coconut-pecan topping evenly over the top. Optional: Drizzle with chocolate ganache or sauce for an extra decadent touch.
  6. Serve and Enjoy : Slice the cheesecake with a sharp knife, wiping the blade clean between cuts for neat slices. Serve chilled and enjoy the layers of chocolatey, nutty, and creamy goodness!

Conclusion

This German Chocolate Cheesecake is a dessert like no other, combining the best elements of German Chocolate Cake with the creamy texture of cheesecake. The rich chocolate filling, buttery crust, and irresistible coconut-pecan topping make this a dessert that’s truly unforgettable. Serve it at your next gathering or indulge in a slice all for yourself—either way, it’s pure decadence.

German Chocolate Cheesecake

This German Chocolate Cheesecake is a dessert likeno other, combining the best elements of German Chocolate Cake with the creamytexture of cheesecake.
Prep Time 30 minutes
Cook Time 1 hour 15 minutes
Resting Time 5 hours 30 minutes
Total Time 7 hours 15 minutes
Servings: 12 Slice
Course: Dessert
Cuisine: American
Calories: 600

Ingredients
  

For the Coconut-Pecan Topping:
  • 4 large egg yolks
  • 12 oz can evaporated milk
  • 1 1/2 tsp vanilla extract
  • 1 1/2 cups sugar
  • 3/4 cup unsalted butter cubed
  • 2 2/3 cups sweetened shredded coconut
  • 1 1/4 cups pecans toasted and chopped
For the Crust:
  • 2 1/2 cups Oreo crumbs about 24 Oreos, finely crushed
  • 1/4 cup unsalted butter melted
For the Cheesecake Filling:
  • 24 oz cream cheese softened to room temperature
  • 1 cup sugar
  • 1 tbsp all-purpose flour
  • 3 tbsp unsweetened cocoa powder
  • 1 cup sour cream room temperature
  • 1/2 tsp vanilla extract
  • 8 oz German chocolate melted and cooled
  • 4 large eggs room temperature
Optional for Garnish:
  • Chocolate ganache or chocolate sauce

Method
 

  1. Prepare the Coconut-Pecan Topping : In a medium saucepan, whisk together the egg yolks, evaporated milk, and vanilla extract. Add the sugar and cubed butter. Cook over medium heat, stirring constantly, until the mixture thickens (about 10 minutes). Remove from heat and stir in the shredded coconut and toasted pecans. Allow the topping to cool completely before using.
  2. Make the Oreo Crust : Preheat the oven to 325°F (163°C). In a medium bowl, mix the Oreo crumbs and melted butter until evenly combined. Press the mixture into the bottom of a 9-inch springform pan, creating an even layer. Bake for 8-10 minutes, then set aside to cool.
  3. Prepare the Cheesecake Filling : In a large mixing bowl, beat the cream cheese and sugar on medium speed until smooth and creamy. Add the flour and cocoa powder, mixing until well combined. Mix in the sour cream and vanilla extract, followed by the melted German chocolate. Add the eggs one at a time, mixing on low speed after each addition. Be careful not to overmix to prevent air bubbles.
  4. Assemble and Bake the Cheesecake : Pour the cheesecake filling over the cooled Oreo crust in the springform pan. Place the pan in a water bath by setting it in a larger baking dish and filling the dish with 1 inch of hot water. This prevents cracks in the cheesecake. Bake at 325°F (163°C) for 75-85 minutes, or until the edges are set and the center has a slight jiggle. Turn off the oven, crack the door slightly, and let the cheesecake cool inside for 1 hour. Remove the cheesecake from the water bath and allow it to cool to room temperature. Refrigerate for at least 4 hours, preferably overnight.
  5. Add the Coconut-Pecan Topping : Once the cheesecake is fully chilled, spread the coconut-pecan topping evenly over the top. Optional: Drizzle with chocolate ganache or sauce for an extra decadent touch.
  6. Serve and Enjoy : Slice the cheesecake with a sharp knife, wiping the blade clean between cuts for neat slices. Serve chilled and enjoy the layers of chocolatey, nutty, and creamy goodness!

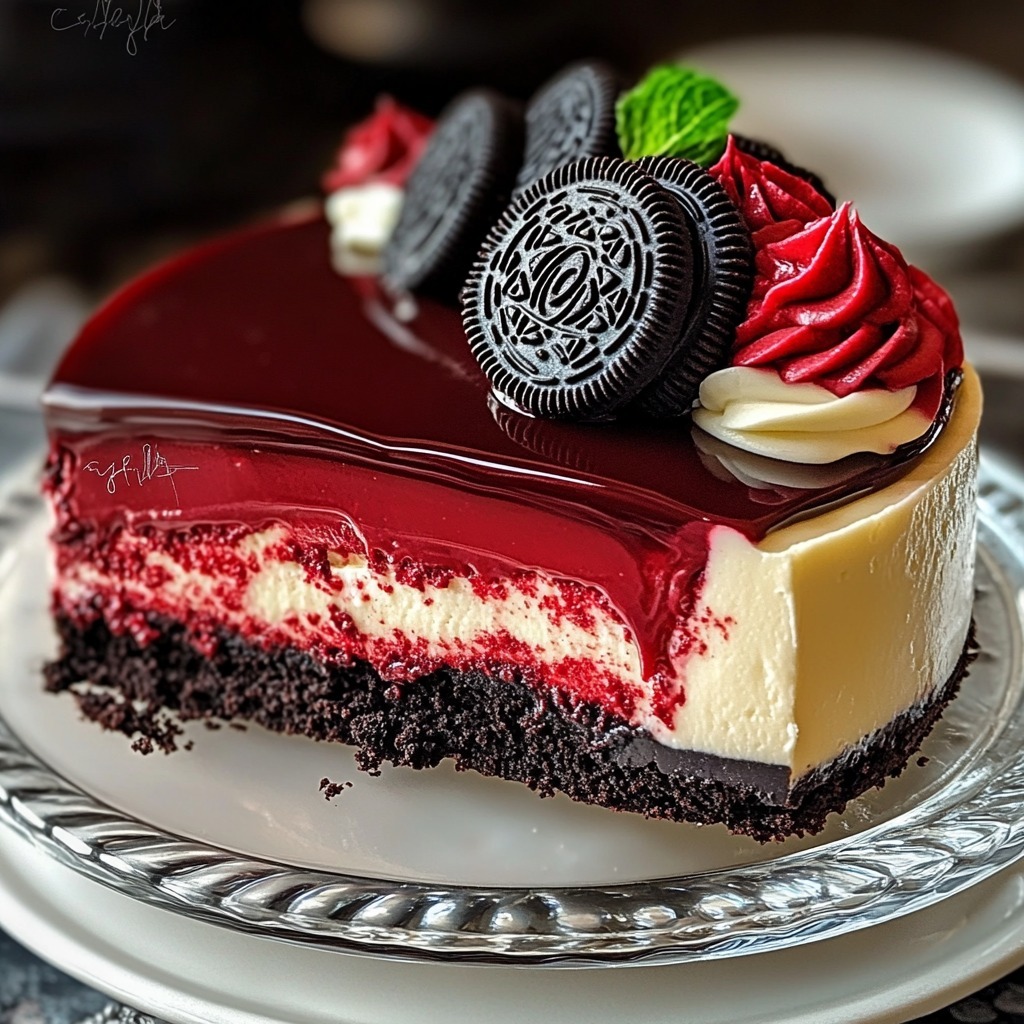
Red Velvet Oreo Cheesecake with Chocolate Ganache

Indulge in the perfect fusion of flavors with this Red Velvet Oreo Cheesecake. Combining the tangy richness of red velvet cake, the creaminess of Oreo-infused cheesecake, and the luxurious smoothness of chocolate ganache, this dessert is a showstopper. Perfect for celebrations or simply treating yourself, this layered masterpiece is as stunning as it is delicious. The crunchy Oreo crust and vibrant red velvet base make every bite an unforgettable experience.

Ingredients

For the Red Velvet Cake Layer:

  • 1 1/2 cups all-purpose flour
  • 2 tsp unsweetened cocoa powder
  • 1/2 tsp salt
  • 1/2 cup unsalted butter, at room temperature
  • 1 cup granulated sugar
  • 1/2 cup sour cream, at room temperature
  • 1/4 cup vegetable oil
  • 2 tsp pure vanilla extract
  • 2 large eggs, at room temperature
  • 4 tsp red food coloring
  • 2/3 cup buttermilk, at room temperature
  • 1 tsp baking soda
  • 1 tsp white vinegar

For the Oreo Cheesecake Layer:

  • 10 Oreo cookies (filling removed, wafers crushed), for the crust
  • 24 oz full-fat cream cheese, softened to room temperature
  • Oreo filling from the above 10 cookies
  • 1 cup granulated sugar
  • 1 tbsp cornstarch or all-purpose flour
  • 1 cup sour cream, at room temperature
  • 1 tbsp pure vanilla extract
  • 2 large eggs + 1 egg yolk, at room temperature
  • 15 Oreos (chopped), for texture

For the Chocolate Ganache:

  • 1 cup dark chocolate chips
  • 1/2 cup heavy cream

For Decoration:

  • 1 can store-bought cream cheese frosting
  • 8 chopped Oreos, for garnish

Instructions

  1. Prepare the Red Velvet Cake Layer : Preheat the oven to 350°F (175°C). Grease and line the bottom of a 9-inch springform pan. In a medium bowl, whisk together flour, cocoa powder, and salt. In a large bowl, beat butter and sugar until light and fluffy. Add sour cream, vegetable oil, and vanilla extract, and mix until smooth. Beat in the eggs, one at a time, followed by the red food coloring. Gradually mix in the dry ingredients, alternating with the buttermilk, starting and ending with the dry ingredients. Stir in the baking soda and vinegar until just combined. Pour the batter into the prepared pan and bake for 20-25 minutes, or until a toothpick comes out clean. Let the cake cool completely in the pan.
  2. Make the Oreo Cheesecake Layer Lower the oven temperature to 325°F (163°C).Spread the crushed Oreo wafers evenly over the cooled cake layer, pressing gently to form a thin crust.In a large bowl, beat the cream cheese, Oreo filling, and sugar until smooth. Add the cornstarch and mix well.Beat in the sour cream and vanilla extract until combined. Add the eggs and egg yolk one at a time, mixing gently to avoid overbeating.Fold in the chopped Oreos.Pour the cheesecake batter over the Oreo crust in the springform pan. Place the pan in a water bath and bake for 55-65 minutes, or until the center is just set.Turn off the oven, crack the door slightly, and let the cheesecake cool for 1 hour. Chill in the refrigerator for at least 4 hours or overnight.
  3. Prepare the Chocolate Ganache : Heat the heavy cream in a small saucepan over medium heat until it begins to simmer. Pour the hot cream over the dark chocolate chips in a bowl. Let sit for 2 minutes, then stir until smooth and glossy. Let the ganache cool slightly before spreading it evenly over the chilled cheesecake.
  4. Decorate and Serve : Pipe cream cheese frosting around the edges of the cheesecake for decoration. Sprinkle chopped Oreos on top as garnish. Slice and serve chilled for the ultimate dessert experience.

Conclusion

This Red Velvet Oreo Cheesecake with Chocolate Ganache is a dessert lover’s dream. With its velvety cake base, creamy Oreo cheesecake layer, and decadent chocolate ganache topping, it’s a showpiece that tastes as good as it looks. Perfect for birthdays, holidays, or any special occasion, this dessert is bound to impress. Try it out and delight your guests with every indulgent bite.

Red Velvet Oreo Cheesecake with Chocolate Ganache

This Red Velvet Oreo Cheesecake with ChocolateGanache is a dessert lover’s dream. With its velvety cake base, creamy Oreocheesecake layer, and decadent chocolate ganache topping, it’s a showpiece thattastes as good as it looks.
Prep Time 30 minutes
Cook Time 1 hour 30 minutes
Resting Time 4 hours
Total Time 6 hours
Servings: 12 Slice
Course: Dessert
Cuisine: American
Calories: 550

Ingredients
  

For the Red Velvet Cake Layer:
  • 1 1/2 cups all-purpose flour
  • 2 tsp unsweetened cocoa powder
  • 1/2 tsp salt
  • 1/2 cup unsalted butter at room temperature
  • 1 cup granulated sugar
  • 1/2 cup sour cream at room temperature
  • 1/4 cup vegetable oil
  • 2 tsp pure vanilla extract
  • 2 large eggs at room temperature
  • 4 tsp red food coloring
  • 2/3 cup buttermilk at room temperature
  • 1 tsp baking soda
  • 1 tsp white vinegar
For the Oreo Cheesecake Layer:
  • 10 Oreo cookies filling removed, wafers crushed, for the crust
  • 24 oz full-fat cream cheese softened to room temperature
  • Oreo filling from the above 10 cookies
  • 1 cup granulated sugar
  • 1 tbsp cornstarch or all-purpose flour
  • 1 cup sour cream at room temperature
  • 1 tbsp pure vanilla extract
  • 2 large eggs + 1 egg yolk at room temperature
  • 15 Oreos chopped, for texture
For the Chocolate Ganache:
  • 1 cup dark chocolate chips
  • 1/2 cup heavy cream
For Decoration:
  • 1 can store-bought cream cheese frosting
  • 8 chopped Oreos for garnish

Method
 

  1. Prepare the Red Velvet Cake Layer : Preheat the oven to 350°F (175°C). Grease and line the bottom of a 9-inch springform pan. In a medium bowl, whisk together flour, cocoa powder, and salt. In a large bowl, beat butter and sugar until light and fluffy. Add sour cream, vegetable oil, and vanilla extract, and mix until smooth. Beat in the eggs, one at a time, followed by the red food coloring. Gradually mix in the dry ingredients, alternating with the buttermilk, starting and ending with the dry ingredients. Stir in the baking soda and vinegar until just combined. Pour the batter into the prepared pan and bake for 20-25 minutes, or until a toothpick comes out clean. Let the cake cool completely in the pan.
  2. Make the Oreo Cheesecake Layer Lower the oven temperature to 325°F (163°C). Spread the crushed Oreo wafers evenly over the cooled cake layer, pressing gently to form a thin crust. In a large bowl, beat the cream cheese, Oreo filling, and sugar until smooth. Add the cornstarch and mix well. Beat in the sour cream and vanilla extract until combined. Add the eggs and egg yolk one at a time, mixing gently to avoid overbeating. Fold in the chopped Oreos. Pour the cheesecake batter over the Oreo crust in the springform pan. Place the pan in a water bath and bake for 55-65 minutes, or until the center is just set. Turn off the oven, crack the door slightly, and let the cheesecake cool for 1 hour. Chill in the refrigerator for at least 4 hours or overnight.
  3. Prepare the Chocolate Ganache : Heat the heavy cream in a small saucepan over medium heat until it begins to simmer. Pour the hot cream over the dark chocolate chips in a bowl. Let sit for 2 minutes, then stir until smooth and glossy. Let the ganache cool slightly before spreading it evenly over the chilled cheesecake.
  4. Decorate and Serve : Pipe cream cheese frosting around the edges of the cheesecake for decoration. Sprinkle chopped Oreos on top as garnish. Slice and serve chilled for the ultimate dessert experience.

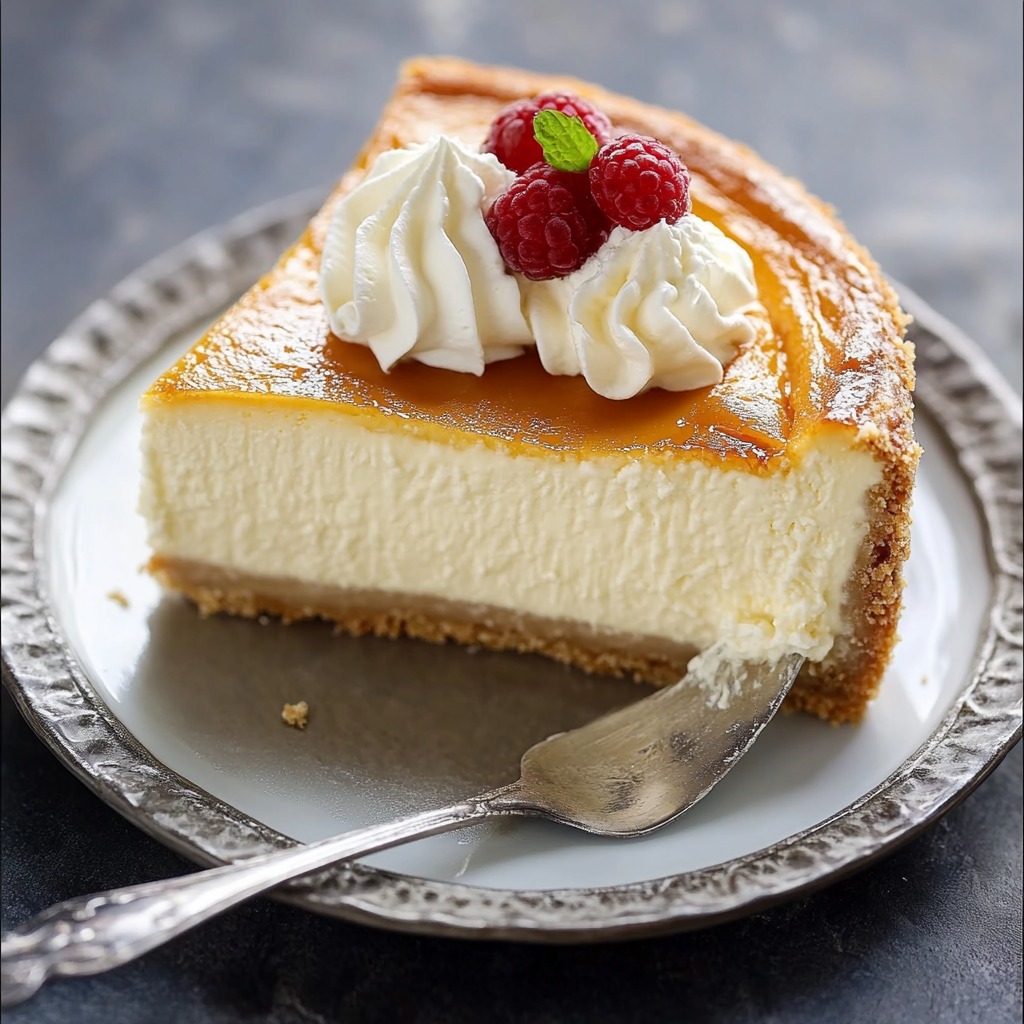
Creamy Indulgence: The Ultimate Cheesecake Recipe

Cheesecake is a timeless dessert, loved for its rich, creamy texture and buttery crust. This ultimate cheesecake recipe combines a smooth, luscious filling with a perfectly crisp graham cracker crust, making it an ideal treat for any occasion. Whether you’re celebrating a birthday, hosting a dinner party, or just indulging in a well-deserved sweet treat, this cheesecake is sure to impress. With a few simple ingredients and a touch of love, you’ll create a dessert that rivals even the best bakeries.

Ingredients

For the Crust :

  • 2 cups (198 grams) graham cracker crumbs
  • 1/3 cup (67 grams) sugar
  • 7 tablespoons (99 grams) butter, melted

For the Creamy Cheesecake Filling :

  • 5 blocks (40 ounces) full-fat cream cheese, softened to room temperature
  • 1 and 1/2 cups (300 grams) granulated sugar
  • 2 teaspoons pure vanilla extract
  • 5 large eggs, room temperature
  • 3 large egg yolks, room temperature
  • 1/2 cup (113 grams) heavy cream, room temperature

Instructions

  1. Prepare the Crust: Preheat your oven to 325°F (163°C).In a mixing bowl, combine graham cracker crumbs, sugar, and melted butter. Mix until the crumbs are evenly coated and the texture resembles wet sand.Press the mixture firmly into the bottom of a 9-inch (23 cm) springform pan to form an even layer.Bake the crust for 10 minutes, then set aside to cool while preparing the filling.
  2. Make the Cheesecake Filling: In a large mixing bowl, beat the softened cream cheese and granulated sugar together using an electric mixer on medium speed until smooth and creamy. Add the vanilla extract, then mix in the eggs one at a time, ensuring each egg is fully incorporated before adding the next. Blend in the egg yolks, followed by the heavy cream. Mix until just combined, avoiding overmixing to prevent air bubbles.
  3. Assemble and Bake: Pour the cheesecake filling over the cooled crust, smoothing the top with a spatula.Place the springform pan in a larger baking dish, then fill the baking dish with about 1 inch of hot water to create a water bath. This helps prevent cracking. Bake the cheesecake at 325°F (163°C) for 75-90 minutes, or until the edges are set and the center jiggles slightly when gently shaken.
  4. Cool and Chill: Turn off the oven, crack the door slightly, and let the cheesecake cool inside for 1 hour. Remove the cheesecake from the water bath and cool completely at room temperature. Cover and refrigerate for at least 4 hours, preferably overnight, to fully set before slicing and serving.

Conclusion

This ultimate cheesecake is the perfect dessert for any sweet lover. Its silky-smooth filling and crunchy graham cracker crust make every bite a heavenly experience. Serve it as is, or pair it with your favorite toppings like fresh berries, chocolate drizzle, or whipped cream for a personal touch. No matter how you slice it, this cheesecake will quickly become a family favorite. Happy baking!

Creamy Indulgence: The Ultimate Cheesecake Recipe

A rich and creamy cheesecake with a buttery grahamcracker crust, perfect for any occasion. This dessert is easy to make and guaranteed to impress.
Prep Time 20 minutes
Cook Time 1 hour 30 minutes
Resting Time 6 hours 20 minutes
Total Time 8 hours 10 minutes
Servings: 12 Slice
Course: Dessert
Cuisine: American
Calories: 350

Ingredients
  

For the Crust :
  • 2 cups 198 grams graham cracker crumbs
  • 1/3 cup 67 grams sugar
  • 7 tablespoons 99 grams butter, melted
For the Creamy Cheesecake Filling :
  • 5 blocks 40 ounces full-fat cream cheese, softened to room temperature
  • 1 and 1/2 cups 300 grams granulated sugar
  • 2 teaspoons pure vanilla extract
  • 5 large eggs room temperature
  • 3 large egg yolks room temperature
  • 1/2 cup 113 grams heavy cream, room temperature

Method
 

  1. Prepare the Crust: Preheat your oven to 325°F (163°C). In a mixing bowl, combine graham cracker crumbs, sugar, and melted butter. Mix until the crumbs are evenly coated and the texture resembles wet sand. Press the mixture firmly into the bottom of a 9-inch (23 cm) springform pan to form an even layer. Bake the crust for 10 minutes, then set aside to cool while preparing the filling.
  2. Make the Cheesecake Filling: In a large mixing bowl, beat the softened cream cheese and granulated sugar together using an electric mixer on medium speed until smooth and creamy. Add the vanilla extract, then mix in the eggs one at a time, ensuring each egg is fully incorporated before adding the next. Blend in the egg yolks, followed by the heavy cream. Mix until just combined, avoiding overmixing to prevent air bubbles.
  3. Assemble and Bake: Pour the cheesecake filling over the cooled crust, smoothing the top with a spatula. Place the springform pan in a larger baking dish, then fill the baking dish with about 1 inch of hot water to create a water bath. This helps prevent cracking. Bake the cheesecake at 325°F (163°C) for 75-90 minutes, or until the edges are set and the center jiggles slightly when gently shaken.
  4. Cool and Chill: Turn off the oven, crack the door slightly, and let the cheesecake cool inside for 1 hour. Remove the cheesecake from the water bath and cool completely at room temperature. Cover and refrigerate for at least 4 hours, preferably overnight, to fully set before slicing and serving.

Polar Bear Paws Candy: A Festive Sweet Treat

Bring the magic of the holidays to your kitchen with these Polar Bear Paws Candies. Combining gooey caramel, crunchy roasted peanuts, and creamy white almond bark, these homemade treats are a delightful mix of textures and flavors. Perfect for gifting or as a crowd-pleasing dessert, this recipe is simple to follow and results in a sweet confection that everyone will love.

Ingredients:

  • 11 ounces caramel squares (1 bag)
  • 3 tablespoons heavy whipping cream
  • 1 tablespoon unsalted butter
  • 1 teaspoon vanilla extract
  • 1 cup roasted salted peanuts
  • 1 pound white almond bark
  • Sprinkles (optional)

Instructions:

  1. Melt the Caramel Mixture: In a microwave-safe bowl, combine the caramel squares, heavy whipping cream, and unsalted butter. Microwave in 20–30 second intervals, stirring between each, until the caramel is fully melted and smooth. Stir in the vanilla extract to enhance the flavor.
  2. Add the Peanuts: Fold the roasted salted peanuts into the caramel mixture, ensuring they are evenly coated.
  3. Form the Candy Clusters: Using a spoon, drop small mounds of the caramel-peanut mixture onto a parchment-lined baking sheet. Leave enough space between each cluster to prevent them from sticking together. Allow the clusters to cool and set for about 15–20 minutes.
  4. Melt the White Almond Bark: In a microwave-safe bowl, melt the white almond bark in 20–30 second intervals, stirring frequently until smooth. Alternatively, you can use a double boiler to melt the almond bark gently.
  5. Coat the Candy Clusters: Dip each caramel-peanut cluster into the melted almond bark, ensuring it is fully coated. Use a fork to lift the cluster out and tap off any excess coating. Return the coated clusters to the parchment-lined baking sheet.
  6. Add Decorative Touches: If desired, sprinkle festive decorations, like holiday sprinkles, over the coated clusters before the almond bark sets.
  7. Set and Serve: Allow the candies to set at room temperature or refrigerate them for about 15–20 minutes until the coating is firm. Once set, transfer the candies to an airtight container for storage.

Conclusion:

These Polar Bear Paws Candies are a delightful homemade treat that combines the chewy, nutty sweetness of caramel and peanuts with the creamy richness of white almond bark. Simple to make and perfect for the holiday season, they’re an excellent addition to your festive celebrations or a thoughtful gift for friends and family.

Polar Bear Paws Candy: A Festive Sweet Treat

A sweet and creamy candy featuring caramel, roastedpeanuts, and white almond bark—ideal for festive occasions.
Prep Time 15 minutes
Cook Time 10 minutes
Cooling Time 30 minutes
Total Time 55 minutes
Servings: 20 candies
Course: Dessert
Cuisine: American-inspired
Calories: 120

Ingredients
  

  • 11 ounces caramel squares 1 bag
  • 3 tablespoons heavy whipping cream
  • 1 tablespoon unsalted butter
  • 1 teaspoon vanilla extract
  • 1 cup roasted salted peanuts
  • 1 pound white almond bark
  • Sprinkles optional

Method
 

  1. Melt the Caramel Mixture: In a microwave-safe bowl, combine the caramel squares, heavy whipping cream, and unsalted butter. Microwave in 20–30 second intervals, stirring between each, until the caramel is fully melted and smooth. Stir in the vanilla extract to enhance the flavor.
  2. Add the Peanuts: Fold the roasted salted peanuts into the caramel mixture, ensuring they are evenly coated.
  3. Form the Candy Clusters: Using a spoon, drop small mounds of the caramel-peanut mixture onto a parchment-lined baking sheet. Leave enough space between each cluster to prevent them from sticking together. Allow the clusters to cool and set for about 15–20 minutes.
  4. Melt the White Almond Bark: In a microwave-safe bowl, melt the white almond bark in 20–30 second intervals, stirring frequently until smooth. Alternatively, you can use a double boiler to melt the almond bark gently.
  5. Coat the Candy Clusters: Dip each caramel-peanut cluster into the melted almond bark, ensuring it is fully coated. Use a fork to lift the cluster out and tap off any excess coating. Return the coated clusters to the parchment-lined baking sheet.
  6. Add Decorative Touches: If desired, sprinkle festive decorations, like holiday sprinkles, over the coated clusters before the almond bark sets.
  7. Set and Serve: Allow the candies to set at room temperature or refrigerate them for about 15–20 minutes until the coating is firm. Once set, transfer the candies to an airtight container for storage.

Chocolate Peanut Butter Pretzel Candies: A Sweet and Salty Delight

Indulge in the perfect balance of sweet and salty with these Chocolate Peanut Butter Pretzel Candies. Featuring the creamy richness of peanut butter, the crunch of pretzels, and a luscious chocolate coating, these bite-sized treats are irresistibly delicious. Whether you’re making them for the holidays, a party, or just because, these candies are easy to prepare and guaranteed to satisfy your cravings.

Ingredients:

  • 1 cup peanut butter (creamy or chunky)
  • ½ cup powdered icing sugar
  • 2 tablespoons cream or milk
  • ⅔ cup pretzels, coarsely crushed
  • ½ cup salted peanuts, chopped
  • 1½ cups dark chocolate (about 150g)
  • 1½ cups white chocolate (about 150g)

Instructions:

  1. Prepare the Peanut Butter Filling: In a large mixing bowl, combine the peanut butter, powdered icing sugar, and cream or milk. Mix until smooth and well combined. Gently fold in the crushed pretzels and chopped salted peanuts to create a slightly chunky mixture.
  2. Shape the Candies: Using a spoon or cookie scoop, take small portions of the mixture and roll them into bite-sized balls with your hands. Place the balls on a parchment-lined tray and refrigerate for 30–40 minutes to firm up.
  3. Melt the Chocolate: Melt the dark chocolate and white chocolate separately in heatproof bowls using a microwave in 20-second intervals, stirring after each interval, until smooth. Alternatively, use a double boiler for gentle melting.
  4. Coat the Candies: Dip half of the peanut butter balls in the melted dark chocolate and the other half in the melted white chocolate, ensuring they are fully coated. Place the coated candies back on the parchment-lined tray. For a decorative touch, drizzle the alternate chocolate (dark over white, white over dark) over the top.
  5. Set the Candies: Allow the coated candies to set at room temperature or refrigerate them for 15–20 minutes until the chocolate is firm.
  6. Serve and Enjoy: Once the candies are set, transfer them to a serving dish or store them in an airtight container. Enjoy these sweet and salty treats anytime!

Conclusion:

These Chocolate Peanut Butter Pretzel Candies combine a delightful mix of textures and flavors—creamy, crunchy, sweet, and salty—all in one irresistible bite. Perfect for the holidays, gift-giving, or a snack-time indulgence, these candies are as easy to make as they are to enjoy.

Chocolate Peanut Butter Pretzel Candies: A Sweet and Salty Delight

A sweet and salty treat combining peanut butter,pretzels, peanuts, and chocolate for a crunchy, creamy dessert. Perfect for anyoccasion.
Prep Time 20 minutes
Resting Time 40 minutes
Total Time 1 hour
Servings: 20 candies
Course: Dessert
Cuisine: American-inspired
Calories: 142

Ingredients
  

  • 1 cup peanut butter creamy or chunky
  • ½ cup powdered icing sugar
  • 2 tablespoons cream or milk
  • ⅔ cup pretzels coarsely crushed
  • ½ cup salted peanuts chopped
  • 1½ cups dark chocolate about 150g
  • 1½ cups white chocolate about 150g

Method
 

  1. Prepare the Peanut Butter Filling: In a large mixing bowl, combine the peanut butter, powdered icing sugar, and cream or milk. Mix until smooth and well combined. Gently fold in the crushed pretzels and chopped salted peanuts to create a slightly chunky mixture.
  2. Shape the Candies: Using a spoon or cookie scoop, take small portions of the mixture and roll them into bite-sized balls with your hands. Place the balls on a parchment-lined tray and refrigerate for 30–40 minutes to firm up.
  3. Melt the Chocolate: Melt the dark chocolate and white chocolate separately in heatproof bowls using a microwave in 20-second intervals, stirring after each interval, until smooth. Alternatively, use a double boiler for gentle melting.
  4. Coat the Candies: Dip half of the peanut butter balls in the melted dark chocolate and the other half in the melted white chocolate, ensuring they are fully coated. Place the coated candies back on the parchment-lined tray. For a decorative touch, drizzle the alternate chocolate (dark over white, white over dark) over the top.
  5. Set the Candies: Allow the coated candies to set at room temperature or refrigerate them for 15–20 minutes until the chocolate is firm.
  6. Serve and Enjoy: Once the candies are set, transfer them to a serving dish or store them in an airtight container. Enjoy these sweet and salty treats anytime!

Stay Connected

Get recipes via email: