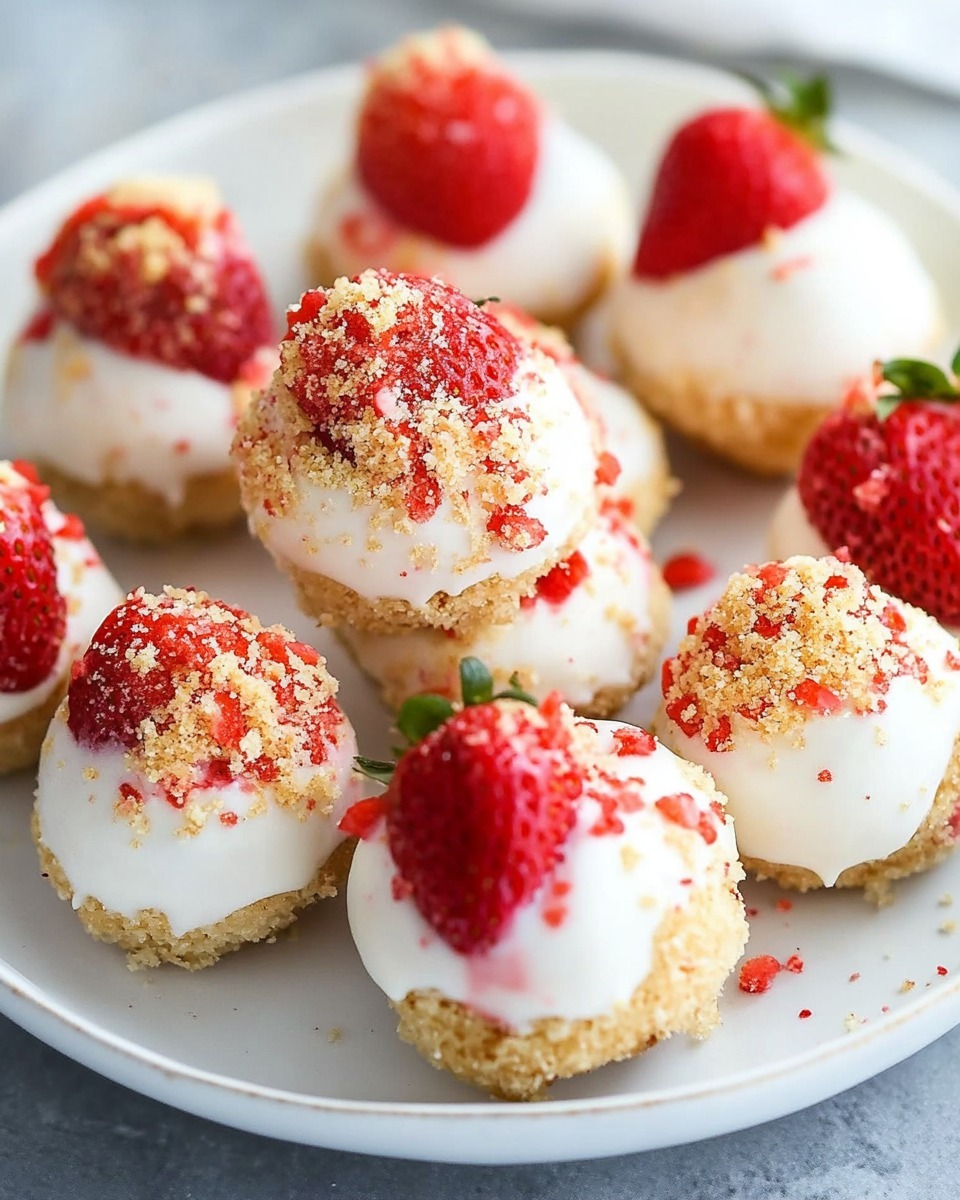
Irresistible 5-Ingredient Strawberry Shortcake Bites: A Sweet and Simple Treat

Strawberry shortcake bites are the ultimate fusion of ease and indulgence. These no-bake treats combine the essence of classic strawberry shortcake with a modern twist. Perfect for parties, afternoon snacks, or satisfying your sweet cravings, this recipe requires just five simple ingredients and a few steps to create bite-sized bliss. Let’s dive into this quick and delightful recipe!

Ingredients

  • Strawberries: 1 cup, diced into small pieces
  • Almond Flour: ¾ cup
  • White Chocolate Chips: 1 cup
  • Coconut Oil: 2 tsp
  • Graham Cracker Sheets: 1 sleeve, crushed into crumbs

Instructions

1. Prepare the Base

  1. In a mixing bowl, combine the almond flour and diced strawberries.
  2. Stir until the strawberries release some juice and form a moist, crumbly dough.

2. Shape the Bites

  1. Using a tablespoon, scoop out portions of the mixture and roll them into small balls. If the mixture feels too sticky, chill it in the fridge for 10 minutes to firm up.
  2. Place the balls on a parchment-lined tray and freeze for 15 minutes.

3. Melt the Chocolate

  1. In a microwave-safe bowl, combine the white chocolate chips and coconut oil.
  2. Microwave in 20-second intervals, stirring between each, until fully melted and smooth.

4. Coat the Bites

  1. Remove the strawberry balls from the freezer. Using a fork, dip each ball into the melted chocolate, ensuring it’s fully coated.
  2. Roll the chocolate-coated balls in the crushed graham crackers for a crunchy outer layer.

5. Set and Serve

  1. Place the coated bites back on the parchment-lined tray and chill in the fridge for 30 minutes or until the chocolate hardens.
  2. Serve chilled and enjoy!

Conclusion

These 5-ingredient strawberry shortcake bites are a simple yet indulgent treat that delivers all the charm of a classic dessert in a convenient, no-bake format. Perfect for any occasion, they’re as easy to make as they are to enjoy. Try them today and savor the delightful combination of fresh strawberries, creamy chocolate, and crunchy graham crackers!
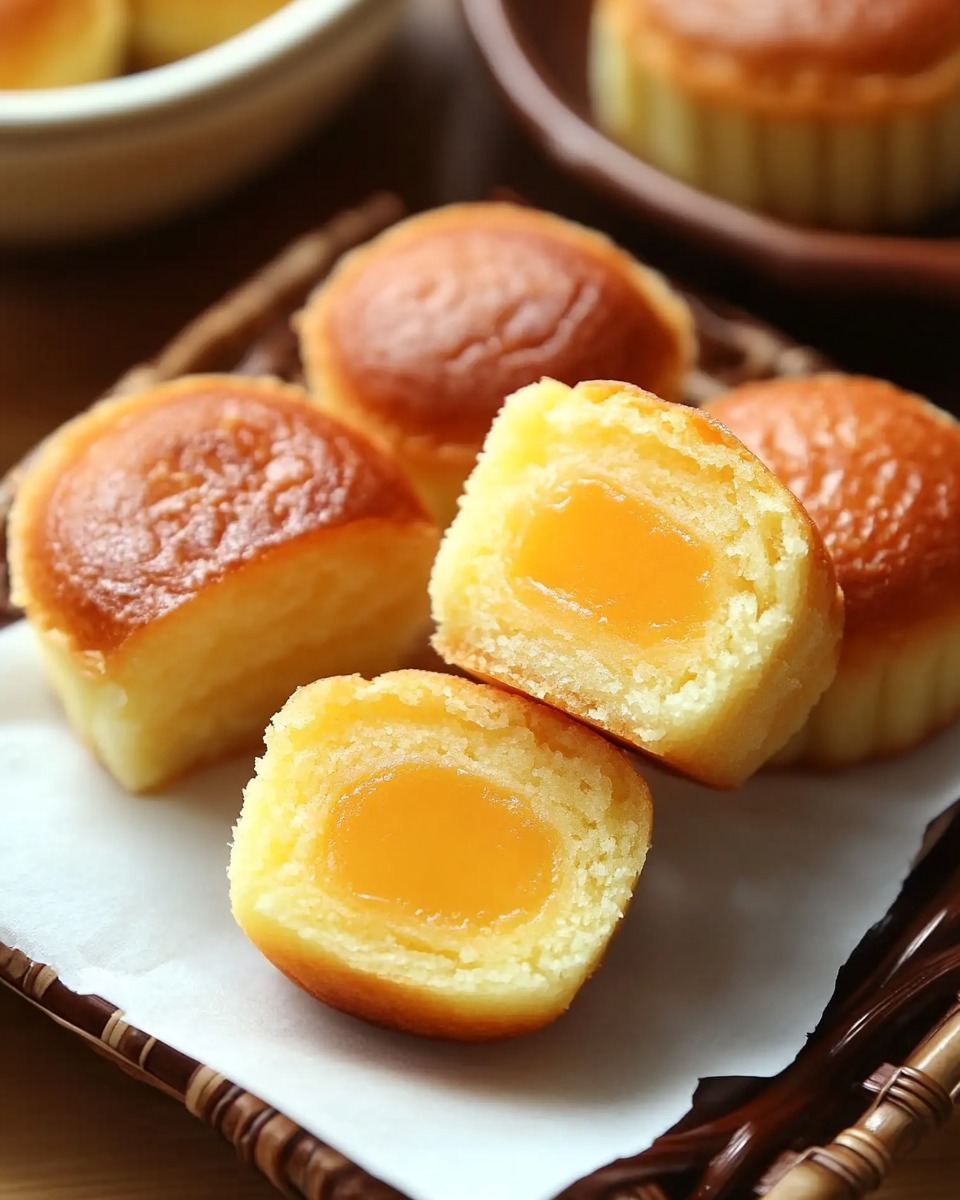
Delightfully Fluffy Chinese Egg Cake: A Sweet Treat to Brighten Your Day

Chinese egg cake, also known as “Ji Dan Gao” (鸡蛋糕), is a classic, airy dessert that has been enjoyed across generations in China. This delightful cake is known for its soft texture, subtle sweetness, and golden crust. Made with simple ingredients, it’s a versatile treat perfect for breakfast, tea time, or a light dessert. In this unique rendition, we’ll walk you through creating a perfectly fluffy Chinese egg cake that’s sure to become a family favorite.

Ingredients

  • Eggs: 2 medium-sized (preferably room temperature)
  • Cake Flour: 60 g (sifted for a smoother texture)
  • Castor Sugar: 40 g
  • Neutral Oil: 5 g (such as vegetable or canola oil)
  • Water: 1 tbsp

Instructions

1. Prepare Your Workspace

  1. Preheat your oven to 170°C (340°F). If using a traditional bamboo steamer, boil water in a large pot.
  2. Line a small cake tin or steaming container with parchment paper or lightly grease it.

2. Whisk the Eggs

  1. In a clean, dry mixing bowl, crack the eggs and add the castor sugar.
  2. Using an electric mixer, whisk the eggs and sugar on high speed until the mixture becomes pale, thick, and triples in volume. This step is crucial for achieving the cake’s fluffy texture.

3. Combine the Ingredients

  1. Gradually sift the cake flour into the egg mixture in three batches. Gently fold each batch with a spatula to maintain the airy structure.
  2. In a small bowl, mix the oil and water, then drizzle it into the batter. Fold gently until just combined. Avoid overmixing.

4. Pour and Level

  1. Pour the batter into the prepared tin, gently tapping it on the counter to remove air bubbles. Level the surface with a spatula.

5. Bake or Steam

  1. If baking, place the tin in the oven and bake for 20–25 minutes or until a skewer inserted into the center comes out clean.
  2. For steaming, place the tin in the steamer and steam on medium-high heat for 25–30 minutes.

6. Cool and Serve

  1. Once done, allow the cake to cool in the tin for 10 minutes before transferring it to a wire rack.
  2. Slice into wedges or squares and enjoy!

Conclusion

This fluffy Chinese egg cake is a testament to the beauty of simplicity. With its light texture and subtly sweet flavor, it’s a dessert that feels like a warm hug on a plate. Whether you enjoy it with a cup of tea or share it with loved ones, this recipe is sure to bring joy to your table. Happy baking!

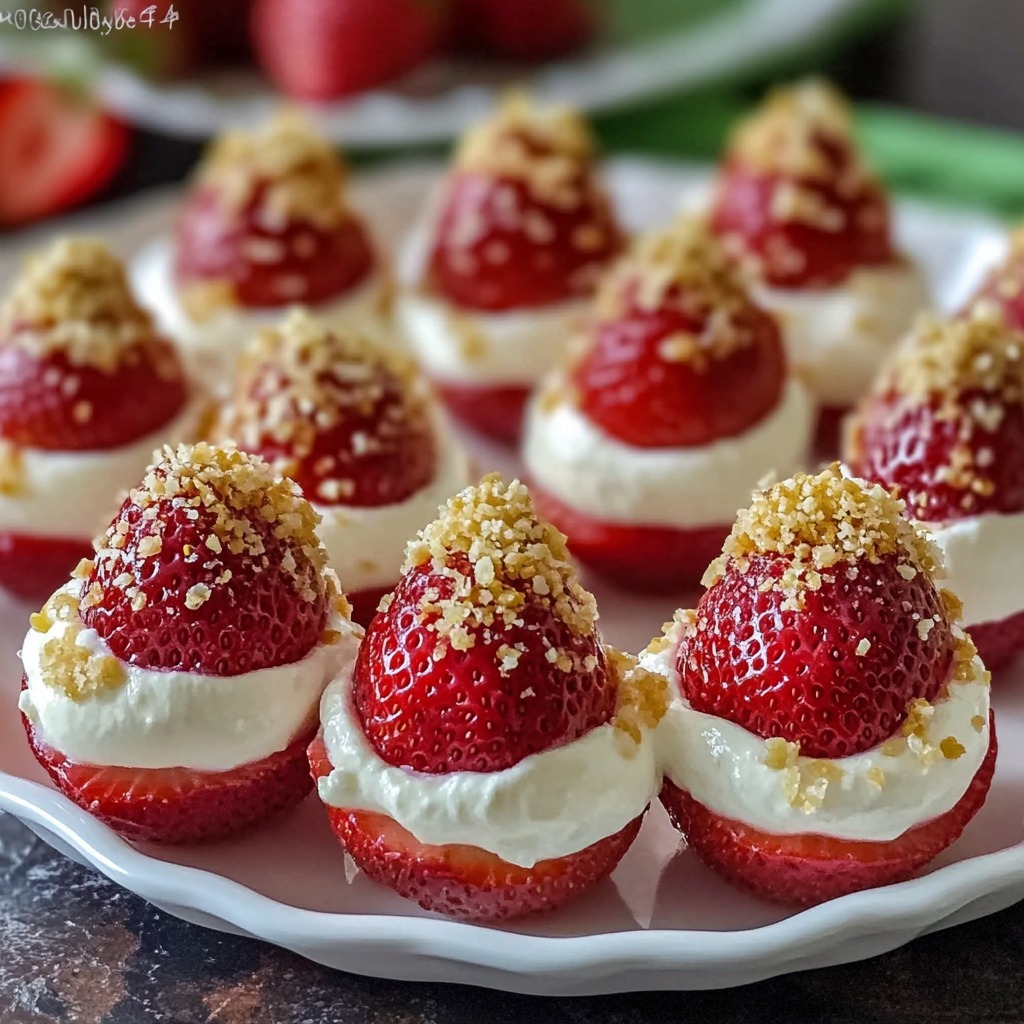
Cheesecake-Stuffed Strawberries: A Bite-Sized Delight

If you’re craving a dessert that combines the creamy richness of cheesecake with the natural sweetness of strawberries, this recipe is for you! These Cheesecake-Stuffed Strawberries are easy to prepare, visually stunning, and absolutely delicious. With their decadent filling and optional toppings like chocolate drizzle or crushed nuts, they’re the perfect treat for parties, picnics, or a quick indulgence. Let’s get started on these bite-sized delights!

Ingredients

For the Strawberries

  • 1 pint of fresh strawberries, washed and dried

For the Cheesecake Filling

  • 8 oz cream cheese, softened
  • ½ cup powdered sugar
  • 1 teaspoon vanilla extract

For the Topping

  • ¼ cup graham cracker crumbs
  • Optional: chocolate drizzle, crushed nuts, or colorful sprinkles

Instructions

1. Prepare the Strawberries

  1. Slice off the tops of the strawberries to create a flat base so they can stand upright.
  2. Using a small paring knife or a strawberry huller, carefully hollow out the centers of the strawberries to make room for the filling.

2. Make the Cheesecake Filling

  1. In a medium bowl, beat the softened cream cheese with a hand mixer or whisk until smooth and creamy.
  2. Add the powdered sugar and vanilla extract, and mix until fully incorporated and fluffy.

3. Fill the Strawberries

  1. Transfer the cheesecake filling to a piping bag fitted with a star tip (or use a zip-top bag with a corner snipped off).
  2. Pipe the filling into the hollowed strawberries, creating a decorative swirl at the top.

4. Add the Finishing Touches

  1. Sprinkle graham cracker crumbs over the filled strawberries for a classic cheesecake flair.
  2. If desired, drizzle with melted chocolate, sprinkle crushed nuts, or add colorful sprinkles for extra texture and flavor.

5. Serve and Enjoy

  1. Arrange the filled strawberries on a serving platter.
  2. Serve immediately, or refrigerate for up to 2 hours before serving.

Conclusion

These Cheesecake-Stuffed Strawberries are the perfect fusion of fresh fruit and rich cheesecake goodness. Easy to make yet elegant enough to wow your guests, they’re a versatile dessert that can be customized with your favorite toppings. Whether it’s a special occasion or a casual treat, these little bites of heaven are guaranteed to disappear quickly. Enjoy!

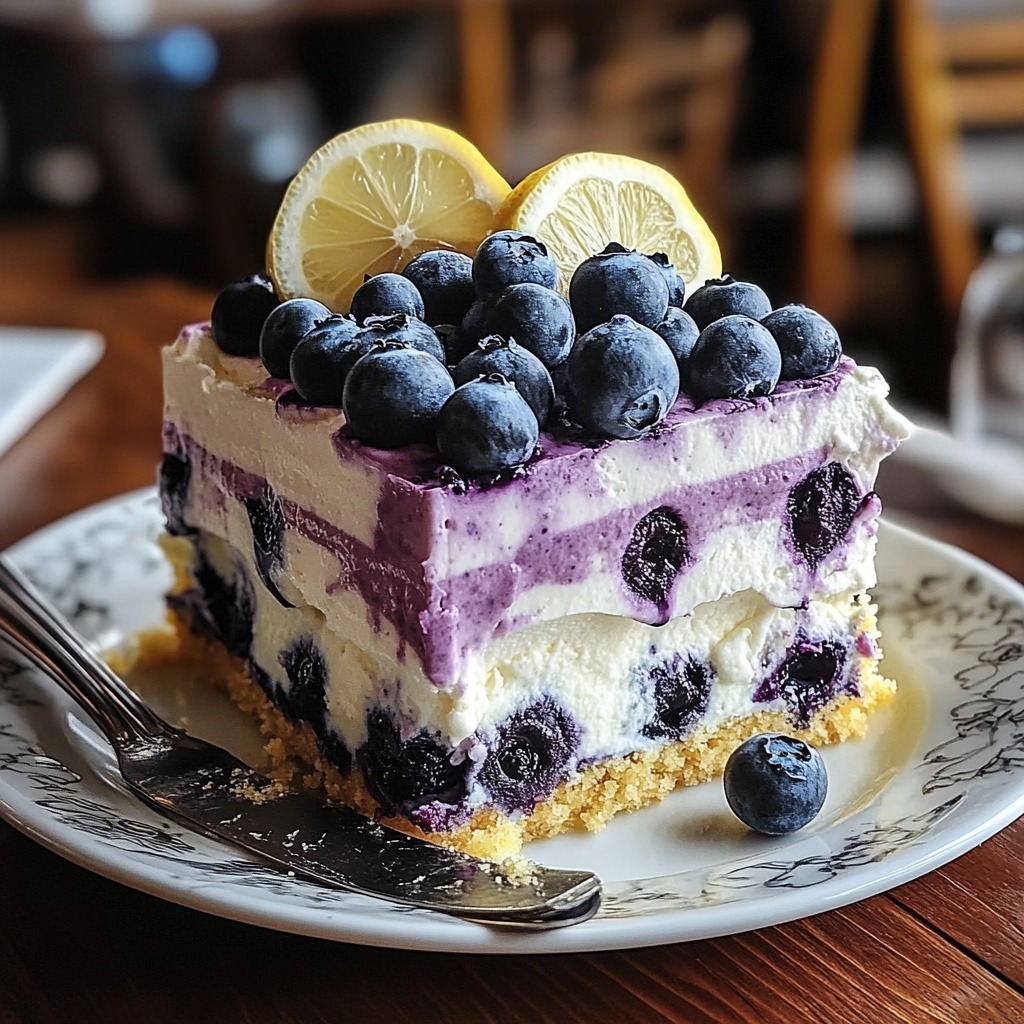
Zesty Lemon Blueberry Mousse Cake with Buttery Shortbread Crust

Brighten your day with the perfect combination of tangy lemon, sweet blueberries, and a buttery shortbread base. This Lemon Blueberry Mousse Cake is a celebration of fresh, vibrant flavors layered with creamy textures. Whether you’re entertaining guests or simply treating yourself, this elegant dessert is guaranteed to impress. Let’s dive into creating this luscious masterpiece!

Ingredients

For the Shortbread Crust:

  • ½ cup unsalted butter, softened
  • ½ cup powdered sugar
  • 1 cup all-purpose flour
  • 1 pinch of salt

For the Lemon Mousse:

  • 9/16 cup fresh lemon juice (about 2–3 lemons)
  • Zest of 2 lemons
  • ¾ cup granulated sugar
  • 1 tablespoon gelatin powder
  • 2 tablespoons water
  • 1 cup heavy cream, whipped to stiff peaks
  • 8 oz cream cheese, softened

For the Blueberry Topping:

  • 2 cups fresh blueberries
  • 2 tablespoons granulated sugar (optional, depending on sweetness of the blueberries)

Instructions

1. Prepare the Shortbread Crust

  1. Preheat your oven to 350°F (175°C).
  2. In a mixing bowl, cream together the softened butter and powdered sugar until smooth.
  3. Add the flour and salt, mixing until a soft dough forms.
  4. Press the dough evenly into the bottom of a 9-inch springform pan.
  5. Bake for 15–18 minutes, or until the edges are lightly golden. Let it cool completely before adding the mousse layer.

2. Make the Lemon Mousse

  1. In a small bowl, sprinkle the gelatin over 2 tablespoons of water. Let it bloom for about 5 minutes.
  2. In a saucepan over medium heat, combine the fresh lemon juice, lemon zest, and granulated sugar. Heat until the sugar dissolves completely. Remove from heat and stir in the bloomed gelatin until fully melted. Let this mixture cool to room temperature.
  3. In a large bowl, beat the cream cheese until smooth. Gradually mix in the cooled lemon mixture until fully combined.
  4. Gently fold in the whipped cream to create a light, airy mousse.
  5. Pour the mousse over the cooled shortbread crust, spreading it evenly. Refrigerate for at least 4 hours, or until set.

3. Prepare the Blueberry Topping

  1. In a small saucepan, heat the blueberries over medium-low heat, stirring occasionally. Add granulated sugar if the blueberries are too tart. Cook for 5–7 minutes, or until the berries begin to release their juices.
  2. Let the mixture cool to room temperature before spooning it over the chilled lemon mousse layer.

4. Assemble and Serve

  1. Once the mousse has set and the blueberry topping is cooled, carefully spread the blueberries over the top of the mousse layer.
  2. Gently release the springform pan, and transfer the cake to a serving plate.
  3. Slice and serve chilled for a refreshing, decadent dessert.

Conclusion

This Lemon Blueberry Mousse Cake brings together the best of summer’s bright flavors with a rich, creamy twist. From the buttery shortbread crust to the tangy lemon mousse and juicy blueberries, every bite is a symphony of taste and texture. Perfect for special occasions or as an indulgent treat, this dessert will leave everyone asking for seconds. Enjoy!

A Taste of Paris: Homemade Vanilla Beignets Recipe

Transport yourself to the romantic streets of Paris with every bite of these delightful Vanilla Beignets. Light, fluffy, and kissed with a hint of vanilla, these traditional French pastries are perfect for breakfast, brunch, or a sweet indulgence any time of the day. Whether you’re savoring them fresh out of the fryer with a dusting of powdered sugar or pairing them with your favorite coffee, this recipe will make your kitchen feel like a Parisian café. Best of all, they’re easy to make, so let’s get started!

Ingredients

Dry Ingredients

  • 2 teaspoons active dry yeast
  • 2 ½ cups all-purpose flour
  • ¼ cup granulated sugar
  • ½ teaspoon salt

Wet Ingredients

  • 1 tablespoon unsalted butter, melted
  • 1 cup warm milk (not too hot, about 100°F/38°C)
  • 1 tablespoon pure vanilla extract

For Frying & Topping

  • Vegetable oil (for frying)
  • Powdered sugar (for dusting)

Instructions

1. Prepare the Dough

  1. In a small bowl, combine the warm milk and yeast. Stir gently and let it sit for about 5 minutes until frothy.
  2. In a large mixing bowl, whisk together the flour, granulated sugar, and salt.
  3. Gradually add the yeast mixture to the dry ingredients, followed by the melted butter and vanilla extract. Mix until a soft dough forms.

2. Knead and Rest

  1. Transfer the dough to a floured surface and knead for 8–10 minutes until smooth and elastic. Alternatively, use a stand mixer with a dough hook for 5–7 minutes.
  2. Place the dough in a lightly oiled bowl, cover it with a clean kitchen towel, and let it rise in a warm spot for 1–2 hours, or until it doubles in size.

3. Roll and Shape

  1. Once risen, punch down the dough and turn it out onto a floured surface.
  2. Roll the dough to about ¼-inch thickness. Using a sharp knife or pastry cutter, cut into squares or rectangles (about 2 inches each).
  3. Cover the cut dough with a towel and let it rest for another 30 minutes.

4. Fry the Beignets

  1. Heat about 2 inches of vegetable oil in a deep pot or fryer to 350°F (175°C).
  2. Fry the dough squares in batches, 2–3 minutes per side, until they are golden brown and puffed. Use a slotted spoon to remove them from the oil and place them on a plate lined with paper towels.

5. Finish and Serve

  1. Generously dust the beignets with powdered sugar while they are still warm.
  2. Serve immediately and enjoy them fresh, warm, and irresistibly delicious!

Conclusion

Making Vanilla Beignets at home is not only a rewarding culinary experience but also a delightful way to bring the flavors of France to your table. With their golden exterior, airy interior, and a touch of sweetness, these pastries are sure to become a household favorite. Pair them with a steaming cup of coffee or a scoop of ice cream for a truly indulgent treat. Bon appétit!

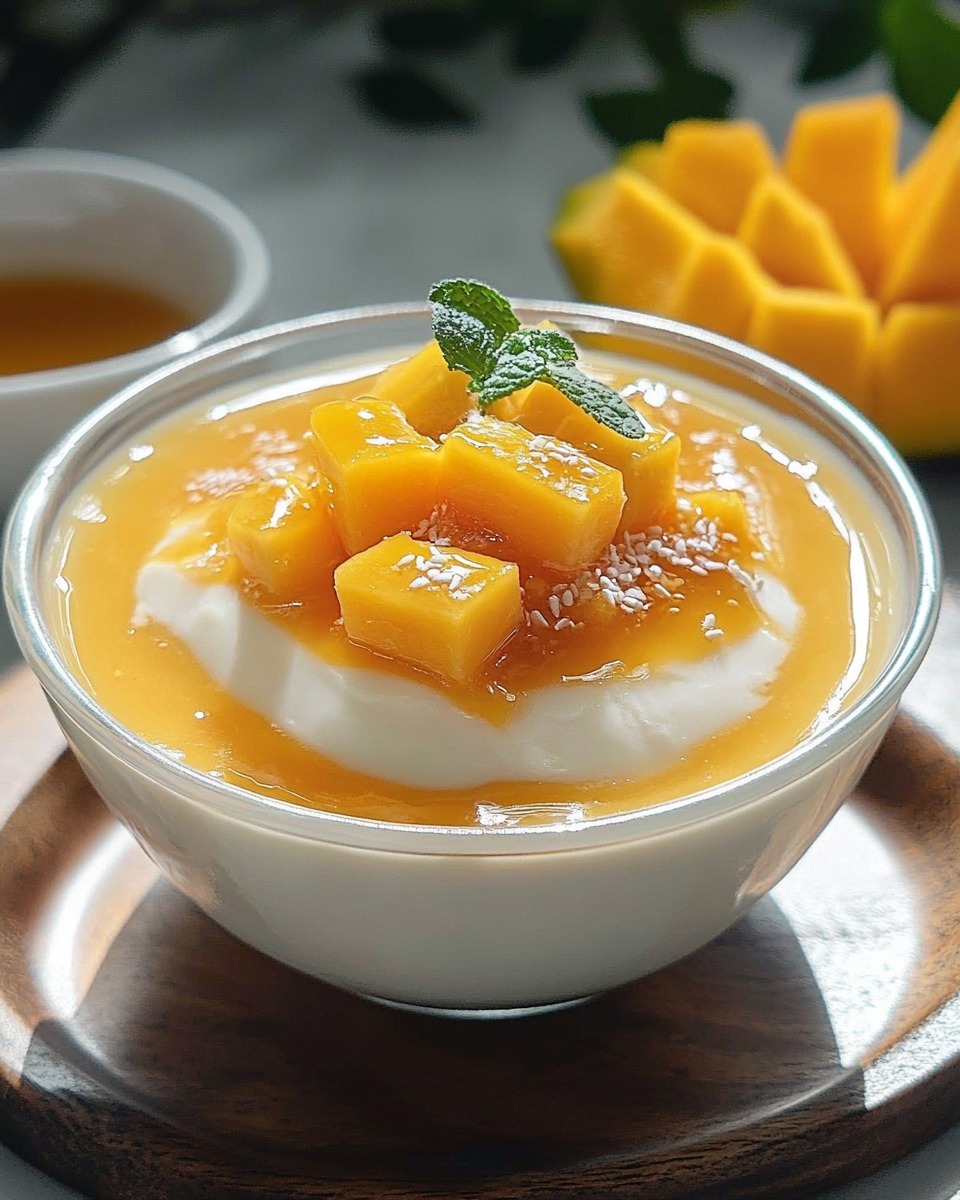
Silky Chinese Mango Pudding: A Tropical Delight

Transport yourself to a tropical paradise with this silky Chinese Mango Pudding. This beloved dessert features the natural sweetness of ripe mangoes combined with the creamy richness of coconut milk. Simple yet elegant, it’s the perfect refreshing treat for hot summer days or to end a delicious meal on a sweet note.

Ingredients:

  • Produce:
    • 2 ripe yellow mangoes (about 1 ½ cups puréed mango)
  • Baking & Spices:
    • ½ tbsp sugar (adjust based on mango sweetness)
  • Dairy:
    • ½ cup coconut milk or half & half
    • 1 tbsp condensed milk
  • Desserts:
    • 2 ½ tsp unflavored gelatin
  • Liquids:
    • ¾ cup water

Instructions:

1. Prepare the Mangoes:

  • Peel the mangoes, remove the pits, and cut the flesh into chunks.
  • Reserve a few pieces for garnish and purée the rest in a blender or food processor until smooth. You should have about 1 ½ cups of mango purée.

2. Dissolve the Gelatin:

  • In a small bowl, sprinkle the gelatin over ¼ cup of water and let it bloom for about 5 minutes.
  • Heat the remaining ½ cup of water in a small saucepan over low heat. Add the bloomed gelatin and stir until completely dissolved.

3. Mix the Pudding Base:

  • In a large bowl, combine the mango purée, sugar, coconut milk (or half & half), and condensed milk. Mix well until smooth.
  • Add the dissolved gelatin mixture to the mango mixture and whisk until fully incorporated.

4. Pour into Molds:

  • Pour the mixture into individual serving cups or ramekins. Use a fine sieve to strain the mixture if you prefer a smoother texture.
  • Tap the molds gently on the counter to release any air bubbles.

5. Chill and Set:

  • Refrigerate the puddings for at least 4 hours or until fully set.

6. Serve and Garnish:

  • Once set, garnish with reserved mango chunks or a drizzle of coconut milk. For an extra touch, add a sprig of mint or a sprinkle of toasted coconut flakes. Serve chilled.

Conclusion:

This Chinese Mango Pudding is a luscious dessert that perfectly balances the tropical sweetness of mango with creamy coconut milk. Easy to make and irresistibly refreshing, it’s a crowd-pleaser that’s sure to brighten any occasion. With just a handful of ingredients, you’ll have a silky, melt-in-your-mouth treat that captures the essence of summer in every bite!

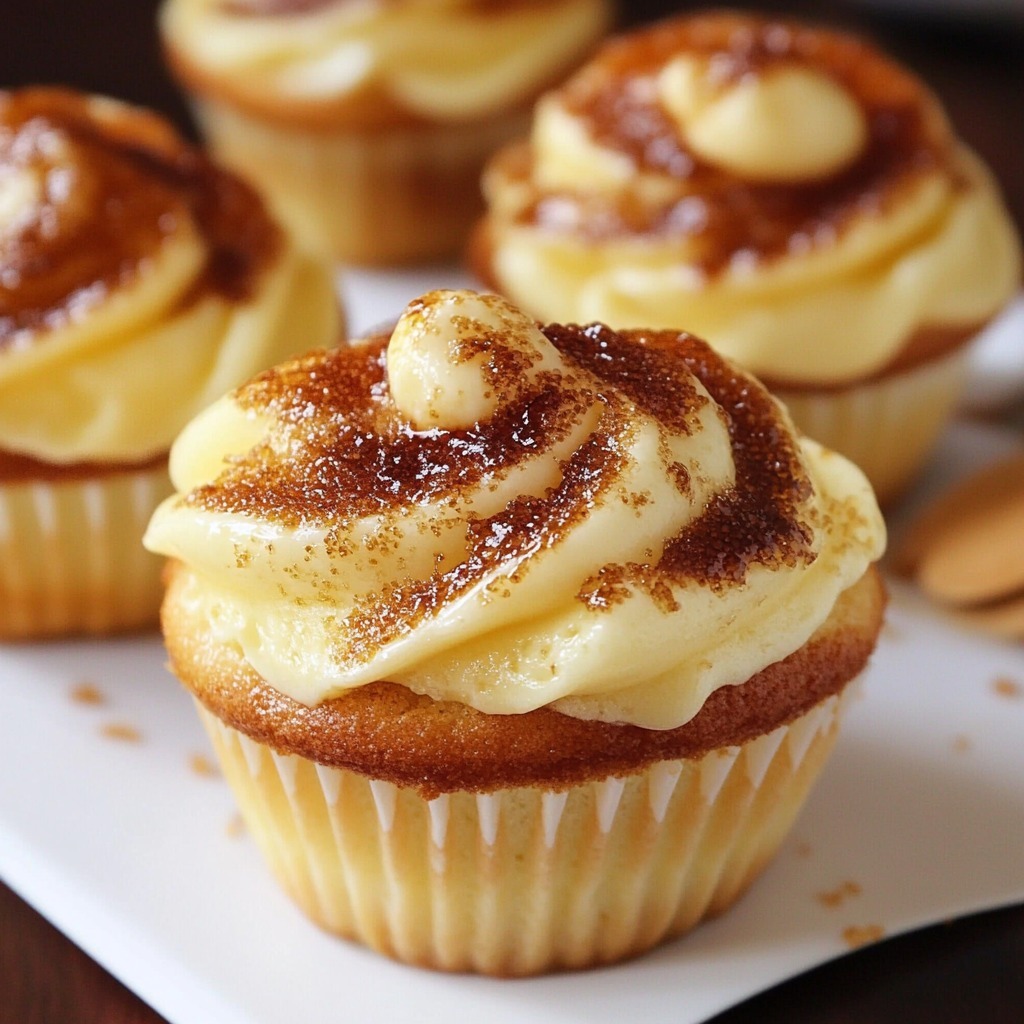
Crème Brûlée Cupcakes: A Decadent Twist on a Classic Dessert

Love the creamy, caramelized allure of crème brûlée? Now you can enjoy this sophisticated dessert in cupcake form! These Crème Brûlée Cupcakes feature moist vanilla cupcakes filled with luscious vanilla pastry cream, topped with a crisp, caramelized sugar layer. Perfect for special occasions or as a unique treat, these cupcakes are sure to impress.

Ingredients:

Pastry Cream Filling & Topping:

  • 1 batch Easy One Pot Vanilla Pastry Cream (follow your preferred recipe)
  • ½ cup (100g) coarse sugar (such as raw, turbinado, or sanding sugar)

Cupcake Batter:

  • 6 tbsp (84g) unsalted butter, softened
  • ¾ cup (150g) granulated sugar
  • 1 ½ tsp (7ml) pure vanilla extract
  • 2 large eggs
  • 1 ¼ cups (180g) all-purpose flour
  • 1 tsp (3g) cornstarch
  • 1 ¼ tsp baking powder
  • ¼ tsp salt
  • ⅓ cup plus 1 tbsp (95ml) whole milk
  • 1 tbsp (15ml) sunflower oil (or canola/vegetable oil)

Instructions:

1. Prepare the Pastry Cream:

  • Follow your recipe for Easy One Pot Vanilla Pastry Cream. Let it cool completely in the refrigerator.

2. Make the Cupcakes:

  • Preheat your oven to 350°F (175°C) and line a cupcake tin with paper liners.
  • In a large bowl, cream together the softened butter and sugar until light and fluffy, about 2–3 minutes.
  • Mix in the vanilla extract and eggs, one at a time, beating well after each addition.
  • In a separate bowl, sift together the flour, cornstarch, baking powder, and salt.
  • Gradually add the dry ingredients to the butter mixture in three additions, alternating with the milk and oil, starting and ending with the dry ingredients. Mix until just combined.
  • Divide the batter evenly among the cupcake liners, filling each about 2/3 full.
  • Bake for 18–22 minutes or until a toothpick inserted into the center comes out clean. Let the cupcakes cool completely on a wire rack.

3. Fill the Cupcakes:

  • Use a small knife or a cupcake corer to remove a small portion from the center of each cupcake. Fill the hollow with the prepared vanilla pastry cream. Smooth the tops to ensure the filling is flush with the surface.

4. Top with Pastry Cream:

  • Spoon or pipe a layer of pastry cream on top of each cupcake, spreading it evenly.

5. Caramelize the Sugar:

  • Sprinkle a generous layer of coarse sugar over the pastry cream topping. Use a kitchen torch to carefully caramelize the sugar until it melts and forms a golden, glassy layer. Allow the caramel to harden before serving.

6. Serve and Enjoy:

  • Serve the Crème Brûlée Cupcakes immediately to enjoy the crispy caramel topping. These cupcakes are best eaten fresh but can be stored in the refrigerator for up to 2 days.

Conclusion:

These Crème Brûlée Cupcakes transform the elegance of crème brûlée into a fun, handheld treat. With their moist vanilla base, creamy filling, and crispy caramel topping, they deliver a luxurious dessert experience in every bite. Whether for a celebration or an indulgent afternoon treat, these cupcakes are guaranteed to delight!

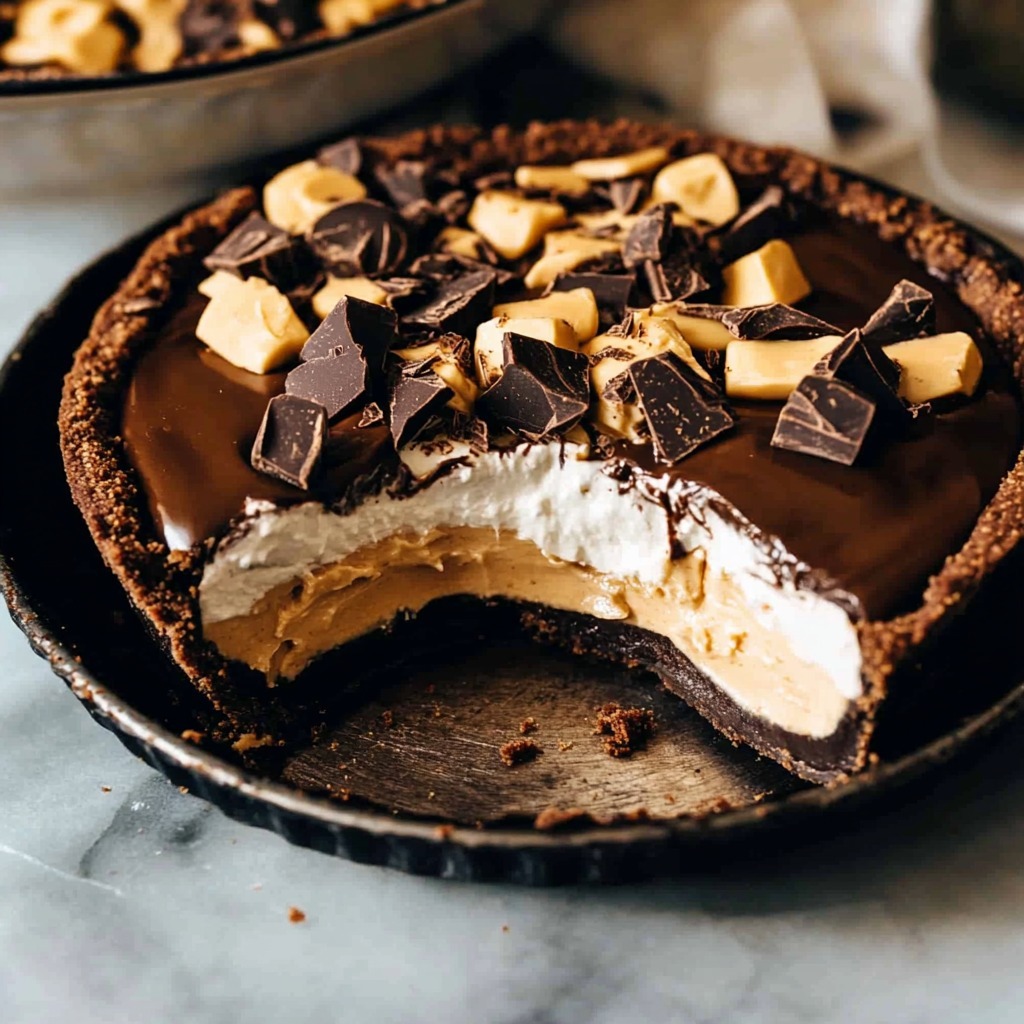
Decadent Chocolate Peanut Butter Pie with Oreo Crust

Indulge in the perfect marriage of chocolate and peanut butter with this luxurious Chocolate Peanut Butter Pie. With a crunchy Oreo crust, velvety chocolate pudding, and creamy peanut butter mousse, every bite is a symphony of textures and flavors. Topped with chopped peanut butter cups, this dessert is a guaranteed crowd-pleaser that’s surprisingly simple to make.

Ingredients:

Oreo Crust:

  • 20 Oreo sandwich cookies, finely ground (regular or gluten-free)
  • 1/4 cup (55g) unsalted butter, melted

Chocolate Pudding Layer:

  • 1/4 cup (50g) granulated sugar
  • 2 tbsp cornstarch
  • 2 tbsp unsweetened cocoa powder
  • 1/2 tsp instant espresso powder (optional)
  • 1/4 tsp kosher salt
  • 1 cup (240g) whole milk
  • 2 large egg yolks
  • 3.5 oz dark chocolate, chopped (use milk chocolate for a sweeter flavor)
  • 1 tbsp unsalted butter
  • 1 tsp vanilla extract

Peanut Butter Mousse:

  • 4 oz cream cheese, room temperature
  • 2 cups (480g) heavy whipping cream
  • 1/4 cup (45g) powdered sugar
  • 1 tsp vanilla extract
  • 1 cup (250g) creamy peanut butter

Topping:

  • Chopped peanut butter cups (gluten-free if needed)

Instructions:

1. Make the Oreo Crust:

  • Preheat your oven to 350°F (175°C).
  • In a bowl, combine crushed Oreo cookies with melted butter, stirring until the mixture is uniform.
  • Press the mixture into the base and up the sides of a 9-inch pie dish, using a glass or your hands to press it down firmly.
  • Bake for 8 to 10 minutes, then allow the crust to cool completely before using.

2. Prepare the Chocolate Pudding Layer:

  • In a medium saucepan, whisk together the sugar, cornstarch, cocoa powder, espresso powder (if using), and salt. Gradually whisk in the milk until smooth.
  • Heat the mixture over medium heat, stirring constantly until it thickens and begins to simmer.
  • In a separate bowl, beat the egg yolks. Slowly pour about 1/4 cup of the hot mixture into the yolks while whisking to gently warm them. Then, add this egg mixture back into the saucepan.
  • Continue cooking for 1–2 minutes, stirring until the pudding becomes thick and glossy. Remove from the heat.
  • Stir in chopped chocolate, butter, and vanilla extract until fully combined and smooth.
  • Pour the pudding into the chilled Oreo crust and smooth it out evenly.
  • Refrigerate until set, about 1–2 hours.

3. Make the Peanut Butter Mousse:

  • In a large bowl, beat the cream cheese until smooth.
  • Add the heavy whipping cream, powdered sugar, and vanilla extract. Beat until soft peaks form.
  • Fold in the creamy peanut butter until the mixture is smooth and fluffy.

4. Assemble the Pie:

  • Once the pudding layer is set, spread the peanut butter mousse over the top, smoothing it out with a spatula.

5. Add the Toppings:

  • Sprinkle chopped peanut butter cups generously over the mousse layer for a finishing touch.

6. Chill and Serve:

  • Refrigerate the pie for at least 2–3 hours to allow all layers to firm up.
  • Slice and serve this rich, irresistible dessert chilled.

Conclusion:

This Chocolate Peanut Butter Pie is a decadent dessert that effortlessly combines the richness of chocolate, the creaminess of peanut butter, and the crunch of an Oreo crust. With its beautiful layers and irresistible toppings, it’s the perfect showstopper for any special occasion—or simply to treat yourself!

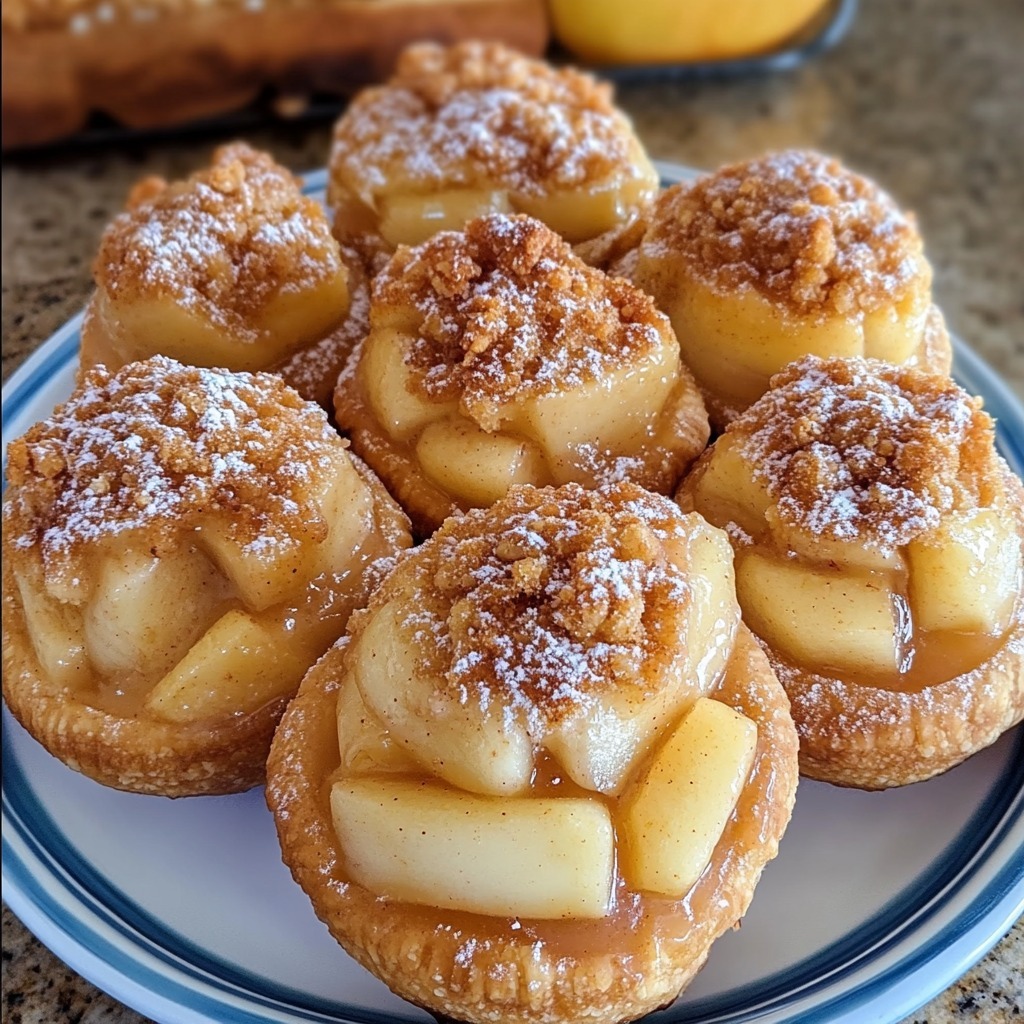
Explosive Apple Pie Bombs: A Crispy, Sweet Delight

Craving a bite-sized version of classic apple pie? These Apple Pie Bombs are the answer! With a golden, flaky biscuit exterior and a gooey, cinnamon-infused apple filling, they’re a quick and fun twist on the traditional dessert. Perfect for gatherings, snacking, or satisfying those sweet cravings, these little treats are simple to prepare and impossible to resist.

Ingredients:

For the Filling and Bombs:

  • 1 (21-ounce) can Apple pie filling or caramel apple pie filling
  • 1 (16.3-ounce) can Grands “Big” biscuits, flaky
  • 1 cup Granulated sugar
  • 1 tbsp Ground cinnamon

For Frying:

  • Vegetable oil (enough to fill a skillet or deep fryer by 2 inches)

Instructions:

1. Prepare the Filling:

  • Open the apple pie filling can and cut the apple slices into smaller, bite-sized pieces. This will make it easier to fill the biscuits.

2. Prep the Dough:

  • Open the biscuit can and separate the dough into individual biscuits.

3. Fill the Bombs:

  • Place about a tablespoon of apple pie filling in the center of each flattened biscuit. Be careful not to overfill.
  • Pinch the edges of the dough together to seal, forming a ball. Make sure the seams are tightly closed to prevent leaks during frying.

4. Heat the Oil:

  • Heat vegetable oil in a deep pan or fryer over medium-high heat, bringing it to a temperature of around 350°F (175°C).

5. Fry the Bombs:

  • Carefully lower a few dough balls into the hot oil, seam-side down. Fry in batches to avoid overcrowding.
  • Cook for 2–3 minutes on each side, or until the bombs are golden brown and puffed.
  • Use a slotted spoon to lift the items from the oil and set them on a plate lined with paper towels to absorb any extra oil.

6. Coat in Cinnamon Sugar:

  • In a separate bowl, combine the sugar and cinnamon.
  • While still warm, gently toss the treats in the cinnamon-sugar mixture, ensuring they are evenly coated.

7. Serve and Enjoy:

  • Serve these Apple Pie Bombs warm for the ultimate indulgence. They pair perfectly with a scoop of vanilla ice cream or a drizzle of caramel sauce!

Conclusion:

These Explosive Apple Pie Bombs are a quick and delightful way to enjoy the flavors of apple pie in a fun, handheld form. Crispy on the outside, gooey on the inside, and coated in irresistible cinnamon sugar, they’re a treat that will disappear as fast as you can make them. Whether you’re hosting a party or enjoying a cozy night in, these little delights are guaranteed to impress!

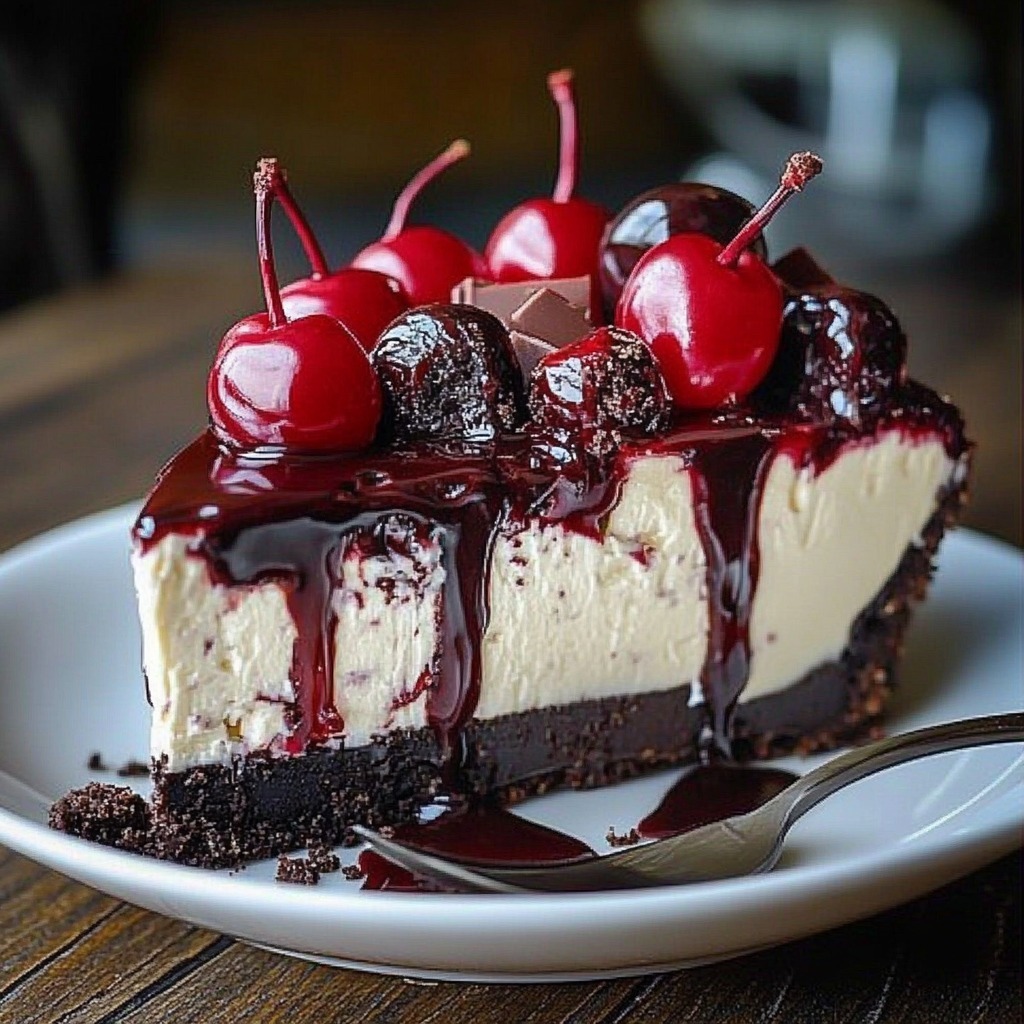
No-Bake Black Forest Berry Cheesecake: A Decadent Delight

Indulge in the luscious harmony of chocolate, cream cheese, and berries with this no-bake Black Forest Berry Cheesecake. Combining the classic flavors of Black Forest desserts with a refreshing twist, this cheesecake is an effortless dessert perfect for any occasion. It features layers of creamy goodness atop a crunchy biscuit base, topped with a medley of berries and rich cherry fruit filling. Ready to wow your taste buds? Let’s dive into this culinary delight!

Ingredients:

Base:

  • 150 g Bourbon biscuits
  • 45 g Unsalted butter, melted

Cheesecake Filling:

  • 300 g Soft cream cheese
  • 150 ml Double cream (heavy cream)
  • 60 g Caster sugar
  • 2 tbsp Kirsch (optional, for a boozy twist)

Topping:

  • 410 g Black cherry fruit filling (tinned)
  • 150 g Blackberries
  • 125 g Blueberries
  • Zest and juice of 1 lime
  • 60 g Dark chocolate (for shavings or drizzle)

Instructions:

1. Prepare the Biscuit Base:

  • Crush the Bourbon biscuits into fine crumbs using a food processor or by sealing them in a ziplock bag and rolling with a pin.
  • Combine the crushed crumbs with melted butter, stirring until well incorporated.
  • Firmly press the mixture into the bottom of a tart pan or springform pan, using a spoon to smooth and pack it down. Place the pan in the fridge for 30 minutes to set.

2. Whip Up the Cheesecake Filling:

  • In a spacious mixing bowl, blend the cream cheese with the sugar until the mixture becomes velvety and free of lumps.
  • Gradually add the double cream, whisking until thickened and fully incorporated.
  • Stir in the Kirsch if using, for a hint of cherry liqueur.
  • Spoon the filling over the chilled biscuit base, smoothing the top with a spatula. Return to the refrigerator for at least 4 hours or overnight to set completely.

3. Prepare the Topping:

  • In a bowl, gently mix the black cherry fruit filling with the blackberries and blueberries. Add the lime juice and zest for a tangy kick.
  • Once the cheesecake is set, spread the berry mixture over the top.

4. Add the Finishing Touches:

  • Grate or shave the dark chocolate over the berry topping for a rich, indulgent garnish. Alternatively, melt the chocolate and drizzle it over the top for a dramatic effect.

5. Serve and Enjoy:

  • Remove the cheesecake from the tin carefully and place it on a serving plate. Slice and serve this stunning dessert chilled.

Conclusion:

This No-Bake Black Forest Berry Cheesecake is a dessert that strikes the perfect balance between rich indulgence and fruity freshness. With its silky-smooth filling, crunchy base, and vibrant berry topping, it’s destined to become a showstopper at your next gathering. The best part? No oven required! So why wait? Treat yourself and your loved ones to this unforgettable dessert today!

Stay Connected

Get recipes via email: