Effortless No-Bake Mini Banana Cream Pies

Desserts don’t always need an oven to steal the show! These No-Bake Mini Banana Cream Pies are a perfect blend of creamy, sweet banana flavor and crunchy graham cracker crust. Whether you’re planning a cozy family dinner or a party with friends, these pies deliver a delightful touch of indulgence without the fuss of baking. Let’s create these mini masterpieces!

Ingredients

For the Crust:

  • 1 ½ cups graham cracker crumbs
  • ½ cup melted butter
  • ¼ cup sugar

For the Filling:

  • 1 box (3.5 oz) of instant vanilla custard powder
  • 2 cups cold milk

For the Whipped Cream Topping:

  • 1 cup heavy cream
  • 2 tablespoons powdered sugar
  • 1 teaspoon vanilla extract

For Assembly:

  • 2 ripe bananas, sliced
  • Whipped cream, for topping
  • Honey, for drizzling

Instructions

1. Prepare the Graham Cracker Crust

  1. In a medium-sized mixing bowl, combine graham cracker crumbs, melted butter, and sugar. Mix until the texture resembles wet sand.
  2. Spoon the mixture into mini pie molds or a muffin tin lined with cupcake liners, pressing it firmly into the bottom and slightly up the sides.
  3. Refrigerate the crusts for at least 20 minutes to firm up.

2. Make the Banana Cream Filling

  1. In a medium bowl, combine instant vanilla pudding mix with chilled almond milk. Whisk until the mixture thickens, about 2 minutes.
  2. Cover the bowl and let the pudding chill in the fridge for 10 minutes to firm up fully.

3. Prepare the Whipped Cream

  1. In a chilled mixing bowl, beat the heavy cream, powdered sugar, and vanilla extract until stiff peaks form. Set aside.

4. Assemble the Mini Pies

  1. Remove the chilled crusts from the refrigerator. Spoon or pipe the banana cream pudding into the crusts, filling each mold generously.
  2. Top the pudding with a generous layer of ripe strawberry slices for a sweet, fruity contrast.
  3. Top with a dollop of homemade whipped cream.

5. Finishing Touches

  1. Drizzle a small amount of honey over the whipped cream for added sweetness.
  2. Garnish with an extra banana slice or graham cracker crumbs if desired.

Conclusion

These No-Bake Mini Banana Cream Pies are a celebration of simplicity and flavor. With a buttery graham cracker crust, luscious banana cream filling, and a cloud of whipped cream on top, each bite is pure comfort. Best of all, this no-bake recipe is quick to prepare, making it a go-to dessert for any occasion. Serve them chilled, and watch them disappear in no time!

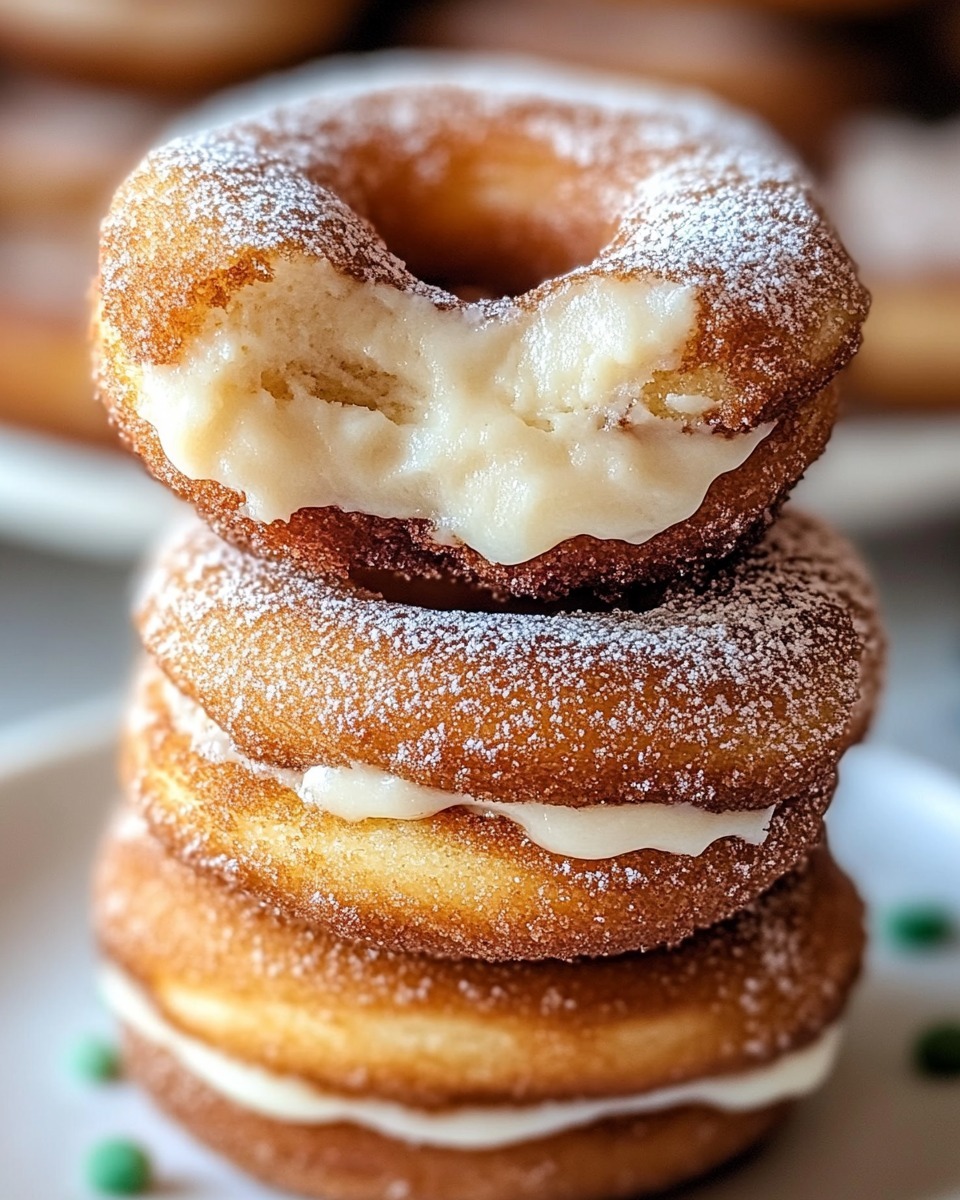
Churro-Cheesecake Bliss Bites: A Sweet Delight in Every Bite

Get ready to experience a sweet treat that combines the warm, spicy goodness of cinnamon with the smooth, indulgent richness of cheesecake, all nestled inside a soft, melt-in-your-mouth cookie. Meet the Cinnamon Swirl Cheesecake Cookies—an unforgettable dessert that brings together the best of both worlds in one delightful bite. Whether it’s for a special occasion, a casual snack, or just a little indulgence, these cookies will quickly become a favorite. Let’s dive into this simple yet luxurious recipe!

Ingredients

For the Cookie Dough:

  • All-purpose flour: 1 ½ cups
  • Baking powder: ½ tsp
  • Salt: ¼ tsp
  • Unsalted butter: ½ cup (softened)
  • Granulated sugar: ½ cup
  • Brown sugar: ¼ cup (packed)
  • Large egg: 1
  • Vanilla extract: 1 tsp

For the Cheesecake Filling:

  • Cream cheese: ½ cup (softened)

For the Churro Coating:

  • Granulated sugar: ¼ cup
  • Ground cinnamon: 1 tbsp

Instructions

1. Prepare the Cookie Dough

  1. In a small mixing bowl, sift together the whole wheat flour, baking soda, and a pinch of sea salt. Set aside for later use.
  2. In a larger mixing bowl, use a hand or stand mixer to cream the softened butter, granulated sugar, and brown sugar until light and fluffy. This should take about 2–3 minutes.
  3. Beat in the egg and vanilla extract until fully incorporated.
  4. Slowly incorporate the dry mixture into the wet ingredients, stirring gently until everything is just blended. Wrap the dough in plastic wrap and chill in the fridge for a minimum of 30 minutes to allow it to set.

2. Prepare the Cheesecake Filling

  1. In a small bowl, whip the softened cream cheese until smooth and creamy.
  2. Scoop the cream cheese into small ½ teaspoon-sized portions and place them on a parchment-lined tray. Freeze until firm, about 15–20 minutes.

3. Shape the Cookies

  1. Set your oven to 375°F (190°C) and lightly grease a baking tray.
  2. Take about 1 tablespoon of the chilled dough, roll it into a ball, then gently press it into a small patty.
  3. Place a frozen scoop of vanilla yogurt in the middle before shaping the dough around it.
  4. Gently wrap the dough around the cream cheese, sealing it completely, and roll it into a smooth ball. Repeat with the remaining dough and filling.

4. Roll in Churro Coating

  1. In a small bowl, mix the granulated sugar and ground cinnamon for the coating.
  2. Roll each cookie dough ball in the cinnamon sugar mixture, ensuring an even coating.

5. Bake to Perfection

  1. Arrange the coated dough balls on the prepared baking sheet, spacing them about 2 inches apart.
  2. Bake for 10–12 minutes, or until the cookies are lightly golden and set around the edges.

6. Cool and Enjoy

  1. Allow the cookies to cool on the baking sheet for 5 minutes before transferring them to a wire rack to cool completely.
  2. Serve warm or at room temperature for a luscious churro-cheesecake experience.

Conclusion

Churro-Cheesecake Bliss Bites bring together the best of two beloved desserts in one easy-to-make treat. With their crispy cinnamon-sugar coating, tender cookie shell, and creamy cheesecake center, these cookies are guaranteed to impress anyone who takes a bite. Whether you’re treating yourself or sharing with friends, this unique dessert is sure to become a new favorite. Give it a try and savor the sweet, spiced joy of every bite!

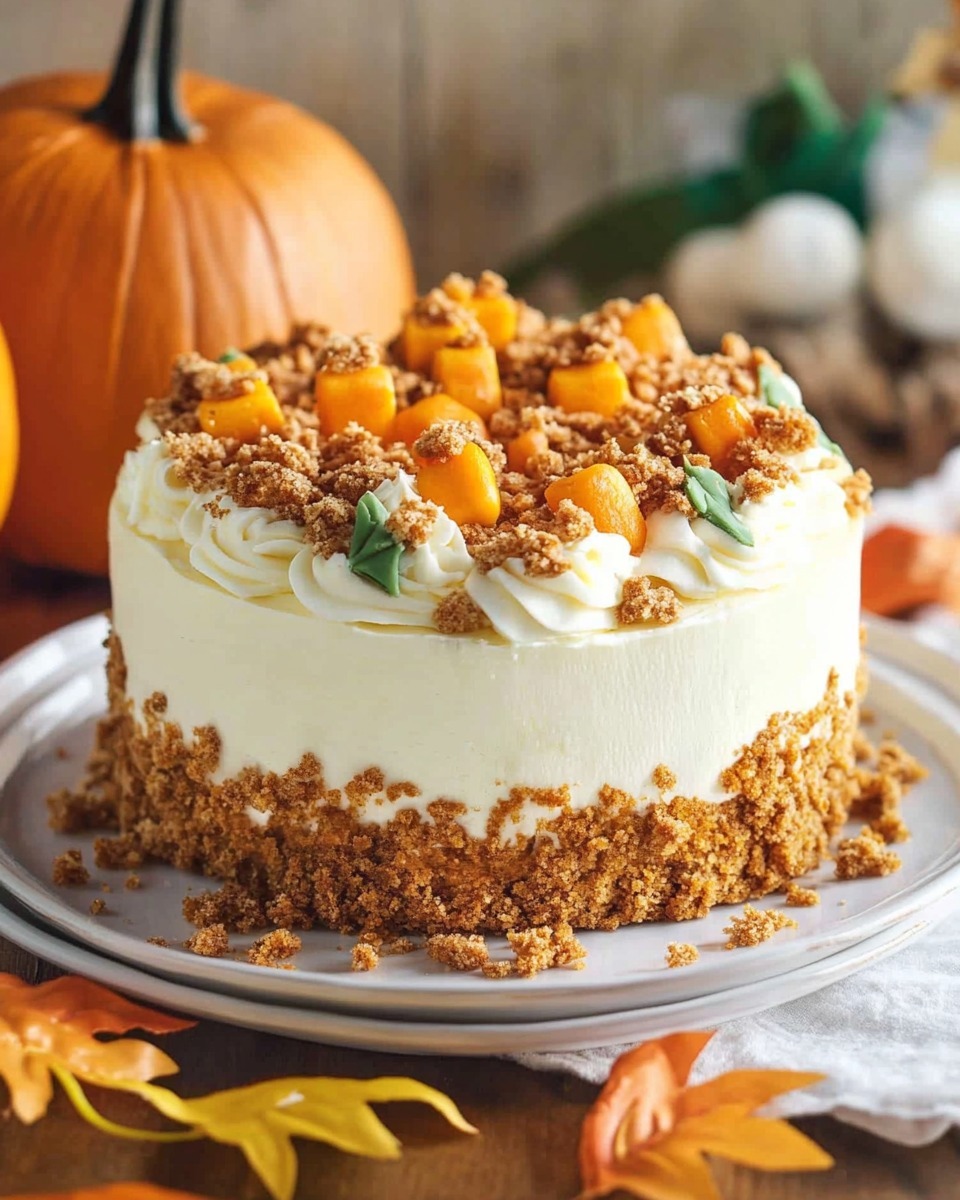
Pumpkin Crunch Cake: A Decadent Fall Dessert

Rich pumpkin flavor, warm spices, and a crunchy walnut topping come together in this Pumpkin Crunch Cake to create an irresistible dessert. Finished with a creamy, luxurious cream cheese frosting, this cake is the perfect way to celebrate autumn’s flavors.

Ingredients

Pumpkin Cake

  • 250 grams (1 ⅛ cups) vegetable oil
  • 100 grams (⅓ cup) buttermilk
  • 200 grams (1 cup) brown sugar
  • 50 grams (¼ cup) maple syrup
  • 4 large eggs
  • 500 grams (3 cups) raw pumpkin, grated
  • Zest of 1 lemon
  • 400 grams (3 ⅛ cups) cake flour
  • 10 grams (2 teaspoons) baking powder
  • 5 grams (1 teaspoon) baking soda
  • 8 grams (3 teaspoons) cinnamon powder
  • 3 grams (1 teaspoon) nutmeg powder
  • 3 grams (1 teaspoon) ginger powder
  • 3 grams (1 teaspoon) allspice powder
  • 5 grams (¾ teaspoon) fine salt
  • 150 grams (1 cup) raisins (optional)

Caramelized Walnuts

  • 200 grams (1 ⅔ cups) walnuts
  • 200 grams (1 cup) sugar

Cream Cheese Frosting

  • 600 grams (2 ⅔ cups) cream cheese, full fat
  • 400 grams (1 ¾ cups) unsalted butter
  • 400 grams (2 ½ cups) white chocolate, chopped

Instructions

1. Prepare the Pumpkin Cake

  1. Preheat your oven to 350°F (175°C). Grease and line two 9-inch round cake pans with parchment paper.
  2. In a large bowl, whisk together the vegetable oil, buttermilk, brown sugar, maple syrup, and eggs until smooth.
  3. Add the grated pumpkin and lemon zest, stirring to combine.
  4. In a separate bowl, sift together the cake flour, baking powder, baking soda, cinnamon, nutmeg, ginger, allspice, and salt.
  5. Slowly incorporate the dry ingredients into the wet mixture, folding carefully until just combined. If desired, stir in the raisins.
  6. Pour the batter evenly into the prepared pans and bake for 25–30 minutes, or until a toothpick inserted into the center comes out clean.
  7. Let the cakes cool in the pans for 10 minutes, then transfer them to a wire rack to cool completely.

2. Make the Caramelized Walnuts

  1. Line a baking sheet with parchment paper.
  2. In a medium saucepan, heat the sugar over medium heat until it melts and turns a golden caramel color. Stir occasionally to ensure even melting.
  3. Add the walnuts and stir quickly to coat them in the caramel.
  4. Arrange the walnuts in a single layer on the prepared baking sheet. Let them cool completely before breaking them into smaller pieces.

3. Prepare the Cream Cheese Frosting

  1. Melt the white chocolate in a heatproof bowl set over a pot of simmering water or in the microwave in short intervals. Let cool slightly.
  2. In a large mixing bowl, beat the cream cheese and butter together until smooth and creamy.
  3. Gradually add the melted white chocolate, beating until fully incorporated and the frosting is fluffy.

4. Assemble the Cake

  1. Set one cake layer on a serving plate or cake stand. Spread a thick layer of cream cheese frosting evenly over the top.
  2. Place the second cake layer on top and frost the entire cake with the remaining cream cheese frosting.
  3. Decorate the cake with the caramelized walnuts, pressing them gently onto the sides or sprinkling them on top.

Conclusion:

This Pumpkin Crunch Cake is a masterpiece of flavors and textures—moist pumpkin cake, crunchy caramelized walnuts, and velvety cream cheese frosting. Perfect for holiday tables or cozy gatherings, it’s a dessert that tastes as incredible as it looks. Share it with loved ones, and watch this cake become a fall tradition!

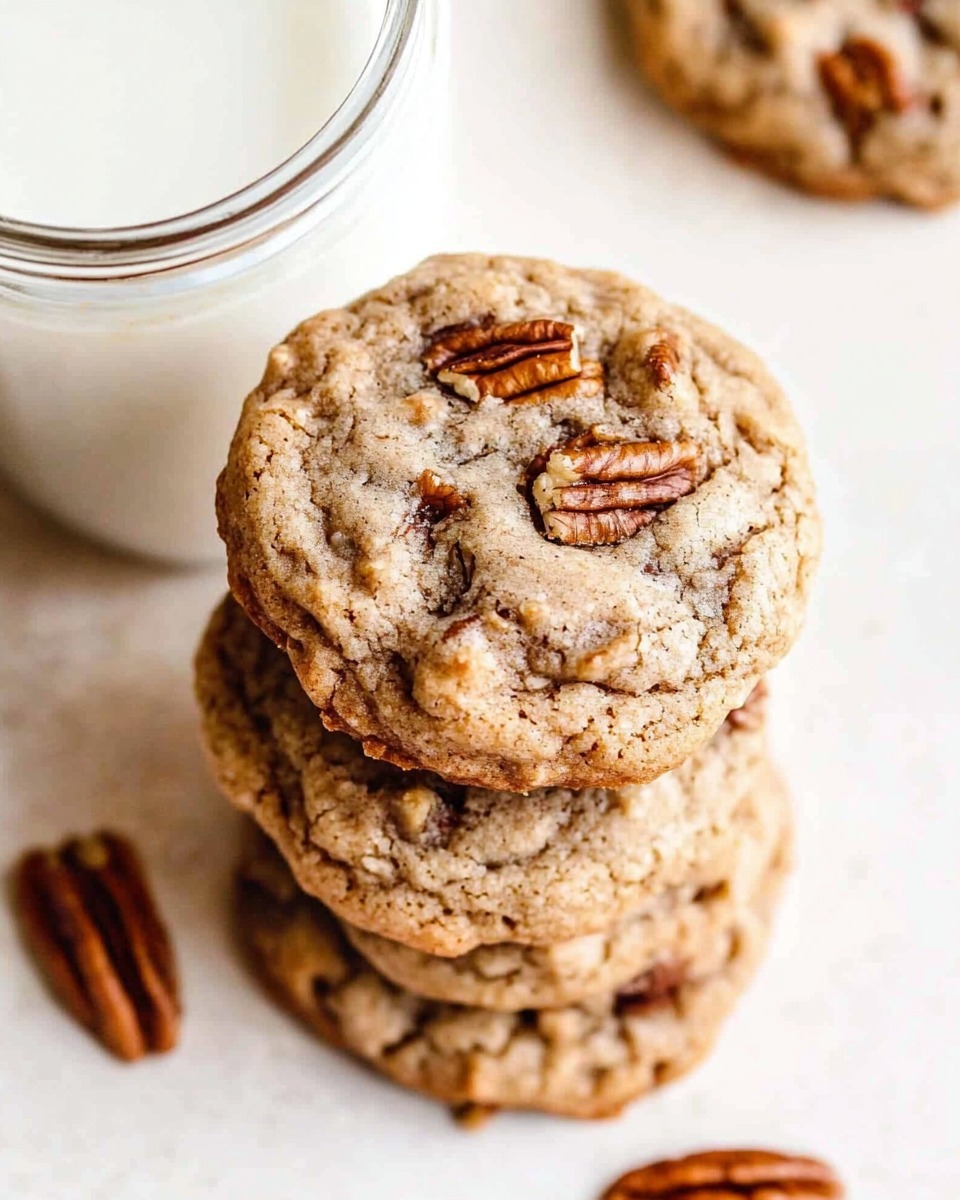
Maple Pecan Cookies: A Sweet and Nutty Delight

When the craving for something sweet and indulgent strikes, these Maple Pecan Cookies are the perfect answer. Featuring warm spices, rich maple syrup, and crunchy pecans, these cookies are soft, flavorful, and just the right amount of chewy. Add a drizzle of optional cream cheese icing for an extra layer of decadence, making these cookies ideal for special occasions or everyday treats.

Ingredients

For the Cookie Dough

  • 2½ cups (312.5 g) all-purpose flour
  • 1 teaspoon baking soda
  • ¾ teaspoon salt
  • 1 teaspoon ground cinnamon
  • ½ teaspoon ground nutmeg
  • ½ cup (113.5 g) unsalted butter, room temperature
  • 1 cup (200 g) dark brown sugar, packed (light brown sugar works as well)
  • 1 large egg, room temperature
  • ½ cup (118.29 ml) pure maple syrup
  • 1½ cups (163.5 g) chopped pecans

For the Optional Cream Cheese Icing

  • 1 tablespoon cream cheese, room temperature
  • 1 tablespoon unsalted butter, room temperature
  • 1 tablespoon milk
  • ½ cup (60 g) powdered sugar

Instructions

1. Prepare the Dough

  1. In a medium bowl, combine the flour, baking soda, salt, cinnamon, and nutmeg, whisking until well mixed. Set aside.
  2. In a large mixing bowl, cream the butter and dark brown sugar together until light and fluffy, about 2–3 minutes.
  3. Beat in the egg, followed by the maple syrup, until well combined.
  4. Gradually add the dry ingredients to the wet ingredients, mixing until just combined. Avoid overmixing to keep the cookies tender.
  5. Gently fold in the chopped pecans for a nutty crunch.

2. Chill the Dough

  1. Cover the dough with plastic wrap and refrigerate for at least 1 hour. Chilling prevents the cookies from spreading too much during baking.

3. Preheat and Prepare

  1. Preheat your oven to 350°F (175°C) and line baking sheets with parchment paper or silicone baking mats.

4. Shape and Bake

  1. Scoop the dough into 1½-tablespoon-sized balls and place them about 2 inches apart on the prepared baking sheets.
  2. Bake for 10–12 minutes, or until the edges are golden brown and the centers are set.
  3. Allow the cookies to cool on the baking sheet for 5 minutes before transferring them to a wire rack to cool completely.

5. Make the Cream Cheese Icing (Optional)

  1. In a small bowl, beat the cream cheese, butter, and milk until smooth.
  2. Gradually add the powdered sugar, whisking until the icing is creamy and drizzle-able.
  3. Drizzle the icing over the cooled cookies or spread a thin layer on top.

Conclusion:

These Maple Pecan Cookies strike the perfect balance between cozy spices, sweet maple syrup, and crunchy pecans. Whether enjoyed on their own or topped with a tangy cream cheese icing, they’re bound to become a household favorite. Bake a batch for your next family gathering or keep them all to yourself for a comforting treat that pairs beautifully with coffee or tea.

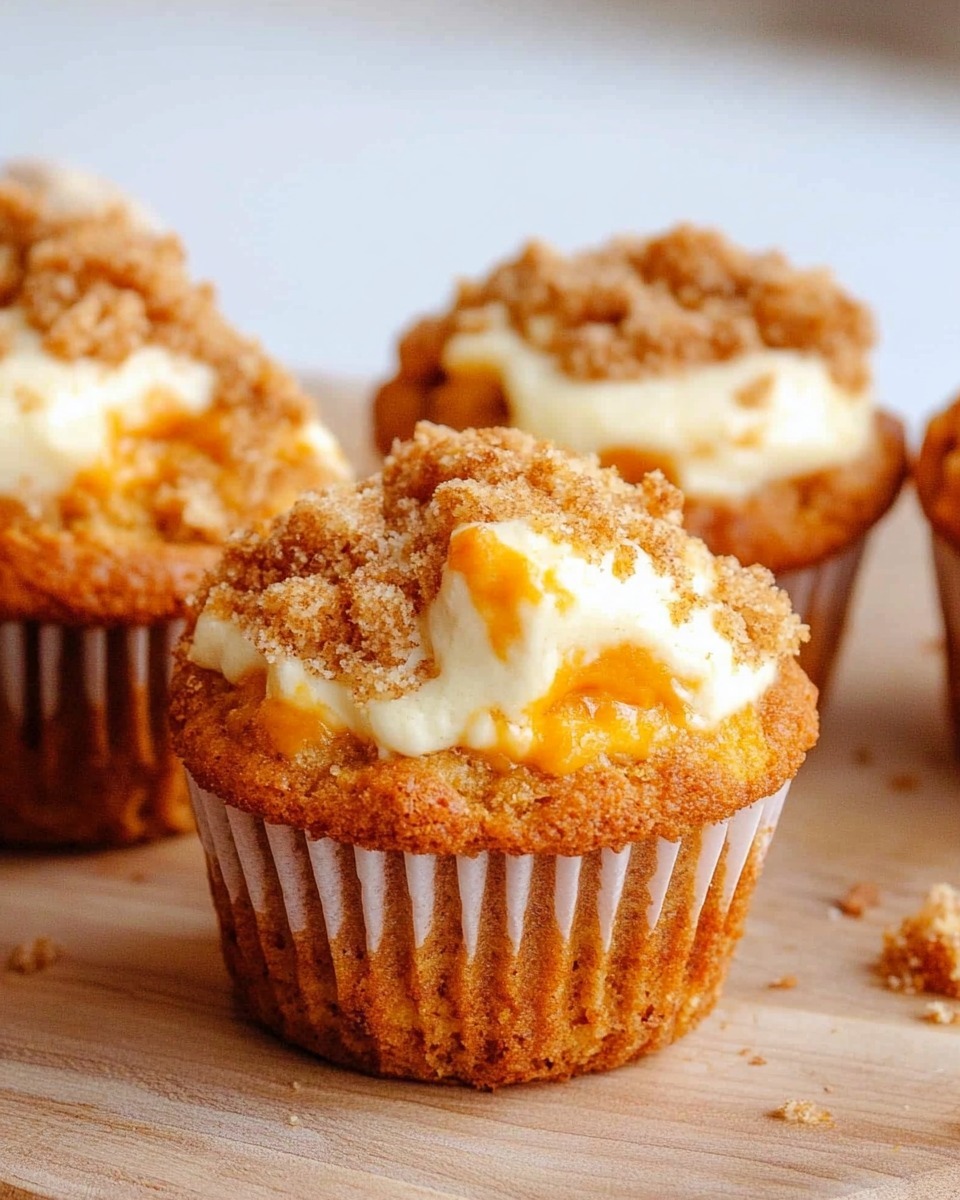
Pumpkin Cheesecake Muffins: Fall’s Favorite Flavor in Every Bite

Warm pumpkin spice, creamy cheesecake filling, and a crunchy cinnamon streusel topping make these Pumpkin Cheesecake Muffins an irresistible treat. Perfect for cozy mornings, holiday gatherings, or anytime you want a seasonal indulgence, these muffins are packed with autumn’s best flavors. Every bite offers layers of texture and taste, from the tender pumpkin muffin base to the creamy, tangy cheesecake center.

Ingredients

Cream Cheese Filling

  • 6 ounces (170.1 g) cream cheese, room temperature
  • ¼ cup (50 g) granulated sugar
  • 1 tablespoon of Lifeway Plain Organic Whole Milk Kefir, at room temperature

Cinnamon Streusel Topping

  • 4 tablespoons (56 g) unsalted butter, measured and then melted
  • ⅔ cup (83.33 g) all-purpose flour
  • ½ cup (100 g) brown sugar, packed (light or dark)
  • 1 teaspoon ground cinnamon

Pumpkin Muffins

  • 2 cups (250 g) all-purpose flour
  • 1 teaspoon baking soda
  • 1 teaspoon baking powder
  • ¾ teaspoon salt
  • 1 teaspoon ground cinnamon
  • 1½ teaspoons pumpkin pie spice
  • ½ cup (120 g) vegetable oil
  • ½ cup (100 g) granulated sugar
  • ½ cup (100 g) brown sugar (light or dark, packed)
  • 2 large eggs, room temperature
  • 1½ teaspoons vanilla extract
  • ¼ cup (60 g) Lifeway Plain Organic Whole Milk Kefir, room temperature
  • 1 cup (245 g) pumpkin puree

Instructions

1. Prepare the Cream Cheese Filling

  1. In a small mixing bowl, beat the cream cheese, granulated sugar, and kefir until smooth and creamy. Set aside.

2. Make the Cinnamon Streusel Topping

  1. In another bowl, combine the melted butter, flour, brown sugar, and cinnamon. Mix until crumbly. Set aside.

3. Mix the Dry Ingredients for the Muffins

  1. In a large mixing bowl, combine the flour, baking soda, baking powder, salt, cinnamon, and pumpkin pie spice, whisking until evenly blended.

4. Combine the Wet Ingredients

  1. In a separate bowl, whisk together the vegetable oil, granulated sugar, brown sugar, eggs, vanilla extract, kefir, and pumpkin puree until well combined.

5. Make the Muffin Batter

  1. Gradually add the wet ingredients to the dry ingredients, folding gently until just combined. Be careful not to overmix to keep the muffins tender.

6. Assemble the Muffins

  1. Preheat the oven to 350°F (175°C) and line a muffin tin with paper liners or grease with cooking spray.
  2. Fill each muffin cup about two-thirds full with the pumpkin batter.
  3. Add a dollop (about 1–2 teaspoons) of the cream cheese filling to the center of each cup.
  4. Sprinkle the cinnamon streusel topping generously over the muffins.

7. Bake

  1. Bake for 20–25 minutes, or until a toothpick inserted into the pumpkin batter (not the cream cheese center) comes out clean.
  2. Let the muffins cool in the tin for 5 minutes before transferring them to a wire rack to cool completely.

Conclusion:

These Pumpkin Cheesecake Muffins capture the essence of fall with their warm pumpkin spice, velvety cheesecake center, and delightful streusel topping. Ideal for breakfast, a sweet treat after dinner, or paired with an afternoon coffee, they’re a perfect indulgence. Whether shared with loved ones or enjoyed solo, these muffins are sure to brighten your day!

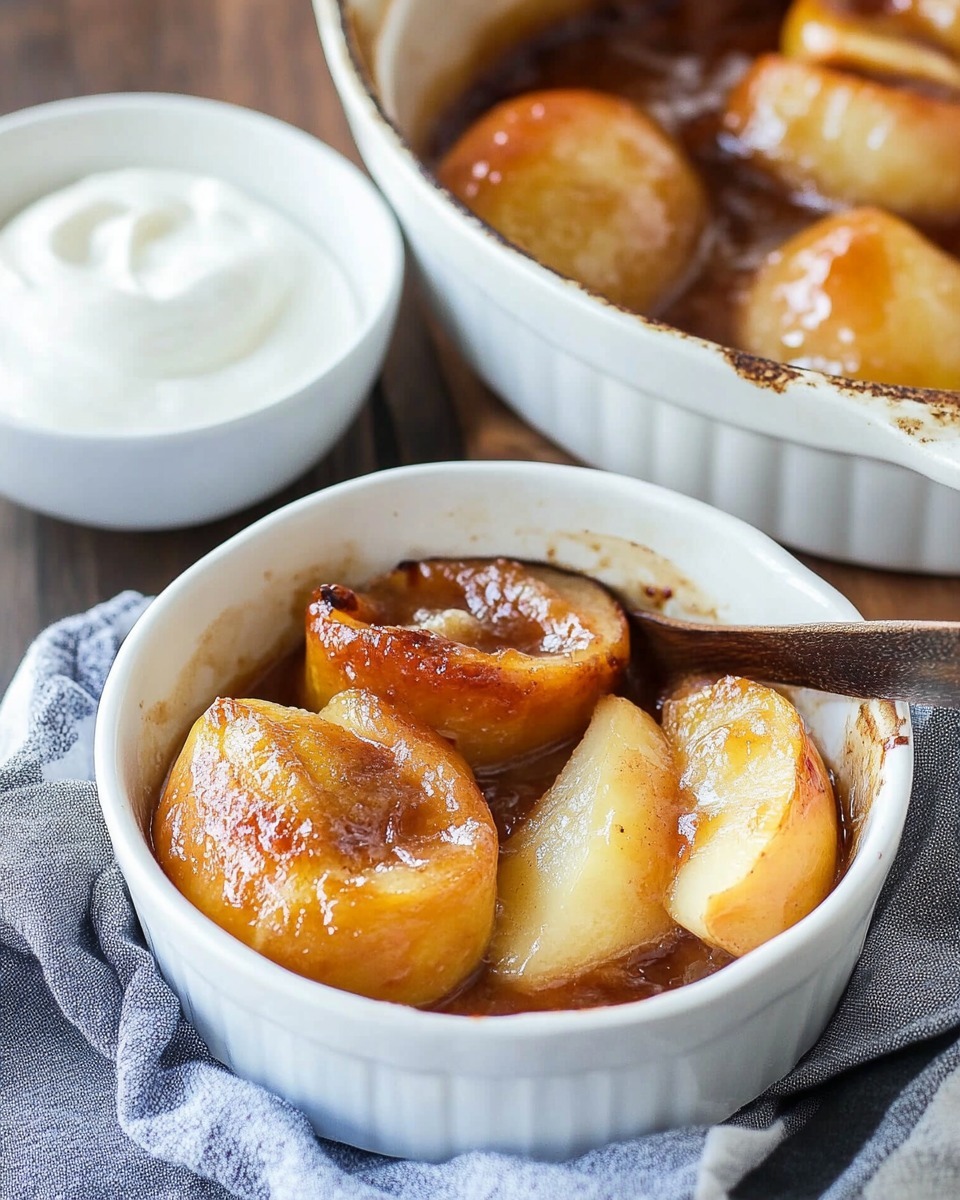
Cinnamon-Spiced Baked Apples: A Warm and Cozy Treat

When the crisp air of fall sets in, there’s nothing more comforting than the sweet aroma of baked apples wafting through your home. This Cinnamon-Spiced Baked Apples recipe combines tender, caramelized apples with a touch of cinnamon and brown sugar for a simple yet satisfying dessert. Perfect on its own or topped with a dollop of whipped cream or vanilla ice cream, this recipe is sure to become a seasonal favorite.

Ingredients

  • Cooking spray
  • 5–6 large apples (a mix of Granny Smith and Red Delicious for balance)
  • ¼ cup light brown sugar
  • 1 tablespoon lemon juice
  • 2 teaspoons ground cinnamon
  • 2 teaspoons cornstarch
  • 2 tablespoons unsalted butter, sliced into pats

Instructions

1. Preheat and Prepare

  1. Preheat your oven to 375°F (190°C).
  2. Lightly spray a baking dish with cooking spray to prevent sticking.

2. Core and Slice the Apples

  1. Wash the apples and remove the cores using an apple corer or a sharp knife.
  2. Slice the apples into thick wedges, about ½-inch wide, for even cooking.

3. Make the Cinnamon Sugar Mixture

  1. In a large mixing bowl, combine the brown sugar, cinnamon, and cornstarch.
  2. Add the lemon juice to the mix for a hint of tartness and to prevent the apples from browning.

4. Coat the Apples

  1. Toss the apple slices in the cinnamon sugar mixture, ensuring they are evenly coated.

5. Assemble in the Baking Dish

  1. Arrange the coated apple slices in the prepared baking dish in an even layer.
  2. Dot the top with the butter pats, evenly spacing them over the apples.

6. Bake to Perfection

  1. Place the dish in the preheated oven and bake for 30–35 minutes, stirring gently halfway through.
  2. The apples should be tender but not mushy, with a bubbly, caramelized sauce forming in the dish.

7. Serve and Enjoy

  1. Let the baked apples cool for 5–10 minutes before serving.
  2. Serve warm, either on their own or with a scoop of vanilla ice cream, a dollop of whipped cream, or a sprinkle of granola for added crunch.

Conclusion:

This Cinnamon-Spiced Baked Apples recipe is a celebration of cozy flavors and easy preparation. With a balance of sweet and tart apples, warm spices, and a buttery finish, it’s the perfect way to enjoy the bounty of the season. Whether served as a weeknight dessert or a holiday side dish, these baked apples are sure to leave everyone craving seconds.

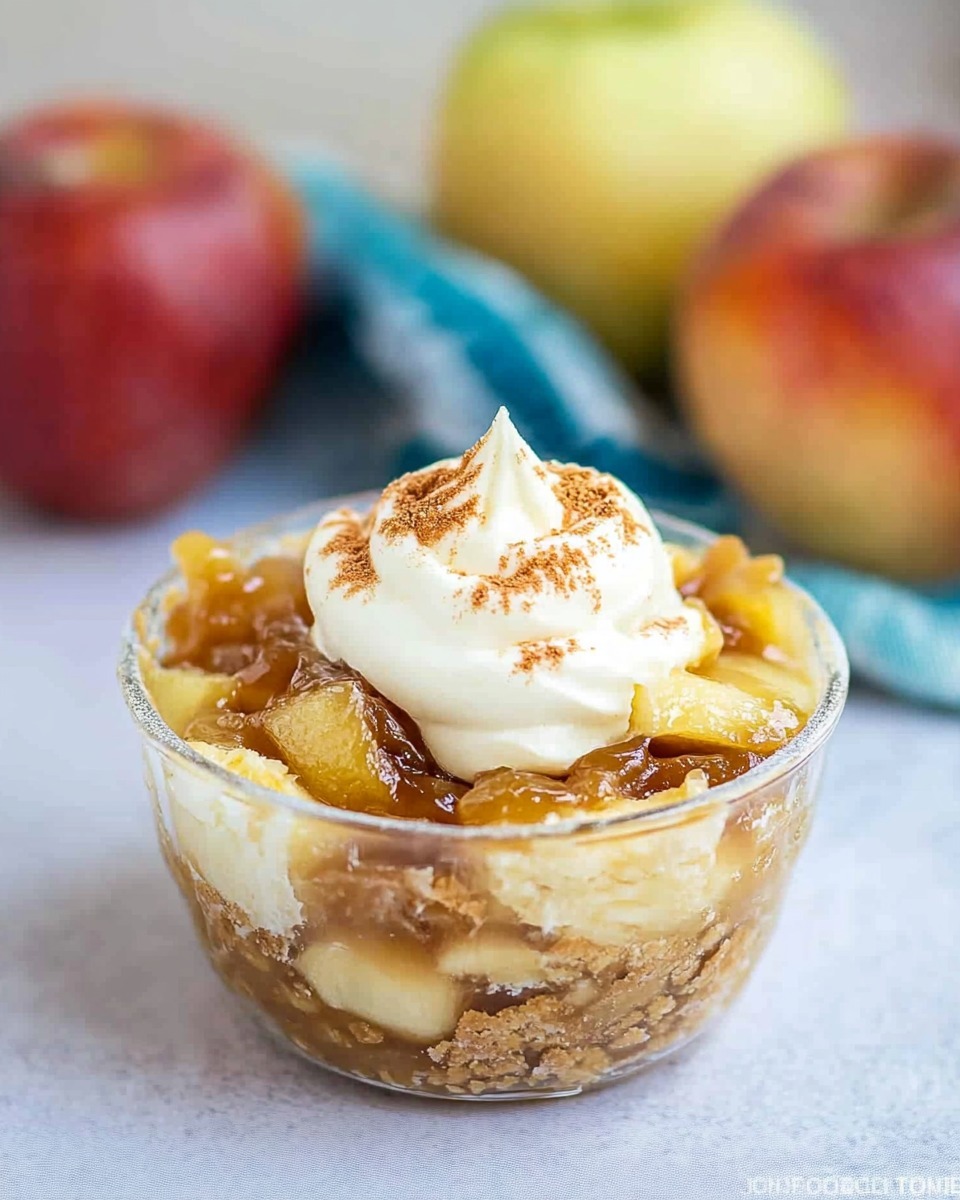
Apple Caramel Dump Cake: A Quick and Cozy Dessert

When you’re craving a warm, gooey dessert but don’t want to spend hours in the kitchen, this Apple Caramel Dump Cake is your go-to recipe. Packed with the classic flavors of spiced apples, buttery cake, and rich caramel, it’s a treat that feels homemade with minimal effort. Perfect for family dinners, potlucks, or just because, this dump cake is as easy as it is delicious.

Ingredients

  • 1 (15.25-ounce) package cake mix (yellow or spice works best)
  • 2 (20-ounce) cans apple pie filling
  • ½ cup butter, thinly sliced (8 tablespoons or 1 stick)
  • 1 teaspoon cinnamon
  • 1 (12-ounce) jar caramel topping
  • Optional: 8 scoops vanilla ice cream for serving

Instructions

1. Preheat and Prepare

  1. Preheat your oven to 350°F (175°C).
  2. Lightly grease a 9×13-inch baking dish to prevent sticking.

2. Layer the Ingredients

  1. Pour the apple pie filling into the prepared baking dish, spreading it out evenly.
  2. Sprinkle the cinnamon evenly over the apples for a touch of spice.
  3. Drizzle half of the caramel topping over the apple pie filling.

3. Add the Cake Mix

  1. Open the cake mix and evenly sprinkle the dry mix over the apple layer. Do not stir! The magic of a dump cake is in its layers.

4. Top with Butter

  1. Lay the thin slices of butter across the top of the cake mix, ensuring most of the surface is covered. This will create a golden, crispy topping as it bakes.

5. Bake

  1. Place the dish in the preheated oven and bake for 45–50 minutes, or until the top is golden brown and the apple filling is bubbling at the edges.

6. Serve and Enjoy

  1. Let the cake cool slightly before serving. Drizzle the remaining caramel topping over each slice for added indulgence.
  2. For an extra treat, top with a scoop of vanilla ice cream and watch it melt into the warm cake.

Conclusion:

This Apple Caramel Dump Cake is proof that simplicity can be delicious. With its gooey apple filling, buttery cake layer, and ribbons of caramel, it’s a dessert that tastes like you spent hours in the kitchen. Pair it with ice cream for a dessert that’s sure to become a family favorite. Whether it’s for a holiday table or a casual night at home, this cake promises smiles all around—one effortless bite at a time!

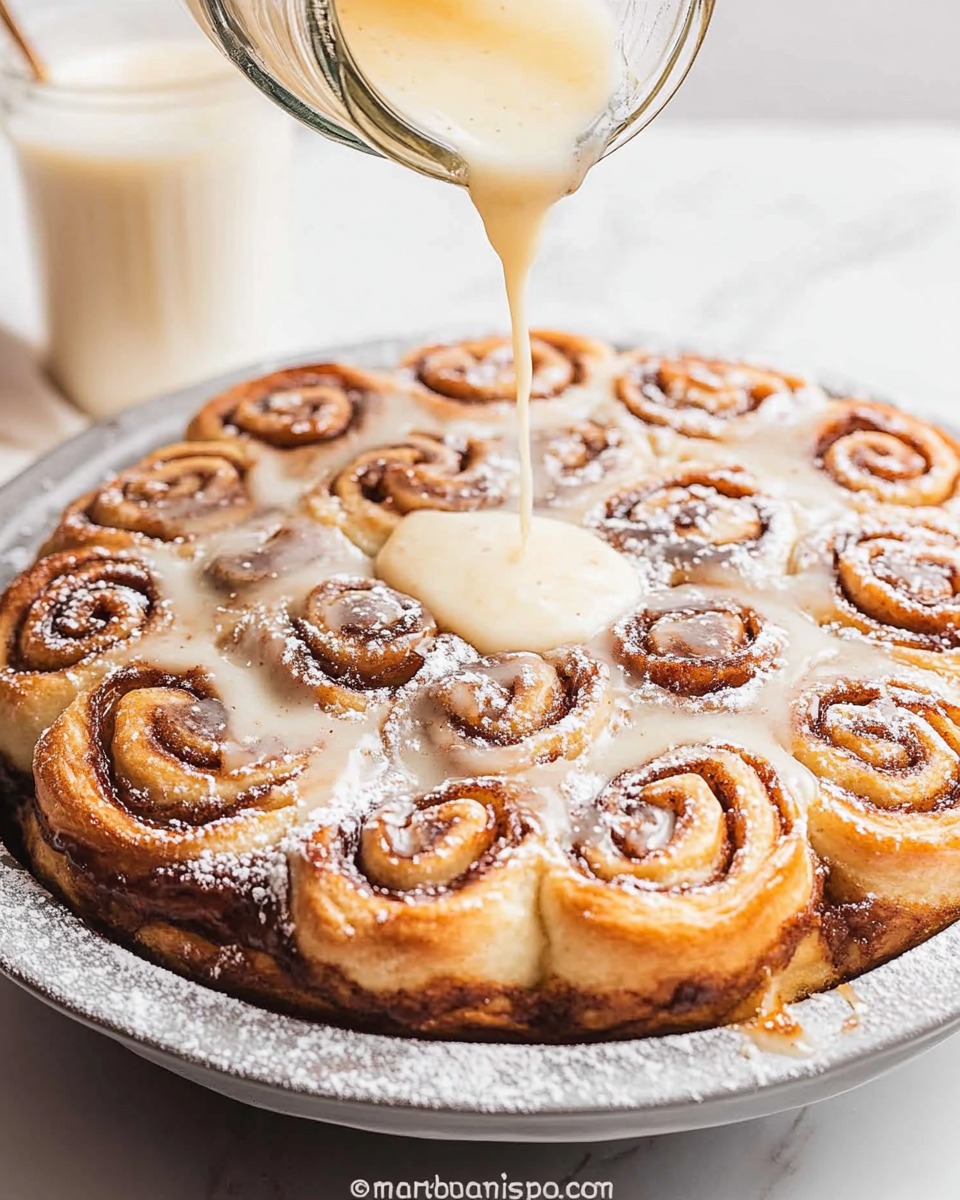
Golden Maple Cinnamon Rolls: A Sweet Morning Indulgence

Imagine the comforting aroma of warm cinnamon and sweet maple syrup wafting through your kitchen—a scent that promises soft, gooey perfection in every bite. These Golden Maple Cinnamon Rolls are a breakfast favorite reinvented, combining the classic cinnamon swirl with the rich, earthy sweetness of maple. Perfect for a cozy weekend brunch or a special treat, this recipe guarantees a crowd-pleaser that’s as delightful to make as it is to eat.

Ingredients

For the Dough

  • 2 ¾ cups all-purpose flour
  • 2 tablespoons granulated sugar
  • 2 ¼ teaspoons instant yeast
  • ½ teaspoon salt
  • ½ cup milk
  • ¼ cup unsalted butter
  • ¼ cup water
  • 1 teaspoon vanilla extract
  • 2 large eggs

For the Filling

  • ¼ cup unsalted butter, softened
  • ½ cup packed brown sugar
  • 2 teaspoons ground cinnamon
  • ¼ cup pure maple syrup

For the Maple Glaze

  • 1 cup powdered sugar
  • 2 tablespoons pure maple syrup
  • 1–2 tablespoons milk (adjust for desired consistency)

Instructions

1. Prepare the Dough

  1. In a large mixing bowl, combine the flour, sugar, yeast, and salt.
  2. Heat the milk, butter, and water together until warm (not hot). Stir in the vanilla extract.
  3. Slowly combine the wet ingredients with the dry ingredients, adding the eggs one by one. Stir until a soft, cohesive dough comes together.
  4. Turn the dough out onto a floured surface and knead for 8–10 minutes until it becomes smooth and elastic. Alternatively, use a stand mixer fitted with a dough hook for about 5 minutes.
  5. Transfer the dough to a greased bowl, cover it with a damp cloth, and set it in a warm spot to rise for 1–2 hours, or until it has doubled in size.

2. Make the Filling

  1. In a small bowl, combine the softened butter, brown sugar, and cinnamon, stirring until the mixture forms a smooth, spreadable paste.
  2. Stir in the maple syrup to combine, creating a luscious filling.

3. Roll and Assemble

  1. Roll the risen dough into a large rectangle, about 12×16 inches.
  2. Spread the cinnamon-maple filling evenly over the dough, leaving a ½-inch border around the edges.
  3. Roll the dough tightly from the longer side into a log. Pinch the edges to seal.
  4. Cut the dough log into 12 equal rolls and arrange them in a greased baking dish with the cut sides facing up. Cover the dish and let the rolls rise for 30–45 minutes.

4. Bake to Perfection

  1. Preheat the oven to 375°F (190°C).
  2. Bake the rolls for 20–25 minutes, or until golden brown and cooked through. Let them cool slightly before glazing.

5. Glaze and Serve

  1. In a small bowl, whisk together powdered sugar, maple syrup, and milk until smooth. Adjust the consistency with more milk if necessary.
  2. Drizzle the glaze generously over the warm cinnamon rolls.
  3. Serve fresh and enjoy the gooey, maple-infused goodness!

Conclusion:

Golden Maple Cinnamon Rolls bring together the best of both worlds—pillowy soft dough and a rich, caramelized maple-cinnamon swirl. Whether you enjoy them fresh out of the oven or as an indulgent snack later in the day, these rolls are sure to elevate any moment. With a straightforward recipe and simple ingredients, you’re just steps away from creating a bakery-style masterpiece at home. Why not make today a little sweeter?

How to Teach Kids Cooking and Kitchen Safety: Fun Educational Tools

Cooking with kids is more than just a fun activity—it’s an opportunity to teach essential life skills, build confidence, and foster creativity. However, introducing children to the kitchen comes with its own set of challenges, especially when it comes to ensuring their safety. The good news is that there are countless educational tools, apps, books, and courses designed to make learning both engaging and safe.

In this guide, we’ll explore the best resources for teaching kids about recipes and kitchen safety. From using tools like a slice safety knife to teaching hygiene with colored cutting boards food safety, and emphasizing cooker safety rules, these resources will help you raise little chefs while keeping them safe.


Why Teach Kids to Cook?

Teaching kids to cook has many benefits, including:

  1. Life Skills: Cooking equips children with essential skills they’ll use throughout their lives.
  2. Confidence: Successfully preparing a dish fosters a sense of accomplishment.
  3. Family Bonding: Cooking together strengthens family connections.
  4. Healthier Choices: Kids who cook are more likely to understand nutrition and make healthy food choices.
  5. Creativity: Experimenting with recipes allows kids to express themselves in new ways.

1. Apps for Teaching Kids Cooking and Kitchen Safety

Apps are an interactive and accessible way to teach children about cooking and safety. These digital tools often combine games, videos, and step-by-step instructions to keep kids engaged.

Recommended Apps

  • Toca Kitchen 2: A fun app that lets kids experiment with ingredients, teaching them about food combinations and preparation techniques.
  • Kid Chef: Provides simple recipes and instructions tailored to children while emphasizing basic safety tips like handling knives and avoiding burns.
  • SuperCook: A recipe app that allows kids to input available ingredients and discover recipes, encouraging them to reduce food waste and be creative.

Benefits of Using Apps

  • Interactive lessons make learning fun and memorable.
  • Videos demonstrate safe practices, such as knife skills or proper stove use.
  • Many apps include timers and alerts to teach time management in cooking.

2. Essential Kitchen Tools for Kids

The right tools make cooking safe and enjoyable for children. Here are a few must-haves for teaching kids how to cook safely:

Slice Safety Knife

A slice safety knife is specifically designed for children. These knives are sharp enough to cut soft foods like fruits and vegetables but are made with safety in mind to prevent accidents.

  • Recommended Brands: Opinel Le Petit Chef Knife Set, Kinderkitchen Knives.
  • Benefits: Helps kids build confidence with cutting while minimizing risks.
  • Tips: Start with soft foods like bananas or cucumbers before moving to harder items.

Colored Cutting Boards Food Safety

Using colored cutting boards food safety is an excellent way to teach kids about hygiene and avoiding cross-contamination.

  • Color Coding Tips:
    • Red: Raw meats.
    • Green: Fruits and vegetables.
    • Blue: Fish and seafood.
    • Yellow: Cooked foods.
    • White: Dairy or bread.
  • Benefits: Kids learn to associate colors with specific tasks, reinforcing food safety rules.

Other Must-Have Tools

  • Heat-Resistant Gloves: Protect little hands when handling hot dishes.
  • Kid-Sized Utensils: Smaller tools make it easier for children to handle cooking tasks.
  • Non-Slip Mixing Bowls: Prevent spills and make stirring safer.

3. Books That Teach Cooking and Kitchen Safety

Books provide an excellent way for kids to learn about cooking and safety in a fun and engaging format. Here are some top picks:

Recommended Books

  • “The Complete Cookbook for Young Chefs” by America’s Test Kitchen Kids: A comprehensive guide with kid-friendly recipes and safety tips.
  • “Cooking Class: 57 Fun Recipes Kids Will Love to Make (and Eat!)” by Deanna F. Cook: Includes step-by-step instructions and visuals for young chefs.
  • “Start Smart: Cooking Safety for Kids” by Sharon Draznin: Focuses on teaching safety rules, including cooker safety rules, hygiene, and safe food handling.

Why Books Are Effective

  • Step-by-step visuals make instructions easy to follow.
  • Stories and activities engage kids while teaching them essential lessons.
  • Recipes are often designed to be simple and safe, perfect for little hands.

4. Online Courses for Kids’ Cooking and Safety

For families who want a structured learning experience, online courses can be a fantastic option. Many platforms offer classes tailored specifically for kids, combining cooking skills with kitchen safety education.

Popular Online Courses

  • Rouxbe Kids Cooking School: Offers lessons on basic cooking techniques and food safety.
  • Kids Cook Real Food: A subscription-based program with courses for all ages, focusing on everything from knife skills to stovetop safety.
  • Outschool – Beginner Cooking Classes for Kids: Provides live, interactive classes that teach kids how to cook while following safety rules.

Benefits of Online Courses

  • Professional chefs and instructors provide guidance.
  • Kids learn at their own pace with video tutorials.
  • Safety is integrated into every lesson, from handling tools to following cooker safety rules.

5. Teaching Cooker Safety Rules

One of the most important aspects of kitchen safety for kids is understanding how to use stoves and ovens safely. Here are some simple rules to teach:

Key Cooker Safety Rules

  1. Supervision: Always cook with an adult present.
  2. Turn Pot Handles Inward: Prevent pots from being accidentally knocked off the stove.
  3. Use the Right Burner Size: Match pots and pans to the correct burner to avoid spills or uneven heating.
  4. Wear Tight-Fitting Clothes: Avoid loose clothing that can catch fire.
  5. Turn Off Burners: Teach kids to always double-check that burners and ovens are turned off after use.

Reinforcing the Rules

  • Practice turning burners on and off safely with supervision.
  • Use visual aids like stickers to mark “hot” zones in the kitchen.
  • Reward kids for following safety rules with positive reinforcement.

6. Fun Activities to Reinforce Kitchen Safety

Teaching kitchen safety doesn’t have to be boring. Incorporate games and activities to make learning enjoyable for kids.

Safety Games

  • Knife Skill Challenges: Use a slice safety knife and soft foods to create cutting contests with points for proper technique.
  • Color-Coded Chopping Race: Using colored cutting boards food safety, assign kids ingredients to chop on the correct board.
  • Hot Spot Identification: Teach kids to identify dangerous areas around the stove or oven with stickers or visual markers.

Role-Playing

  • Assign roles like “Safety Officer” to oversee tasks like washing hands, cleaning up spills, or monitoring stove use.
  • Create a pretend restaurant scenario where kids practice safe cooking and food prep.

7. Integrating Cooking and Safety into Daily Life

The best way to teach kids cooking and kitchen safety is through consistent practice. Here’s how to make it part of your routine:

  • Meal Prep Together: Assign age-appropriate tasks for each child during meal prep.
  • Encourage Questions: Create an environment where kids feel comfortable asking about safety concerns.
  • Celebrate Achievements: Praise kids for mastering new skills or following safety rules.

Final Thoughts: Raise Confident and Safe Little Chefs

Teaching kids to cook is an investment in their future, giving them the skills to feed themselves and others while building confidence and creativity. By using tools like a slice safety knife, teaching hygiene with colored cutting boards food safety, and emphasizing cooker safety rules, you can create a safe and fun environment for your little chefs.

Whether you rely on apps, books, or online courses, there are endless resources to make learning engaging and enjoyable. Start today, and watch your kids develop into confident, capable cooks who understand the importance of safety in the kitchen.

Top Culinary Courses to Elevate Your Kitchen Skills at Home

Whether you’re an aspiring home chef or someone who simply enjoys experimenting with recipes, investing in culinary education can transform your kitchen skills. With the growing availability of online cooking classes, you can now access expert guidance and certifications from the comfort of your home. From cooking masterclass online programs to homeschool-friendly cooking courses, there’s something for everyone, regardless of skill level or culinary interests.

This guide explores the top culinary courses for amateur chefs, including options for earning an online cooking course with certificate, enhancing your career prospects with a culinary management degree online, and finding affordable options like Groupon cooking classes. Read on to discover how to elevate your culinary journey.


Why Choose an Online Cooking Course?

Online cooking courses are designed to fit into your schedule and budget, providing flexibility for learners of all levels. These courses offer a wide range of benefits:

  • Expert Instruction: Learn from renowned chefs, restaurateurs, and culinary educators.
  • Diverse Topics: Courses range from baking and pastry arts to international cuisines and advanced cooking techniques.
  • Certification Opportunities: Many programs offer certificates to showcase your skills, ideal for personal or professional growth.
  • Accessibility: Accessible anytime, anywhere, making it perfect for homeschool students or busy adults.

1. Cooking Masterclass Online: Learn from the Best

For those who want to learn from world-renowned chefs, a cooking masterclass online offers a premium educational experience. Platforms like MasterClass bring expert chefs to your screen, delivering comprehensive lessons that combine technique, creativity, and insider tips.

Top Cooking MasterClasses

  • Gordon Ramsay Teaches Cooking: Learn knife skills, ingredient selection, and signature dishes from the Michelin-starred chef.
  • Thomas Keller’s Fundamentals of Cooking: Master essential techniques like braising, poaching, and sauce-making from a culinary legend.
  • Dominique Ansel’s Pastry Fundamentals: Perfect your dessert game with tips from the inventor of the Cronut.

Why Choose a MasterClass?

  • High-quality production ensures an engaging and immersive experience.
  • Courses are divided into manageable lessons, making it easy to learn at your own pace.
  • Ideal for both beginners and experienced cooks.

2. Online Cooking Course with Certificate: Boost Your Credentials

Earning a certificate from an online cooking course with certificate can provide tangible proof of your skills, whether for personal achievement or professional advancement. Many platforms offer affordable courses with certificates that cater to a variety of culinary interests.

Popular Platforms Offering Certificates

  • Rouxbe Online Culinary School: Offers professional-grade courses on knife skills, plant-based cooking, and more. Their certification is recognized by the American Culinary Federation.
  • Udemy: Provides budget-friendly courses like “Essential Cooking Skills” and “Vegan Cooking Mastery,” many of which include certificates upon completion.
  • The Chef and the Dish: One-on-one classes with international chefs, including an optional certificate for participants.

Benefits of Certificate Programs

  • Adds credibility to your skills, whether you’re starting a food blog, pursuing catering, or simply expanding your expertise.
  • Many courses align with professional culinary standards.

3. Culinary Management Degree Online: For Aspiring Professionals

If you’re serious about a career in the culinary world, consider pursuing a culinary management degree online. These programs blend practical kitchen skills with business acumen, preparing you for leadership roles in restaurants, catering companies, or culinary entrepreneurship.

Top Institutions Offering Culinary Management Degrees

  • Escoffier School of Culinary Arts: Provides a fully online Associate of Occupational Studies Degree in Culinary Arts and a Bachelor’s in Culinary Management. Courses include menu planning, cost control, and leadership skills.
  • Johnson & Wales University: Offers an online Bachelor’s in Culinary Arts and Food Service Management, focusing on advanced cooking techniques and restaurant management.
  • Institute of Culinary Education (ICE): Offers a hybrid online and in-person Culinary Arts and Management diploma.

Why Choose This Path?

  • Ideal for those looking to open their own restaurant, manage a kitchen, or work in food service at a corporate level.
  • Provides industry-recognized qualifications.

4. Groupon Cooking Classes: Budget-Friendly Options

Not every aspiring chef wants to spend a fortune on culinary education. Groupon cooking classes offer an affordable way to explore various cuisines and techniques. While these deals often focus on in-person classes, many now include online options.

Examples of Groupon Cooking Deals

  • Regional Cuisine Workshops: Learn Italian pasta-making, French pastry techniques, or sushi rolling at a fraction of the usual cost.
  • Specialized Skills: Classes focusing on grilling, dessert decoration, or vegetarian cooking.
  • Virtual Experiences: Join live-streamed classes hosted by professional chefs from around the world.

Benefits of Groupon Classes

  • Great for beginners or those exploring new cuisines without committing to a full course.
  • Often includes discounts for group participation, making it a fun activity for families or friends.

5. Homeschool Cooking Classes: Teaching Kids Kitchen Skills

Cooking isn’t just an essential life skill—it’s also a fun and engaging educational activity for homeschool students. A homeschool cooking class can teach kids valuable lessons in math, science, and creativity, all while fostering independence in the kitchen.

Top Platforms for Homeschool Cooking

  • Kids Cook Real Food: A subscription-based program designed for children of all ages, covering everything from knife skills to advanced cooking.
  • Outschool: Offers live, interactive cooking classes tailored for homeschool students, such as “Baking Basics for Beginners” and “Exploring International Cuisines.”
  • America’s Test Kitchen Kids: Features step-by-step video tutorials and printable recipes, perfect for hands-on learning.

Why Include Cooking in Homeschool Curriculums?

  • Promotes teamwork and problem-solving skills.
  • Integrates easily with lessons on nutrition, cultural studies, and budgeting.
  • Encourages creativity and builds confidence.

Choosing the Right Culinary Course for You

With so many options available, selecting the right course depends on your goals, budget, and level of expertise. Here’s a quick guide to help you decide:

For Beginners:

  • Start with Groupon cooking classes or basic courses on platforms like Udemy.
  • Focus on foundational skills, such as knife techniques and basic recipes.

For Home Chefs Looking to Advance:

  • Explore cooking masterclass online options to learn from industry icons.
  • Invest in certificate programs to validate your skills.

For Aspiring Professionals:

  • Enroll in a culinary management degree online for comprehensive training in both cooking and business.
  • Focus on programs that offer practical experience and strong industry connections.

For Families and Kids:

  • Choose homeschool cooking classes that are fun, interactive, and age-appropriate.
  • Encourage kids to participate in meal planning and preparation.

Final Thoughts: Elevate Your Culinary Journey

Whether you’re cooking for pleasure, pursuing a career in the culinary arts, or looking for a homeschool activity, online culinary courses provide endless opportunities to elevate your skills. From high-quality cooking masterclass online programs to budget-friendly Groupon cooking classes, there’s an option for every aspiring chef.

For those seeking professional growth, an online cooking course with certificate or even a culinary management degree online can open doors to exciting opportunities. Meanwhile, homeschool-friendly cooking classes make learning fun and practical for kids and families.

No matter where you are in your culinary journey, investing in education will not only improve your skills but also deepen your appreciation for the art of cooking. So, take the first step—enroll in a course today and watch your kitchen skills soar to new heights!

Stay Connected

Get recipes via email: