

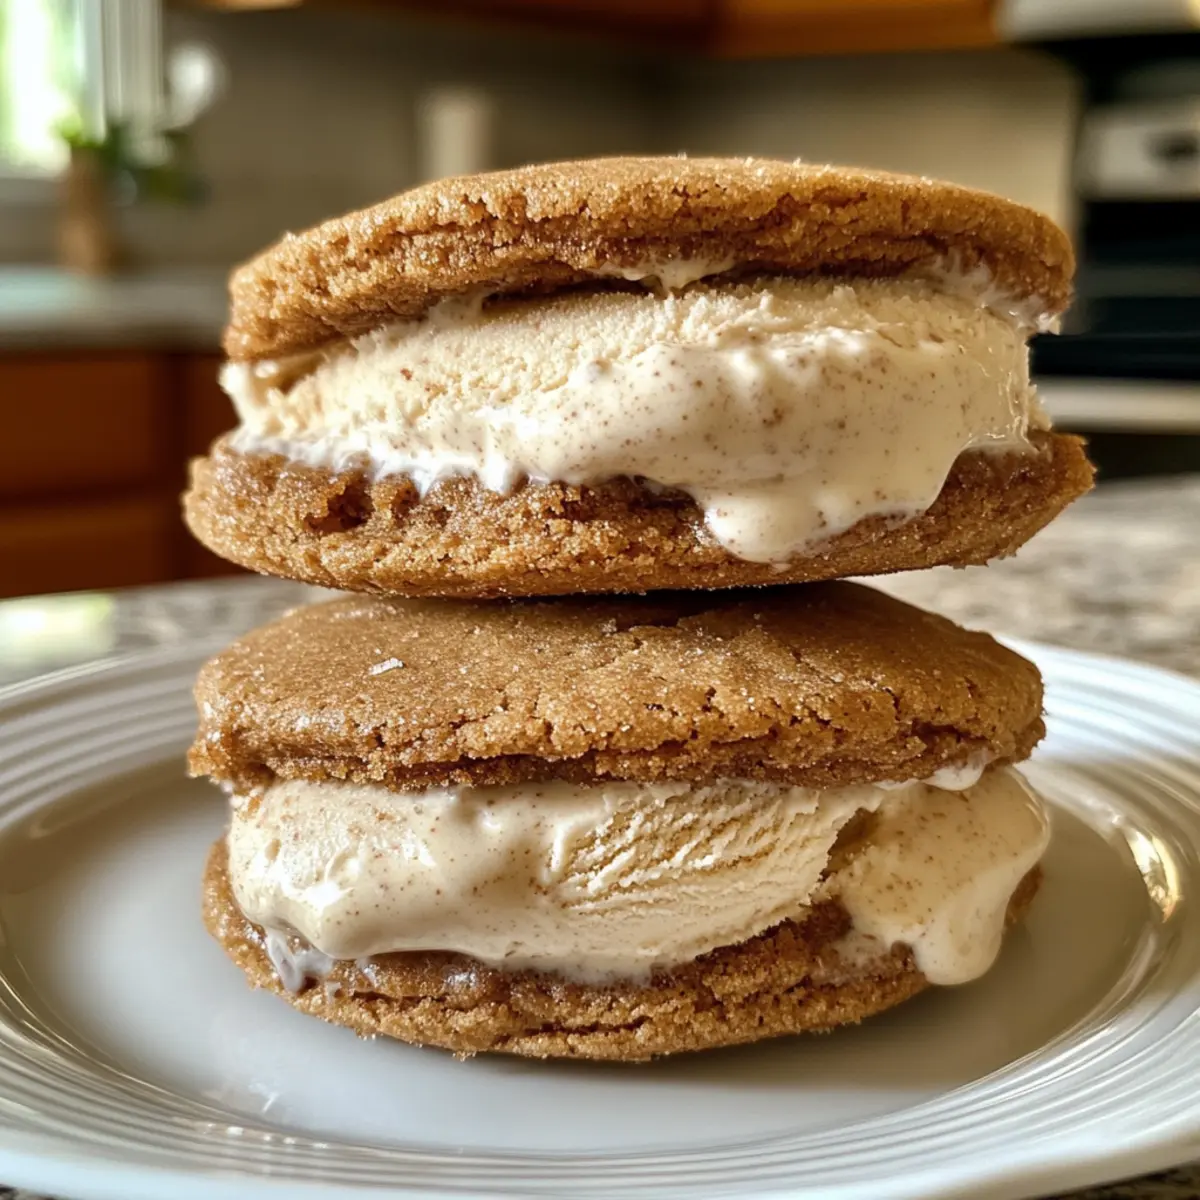
The aroma of freshly baked cookies fills the air, instantly transporting me back to summer afternoons spent in the kitchen. There’s something magical about combining warm, chewy salted brown sugar cookies with velvety butterscotch ice cream, turning them into Salted Brown Sugar Butterscotch Ice Cream Sandwiches that are nothing short of delightful. With a no-churn ice cream method, this recipe effortlessly caters to your seasonal cravings while keeping your kitchen cool. Not only do these sandwiches come together quickly, but they’re sure to be a showstopper when shared with family and friends. So, are you ready to treat yourself to a sweet indulgence that combines the best of both worlds?
Why are these ice cream sandwiches irresistible?
Chewy Texture: Each bite of the salted brown sugar cookies delivers a soft, chewy experience that’s simply delightful.
Butterscotch Bliss: The creamy butterscotch ice cream adds a rich, sweet layer, creating a magical flavor combination that feels like a summer dream.
No Churn Magic: Effortlessly whip up the velvety ice cream without the need for specialized equipment, making it accessible for everyone!
Quick Assembly: These sandwiches come together in no time, perfect for impromptu gatherings or a cozy night in.
Versatile Delight: Feel free to experiment with flavors or toppings, like drizzling chocolate sauce or using different cookie types for a fun twist!
Crowd-Pleasing Treat: Whether it’s a family barbecue or a casual get-together, these ice cream sandwiches are a guaranteed hit!
Salted Brown Sugar Butterscotch Ice Cream Sandwich Ingredients
For the Cookies
- AP Flour – Provides structure and stability for the cookies; no direct substitution suggested.
- Bread Flour – Enhances chewiness and texture; can be replaced with all-purpose flour for a softer cookie.
- Baking Soda – Acts as a leavening agent for cookie spread and rise; ensure it’s fresh for optimal results.
- Salt – Balances sweetness and enhances flavor; fleur de sel or sea salt can be used as substitutes.
- Softened Butter – Adds moisture and richness; can use unsalted butter, but adjust salt content.
- Sugar – Contributes sweetness and structure; granulated sugar can be replaced with coconut sugar for a slight caramel flavor.
- Brown Sugar – Imparts moisture and a delightful toffee-like flavor; light or dark varieties can be used interchangeably.
- Eggs – Serve as a binding agent and contribute moisture; flax eggs can be a vegan substitute.
- Vanilla Extract – Enhances overall flavor; use pure vanilla for the best results.
- Coarse Salt – Elevates the cookies’ flavor post-baking; use flaky sea salt for a gourmet touch.
For the Butterscotch Ice Cream
- Heavy Cream – Creates a rich, creamy texture; coconut cream provides a non-dairy version.
- Sweetened Condensed Milk – Offers sweetness and creamy texture without the need for churning; evaporated milk can be a lower-sugar alternative, but texture will differ.
- Butterscotch Chips – Add flavor and texture to the ice cream; can be replaced with chocolate chips if preferred.
These ingredients, combined, yield the perfect Salted Brown Sugar Butterscotch Ice Cream Sandwiches that are bursting with rich flavors and delightful textures!
Step‑by‑Step Instructions for Salted Brown Sugar Butterscotch Ice Cream Sandwiches
Step 1: Preheat the Oven
Begin by preheating your oven to 350°F (175°C). While the oven warms up, line two baking sheets with parchment paper, ensuring ample space between cookies when placing the dough. This setup will help create perfectly baked salted brown sugar cookies that are essential for your delicious ice cream sandwiches.
Step 2: Mix Dry Ingredients
In a medium bowl, whisk together all-purpose flour, bread flour, baking soda, and salt until thoroughly combined. This mixture is vital for the structure and chewiness of your cookies, providing a delightful texture. Once combined, set it aside for later use as you proceed with the wet ingredients.
Step 3: Cream Butter and Sugars
In a large mixing bowl, beat softened butter with granulated and brown sugar until the mixture becomes light and fluffy, about 3-4 minutes. This step incorporates air into the butter, enhancing the cookie’s texture. Next, add in the eggs and vanilla extract, mixing until everything is smooth and well blended, ensuring your cookies are rich in flavor.
Step 4: Combine Mixtures
Gradually add the dry ingredient mixture to the wet ingredients, stirring gently until just combined. Be mindful not to overmix; you want your salted brown sugar butterscotch cookies to remain tender. The dough should be soft yet slightly sticky, perfect for scooping onto the baking sheets.
Step 5: Scoop Dough
Using a tablespoon or a cookie scoop, portion out the dough onto the lined baking sheets, leaving about 2 inches of space between each scoop. This allows the cookies to spread during baking, creating that perfect chewy center and slightly crisp edges that you’re looking for in these sandwiches.
Step 6: Bake the Cookies
Place the baking sheets in the preheated oven and bake for 8-10 minutes, or until the edges are golden brown while the centers remain soft. Once baked, immediately sprinkle the cookies with coarse salt to enhance their flavor. Allow the cookies to cool on the baking sheets for a few minutes before transferring them to a wire rack.
Step 7: Cool Cookies
After a gentle resting period on the baking sheets, transfer your cookies to a wire rack to cool completely. This cooling process is crucial, as it helps the cookies firm up and retain their chewy texture, making them perfect for holding the luscious butterscotch ice cream.
Step 8: Prepare Ice Cream Mixture
In a large bowl, beat the heavy cream with a hand mixer until stiff peaks form, indicating it’s perfectly whipped. Gently fold in the sweetened condensed milk, vanilla extract, and a pinch of salt until just combined. Be cautious not to deflate the whipped cream, as this is the key to a light and creamy ice cream.
Step 9: Mix in Butterscotch Chips
Quickly and gently fold the melted butterscotch chips into the whipped cream mixture. This step is essential, as the rich butterscotch flavor infuses the ice cream, creating a delightful flavor profile in your salted brown sugar butterscotch ice cream sandwiches. Work swiftly before the mixture begins to thicken.
Step 10: Freeze the Ice Cream
Divide the ice cream mixture evenly between two lined cake pans. Smooth the surface with a spatula and freeze for at least 2 hours or until fully set. This no-churn ice cream method allows you to prepare the dessert without an ice cream maker, resulting in creamy butterscotch ice cream ready for sandwiches.
Step 11: Assemble the Sandwiches
Once the ice cream is solidified, remove it from the cake pans and prepare to assemble your sandwiches. Use a round cutter or knife to create circles of ice cream and place one round between two cookies. Press down gently to adhere, ensuring the creamy butterscotch ice cream is well encapsulated by the chewy cookies.
Step 12: Wrap and Freeze
Wrap each assembled salted brown sugar butterscotch ice cream sandwich tightly in plastic wrap or place them in individual zippered bags. Return them to the freezer to set for a more extended period or until ready to serve. This makes for a perfect make-ahead sweet treat for those warm summer days!
What to Serve with Salted Brown Sugar Butterscotch Ice Cream Sandwiches
Imagine a warm summer evening, laughter echoing through the air, and the sweet, rich aroma of dessert beckoning you to indulge.
-
Fresh Berries: Juicy strawberries or tangy raspberries provide a refreshing contrast to the rich flavors of the sandwich, balancing sweetness with tartness.
-
Chocolate Sauce: A drizzle of warm chocolate sauce adds a decadent touch, enhancing the butterscotch flavor and making every bite even more indulgent.
-
Whipped Cream: Light and airy whipped cream brings a silky texture that complements the chewy cookies and creamy ice cream, making it a delightful addition.
-
Mint Leaves: A sprig of fresh mint offers a pop of color and a refreshing herbal note that cuts through the richness, adding brightness to the whole dessert.
-
Coffee: A cup of warm, freshly brewed coffee pairs beautifully with these ice cream sandwiches, providing a perfect contrast to the sweetness and enriching the flavors.
-
Fruit Sorbet: For an extra cooling effect, serve a scoop of fruit sorbet on the side. The fruity ice treat will elevate the dessert experience with its bright and refreshing taste.
-
Nutty Caramel Sauce: Drizzling nutty caramel sauce enhances the complexity of flavors, leaving a rich taste that lingers delightfully on the palate.
-
Ice Cold Milk: A classic pairing, a tall glass of ice-cold milk not only balances the sweetness but also ties together the flavors of childhood classics and indulgent desserts.
Make Ahead Options
These Salted Brown Sugar Butterscotch Ice Cream Sandwiches are perfect for meal prep, allowing you to savor the summer treat without all the last-minute fuss! You can prepare the cookie dough up to 24 hours in advance; simply cover and refrigerate it until you’re ready to bake. The cookies can also be baked ahead of time and stored in an airtight container for up to 3 days. For the ice cream, you can mix and freeze it at least 2 hours prior to assembling the sandwiches. When you’re ready to enjoy, simply cut ice cream rounds, sandwich them between the cookies, and wrap them tightly before returning them to the freezer until needed. This way, you’ll have delicious homemade treats ready to serve with minimal effort whenever sweet cravings strike!
Expert Tips for Salted Brown Sugar Butterscotch Ice Cream Sandwiches
-
Quality Ingredients: Use high-quality butter and pure vanilla extract to elevate flavors, ensuring your salted brown sugar butterscotch ice cream sandwiches truly shine.
-
Monitor Baking Time: Keep a close eye on your cookies while baking; they should be golden at the edges but still soft in the center to prevent them from hardening once frozen.
-
Chill the Dough: If your dough feels too warm, chill it for 30 minutes before baking. This helps maintain the chewy texture in your final salted brown sugar cookies.
-
Mix Carefully: When combining the ice cream ingredients, fold gently to keep the whipped cream’s airiness, resulting in smooth, creamy butterscotch ice cream.
-
Wrap Tight: Ensure you wrap your assembled sandwiches tightly in plastic wrap or place them in bags to prevent freezer burn, keeping each sandwich fresh and delicious.
How to Store and Freeze Salted Brown Sugar Butterscotch Ice Cream Sandwiches
Room Temperature: Serve the sandwiches immediately after assembly for the best taste. They should not be left out for more than 30 minutes to prevent ice cream melting.
Fridge: If you have leftover ice cream, it can be stored in the refrigerator for up to 3 days, but it’s best enjoyed fresh in your salted brown sugar butterscotch ice cream sandwiches.
Freezer: Wrap each sandwich tightly in plastic wrap or place in individual zippered bags. They can be kept in the freezer for up to 2-3 weeks while maintaining their delightful flavor and texture.
Reheating: There’s no need to reheat ice cream sandwiches, but if they have been frozen for a long time, let them sit at room temperature for a few minutes to soften slightly before enjoying.
Salted Brown Sugar Butterscotch Ice Cream Sandwiches Variations
Feel free to explore these delightful twists to make your ice cream sandwiches even more appealing and personalized!
-
Chocolate Swap: Replace butterscotch chips with semi-sweet or dark chocolate chips for a deeper flavor. The richness of chocolate pairs beautifully with the brown sugar cookies.
-
Nutty Crunch: Add chopped nuts like pecans or walnuts to your cookie dough for a delightful crunch. This adds an unexpected texture that elevates the entire sandwich!
-
Cinnamon Twist: Incorporate a teaspoon of cinnamon into the cookie dough for a warm, spiced flavor. The scent of cinnamon wafting through your kitchen is irresistible!
-
Caramel Drizzle: Drizzle some caramel sauce over the ice cream before sandwiching it between the cookies. This extra indulgence enhances the overall sweetness and offers a sticky surprise.
-
Fruit Addition: Layer ripe banana or fresh berries into your sandwiches for a refreshing burst of flavor. The natural sweetness from fruits complements the cookies perfectly.
-
Dairy-Free Delight: Swap heavy cream with coconut cream for a delicious non-dairy option. Your sandwiches will still be creamy, with a hint of tropical flavor!
-
Different Sugar: Experiment by substituting brown sugar with maple sugar for a unique, rich taste that adds depth to your cookies. It’s a fun way to change up the sweetness without extra effort.
-
Savory Pairing: Add a sprinkle of sea salt on top of the ice cream before sandwiching. This little touch heightens the flavor and brings balance to the sweetness.
As you explore these variations, consider pairing your sandwiches with a side of refreshing avocado and tomato salad to balance the sweetness or serve them alongside a scoop of rich, creamy blueberry cream cheese for a delightful dessert spread!
Salted Brown Sugar Butterscotch Ice Cream Sandwiches Recipe FAQs
How do I select the right brown sugar for the cookies?
Absolutely! You can use either light or dark brown sugar in this recipe, depending on your flavor preference. Light brown sugar has a milder flavor, while dark brown sugar provides a richer, more pronounced caramel taste due to its higher molasses content. For a unique twist, consider experimenting with a blend of both!
What’s the best way to store these ice cream sandwiches?
I recommend wrapping each sandwich tightly in plastic wrap or placing them in individual zippered bags to maintain freshness. When stored properly, these Salted Brown Sugar Butterscotch Ice Cream Sandwiches can last in the freezer for up to 2-3 weeks. Just remember to take them out a few minutes before serving for the best taste!
Can I freeze the ice cream mixture before assembling the sandwiches?
Very! You can freeze the prepared butterscotch ice cream mixture in lined cake pans for at least 2 hours until solid. Once set, scoop out rounds of the ice cream to assemble your sandwiches. If you plan to make the ice cream mixture in advance, it’s best to do so and then assemble the sandwiches right before serving, much to everyone’s delight.
What are some common issues when making these ice cream sandwiches?
A common issue is overbaking the cookies, which can lead to a hard texture, especially after freezing. Make sure to bake them until the edges are golden but the centers remain soft. If your cookies spread too much during baking, the dough might have been too warm; you can chill it for about 30 minutes before scooping.
Can my pets share in this treat?
While your furry friends may be curious about these sandwiches, they should stick to their own treats! The cookies contain sugar and the butterscotch ice cream is not suitable for pets due to the dairy content. If you want to treat your pets, consider making dog-friendly cookies or ice cream made especially for them.
Salted Brown Sugar Butterscotch Ice Cream Sandwiches Bliss
Ingredients
Equipment
Method
- Preheat your oven to 350°F (175°C) and line two baking sheets with parchment paper.
- In a medium bowl, whisk together all-purpose flour, bread flour, baking soda, and salt until combined.
- In a large bowl, beat softened butter with granulated and brown sugar until light and fluffy, then add eggs and vanilla extract.
- Gradually add the dry mixture to the wet ingredients, stirring until just combined.
- Scoop dough onto baking sheets, leaving space for spreading.
- Bake for 8-10 minutes until edges are golden and centers soft, then sprinkle with coarse salt.
- Transfer cookies to a wire rack to cool completely.
- Beat the heavy cream until stiff peaks form, then fold in sweetened condensed milk, vanilla extract, and salt until combined.
- Gently fold butterscotch chips into whipped cream mixture.
- Divide ice cream mixture between lined cake pans and freeze for at least 2 hours until set.
- Assemble sandwiches by placing a round of ice cream between two cookies and gently pressing together.
- Wrap each sandwich tightly and freeze until ready to serve.