

There’s something truly magical about the smell of fresh, homemade bread wafting through the house. For me, the process of baking bread is deeply personal. It takes me back to childhood afternoons spent in my grandmother’s kitchen, where she would expertly knead the dough, her hands moving rhythmically, almost as if she was telling a story. Her kitchen always felt warm, full of love, and her bread was the heart of every meal.
As the bread baked, the aroma filled every corner of the house, and I couldn’t wait to tear off a warm slice, smother it with butter, and savor the simple pleasure of homemade goodness. Today, I continue that tradition with my own family, passing down the art of baking bread and making memories along the way. This recipe is a modern take on the classic homemade bread, but it carries the same spirit of love and warmth that my grandmother instilled in me.
Homemade bread has a unique charm. Unlike store-bought loaves, it’s not just about the ingredients or the process—it’s about the experience. From mixing the dough to kneading it, the entire process becomes a form of therapy, a way to slow down and connect with your senses. And the best part? The soft, warm loaf that emerges from the oven, ready to be enjoyed with family, friends, or just by yourself in the quiet of your kitchen. This bread recipe is not just a meal; it’s a reminder of the simple joys that are often overlooked in today’s fast-paced world.
Why This Homemade Bread Recipe is Worth the Effort
At first glance, making bread from scratch may seem like a daunting task, especially for beginners. The ingredients list might look intimidating, and the thought of kneading dough and waiting for it to rise might feel like a test of patience. However, this recipe is designed to be easy and forgiving, so even novice bakers can achieve perfect results without the stress.
What sets this homemade bread recipe apart is the balance of simplicity and flavor. You don’t need fancy equipment or hard-to-find ingredients. With just a few pantry staples—flour, yeast, salt, and warm water—you can create a delicious loaf that rivals anything from a bakery. The dough is easy to work with, and the process gives you plenty of time to relax while the bread does its magic.
Unlike store-bought bread, which often contains preservatives and additives, homemade bread is pure, fresh, and free from anything artificial. The texture is soft and pillowy, with a golden-brown crust that adds just the right amount of crunch. Whether you enjoy it on its own, with a smear of butter, or as a side to your favorite meal, this homemade bread brings a level of satisfaction that can’t be replicated with store-bought alternatives.
Ingredients:
| Dough | |
|---|---|
| 1 teaspoon yeast (2 g) | |
| 2 glasses warm water (400 ml) | |
| 1 teaspoon salt (6 g) | |
| 5 cups all-purpose flour (550 g) |
Directions:
- In a small bowl, dissolve the yeast in warm water and let it sit for about 5 minutes, until it starts to foam. This shows the yeast is active.
- In a large mixing bowl, combine the flour and salt. Stir the mixture gently.
- Gradually pour the yeast mixture into the flour mixture while stirring until the dough begins to form.
- Turn the dough onto a lightly floured surface and knead for about 8–10 minutes, or until the dough becomes smooth and elastic.
- Place the dough into a greased bowl, cover it with a damp cloth, and let it rise in a warm area for 1 to 1.5 hours, or until it has doubled in size.
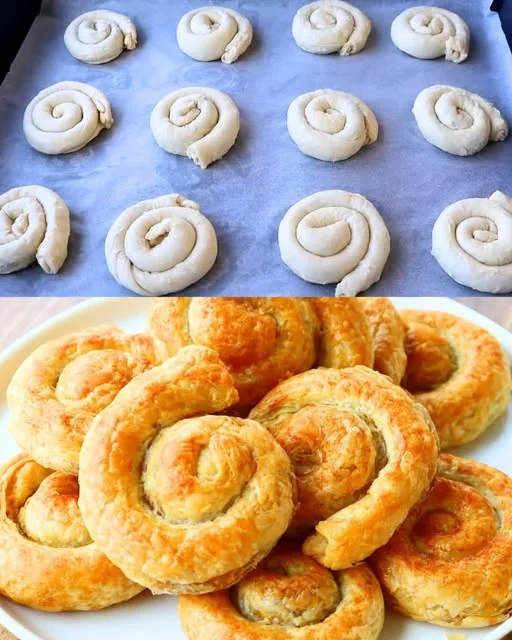
- Once the dough has risen, punch it down to remove the air, then shape it into a loaf or divide it into smaller rolls, depending on your preference.
- Preheat the oven to 375°F (190°C). Place the shaped dough on a greased baking sheet and allow it to rise for another 15 minutes.
- Bake for 25–30 minutes, or until the bread sounds hollow when tapped on the bottom, and the crust is golden brown.
- Let the bread cool on a wire rack before slicing and serving.
Nutritional Information (per serving, based on 12 servings):
| Nutrient | Amount per Serving |
|---|---|
| Calories | 130 kcal |
| Protein | 4 g |
| Carbohydrates | 26 g |
| Fiber | 1 g |
| Fat | 1 g |
| Sodium | 160 mg |
Frequently Asked Questions (FAQs)
1. How can I make this bread recipe vegan-friendly?
It’s simple to make this recipe vegan by substituting the ingredients that contain animal products. To make the bread dairy-free, just swap out any butter for a vegan alternative like margarine or olive oil. Additionally, ensure that the yeast you’re using is vegan-friendly, as some yeast brands use animal-derived ingredients in their production process. With these small adjustments, you can enjoy this recipe without any concerns about animal products.
2. What kind of flour should I use for this recipe?
This recipe calls for all-purpose flour, which is versatile and works well for most bread recipes. However, if you want to add a unique twist to your bread, you can experiment with different types of flour. Whole wheat flour can be used for a denser, heartier loaf, while bread flour, which has a higher protein content, can result in a slightly chewier texture. If you opt for a different type of flour, you may need to adjust the water ratio, as whole wheat flour tends to absorb more liquid than all-purpose flour.
3. Can I use instant yeast instead of active dry yeast?
Yes, you can use instant yeast in place of active dry yeast. Instant yeast doesn’t need to be dissolved in warm water before adding it to the flour mixture, which can save you some time. Just mix it directly with the dry ingredients. If you choose instant yeast, the process will remain the same, but you can skip the step of letting the yeast foam in the water.
4. What should I do if my dough doesn’t rise?
If your dough doesn’t rise as expected, there could be a few reasons why. First, check the expiration date on your yeast, as old yeast may lose its potency. Second, make sure the water you used to activate the yeast was warm, not too hot or too cold. Yeast works best in warm water, around 110°F (43°C). If the dough still doesn’t rise, it may need a warmer environment. Try placing it in a slightly warm oven or covering it with a damp cloth and letting it rest in a cozy spot for a longer period.
5. How do I know when my bread is done baking?
To check if your bread is done, tap the bottom of the loaf. If it sounds hollow, it’s ready. You can also use a thermometer to measure the internal temperature of the bread, which should be around 190°F (88°C). Keep an eye on the color of the crust as well—it should be golden brown. If you find that the bread is browning too quickly, you can cover it loosely with foil and continue baking until it reaches the right texture.
6. Can I freeze the dough?
Yes, you can freeze the dough for later use. After kneading the dough, shape it into a ball and place it in a greased bowl. Cover it tightly with plastic wrap and then foil. Freeze it for up to three months. When you’re ready to bake, simply thaw the dough overnight in the fridge, then let it rise and proceed with the baking instructions as usual.
7. How can I store homemade bread?
Homemade bread is best enjoyed fresh, but you can store it for later use. To keep the bread fresh, wrap it in a clean kitchen towel or place it in a breadbox. Avoid storing it in plastic, as this can make the crust soggy. For longer storage, you can freeze individual slices or the whole loaf. Simply wrap the bread tightly in plastic wrap and foil, then store it in the freezer for up to three months. When ready to enjoy, reheat slices in the oven or microwave.
Tips for Perfect Homemade Bread
- Use quality yeast: Fresh, high-quality yeast is key to achieving a great rise. Check the expiration date before use, and store your yeast in a cool, dry place.
- Measure your flour properly: If you scoop flour directly from the container with your measuring cup, you may end up with too much flour. Instead, spoon the flour into the measuring cup and level it off for more accurate results.
- Knead with care: Kneading is an essential part of developing the gluten in the dough. Don’t rush this step—take your time, and make sure the dough is smooth and elastic before letting it rise.
- Allow enough rising time: The first rise is crucial for developing flavor and texture. If you’re in a rush, you can speed it up by placing the dough in a warm, slightly humid environment, but don’t skip this step. A slow rise is often the secret to the best flavor.
- Experiment with add-ins: Once you’re comfortable with the basic bread recipe, you can customize it by adding herbs, garlic, or even cheese to the dough before baking. These additions can elevate the flavor and make the bread unique to your tastes.
The Power of Homemade Bread: A Conclusion
There’s a special kind of magic that happens when you bake bread from scratch. It’s not just about the end product—it’s about the experience. The feeling of your hands working the dough, the anticipation as the dough rises, and the joy when that golden loaf finally comes out of the oven. Homemade bread is a symbol of patience, love, and care, qualities that are often forgotten in today’s fast-paced world.
Baking this homemade bread is a way to connect with those you love, create cherished memories, and enjoy something truly special. And just as my grandmother passed down her bread-making skills to me, I hope you’ll share this recipe with your family and friends, creating new traditions of your own. It’s more than just bread—it’s a gift that keeps on giving, one slice at a time.