

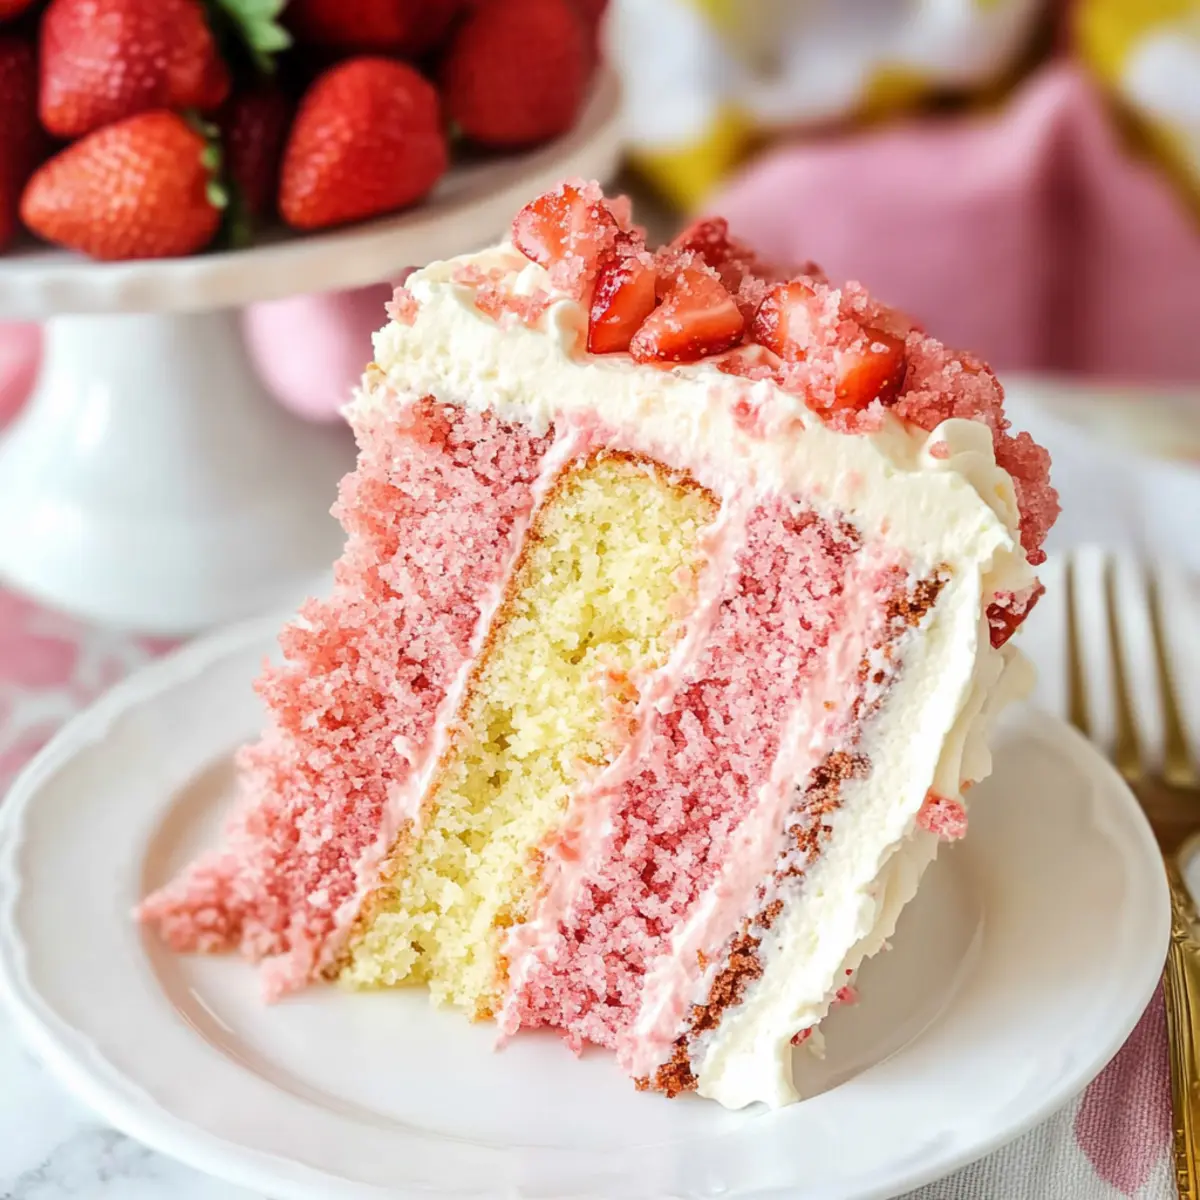
As I sifted through my kitchen pantry, a burst of excitement bubbled up within me—creamy vanilla and sweet strawberries were just waiting to come together. That’s when my vision for a delightful Strawberry Crunchy Layer Cake sparked to life! This mesmerizing cake features moist layers of strawberry and vanilla cake, all wrapped in luscious vanilla frosting. Not only is it a stunning centerpiece for birthdays and special occasions, but it’s also incredibly easy to make, ensuring you’ll have time to enjoy those precious moments with loved ones. As you savor the delightful crunch from the strawberry bits, you’ll appreciate that this treasure is homemade and brimming with fresh flavors. Ready to create a showstopper that will have family and friends asking for seconds? Let’s gather our ingredients and dive into the magic of baking!
Why is This Cake Perfect for You?
Decadent, the Strawberry Crunchy Layer Cake is a feast for the senses, delighting both the eye and palate with vibrant layers. Easy to Make, even novice bakers will appreciate its straightforward instructions and minimal prep time! Versatile enough for any occasion, it adapts beautifully to birthdays or casual gatherings. Fresh Ingredients elevate the flavor, creating that irresistibly homemade taste that fast food simply can’t compare to. Plus, experiencing the satisfying crunch of strawberry bits is an enchanting surprise with every bite. For more delightful homemade inspirations, try our Nutty Vanilla Cake or a refreshing Crunchy Banana Seed Cookie!
Strawberry Crunchy Layer Cake Ingredients
For the Cake
- All-Purpose Flour – Provides structure; for a lighter texture, feel free to use cake flour.
- Baking Powder – Ensures a nice rise; make sure it’s fresh for the best results.
- Salt – Enhances the flavor; substitute with sea salt if preferred.
- Unsalted Butter – Adds moisture and richness; use margarine for a dairy-free option.
- Vegetable Oil – Keeps the cake moist; can be replaced with melted coconut oil for a unique flavor.
- Granulated Sugar – Sweetens the cake; brown sugar is an excellent substitute for a deeper taste.
- Vanilla Extract – Infuses flavor; almond extract can be a sweet twist if you fancy.
- Eggs – Acts as a binding agent; substitute with flax eggs for a vegan alternative.
- Milk – Adds moisture; almond or any plant-based milk works perfectly.
- Strawberry Puree – Delivers that sweet strawberry flavor; fresh strawberries can work if pureed and reduced.
- Strawberry Extract – Enhances the strawberry taste; you may omit this if the puree is strong enough.
- Red Food Coloring – Adds visual appeal; it’s optional and based on your preference.
- Freeze-Dried Strawberry Powder – Adds a delightful crunch; regular flour can substitute if necessary.
For the Frosting
- Unsalted Butter – Essential for a creamy texture; let it reach room temperature for easy mixing.
- Powdered Sugar – Sweetens and thickens the frosting; sifting it first creates a smoother consistency.
- Milk – Adjust the frosting consistency; add as needed for creaminess.
- Vanilla Extract – Enhances the flavor of the frosting; for an extra touch, consider using almond extract.
Get ready to create your own Strawberry Crunchy Layer Cake that will have everyone falling in love with homemade dessert perfection!
Step‑by‑Step Instructions for Strawberry Crunchy Layer Cake
Step 1: Prepare Strawberry Puree
Begin by cooking fresh strawberries in a saucepan over medium heat until they break down, stirring occasionally. This process typically takes about 10-15 minutes. Once reduced to about half in volume, let the puree cool completely before using it in the cake batter. The vibrant color and sweet flavor will be essential for your Strawberry Crunchy Layer Cake.
Step 2: Preheat and Prepare Bakeware
Preheat your oven to 350°F (176°C) and get ready to bake! While the oven heats, prepare four 8-inch round cake pans by greasing them with butter and lightly dusting with flour. This will help the cakes release easily after baking, ensuring that your Strawberry Crunchy Layer Cake maintains its beautiful layers.
Step 3: Mix Dry Ingredients
In a large mixing bowl, whisk together the all-purpose flour, baking powder, and salt until well combined. This adds a light structure to the cake. Set this dry mixture aside as you will be incorporating it with wet ingredients in the next step, ensuring that your cakes rise beautifully and are fluffy.
Step 4: Combine Wet Ingredients
In another bowl, cream together the unsalted butter and granulated sugar until light and fluffy, about 3-5 minutes using an electric mixer. Add the vegetable oil, eggs, and vanilla extract, mixing until just combined. This wet mixture infused with rich flavors will create a moist base for your Strawberry Crunchy Layer Cake.
Step 5: Create the Batter
Gradually add the dry ingredients mixture to the wet ingredients, alternating with the milk. Begin and end with the dry ingredients, mixing gently until just combined. The batter will be thick and creamy; be careful not to overmix as this will affect the texture of your cake.
Step 6: Divide and Flavor the Batter
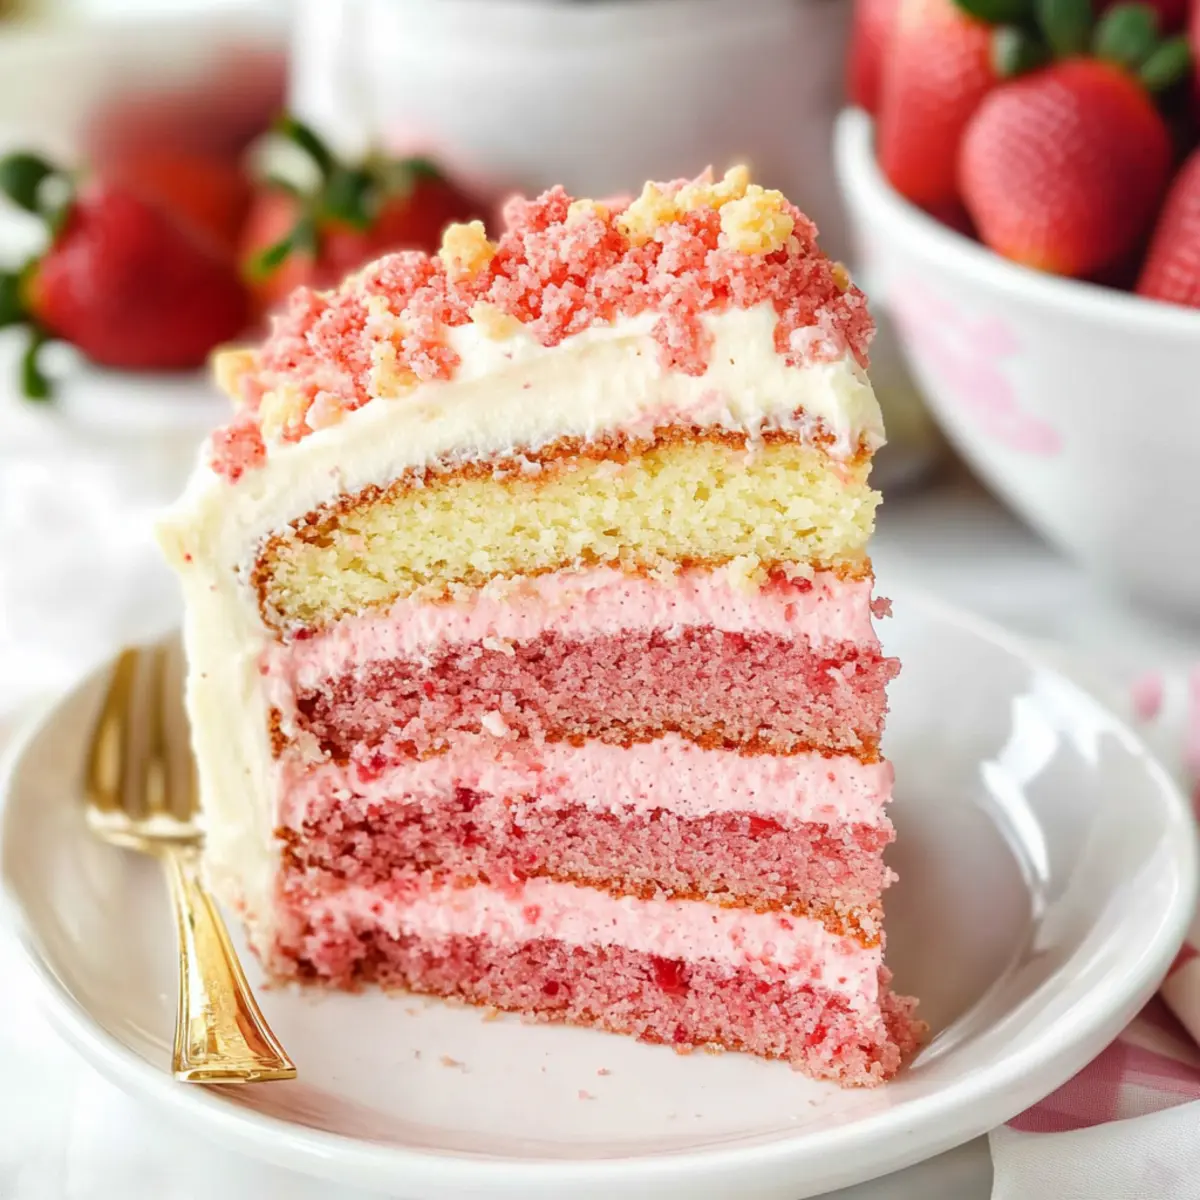
Divide the batter in half, placing each half in separate bowls. To one bowl, add the reserved strawberry puree, strawberry extract, and red food coloring for that vibrant look. In the other bowl, just add a splash more milk to keep it vanilla-flavored. Mix each batter until combined, showcasing the lovely pink and white colors.
Step 7: Bake the Cakes
Carefully pour the pink and white batters into your prepared cake pans, filling them evenly. Bake in the preheated oven for 22-25 minutes, or until a toothpick inserted into the center comes out clean. The cakes should be lightly golden and spring back when touched.
Step 8: Make the Crunchies
While the cakes are cooling, prepare the strawberry and vanilla crunchies. In separate bowls, combine the freeze-dried strawberry powder with flour for the strawberry version and prepare a simple mixture for vanilla. Spread them on a baking sheet and bake in a 350°F (176°C) oven for about 5 minutes, watching closely for a lightly golden color.
Step 9: Prepare the Buttercream Frosting
Start making the buttercream frosting by beating the unsalted butter until smooth and creamy. Gradually add the powdered sugar and mix well, then add milk to achieve your desired consistency. Set aside a portion to mix with a bit of strawberry puree for the filling between cake layers, creating that luscious flavor in your Strawberry Crunchy Layer Cake.
Step 10: Assemble the Cake
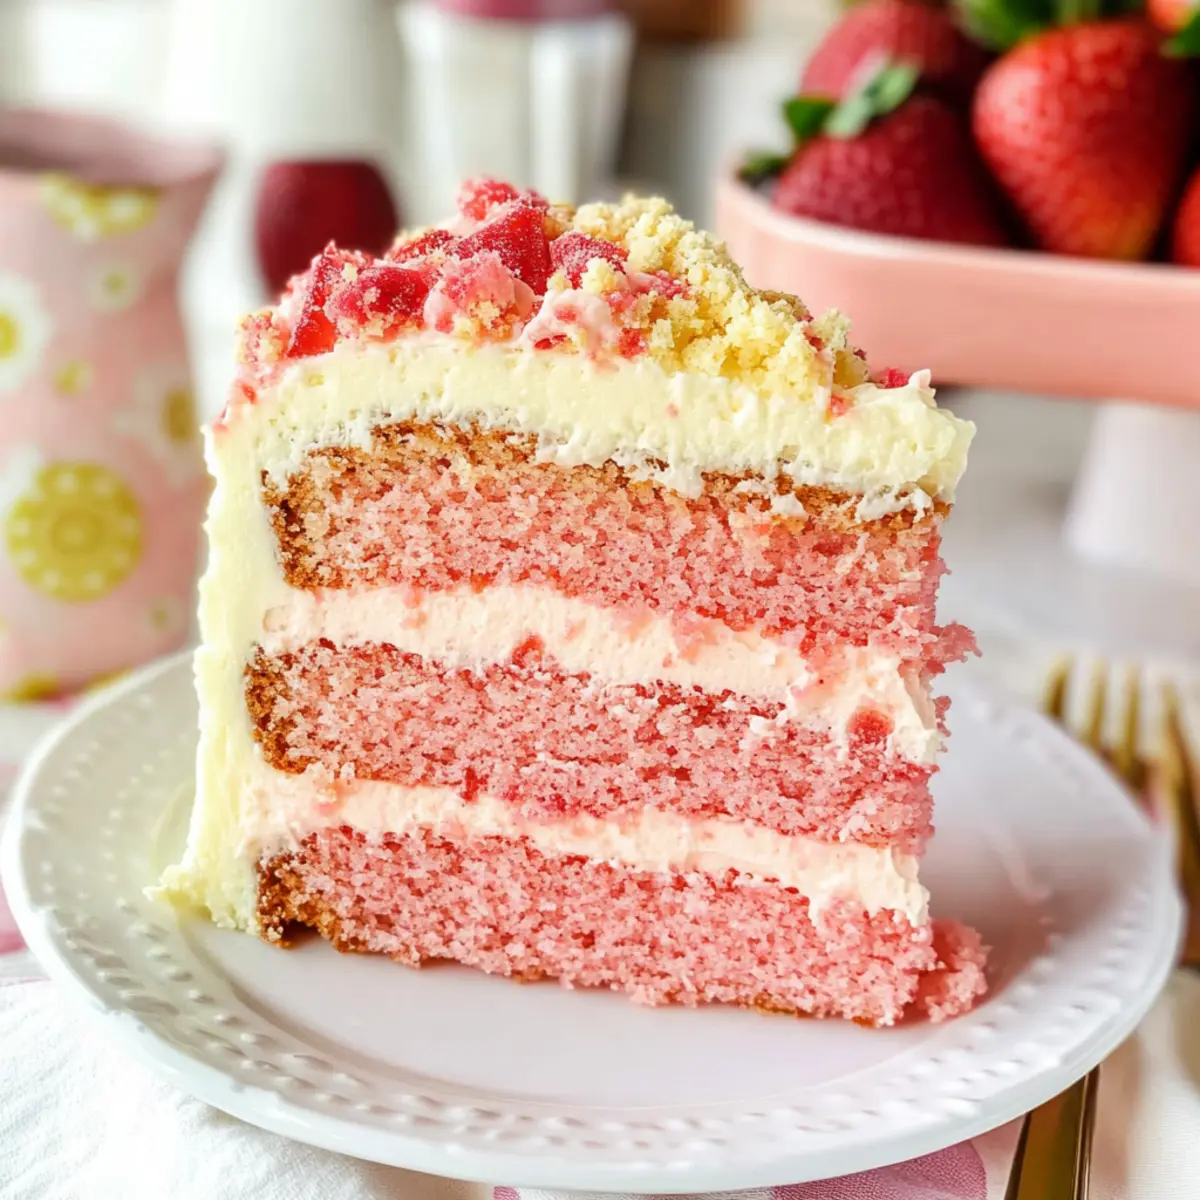
Once the cakes are completely cooled, layer them alternately with the strawberry and vanilla frosting between each layer. Frost the outside of the Strawberry Crunchy Layer Cake with the leftover vanilla buttercream, ensuring a delightful presentation.
Step 11: Decorate with Crunchies and Strawberries
Finally, press the crunchy strawberry bits onto the frosted sides of the cake, giving it a charming texture. Decorate the top with swirls of remaining frosting and fresh strawberry slices for that picture-perfect finish. Your inviting Strawberry Crunchy Layer Cake is now ready to be celebrated!
What to Serve with Strawberry Crunchy Layer Cake
Imagine friends gathered around a beautiful table, ready to indulge in slices of your stunning cake—the perfect moment deserves delightful accompaniments!
- Vanilla Ice Cream: Creamy and cool, this classic pairing enhances the cake’s sweetness while adding a refreshing contrast. A scoop next to each slice creates a comforting balance.
- Fresh Berries: A medley of strawberries, blueberries, and raspberries not only adds color to your presentation but freshens each bite, enhancing the fruity flavors of the cake.
- Whipped Cream: Light and airy, a dollop of homemade whipped cream pairs wonderfully with the moist layers, creating a delightful experience that feels almost like a cloud!
- Lemonade or Iced Tea: Refreshing beverages like homemade lemonade or a sweetened iced tea make perfect companions, cutting through the sweetness while uplifting the overall feast.
- Fruit Salad: A vibrant mix of seasonal fruits! It introduces different textures and tastes, balancing the cake’s richness and adding a sunny, healthful twist to your dessert table.
- Chocolate Fondue: For those who enjoy a little decadence, serve with a side of chocolate fondue for dipping strawberries or cake pieces—indulgence at its best!
How to Store and Freeze Strawberry Crunchy Layer Cake
Room Temperature: Store leftover cake in an airtight container for up to 3-4 days to maintain moisture and flavor.
Fridge: If not consumed within the first few days, keep the cake refrigerated for prolonged freshness. Cover with plastic wrap to prevent drying out.
Freezer: For longer storage, freeze the layers and frosting separately for up to 3 months. Wrap each layer tightly in plastic wrap, then foil, to avoid freezer burn.
Reheating: Thaw frozen layers in the fridge overnight when ready to enjoy. For a warm treat, reheat slices in the microwave for 10-15 seconds.
Strawberry Crunchy Layer Cake Variations
Feel free to let your imagination run wild as you explore exciting twists to the Strawberry Crunchy Layer Cake!
-
Raspberry Twist: Swap out strawberry puree with raspberry puree for a tart and tangy flavor that still delights. A beautiful berry blend awaits!
-
Chocolate Delight: Mix in cocoa powder into the batter for a chocolate variation and pair it with rich chocolate frosting. Imagine the joyful smiles of chocolate lovers in your life!
-
Coconut Flavors: Replace vegetable oil with melted coconut oil for a tropical touch. It adds a subtle fragrance that brings summer to every bite.
-
Gluten-Free: Substitute all-purpose flour with a gluten-free blend for a tasty alternative. This way, everyone can savor a slice of your masterpiece!
-
Nuts for Crunch: Add chopped nuts such as almonds or pecans to the crunchies for extra flavor and texture. Each bite will provide a delightful surprise.
-
Spiced Up: Incorporate a sprinkle of cinnamon or nutmeg into the batter for a warm, cozy spice touch. It’ll take your cake to a whole new comforting dimension!
-
Vegan-Friendly: Use flax eggs instead of regular eggs along with almond milk for a delicious vegan version. It’s heartwarming to know you can share the joy of cake with everyone.
-
Seasonal Fruits: Swap strawberries with seasonal fruits like peaches or blueberries to create delightful twists. The variations keep your dessert table vibrant and fresh!
For more delectable treats, don’t miss out on our Strawberry Cheesecake Dump or try the refreshing Crunchy Cabbage Carrot salad for a burst of flavor!
Expert Tips for Strawberry Crunchy Layer Cake
- Room Temperature Butter: Make sure your butter is at room temperature to easily cream with the sugar, enhancing the cake’s moistness.
- Avoid Overmixing: Stop mixing the batter as soon as combined. Overmixing can lead to a dense cake instead of the light, airy texture you desire for your Strawberry Crunchy Layer Cake.
- Check Your Baking Powder: Always use fresh baking powder for the best rise. If it’s been open for a while, test it beforehand, or it may ruin your cake’s fluffiness.
- Let It Cool: Allow the cakes to cool completely before frosting. This avoids the frosting melting and ensures a beautiful presentation for your Strawberry Crunchy Layer Cake.
- Watch the Crunchies: Keep an eye on the crunchies as they bake; they can go from perfectly crisp to burnt quickly!
- Layering Wisely: When assembling, alternate flavors for a beautiful cross-section. It adds to the appeal and makes each slice a delightful surprise.
Make Ahead Options
These Strawberry Crunchy Layer Cakes are perfect for busy home cooks looking to save time without compromising on flavor! You can prepare the strawberry puree and make the crunchies up to 3 days in advance; just be sure to refrigerate them in airtight containers to maintain their freshness. Additionally, you can bake the cake layers up to 24 hours ahead; cool them completely, and wrap them tightly in plastic wrap before storing in the fridge. When you’re ready to serve, simply let the cake come to room temperature, assemble the layers with frosting, and embellish with the crunchies for that delightful finish. Your friends and family will love the homemade touch, and you’ll enjoy the ease of this time-saving approach!
Strawberry Crunchy Layer Cake Recipe FAQs
What type of strawberries should I use for the puree?
I recommend using ripe, fresh strawberries for the best flavor. Look for berries that are bright red and fragrant with no dark spots or mold. If they’re a bit past their prime, they may still work, but the flavor won’t be as sweet and vibrant.
How can I store leftover Strawberry Crunchy Layer Cake?
You can store the cake in an airtight container at room temperature for up to 3-4 days. If you want to keep it fresh longer, move it to the refrigerator, but make sure to cover it with plastic wrap to keep it from drying out.
Can I freeze the Strawberry Crunchy Layer Cake?
Absolutely! For freezing, wrap each cake layer individually in plastic wrap, then in foil, to prevent freezer burn. You can freeze the layers separately for up to 3 months. Just remember to let them thaw in the fridge overnight when you’re ready to enjoy the cake again.
What should I do if my cake layers are domed and not flat?
If your cake layers dome during baking, simply use a serrated knife to level them once they’re cool. This will create a flatter surface for layering and frosting. Keep an eye on your baking time, as overbaking can contribute to a domed top.
Are there any dietary considerations for this recipe?
For those avoiding gluten, you can substitute all-purpose flour with a gluten-free blend. If there are dairy allergies, using dairy-free butter and almond milk will work great! Additionally, for vegan options, substitute the eggs with flax eggs and follow the other dairy-free adjustments.
How do I make the crunchies without burning them?
To ensure your strawberry and vanilla crunchies don’t burn, set a kitchen timer for 4 minutes while baking. Check them closely, as they can go from perfect to burnt quickly! Once they start to turn golden, take them out to cool before using them in your cake.

Decadent Strawberry Crunchy Layer Cake for Your Sweet Celebrations
Ingredients
Equipment
Method
- Prepare Strawberry Puree: Cook fresh strawberries in a saucepan over medium heat until broken down, about 10-15 minutes. Cool completely.
- Preheat oven to 350°F (176°C) and grease four 8-inch round cake pans with butter and dust with flour.
- Mix Dry Ingredients: In a bowl, whisk all-purpose flour, baking powder, and salt until combined. Set aside.
- Combine Wet Ingredients: Cream unsalted butter and granulated sugar until fluffy. Add vegetable oil, eggs, and vanilla extract, mixing until just combined.
- Create the Batter: Gradually mix dry ingredients with wet ingredients, alternating with milk, being careful not to overmix.
- Divide and Flavor the Batter: Separate batter into two bowls. Add strawberry puree, strawberry extract, and red food coloring to one, and milk to the other.
- Bake the Cakes: Pour batters into prepared pans and bake for 22-25 minutes or until a toothpick comes out clean.
- Make the Crunchies: Mix freeze-dried strawberry powder with flour and bake in a 350°F oven for about 5 minutes until lightly golden.
- Prepare the Buttercream Frosting: Beat unsalted butter until smooth, gradually adding powdered sugar and milk for desired consistency.
- Assemble the Cake: Layer cakes alternately with frosting, frosting the outside with vanilla buttercream.
- Decorate with Crunchies and Strawberries: Press crunchy strawberry bits onto the sides and top with frosting swirls and fresh strawberries.