

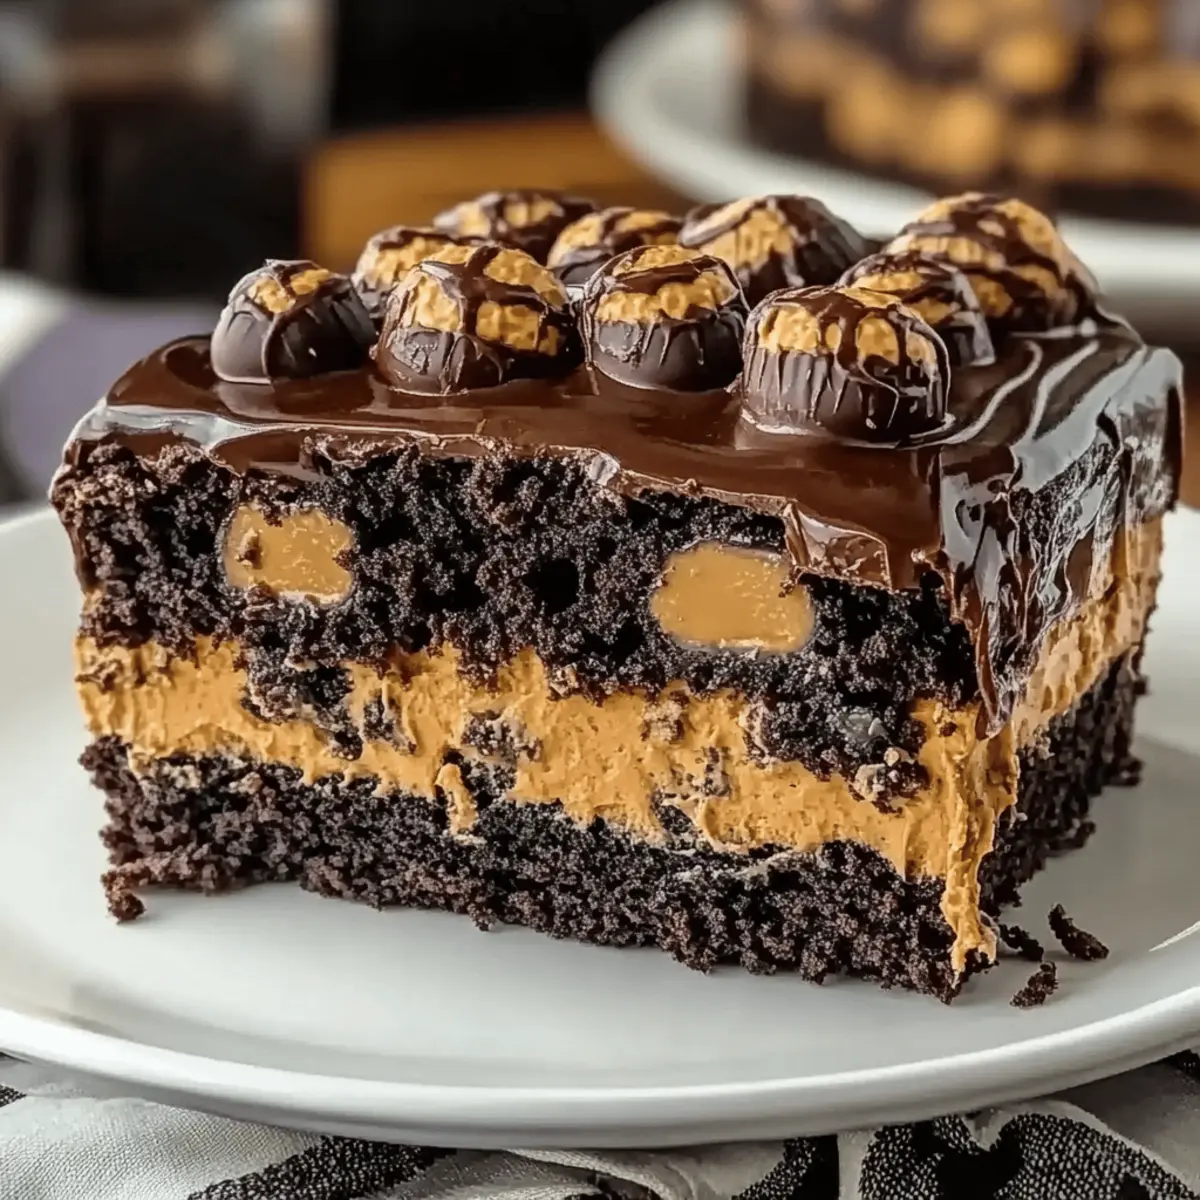
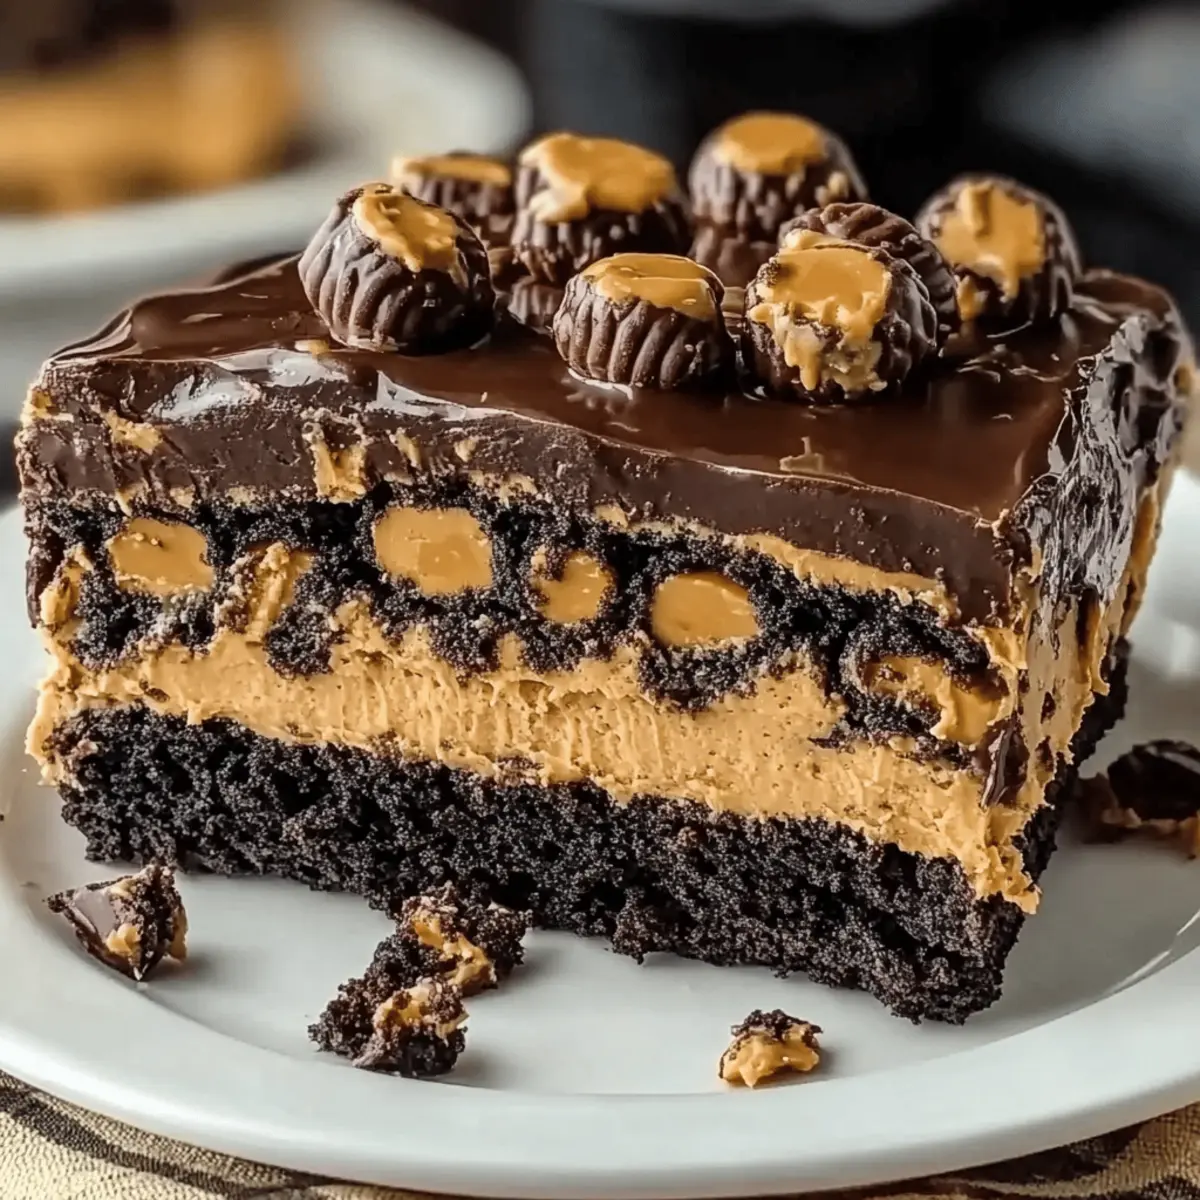
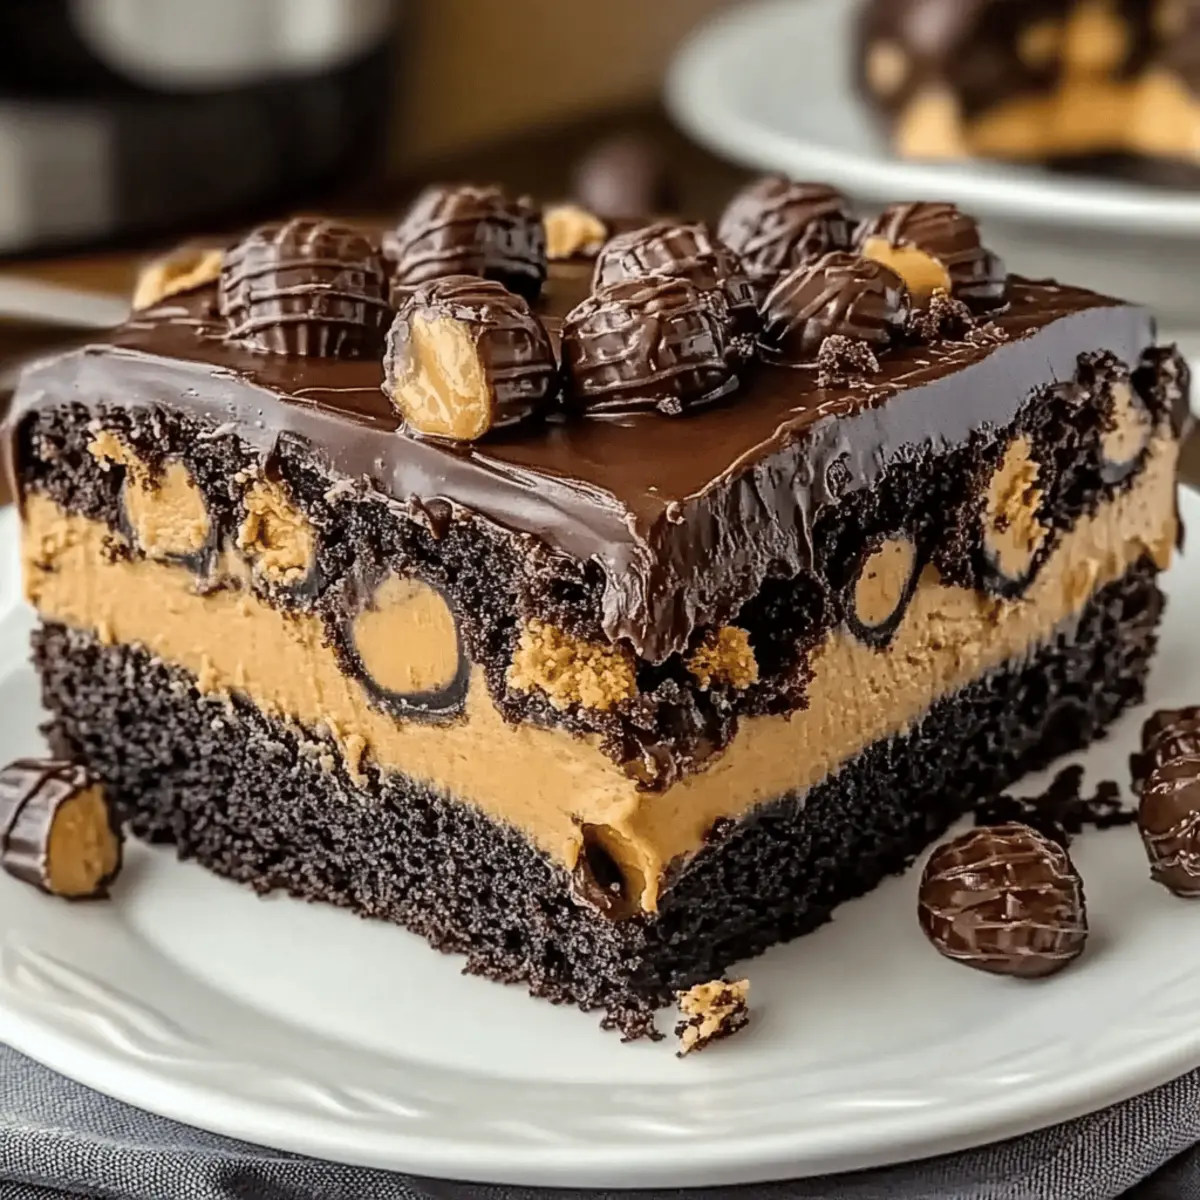
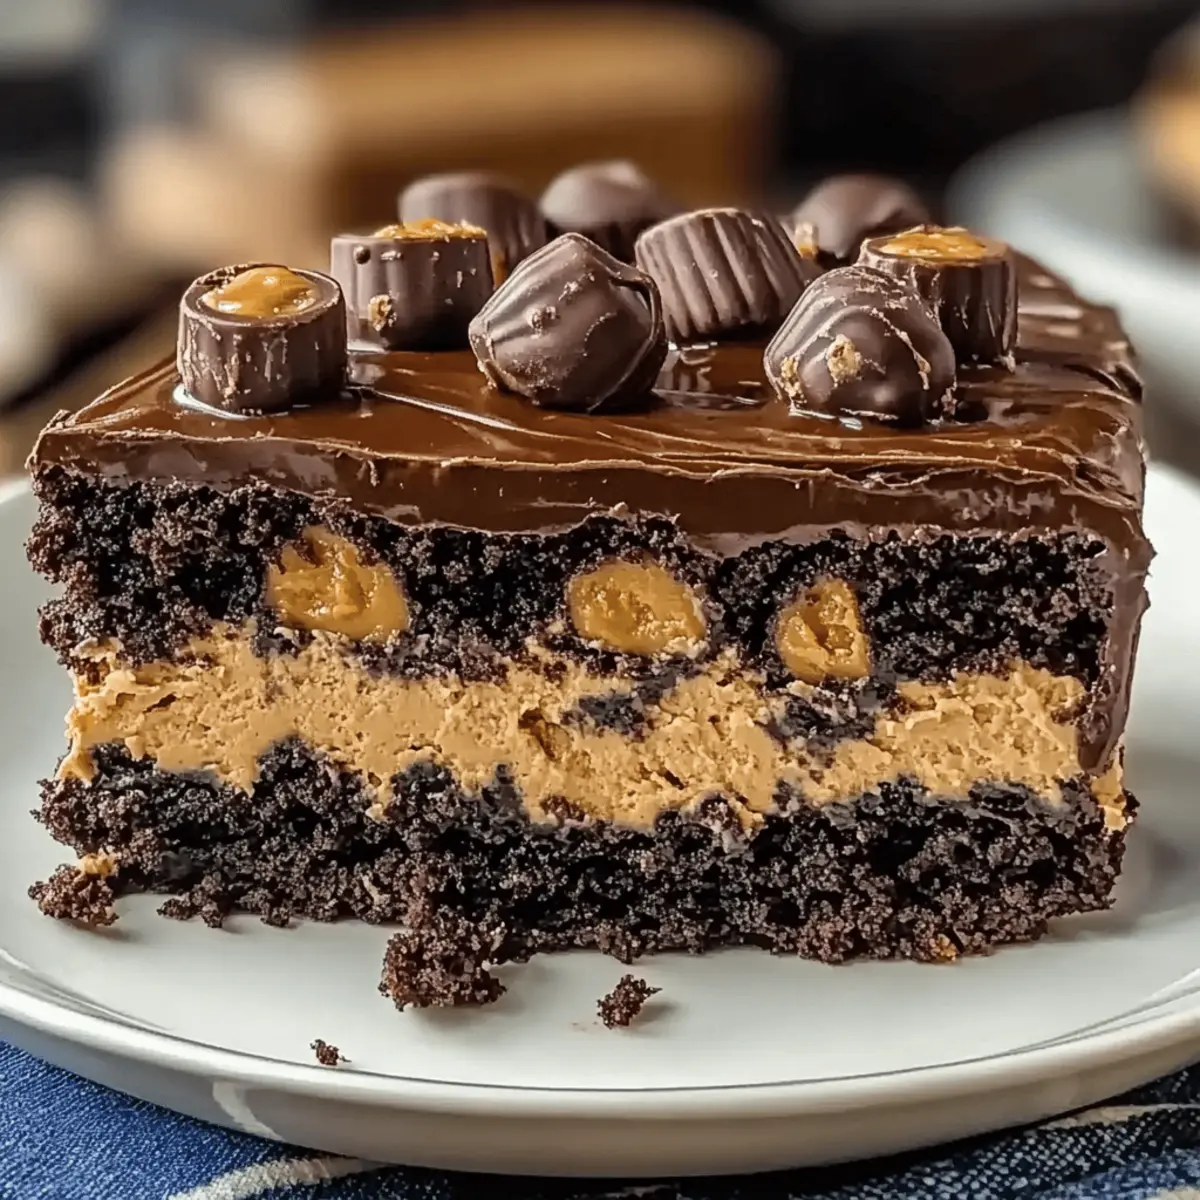
You won’t believe how a simple cake can transport you back to the joy of childhood treats! Let me introduce you to my go-to indulgence: the Reese’s Peanut Butter Earthquake Cake. This sinfully delicious dessert marries rich chocolate with creamy peanut butter, boasting a gooey center that’s hard to resist. What’s more, it’s incredibly easy to whip up, making it a fantastic option for gatherings or a special night in. Imagine your kitchen filled with that comforting aroma as you bake—it’s a sure way to warm hearts and create sweet memories. Ready to dive into this nostalgic delight? Let’s get started!
Why is this cake a must-try?
Indulgent Flavor: The Reese’s Peanut Butter Earthquake Cake offers a heavenly blend of rich chocolate and creamy peanut butter that will satisfy your sweet cravings.
Easy to Bake: With simple ingredients, this cake comes together quickly, making it a perfect choice for busy home cooks and bakers alike.
Nostalgic Treat: Relive childhood memories with each bite, as this dessert evokes the timeless taste of Reese’s Peanut Butter Cups.
Versatile Options: Feel free to swap out peanut butter for almond or cashew butter, adding your personal touch to this delightful recipe.
Crowd-Pleaser: Whether at a party or a family gathering, this cake is sure to impress both kids and adults, just like a classic dessert experience.
For an extra treat, pair it with a scoop of vanilla ice cream or consider serving it alongside a slice of Sky Jelly Cake for variety!
Reese’s Peanut Butter Earthquake Cake Ingredients
For the Cake
- Chocolate Cake Mix – Provides the rich chocolate base; consider using dark chocolate mix for a deeper flavor.
- Water – Ensures a moist cake, hydrating the dry mix perfectly.
- Vegetable Oil – Adds moisture and softness; melted coconut oil can give a unique flavor twist.
- Large Eggs – Essential for structure and rising; let them reach room temperature for best results.
For the Peanut Butter Filling
- Creamy Peanut Butter – Imparts a delicious, nutty flavor; almond or cashew butter can be used for a different taste.
- Cream Cheese (softened) – Creates a rich, creamy texture in the filling.
- Unsalted Butter (melted) – Enhances both flavor and moisture; using salted butter adds a yummy touch.
- Powdered Sugar – Sweetens the peanut butter filling and ensures smoothness.
- Vanilla Extract – Complements the flavors and adds warmth to the filling.
For the Topping
- Reese’s Peanut Butter Cups (chopped) – Adds delightful chunks of chocolate and peanut butter; a must for that signature taste!
Step‑by‑Step Instructions for Reese’s Peanut Butter Earthquake Cake
Step 1: Preheat the Oven
Begin by preheating your oven to 350°F (175°C). While it’s heating up, grease a 9×13-inch baking dish generously with butter or cooking spray to ensure your cake comes out easily after baking. This crucial first step sets the stage for your delicious Reese’s Peanut Butter Earthquake Cake.
Step 2: Mix the Cake Batter
In a large mixing bowl, combine the chocolate cake mix, water, vegetable oil, and eggs. Using an electric mixer, beat the mixture on medium speed for about 2 minutes until the batter is smooth and well combined. You’ll see a rich, chocolaty batter forming, ready to give your cake its delightful base.
Step 3: Prepare the Peanut Butter Filling
In a separate bowl, blend together the creamy peanut butter, softened cream cheese, melted unsalted butter, powdered sugar, and vanilla extract. Mix these ingredients until you achieve a smooth and creamy filling. The combination of creamy and sweet aromas wafting from this mixture will have your taste buds excited for the Reese’s Peanut Butter Earthquake Cake!
Step 4: Layer the Cake Batter
Pour half of the chocolate cake batter into the prepared baking dish, spreading it evenly across the bottom. Next, drizzle sweetened condensed milk over this layer, letting it pool in the chocolate batter. Follow this by adding the remaining chocolate batter on top, ensuring that your layers are beautifully stacked.
Step 5: Add the Peanut Butter Mixture
Now, take spoonfuls of the peanut butter mixture and drop them onto the chocolate batter. With a knife or a skewer, gently swirl the peanut butter into the batter, creating a marbled effect. This step is key to achieving that gooey center that characterizes Reese’s Peanut Butter Earthquake Cake.
Step 6: Sprinkle with Peanut Butter Cups
Scatter the chopped Reese’s Peanut Butter Cups evenly over the top of the cake batter. This not only adds incredible chunks of chocolate and peanut butter but also gives the cake a visually appealing finish. Your cake is now ready to bake and become an indulgent masterpiece.
Step 7: Bake the Cake
Place the baking dish in the preheated oven and bake for 30 to 35 minutes. You’ll know it’s ready when a toothpick inserted in the center comes out with moist crumbs, not wet batter. The top should look set with a slight jiggle, signaling a gooey heart hidden inside.
Step 8: Cool and Serve
Once baked, remove the cake from the oven and let it cool in the dish for about 10 minutes. This cooling period allows the flavors to settle. If desired, dust the top with powdered sugar before slicing into squares and serving. Bask in the warm, nostalgic scents as you share this delectable Reese’s Peanut Butter Earthquake Cake with loved ones!
Reese’s Peanut Butter Earthquake Cake Variations
Don’t be shy to add your own spin to this delightful dessert; your creativity is the secret ingredient!
-
Nut Butter Swap: Use almond or cashew butter for a unique flavor twist. This brings a different nutty richness to the filling, while still keeping that heavenly essence of the original cake.
-
Chocolate Chips Galore: Add a handful of semi-sweet or dark chocolate chips to the batter for an extra chocolatey experience. They will melt beautifully, creating pockets of chocolate goodness throughout the cake.
-
Cookie Crumble Topping: Crushed Oreos or your favorite cookies sprinkled on top before baking add a delightful crunch. Imagine biting into a fudgy cake with a crispy surprise in every forkful!
-
Spicy Kick: Mix in a pinch of cayenne pepper or chili powder to the batter for an unexpected spicy kick. The heat beautifully contrasts the sweetness, elevating the flavor profile of your indulgence.
-
Dairy-Free Delight: Substitute the cream cheese with a dairy-free alternative like cashew cream. This keeps the deliciousness without the dairy, allowing everyone to enjoy a slice.
-
Fruity Addition: Fold in some mashed bananas or chopped strawberries for a touch of fruitiness. The moisture from the fruit will balance the richness, making every bite an exciting surprise.
-
Miniature Form: Bake the batter in a muffin tin to create individual mini earthquake cakes. Perfect for gatherings, they make serving and enjoying this treat even more fun!
For more delightful ideas, why not explore a slice of heavenly Sky Jelly Cake alongside your Earthquake Cake? You’ll have a variety of flavors accommodating every palate!
Expert Tips for Reese’s Peanut Butter Earthquake Cake
-
Perfect Baking Time: Keep an eye on the baking time; overbaking can dry out your cake. Aim for moist crumbs on your toothpick to ensure that gooey center!
-
Ingredient Temperature: Allow your eggs and cream cheese to come to room temperature before mixing. This helps achieve a smoother batter and better rise for your Reese’s Peanut Butter Earthquake Cake.
-
Gentle Swirling: When adding the peanut butter filling, swirl gently to keep it from sinking. You want that yummy gooeyness distributed throughout without losing its lovely layers!
-
Mixing Tips: Use an electric mixer for the cake batter but avoid overmixing. Just enough to combine will give you that perfect texture without toughness.
-
Flavor Variations: Feel free to customize by using different nut butters or adding mix-ins like chocolate chips. Each variation can lead to a delicious twist on the classic Reese’s Peanut Butter Earthquake Cake!
Storage Tips for Reese’s Peanut Butter Earthquake Cake
Room Temperature: Keep leftover cake stored in an airtight container for up to 3 days to maintain its moistness and flavor.
Fridge: If you prefer, refrigerate the cake for up to a week. Just remember to tightly cover it to prevent drying out.
Freezer: To enjoy this indulgent dessert later, freeze slices wrapped in plastic wrap and foil for up to 3 months. Thaw in the fridge overnight before serving.
Reheating: Warm individual slices in the microwave for about 20-30 seconds for a delightful gooey texture before serving.
Make Ahead Options
These Reese’s Peanut Butter Earthquake Cake is perfect for busy weeknights or gatherings! You can prepare the chocolate cake batter and the peanut butter filling up to 24 hours in advance, storing them separately in the refrigerator. For best results, mix the cake batter and cover it tightly with plastic wrap, while the peanut butter mixture should be stored in an airtight container to maintain its creamy texture. When you’re ready to bake, simply pour the prepared batter into the baking dish, swirl in the peanut butter filling, and sprinkle with chopped Reese’s Peanut Butter Cups before baking. This saves time and ensures that the cake remains just as delicious as when made fresh!
What to Serve with Reese’s Peanut Butter Earthquake Cake
Looking to elevate your cake experience into a complete meal? Pair these delightful choices with your decadent dessert.
-
Creamy Vanilla Ice Cream: A scoop of vanilla ice cream adds a refreshing contrast, melting slightly and soaking into the warm cake for pure bliss.
-
Fresh Strawberries: Juicy, sweet strawberries bring a pop of color and a fruity balance to the rich, chocolatey flavors of the cake.
-
Whipped Cream: Light and airy, whipped cream enhances the cake’s texture and offers a sweet, fluffy contrast to the dense cake.
-
Chocolate Sauce: Drizzling warm chocolate sauce over the cake intensifies the chocolatey goodness and adds an extra layer of indulgence to each bite.
-
Chocolate Milkshake: A thick, creamy chocolate milkshake is a nostalgic drink that pairs beautifully, evoking memories of enjoying treats at diner counters.
-
Espresso or Coffee: The bitterness of espresso balances the sweetness of the cake, making it a perfect pairing for a late-night treat.
-
Caramel Sauce: A drizzle of warm caramel sauce not only adds a sweet touch but also complements the peanut butter flavors beautifully.
-
Nutty Trail Mix: For a crunchy contrast, a side of nutty trail mix offers a delightful texture that pairs well with the cake’s softness.
-
Cool Lemonade: A glass of tangy lemonade refreshes the palate, cutting through the cake’s richness with its bright acidity.
Reese’s Peanut Butter Earthquake Cake Recipe FAQs
What type of chocolate cake mix works best for this recipe?
For the Reese’s Peanut Butter Earthquake Cake, a standard chocolate cake mix is perfect, but if you want a richer flavor, I recommend using dark chocolate cake mix. The deeper cocoa notes will enhance the overall taste, making each bite even more indulgent.
How should I store the leftover cake?
To maintain the cake’s moisture, store any leftovers in an airtight container at room temperature for up to 3 days. If you prefer an even longer shelf life, you can refrigerate it for up to a week. Just make sure it’s well-covered to prevent it from drying out.
Can I freeze the Reese’s Peanut Butter Earthquake Cake? How?
Absolutely! To freeze, slice the cake into individual portions and wrap each piece tightly in plastic wrap, followed by a layer of aluminum foil. This will prevent freezer burn and ensure excellent flavor. You can freeze it for up to 3 months. When you’re ready to enjoy, simply thaw the slices in the refrigerator overnight and warm them in the microwave for about 20-30 seconds for that gooey texture.
What should I do if the cake comes out dry?
If your cake turns out dry, it may have been overbaked. Always check for doneness at the lower end of the baking time; a toothpick should come out with moist crumbs. For a dry cake, you can remedy it by serving it with a scoop of ice cream or whipped cream to add moisture while enjoying each bite.
Are there any dietary considerations I should keep in mind?
Yes, if you’re serving this cake to someone with nut allergies, it’s important to either avoid using peanut butter altogether or substitute it with a nut-free option such as sunflower seed butter. Always check the labels for any allergens, including the chocolate and cream cheese, to ensure everyone can indulge safely.
Can I use substitutions for the peanut butter?
Definitely! If you’re looking for a different flavor or have a nut allergy, feel free to swap creamy peanut butter for almond or cashew butter. You can also explore options by adding ingredients like Nutella or even caramel for an entirely new twist on the classic Reese’s Peanut Butter Earthquake Cake!
Reese’s Peanut Butter Earthquake Cake: The Ultimate Indulgence
Ingredients
Equipment
Method
- Preheat your oven to 350°F (175°C) and grease a 9x13-inch baking dish.
- In a large mixing bowl, combine the chocolate cake mix, water, vegetable oil, and eggs. Beat on medium speed for 2 minutes until smooth.
- In another bowl, blend together the creamy peanut butter, cream cheese, melted unsalted butter, powdered sugar, and vanilla extract until smooth.
- Pour half of the chocolate cake batter into the prepared baking dish. Drizzle sweetened condensed milk over it and top with the remaining batter.
- Drop spoonfuls of the peanut butter mixture onto the chocolate batter and swirl gently for a marbled effect.
- Sprinkle the chopped Reese’s Peanut Butter Cups evenly on top.
- Bake for 30 to 35 minutes, until a toothpick comes out with moist crumbs.
- Cool for 10 minutes before slicing and serving. Dust with powdered sugar if desired.