

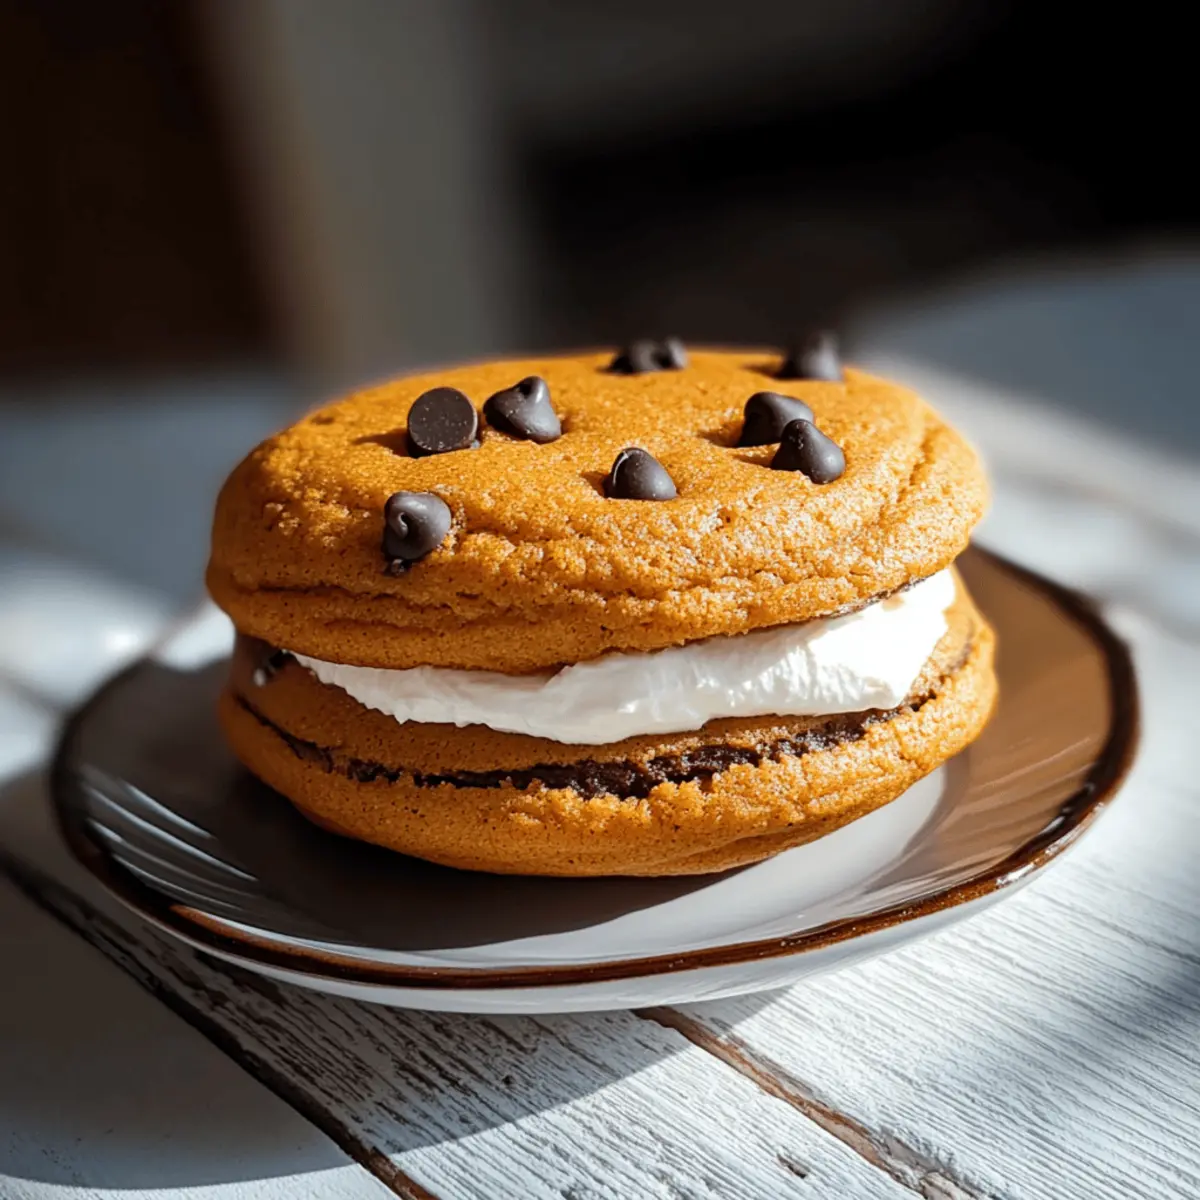
As I took my first bite, the soft, spiced pumpkin cake hugged the creamy filling, and I was instantly transported to a cozy autumn afternoon. These Pumpkin Chocolate Chip Whoopie Pies are my go-to dessert for any occasion, blending the comforting flavors of fall with a playful twist that everyone loves. Not only are they incredibly easy to whip up, but they also offer a delightful way to enjoy pumpkin’s natural sweetness paired with rich chocolate. Whether you’re hosting a gathering or just craving a sweet treat, these whoopie pies are a must-try that will leave your friends and family eagerly asking for more. Ready to dive into this scrumptious recipe? Let’s get baking!

Why are Pumpkin Whoopie Pies a must-try?
Irresistible Comfort: With their fluffy, cake-like structure, these whoopie pies deliver a warm, nostalgic taste that feels like a hug in dessert form.
Easy Baking: You don’t need to be a pro in the kitchen to create these delightful treats; they’re simple enough for bakers of all levels.
Versatile Flavor: The combination of pumpkin and chocolate is a marriage made in heaven, perfect for any season. If you’re looking for more pumpkin goodness, check out our Nutty Chocolate Date recipe!
Crowd-Pleaser: Whether at a party or a cozy family dinner, these pies will have everyone coming back for seconds.
Quick to Make: You’ll have these exquisite treats ready in about 30 minutes, making them a great last-minute dessert option.
Nut-Free Delight: Perfect for school lunches or gatherings, these whoopie pies cater to nut-sensitive eaters while still delivering big flavor.
Pumpkin Chocolate Chip Whoopie Pie Ingredients
For the Cookie
- Pumpkin Puree – Moisture and flavor base; use canned or homemade pumpkin puree for consistency.
- Unsalted Butter – Adds richness and moisture; melt before mixing to improve batter texture.
- Light Brown Sugar – Sweetness and notes of caramel; can substitute with brown sugar or coconut sugar for a deeper flavor.
- Egg – Acts as a binder, providing structure; ensure it’s at room temperature for better incorporation.
- Vanilla Extract – Enhances flavor; substitute with almond extract for a different aroma.
- All-Purpose Flour – Provides structure for the cookies; use gluten-free flour for a gluten-free version.
- Baking Powder – A leavening agent for a fluffy texture; double-check freshness for optimal results.
- Ground Cinnamon – Adds warmth; can substitute with pumpkin pie spice for a more complex flavor.
- Ground Ginger – Complements the pumpkin flavor; omit or reduce if you prefer less spice.
- Ground Nutmeg – Enhances the spice profile; freshly grated nutmeg offers more depth.
- Salt – Balances sweetness and enhances flavors.
- Semi-Sweet Chocolate Chips – Adds sweet, rich bursts of chocolate; mini chocolate chips create a more chocolatey experience per bite.
For the Cream Cheese Filling
- Cream Cheese – Forms the luscious filling; can replace with mascarpone for a different taste.
- Powdered Sugar – Sweetens and thickens the filling; adjust quantity based on desired sweetness.
Enjoy baking these irresistible Pumpkin Chocolate Chip Whoopie Pies that are sure to delight family and friends!
Step‑by‑Step Instructions for Pumpkin Chocolate Chip Whoopie Pies
Step 1: Preheat the Oven
Start by preheating your oven to 350°F (175°C). While it warms up, grab a baking sheet and line it with parchment paper for easy cleanup later. This will ensure your Pumpkin Chocolate Chip Whoopie Pies bake evenly and don’t stick.
Step 2: Prepare the Batter
In a large mixing bowl, combine 1 cup of pumpkin puree, ½ cup of melted unsalted butter, 1 cup of light brown sugar, 1 egg (at room temperature), and 1 teaspoon of vanilla extract. Mix these ingredients well until smooth and creamy, taking about 2-3 minutes. This rich base is crucial for the moist texture of your whoopie pies.
Step 3: Whisk Dry Ingredients
In another bowl, whisk together 2 cups of all-purpose flour, 1 teaspoon of baking powder, 1 teaspoon of ground cinnamon, ½ teaspoon of ground ginger, ½ teaspoon of ground nutmeg, and ½ teaspoon of salt. This step ensures your dry ingredients are evenly distributed, contributing to the fluffy structure of the Pumpkin Chocolate Chip Whoopie Pies.
Step 4: Combine Wet and Dry Ingredients
Gradually fold the dry mixture into the pumpkin batter using a spatula, being careful not to overmix—this will maintain the lovely texture. Once incorporated, stir in 1 cup of semi-sweet chocolate chips for those delightful bursts of sweetness. The batter should be thick yet smooth, perfect for shaping.
Step 5: Bake the Cookies
Using a tablespoon or cookie scoop, drop heaping mounds of the batter onto the lined baking sheet, spacing them about 2 inches apart. Slide them into your preheated oven and bake for 10-12 minutes. You’ll know they’re done when the edges are set and the tops spring back when touched gently.
Step 6: Cool the Cookies
Once baked, remove the whoopie pies from the oven and allow them to cool on the baking sheet for about 5 minutes. Then transfer them to a wire rack to cool completely. This cooling step is essential, as it prevents the filling from melting when you assemble your delicious treats.
Step 7: Make the Cream Cheese Filling
While the cookies cool, prepare the filling. In a mixing bowl, beat together 8 ounces of softened cream cheese and ¼ cup of unsalted butter until fluffy, which should take about 2-3 minutes. Gradually add 2 cups of powdered sugar and 1 teaspoon of vanilla extract, mixing until it reaches a smooth, creamy consistency.
Step 8: Assemble the Whoopie Pies
Once the cookies are completely cool, spread a generous amount of the cream cheese filling on the flat side of half the cookies. Top with the remaining cookies, pressing down gently to form sandwiches. These Pumpkin Chocolate Chip Whoopie Pies are best served immediately or can be chilled until you’re ready to treat your family and friends!
Storage Tips for Pumpkin Chocolate Chip Whoopie Pies
Room Temperature: Store your whoopie pies in an airtight container at room temperature for up to 3 days, ensuring they remain soft and delicious.
Fridge: If you prefer a chilled treat, keep them in the refrigerator for about a week. Just make sure they are well-covered to avoid drying out.
Freezer: For long-term storage, individually wrap the whoopie pies in plastic wrap and place them in a freezer-safe bag. They can be frozen for up to 3 months without losing flavor.
Reheating: When you’re ready to enjoy your frozen Pumpkin Chocolate Chip Whoopie Pies, simply thaw them in the fridge overnight. For a warm treat, pop them in the microwave for a few seconds before serving!
Pumpkin Chocolate Chip Whoopie Pies Variations
Feel free to customize these whoopie pies with delightful twists that cater to your taste buds!
- Nut-Free Option: Leave out the nuts entirely or replace with sunflower seeds to ensure a nut-free treat. Perfect for school lunches!
- Gluten-Free: Substitute all-purpose flour with a 1:1 gluten-free baking blend for a delicious gluten-free version everyone can enjoy. No one will miss the gluten!
- Syrup Sweetened: Instead of powdered sugar in the filling, use maple syrup for a natural sweet touch that complements the pumpkin beautifully. This adds a rich flavor that feels like a cozy hug.
- Spice Boost: Add a teaspoon of pumpkin pie spice to the cookie batter for an extra punch of warmth, perfect if you’re a spice lover. It amps up the comforting fall flavors!
- Cocoa Swirl: Mix in a few tablespoons of cocoa powder into half the batter to create a marbled effect for a chocolatey twist. This adds both flavor and aesthetic appeal.
- Flavor Infusion: Use flavored extracts like orange or almond instead of vanilla for a unique taste twist that brightens each whoopie pie bite. Experiment and see what you love best!
- Mini Versions: Create mini whoopie pies for bite-sized treats, adjusting the baking time to about 8-10 minutes. Perfect for sharing at parties or gatherings!
- Zesty Cream Cheese: Add a splash of fresh lemon juice or zest to the cream cheese filling for a refreshing contrast to the sweetness. This zesty kick will surprise and delight!
These variations can transform your Pumpkin Chocolate Chip Whoopie Pies into a brand-new dessert experience every time you bake! For a little more inspiration, try pairing them with a comforting Homemade Bake Chocolate treat or whip up our delectable Coconut Chocolate Rolls. Let your creativity flow and enjoy the baking journey!
Make Ahead Options
These Pumpkin Chocolate Chip Whoopie Pies are perfect for meal prep enthusiasts! You can prepare the cookie batter up to 24 hours in advance; simply cover and refrigerate it to keep it fresh and prevent browning. The baked cookies can also be made up to 3 days ahead—just store them in an airtight container at room temperature. For the cream cheese filling, whip it up and refrigerate for a delectable taste boost. When you’re ready to assemble, let the filling sit at room temperature for about 15 minutes to soften, then spread it between the cookies for a delightful treat that is just as delicious as if it were freshly made!
What to Serve with Pumpkin Chocolate Chip Whoopie Pies
As you revel in the delightful flavors of these whoopie pies, consider pairing them with complementary dishes that elevate your dessert experience.
-
Creamy Vanilla Ice Cream: A scoop of creamy vanilla ice cream alongside your whoopie pies enhances their flavors, offering a delightful contrast in temperature and texture. Imagine the cool creaminess melting into each bite of sweet pumpkin and rich chocolate!
-
Rich Coffee or Chai Tea: The warmth of a steaming cup of coffee or spiced chai tea creates a cozy atmosphere, perfectly balancing the sweetness of the whoopie pies. Your taste buds will thank you for this delightful duo!
-
Fresh Cranberry Sauce: A small dollop of tart cranberry sauce adds a burst of freshness that cuts through the richness of the cream cheese filling. It’s an elegant touch that brightens the overall flavor profile.
-
Spiced Apple Cider: Serve these whoopie pies with warm spiced apple cider for an extra autumnal vibe. The inviting spices harmonize beautifully with the pumpkin, making each bite feel like a festive celebration.
-
Chocolate Dipped Pretzels: For a fun and crunchy contrast, offer chocolate dipped pretzels. The salty-sweet combination enhances the flavor of the whoopie pies, taking your dessert experience to the next level.
-
Pumpkin Spice Latte: Embrace the season with a seasonal pumpkin spice latte that syncs with your whoopie pies perfectly. This combination will envelop you in the warmth of fall, making every moment feel special.
-
Caramel Sauce Drizzle: Add a drizzle of warm caramel sauce on top of whoopie pies for a luxurious finish. The sweet, sticky richness pairs beautifully with the spiced flavors of pumpkin and chocolate.
-
Honey Sweetened Yogurt: For a lighter option, serve the whoopie pies with honey sweetened yogurt. Its creamy texture and mild sweetness offer a refreshing complement without overpowering the delightful flavors of your baked treat.
Expert Tips for Pumpkin Chocolate Chip Whoopie Pies
-
Stick to Room Temperature: Make sure your egg and cream cheese are at room temperature before use. This helps achieve a smooth batter and filling for these delightful Pumpkin Chocolate Chip Whoopie Pies.
-
Don’t Overmix: When combining the wet and dry ingredients, mix just until incorporated. Overmixing can lead to denser whoopie pies instead of the fluffy texture you want.
-
Spacing Matters: When dropping the batter onto the baking sheet, ensure enough space (about 2 inches apart) between mounds. This allows the whoopie pies to spread and bake evenly without merging.
-
Cool Before Assembling: Allow the cookies to cool completely before adding the cream cheese filling. If they’re warm, the filling may melt, ruining the whoopie pie’s delightful structure.
-
Adjust Sweetness: Feel free to customize the sweetness of your filling by adjusting the amount of powdered sugar. This way, you can create the perfect balance for your taste!
-
Perfect Chocolate Balance: Using mini chocolate chips not only distributes chocolate better but also offers a more intense chocolate flavor in every bite of your Pumpkin Chocolate Chip Whoopie Pies.
Pumpkin Chocolate Chip Whoopie Pies Recipe FAQs
What type of pumpkin puree should I use?
Absolutely! You can use either canned pumpkin puree or homemade. Canned is convenient and consistent, while homemade adds a personal touch. Just be sure it’s pure pumpkin and not pumpkin pie filling, which contains added sugars and spices.
How should I store my whoopie pies?
Store your Pumpkin Chocolate Chip Whoopie Pies in an airtight container at room temperature for up to 3 days to keep them soft and fresh. If you want them to last longer, place them in the refrigerator, where they can stay good for about a week.
Can I freeze whoopie pies for later?
Yes! Individually wrap your whoopie pies in plastic wrap and place them in a freezer-safe bag for up to 3 months. To enjoy them, let them thaw in the fridge overnight. If you prefer a warm treat, you can microwave them for a few seconds after thawing.
What should I do if my batter is too sticky?
If you find your batter too sticky to manage, no worries! Chill the batter in the fridge for 10-15 minutes. This should make it easier to drop spoonfuls on your baking sheet. Remember, the colder your dough, the better your cookies will hold their shape!
Are these whoopie pies suitable for people with nut allergies?
Yes! The Pumpkin Chocolate Chip Whoopie Pies are nut-free, making them perfect for gatherings with nut-sensitive eaters. However, if you’re avoiding chocolate altogether, you can substitute mini chocolate chips with white chocolate or butterscotch chips to keep the dessert delicious!
Irresistibly Soft Pumpkin Chocolate Chip Whoopie Pies Recipe
Ingredients
Equipment
Method
- Preheat the oven to 350°F (175°C) and line a baking sheet with parchment paper.
- In a large mixing bowl, combine pumpkin puree, melted unsalted butter, light brown sugar, egg, and vanilla extract. Mix well until smooth, about 2-3 minutes.
- In another bowl, whisk together all-purpose flour, baking powder, ground cinnamon, ground ginger, ground nutmeg, and salt.
- Gradually fold the dry mixture into the pumpkin batter, then stir in semi-sweet chocolate chips.
- Drop heaping mounds of batter onto the prepared baking sheet, spacing them about 2 inches apart. Bake for 10-12 minutes until edges are set.
- After baking, cool on the sheet for 5 minutes before transferring to a wire rack to cool completely.
- While the cookies cool, beat together cream cheese and unsalted butter until fluffy. Gradually add powdered sugar and vanilla extract.
- Spread the cream cheese filling on the flat side of half the cookies, then top with the remaining cookies.