

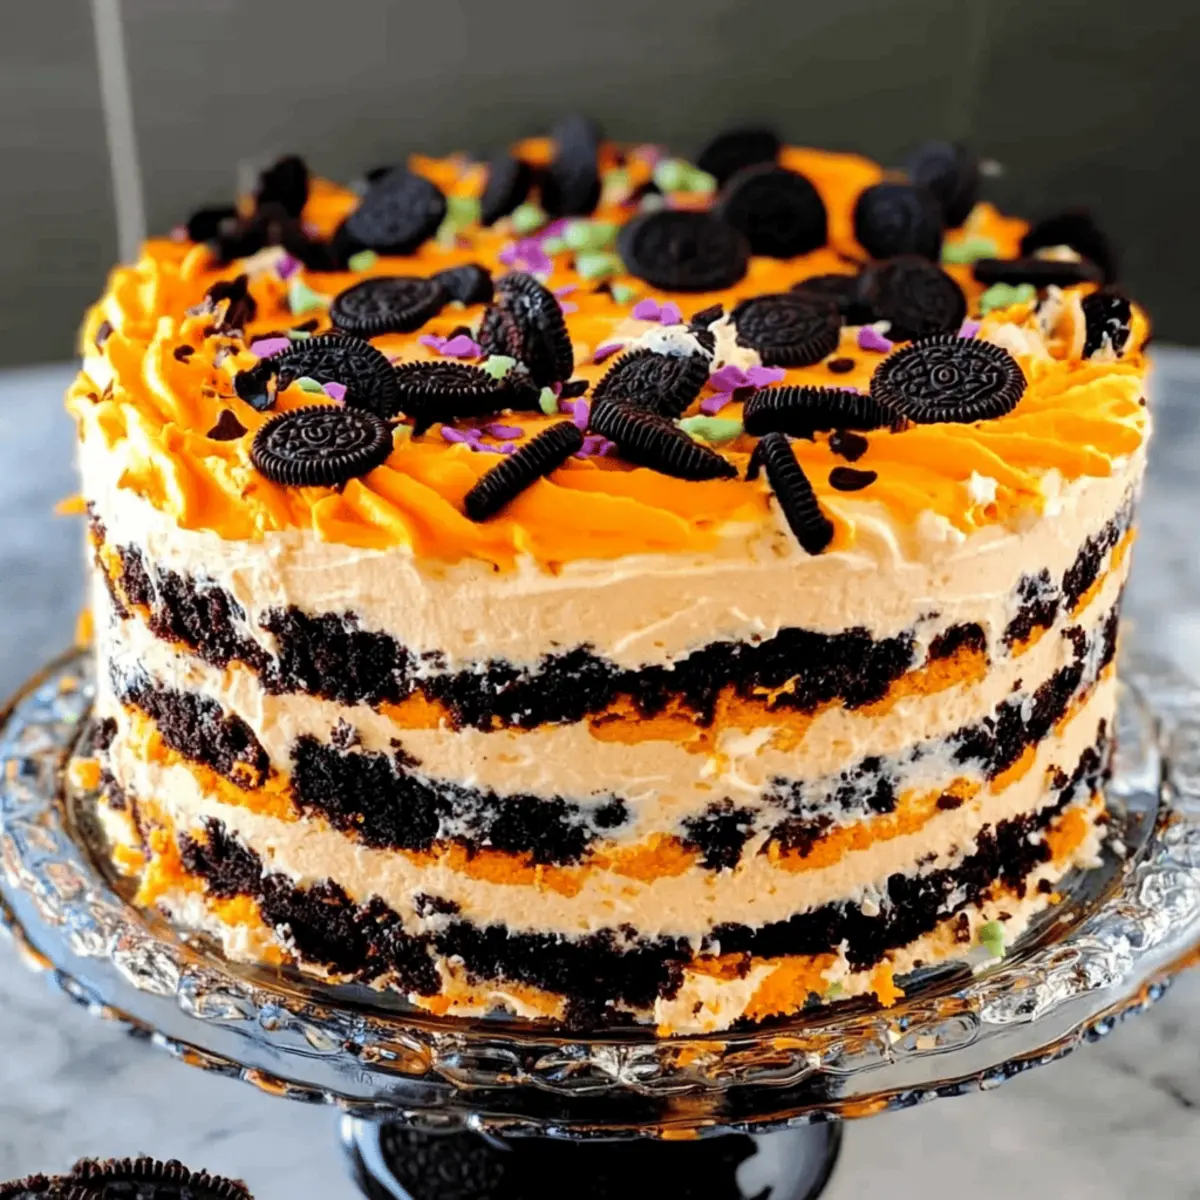
As the leaves turn and the air becomes crisp, I find myself delighting in the magic of Halloween. This year, I’ve conjured up a spook-tacular treat: a No-Bake Halloween Icebox Cake that’s as easy to whip up as it is fun to gobble down! With layers of velvety homemade whipped cream nestled between chocolatey Oreo cookies, this dessert is not only a showstopper at any Halloween gathering but also a breeze to prepare. You’ll love how quickly it comes together, leaving you with more time to enjoy haunting festivities with family and friends. Plus, it’s dressed in the most festive shades of orange, making it an eye-catching centerpiece. Ready to dive into some no-bake magic?
Why is this Halloween Icebox Cake special?
Simplicity: This no-bake dessert saves you time in the kitchen, letting you focus on the fun of Halloween!
Festive Vibes: With its vibrant orange hues, it brings the spirit of the season right to your table.
Creamy Delight: The combination of rich whipped cream and crunchy Oreo cookies creates a mouthwatering texture that everyone will love.
Customization: Whether you want to add fruit layers or try different cookie flavors, the options are endless!
Crowd-Pleasing: This cake is sure to impress your guests, making it a delightful addition to any Halloween gathering.
Halloween Icebox Cake Ingredients
For the Whipped Cream
- Heavy Whipping Cream – Adds richness and creates the cake’s creamy texture. Use dairy-free alternatives for a non-dairy version.
- Vanilla Extract – Provides flavor depth. Substitutable with almond extract or omit for a simpler taste.
- Powdered Sugar – Sweetens the whipped cream. Use granulated sugar if powdered sugar is unavailable, but it may affect texture.
- Orange Gel Food Coloring – Adds festive color to the whipped cream layers. Use natural coloring alternatives for a less vibrant option.
For the Cookies
- Oreo Cookies – Provide the cake structure and flavor. Substitute with gluten-free cookies for a gluten-free version or chocolate wafer cookies.
For the Decoration
- Orange Icing – Used to add a festive touch to the top of the cake.
- Sprinkles – Perfect for adding a fun Halloween flair!
Embrace the spirit of the season with this delightful Halloween Icebox Cake, where every layer promises the perfect blend of textures and flavors!
Step‑by‑Step Instructions for Halloween Icebox Cake
Step 1: Prepare the Pan
Begin by taking a 9-inch springform pan and line the bottom and sides with plastic wrap or parchment paper for easy removal. This step is crucial for the Halloween Icebox Cake, ensuring a smooth presentation. Make sure the lining overlaps the edge slightly to make the cake layer a breeze to lift out later.
Step 2: Whip the Cream
In a mixing bowl, combine 2 cups of heavy whipping cream, 1 teaspoon of vanilla extract, and ¾ cup of powdered sugar. Using an electric mixer, whip the mixture on medium-high speed for about 5 minutes or until stiff peaks form. The whipped cream should look fluffy and hold its shape perfectly, creating a light base for your cake layers.
Step 3: Color the Cream
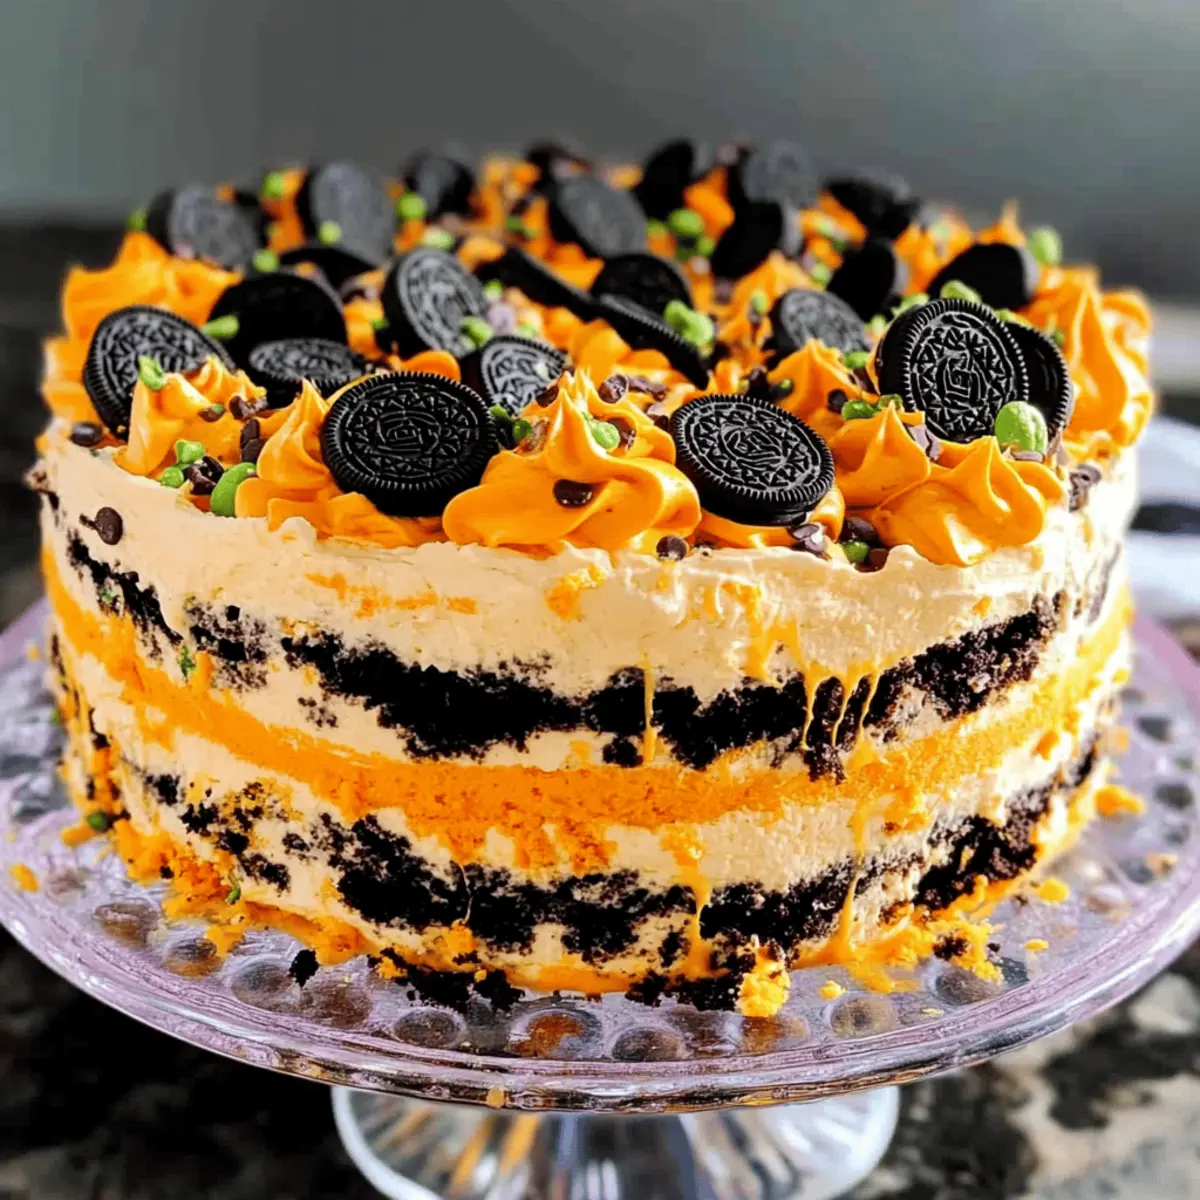
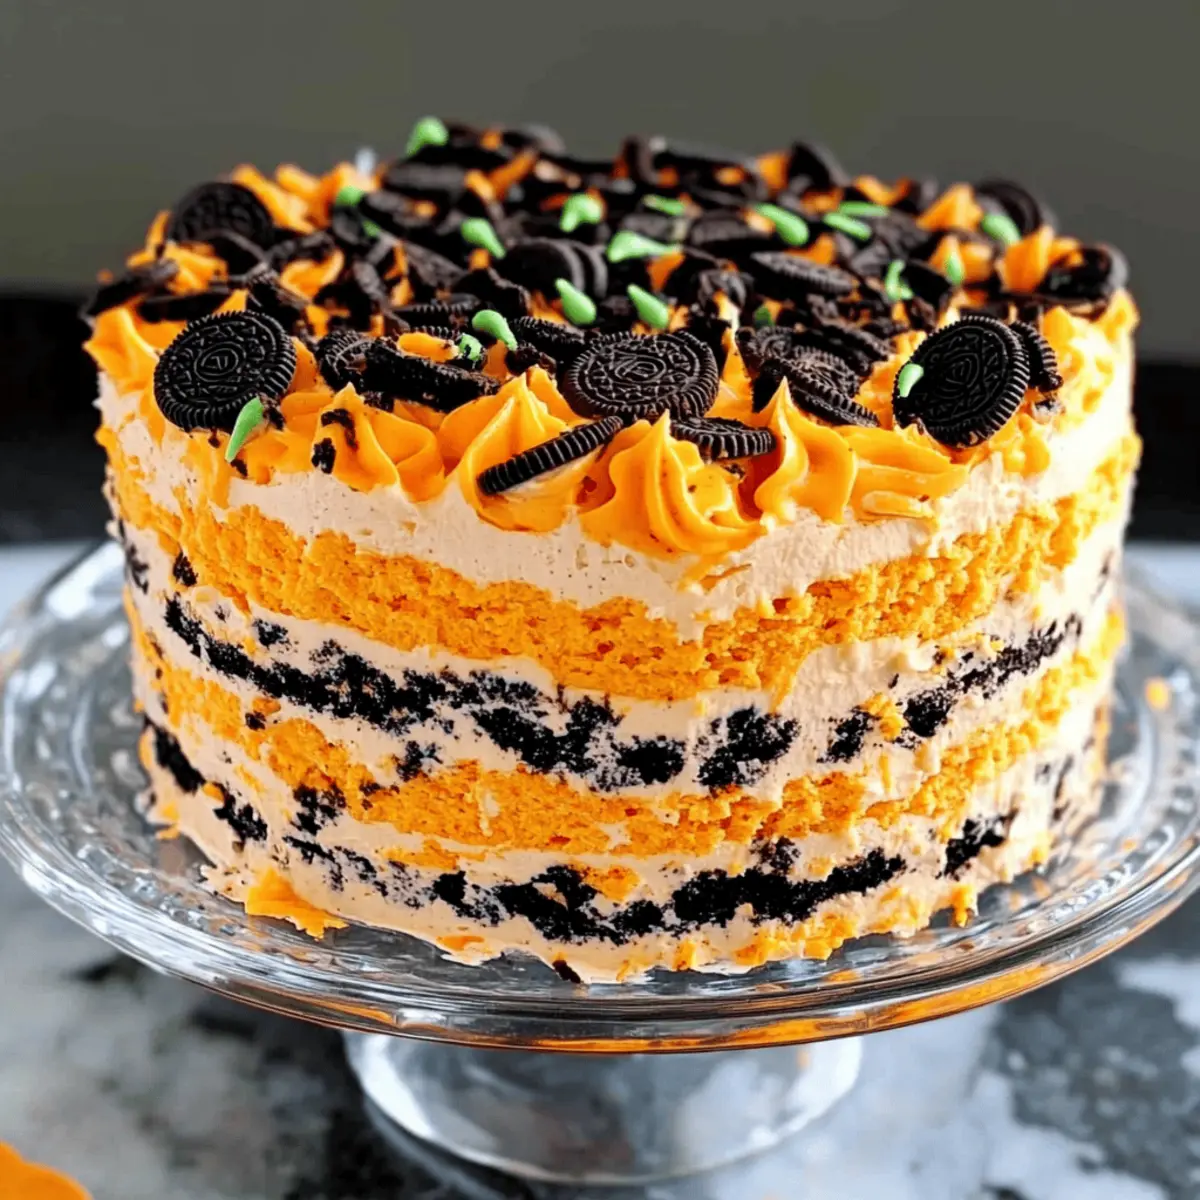
Divide the whipped cream evenly into three bowls. In each bowl, add different amounts of orange gel food coloring to create various shades from light to dark. Gently fold the coloring into the whipped cream using a spatula, being careful not to deflate the mixture. This colorful cream will form the festive layers of your Halloween Icebox Cake.
Step 4: Start Assembling
Place a layer of Oreo cookies at the bottom of your prepared springform pan, making sure to cover the entire base. For a more secure structure, you can break some cookies into pieces and fill any gaps between the whole cookies. This initial layer will provide a delicious foundation for the creamy layers to follow.
Step 5: Add the Darkest Cream Layer
Spread one-third of the darkest shade of whipped cream over the Oreo cookie layer, smoothing it out with an offset spatula. Ensure an even layer, reaching the edges of the pan. The rich color contrasted with the cookies will create a beautiful, eye-catching layer in your Halloween Icebox Cake.
Step 6: Repeat with Another Cookie Layer
Place another layer of Oreo cookies on top of the whipped cream, again making sure the cookies are laid flat and snug. This layer should balance both the creaminess and crunch needed for the cake. Afterward, add another third of your second-lightest orange whipped cream, spreading it evenly as you did before.
Step 7: Final Cookie and Cream Layer
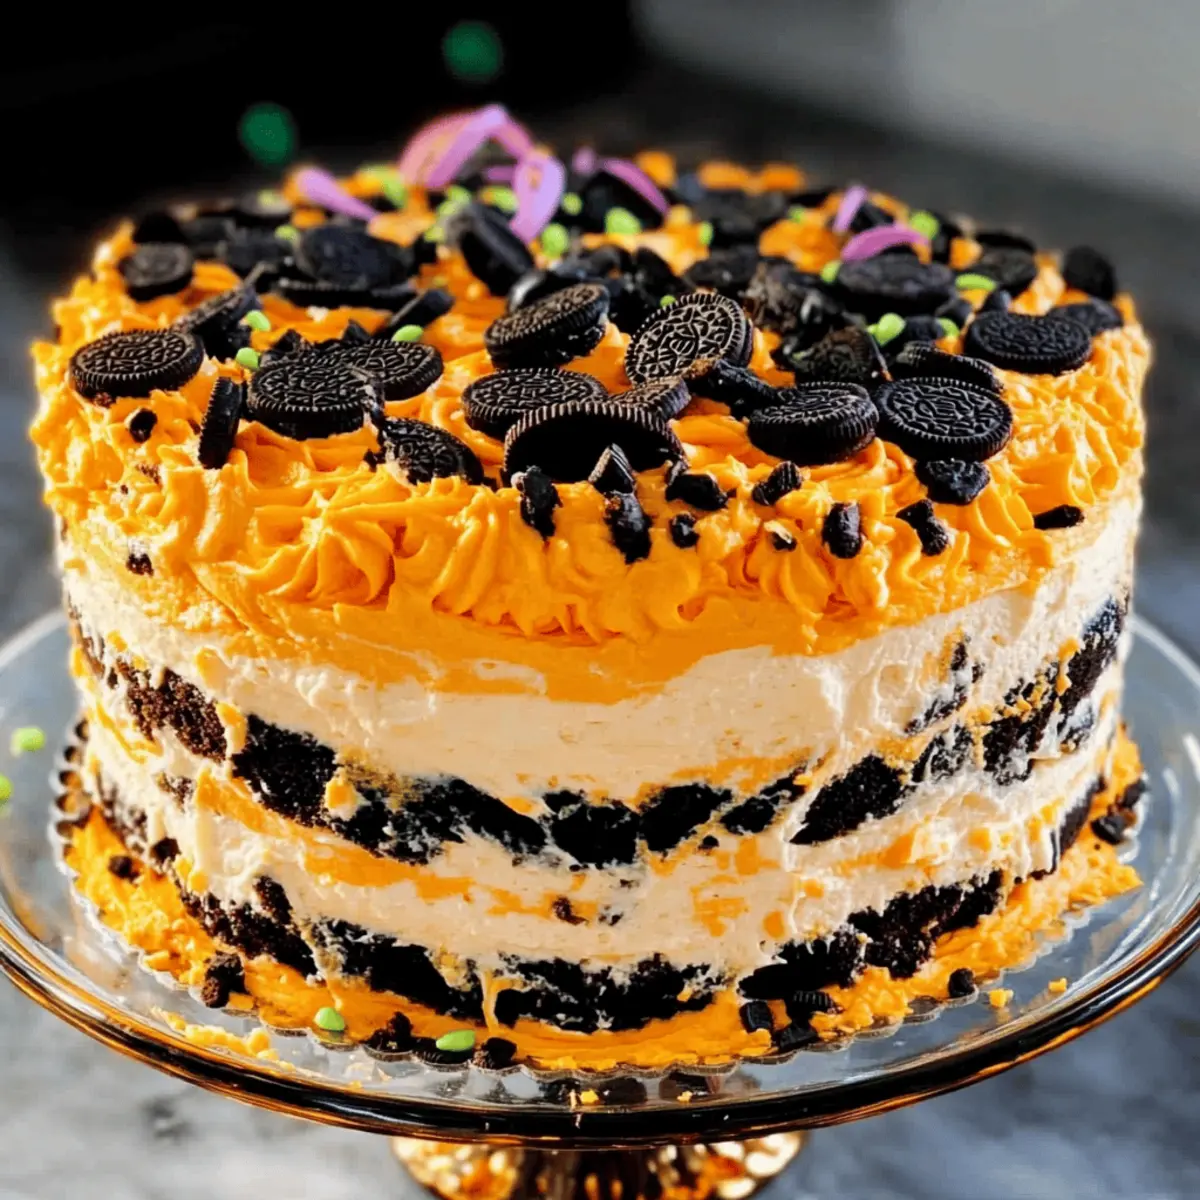
For the final touch, add one last layer of Oreo cookies, ensuring the entire pan is filled. Top this with the remaining whipped cream, smoothing it into a beautiful peak or swirl design. This layer will be the most visible, so make it visually appealing as this is the glorious uppermost part of your Halloween Icebox Cake.
Step 8: Chill and Set
Cover the springform pan securely with plastic wrap and place it in the refrigerator. Let it chill for at least 6 hours, or overnight for the best results. This cooling step is essential for the flavors to meld and for the cake to set, ensuring you can cut clean slices when ready to serve.
Step 9: Decorate Before Serving
Once the Halloween Icebox Cake has set, carefully remove it from the refrigerator. Gently release the sides of the springform pan and peel away the lining. Now, sprinkle orange icing and decorative sprinkles on top, adding a fun and festive finish. This finishing touch will truly bring your cake to life for your Halloween celebrations!
Halloween Icebox Cake Variations & Substitutions
Inviting a sprinkle of creativity and taste into your Halloween Icebox Cake is as fun as the festivities themselves!
-
Dairy-Free: Substitute heavy whipping cream with coconut cream for a deliciously rich and creamy, non-dairy version.
-
Gluten-Free: Use gluten-free chocolate sandwich cookies instead of Oreos to ensure everyone can indulge without worry.
-
Natural Colors: Instead of gel food coloring, mix in natural alternatives like beet juice for a lovely hue while keeping it healthy.
-
Flavor Boost: Add a hint of almond or pumpkin spice instead of vanilla extract to warm up the flavors of this spooky cake.
-
Textural Surprise: Layer in some crushed candy corn or seasonal nuts between whipped cream layers to add delightful crunch.
-
Fruit Fun: Incorporate thin layers of banana or strawberry slices between the whipped cream for a fresh, fruity twist that brightens the cake!
-
Boozy Touch: For an adult version, drizzle a little rum or orange liqueur over the cookie layers before adding the whipped cream for a spirited addition.
-
Decorative Theme: Get creative with your sprinkles! Use colored sugar or themed Halloween sprinkles to customize the cake topping perfect for your Halloween party.
Feel free to explore these variations in your no-bake masterpiece, and if you’re looking for more inspiration, check out this delightful Strawberry Cheesecake Dump or perhaps brighten up another gathering with a Blueberry and Cream Cheese Cake. With a little imagination, every version can be a star at your Halloween celebration!
How to Store and Freeze Halloween Icebox Cake
Fridge: Store your Halloween Icebox Cake in an airtight container in the refrigerator. It will stay fresh for up to 2 days, but the flavors are best within the first day for optimal enjoyment.
Freezer: If you’re not serving it right away, you can freeze individual slices wrapped in plastic wrap and then aluminum foil. They’ll keep in the freezer for up to 2 months, making it easy to enjoy this festive treat anytime!
Reheating: There’s no need to reheat the cake; simply serve it chilled directly from the fridge or freezer. If frozen, allow it to thaw in the refrigerator overnight before serving.
Assembly Reminder: Don’t forget to decorate your Halloween Icebox Cake with icing and sprinkles just before serving to keep them looking fresh and festive!
Make Ahead Options
These Halloween Icebox Cake layers are perfect for meal prep! You can prepare the whipped cream and cookie layers up to 24 hours in advance, which will save you time on the day of your celebration. Simply whip the heavy cream, mix in the vanilla and powdered sugar, and divide it into bowls to color it for your cake. Assemble the cake by layering the Oreo cookies and whipped cream in the springform pan, then cover tightly with plastic wrap and refrigerate. To maintain quality, ensure it’s chilled for at least 6 hours or overnight to achieve a firm texture. When you’re ready to serve, just decorate with orange icing and sprinkles for a stunning finish that’s just as delicious as if made fresh that day!
Helpful Tricks for Halloween Icebox Cake
Whip Right: Ensure your heavy whipping cream reaches stiff peaks. This provides the perfect texture and stability for your cake layers.
Chill Out: Don’t skimp on the chilling time! Refrigerate the cake for at least 8 hours, ideally overnight, to achieve firm, clean slices.
Layering Love: Alternate cookie and cream layers carefully. Creating the right balance is key to a gorgeous presentation and delightful taste in your Halloween Icebox Cake.
Customize Colors: Use varying amounts of orange food coloring to match your Halloween theme. Feel free to play with shades for creativity!
Slice with Care: Use a sharp, warm knife to slice the cake. This will help you achieve beautiful, clean cuts for serving.
What to Serve with Halloween Icebox Cake
As Halloween approaches, indulge in the festive flavors of this creamy delight by pairing it with equally enchanting accompaniments.
- Crispy Chocolate Wafers: The extra crunch complements the smoothness of the icebox cake, enhancing the overall texture experience.
- Fresh Berries: Tart raspberries or strawberries offer a refreshing contrast, cleansing the palate between bites of rich cake.
- Pumpkin Spice Latte: This cozy drink’s warm spices harmonize beautifully with the cake’s flavors, enhancing the festive atmosphere.
- Candy Corn Medley: For a whimsical touch, this classic Halloween candy adds sweetness and fun to your dessert spread.
- Whipped Cream Topper: A dollop of plain whipped cream on each slice amplifies the creaminess, making each bite even more indulgent.
- Chocolate Sauce Drizzle: A warm, rich drizzle adds a decadent touch and enhances the cake’s chocolate notes, delighting any chocolate lover.
- Cinnamon Sugar Donuts: Their warm, sugary goodness provides a delightful contrast to the coolness of the icebox cake, perfect for a festive feast.
- Spiced Apple Cider: Served hot, this drink perfectly balances the sweetness of the cake with its spiced aroma, warming your guests from the inside out.
- Vanilla Ice Cream: A scoop of creamy vanilla ice cream creates a deliciously rich pairing, perfect for those who want an extra treat alongside their slices.
Halloween Icebox Cake Recipe FAQs
What type of cream should I use for the best texture?
Absolutely! For the creamiest and richest texture, I recommend using heavy whipping cream. It whips beautifully and holds stiff peaks, ensuring your layers are fluffy and delightful. If you’re looking for a non-dairy option, coconut cream works wonderfully as a substitute.
How should I store leftover Halloween Icebox Cake?
Very good question! Store your leftover Halloween Icebox Cake in an airtight container in the refrigerator. It will be best enjoyed within 2 days, but it can last up to 3 days. Just keep in mind that the flavors are at their peak within the first day, making it perfect for immediate enjoyment!
Can I freeze this Halloween Icebox Cake?
Yes, you can! To freeze your Halloween Icebox Cake, slice it into individual pieces and wrap each piece tightly in plastic wrap, followed by a layer of aluminum foil. This will protect it from freezer burn. It will stay good for up to 2 months in the freezer. Just remember to thaw it in the refrigerator overnight before serving!
What if the whipped cream doesn’t reach stiff peaks?
No worries! If you find that your whipped cream isn’t reaching stiff peaks, it might be because the cream wasn’t cold enough or it was over-whipped. Make sure your bowl and beaters are chilled and try whipping on medium-high speed. If it still doesn’t work after a couple of minutes, you may need to start over with a fresh batch.
Are there any dietary considerations I should be aware of?
Great question! If you’re preparing this cake for guests, be mindful of common allergies. The Halloween Icebox Cake contains dairy and gluten from the heavy whipping cream and Oreo cookies. For a gluten-free version, you can substitute the Oreos with gluten-free cookies. Additionally, you can use dairy-free alternatives like coconut cream for those avoiding dairy.
Can I customize the colors and flavors?
Absolutely! This cake is all about creativity! You can use different food colorings to match your Halloween theme more closely, or even try flavored extracts like almond or pumpkin spice added to the whipped cream. Feel free to layer in some fruit or pudding for an extra twist!
Deliciously Easy Halloween Icebox Cake for Spooky Celebrations
Ingredients
Equipment
Method
- Prepare the pan by lining the bottom and sides of a 9-inch springform pan with plastic wrap or parchment paper.
- Whip the cream, combining heavy whipping cream, vanilla extract, and powdered sugar until stiff peaks form.
- Divide the whipped cream into three bowls and add orange gel food coloring to create various shades.
- Start assembling with a layer of Oreo cookies at the bottom of the prepared pan.
- Spread one-third of the darkest shade of whipped cream over the Oreo cookie layer.
- Place another layer of Oreo cookies on top and add a layer of the second-lightest orange whipped cream.
- For the final touch, add one last layer of Oreo cookies and top with the remaining whipped cream.
- Chill the cake covered with plastic wrap in the refrigerator for at least 6 hours.
- Decorate the cake with orange icing and sprinkles before serving.