

As I pulled the warm, fragrant baked pears from the oven, I couldn’t help but feel enveloped by an aroma that made my kitchen feel like a cozy retreat. This recipe for Baked Pears with Berries showcases how beautifully simple ingredients can transform into a heartfelt dessert. The magic lies in the sweet caramelization of the pears, perfectly balanced by the juicy bursts of berries, crunchy walnuts, and creamy blue cheese. Not only is this dish a delightful indulgence, but it’s also gluten-free and customizable to suit your taste. With minimal prep required, these baked pears make for an impressive yet easy treat that can fit into any gathering or cozy night in. Ready to savor this delight, or are you intrigued to explore some delicious variations?

Why Are Baked Pears with Berries So Irresistible?
Flavor Explosion: The delightful mix of sweet, caramelized pears with the tartness of fresh berries creates a flavor harmony that’s simply unforgettable.
Customizable Treat: Every palate is welcome here! Swap in different nuts or choose a dairy-free cheese for a tailored experience.
Quick & Easy: Perfectly suited for busy nights, this recipe comes together effortlessly, allowing you to impress without the fuss.
Health-Conscious Indulgence: Loaded with antioxidants and fiber, you can indulge guilt-free as you enjoy a dessert that’s good for you!
Pair these luscious baked pears with a side of Cucumber Carrot Salad for a refreshing contrast, or serve alongside Nutty Vanilla Cake for a decadent dessert spread.
Baked Pears with Berries Ingredients
For the Pears
• Pears – Naturally sweet and tender, providing the dessert’s base; substitute with canned pears in juice if needed.
• Butter – Adds richness and helps the pears to caramelize; can be replaced with coconut oil for a dairy-free option.
For the Topping
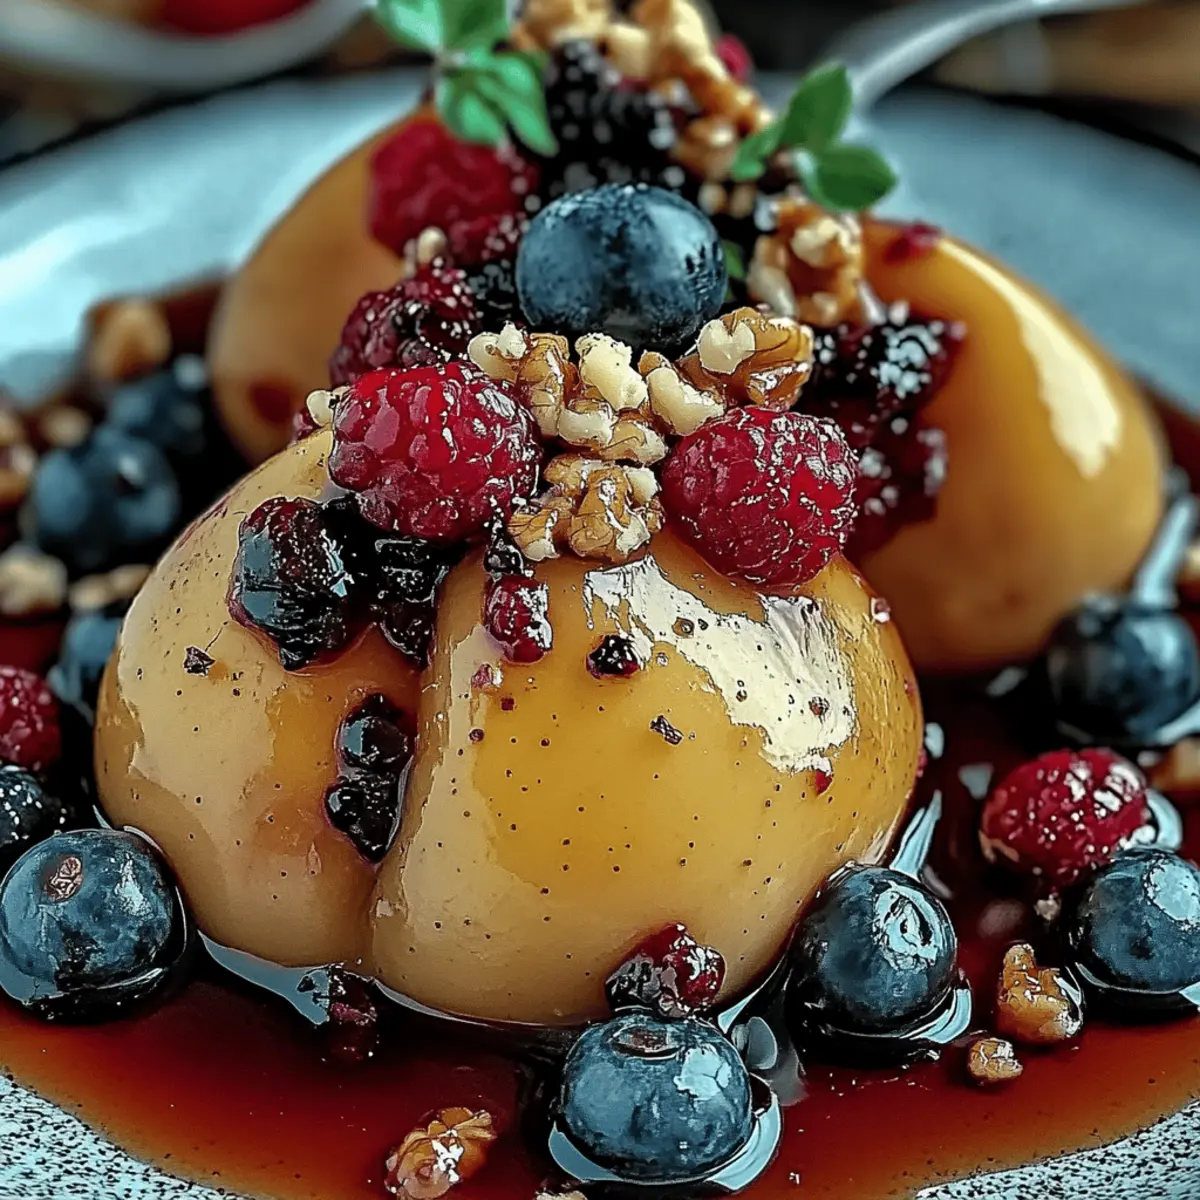
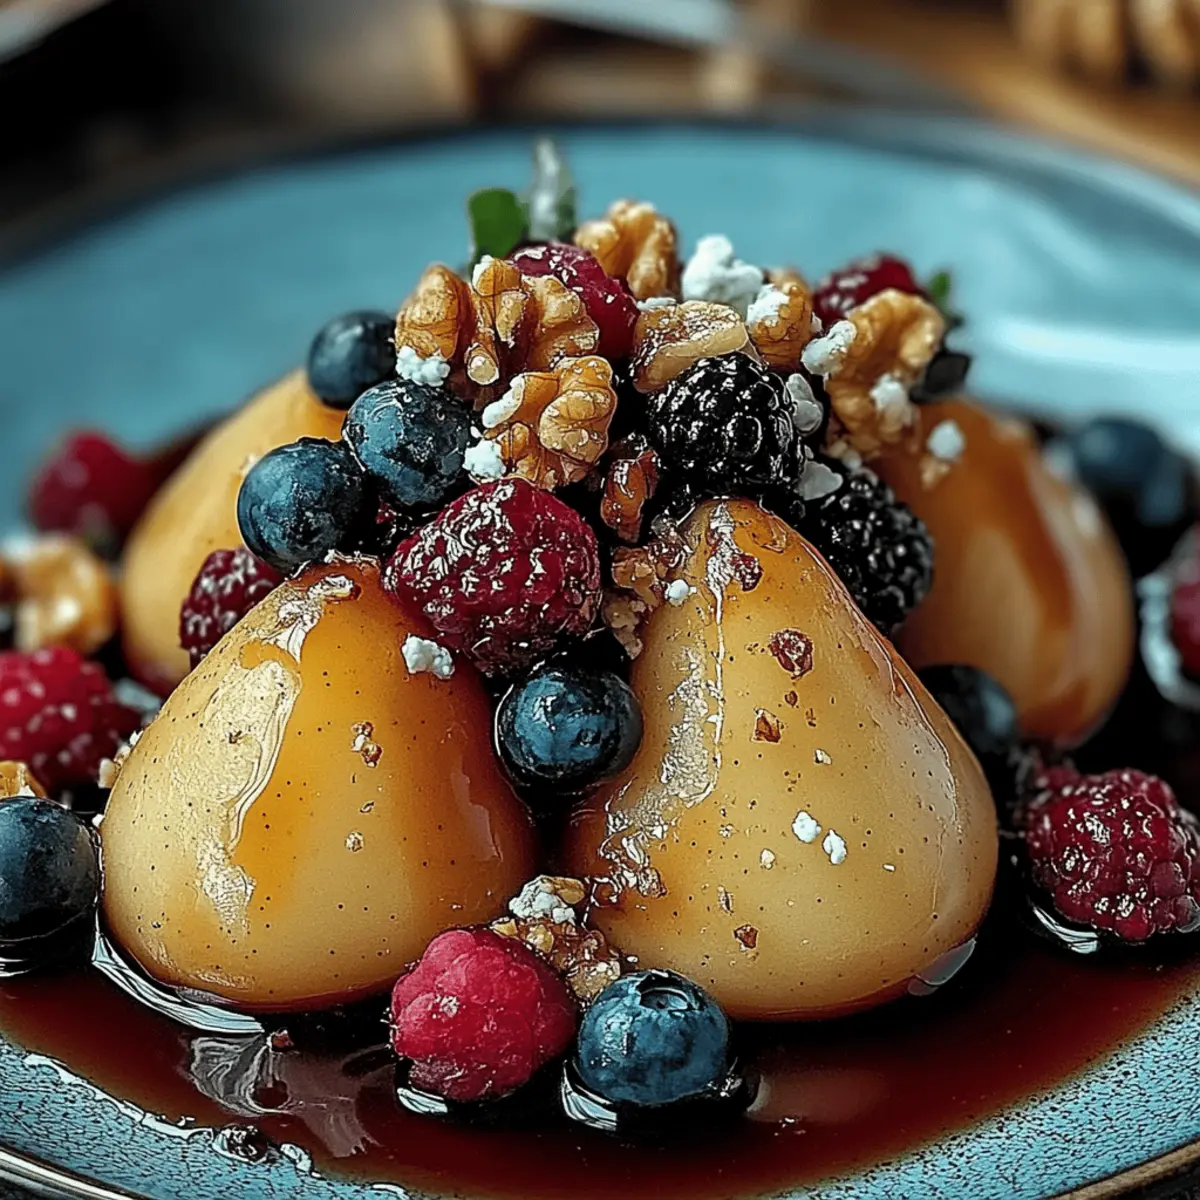
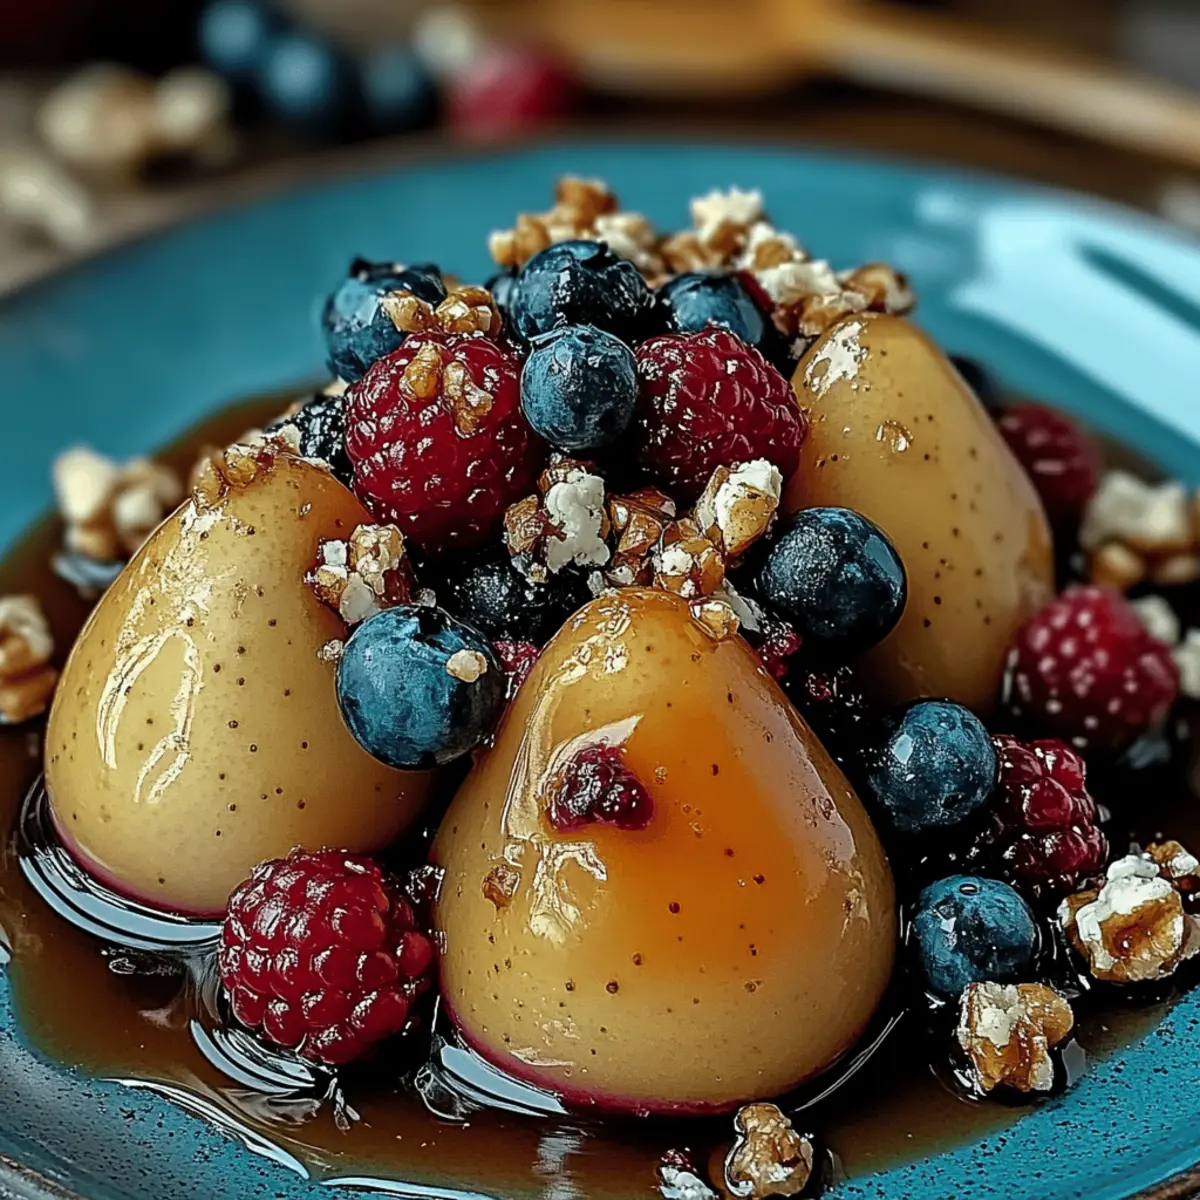
• Mixed Fresh Berries – Contributes vibrant color and tangy flavor; use any combination of blueberries, raspberries, or blackberries for your baked pears with berries.
• Walnuts – Adds crunch and healthy fats; substitute with sunflower or pumpkin seeds for a nut-free alternative.
• Blue Cheese – Provides tanginess and creaminess; swap for goat cheese, feta, or a vegan cheese for variations.
• Honey – Sweetens the dish and enhances flavors; maple syrup can be used as a vegan alternative.
For Garnish
• Fresh Thyme Sprigs – Optional garnish for added aroma and visual appeal.
Step‑by‑Step Instructions for Baked Pears with Berries
Step 1: Preheat Oven
Begin by preheating your oven to 350°F (175°C). As the oven warms up, prepare a baking sheet by either lining it with parchment paper or lightly greasing it with butter or cooking spray. This step ensures your Baked Pears with Berries will bake evenly and won’t stick to the pan.
Step 2: Prepare Pears
While the oven heats, take your ripe but firm pears and slice them in half lengthwise. Using a spoon or a melon baller, carefully remove the core from each half. Place the pear halves cut-side up on the prepared baking sheet, then brush the tops generously with melted butter for added richness and to promote caramelization.
Step 3: Bake Pears
Once preheated, place the tray of prepared pears in the oven and bake for 15 to 20 minutes. Keep a close eye on them; you want the pears to be tender yet firm, easily pierced with a fork but not mushy. The edges may begin to caramelize, creating a delightful aroma that fills your kitchen.
Step 4: Add Toppings
After baking, carefully remove the pears from the oven and let them cool for a minute. Evenly distribute your choice of mixed fresh berries across the warm pear halves. The contrast of colors will make your Baked Pears with Berries visually enticing and flavorful, enhancing the overall presentation.
Step 5: Finish with Walnuts and Honey
Sprinkle a handful of chopped walnuts over each pear, adding a satisfying crunch and nutty flavor to the dish. Then, drizzle honey generously over the pears and berries, allowing the sweetness to enhance the dish’s overall taste.
Step 6: Serve
For a final touch, if desired, garnish your Baked Pears with sprigs of fresh thyme to add a hint of aroma and elegance. Serve the warm pears immediately, or at room temperature, as a delightful health-conscious dessert any time of the year.
Baked Pears with Berries Variations
Feel free to unleash your creativity and customize these baked pears to match your palate and dietary needs!
- Vegan Delight: Swap blue cheese for vegan cheese or omit it completely for a dairy-free twist.
- Nut-Free Crunch: Replace walnuts with sunflower seeds or pumpkin seeds for a delightful crunch without the nuts.
- Coconut Bliss: Use coconut oil instead of butter for a tropical flavor and dairy-free richness.
- Fruit Fusion: Experiment with different fruits like peaches or apples for a deliciously unique variation of baked pears.
These baked pears are all about personalization! Add a splash of orange or lemon juice for a zing that brightens the dish beautifully.
-
Maple Sweetness: Substitute honey with maple syrup for a vegan-friendly sweetness that’s equally indulgent.
-
Herb Infusion: Try adding a sprinkle of fresh rosemary alongside thyme for an earthy twist. This unexpected addition blends savory notes with the sweetness of the dessert.
-
Berry Medley: Use a combination of frozen berries when fresh ones are out of season. Just adjust baking time slightly for an equally fruity experience!
As you explore these variations, consider these options as you prepare a light, refreshing Cucumber Carrot Salad or keep it sweet with Nutty Vanilla Cake on the side!
Tips for the Best Baked Pears
Use Perfect Pears: Choose ripe but firm pears to ensure they hold their shape during baking. Overripe pears can become mushy.
Mind the Bake: Keep an eye on your pears while they bake to prevent overbaking and losing that delightful texture in your baked pears with berries.
Customize Wisely: Feel free to swap in different nuts or use a dairy-free cheese. But remember to taste as you go to balance flavors!
Garnish Girl: A sprinkle of fresh thyme not only enhances the aroma but also adds a gourmet touch. Don’t skip this lovely finish!
Serve Warm or Cold: These baked pears can be enjoyed warm right out of the oven or at room temperature for a refreshing treat.
What to Serve with Baked Pears with Berries?
Indulge your senses and elevate your Baked Pears with Berries with these mouthwatering pairings that create a complete dining experience.
-
Creamy Greek Yogurt: A dollop of Greek yogurt adds a luscious creaminess that balances the sweetness of the pears and berries. It’s a perfect contrast to the warm dessert!
-
Savory Cheese Platter: Serve with a mix of cheeses like sharp cheddar and brie for a delightful sweet and savory experience, complementing the tang of blue cheese.
-
Crunchy Granola: Top your Baked Pears with a sprinkle of granola for added texture and a wholesome crunch, balancing the soft and juicy elements beautifully.
-
Honey-Drizzled Whole Wheat Toast: A slice of toasted whole wheat bread with honey brings a rustic charm, perfect for scooping up those delicious toppings.
-
Fresh Mint Tea: A warm cup of mint tea cleanses the palate and enhances the dessert’s sweet and fragrant notes, creating a comforting, aromatic pairing.
-
Vanilla Ice Cream: A scoop of vanilla ice cream melting over warm pears offers a delightful cold and creamy contrast, making it an irresistible comforting treat.
Serve these delectable pairings alongside your Baked Pears with Berries to create a meal that feels both special and satisfying, perfect for any occasion!
Make Ahead Options
These Baked Pears with Berries are ideal for meal prep, saving you precious time during busy weeknights! You can prepare the pears by halving and coring them up to 24 hours in advance, then store them in an airtight container in the refrigerator. If you’re looking to prep even further, you can also wash and slice your mixed berries (best done the day before) and refrigerate them separately. When you’re ready to serve, simply brush the pears with melted butter, bake for 15-20 minutes until tender, and finish with the berries, walnuts, and honey. This way, you’ll have a delectable, restaurant-quality dessert with minimal effort!
How to Store and Freeze Baked Pears with Berries
Fridge: Store any leftover baked pears with berries in an airtight container for up to 3 days. Make sure to let them cool completely before sealing to prevent moisture buildup.
Freezer: For longer storage, freeze the baked pears in a single layer on a baking sheet. Once frozen, transfer them to a freezer-safe bag or container, and they’ll keep for up to 2 months.
Reheating: When you’re ready to enjoy them again, simply reheat the pears in a preheated oven at 350°F (175°C) for about 10 minutes, ensuring they warm through without drying out.
Serving Again: Consider serving your reheated baked pears with fresh berries and a drizzle of honey to recapture the delightful flavors.
Baked Pears with Berries Recipe FAQs
What kind of pears should I use for baked pears with berries?
Absolutely! Choose ripe but firm pears for this recipe. Varieties like Bosc or Anjou work best, as they are sweet and hold their shape during baking. Avoid overripe pears, as they can become mushy and lose their delightful texture.
How should I store leftover baked pears with berries?
Store any leftover baked pears in an airtight container in the refrigerator for up to 3 days. Make sure they cool completely before sealing the container to prevent moisture buildup. You can enjoy them warm or at room temperature!
Can I freeze baked pears with berries?
Very! To freeze your baked pears, place them in a single layer on a baking sheet and freeze until solid. Then, transfer them to a freezer-safe bag or container, where they’ll stay good for up to 2 months. To reheat, simply place them in a preheated oven at 350°F (175°C) for about 10 minutes.
What are some common issues when making baked pears with berries?
If your pears turn out mushy, it’s likely because they were overripe or baked too long. I recommend keeping a close watch as they bake, aiming for a fork-tender consistency without losing firmness. If you find the toppings are burning while baking, cover the pears loosely with aluminum foil until they’re done to prevent over-browning.
Are baked pears with berries safe for pets?
While pears are generally safe for dogs in small amounts, it’s important to note that blue cheese can be harmful to them. If you’re sharing a bit with your furry friend, ensure you leave off the cheese and toppings. Always consult your vet if you’re unsure about food safety for your pets!
Can I customize the ingredients for dietary restrictions?
Definitely! This dessert is highly customizable. For a dairy-free version, replace butter with coconut oil and use a vegan cheese. You can also swap out walnuts for pumpkin or sunflower seeds to cater to nut allergies. Feel free to adjust based on your dietary needs!
Baked Pears with Berries: A Sweet and Savory Delight
Ingredients
Equipment
Method
- Preheat your oven to 350°F (175°C) and prepare a baking sheet.
- Slice pears in half lengthwise and remove the core. Place cut-side up on the baking sheet and brush with melted butter.
- Bake the pears for 15 to 20 minutes, until tender yet firm.
- Remove from the oven and evenly distribute mixed berries on top of the warm pear halves.
- Sprinkle chopped walnuts over each pear and drizzle with honey.
- Garnish with fresh thyme sprigs if desired and serve warm or at room temperature.