

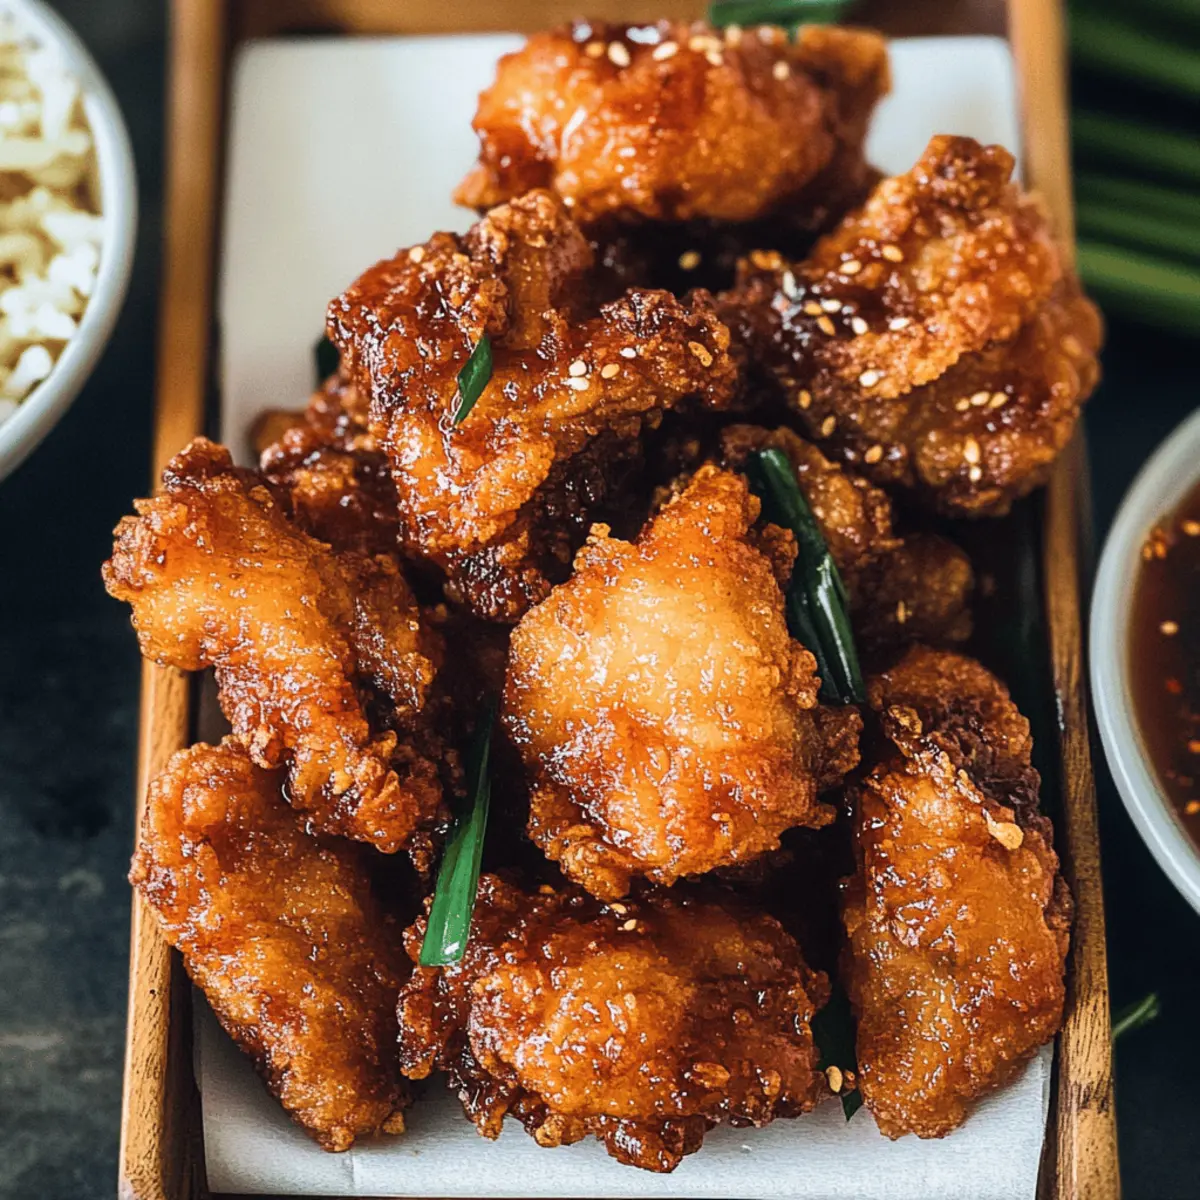
As I stood in my kitchen, the sweet aroma of garlic began to wrap around me like a warm hug, transporting me straight to the shores of Hawaii. This Crispy Hawaiian Fried Garlic Chicken is not just a meal—it’s a delicious adventure waiting to unfold. With just 30 minutes of prep and cook time, it’s the perfect solution for busy weeknights or spontaneous gatherings. Picture tender pieces of chicken enveloped in a light, crispy coating, all drenched in a sticky garlic sauce that’ll make your taste buds dance. What’s more, this dish is a fantastic way to elevate your comfort food game while keeping it quick and easy. So, how about we dive into this savory paradise together?
Why Is This Chicken Recipe a Must-Try?
Simplicity at Its Finest: This recipe comes together in just 30 minutes, making it perfect for those hectic weeknights.
Flavor Explosion: The combination of garlic, soy sauce, and a touch of sweetness creates a delightful umami experience that’s hard to resist.
Versatile Options: Whether you prefer chicken thighs or drumsticks, you can easily adapt this dish to suit your tastes.
Crowd-Pleasing Appeal: Serve it at your next gathering, or enjoy it with family for a satisfying dinner—everyone will be asking for seconds!
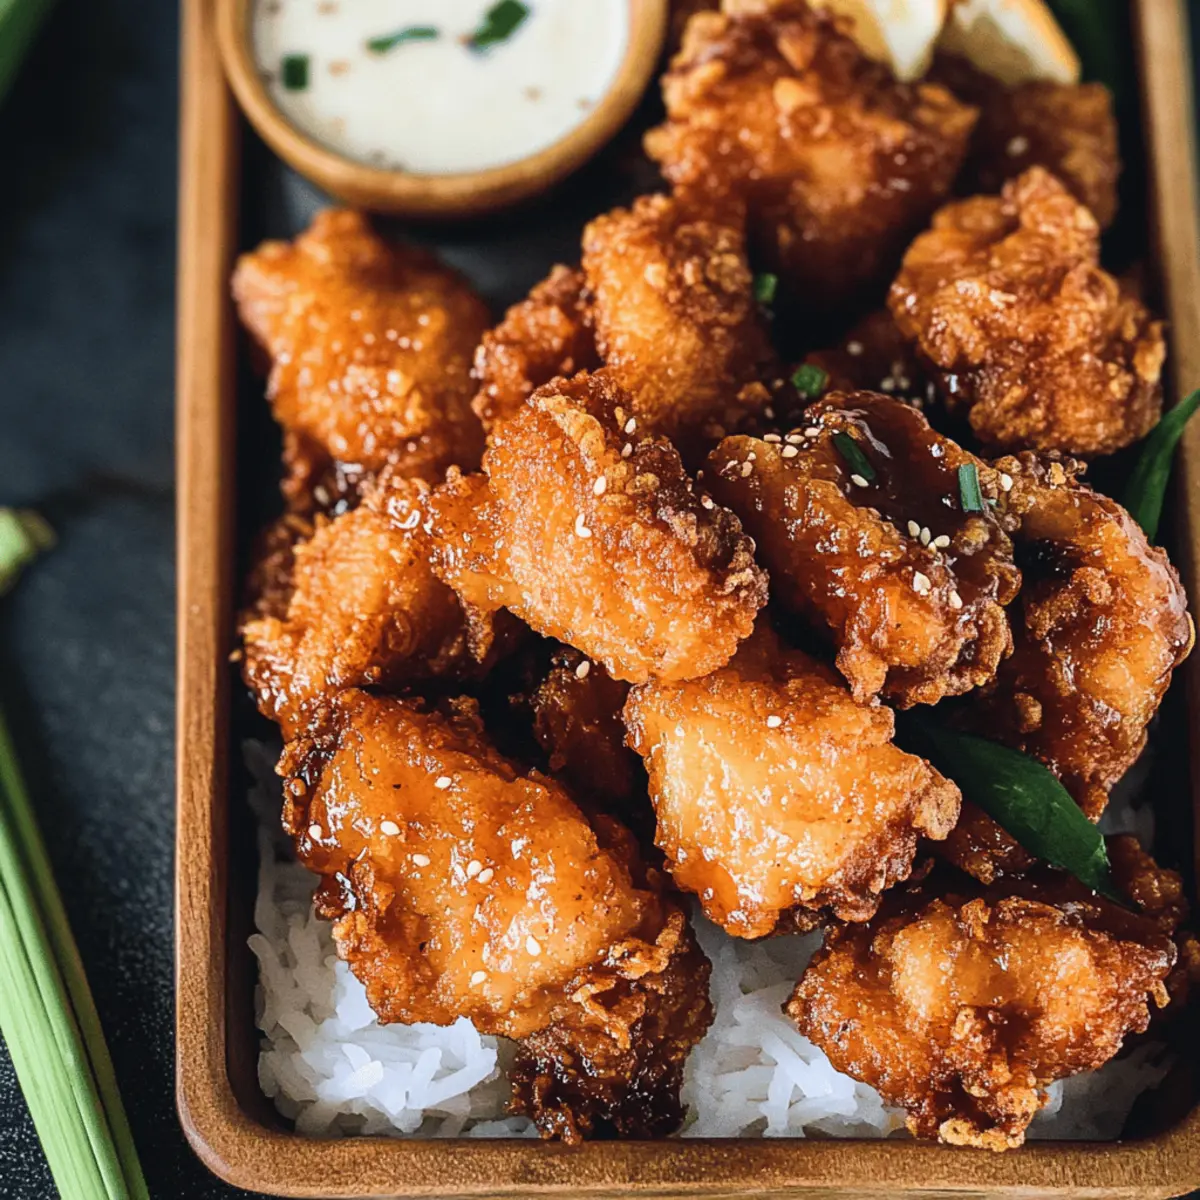
Comforting Home Cooking: Bring the tropical vibes of Hawaii into your kitchen and transform your meals from mundane to extraordinary. Pair it with jasmine rice or enjoy it alongside Honey Chili Chicken for a delicious feast!
Hawaiian Fried Garlic Chicken Ingredients
For the Chicken
- Chicken (2 pounds/1 kg) – Main protein; cut into cubes for fast cooking, or substitute with drumettes or wings for variation.
- Cornstarch (1 TBSP for chicken) – Acts as a tenderizer, ensuring juicy bites that fry up crispy.
For the Marinade
- Soy Sauce (3/4 cup) – Provides savory depth and umami; opt for gluten-free soy sauce for a gluten-free version.
- Sugar (3/4 cup) – Balances the savory elements of the soy sauce; brown sugar adds a deeper flavor.
- Garlic (1/2 cup, crushed or finely chopped) – Offers the dish’s signature flavor; fresh garlic is essential—powdered garlic won’t do!
- Vegetable Oil (1 TBSP) – Used for marinating, keeping the chicken moist during frying.
For the Coating
- Flour (1 1/2 cups) – Forms a crispy coating; substitute with gluten-free flour if needed.
- Cornstarch (1/2 cup for coating) – Helps achieve that extra crunchy texture everyone loves.
- Salt (1/2 tsp) – Enhances the overall flavor of the coating.
For the Garlic Sauce
- Green Onion (1/4 cup, chopped) – Adds freshness and a mild crunch; chives can work in a pinch.
- Sesame Oil (1 TBSP) – Enhances richness and nutty flavor; regular vegetable oil is a fine alternative.
- Red Chili Flakes (1 tsp) – Adds a kick; adjust according to your spice preference.
- White Pepper (1/2 tsp) – Offers a subtle heat that complements the garlic; black pepper can be used if that’s what you have on hand.
For Frying
- Vegetable Oil (additional for frying) – Use canola or another neutral oil for frying until golden and crispy.
With these ingredients, you’ll be on your way to creating a mouthwatering dish of Hawaiian Fried Garlic Chicken, perfect for family dinners or casual gatherings!
Step‑by‑Step Instructions for Hawaiian Fried Garlic Chicken
Step 1: Make the Garlic Sauce
In a small saucepan, combine 3/4 cup soy sauce and 3/4 cup sugar over medium heat, bringing to a gentle boil for about 2-3 minutes until it thickens slightly. Stir in 1/2 cup crushed garlic, 1/4 cup chopped green onion, 1 tablespoon sesame oil, 1 teaspoon red chili flakes, and 1/2 teaspoon white pepper. Let it boil for another minute before removing it from the heat, then set the sauce aside to cool.
Step 2: Marinate Chicken
In a large mixing bowl, add 2 pounds of cubed chicken along with 4-5 tablespoons of the prepared garlic sauce, 1 tablespoon cornstarch, and 1 tablespoon vegetable oil. Mix everything thoroughly until the chicken is well-coated. Cover the bowl with plastic wrap and allow it to marinate at room temperature for 30 minutes, or refrigerate overnight for an even richer flavor.
Step 3: Prepare Coating
While the chicken marinates, prepare the coating mixture in another bowl by whisking together 1 1/2 cups of flour, 1/2 cup cornstarch, and 1/2 teaspoon salt. To add a hint of flavor, incorporate 3 tablespoons of the garlic sauce into the dry mix, stirring until it forms small clumps. This will create a more textured coating for your Hawaiian Fried Garlic Chicken.
Step 4: Heat Oil
In a deep frying pan or large skillet, pour in enough vegetable oil to reach about 2 inches deep. Heat the oil over medium-high heat until it shimmers, ideally between 350°F to 375°F (175°C to 190°C). Using a thermometer can help ensure the oil is at the perfect temperature for frying, promoting an even golden crispiness on the chicken.
Step 5: Coat & Fry Chicken
Once the oil is heated, take the marinated chicken pieces and dredge them in the flour coating, pressing to ensure the mixture adheres well. Working in batches, carefully place the coated chicken into the hot oil, frying each piece for about 3-4 minutes or until golden brown and crispy. Use a slotted spoon to transfer the fried chicken onto paper towels to drain excess oil and keep them crisp.
Step 6: Coat Chicken with Sauce
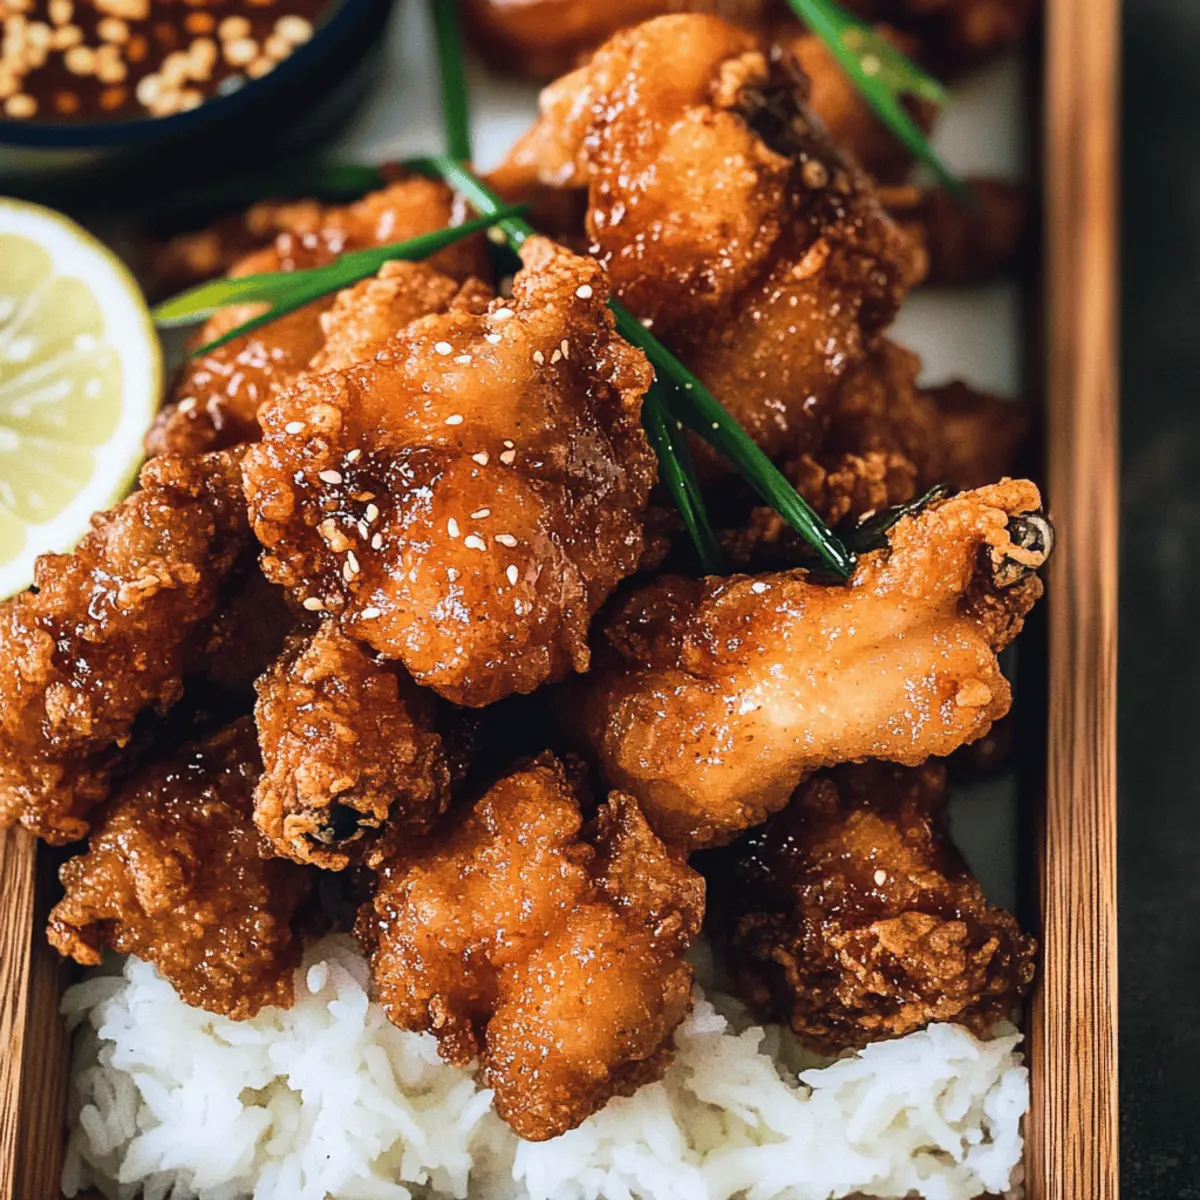
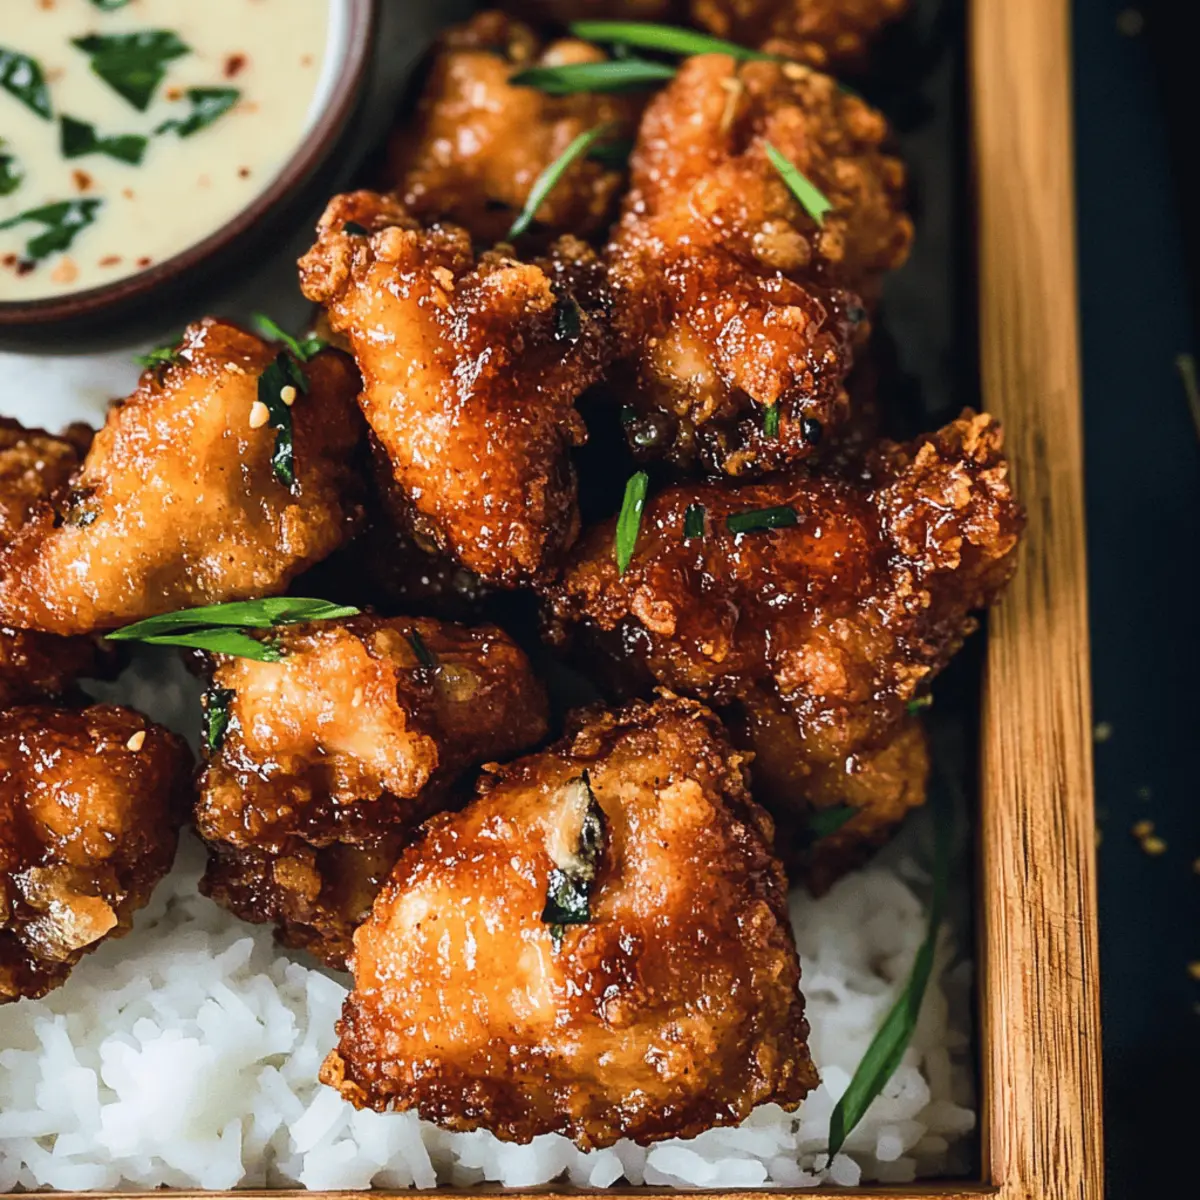
After frying, warm any remaining garlic sauce over low heat until heated through. In a large mixing bowl, toss the crispy fried chicken with the warm sauce until well coated, allowing the sweetness and flavor to cling to each piece. Alternatively, serve the savory garlic sauce on the side for dipping, ensuring everyone enjoys a taste of this delicious Hawaiian Fried Garlic Chicken.
What to Serve with Crispy Hawaiian Fried Garlic Chicken
As you savor each bite of this crispy delight, consider complementing it with vibrant flavors and textures to create the ultimate dining experience.
-
Jasmine Rice: The fluffy rice soaks up the sweet and sticky sauce beautifully, providing a satisfying base that balances the dish’s richness.
-
Fried Rice with Vegetables: Add colorful veggies to fried rice for a deliciously textured side that enhances the meal’s savory elements and adds a crunch.
-
Grilled Pineapple Slices: Freshly grilled pineapple slices bring a sweet, caramelized touch that pairs exquisitely with the garlic chicken, creating a bright tropical contrast.
-
Asian Slaw: A tangy slaw with cabbage, carrots, and sesame dressing adds both freshness and crunch, tempering the richness of the fried chicken perfectly.
-
Garlic Noodles: These buttery, garlic-infused noodles make a fantastic side, creating a symphony of flavors that tie in beautifully with the main dish.
-
Beer or Tropical Fruit Punch: A refreshing beer or a fruity punch adds a celebratory touch, balancing the savory intensity of the chicken with bubbly sweetness.
-
Coconut Cream Pie: For a sweet ending, consider serving a slice of coconut cream pie. Its creamy texture and light sweetness perfectly contrast the savory main dish, leaving everyone satisfied.
How to Store and Freeze Hawaiian Fried Garlic Chicken
-
Fridge: Store leftover Hawaiian Fried Garlic Chicken in an airtight container for up to 3 days. This helps maintain its delicious flavor while keeping it safe to eat.
-
Freezer: For longer storage, freeze the chicken in a single layer on a baking sheet. Once solid, transfer to a freezer-safe bag or container for up to 3 months.
-
Reheating: Reheat in the oven at 375°F (190°C) for about 10-15 minutes to maintain crispness. Alternatively, you can reheat in the microwave, but the coating may lose some crunch.
-
Sauce Storage: If you have leftover garlic sauce, store it in a separate container in the fridge for up to 1 week. It can be reheated for dipping or drizzling over freshly cooked chicken.
Hawaiian Fried Garlic Chicken Variations
Feel free to play around with this recipe and discover the delicious possibilities waiting for you!
-
Tofu Option: Replace chicken with firm tofu for a tasty plant-based twist. Marinate and fry until golden for a satisfying vegan dish.
-
Different Cuts: Switch chicken breasts for thighs or drumsticks, providing richer flavor and juicier bites with every mouthful.
-
Heat Booster: Add more red chili flakes or fresh sliced jalapeños to the sauce for a fiery kick that spice lovers will appreciate.
-
Herbal Infusion: Stir in fresh herbs like basil or cilantro into the sauce for an aromatic touch that brightens up the dish effortlessly.
-
Coconut Milk Creaminess: Incorporate a splash of coconut milk into the garlic sauce for a tropical twist that enhances the richness and brings out Hawaiian flavors.
-
Sweet & Spicy: Mix in a touch of honey or sriracha into the sauce for a sweet and spicy fusion that will tantalize your taste buds.
-
Crunchy Coating: For extra crunch, add crushed cornflakes or panko to the dry coating mixture to elevate the texture even further.
-
Savory Pairings: Serve this flavorful chicken alongside fragrant jasmine rice or pair it with fried rice topped with furikake seasoning for the ultimate comfort food experience.
Dive into various combinations that personalize your Hawaiian Fried Garlic Chicken adventure. This comforting recipe is only the beginning of the culinary fun that awaits! If you’d like to explore other savory chicken options, check out our Homemade Chicken Pot or go for a delightful sweet touch with Tropical Chicken Pineapple. Enjoy your cooking!
Expert Tips for Hawaiian Fried Garlic Chicken
-
Oil Temperature: Ensure the oil is hot enough (350°F to 375°F) before frying to achieve that perfect, crispy texture without greasiness.
-
Marination Time: Let the chicken marinate for at least 30 minutes, or overnight if possible. This enhances flavor and tenderness.
-
Coating Adherence: Press the coating onto the chicken firmly when dredging to help it stick better during frying, resulting in an extra-crunchy Hawaiian Fried Garlic Chicken.
-
Batch Frying: Fry in small batches to avoid overcrowding the pan. This allows for even cooking and ensures each piece gets perfectly crispy.
-
Drain Excess Oil: Place the fried chicken on paper towels immediately after frying. This helps remove excess oil and keeps the chicken crunchier for longer.
-
Serving Tip: Serve with extra garlic sauce on the side for dipping to satisfy every garlic lover at the table!
Make Ahead Options
These Crispy Hawaiian Fried Garlic Chicken bites are ideal for meal prep, allowing you to save time on busy nights! You can marinate the chicken in the garlic sauce for up to 24 hours in advance, which not only enhances the flavor but also ensures your chicken remains tender. Additionally, you can prepare the coating mixture and store it in the refrigerator, keeping it fresh for up to 3 days. When you’re ready to fry, simply dredge the marinated chicken in the coating and fry as directed. For the best results, be sure to keep the oil at the correct temperature to maintain that delicious crispiness. Enjoy mouthwatering results with minimal effort!
Hawaiian Fried Garlic Chicken Recipe FAQs
How do I choose the best chicken for this recipe?
Absolutely! For this Hawaiian Fried Garlic Chicken, I recommend using boneless, skinless chicken breasts or thighs, as they cook quickly and remain juicy. If you’re feeling adventurous, drumsticks or wings can add more flavor but may require slightly longer cooking times. Just ensure the chicken pieces are uniform in size for even cooking.
What is the best way to store leftover fried chicken?
Once you’ve enjoyed your meal, store any leftover Hawaiian Fried Garlic Chicken in an airtight container in the refrigerator for up to 3 days. Make sure to let the chicken cool completely before sealing it, as this helps prevent condensation, which could lead to sogginess. Reheat in the oven for best results to regain crispiness.
Can I freeze the Hawaiian Fried Garlic Chicken?
You certainly can! To freeze, first allow the chicken to cool completely. Arrange it in a single layer on a baking sheet and place it in the freezer until firm, about 1-2 hours. Then, transfer the chicken to a freezer-safe bag or container, where it can stay fresh for up to 3 months. Just be sure to label the bag with the date!
What if my chicken coating doesn’t stick?
No worries—this can happen! If the coating isn’t sticking, try pressing it onto the chicken more firmly when dredging. You can also marinate the chicken a bit longer to enhance moisture and stickiness. Additionally, if your cornstarch isn’t thoroughly mixed in with the chicken, it might not adhere well; be sure to coat the chicken evenly.
Are there any dietary considerations I should be aware of?
Very much so! This recipe uses soy sauce, which contains gluten, so opt for gluten-free soy sauce if needed. If you’re cooking for someone with a garlic allergy—though rare—this recipe might not be suitable. For a plant-based alternative, you can swap the chicken for tofu or tempeh, following the same marinade and frying steps.
How can I keep the fried chicken crispy after cooking?
To maintain that delightful crunch, avoid covering the fried chicken right after cooking, as this traps steam and can make it soggy. Place fried chicken on a wire rack over a baking tray to keep air circulation flowing. If you know it will be a while before you’re ready to eat, keep it in a warm (but not hot) oven—around 200°F (90°C)—to keep it crispy for longer.
Crispy Hawaiian Fried Garlic Chicken for a Flavorful Dinner
Ingredients
Equipment
Method
- In a small saucepan, combine 3/4 cup soy sauce and 3/4 cup sugar over medium heat, bringing to a gentle boil for about 2-3 minutes until it thickens slightly. Stir in 1/2 cup crushed garlic, 1/4 cup chopped green onion, 1 tablespoon sesame oil, 1 teaspoon red chili flakes, and 1/2 teaspoon white pepper. Let it boil for another minute before removing it from the heat, then set the sauce aside to cool.
- In a large mixing bowl, add 2 pounds of cubed chicken along with 4-5 tablespoons of the prepared garlic sauce, 1 tablespoon cornstarch, and 1 tablespoon vegetable oil. Mix everything thoroughly until the chicken is well-coated. Cover the bowl with plastic wrap and allow it to marinate at room temperature for 30 minutes, or refrigerate overnight for an even richer flavor.
- While the chicken marinates, prepare the coating mixture in another bowl by whisking together 1 1/2 cups of flour, 1/2 cup cornstarch, and 1/2 teaspoon salt. To add a hint of flavor, incorporate 3 tablespoons of the garlic sauce into the dry mix, stirring until it forms small clumps.
- In a deep frying pan or large skillet, pour in enough vegetable oil to reach about 2 inches deep. Heat the oil over medium-high heat until it shimmers, ideally between 350°F to 375°F (175°C to 190°C).
- Once the oil is heated, take the marinated chicken pieces and dredge them in the flour coating, pressing to ensure the mixture adheres well. Working in batches, carefully place the coated chicken into the hot oil, frying each piece for about 3-4 minutes or until golden brown and crispy.
- After frying, warm any remaining garlic sauce over low heat until heated through. In a large mixing bowl, toss the crispy fried chicken with the warm sauce until well coated. Serve the savory garlic sauce on the side for dipping.