

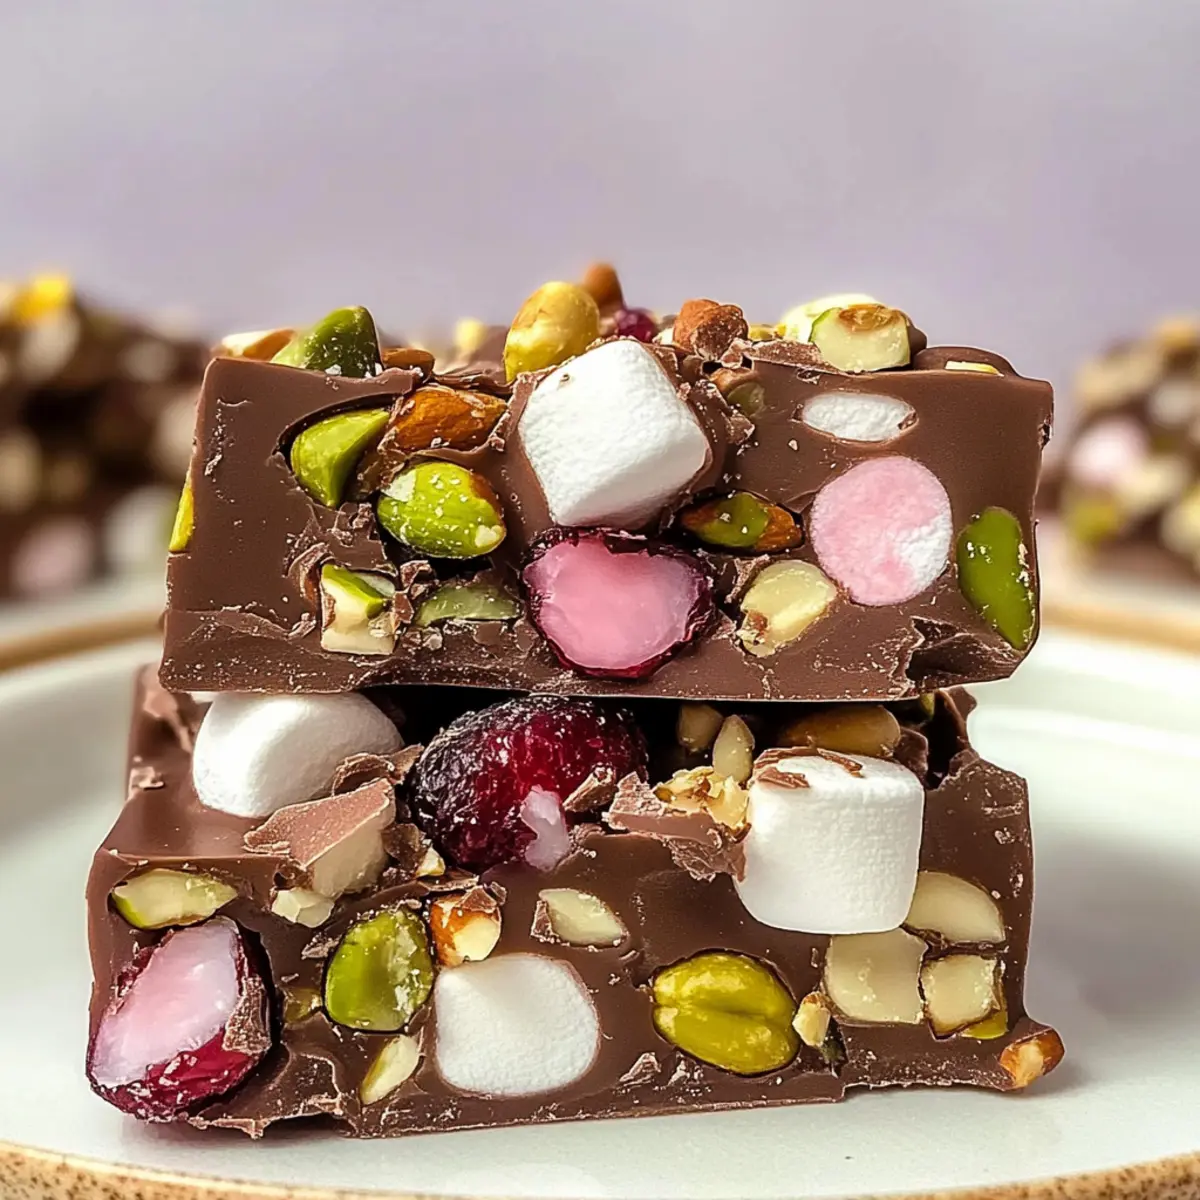
As I unwrapped the festive foil from a box of chocolates, the glossy layers glimmered with promise, igniting a wave of nostalgia for holiday treats past. Enter the Easy No-Bake Christmas Rocky Road—a delightful dessert that brings back those warm, joyful memories! With just 20 minutes of prep, this recipe offers a customizable treat that sidesteps all the fuss of baking while still delivering on flavor and fun. Imagine serving up a colorful array of textures, from creamy chocolate to crunchy nuts and chewy marshmallows, all topped off with a dash of festive flair. Perfect for sharing with friends at holiday gatherings or wrapped up as thoughtful gifts, this sweet creation is both a no-brainer and a showstopper. So, are you ready to dive into this delectable holiday adventure and whip up your own batch? Let’s get started!
Why is Christmas Rocky Road so irresistible?
Customization: With endless ingredient choices, you can tailor this recipe to suit any taste or dietary preference.
Quick Prep: In just 20 minutes, you’ll have a festive dessert ready, making it a time-saver during the busy holiday season.
Celebrity Appeal: Everyone loves a treat that combines chocolate, nuts, and marshmallows—a sure-fire crowd-pleaser for gatherings!
Visual Delight: The vibrant colors and textures make it not just tasty but also a feast for the eyes, perfect for adding joy to your holiday spread.
No-Bake Wonder: Forget preheating the oven—this dessert means no fuss and no mess, allowing you more time to enjoy the festivities.
Gifting Potential: Package it up beautifully, and you’ll have a delightful homemade gift that’s perfect for sharing with friends and family this season.
Try serving it alongside your favorite hot chocolate for a cozy pairing or explore variations, such as adding peppermint extract for a refreshing twist!
Christmas Rocky Road Ingredients
For the Chocolate Base
- Milk Chocolate – Provides a sweet and creamy foundation. You can substitute with dark chocolate for a more intense flavor.
- Dark Chocolate – Enhances the taste complexity; omit if you prefer a purely milk chocolate base.
For the Crunchy Elements
- Roasted Macadamia Nuts – Offers a luxurious crunch; you can swap in almonds or leave them out for a nut-free treat.
- Crispy Pistachios – Adds an extra layer of crunch; sunflower seeds are a great nut-free alternative.
For the Sweet Chewiness
- Mini Marshmallows – Contributes delightful softness; larger marshmallows can be halved if you prefer.
- Cranberries – Adds a burst of tartness; dried cherries or raisins can be substituted for a different flavor twist.
- Turkish Delight – Infuses chewy texture; feel free to replace it with other chewy candies if desired.
Optional Toppings
- Extra Nuts – A sprinkling of your favorite nuts can enhance flavor and decoration.
- Colorful Sprinkles – Perfect for adding a festive touch and visual interest to your Christmas Rocky Road.
Embrace the versatility of this Christmas Rocky Road recipe, where you can mix and match ingredients to create a personalized version that everyone will love!
Step‑by‑Step Instructions for Easy No-Bake Christmas Rocky Road
Step 1: Melt the Chocolate
Begin by chopping the milk and dark chocolate into small pieces to ensure even melting. Place the chopped chocolate in a microwave-safe bowl and heat in 20-second intervals, stirring in between until smooth—this should take about 1 to 2 minutes. Once melted, the chocolate should be glossy and completely liquid, perfect for creating your Christmas Rocky Road base.
Step 2: Mix in Ingredients
Remove the melted chocolate from the microwave and allow it to cool slightly for about 5 minutes. Then, fold in the roasted macadamia nuts, crispy pistachios, mini marshmallows, and cranberries until they are evenly coated with chocolate. You should have a thick mixture that’s substantial but still pourable, ideal for your next step in making this delightful no-bake treat.
Step 3: Prepare the Pan
Line an 8-inch square baking pan with parchment paper, letting the edges hang over the sides for easy removal later. Pour the chocolate mixture into the lined pan, spreading it evenly with a spatula to ensure an even thickness throughout. The mixture should be level, creating a solid foundation for your Christmas Rocky Road to set perfectly.
Step 4: Add Optional Toppings
If you’re using optional toppings, now is the time to sprinkle them over the surface of the chocolate mixture. Gently press down on the toppings with your fingertips to ensure they adhere well. This extra step not only enhances the visual appeal of your Christmas Rocky Road but also adds delightful crunch and flavor variations.
Step 5: Chill to Set
Cover the pan with plastic wrap or aluminum foil to prevent moisture from altering your treat. Place the pan in the refrigerator and chill for at least 1 hour, allowing the chocolate to firm up completely. You’ll know it’s ready when the mixture feels solid and holds its shape when gently pressed.
Step 6: Cut and Serve
Once set, remove the chocolate from the pan by lifting it out using the overhanging parchment paper. Transfer it to a cutting board and slice into squares or rectangles, depending on your preference. Your Easy No-Bake Christmas Rocky Road is now ready to serve, showcasing its vibrant colors and inviting textures—a sure hit at any holiday gathering!
What to Serve with Easy No-Bake Christmas Rocky Road
Imagine a cozy holiday gathering where sweet flavors and festive vibes abound; let’s pair this indulgent treat perfectly!
- Rich Hot Chocolate: The creamy texture and chocolatey richness perfectly complement the sweet crunch of the rocky road.
- Vanilla Ice Cream: This classic pairing adds a refreshing, cold counterpoint to the rich chocolate, creating a delightful balance.
- Coffee or Espresso: A warm cup enhances the sweet flavors while the bitterness cuts through the richness, making each bite even more enjoyable.
- Fruit Salad: A light and zesty fruit salad introduces fresh elements that brighten the palate, enhancing the overall festive experience.
- Nutty Biscotti: Crunchy biscotti adds a delightful texture contrast while echoing the nutty elements in the rocky road itself.
- Spiced Mulled Wine: This aromatic drink not only warms the soul but its spices beautifully align with the holiday spirit of your treat.
- Colorful Sprinkles: Serve as an optional topping; they elevate visual appeal, inviting everyone for a taste of this festive delight.
- Cranberry Sorbet: Tart and refreshing, it acts as a palate cleanser between bites of rich rocky road, enhancing the indulgence.
- Chewy Caramel Brownies: A sweet and fudgy companion that brings an extra layer of decadence, perfect for an indulgent dessert platter.
Expert Tips for the Best Christmas Rocky Road
-
Chocolate Care: Avoid overheating the chocolate; melt it in short bursts to prevent burning and ensure a smooth texture for your Christmas Rocky Road.
-
Chilling Time: For an ideal set, let the mixture chill for at least an hour, or longer if you prefer a firmer treat—it’s worth the wait!
-
Adjustment for Thickness: If your chocolate mixture feels too thick while mixing, add a splash of coconut or vegetable oil to achieve the perfect consistency.
-
Nuts Consideration: When choosing nuts, pre-roast them for extra flavor, but ensure everyone can enjoy it by offering a nut-free version.
-
Festive Presentation: Elevate your Christmas Rocky Road by sprinkling colorful toppings like sprinkles or sea salt before refrigerating—visual appeal makes it more inviting!
-
Customizable Delight: Remember, the beauty of this recipe lies in customization—mix and match ingredients to make the treat truly yours!
Make Ahead Options
These Easy No-Bake Christmas Rocky Road treats are perfect for busy home cooks looking to simplify their holiday preparations! You can prepare the chocolate base up to 24 hours in advance; simply melt and mix your ingredients together, then spread them into the lined baking pan. Cover tightly with plastic wrap and refrigerate. The mixture can also include its toppings at this stage, ensuring everything is ready to go. When it’s time to serve, you’ll just need to cut the Rocky Road into squares—easy and stress-free! By prepping ahead, you’ll keep all the deliciousness without compromising quality, ensuring they are just as delightful for your holiday gatherings.
Christmas Rocky Road Variations & Substitutions
Feel free to switch things up and make this treat your own with these delightful variations!
- Nut-Free: Substitute macadamia nuts and pistachios with sunflower seeds or pumpkin seeds to keep everyone safe and crunchy!
- Minty Fresh: Add a few drops of peppermint extract to the melted chocolate for a refreshing holiday twist—just imagine that cool burst with every bite.
- Color Pop: Use colored mini marshmallows instead for a festive look that’s even more fun and inviting when serving at holiday parties.
- Chewy Choices: Swap out Turkish Delight for your favorite chewy candy, like gummy bears or fruit chews, for a sweet surprise and new texture.
- Spicy Kick: For heat lovers, add a pinch of cayenne or chili powder to the melted chocolate to create a deliciously spicy contrast.
- Dried Fruits: Experiment with dried cherries, apricots, or even figs instead of cranberries for a touch of sweetness and chewy texture that will transport you to a cozy holiday gathering.
- Coconut Lover: Mix in unsweetened shredded coconut along with your nuts for a tropical twist and an extra layer of flavor that complements the chocolate beautifully.
Each variation brings its own charm and allows you to share your personal touch. While you’re at it, don’t forget to enjoy this delightful treat with a warm cup of hot chocolate or serve it alongside a scoop of vanilla ice cream for a truly indulgent dessert experience. Happy holiday cooking!
How to Store and Freeze Christmas Rocky Road
-
Fridge: Store your Christmas Rocky Road in an airtight container in the fridge for up to 2 weeks. This keeps the chocolate soft and the flavors fresh.
-
Freezer: For longer storage, wrap individual slices tightly in plastic wrap and place them in a freezer-safe container. They will last for up to 3 months without losing flavor.
-
Thawing: To enjoy frozen slices, transfer them to the fridge for several hours before serving, or let them sit at room temperature for about 30 minutes.
-
Reheating: If you prefer a slightly melted chocolate consistency, gently microwave a slice for about 10-15 seconds. Enjoy the delicious mix of textures with each bite!
Easy No-Bake Christmas Rocky Road Recipe FAQs
What should I look for when selecting chocolate?
Absolutely! When choosing your chocolate, make sure it has a shiny surface and a rich aroma—both signs of quality. Look for chocolate with a high cocoa content (70% or higher for dark chocolate) for a more intense flavor. Avoid chocolate that has a dull appearance or whitish surface, as these may indicate it’s past its prime.
How should I store leftover Christmas Rocky Road?
You can store your Christmas Rocky Road in an airtight container in the fridge for up to 2 weeks. This helps maintain its delectable texture and flavor. If you prefer, you can wrap the pieces tightly in plastic wrap to keep them fresh. Just ensure the container is sealed well to keep out any moisture.
Can I freeze Christmas Rocky Road for later?
Definitely! To freeze, wrap individual slices in plastic wrap and place them in a freezer-safe container. They can last up to 3 months. When you’re ready to enjoy, just transfer them to the fridge for a few hours to thaw or let them sit at room temperature for about 30 minutes before serving.
What can I do if my chocolate mixture is too thick?
If your chocolate mixture feels too thick, no worries! Just add a splash of coconut or vegetable oil, about 1 tablespoon at a time, and stir until you reach your desired consistency. This helps maintain that lovely smooth texture while ensuring all the ingredients are well-coated. Remember, this is all about making it easy for you!
Are there any allergens to consider with this recipe?
Yes, it’s essential to consider allergens, especially if you’re serving guests. This Christmas Rocky Road contains nuts, chocolate, and possibly dairy from the chocolate. For a nut-free version, simply omit the nuts and substitute with sunflower seeds or extra crispy cereal. Always check labels for potential cross-contaminants if you’re catering to food allergies.
Can pets have any of the ingredients?
No, it’s best to keep this delicious treat away from pets. Chocolate is toxic to dogs and cats, even in small amounts. Ingredients like nuts and sugary candy can also be harmful. Always ensure that any leftover Rocky Road is kept in a place that’s out of reach from your furry friends!
Deliciously Easy Christmas Rocky Road in Just 20 Minutes
Ingredients
Equipment
Method
- Chop the milk and dark chocolate into small pieces. Melt in a microwave-safe bowl in 20-second intervals, stirring until smooth.
- Allow melted chocolate to cool slightly, then fold in the macadamia nuts, pistachios, mini marshmallows, and cranberries.
- Line an 8-inch square baking pan with parchment paper. Pour the chocolate mixture into it, spreading evenly.
- Sprinkle optional toppings over the surface and gently press down to adhere.
- Cover the pan with plastic wrap and chill in the refrigerator for at least 1 hour.
- Once set, lift the chocolate out of the pan using the parchment paper, and cut into squares to serve.