

As I stood in my kitchen, the alluring scent of warm cornmeal filled the air, instantly transporting me to the vibrant streets of Latin America. Let me introduce you to Homemade Arepas with Creamy Reina Pepiada Filling—a dish that effortlessly combines crispy textures and creamy richness into every bite. Not only are these gluten-free delights quick to whip up, making them perfect for busy weeknights, but they’re also versatile enough to suit every palate, whether you’re a seasoned chef or a kitchen novice. Imagine tucking into a golden-brown arepa, generously stuffed with a dreamy mixture of shredded chicken, ripe avocado, and zesty lime. It’s a comforting meal that never fails to impress at the dinner table. Curious about how to bring this slice of culinary joy into your home? Let’s dive into the recipe!
Why Will You Adore This Recipe?
Comforting Delight: Homemade arepas are a warm, inviting dish that wraps you in nostalgia with every bite.
Gluten-Free Goodness: Enjoy a guilt-free treat that caters to gluten-sensitive diets without skimping on flavor.
Quick and Easy: With just a few simple ingredients, you can whip up these arepas in no time, perfect for busy weeknights.
Versatile Filling Options: Think outside the box! While the Reina Pepiada filling is divine, you can easily switch it up with the likes of sautéed vegetables or even black beans for a hearty twist.
Crowd-Pleasing Appeal: Whether it’s a family dinner or a gathering with friends, these arepas are guaranteed to be a hit. Pair them with a side of Homemade Chicken Pot or fresh salsa for an unforgettable meal!
Homemade Arepas Ingredients
For the Arepas
• Pre-cooked White Cornmeal – Provides structure and a nutty flavor; look for the P.A.N. brand for authentic texture.
• Warm Water – Hydrates the cornmeal; aim for a temperature of 100°F to 110°F for best results.
• Salt – Enhances flavor in the dough; adjust according to your taste preference.
• Vegetable Oil – Adds moisture and helps cook the arepas; keep some extra for greasing the skillet.
For the Creamy Filling
• Cooked Chicken (shredded) – The main protein, enriching the filling; rotisserie chicken is a convenient choice.
• Ripe Avocado – The base for creaminess, offering healthy fats; ensure ripeness for optimal mash.
• Mayonnaise – Adds depth of flavor and creaminess; can swap for Greek yogurt for a lighter option.
• Small Onion (finely chopped) – Infuses sweet, aromatic notes into the filling.
• Fresh Cilantro (finely chopped) – Provides a fresh, herbaceous kick; can be substituted with parsley if desired.
• Jalapeño (seeded, finely chopped, optional) – Adds a spicy twist; adjust the amount based on spice preference.
• Juice of 1 Lime – Elevates the flavor with a hint of acidity; fresh lime juice is always recommended.
Dive into these simple ingredients and prepare for the delightful joy of making your very own Homemade Arepas!
Step‑by‑Step Instructions for Homemade Arepas with Creamy Reina Pepiada Filling
Step 1: Prepare the Dough
In a large mixing bowl, combine the pre-cooked white cornmeal, salt, and vegetable oil. Gradually pour in warm water, which should be between 100°F and 110°F, until the mixture forms a smooth, pliable dough. Let the dough rest for 5 minutes, allowing it to hydrate fully and become easier to shape.
Step 2: Shape the Arepas
After resting, divide the dough into six equal portions. Roll each portion into a smooth ball, then flatten it gently into a disc about 4-5 inches wide and ½ inch thick. Ensure the edges are smooth and even for perfect cooking. Place the shaped arepas on a plate, ready for cooking.
Step 3: Cook the Arepas
Heat a skillet over medium heat and add a little vegetable oil. Carefully place the shaped arepas in the skillet, making sure not to overcrowd them. Cook for 6-7 minutes on each side, or until they develop a beautiful golden-brown crust. For an extra crispy texture, transfer the cooked arepas to a preheated oven at 350°F (175°C) for 10-15 minutes.
Step 4: Make the Filling
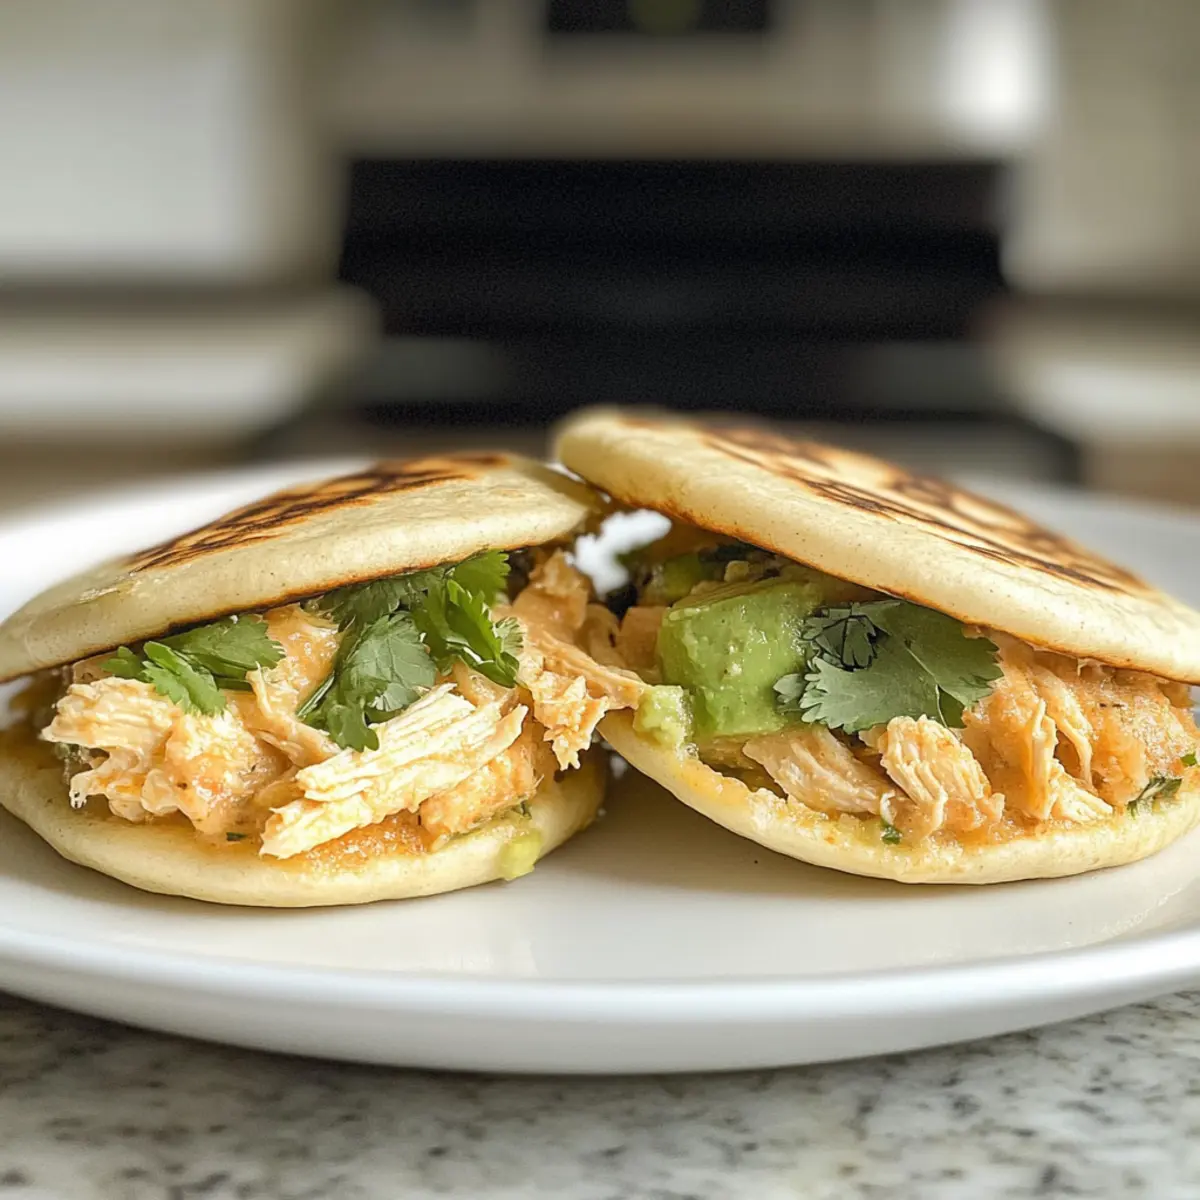
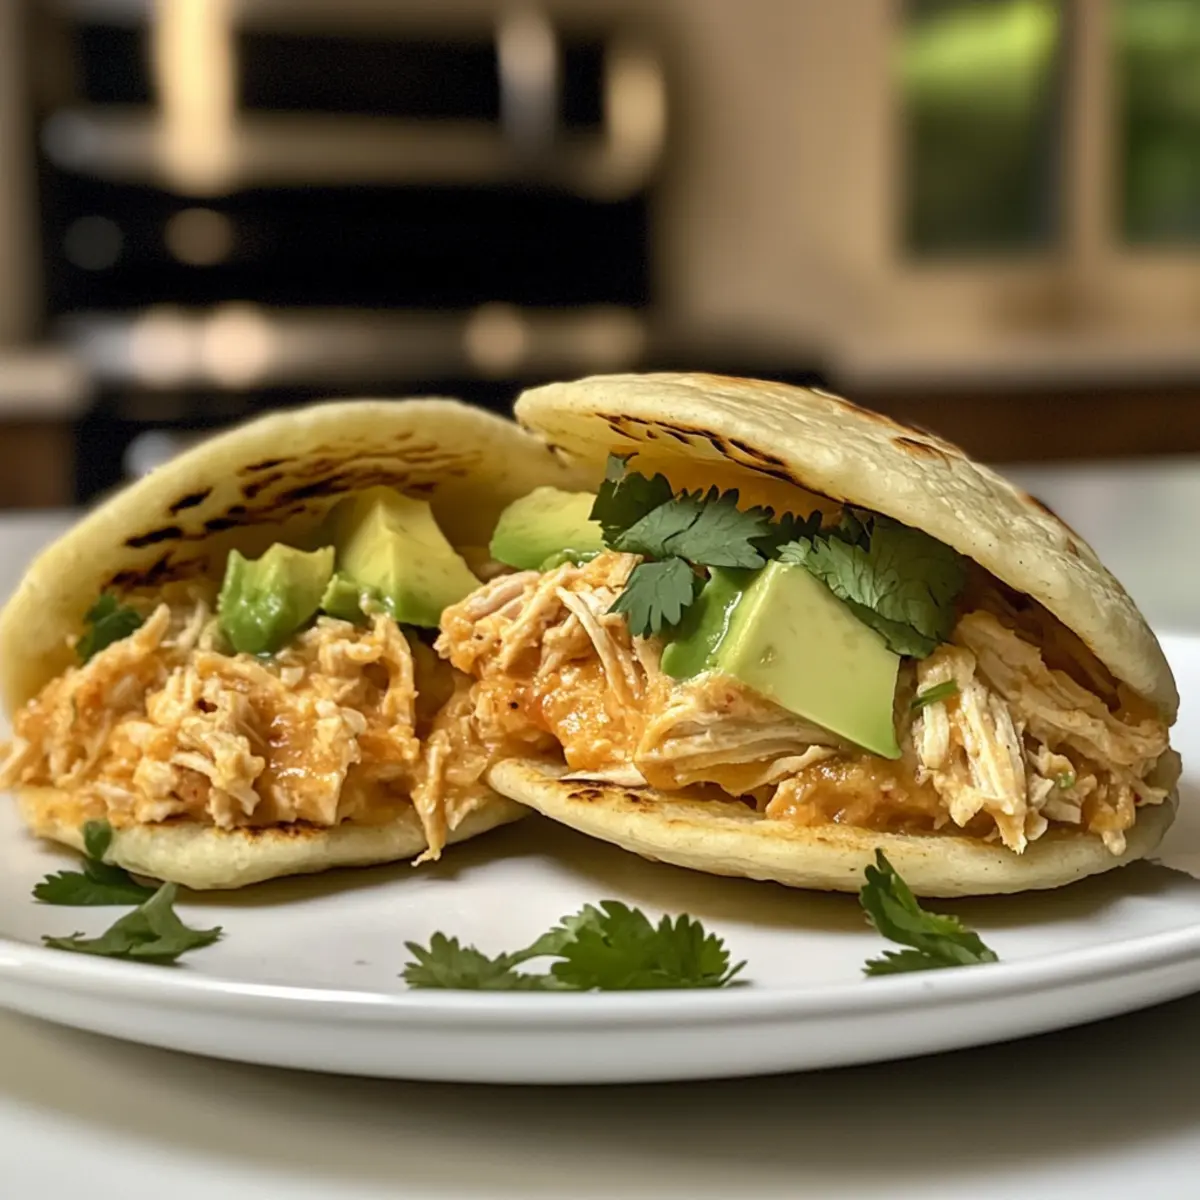
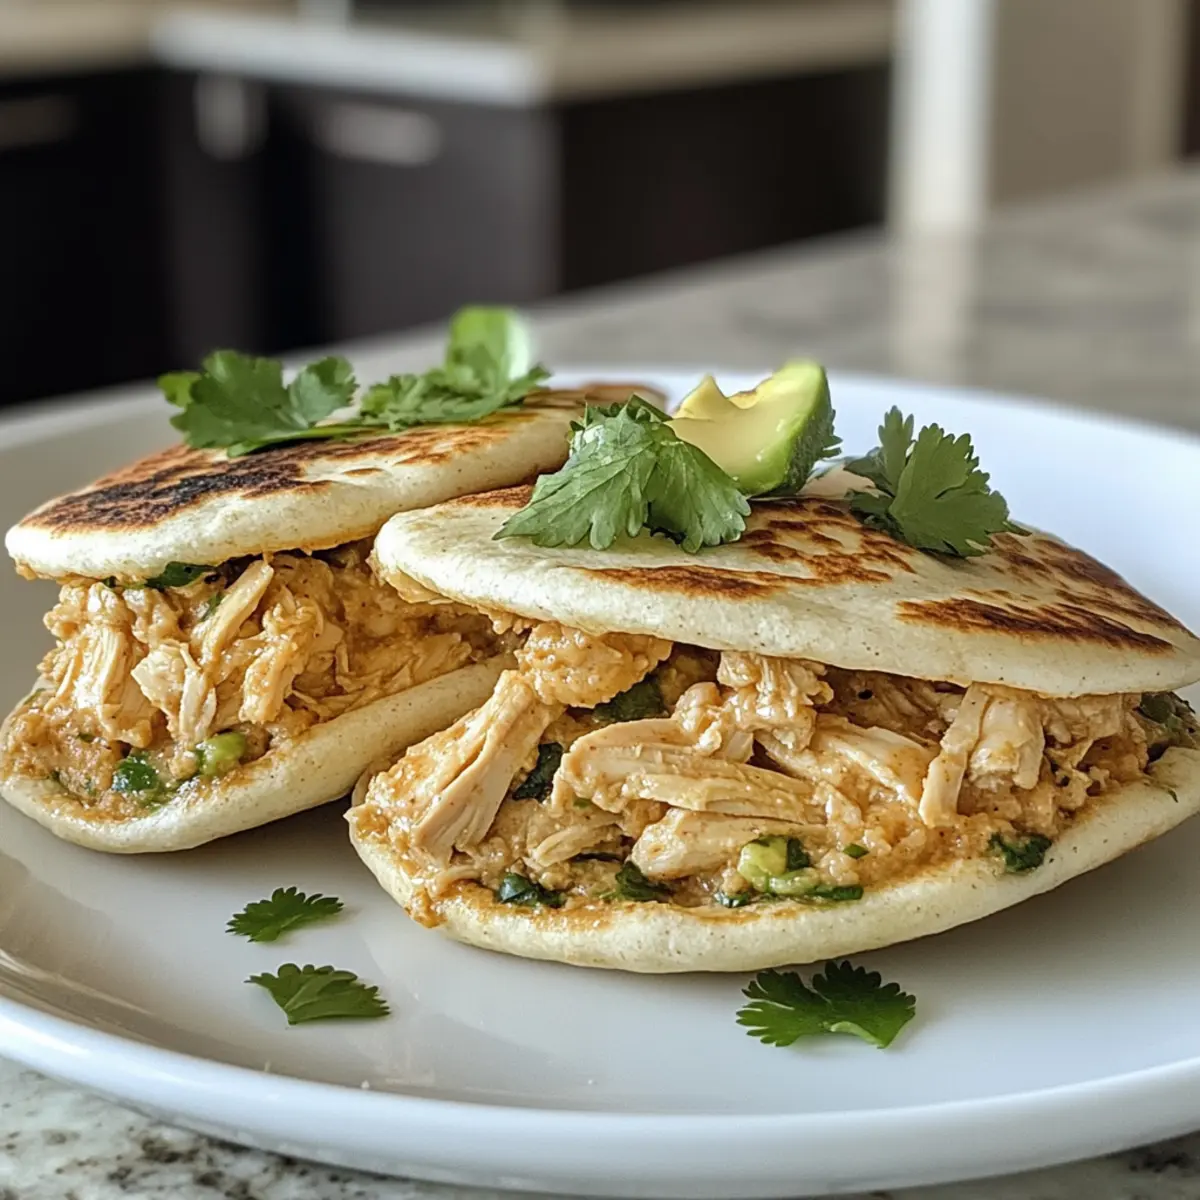
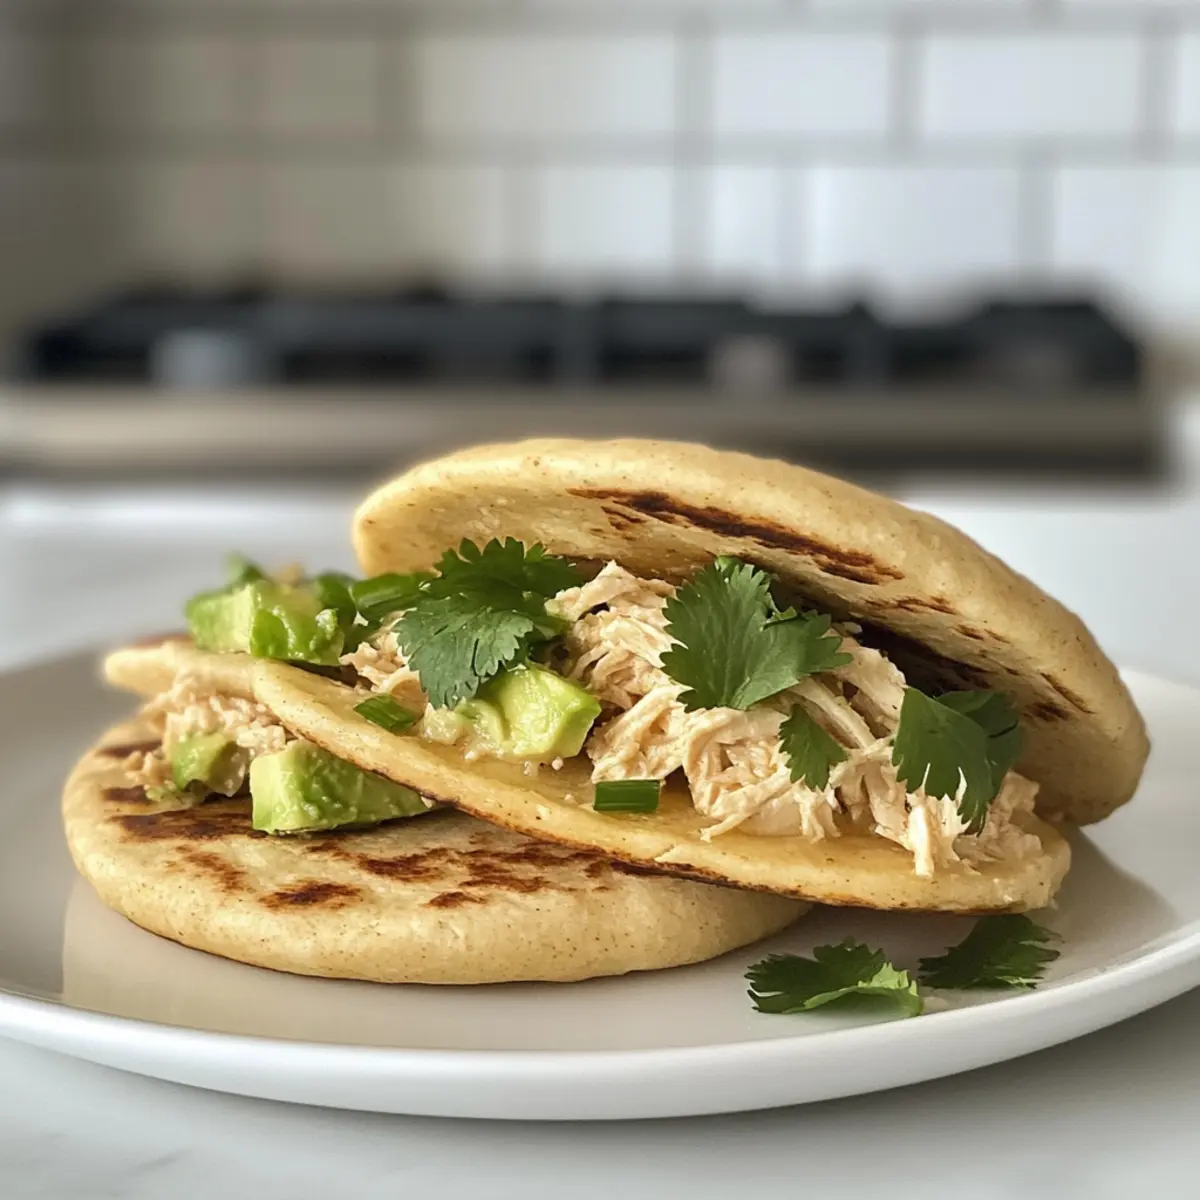
While the arepas are cooking, prepare the creamy Reina Pepiada filling. In a separate bowl, mix the shredded chicken, finely chopped onion, cilantro, and optional jalapeño. In another bowl, mash the ripe avocado and blend it with mayonnaise and lime juice until creamy. Combine this mixture with the chicken and adjust seasoning with salt and pepper to taste.
Step 5: Assemble the Arepas
Once the arepas are cooked and golden, remove them from the heat and let them cool slightly. Slice an opening on one side of each arepa to create a pocket. Generously fill each pocket with the creamy Reina Pepiada mixture, making sure not to overstuff. Serve the filled arepas warm for a delightful homemade meal!
Homemade Arepas: Delicious Variations
Feel free to play with these delectable twists to suit your taste and dietary needs!
-
Vegetarian Delight: Substitute chicken with mozzarella or queso fresco for a rich, cheesy filling. Each bite will surprise you with creamy goodness!
-
Hearty Black Bean Filling: For a protein-packed version, use canned black beans mixed with sautéed onions and spices. This hearty option offers a satisfying twist on the original flavor.
-
Garden Veggie Medley: Sauté a colorful mix of bell peppers, zucchini, and corn for a fresh filling. This provides a delightful crunch that complements the creamy avocado perfectly.
-
Spicy Kick: Add more heat by incorporating diced serrano peppers into the filling. Just the right amount of spice elevates the flavor profile!
-
Creamy Greek Swap: Replace mayonnaise in the filling with Greek yogurt for a tangy, protein-rich option that still delivers on creaminess. You’ll love the light touch!
-
Salsa Splash: Top your filled arepas with a vibrant salsa for an additional layer of flavor. Fresh pico de gallo or a robust mango salsa brings a summer vibe to every bite!
-
Zesty Citrus Burst: Squeeze extra lime juice into the filling for a refreshing, zesty uplift. That extra zing will make your taste buds dance!
For an exceptional meal experience, pair your arepas with a side of Homemade Sweet Orange Jam to bring out contrasting flavors or refreshing salads to balance the meal. Whatever variation you choose, enjoy the comforting allure of your homemade creations!
What to Serve with Homemade Arepas with Creamy Reina Pepiada Filling
As you savor the rich, creamy goodness of these arepas, consider enhancing your meal with delightful sides that balance flavors and textures beautifully.
-
Crispy Plantain Chips: Their sweetness contrasts wonderfully with the savory filling, offering a delightful crunch in every bite.
-
Fresh Corn Salad: A vibrant and colorful mix of corn, tomatoes, and cilantro adds brightness and a refreshing crunch that pairs perfectly.
-
Zesty Guacamole: Creamy and tangy, it’s the ideal dip to accompany your arepas while enriching each bite with extra flavor and moisture.
-
Spicy Salsa Verde: This tangy, vibrant salsa brings a zesty kick that complements the mildness of the arepas and adds a layer of excitement.
-
Black Bean Soup: Hearty and comforting, this dish is a wonderful side that balances the creamy filling of the arepas with its earthy flavors.
-
Sangria: A refreshing fruity drink that harmonizes perfectly with the spices and richness of your meal, bringing a festive flair to the table.
-
Cabbage Slaw: Crunchy and lightly dressed, a slaw provides a crisp contrast to the soft arepas, enhancing your overall dining experience.
-
Churros for Dessert: Lightly crispy on the outside and soft within, they make a perfect sweet ending to a savory meal, especially when dusted with cinnamon sugar.
Each of these pairings complements your Homemade Arepas with Creamy Reina Pepiada Filling while creating a well-rounded and satisfying culinary experience.
Expert Tips for Homemade Arepas
- Perfect Dough Consistency: Ensure your dough is not too sticky or too dry; aim for a smooth, pliable texture to make shaping easier.
- Preheat the Skillet: A well-heated skillet is essential—medium heat allows the arepas to achieve a golden crust without burning.
- Rest the Dough: Allowing the dough to rest for 5 minutes is crucial for hydration, ensuring ease of shaping and better texture in your homemade arepas.
- Optimal Cooking Time: Cook each arepa for 6-7 minutes on each side. A golden-brown appearance indicates they’re ready—don’t rush this step!
- Feel Free to Experiment: Variations are key! Substitute the chicken in the filling with cheese or black beans for a different flavor profile.
Storage Tips for Homemade Arepas
Room Temperature: Store cooked homemade arepas in an airtight container at room temperature for up to 2 days to maintain their freshness and texture.
Fridge: If you need to keep them longer, transfer the arepas to the refrigerator in an airtight container for up to 5 days. This helps preserve their flavor and moisture.
Freezer: For longer storage, freeze the arepas by wrapping them tightly in plastic wrap and then placing them in a freezer bag. They can be kept for up to 3 months.
Reheating: To reheat, thaw frozen arepas overnight in the refrigerator, then warm them in a skillet over medium heat or bake at 350°F (175°C) until heated through, ensuring they stay crispy.
Make Ahead Options
These Homemade Arepas with Creamy Reina Pepiada Filling are a fantastic choice for meal prep, saving you valuable time on busy weeknights! You can prepare the cornmeal dough up to 24 hours in advance—just wrap it in plastic wrap and refrigerate to maintain its moisture. The creamy filling can also be made ahead; store it in an airtight container in the fridge for up to 3 days. When you’re ready to serve, simply shape and cook the arepas, then fill them with your prepared Reina Pepiada mixture. This way, you’ll enjoy delicious, fresh arepas with minimal effort, allowing you to spend more quality time with family or simply relish a moment of peace!
Homemade Arepas with Creamy Reina Pepiada Filling Recipe FAQs
What kind of cornmeal should I use for homemade arepas?
I recommend using pre-cooked white cornmeal, specifically the P.A.N. brand, for authentic texture and flavor in your homemade arepas. This type of cornmeal is finely ground and provides the perfect structure to create those delicious, crispy cakes.
How should I store leftover homemade arepas?
To keep your cooked arepas fresh, store them in an airtight container at room temperature for up to 2 days. If you want to store them longer, transfer them to the refrigerator where they’ll last for up to 5 days. Just be sure to reheat them in a skillet or oven before serving to regain that crispy texture!
Can I freeze homemade arepas?
Absolutely! For optimal freezing, wrap the cooked arepas tightly in plastic wrap, then place them in a freezer bag. They can be frozen for up to 3 months. When you’re ready to enjoy them, thaw them overnight in the refrigerator, and then reheat in a skillet or a 350°F (175°C) oven until heated through and crispy.
What should I do if my arepas fall apart during cooking?
If your arepas are crumbling, it might be due to the dough being too dry. Make sure you’re adding enough warm water when mixing! The ideal texture should be smooth and pliable, not crumbly. Also, ensure you’re not overcrowding the skillet, as this can affect cooking consistency.
Are these homemade arepas suitable for a gluten-free diet?
Yes, definitely! Homemade arepas are naturally gluten-free since they are made from cornmeal. Enjoy them guilt-free if you or someone in your family is following a gluten-sensitive diet. Plus, the creamy Reina Pepiada filling adds a delicious richness that caters to various dietary preferences!
Delicious Homemade Arepas with Creamy Reina Pepiada Filling
Ingredients
Equipment
Method
- In a large mixing bowl, combine the pre-cooked white cornmeal, salt, and vegetable oil. Gradually pour in warm water, which should be between 100°F and 110°F, until the mixture forms a smooth, pliable dough. Let the dough rest for 5 minutes.
- Divide the dough into six equal portions. Roll each portion into a smooth ball, then flatten it gently into a disc about 4-5 inches wide and ½ inch thick.
- Heat a skillet over medium heat and add a little vegetable oil. Carefully place the shaped arepas in the skillet. Cook for 6-7 minutes on each side, or until they develop a beautiful golden-brown crust.
- For an extra crispy texture, transfer the cooked arepas to a preheated oven at 350°F (175°C) for 10-15 minutes.
- In a separate bowl, mix the shredded chicken, finely chopped onion, cilantro, and optional jalapeño.
- In another bowl, mash the ripe avocado and blend it with mayonnaise and lime juice until creamy. Combine this mixture with the chicken and adjust seasoning with salt and pepper to taste.
- Once the arepas are cooked and golden, remove them from the heat and let them cool slightly. Slice an opening on one side of each arepa to create a pocket, and fill with the creamy Reina Pepiada mixture.