The Comfort of Tuna and Egg: A Heartwarming Recipe to Bring Your Family Together

Growing up, there was always something special about the dishes my grandmother would prepare on a lazy Sunday afternoon. The kitchen would be filled with the warmth of comforting aromas as she whipped up simple yet delicious meals. One of her favorites, which still holds a special place in my heart, was a tuna and egg bake. It wasn’t just a dish; it was a moment of connection, a way for her to bring the family together. Each bite, filled with the richness of tuna, eggs, and cheese, had the power to turn any gloomy day into something memorable.

As I’ve grown older, I’ve come to realize that the magic of that dish wasn’t just in the ingredients or the perfect combination of flavors—it was in the experience. A simple meal, made with love, can transform a moment into a cherished memory. This tuna and egg bake is more than just a recipe. It’s a way to recreate those warm, family-centered moments, reminding us of the power of food to bring comfort and joy.

Now, this recipe is one I often turn to when I need something quick, hearty, and full of flavor. It’s one of those dishes that brings a sense of nostalgia while still being incredibly easy to make. Perfect for a weeknight dinner, a weekend brunch, or a quick lunch, it is versatile, nutritious, and utterly satisfying.

A Simple Meal with Complex Flavors

When it comes to creating something that tastes as though it took hours to prepare, yet can be made in just a few simple steps, this tuna and egg bake is the perfect solution. The combination of tuna, eggs, cheese, and fresh spring onions creates a harmonious balance of flavors. The richness of the tuna and eggs, paired with the melt-in-your-mouth cheese, provides a comforting foundation. Fresh tomatoes add a burst of freshness, and the spring onions bring a subtle crunch and depth of flavor.

The beauty of this dish is its simplicity. It’s the kind of recipe that you can prepare with ingredients you likely already have in your pantry and fridge. There’s no need for complicated techniques or hard-to-find ingredients. In just a few steps, you can have a wholesome, nutritious meal that satisfies all your cravings without spending hours in the kitchen.

Why You’ll Love This Tuna and Egg Bake

1. Quick and Easy to Prepare

We all have those busy days where we need a meal that’s quick, satisfying, and doesn’t take a lot of effort. This tuna and egg bake is the perfect solution. In just a few steps, you can prepare a delicious meal that requires minimal prep time and little hands-on work. The tuna and egg filling comes together easily, and with just a short time in the oven, you have a warm, hearty meal ready to enjoy.

2. Nutritious and Filling

In today’s fast-paced world, finding meals that are both delicious and nutritious can be a challenge. But this recipe provides the best of both worlds. Tuna is an excellent source of protein, omega-3 fatty acids, and various vitamins and minerals, while eggs add additional protein and healthy fats. The addition of spring onions and tomatoes offers a good dose of fiber, vitamins, and antioxidants. With all these nutritious ingredients combined, this dish is not only tasty but also keeps you feeling full and satisfied.

3. Budget-Friendly

One of the best things about this tuna and egg bake is that it’s an affordable meal. Canned tuna is a cost-effective protein source, and eggs, cheese, and tomatoes are staples that most people already have in their kitchens. It’s a budget-friendly dish that doesn’t compromise on taste or nutrition, making it ideal for families or anyone looking to eat well without breaking the bank.

4. Versatile and Customizable

This recipe is highly adaptable to your tastes and preferences. You can switch up the cheese depending on what you have on hand—cheddar, mozzarella, or even a mix of both. You can also add extra veggies to the mix, such as bell peppers, spinach, or mushrooms. If you prefer a spicier kick, a sprinkle of red pepper flakes or a dash of hot sauce can easily be incorporated. The possibilities are endless, so you can make this dish your own.

5. Great for Meal Prep

This tuna and egg bake is an excellent option for meal prep. You can make a larger batch and store it in the refrigerator for up to 3 days, making it a convenient and delicious lunch or dinner option for the week ahead. Simply reheat in the microwave or in the oven for a quick and satisfying meal on busy days.

Ingredients

IngredientQuantity
1 can (160g/5.6 oz) tuna in water or oil, drained1 can
2 hard-boiled eggs, chopped2
1 bunch spring onions, chopped1 bunch
1/4 teaspoon black pepper, or to taste1/4 teaspoon
70 grams (2.5 oz) cheese, grated (cheddar, mozzarella, or your preferred melting cheese)70 grams (2.5 oz)
1 medium tomato, sliced1 medium

Directions

  1. Preheat the Oven: Begin by preheating your oven to 375°F (190°C). Prepare a baking dish by greasing it lightly with oil or non-stick spray.
  2. Prepare the Ingredients: In a large mixing bowl, combine the drained tuna, chopped hard-boiled eggs, and spring onions. Season with black pepper to taste. Mix well to combine.
  3. Layer the Mixture: Spread the tuna and egg mixture evenly in the prepared baking dish. Top with a layer of sliced tomatoes, then sprinkle the grated cheese generously on top.
  4. Bake: Place the baking dish in the oven and bake for 20-25 minutes, or until the cheese is melted, golden, and bubbly.
  5. Serve: Once baked to perfection, remove from the oven and let it cool for a few minutes before serving. This dish is delicious served on its own or with a side of fresh salad or steamed vegetables.

Nutritional Information

NutrientPer Serving (1 serving)
Calories250
Total Fat15g
Saturated Fat5g
Carbohydrates5g
Dietary Fiber1g
Sugars2g
Protein21g
Sodium400mg

Frequently Asked Questions

Can I use fresh tuna instead of canned tuna?

While canned tuna is often used for convenience, you can certainly use fresh tuna in this recipe. Just make sure to cook the tuna beforehand and flake it into smaller pieces before adding it to the dish. Fresh tuna will have a firmer texture, which may slightly change the final result, but it will still be delicious.

Can I use different cheese?

Absolutely! You can use any cheese you like in this recipe. Cheddar and mozzarella are great options for their melting qualities, but feel free to experiment with other cheeses like gouda, parmesan, or even feta. Each cheese will bring a unique flavor to the dish.

Can I make this dish ahead of time?

Yes, this dish can be made ahead of time and stored in the fridge for up to 3 days. It’s a great option for meal prepping. Simply reheat it in the oven or microwave before serving.

Can I freeze this dish?

While it’s best enjoyed fresh, you can freeze the baked tuna and egg casserole. Allow it to cool completely, then wrap it tightly in plastic wrap or foil before storing it in the freezer. To reheat, bake it in the oven until heated through, but note that the texture may change slightly after freezing and reheating.

What can I serve this with?

This dish is versatile and pairs well with a variety of sides. You can serve it with a light salad, steamed vegetables, or roasted potatoes for a well-rounded meal. It also goes wonderfully with crusty bread or a side of fresh fruit for a complete lunch or dinner.

Conclusion: A Simple Dish That Brings Comfort

The beauty of this tuna and egg bake lies not only in its simplicity but in the memories it creates. It’s a meal that brings people together and fills your home with warmth. Whether it’s a busy weeknight or a casual weekend brunch, this dish provides a delicious and satisfying solution that everyone will love. Its rich flavors and easy preparation make it a perfect go-to recipe for busy families or anyone looking to create a comforting meal in less time.

Cooking doesn’t always have to be complicated to be delicious. Sometimes, the most comforting and memorable dishes are the simplest ones. This tuna and egg bake is a perfect example of how a few staple ingredients, combined with love and care, can create something truly special. So, the next time you’re looking for a quick, nutritious, and flavorful meal, give this recipe a try. You’ll be glad you did.

Amal

The Comfort of Tuna and Egg: A Heartwarming Recipe to Bring Your Family Together

This tuna and egg bake is a delicious and comforting meal that’s simple to prepare and full of flavor. Combining the richness of tuna with the creaminess of eggs and the meltiness of cheese, it’s the perfect quick dish for any occasion. With fresh spring onions, tomatoes, and a sprinkle of black pepper, this bake is a well-balanced and satisfying choice for a lunch or dinner.
Prep Time 10 minutes
Cook Time 25 minutes
Total Time 35 minutes
Servings: 4 –6 servings
Course: Lunch
Cuisine: American

Ingredients
  

  • 1 can 160g/5.6 oz tuna in water or oil, drained
  • 2 hard-boiled eggs chopped
  • 1 bunch spring onions chopped
  • 1/4 teaspoon black pepper or to taste
  • 70 grams 2.5 oz cheese, grated (cheddar, mozzarella, or your preferred melting cheese)
  • 1 medium tomato sliced

Method
 

  1. Preheat the Oven: Start by preheating your oven to 375°F (190°C). Grease a baking dish lightly with oil or non-stick spray.
  2. Prepare the Ingredients: In a large mixing bowl, combine the drained tuna, chopped hard-boiled eggs, and chopped spring onions. Add the black pepper to taste and mix everything together.
  3. Layer the Dish: Transfer the tuna mixture to the prepared baking dish and spread it out evenly. Layer the sliced tomatoes on top of the tuna mixture. Finish by sprinkling the grated cheese generously over the top.
  4. Bake: Place the baking dish in the oven and bake for 20-25 minutes, or until the cheese is melted, bubbly, and slightly golden.
  5. Serve: Once the dish is done baking, remove it from the oven and let it cool for a few minutes before serving. It’s perfect on its own or paired with a fresh salad or steamed vegetables.

Notes

  • Storage: Leftovers can be stored in the refrigerator for up to 3 days. Reheat in the microwave or oven for a quick meal.
  • Variations: Feel free to add additional vegetables like spinach, bell peppers, or mushrooms to customize the dish to your taste. You can also experiment with different cheeses for a unique flavor profile.
  • Meal Prep: This dish is great for meal prep. Prepare it in advance and store it in airtight containers for an easy lunch or dinner throughout the week.

Introduction: The Fritters That Changed My Kitchen Forever

It was one of those late afternoons when I was scrambling to prepare something quick and healthy for dinner. I had just returned from the farmers’ market with bags full of fresh produce, most notably a large, plump zucchini that had caught my eye. I didn’t have much time, but I knew I had to create something that my family would enjoy while still being light and nourishing. As I dug through my fridge, I found a potato, a carrot, and some cheese—staples I always have on hand.

That evening, I stumbled upon a simple idea: why not combine all these ingredients into a quick and crispy fritter? What happened next was nothing short of magic. The golden-brown fritters crisped up beautifully on the outside, yet remained tender and flavorful on the inside. With each bite, I could taste the freshness of the vegetables, the richness of the cheese, and the warmth of the garlic. My family loved it—and so did I.

The beauty of that moment wasn’t just in the meal itself, but in how simple ingredients, when combined with a bit of creativity, could bring a sense of satisfaction and joy to the table. It reminded me that cooking doesn’t have to be complicated to be delicious. From that night onward, these zucchini fritters became a regular on our dinner table, and over time, I perfected the recipe to include just the right balance of texture, flavor, and nutrition.

Why Zucchini Fritters Are the Perfect Comfort Food

Food has an extraordinary power to evoke memories and feelings, and for me, zucchini fritters have become a comfort food that brings back fond memories of cozy evenings with my family. They are an uncomplicated dish, yet they offer so much in terms of flavor and versatility. The humble zucchini, often overlooked, transforms into something truly special when combined with the right ingredients. It is the epitome of comfort food, perfect for feeding a crowd or enjoying as a quick, solo dinner.

But there’s more to zucchini fritters than just being a comfort food. These fritters are incredibly versatile, which is why they have earned their place as a staple in my kitchen. The zucchini, when grated and cooked, becomes sweet and tender, and the addition of carrot and potato creates a heartiness that makes these fritters both filling and satisfying. Whether served as a snack, appetizer, or main dish, they can adapt to any mealtime. You can eat them on their own, paired with a light salad, or topped with a dollop of sour cream or a tangy dipping sauce.

Ingredients

IngredientQuantity
1 zucchini, grated1
1 carrot, grated1
1 potato, grated1
4 tablespoons oatmeal4 tablespoons
100 grams cheese, grated100 grams
Fresh parsley, chopped2 tablespoons
2 cloves garlic, minced2 cloves
Ground black pepper to tasteTo taste

Directions

  1. Prepare the Veggies: Grate the zucchini, carrot, and potato using a box grater or food processor. Place them in a clean kitchen towel or cheesecloth and squeeze out any excess moisture. This is important to prevent the fritters from being soggy.
  2. Mix the Ingredients: In a large bowl, combine the grated zucchini, carrot, and potato. Add the oatmeal, grated cheese, minced garlic, fresh parsley, and ground black pepper. Mix well until everything is evenly distributed.
  3. Form the Fritters: Heat a non-stick pan over medium heat and lightly coat with a bit of oil. Using your hands, form small patties from the mixture and place them in the pan.
  4. Cook the Fritters: Fry the fritters in batches for about 3-4 minutes per side, or until they are golden brown and crispy. Make sure the heat is moderate to avoid burning the fritters before they cook through.
  5. Serve: Once cooked, place the fritters on a paper towel to absorb any excess oil. Serve warm with a side of your favorite dipping sauce or enjoy them as a standalone dish.

Nutritional Information

NutrientPer Serving (1 fritter)
Calories90
Total Fat4g
Saturated Fat2g
Carbohydrates10g
Dietary Fiber2g
Sugars3g
Protein3g
Sodium100mg

The Health Benefits of Zucchini Fritters

These zucchini fritters are not only delicious but also packed with nutrition. Here’s why:

Rich in Nutrients

Zucchini is a great source of vitamins and minerals. It is low in calories but high in fiber, which makes it a great choice for anyone looking to maintain a healthy diet. Zucchini is rich in antioxidants, including vitamin C, which helps boost the immune system, and potassium, which supports heart health and helps regulate blood pressure. The addition of carrot, potato, and cheese only increases the nutritional value, making this dish an excellent source of fiber, vitamins, and minerals.

High in Fiber

Fiber is an essential part of any healthy diet, and these fritters are a good source of it. The vegetables, particularly zucchini and carrot, are high in fiber, which aids in digestion and helps keep you feeling fuller for longer. A high-fiber diet can also help lower cholesterol and regulate blood sugar levels. With oatmeal included in the recipe, the fiber content increases even further, making these fritters a great choice for those looking to improve their digestive health.

Low in Carbs, High in Flavor

Despite being made with potato, this recipe is still relatively low in carbs compared to many traditional fritter recipes. The use of oatmeal as a binding ingredient instead of flour makes these fritters lighter and more nutritious. The balance of carbs, fiber, and protein in this dish ensures that it won’t cause a blood sugar spike, making it a healthier alternative to many fried dishes.

Zucchini Fritters for Every Occasion

One of the things I love most about zucchini fritters is their versatility. They can be customized to fit any meal and are perfect for a variety of occasions. Here are a few ways you can enjoy these fritters:

As a Healthy Snack

Zucchini fritters make for a fantastic snack. They are easy to prepare and serve as a great mid-day pick-me-up. You can even make them ahead of time, store them in the fridge, and reheat them when you’re ready to enjoy a quick bite. Pair them with a dip like tzatziki or a tangy yogurt sauce for an added burst of flavor.

As a Light Lunch or Dinner

These fritters can easily become the centerpiece of a light lunch or dinner. Serve them with a side salad of leafy greens, a few slices of tomato, or even some hummus for a complete meal. They are especially great when you’re in need of something hearty but not too heavy.

As a Crowd-Pleasing Appetizer

Zucchini fritters are a great appetizer option when entertaining guests. They are quick to make and can be served with a variety of dips, such as garlic aioli, spicy ketchup, or a yogurt-based dip. The combination of crispy outside and tender inside is sure to impress your guests.

Perfect for Meal Prep

If you’re someone who likes to meal prep, zucchini fritters are a great choice. They store well in the fridge for several days and even freeze beautifully for future use. Just pop them in the oven or reheat them in a pan to get that crispy texture back. This makes them an ideal option for busy weeks when you need something quick and healthy to grab on the go.

Frequently Asked Questions (FAQs)

1. Can I use frozen zucchini for this recipe?
While fresh zucchini is always the best option, you can use frozen zucchini in a pinch. Just make sure to thaw and squeeze out any excess moisture before grating it. This will prevent the fritters from becoming too soggy.

2. Can I make these fritters gluten-free?
Yes! Simply substitute the oatmeal for gluten-free oats, and make sure the cheese you’re using is gluten-free. This will make the fritters suitable for those following a gluten-free diet.

3. Can I add other vegetables?
Absolutely! Feel free to experiment with other vegetables such as bell peppers, spinach, or even sweet potatoes. Just be sure to adjust the moisture content accordingly, as some vegetables may release more water than others.

4. How do I store the fritters?
You can store leftover fritters in the fridge for up to 3 days. To reheat, simply pop them in the oven or on a skillet to regain their crispy texture. Alternatively, you can freeze them for up to a month.

Conclusion: A Recipe That Stands the Test of Time

Zucchini fritters are more than just a recipe; they are a reminder of the joy of cooking simple, nourishing food. This dish is a perfect example of how humble ingredients can come together to create something truly extraordinary. Whether you’re enjoying them as a snack, appetizer, or main course, zucchini fritters are versatile, healthy, and absolutely delicious.

As a busy parent or someone looking to eat healthier, these fritters offer the perfect solution—easy to make, full of nutrients, and great for any occasion. With the ability to customize them to your preferences, they’re a dish that can evolve with your tastes and dietary needs. And like the fond memories they’ve given me in my kitchen, these zucchini fritters are sure to become a cherished recipe in your home as well.

Amal

Introduction: The Fritters That Changed My Kitchen Forever

These zucchini fritters are a quick and easy dish that combines the crunch of fresh vegetables with the melt-in-your-mouth texture of golden, crispy fritters. Perfect for a healthy snack or a light meal, this recipe features zucchini, carrots, and potatoes, all seasoned to perfection and packed with flavor. A fantastic way to sneak in more veggies while enjoying a delicious dish, these fritters are bound to become a family favorite!
Prep Time 15 minutes
Cook Time 15 minutes
Total Time 30 minutes
Servings: 4 –6 servings
Course: Snack
Cuisine: Mediterranean-Inspired

Ingredients
  

  • 1 zucchini grated
  • 1 carrot grated
  • 1 potato grated
  • 4 tablespoons oatmeal
  • 100 grams cheese grated (cheddar or any cheese of your choice)
  • Fresh parsley chopped (2 tablespoons)
  • 2 cloves garlic minced
  • Ground black pepper to taste

Method
 

  1. Prepare the Veggies: Grate the zucchini, carrot, and potato using a box grater. Place them in a clean kitchen towel and squeeze out any excess moisture.
  2. Mix the Ingredients: In a large bowl, combine the grated vegetables with oatmeal, grated cheese, minced garlic, fresh parsley, and ground black pepper. Mix well to ensure all ingredients are evenly distributed.
  3. Form the Fritters: Heat a non-stick pan over medium heat and lightly coat with oil. Shape the mixture into small patties using your hands and place them into the pan.
  4. Cook the Fritters: Fry the fritters for about 3-4 minutes per side, or until they are golden brown and crispy. Be sure to flip them gently so they don’t break apart.
  5. Serve: Once cooked, transfer the fritters to a paper towel to remove excess oil. Serve them warm with your favorite dipping sauce, or enjoy them on their own as a light meal.

Notes

  • Storage: These fritters are best eaten fresh, but they can be stored in an airtight container in the refrigerator for up to 2 days. Reheat them in a skillet to maintain their crispy texture.
  • Dips: Serve with a variety of dips such as sour cream, tzatziki, or a tangy yogurt-based sauce for an extra burst of flavor.
  • Customizations: Feel free to add chopped onions, bell peppers, or even a dash of cayenne pepper to the mix for added flavor. You can also use any cheese of your choice depending on your preference.

Introduction: The Simple Joy of a Fresh Salad

It was a hot summer afternoon when I first tasted a version of this cucumber salad. My grandmother, who had always been a proponent of simple, healthy eating, served it to me after a long day of gardening. I remember feeling the weight of the day lift as soon as I took the first bite. The fresh crunch of the cucumber, the sweetness of the apple, and the tang of the lemon combined into something far more satisfying than I expected. There was no special occasion; just an ordinary day turned extraordinary by the purity of the ingredients and the joy of sharing a meal with loved ones.

As I sat on the porch with her, enjoying the salad, she told me that food should be both nourishing and healing. Over the years, I have learned that it is the simplest recipes that are often the most impactful. This cucumber salad, which I now make regularly, is one of those simple dishes that brings back memories of my grandmother’s wisdom and the idea that food should fuel not just the body, but the soul as well.

As life moves faster, I often find myself seeking out dishes that ground me, that offer both health and comfort. This salad is one of those go-to recipes. It’s light, refreshing, and perfect for those moments when you want something nutritious and satisfying. It’s also a reminder of those quiet, treasured moments around the table with loved ones, where food becomes more than just sustenance – it becomes a means of connection.

Why This Salad is Perfect for Your Wellness Goals

The Belly Fat-Burning Cucumber Salad is a beautiful example of how food can aid in promoting a healthy lifestyle without sacrificing flavor. It’s refreshing and light, making it perfect for those who are looking to shed a few extra pounds or simply maintain a balanced diet. The ingredients are not only low in calories but also packed with nutrients that are beneficial for digestion and overall well-being.

1. Low in Calories but High in Nutrients

One of the best things about this salad is that it’s incredibly low in calories, yet full of vitamins and minerals. With ingredients like cucumber, cabbage, and apple, you’re getting a significant amount of antioxidants, fiber, and hydration in every bite. The cucumber, for instance, is composed of about 95% water, which makes it perfect for keeping you hydrated and filling you up without adding many calories.

Cabbage is another great ingredient, rich in vitamin C, fiber, and antioxidants. It helps promote digestive health and provides essential nutrients while being extremely low in calories. When combined with the apples, carrots, and honey, the salad becomes a powerhouse of nutrients that help promote overall health.

2. Supports Healthy Digestion and Detoxification

The blend of raw vegetables and fruits in this salad is excellent for digestive health. Cabbage, in particular, is known for its ability to help detoxify the body and promote healthy digestion due to its high fiber content. Fiber plays a crucial role in digestion by promoting regular bowel movements and preventing constipation.

Garlic, a key ingredient in this salad, also aids in detoxification. It is known for its antibacterial and anti-inflammatory properties. Garlic promotes the removal of toxins from the body, and its addition to the salad not only enhances the flavor but also boosts its health benefits.

The lemon juice helps in detoxifying the liver, which in turn supports better digestion and a healthier metabolism. By improving your digestion, this salad can help you feel lighter and more energized.

3. A Sweet and Savory Balance

What makes this salad unique is the balance of flavors. The sweetness from the apple and honey contrasts beautifully with the savory and slightly bitter taste of the cabbage and cucumber. This balance ensures that the salad is not only healthy but also incredibly tasty. The combination of flavors is so refreshing and vibrant, it’s perfect for those who want something light yet satisfying.

The honey adds a natural sweetness without overwhelming the dish, making it suitable for those who prefer a slightly sweet flavor profile. Additionally, the acidity from the lemon and the freshness of the garlic make this salad a well-rounded, flavorful choice for anyone looking to indulge in something nutritious without the guilt.

4. Versatile and Customizable

While this recipe is great as it is, one of the best things about it is its versatility. You can modify the ingredients based on what you have on hand or your personal taste preferences. For example, you can add a bit of feta cheese for a creamy, salty contrast, or throw in some fresh herbs like cilantro or parsley for an added burst of flavor.

If you’re looking for extra crunch or a protein boost, you can add nuts, seeds, or even grilled chicken. The possibilities are endless, and that’s one of the reasons this salad has become a staple in my kitchen. It adapts to whatever I have available and can easily fit into a variety of dietary preferences, from vegan to omnivore.

5. Perfect for Every Meal

This salad is incredibly versatile, making it the perfect addition to any meal. Whether you’re serving it as a light side dish with grilled fish or chicken, or eating it as a standalone lunch, it’s the perfect complement to any meal. It can also be enjoyed as a snack for those looking to satisfy a midday hunger pang in a healthy, satisfying way.

It’s a great salad to take along for picnics or potlucks, and it holds up well in the fridge for a couple of days. If you plan to make it ahead, I recommend dressing it just before serving to keep the veggies crisp and fresh. It’s simple to make and will keep you feeling nourished and full for hours.

Ingredients

IngredientQuantity
Cabbage, shredded or finely sliced2 cups
Salt, to tasteAs needed
1 onion, thinly sliced1
Hot water, for soaking onions1 cup
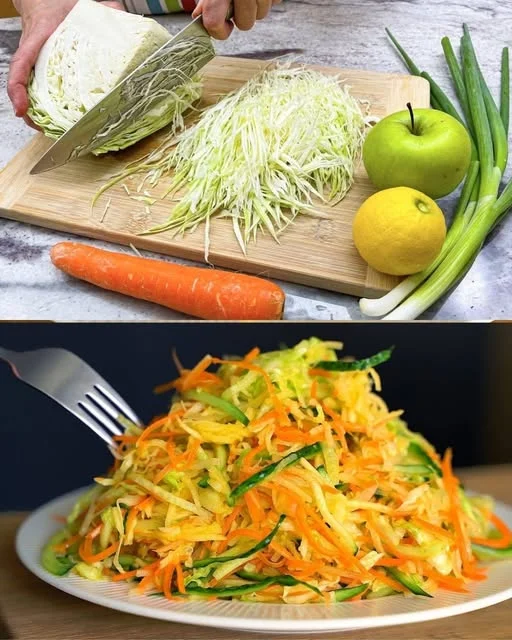
1 cucumber, thinly sliced1
1 carrot, grated1
1 apple, chopped into small pieces1
Juice of 1 lemon1
1 clove garlic, crushed or minced1 clove
1 teaspoon honey1 teaspoon

Directions

  1. Soak the Onion: Start by soaking the thinly sliced onion in hot water for about 10 minutes to soften its flavor. After soaking, drain and set aside.
  2. Prepare the Vegetables: While the onion is soaking, slice the cucumber, grate the carrot, and chop the apple into small pieces. Place them in a large salad bowl.
  3. Mix the Dressing: In a separate small bowl, combine the lemon juice, minced garlic, honey, and a pinch of salt. Stir well to combine.
  4. Combine the Ingredients: Add the soaked and drained onions into the salad bowl with the cucumber, carrot, and apple. Drizzle the dressing over the top and toss everything together until well-coated.
  5. Serve: Serve immediately for a fresh and crunchy salad, or refrigerate for 15-20 minutes to let the flavors meld together.

Nutritional Information

NutrientPer Serving (1 cup)
Calories50
Total Fat0g
Saturated Fat0g
Carbohydrates12g
Dietary Fiber3g
Sugars7g
Protein1g
Sodium150mg

Frequently Asked Questions

1. Can I make this salad in advance?

Yes! This salad can be made in advance, but it’s best to add the dressing just before serving. If you’re storing it in the fridge, the vegetables will soften a little over time, so adding the dressing last helps preserve the crunch of the cabbage and cucumber.

2. Can I substitute other vegetables for the cabbage?

Yes, you can! If you prefer, you can substitute the cabbage with leafy greens like spinach or kale. These will provide a slightly different texture and flavor but will still offer a great nutritional profile.

3. Is this salad good for weight loss?

Absolutely! The ingredients in this salad are low in calories and high in nutrients, which makes it perfect for anyone looking to lose weight or maintain a healthy lifestyle. The fiber content helps you feel full longer, and the fresh ingredients support healthy digestion.

4. Can I use other fruits in this salad?

Certainly! You can experiment with different fruits like pears, grapes, or oranges. Each will give the salad a unique twist while still maintaining the refreshing balance of flavors.

5. How can I make this salad more filling?

If you want to make this salad more filling, you can add protein such as grilled chicken, tofu, or chickpeas. You can also include nuts like almonds or walnuts for an extra crunch and a boost of healthy fats.

Conclusion: The Simple Power of Fresh Ingredients

As I reflect on this recipe, I realize it’s more than just a salad. It’s a reminder of the importance of simplicity and how fresh, wholesome ingredients can nourish both the body and the spirit. This cucumber salad brings together flavors that remind me of summers spent in the garden, enjoying food that is good for both the body and the soul. It’s easy to make, incredibly nutritious, and absolutely delicious. Whether you’re looking to improve your health, shed a few pounds, or simply enjoy a refreshing meal, this salad is the perfect choice. With its balance of sweetness, tang, and crunch, it’s a dish that can brighten any meal and make you feel a little more connected to the simple pleasures in life.

Amal

Introduction: The Simple Joy of a Fresh Salad

A refreshing, light, and nutrient-packed salad that combines the crunch of fresh cucumber, the sweetness of apple, and the tang of lemon, all designed to promote healthy digestion and weight loss. Perfect for anyone looking to maintain a balanced lifestyle, this salad is full of flavors that will leave you feeling both satisfied and energized.
Prep Time 15 minutes
Total Time 15 minutes
Servings: 4 –6 servings
Course: Salad
Cuisine: Mediterranean-Inspired

Ingredients
  

  • 2 cups shredded or finely sliced cabbage
  • Salt to taste
  • 1 onion thinly sliced
  • 1 cup hot water for soaking onions
  • 1 cucumber thinly sliced
  • 1 carrot grated
  • 1 apple chopped into small pieces
  • Juice of 1 lemon
  • 1 clove garlic crushed or minced
  • 1 teaspoon honey

Method
 

  1. Prepare the Onion: Soak the thinly sliced onion in hot water for about 10 minutes to soften its flavor. After soaking, drain and set it aside.
  2. Slice and Grate the Vegetables: While the onion soaks, slice the cucumber, grate the carrot, and chop the apple into small pieces. Place these ingredients in a large salad bowl.
  3. Prepare the Dressing: In a separate bowl, mix the lemon juice, crushed garlic, honey, and a pinch of salt. Stir well to combine.
  4. Assemble the Salad: Add the soaked onion to the salad bowl with the cucumber, grated carrot, and chopped apple. Pour the prepared dressing over the ingredients and toss everything together to coat evenly.
  5. Serve: Serve immediately, or chill in the refrigerator for 15-20 minutes for a more intense flavor.

Notes

  • Storage: This salad is best served fresh but can be stored in the fridge for up to 2 days. Keep the dressing separate until serving to maintain the freshness of the vegetables.
  • Customization: Feel free to add herbs like cilantro or parsley for extra freshness. If you want more protein, top it with grilled chicken or a sprinkle of seeds.
  • Flavor Enhancements: For a spicier version, try adding a small amount of finely chopped chili or bell pepper.

The Bread That Brings Back Memories

There’s something incredibly comforting about the smell of fresh bread baking in the oven. For me, it’s more than just the fragrance; it’s the memories and emotions that come rushing back with each warm loaf. I remember as a child, sitting in my grandmother’s kitchen while she prepared homemade bread, her hands expertly kneading the dough with a quiet rhythm. It wasn’t just the bread that filled the house with warmth, but the love and care she poured into each loaf.

Those days in my grandmother’s kitchen were filled with laughter, patience, and a sense of togetherness. She always said that bread was a metaphor for life – simple, but if you treat it with care, it can become something extraordinary. Watching her bake, I learned the art of patience – the dough had to rise, the ingredients had to come together slowly, and the bread had to bake to perfection.

As I grew older, I wanted to recreate those moments. The smell of freshly baked bread became a reminder of the simpler joys in life, a way to reconnect with a time when everything felt more grounded. This bread recipe, while quick and practical, brings a touch of that nostalgia with it. It’s a simple, no-fuss bread that anyone can make, and it has a way of making your home feel a little warmer and more welcoming.

Why This Recipe is a Game-Changer

In today’s fast-paced world, we often find ourselves looking for shortcuts – and that includes in the kitchen. However, when it comes to bread, many people shy away from making it at home because they think it requires hours of work or a lot of special equipment. This recipe changes all that. It’s designed for people who want to enjoy the smell and taste of freshly baked bread without spending an entire afternoon in the kitchen. It’s practical, efficient, and doesn’t compromise on flavor.

1. Simple Ingredients, Big Flavor

What’s so great about this recipe is its simplicity. You don’t need a long list of exotic ingredients or specialized equipment. With just a few pantry staples—flour, yeast, water, sugar, and salt—you can make a loaf of bread that rivals any store-bought version. The addition of sugar helps activate the yeast, creating the perfect rise, while the salt balances the flavors. It’s amazing how something so basic can create such a delicious outcome. This recipe is proof that sometimes, less is more.

2. The Joy of Homemade Bread

Baking bread at home is an experience that goes beyond just eating. It’s about the process – mixing, kneading, waiting for the dough to rise, and finally seeing the transformation in the oven. There’s a special kind of joy that comes from knowing you’ve made something from scratch with your own hands. Every time you slice into that loaf and taste its warmth, you’ll feel a sense of accomplishment. It’s a simple joy that’s hard to replicate with anything else.

3. The Practicality of It All

Let’s face it: many of us have busy lives, and time is a luxury we often don’t have. But even with a packed schedule, there’s no reason why you can’t enjoy fresh bread at home. This recipe is quick and straightforward, taking less than two hours from start to finish. The dough rises in about an hour, which gives you time to relax, prepare other dishes, or even spend some time with family. The actual baking process takes less than 30 minutes, and in that time, your kitchen will be filled with the aroma of fresh bread—a treat in itself.

4. Perfect for Every Occasion

Whether you’re having a quiet morning alone or hosting a dinner party, this bread is versatile enough to suit any occasion. It pairs wonderfully with everything from soups and stews to a simple slice of butter. Want to make it even more special? You can add herbs, garlic, or cheese to the dough for a twist on the classic. This recipe allows for endless possibilities to make it your own.

5. A Recipe That Even Beginners Can Master

If you’re new to baking, this recipe is the perfect starting point. There’s no need to worry about complex techniques or ingredients. The step-by-step process is easy to follow, and there’s no pressure to perfect every detail. Bread-making is about feeling the dough, being patient, and learning as you go. The beauty of this recipe is that it’s foolproof. Even if it’s your first time making bread, you’ll end up with a loaf that tastes like it came from a professional bakery.

Ingredients

IngredientQuantity
Water3 glasses
Salt1 teaspoon
Sugar1 teaspoon
Yeast1 teaspoon
Flour6 cups

Directions

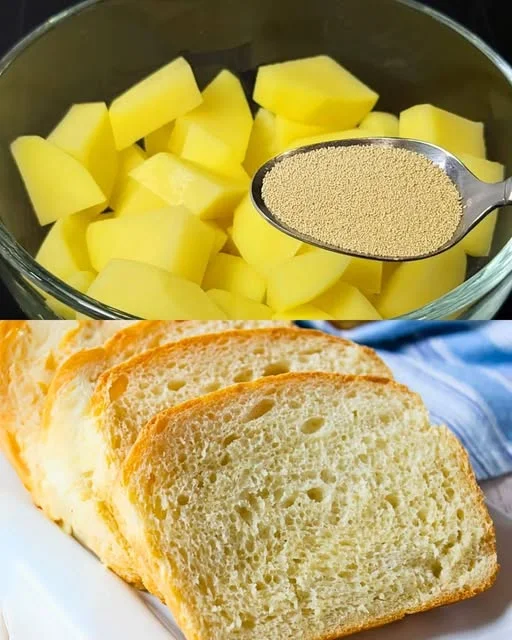
  1. Activate the Yeast: In a large bowl, mix warm water, salt, sugar, and yeast. Stir gently and allow it to sit for about 5 minutes until the yeast becomes active and the mixture starts to bubble and foam.
  2. Form the Dough: Gradually add the flour to the yeast mixture, stirring continuously to form a dough. Once the dough begins to come together, knead it on a lightly floured surface for 5-7 minutes, until it is smooth and elastic.
  3. Let it Rise: Place the dough in a greased bowl, cover it with a clean cloth, and let it rise for 1 to 1.5 hours, or until the dough has doubled in size.
  4. Shape the Dough: Punch down the risen dough to release any air bubbles. Shape it into a loaf or divide it into smaller portions for rolls.
  5. Bake the Bread: Preheat your oven to 375°F (190°C). Place the shaped dough onto a greased baking sheet and bake for 25-30 minutes, or until the bread is golden brown and sounds hollow when tapped on the bottom.
  6. Cool and Serve: Let the bread cool for a few minutes before slicing and serving. Enjoy your fresh, warm bread!

Nutritional Information

NutrientPer Serving (1 slice)
Calories120
Total Fat0g
Saturated Fat0g
Carbohydrates24g
Dietary Fiber1g
Sugars1g
Protein3g
Sodium220mg

Frequently Asked Questions

1. Can I use this dough for other types of bread?

Yes! This dough is versatile and can be used as a base for various bread types. You can easily add herbs, spices, or cheese to the dough before baking to create flavored breads. It can also be used for making rolls or breadsticks. If you’d like to make a more rustic, artisan-style bread, you can shape the dough into a round boule or use a cast-iron pot to bake it.

2. Can I use whole wheat flour instead of white flour?

Yes, you can substitute whole wheat flour for some or all of the white flour in this recipe. Keep in mind that whole wheat flour absorbs more liquid, so you may need to add a little extra water to achieve the right consistency. The texture will be a bit denser than with white flour, but it will still be delicious and nutritious.

3. Can I make this recipe without a stand mixer?

Absolutely! While a stand mixer makes the kneading process easier, you can easily make this bread by hand. Simply combine the ingredients, and then knead the dough on a floured surface for 5-7 minutes until it becomes smooth and elastic. It’s a great way to feel more connected to the bread-making process.

4. How can I store the bread to keep it fresh?

To store your bread, allow it to cool completely, then wrap it in a clean kitchen towel or place it in an airtight container. It will stay fresh for about 2-3 days. If you want to keep it longer, you can freeze the bread. Simply slice it first, then wrap it tightly in plastic wrap and aluminum foil before freezing. To reheat, just pop the slices in the toaster or warm it in the oven.

5. Can I make this recipe in advance?

While this recipe is designed for quick preparation, you can make the dough ahead of time. After the dough has risen, punch it down and store it in the refrigerator for up to 24 hours. When you’re ready to bake, simply let it come to room temperature and proceed with shaping and baking. The slow rise in the fridge will actually improve the flavor of the bread, giving it a slightly tangy, more complex taste.

Conclusion: The Heart of Your Kitchen

This recipe isn’t just about making bread—it’s about the experience. It’s about taking a few basic ingredients, combining them with a little time and patience, and transforming them into something extraordinary. As I knead the dough and watch it rise, I’m reminded of my grandmother’s kitchen and the simple joy of making something from scratch.

Whether you’re a seasoned baker or a complete beginner, this bread recipe invites you into a world where warmth, love, and delicious food come together. It’s more than just a meal; it’s a connection to the past and a way to create new memories in your own kitchen. So, grab your ingredients, roll up your sleeves, and bake some bread that will not only fill your stomach but also warm your heart.

Amal

The Bread That Brings Back Memories

This quick homemade bread recipe is perfect for those who want fresh, warm bread without all the fuss. With simple ingredients and easy steps, you’ll have a loaf of homemade bread ready in under two hours. It’s soft, fluffy, and filled with flavor, making it perfect for sandwiches, toasts, or simply enjoying with butter. Whether you’re a seasoned baker or a beginner, this bread recipe is a must-try!
Prep Time 10 minutes
Cook Time 30 minutes
Total Time 40 minutes
Servings: 12 rolls
Course: Bread
Cuisine: American

Ingredients
  

  • 3 glasses of water
  • 1 teaspoon salt
  • 1 teaspoon sugar
  • 1 teaspoon yeast
  • 6 cups of flour

Method
 

  1. Activate the yeast: In a large bowl, combine the water, salt, sugar, and yeast. Stir and let it sit for 5 minutes until the yeast becomes active and begins to foam.
  2. Make the dough: Slowly add the flour to the yeast mixture, stirring until a dough forms. Once combined, transfer the dough to a floured surface and knead for 5-7 minutes until smooth and elastic.
  3. First rise: Place the dough in a greased bowl, cover with a cloth, and let it rise for 1-1.5 hours or until it doubles in size.
  4. Shape the dough: Punch down the risen dough to release any air bubbles, then shape it into a loaf or divide it into smaller rolls.
  5. Bake the bread: Preheat the oven to 375°F (190°C). Place the dough on a greased baking sheet and bake for 25-30 minutes or until the bread is golden brown and sounds hollow when tapped on the bottom.
  6. Cool and serve: Allow the bread to cool for a few minutes before slicing and serving. Enjoy your fresh, homemade bread!

Notes

  • Storage: Store any leftover bread in an airtight container or wrapped in a cloth. It will stay fresh for up to 3 days. For longer storage, slice and freeze for up to 3 months.
  • Flavor variations: Add garlic, herbs, or cheese to the dough before baking for extra flavor.
  • No stand mixer? No problem!: You can knead the dough by hand if you don’t have a stand mixer. It may take a little longer, but the results will be just as delicious.

Introduction: A Simple Breakfast that Reminds Me of Home

There are certain dishes that feel like home no matter where you are. For me, oatmeal has always been one of those comforting, reliable meals. I remember waking up to the aroma of warm oatmeal filling the house on chilly mornings. It was the kind of breakfast that made the day feel like it was starting right. My mom had a simple way of preparing it—just oatmeal, water, and sometimes a dollop of honey or fresh fruit. There was nothing fancy about it, but it was enough to make me feel cared for and ready to face the world.

As I got older, I started experimenting with new ways to make oatmeal more exciting—adding spices, fruits, and various toppings. But it wasn’t until I stumbled upon the idea of combining ripe bananas with blueberries that I truly found a winning combination. The natural sweetness of the bananas paired with the burst of freshness from the blueberries made the oatmeal not only more delicious but also more nourishing. It was everything I loved about breakfast, rolled into one simple dish.

Now, whenever I make this oatmeal, I’m reminded of the love and warmth that comes from even the most humble of meals. This easy-to-make oatmeal recipe has become a staple in my kitchen. It’s quick, healthy, and filled with memories of home. And the best part? It’s a recipe that anyone can make in just five minutes, making it the perfect breakfast for busy mornings or lazy weekends alike.

Why This Recipe is a Game-Changer

Oatmeal has always been known for its health benefits, and this recipe takes it to the next level. The combination of oatmeal, bananas, and blueberries offers a delightful blend of flavors while also packing a nutritious punch. Let’s talk about why this oatmeal recipe has earned its place as a go-to meal.

1. Nutritional Powerhouse

Oats are known for being high in fiber, particularly beta-glucan, which has been shown to help lower cholesterol levels and improve heart health. They are also a good source of vitamins and minerals like magnesium, iron, and vitamin B1. When you add ripe bananas to the mix, you’re not only boosting the flavor but also increasing the potassium and vitamin B6 content. Bananas provide a natural sweetness that makes this oatmeal indulgent without the need for added sugars.

Blueberries, on the other hand, are packed with antioxidants, particularly anthocyanins, which help protect your body from oxidative stress and inflammation. These antioxidants are also thought to support brain health, making this oatmeal not only delicious but brain-boosting as well. When you drizzle avocado oil over the oatmeal, you’re adding a healthy dose of monounsaturated fats, which are great for heart health and skin hydration. This combination of ingredients makes this oatmeal both nourishing and satisfying.

2. Quick and Easy

In our fast-paced world, finding recipes that are both quick and healthy can be a challenge. This oatmeal recipe takes just five minutes to prepare, making it an ideal breakfast for those who are short on time but still want a meal that’s filling and nutritious. The simplicity of the recipe means you don’t need to spend hours in the kitchen—just a few ingredients, a quick stir, and you’re good to go. Whether you’re rushing to work or trying to get the kids ready for school, this oatmeal ensures that you can start the day on a positive note without feeling stressed about breakfast.

3. Versatile and Customizable

One of the best things about this oatmeal recipe is how easy it is to customize. While the bananas and blueberries offer a great base, you can experiment with other fruits and toppings to suit your preferences. Add a handful of nuts for some extra crunch, drizzle honey or maple syrup for added sweetness, or sprinkle some cinnamon or nutmeg for a cozy, spiced flavor. You can even make this oatmeal with plant-based milk instead of water for a creamier texture. The possibilities are endless, making it a versatile recipe that can be adapted to your taste.

4. Perfect for All Ages

Whether you’re a busy professional, a stay-at-home parent, or a student living on your own, this oatmeal recipe is perfect for everyone. For parents, it’s a great way to get your kids to eat something healthy without them even realizing it. The natural sweetness of the bananas will likely win them over, while the blueberries add a fun pop of color. For adults, this oatmeal is a satisfying meal that can keep you full and energized throughout the morning. It’s a wholesome choice for anyone looking to kickstart their day with something simple yet nourishing.

Ingredients

IngredientQuantity
Oatmeal1 cup (250 ml)
Ripe bananas2
Vanillin (a pinch)1 pinch
Hot water⅔ cup (158 ml)
Blueberries1 cup
Avocado oil (for drizzling)As neede

Directions

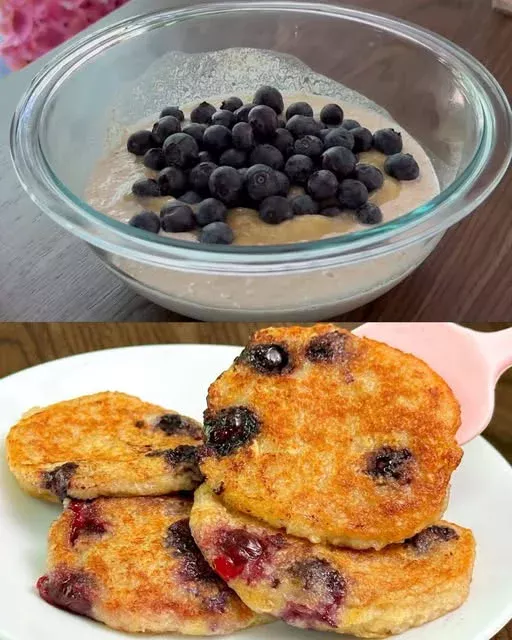
  1. Prepare the Oatmeal: Start by adding the oatmeal to a bowl. Pour the hot water over the oatmeal and stir. Let it sit for 1-2 minutes to allow the oats to absorb the water and soften.
  2. Mash the Bananas: While the oatmeal soaks, peel the bananas and mash them in a separate bowl until smooth. Add a pinch of vanillin to the mashed bananas to enhance the flavor.
  3. Combine the Ingredients: Mix the mashed bananas into the soaked oatmeal, stirring until the mixture is smooth and well-combined.
  4. Add Blueberries: Gently fold in the fresh blueberries, mixing them evenly throughout the oatmeal.
  5. Serve and Drizzle: Spoon the oatmeal into bowls and drizzle a little avocado oil over the top for a smooth finish. Serve immediately and enjoy!

Nutritional Information

NutrientPer Serving
Calories220
Total Fat7g
Saturated Fat1g
Carbohydrates37g
Dietary Fiber6g
Sugars14g
Protein4g
Sodium5mg

Frequently Asked Questions

1. Can I use a different fruit in this recipe?

Absolutely! While bananas and blueberries make a fantastic combination, you can easily swap in other fruits depending on what you have available. Strawberries, raspberries, or blackberries all work well in this oatmeal. If you prefer a tropical flavor, mango or pineapple can be added instead. The key is to choose fruits that will complement the natural sweetness of the oatmeal and add a burst of freshness.

2. Can I make this oatmeal ahead of time?

This recipe is best enjoyed fresh, but if you want to make it ahead of time, you can prepare the oatmeal base and store it in the refrigerator for up to 2 days. When you’re ready to eat it, simply reheat the oatmeal and add the fresh fruit and avocado oil right before serving.

3. Is this oatmeal gluten-free?

Yes! Oats are naturally gluten-free, but it’s important to make sure you’re using certified gluten-free oats if you have celiac disease or a gluten sensitivity. Check the packaging to ensure that the oats were processed in a gluten-free facility to avoid cross-contamination.

4. Can I add protein to this oatmeal?

If you’re looking to make this oatmeal even more filling, you can add a scoop of protein powder to the mix. You could also stir in some Greek yogurt or nut butter for a protein boost. These additions will not only increase the protein content but also add creaminess to the oatmeal.

5. Can I use a sweetener if I prefer my oatmeal sweeter?

While the ripe bananas add a natural sweetness to the oatmeal, you can certainly add a touch of honey, maple syrup, or agave nectar if you prefer your oatmeal on the sweeter side. Start with a small amount and taste as you go, so you can adjust it to your liking.

Conclusion: A Breakfast Worth Repeating

This oatmeal recipe is a perfect example of how simple ingredients can come together to create something extraordinary. It’s not just a breakfast; it’s a reminder of the comfort that food can bring. Whether you’re making it on a busy morning or leisurely enjoying it over the weekend, this oatmeal will always satisfy. It’s a wholesome, quick, and customizable meal that nourishes both the body and the soul.

So, the next time you’re looking for a delicious, nutritious, and easy breakfast, remember that with just a few basic ingredients—oatmeal, bananas, and blueberries—you can create a meal that’s not only good for you but also brings a sense of warmth and comfort that will stay with you all day. Enjoy it, share it with others, and savor the memories it brings back of mornings spent around the breakfast table, where the simplest meals are the ones that matter most.

Amal

Introduction: A Simple Breakfast that Reminds Me of Home

This oatmeal recipe is the perfect way to start your day with a nutritious, tasty, and filling breakfast. The sweet, natural flavor of ripe bananas pairs perfectly with juicy blueberries, while the oats provide fiber and energy to keep you satisfied until lunchtime. Drizzle a little avocado oil on top for added richness and heart-healthy fats. Best of all, you can whip this up in just five minutes!
Prep Time 5 minutes
Total Time 5 minutes
Servings: 2 -3 servings
Course: Breakfast
Cuisine: American

Ingredients
  

  • 1 cup oatmeal
  • 2 ripe bananas
  • 1 pinch of vanillin
  • cup hot water
  • 1 cup blueberries
  • Avocado oil for drizzling

Method
 

  1. In a bowl, combine the oatmeal with the hot water and stir. Let it sit for about 1-2 minutes to soften the oats.
  2. While the oatmeal is soaking, peel and mash the bananas in a separate bowl. Add a pinch of vanillin for extra flavor.
  3. Stir the mashed bananas into the oatmeal until fully combined.
  4. Gently fold in the blueberries, distributing them evenly throughout the mixture.
  5. Serve the oatmeal in bowls, drizzle a little avocado oil on top for added smoothness, and enjoy!

Notes

  • Storage Tip: For the best texture, enjoy this oatmeal fresh. If you need to store leftovers, keep them in the refrigerator for up to 2 days. Reheat with a splash of water or milk.
  • Customization: Feel free to swap the blueberries for any other fresh berries or fruits you enjoy. You can also add a handful of nuts or seeds for extra crunch.
  • Sweetener Option: If you prefer your oatmeal sweeter, you can add a drizzle of honey or maple syrup after cooking.

Introduction: The Simple Joys of Homemade Comfort

There’s something magical about the way food can bring people together. For me, one of the most cherished memories of my childhood is sitting around the dinner table with my family, eagerly awaiting the moment when the crispy, golden-brown zucchini bites were placed in front of us. They weren’t just a dish—they were a symbol of love and care, a delicious reminder that some of the best things in life come from the simplest ingredients.

Growing up, my grandmother was the heart of our family kitchen. She had a knack for turning basic vegetables into something extraordinary. Zucchini was one of her favorites, and she’d find every excuse to incorporate it into her meals. She’d grate it, sauté it, stuff it, and bake it—making sure no zucchini ever went to waste. But her zucchini bites were the dish we all eagerly anticipated. They were crispy on the outside, tender on the inside, and bursting with fresh flavor. To this day, whenever I make them, I’m reminded of those warm, bustling dinners filled with laughter and the comforting aroma of home-cooked food.

Zucchini bites are one of those dishes that are simple enough to make on a weeknight, but special enough to be served at any gathering. They’re versatile, satisfying, and a great way to enjoy fresh zucchini in a new and exciting way. Whether served as an appetizer, side dish, or snack, they never fail to bring a smile to everyone who tries them. And what’s even better is that they’re a great way to sneak in some extra vegetables without anyone complaining—something my grandmother knew all too well!

Why Zucchini Bites Are a Kitchen Favorite

The beauty of zucchini bites lies in their versatility. They’re incredibly simple to prepare, yet they pack a punch when it comes to flavor. Zucchini, as mild and unassuming as it may seem, serves as the perfect base for a wide range of flavors. It’s soft, moist, and slightly sweet—qualities that lend themselves perfectly to being transformed into crispy, savory fritters. Whether it’s the addition of garlic, lemon zest, rosemary, or the rich flavors of cheddar and Parmesan, every bite offers a delightful combination of textures and tastes.

Another reason these zucchini bites are so loved is their flexibility. You can easily customize them to suit your taste preferences. Add more garlic for extra flavor, experiment with different herbs like thyme or basil, or even swap out the cheeses for something different. The possibilities are endless, which is why this recipe is one that I return to time and time again.

But beyond the flexibility and flavor, zucchini bites have a way of bringing people together. The act of cooking them, sharing them, and enjoying them with others creates a sense of connection. It’s a small gesture that reminds us that food is more than just sustenance—it’s a way to show love and care, to create memories, and to celebrate life’s simple pleasures.

Ingredients

IngredientQuantity
Zucchini, grated (large holes of a box grater)2 pounds
Kosher salt½ teaspoon
Mayonnaise¼ cup
Large eggs3
Fresh bread (without crust), diced¾ cup
Green onions (including green parts), minced½ cup
Garlic, minced (about 2 teaspoons)2 cloves
Lemon zest1 ½ teaspoons
Fresh rosemary, minced¼ teaspoon
Cheddar cheese, grated½ cup
Parmesan cheese, grated¼ cup

Directions

  1. Prepare the Zucchini: Grate the zucchini using a box grater with large holes. Place the grated zucchini in a colander, sprinkle it with kosher salt, and let it sit for about 10 minutes to draw out excess moisture. Once it’s done sitting, squeeze out any remaining water with your hands.
  2. Combine the Ingredients: In a large mixing bowl, combine the squeezed zucchini with mayonnaise, eggs, diced bread, minced green onions, garlic, lemon zest, and minced rosemary. Stir the mixture thoroughly until all ingredients are well incorporated.
  3. Add the Cheese: Fold the grated cheddar and Parmesan cheeses into the mixture until evenly distributed.
  4. Form the Bites: Heat a non-stick skillet over medium heat and lightly grease it with cooking spray or a bit of oil. Shape the zucchini mixture into small patties or fritters using your hands and place them in the skillet, cooking in batches if necessary.
  5. Cook the Bites: Fry each zucchini bite for 3-4 minutes on each side, or until golden brown and crispy. Once cooked, remove them from the skillet and place them on a paper towel-lined plate to drain any excess oil.
  6. Serve and Enjoy: Serve the zucchini bites warm. These make a great appetizer, side dish, or snack. They pair wonderfully with a creamy dipping sauce like sour cream or yogurt.

Nutritional Information

NutrientPer Serving (2 bites)
Calories150
Total Fat9g
Saturated Fat2g
Carbohydrates11g
Dietary Fiber2g
Sugars3g
Protein6g
Sodium250mg

Frequently Asked Questions About Zucchini Bites

1. Can I use frozen zucchini for this recipe?

While fresh zucchini is always recommended for the best flavor and texture, you can use frozen zucchini in a pinch. However, you’ll need to thaw it completely and then squeeze out any excess moisture before using it in the recipe. Frozen zucchini tends to release more water during cooking, which can result in soggy fritters if not properly drained.

2. How do I prevent the zucchini bites from falling apart while cooking?

The key to keeping your zucchini bites intact is to make sure you’ve properly drained the excess moisture from the grated zucchini. After salting and letting it sit, squeeze out as much water as possible using a clean kitchen towel or your hands. Additionally, the breadcrumbs and eggs in the mixture help bind the ingredients together. If your mixture seems too loose, you can add a little extra breadcrumbs until it holds together better.

3. Can I make these zucchini bites ahead of time?

Absolutely! These zucchini bites can be made ahead of time. You can prepare the mixture, form the patties, and then refrigerate them for up to a day before cooking. Alternatively, you can cook them in advance and store them in the fridge. To reheat, simply pop them in a warm oven (350°F) for 5–10 minutes until they’re crispy again. This makes them a perfect option for meal prepping or for serving at a party.

4. Can I make these gluten-free?

Yes! To make these zucchini bites gluten-free, simply replace the regular breadcrumbs with gluten-free breadcrumbs or another binding agent such as ground oats or almond flour. This swap won’t sacrifice the flavor or texture, and you’ll still get the crispy exterior and tender interior that make these bites so delicious.

5. What can I serve these zucchini bites with?

Zucchini bites are incredibly versatile and pair well with a wide range of dips and sauces. Sour cream, Greek yogurt, or tzatziki sauce make excellent options for a refreshing contrast to the richness of the bites. You could also serve them with a spicy ketchup, a creamy avocado dip, or even a simple vinaigrette. They make a great accompaniment to a salad, grilled meats, or even as a snack on their own.

6. Can I freeze zucchini bites?

Yes! Zucchini bites freeze well. After frying and cooling them, place them in an airtight container or freezer-safe bag. They can be stored in the freezer for up to 3 months. When you’re ready to eat them, simply reheat them in the oven at 350°F for about 10 minutes, or until they’re heated through and crispy again.

7. How do I make these zucchini bites less greasy?

If you’re concerned about the zucchini bites being too greasy, there are a couple of things you can do. First, make sure to squeeze out all the moisture from the zucchini before cooking. You can also cook them on a paper towel-lined plate to help absorb any excess oil. Using a non-stick skillet with a small amount of oil will also help reduce the amount of oil absorbed by the bites.

The Beauty of Simplicity

At the heart of every great recipe is a simple idea, and zucchini bites embody this idea perfectly. With just a few ingredients, you can create something truly remarkable. They’re easy to make, fun to share, and full of fresh, vibrant flavor. Whether you’re making them for a family dinner, bringing them to a potluck, or simply enjoying them as a midday snack, zucchini bites will always deliver.

As someone who loves to cook, I find that recipes like this remind me why I started cooking in the first place: to create moments of joy and connection. The act of preparing food, savoring it with loved ones, and passing down recipes through generations is something truly special. These zucchini bites are not just a dish—they’re a celebration of the simple, everyday moments that make life so beautiful.

Conclusion: More Than Just a Recipe

Zucchini bites are more than just a tasty treat—they’re a symbol of how food can bring us together. Whether you’re cooking for yourself, your family, or a group of friends, they serve as a reminder that food isn’t just about filling our stomachs; it’s about sharing love, creating memories, and enjoying the little things in life. The next time you make these zucchini bites, take a moment to savor the experience—not just the flavors, but the connections you’re making along the way.

Amal

Introduction: The Simple Joys of Homemade Comfort

These crispy zucchini bites are a delicious and simple way to enjoy fresh zucchini. Grated zucchini is combined with savory ingredients like garlic, green onions, and cheese, then shaped into golden-brown fritters. The result is a crispy outside and tender inside that’s perfect as a side dish, appetizer, or snack. With their burst of flavor and light texture, they’re sure to become a family favorite!
Prep Time 15 minutes
Cook Time 20 minutes
Total Time 35 minutes
Servings: 12 -14 zucchini bites
Course: Appetizer
Cuisine: American

Ingredients
  

  • 2 pounds zucchini grated (large holes of a box grater)
  • ½ teaspoon kosher salt
  • ¼ cup mayonnaise
  • 3 large eggs
  • ¾ cup diced fresh bread without crust
  • ½ cup minced green onions including green parts
  • 2 cloves garlic minced (about 2 teaspoons)
  • 1 ½ teaspoons grated lemon zest
  • ¼ teaspoon minced fresh rosemary
  • ½ cup grated cheddar cheese
  • ¼ cup grated Parmesan cheese

Method
 

  1. Prepare the Zucchini: Grate the zucchini using the large holes of a box grater. Place the grated zucchini in a colander, sprinkle with kosher salt, and let it sit for about 10 minutes to draw out excess moisture. Afterward, squeeze out the water by pressing the zucchini in a clean kitchen towel.
  2. Combine the Ingredients: In a large bowl, mix the squeezed zucchini with mayonnaise, eggs, diced bread, minced green onions, garlic, lemon zest, and rosemary. Stir until fully incorporated.
  3. Add the Cheese: Stir in the grated cheddar and Parmesan cheeses until evenly distributed throughout the mixture.
  4. Form the Bites: Heat a non-stick skillet over medium heat and lightly grease with oil or cooking spray. Shape the zucchini mixture into small patties or fritters and cook them in batches in the skillet.
  5. Cook the Zucchini Bites: Fry each side for 3-4 minutes until golden brown and crispy. Once done, transfer them to a paper towel-lined plate to remove any excess oil.
  6. Serve and Enjoy: Serve the zucchini bites warm with your favorite dipping sauce, and enjoy the crispy, savory goodness!

Notes

  • Make-Ahead Tip: You can prepare the mixture and refrigerate it for up to 24 hours before cooking the bites.
  • Freezing Tip: These zucchini bites can be frozen once cooked. Store them in an airtight container in the freezer and reheat in the oven at 350°F for 5-10 minutes.
  • Gluten-Free: Substitute regular breadcrumbs with gluten-free breadcrumbs or almond flour for a gluten-free version.

Introduction: The Warmth of Home in Every Bite

There are few things in life as comforting as the scent of freshly baked bread wafting through the house. It brings back memories of family gatherings, laughter around the dinner table, and the cozy feeling of home. For me, one of the most cherished memories is my grandmother’s kitchen, where the warmth of the oven matched the warmth of her loving presence. She had a gift for making the simplest ingredients come alive with flavor, and it was during those years that I learned the magic of combining love and food. Among the many recipes she passed down to me, her fluffy potato rolls were always a crowd favorite. Simple yet rich in texture, these rolls were a perfect complement to any meal, adding an extra layer of comfort that made each bite feel like a warm hug.

Today, I want to share with you the recipe for these unforgettable potato rolls—a recipe that has traveled through generations, bringing smiles to faces and warmth to hearts. Whether you’re planning a holiday dinner or simply want to enjoy something homemade, these rolls are a reminder that food is more than just fuel. It’s about connection, tradition, and a bit of magic.

The Secret Behind the Soft, Fluffy Texture: Why Potato Rolls Stand Out

You might be wondering, what makes potato rolls different from other types of bread? The secret lies in the addition of mashed potatoes and potato water. While traditional bread recipes rely heavily on water or milk to hydrate the dough, potato rolls use the starchy water from cooking the potatoes and the creamy texture of the mashed potatoes themselves. This gives the dough a uniquely soft and pillowy texture that’s perfect for holding in flavor.

Potatoes are a natural source of moisture, and when they are incorporated into dough, they not only enhance the bread’s tenderness but also extend its freshness. These rolls stay soft for days, and their flavor only improves as they rest. The richness of the potato adds an almost subtle sweetness to the dough, creating a perfect balance with the slight tang of the yeast and the warmth of the honey.

Ingredients

IngredientQuantity
Medium russet potato1
Potato water (from cooking the potato)½ cup
Whole milk (warmed)1 ½ cups
Active dry yeast2 ¼ teaspoons
Honey1 tablespoon
Canola oil2 tablespoons
Salt1 teaspoon
All-purpose flour5 ½ – 6 cups

Directions

  1. Prepare the Potato: Begin by washing the russet potato thoroughly, then place it in a pot with water and boil until soft. Reserve ½ cup of the potato water before draining and mashing the potato.
  2. Activate the Yeast: In a small bowl, dissolve the active dry yeast and honey in the warm potato water. Allow it to sit for about 5 minutes or until it becomes frothy.
  3. Mix Ingredients: In a large bowl, combine the mashed potato, warmed milk, and canola oil. Stir in the activated yeast mixture.
  4. Form the Dough: Gradually add flour, 1 cup at a time, mixing until a soft dough forms. Knead the dough on a floured surface for 8-10 minutes until smooth and elastic.
  5. Let it Rise: Place the dough in an oiled bowl and cover it with a clean cloth. Allow it to rise in a warm place for 1-2 hours, or until doubled in size.
  6. Shape the Rolls: Once risen, punch down the dough and divide it into small pieces. Roll each piece into a ball and place them in a greased baking dish.
  7. Second Rise: Let the shaped rolls rise for 30 minutes, covered with a cloth.
  8. Bake the Rolls: Preheat your oven to 375°F (190°C). Bake the rolls for 20-25 minutes, or until golden brown on top.
  9. Serve and Enjoy: Brush the tops with a bit of melted butter, serve warm, and enjoy the soft, fluffy goodness!

Nutritional Information

NutrientPer Serving (1 roll)
Calories180
Total Fat4g
Saturated Fat0.5g
Carbohydrates33g
Dietary Fiber1g
Sugars2g
Protein3g
Sodium200mg

The Perfect Pair: When and How to Serve These Potato Rolls

These potato rolls are versatile, making them an excellent choice for any occasion. They are perfect for family dinners, holiday meals, or as a side for a simple weeknight meal. Imagine them alongside a savory roast chicken, dipping into gravy, or served with butter melting on top.

They also work well as a snack with a variety of spreads. Whether it’s a rich herb butter, a tangy cream cheese dip, or even a sweet fruit preserve, these rolls hold up beautifully with both savory and sweet accompaniments. And don’t forget about sandwiches! These rolls are soft enough to use for sliders or sandwiches, yet sturdy enough to hold up to a juicy filling.

The Science of Yeast: Understanding the Role of Yeast in Potato Rolls

A crucial ingredient in potato rolls is the active dry yeast, which is responsible for leavening the dough. Yeast is a living organism that feeds on the sugars present in the flour, producing carbon dioxide gas as a byproduct. This gas causes the dough to rise, giving it its airy, light texture. The honey in the dough provides food for the yeast, helping it to thrive and work its magic.

The key to perfect rolls is making sure that the yeast is properly activated before adding it to the dough. The warm potato water (not too hot, not too cold) helps the yeast bloom, creating the bubbly, frothy mixture that is essential for proper fermentation. This is why it’s important to pay attention to the temperature of the liquids—if the water is too hot, it can kill the yeast, and if it’s too cold, the yeast won’t activate.

Frequently Asked Questions About Potato Rolls

1. Can I use a different type of flour for these rolls?

Yes! All-purpose flour works best for this recipe because it provides the ideal balance of structure and softness, but you can experiment with other types of flour if you like. Bread flour, for example, will give your rolls a slightly chewier texture, while whole wheat flour will add a nutty flavor. If you’re using whole wheat flour, you may need to adjust the amount of liquid, as whole wheat flour absorbs more moisture than all-purpose flour.

2. How can I make these rolls ahead of time?

If you’d like to prepare the rolls ahead of time, you have a few options. One method is to prepare the dough and allow it to rise, then shape the rolls and place them on a baking sheet. Cover them with plastic wrap and refrigerate the dough overnight. The next day, let them come to room temperature and rise for an additional 30 minutes before baking.

Alternatively, you can bake the rolls and store them in an airtight container. Reheat them in the oven for about 5 minutes at 350°F (175°C) to restore their softness and warmth.

3. Can I freeze these potato rolls?

Yes, potato rolls freeze beautifully! Once they are baked and cooled, place them in a freezer-safe bag or container. They will keep for up to 3 months. To reheat, simply thaw them at room temperature and warm them in the oven for 5–10 minutes, or until they are heated through.

4. Why did my potato rolls turn out dense?

There are several reasons why potato rolls might turn out dense. The most common reason is that the dough wasn’t given enough time to rise. Make sure to allow the dough to double in size during the first rise. If the dough is too stiff, it may need more flour to reach the right consistency. Also, make sure you’re using fresh yeast, as expired yeast may not be as effective at leavening the dough.

5. Can I use instant yeast instead of active dry yeast?

Yes, you can substitute instant yeast for active dry yeast in this recipe. However, instant yeast doesn’t need to be activated in warm water, so you can simply add it directly to the dry ingredients. If using instant yeast, reduce the rise time by about 10–15 minutes, as it works faster than active dry yeast.

6. Can I add herbs or other ingredients to the dough?

Absolutely! Potato rolls are a wonderful base for experimentation. You can add fresh herbs like rosemary or thyme to the dough for a fragrant twist. For a savory flavor, try adding garlic powder or onion powder. If you like a sweeter roll, consider adding cinnamon or nutmeg for a warm, spiced aroma. Just be sure to balance these additions so they complement the softness of the rolls.

Baking Tips for the Perfect Potato Rolls

To ensure that your potato rolls are always perfect, consider these baking tips:

  1. Don’t Rush the Rise: The dough needs time to rise properly. Resist the urge to speed up the process with high heat, as this can alter the texture of the rolls. Allow the dough to rise in a warm, draft-free place.
  2. Use a Soft Hand: When shaping the rolls, handle the dough gently. Overworking it can make the rolls dense. Lightly shape them into balls, and don’t worry if they’re not perfectly round. Imperfections give them character!
  3. Brush with Butter: For an extra touch of flavor and gloss, brush the tops of the rolls with melted butter just after baking. This adds richness and gives the rolls a beautiful shine.
  4. Monitor the Oven Temperature: Ovens can vary in temperature, so make sure to check your rolls around the 20-minute mark. If the tops are golden brown, they are likely ready, but if you’re unsure, a quick tap on the bottom of the roll should produce a hollow sound when it’s fully baked.

Conclusion: A Recipe That Brings People Together

These potato rolls aren’t just about the ingredients. They’re about the moments shared with loved ones, the laughter around the table, and the memories that are created when food is made with care. This recipe has been passed down through generations, and it holds a special place in my heart. Every time I bake these rolls, I am reminded of my grandmother’s kitchen and the simple joy of being together.

Whether you’re a seasoned baker or a beginner in the kitchen, these potato rolls are a reminder that there is magic in making something from scratch. The fluffy, soft texture, the slight sweetness from the potato, and the golden-brown crust will make every meal feel like a celebration. So go ahead, bake these rolls, and share them with the people who matter most. You’ll be making memories that will last a lifetime.

Amal

Introduction: The Warmth of Home in Every Bite

These homemade potato rolls are a soft, fluffy delight that will quickly become a family favorite. With the perfect balance of yeast, honey, and mashed potatoes, they are wonderfully tender and slightly sweet. Perfect for any meal or event, these rolls can be enjoyed as a side, snack, or even used for sandwiches.
Prep Time 15 minutes
Cook Time 25 minutes
Total Time 2 hours 40 minutes
Servings: 12 -16 rolls
Course: Bread
Cuisine: American

Ingredients
  

  • 1 medium russet potato
  • ½ cup potato water from cooking the potato
  • 1 ½ cups whole milk warmed
  • 2 ¼ teaspoons active dry yeast
  • 1 tablespoon honey
  • 2 tablespoons canola oil
  • 1 teaspoon salt
  • 5 ½ – 6 cups all-purpose flour

Method
 

  1. Prepare the Potato: Begin by washing the russet potato thoroughly. Place it in a pot with water and bring it to a boil. Once soft, drain the potato, reserving ½ cup of the water, and mash the potato until smooth.
  2. Activate the Yeast: In a small bowl, combine the potato water (warmed) with honey and active dry yeast. Let it sit for about 5 minutes, allowing it to froth and activate.
  3. Mix the Ingredients: In a large mixing bowl, combine the mashed potato, warmed whole milk, and canola oil. Stir in the yeast mixture.
  4. Add the Flour: Gradually add flour, one cup at a time, stirring until the dough comes together. You may need more or less flour depending on the moisture content of the mashed potato.
  5. Knead the Dough: Turn the dough onto a floured surface and knead for about 8–10 minutes until it is smooth and elastic.
  6. Let the Dough Rise: Place the dough in a lightly oiled bowl, cover it with a cloth, and let it rise in a warm place for 1 to 2 hours, or until it has doubled in size.
  7. Shape the Rolls: Punch the dough down and divide it into small pieces, rolling each piece into a smooth ball. Arrange the rolls in a greased baking dish.
  8. Second Rise: Cover the shaped rolls with a cloth and allow them to rise for 30 minutes, or until puffed up.
  9. Bake the Rolls: Preheat your oven to 375°F (190°C). Bake the rolls for 20-25 minutes, or until golden brown on top.
  10. Serve and Enjoy: Remove the rolls from the oven, brush with butter if desired, and serve warm. Enjoy the soft, pillowy texture and subtle sweetness!

Notes

  • Make-Ahead: If you want to prepare these rolls ahead of time, you can refrigerate the dough after the first rise. Shape the rolls, cover them, and place them in the fridge overnight. In the morning, let them come to room temperature for 30 minutes before baking.
  • Freezing: These rolls freeze well. Once baked and cooled, store them in a freezer-safe bag or container. Reheat in the oven for 5–10 minutes at 350°F (175°C).
  • For a Crispier Top: Brush the tops of the rolls with melted butter before baking for an extra golden finish.
  • Yeast Troubleshooting: Ensure the potato water is warm, not hot, to properly activate the yeast. If the yeast doesn’t froth, it may be expired, and you should try with a fresh packet.
  • Flavor Variations: For added flavor, consider incorporating fresh herbs like rosemary or thyme into the dough.

Heavenly Delight: Homemade Cake in Minutes

There are few things in life as comforting as the aroma of a cake baking in the oven. It fills the house with warmth, creating an atmosphere of love, anticipation, and pure happiness. For me, homemade cake has always been more than just dessert—it’s a memory, a tradition, and a way to bring people together.

I remember standing on a wooden stool in my grandmother’s kitchen, watching her hands move effortlessly as she separated eggs and measured flour. She never used a scale; everything was done by instinct, years of experience guiding her movements. The best part was licking the spoon after the batter was poured into the pan—a small reward for my “help.”

That cake was always perfect. Soft, fluffy, with just the right balance of sweetness. She would fill it with a rich, creamy custard that tasted like vanilla and sunshine. Every bite was a reminder that homemade food has a special kind of magic—one that store-bought cakes simply can’t replicate.

Now, whenever I make this cake, I think of those afternoons spent in her kitchen. And with this simple recipe, you can create the same kind of magic in your own home.

Why This Cake is a Must-Try

This homemade cake recipe is a classic sponge cake filled with a smooth and velvety custard. It is light, airy, and absolutely delicious. The combination of the soft cake and creamy filling creates a perfect balance of textures, making each bite incredibly satisfying.

The best part? You don’t need to be an expert baker to make it. Unlike complicated layered cakes that require hours of effort, this one comes together quickly and easily. It’s perfect for when you need a last-minute dessert or simply want to treat yourself without too much fuss.

What Makes This Cake Special?

  1. Light and Fluffy Texture – The sponge cake is made with whipped egg whites, which give it an airy, melt-in-your-mouth consistency.
  2. Rich and Creamy Custard – Unlike buttercream or frosting, the custard filling adds a luscious, silky smooth layer that enhances the overall flavor.
  3. Simple and Elegant – This cake doesn’t rely on excessive decorations. It’s beautiful in its simplicity, making it perfect for any occasion.
  4. Minimal Ingredients, Maximum Flavor – No complicated techniques or fancy ingredients—just a few pantry staples that come together perfectly.

Whether you’re celebrating a birthday, hosting a tea party, or just craving something sweet, this cake is the answer.

Ingredients

Sponge Cake

IngredientQuantity
Eggs (separated)4
Sugar (for yolks)60g / 2 oz
Sugar (for egg whites)120g / 4 oz
Juice of 1/2 lemon
Flour170g / 6 oz
Baking powder10g / 0.35 oz
Corn starch15g / 0.5 oz

Custard Filling

IngredientQuantity
Eggs2
Sugar90g / 3 oz
Vanilla essence1 teaspoon
Corn starch45g / 1.5 oz
Milk600ml / 20 fl oz

Directions

1. Prepare the Sponge Cake

  • Preheat the oven to 180°C (350°F). Grease and line a cake pan with parchment paper.
  • Beat egg yolks with sugar until pale and creamy. Add lemon juice.
  • In a separate bowl, beat egg whites with the remaining sugar until stiff peaks form.
  • Sift together flour, baking powder, and corn starch. Gently fold the dry ingredients into the egg yolk mixture, alternating with the whipped egg whites to maintain the airiness.
  • Pour the batter into the prepared pan and bake for 25-30 minutes or until golden brown and a toothpick inserted comes out clean.
  • Let the cake cool completely before slicing.

2. Prepare the Custard Filling

  • In a saucepan, whisk eggs, sugar, and vanilla essence. Add corn starch and mix well.
  • Gradually pour in the milk, whisking constantly to prevent lumps.
  • Cook over medium heat, stirring continuously, until the custard thickens. Remove from heat and let it cool completely.

3. Assemble the Cake

  • Slice the sponge cake into layers. Spread the custard filling between the layers evenly.
  • Chill in the refrigerator for at least an hour before serving to let the flavors meld together.
  • Dust with powdered sugar or decorate as desired.

Nutritional Information

NutrientPer 100g
Calories280 kcal
Carbohydrates45g
Protein6g
Fat6g
Sugar20g

Common Mistakes and How to Avoid Them

Even though this recipe is easy to follow, a few common mistakes can affect the final result. Here’s how to ensure your cake turns out perfect every time:

1. Overmixing the Batter

The key to a light and airy sponge cake is to mix the ingredients gently. Overmixing will deflate the air bubbles in the egg whites, making the cake dense instead of fluffy. Always fold the ingredients carefully with a spatula rather than stirring vigorously.

2. Not Beating Egg Whites Properly

Whipping egg whites to stiff peaks is crucial for the cake’s structure. If the egg whites are under-whipped, the cake won’t rise properly. If they are over-whipped, they may become grainy and difficult to incorporate into the batter. The trick is to beat them until they form soft peaks that hold their shape but still have a slight bend at the tip.

3. Skipping the Sifting Step

Sifting flour, baking powder, and corn starch together ensures even distribution of ingredients and prevents clumps. This extra step makes a big difference in achieving a smooth, even texture in the cake.

4. Rushing the Custard

Custard requires patience. If you cook it over high heat or stop stirring, you may end up with lumps. Always cook it on medium heat while whisking continuously until it thickens into a smooth, creamy consistency. If you do get lumps, you can strain the custard through a fine sieve to fix it.

5. Assembling the Cake While It’s Still Warm

Allowing the cake and custard to cool completely before assembling is essential. If the cake is warm, the custard will melt and seep into the sponge, making it soggy instead of layered and creamy.

Creative Variations to Try

Once you master this basic recipe, you can customize it in endless ways. Here are a few ideas to inspire you:

1. Chocolate Custard Cake

Replace the vanilla essence in the custard with cocoa powder or melted chocolate for a rich, chocolatey twist.

2. Citrus Delight

Add the zest of a lemon or orange to the cake batter for a bright, citrusy flavor that pairs beautifully with the custard.

3. Berry-Filled Cake

Layer the custard with fresh berries such as strawberries, raspberries, or blueberries for a refreshing contrast to the sweetness.

4. Caramel Drizzle

Top the cake with a drizzle of homemade caramel sauce for an extra layer of indulgence.

5. Nutty Crunch

Sprinkle chopped almonds, pistachios, or hazelnuts over the custard layer for added texture and flavor.

Frequently Asked Questions (FAQs)

Q1: Can I Make This Cake in Advance?

Yes! You can bake the sponge cake a day ahead and store it in an airtight container. The custard can also be made in advance and kept in the refrigerator. Assemble the cake just before serving for the best texture.

Q2: Can I Use a Different Type of Flour?

All-purpose flour works best for this recipe, but you can substitute it with cake flour for an even lighter texture. If using whole wheat flour, keep in mind that the cake may turn out denser.

Q3: How Do I Store Leftovers?

Store the cake in the refrigerator for up to 3 days. Since the custard contains milk and eggs, it should not be left at room temperature for too long. Cover the cake with plastic wrap or store it in an airtight container to keep it fresh.

Q4: Can I Use Store-Bought Custard Instead?

While homemade custard tastes the best, you can use store-bought custard as a shortcut. Just make sure it’s thick enough to hold between the cake layers.

Q5: Can I Make This Cake Gluten-Free?

Yes! You can substitute the regular flour with a gluten-free all-purpose flour blend. The texture might be slightly different, but it will still taste amazing.

Conclusion: A Cake That Feels Like Home

There is something undeniably special about homemade cake. It’s not just about the taste—it’s about the love and care that go into making it. This sponge cake with custard filling is a timeless classic that brings joy with every bite.

Whether you’re baking for a celebration, a family gathering, or simply to treat yourself, this cake is guaranteed to impress. It is soft, creamy, and full of flavor—just like the ones grandma used to make.

So go ahead, gather your ingredients, and create something wonderful. Because nothing beats the joy of baking a homemade cake, especially when it’s this easy and delicious.

Amal

Heavenly Delight: Homemade Cake in Minutes

This homemade sponge cake with creamy custard filling is the perfect dessert for any occasion. Light, airy, and filled with rich vanilla custard, this cake is both simple to make and absolutely delicious. Whether you serve it at a family gathering or enjoy it with your afternoon tea, every bite melts in your mouth with a perfect balance of sweetness and texture.
Prep Time 20 minutes
Cook Time 30 minutes
Total Time 50 minutes
Servings: 1 medium-sized cake
Course: Dessert
Cuisine: International

Ingredients
  

For the Sponge Cake:
  • 4 eggs separated
  • 60 g 2 oz sugar (for yolks)
  • 120 g 4 oz sugar (for egg whites)
  • Juice of 1/2 lemon
  • 170 g 6 oz flour
  • 10 g 0.35 oz baking powder
  • 15 g 0.5 oz corn starch
For the Custard Filling:
  • 2 eggs
  • 90 g 3 oz sugar
  • 1 teaspoon vanilla essence
  • 45 g 1.5 oz corn starch
  • 600 ml 20 fl oz milk

Method
 

  1. Prepare the Sponge Cake: Preheat the oven to 180°C (350°F) and grease a cake pan. Beat egg yolks with sugar until creamy, then add lemon juice. In a separate bowl, beat egg whites with sugar until stiff peaks form. Sift flour, baking powder, and corn starch together. Gently fold them into the egg yolk mixture, alternating with the egg whites to maintain airiness. Pour the batter into the pan and bake for 25-30 minutes, or until a toothpick inserted comes out clean. Let the cake cool completely before assembling.
  2. Prepare the Custard Filling: In a saucepan, whisk eggs, sugar, and vanilla essence. Add corn starch and mix well. Gradually pour in the milk while whisking continuously to prevent lumps. Cook over medium heat, stirring constantly, until the custard thickens. Remove from heat and allow it to cool completely.
  3. Assemble the Cake: Slice the sponge cake into layers. Spread the custard filling evenly between the layers. Chill the cake for at least an hour before serving. Optionally, dust with powdered sugar or garnish with fruits.

Notes

  • Make sure the sponge cake is completely cool before adding the custard to prevent it from melting into the layers.
  • For a citrusy twist, add lemon or orange zest to the cake batter.
  • If the custard is too thick, whisk in a little warm milk to loosen it.
  • The cake can be stored in the refrigerator for up to 3 days.

Golden Melt Bread: The No-Knead Cheese Bread You’ll Love

There is something deeply comforting about the scent of freshly baked bread filling the house. It is a reminder of home, of lazy Sunday mornings spent waiting by the oven, and of the simple joys found in a warm, golden crust.

The first time I made no-knead cheese bread, I was skeptical. Could something so easy really turn out as delicious as the traditional, time-consuming loaves I had grown up with? My grandmother, who always kneaded her dough with patience and care, would have certainly raised an eyebrow at the idea of skipping that crucial step. But life gets busy, and sometimes, we need recipes that fit into our schedules without sacrificing taste.

When I pulled my first loaf out of the oven—its golden crust glistening from the egg wash, the edges crisp but not hard—I knew I had discovered something special. The inside was pillowy soft, infused with just the right amount of cheesy goodness. It was everything I loved about homemade bread, with none of the hassle.

This no-knead bread is for anyone who loves good food but doesn’t always have the time for labor-intensive baking. Whether you are a seasoned baker or a beginner, this recipe will make you feel like a pro.

Why No-Knead Bread Works Like Magic

Traditional bread recipes rely on kneading to develop gluten, which gives bread its structure and chewiness. However, no-knead bread takes a different approach. Instead of manually working the dough, we allow time to do the heavy lifting.

The secret lies in hydration and fermentation. The wet dough hydrates the flour over time, allowing gluten strands to form naturally. Meanwhile, the yeast works slowly, fermenting the dough and creating air pockets that give the bread its airy texture.

The Role of Key Ingredients

  • Flour: Provides the structure and texture. Using sifted flour ensures a smoother, softer crumb.
  • Yeast: Activates fermentation, helping the dough rise without the need for kneading.
  • Milk: Enhances the softness and adds a subtle richness to the bread.
  • Cheese: The heart of this recipe. It melts into the dough, adding bursts of flavor and moisture.
  • Olive Oil: Gives the bread a slight tenderness and enhances the crust’s golden color.

By simply mixing, resting, and baking, you get a homemade bread that feels like it took hours of effort—when, in reality, it required almost none.

Ingredients

IngredientQuantity
Warm milk400 ml
Sugar15g
Dry yeast10g
Wheat flour (sifted)480g
Salt8g
Olive oil20g
Mozzarella or cheddar cheese (grated)200g
Egg yolk1
Vegetable oil (for greasing)As needed

Directions

  1. Activate the Yeast
    • In a bowl, mix warm milk, sugar, and dry yeast. Let it sit for about 10 minutes until frothy.
  2. Mix the Dough
    • In a large mixing bowl, combine sifted flour and salt.
    • Add the yeast mixture and olive oil, stirring with a spatula or spoon until a sticky dough forms.
    • Fold in the grated cheese evenly.
  3. Rest and Rise
    • Cover the bowl with a damp cloth and let the dough rise in a warm place for about 60-90 minutes or until doubled in size.
  4. Shape and Second Rise
    • Grease a baking pan with vegetable oil.
    • Transfer the dough into the pan, spreading it evenly without overhandling.
    • Let it rest for another 20-30 minutes.
  5. Bake to Perfection
    • Preheat the oven to 180°C (350°F).
    • Brush the top with egg yolk for a golden finish.
    • Bake for 25-30 minutes or until the top is golden brown and the bread sounds hollow when tapped.
  6. Cool and Serve
    • Allow the bread to cool slightly before slicing. Enjoy warm or at room temperature with butter or extra cheese.

Nutritional Information

NutrientPer 100g
Calories280 kcal
Carbohydrates35g
Protein9g
Fat10g
Sugar2g

Common Mistakes and How to Avoid Them

Even though this recipe is forgiving, there are still a few things to keep in mind to ensure perfect results every time.

1. My Dough Didn’t Rise—What Went Wrong?

  • Your yeast may be expired or inactive. Always proof your yeast first by mixing it with warm milk and sugar. If it doesn’t become frothy after 10 minutes, it’s no longer viable.
  • The environment might be too cold. Yeast thrives in warmth, so if your kitchen is chilly, place the dough near a warm spot, like on top of a preheating oven.

2. My Bread Turned Out Dense Instead of Fluffy

  • Over-mixing the dough can sometimes lead to a tighter crumb. Stir just until combined and let the yeast do its work.
  • If the dough didn’t have enough time to rise, it won’t develop the air pockets that create a soft texture. Be patient and allow a full proofing time.

3. The Cheese Didn’t Distribute Evenly

  • Always fold the cheese in gently rather than dumping it in all at once. This helps create even pockets of cheesy goodness throughout the bread.
  • Using finely grated cheese instead of large chunks ensures it melts uniformly into the dough.

4. How Do I Get That Perfect Golden Crust?

  • Brushing the top with egg yolk before baking gives the bread a rich, golden sheen.
  • If you prefer a crispier crust, place a small oven-safe dish with water inside the oven while baking. The steam helps develop a beautiful exterior without drying out the bread.

Creative Variations to Try

Once you master the basic recipe, there are endless ways to make this no-knead bread your own.

1. Garlic and Herb Cheese Bread

Add minced garlic and a handful of chopped fresh herbs (like rosemary or thyme) to the dough for a fragrant, savory twist.

2. Spicy Jalapeño Cheddar Bread

For those who love a bit of heat, mix in diced jalapeños and extra-sharp cheddar for a bold, spicy kick.

3. Sun-Dried Tomato and Basil Bread

A Mediterranean-inspired version with chopped sun-dried tomatoes and fresh basil brings a rich, slightly tangy flavor to the bread.

4. Sweet and Savory Honey Cheese Bread

Drizzle honey over the dough before baking for a touch of sweetness that pairs beautifully with the savory cheese.

Frequently Asked Questions

Q1: Can I use whole wheat flour instead of white flour?

Yes, but the texture will be denser. Whole wheat flour absorbs more moisture, so you may need to add a bit more milk to keep the dough from becoming too dry.

Q2: Can I make the dough ahead of time?

Absolutely! After mixing, you can refrigerate the dough overnight and bake it the next day. This slow fermentation enhances the flavor even more.

Q3: How should I store this bread?

Store it in an airtight container at room temperature for up to two days. For longer storage, freeze individual slices and toast them when needed.

Q4: Can I make this bread without cheese?

Yes! The base recipe works well on its own, creating a simple, soft no-knead bread. You can also experiment with other add-ins like nuts or dried fruit.

Q5: What’s the best way to serve this bread?

It’s delicious on its own but even better when paired with soups, stews, or simply slathered with butter. It also makes an amazing grilled cheese sandwich.

Conclusion: A Recipe Worth Baking Again and Again

No-knead bread is one of those rare recipes that offer both convenience and indulgence. It proves that great bread doesn’t have to be complicated—sometimes, all you need is a little patience and a handful of quality ingredients.

This recipe is not just about making bread; it’s about bringing warmth into your kitchen. It’s about the excitement of slicing into a freshly baked loaf, watching the steam escape, and taking that first, blissful bite.

So whether you’re a first-time baker or someone who has been making bread for years, give this no-knead cheese bread a try. You might just find yourself coming back to it over and over again, just like I did.

Amal

Golden Melt Bread: The No-Knead Cheese Bread You’ll Love

This no-knead cheese bread is the perfect combination of simplicity and flavor. With a soft, airy crumb and a golden, cheesy crust, it’s an effortless way to enjoy homemade bread without the hard work. Whether served as a snack, side dish, or toasted for breakfast, every bite is irresistibly delicious.
Prep Time 15 minutes
Cook Time 30 minutes
Total Time 45 minutes
Servings: 1 loaf
Course: Bread
Cuisine: International

Ingredients
  

  • 400 ml warm milk
  • 15 grams sugar
  • 10 grams dry yeast
  • 480 grams wheat flour sifted
  • 8 grams salt
  • 20 grams olive oil
  • 200 grams mozzarella or cheddar cheese grated
  • 1 egg yolk
  • Vegetable oil for greasing

Method
 

  1. In a bowl, mix warm milk, sugar, and dry yeast. Let sit for 10 minutes until it becomes frothy.
  2. In a large mixing bowl, combine sifted flour and salt. Pour in the yeast mixture and olive oil, stirring until a sticky dough forms.
  3. Fold in the grated cheese, ensuring even distribution throughout the dough.
  4. Cover the bowl with a damp cloth and let the dough rise in a warm place for 60-90 minutes until doubled in size.
  5. Grease a baking pan with vegetable oil and transfer the dough into it, spreading it evenly without overworking it.
  6. Let the dough rest for another 20-30 minutes for a second rise.
  7. Preheat the oven to 180°C (350°F). Brush the top of the dough with egg yolk for a golden finish.
  8. Bake for 25-30 minutes or until the bread is golden brown and sounds hollow when tapped.
  9. Allow the bread to cool slightly before slicing and serving.

Notes

  • If your kitchen is cold, place the dough near a warm spot to help it rise properly.
  • Use finely grated cheese for an even melt and better texture.
  • For extra flavor, try adding garlic powder, herbs, or a sprinkle of parmesan on top before baking.
  • Store leftover bread in an airtight container for up to two days or freeze slices for longer storage.

Heavenly Clouds: The Magic of Choux Pastry

The first time I made choux pastry, it was a complete disaster. I still remember staring at the flat, lifeless puffs that refused to rise, wondering what had gone wrong. My grandmother, an expert baker, stood beside me with a knowing smile. Instead of giving up, she guided me through the process again—watching the butter melt into the water, stirring in the flour until it came together, and slowly adding the eggs until the dough turned silky and glossy.

That day, as I pulled out my first batch of golden, crisp choux puffs, I understood what baking was truly about: patience, precision, and a bit of magic. Choux pastry isn’t just a recipe; it’s an experience. It’s the anticipation of watching the dough puff up in the oven, the joy of filling them with velvety cream, and the satisfaction of biting into a pastry so light it feels like a cloud.

Whether you are making éclairs, cream puffs, or profiteroles, mastering choux pastry is a skill every baker should embrace. This recipe is deceptively simple yet incredibly rewarding, offering endless possibilities for both sweet and savory creations.

The Science Behind the Perfect Choux Pastry

Choux pastry is unique because it doesn’t rely on baking powder or yeast for leavening. Instead, it harnesses the power of steam. The high moisture content in the dough turns into steam in the oven, causing the pastry to puff up beautifully. The key to success lies in the balance of ingredients and technique:

  • Flour: Provides structure to the dough, allowing it to hold its shape.
  • Butter & Water: Create the base, ensuring a rich flavor and correct moisture level.
  • Eggs: The most crucial ingredient, as they give the dough its elasticity and allow it to expand properly in the oven.

Achieving the right consistency is vital. Too much egg and the dough becomes too runny, preventing the puffs from holding their shape. Too little, and they won’t rise properly. This is why adding eggs gradually is an essential step in perfecting choux pastry.

Ingredients

For the Choux Pastry

IngredientQuantity
Water180g
Butter90g
SaltA pinch
SugarA pinch
Flour130g
Eggs3-4

Directions

  1. Prepare the Dough
    • In a saucepan, combine water, butter, salt, and sugar. Heat over medium flame until the butter fully melts and the mixture begins to simmer.
    • Reduce heat to low and add the flour all at once. Stir vigorously with a wooden spoon until the dough pulls away from the sides of the pan and forms a smooth ball.
  2. Incorporate the Eggs
    • Remove from heat and let the dough cool slightly for about 5 minutes.
    • Add eggs one at a time, beating well after each addition until the mixture is glossy and smooth. The dough should be thick but still pipeable.
  3. Shape and Bake
    • Preheat the oven to 200°C (390°F). Line a baking sheet with parchment paper.
    • Transfer the choux pastry dough into a piping bag and pipe small mounds onto the baking sheet, leaving space between each.
    • Bake for 20-25 minutes or until golden brown and puffed up. Avoid opening the oven door during baking to prevent deflation.
    • Once baked, turn off the oven, crack the door open, and let the pastries cool inside for a few minutes to prevent collapse.
  4. Fill and Serve
    • Once cooled, cut open and fill with pastry cream, whipped cream, or any filling of choice. Dust with powdered sugar or drizzle with chocolate for extra indulgence.

Nutritional Information

NutrientPer 100g
Calories290 kcal
Carbohydrates25g
Protein6g
Fat19g
Sugar1g

Common Mistakes and How to Avoid Them

Even experienced bakers sometimes struggle with choux pastry. Here are some common pitfalls and how to fix them:

1. Flat or Deflated Puffs

  • This usually happens if the oven temperature is too low or if the dough is too runny. Make sure your oven is preheated properly, and add eggs gradually, stopping when the dough reaches the right consistency.

2. Cracked Pastry

  • If your choux pastry cracks instead of forming a smooth shell, it may be due to too high oven temperature. Try baking at a consistent 200°C (390°F) and avoid sudden temperature changes.

3. Dough That Doesn’t Come Together

  • If the dough seems lumpy or too stiff, it may not have been mixed properly after adding the flour. Stir vigorously until it forms a smooth ball before adding eggs.

4. Eggs Not Incorporating Properly

  • If eggs don’t blend smoothly into the dough, it might be too hot. Allow the dough to cool slightly before adding eggs to prevent them from cooking prematurely.

Creative Variations of Choux Pastry

Once you’ve mastered the basic choux pastry, you can explore countless variations to make this dessert truly your own.

1. Chocolate Choux Pastry

Add 2 tablespoons of cocoa powder to the flour for a deep, rich chocolate flavor. Pair it with a chocolate mousse filling or coffee-infused cream for an indulgent treat.

2. Savory Choux Bites

Who says choux pastry is only for desserts? Skip the sugar and add cheese, herbs, or even finely chopped bacon to the dough for delicious savory puffs. Fill them with cream cheese, smoked salmon, or herbed butter for an elegant appetizer.

3. Choux au Craquelin

For extra crunch and a stunning visual appeal, top your choux puffs with a thin layer of craquelin—a dough made of butter, brown sugar, and flour. As it bakes, it forms a delicate, crackly crust, making each bite even more delightful.

4. Fruity Choux Delights

Infuse the pastry cream with fruit purees such as passion fruit, raspberry, or mango for a refreshing twist. Garnish with fresh berries and a dusting of powdered sugar for a sophisticated finish.

Frequently Asked Questions

Q1: Why does my choux pastry collapse after baking?

This usually happens if the pastries weren’t baked long enough. Choux pastry needs to be fully dry inside before being removed from the oven. To prevent collapse, bake them until they are deep golden brown and then let them cool inside the oven with the door slightly open.

Q2: Can I make choux pastry ahead of time?

Yes! You can make the dough a day in advance and store it in the refrigerator. Alternatively, baked choux pastries can be stored in an airtight container at room temperature for a day or frozen for up to a month. To refresh them, simply bake at 180°C (350°F) for a few minutes before serving.

Q3: Can I freeze choux pastry dough?

Yes, you can pipe the dough onto a baking sheet, freeze until firm, then transfer to an airtight container. Bake directly from frozen, adding a couple of extra minutes to the baking time.

Q4: How do I know when my choux pastry is ready for eggs?

After adding flour and stirring, the dough should form a smooth, shiny ball that pulls away from the sides of the pan. Let it cool slightly before adding eggs to avoid scrambling them.

Q5: What fillings pair well with choux pastry?

Classic choices include pastry cream, whipped cream, and chocolate ganache. For a creative twist, try flavored custards, mascarpone cream, or even ice cream for profiteroles.

Conclusion: A Recipe Worth Mastering

Choux pastry is more than just a baking technique—it’s an art form. With its delicate structure, crisp exterior, and airy interior, it is the foundation for some of the most beloved desserts. From the classic cream puff to decadent éclairs and gourmet variations, the possibilities are endless.

While it may seem intimidating at first, choux pastry is forgiving if you follow the right steps and understand the science behind it. Once you get the hang of it, you’ll find yourself returning to this recipe time and time again, experimenting with flavors and fillings to create your own signature treats.

So the next time you’re in the kitchen, take a deep breath, trust the process, and enjoy the magic of choux pastry. After all, every great baker starts with a few mistakes—but the reward is always worth it.

Amal

Heavenly Clouds: The Magic of Choux Pastry

Light, airy, and crisp, this classic choux pastry recipe is the foundation for irresistible cream puffs, éclairs, and profiteroles. With a delicate texture and endless filling possibilities, these golden pastries are perfect for any occasion. Whether dusted with powdered sugar, drizzled with chocolate, or filled with luscious cream, they melt in your mouth with every bite.
Prep Time 15 minutes
Cook Time 25 minutes
Total Time 40 minutes
Servings: 12 -15 pastries
Course: Dessert
Cuisine: French-inspired

Ingredients
  

  • 180 g water
  • 90 g butter
  • A pinch of salt
  • A pinch of sugar
  • 130 g flour
  • 3-4 eggs

Method
 

  1. Prepare the Dough: In a medium saucepan over medium heat, combine water, butter, salt, and sugar. Heat until the butter is fully melted and the mixture starts to simmer. Reduce the heat to low and add the flour all at once, stirring continuously with a wooden spoon until the dough forms a smooth ball and pulls away from the sides of the pan.
  2. Cool and Add Eggs: Remove the dough from heat and let it cool for about 5 minutes. Add eggs one at a time, mixing well after each addition, until the dough is smooth, glossy, and thick enough to hold its shape when piped.
  3. Pipe and Bake: Preheat the oven to 200°C (390°F) and line a baking sheet with parchment paper. Transfer the dough to a piping bag fitted with a round tip. Pipe small mounds onto the baking sheet, leaving space between each. Bake for 20-25 minutes, or until golden brown and puffed. Avoid opening the oven door while baking. Turn off the oven and leave the pastries inside with the door slightly open for a few minutes to prevent deflation.
  4. Fill and Serve: Once cooled, cut open and fill with pastry cream, whipped cream, or any desired filling. Dust with powdered sugar or drizzle with chocolate before serving.

Notes

  • If the dough is too thick after adding three eggs, you may not need the fourth. The consistency should be smooth but not runny.
  • Choux pastries can be stored in an airtight container at room temperature for a day or frozen for up to a month. To refresh, bake at 180°C (350°F) for a few minutes before serving.
  • For extra crispy pastries, poke a small hole in each after baking to release excess steam.