A Family Favorite, Reimagined

It’s often the simplest recipes that leave the most lasting impression. For me, those recipes come from memories with my grandmother, who had an uncanny ability to take the most basic ingredients and turn them into something extraordinary. Among her many creations, one of the most comforting dishes she made was carrot cake. I can still picture her in the kitchen, the warm aroma of cinnamon, ginger, and freshly grated carrots filling the air as she worked. She would bake her carrot cake from scratch, making it moist and flavorful, and we’d all eagerly wait for it to cool before having a slice.

As I’ve gotten older, I’ve come to appreciate the joy of reimagining the classic recipes I grew up with, finding healthier and more convenient ways to enjoy the flavors I loved so much. The recipe for Carrot Cake Energy Bites is one of those reimagined classics. I wanted to capture the nostalgic flavors of carrot cake, but in a more portable, no-bake form. These energy bites are a perfect blend of all the ingredients that made my grandmother’s carrot cake so special, combined with the convenience of a modern, healthy snack.

This recipe is more than just a snack—it’s a celebration of family, tradition, and finding joy in the simple things. Whether you’re in need of an afternoon pick-me-up or searching for a healthier alternative to store-bought snacks, these Carrot Cake Energy Bites offer the same comforting flavors, but with a fraction of the effort and none of the guilt. As you prepare and enjoy these bites, I hope they bring a little bit of warmth and nostalgia into your day, just as they have for me.

A Symphony of Natural Flavors

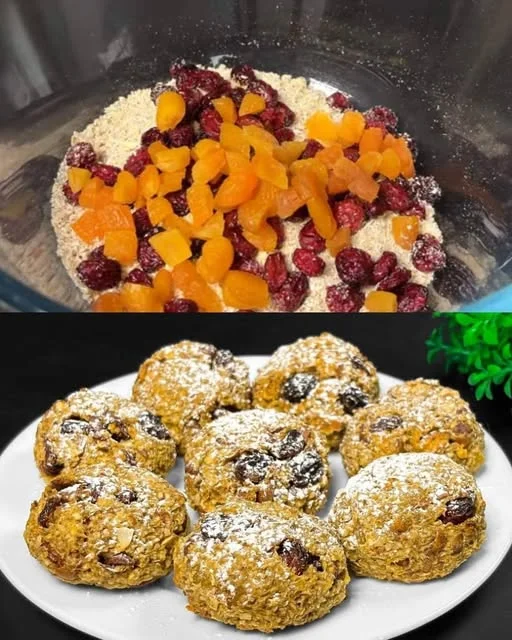
The beauty of these Carrot Cake Energy Bites lies in their simplicity. Each ingredient has a purpose, contributing to both the flavor and nutritional value of the snack. Oats provide a hearty base, offering fiber to help keep you full longer. The Medjool dates bring natural sweetness and a chewy texture that complements the crunch of the pecans. The shredded coconut adds a subtle tropical flavor and an extra layer of texture, while the spices—cinnamon, ginger, and nutmeg—give the energy bites their signature carrot cake taste.

Carrots, of course, are the star of the show. These orange wonders are not only packed with vitamins and antioxidants, but they also bring a natural sweetness and moisture to the bites. Combined with the spices and nuts, they make these energy bites reminiscent of the best parts of a classic carrot cake, but without the heaviness of frosting or excess sugar.

Why These Energy Bites Are the Perfect Snack

In our fast-paced world, finding a snack that is both healthy and satisfying can be a challenge. Many store-bought snacks are filled with processed ingredients, added sugars, and preservatives, making it difficult to find something that is genuinely good for you. These Carrot Cake Energy Bites, however, offer a solution. They are made with whole, nutritious ingredients that provide a quick and sustained energy boost without the sugar crash.

Not only are these bites packed with nutrients, but they are also incredibly versatile. Whether you’re looking for a quick breakfast on the go, a mid-afternoon energy boost, or a healthy dessert, these bites check all the boxes. They are also naturally gluten-free, dairy-free, and can be easily customized to suit different dietary preferences.

In addition to their health benefits, these energy bites are a great choice for people who are always on the move. They’re easy to prepare, and you can make a batch ahead of time and store them in the fridge for whenever you need a snack. They are also a great option for busy parents who want to provide their kids with a healthier snack that still tastes indulgent. With just a few simple ingredients and a few minutes of prep time, you’ll have a snack that is both nutritious and satisfying.

Ingredients:

IngredientQuantity
Large carrot, peeled and chopped1
Old-fashioned rolled oats (gluten-free)1 cup
Pitted Medjool dates1 cup
Pecans1/2 cup
Unsweetened shredded coconut1 cup, divided
Vanilla extract1 teaspoon
Ground cinnamon1/2 teaspoon
Ground ginger1/4 teaspoon
Ground nutmeg1/8 teaspoon

Directions:

  1. Prepare the Carrot and Other Ingredients: Start by grating the peeled carrot finely using a food processor or box grater. Then, add the grated carrot, rolled oats, Medjool dates, pecans, 1/2 cup of shredded coconut, vanilla extract, ground cinnamon, ground ginger, and ground nutmeg to the food processor.
  2. Blend the Mixture: Pulse the mixture in the food processor until everything is well combined and sticky. Make sure to stop and scrape down the sides to ensure all the ingredients blend together properly.
  3. Form the Bites: With clean hands, scoop out the mixture and roll it into small bite-sized balls, about 1 inch in diameter.
  4. Coat with Coconut: Roll each energy bite in the remaining 1/2 cup of shredded coconut for a delicious outer coating.
  5. Chill and Enjoy: Place the energy bites on a baking sheet or plate and refrigerate for at least 30 minutes to allow them to firm up. Once chilled, they are ready to serve.

Nutritional Information (per serving):

NutrientAmount
Calories120 kcal
Protein2 g
Carbohydrates18 g
Dietary Fiber3 g
Fat5 g
Sugar10 g

Frequently Asked Questions (FAQs)

1. Can I make these energy bites without nuts? Yes! If you have a nut allergy or simply prefer not to use nuts, you can replace the pecans with seeds like sunflower or pumpkin seeds. You could also leave them out entirely and add more dried fruit or oats for texture.

2. How long do these energy bites last? These energy bites will stay fresh in an airtight container in the refrigerator for up to one week. You can also freeze them for up to three months. Just be sure to thaw them in the fridge for a few hours before enjoying.

3. Can I make these energy bites vegan? Yes! These energy bites are already dairy-free, but if you want to make them vegan, simply replace the honey with maple syrup or agave nectar.

4. Can I use regular oats instead of gluten-free oats? Yes, regular rolled oats can be used if you are not following a gluten-free diet. The recipe works well with either type of oat.

5. Are these energy bites suitable for children? Absolutely! These energy bites are a great snack for kids because they are packed with natural sweetness and nutrients. They provide a good source of fiber, healthy fats, and vitamins to keep children energized and satisfied between meals.

6. How can I adjust the sweetness of these energy bites? If you prefer a sweeter snack, you can increase the amount of dates or add a little bit of maple syrup or honey. Conversely, if you prefer a less sweet version, you can reduce the dates or leave them out entirely.

The Health Benefits of Carrot Cake Energy Bites

These energy bites offer numerous health benefits thanks to their nutrient-dense ingredients. Carrots, rich in beta-carotene, promote eye health and are packed with antioxidants that help protect the body from free radical damage. The oats provide soluble fiber, which supports digestive health and helps to regulate blood sugar levels. Pecans are an excellent source of healthy fats, which are essential for brain function and heart health. Meanwhile, the spices—cinnamon, ginger, and nutmeg—not only add flavor but also offer anti-inflammatory properties and support metabolism.

By combining these wholesome ingredients, the Carrot Cake Energy Bites provide a balanced snack that can help sustain energy levels, reduce cravings, and support overall health. Plus, they’re free from refined sugars and preservatives, making them a clean and nourishing alternative to many store-bought snacks.

Conclusion: A Bite of Nostalgia, a Bite of Wellness

Making these Carrot Cake Energy Bites isn’t just about creating a delicious snack; it’s about carrying forward a tradition of love, health, and nourishment. These energy bites are more than just a treat—they’re a reminder of the importance of simplicity and wholesome ingredients. Whether you’re busy running errands, fueling up for a workout, or satisfying your sweet tooth, these energy bites are the perfect balance of taste and nutrition. They offer a quick, healthy, and delicious solution to the modern-day snack dilemma, providing an energy boost without compromising on flavor or health.

As you take a bite of these Carrot Cake Energy Bites, I hope you feel the same comfort and joy I felt when I first made them—a moment of nostalgia, a touch of family, and a whole lot of wellness. Enjoy them as a snack, share them with friends and family, and savor the goodness in every bite.

A Journey Back to Simplicity and Comfort

When I think about comfort food, my mind often drifts back to simpler times—moments spent in my grandmother’s kitchen, where the aroma of freshly prepared meals lingered in the air. As a child, I would always look forward to the day when she would make something that seemed too good to be true—sweet, healthy, and comforting all in one. One such recipe that stands out in my memories is the simple yet delightful combination of apples, oats, and nuts. This dish was always a reminder that food doesn’t have to be complex to be delicious.

In those moments, I learned that food has the power to evoke feelings of nostalgia, love, and connection. My grandmother would share stories while preparing her dishes, and that’s where I began to realize that cooking isn’t just about following recipes—it’s about the love and care that goes into creating something nourishing for yourself and others. Fast forward to today, and I find myself making variations of her recipes for my own family. This Nutty Apple Delight is one of those creations. It’s a blend of simple ingredients that not only reminds me of my grandmother’s kitchen but also offers something that is both healthy and satisfying.

In the modern world, with its rush and constant demands, we often overlook the importance of simplicity and nourishment. But I believe that every bite of this dish carries with it not just the goodness of whole foods, but also the essence of family and tradition. That’s what this recipe is about—a little moment of peace, a bite of nostalgia, and a chance to connect with those you love.

The Power of Simple, Whole Ingredients

This Nutty Apple Delight combines some of the most wholesome ingredients found in nature—apples, oatmeal, nuts, and dried fruits. These ingredients might seem basic, but they each have their own set of benefits and flavors that come together in a harmonious, satisfying way. This is why I consider this dish a true representation of the simple joys in life.

Oatmeal, for example, is one of the most versatile and nutritious ingredients. Not only is it filling and rich in fiber, but it also serves as the perfect base for a variety of toppings. It provides a sense of comfort that’s hard to beat, reminding us of cozy mornings spent at the kitchen table. Oats are known to help with digestion, provide steady energy, and are an excellent source of heart-healthy beta-glucan.

The addition of apples brings a natural sweetness and a refreshing crunch to the dish. Apples are rich in antioxidants, fiber, and vitamin C, making them an excellent choice for supporting the immune system and promoting overall health. What’s more, apples are incredibly versatile—whether you enjoy them raw, cooked, or baked, they add both texture and flavor to a dish.

Then, we have the nuts—walnuts and almonds, in particular. These provide a satisfying crunch and a wealth of healthy fats, which support brain health, cardiovascular health, and overall well-being. Walnuts are also a great source of omega-3 fatty acids, while almonds provide vitamin E and magnesium. These nuts not only add richness but also boost the nutritional value of the dish, creating a more balanced meal that satisfies both your taste buds and your body.

Dried apricots and cranberries bring a burst of sweetness and tang. Apricots are high in vitamin A and iron, while cranberries are rich in antioxidants and vitamin C. Together, they add depth to the flavor profile of this dish, making it both complex and comforting at the same time.

When combined, these ingredients create a dessert (or snack) that not only tastes amazing but also provides a range of health benefits, making it the perfect choice for anyone seeking a healthy, low-calorie treat.

Ingredients:

IngredientQuantity
Oatmeal1 cup
Walnuts1 cup
Dried apricots50 grams
Almonds50 grams
Cranberries1/2 cup
Apples2
Water50 ml
Olive oil2 tablespoons

Directions:

  1. Prepare the Ingredients: Start by chopping the apples into small cubes and slicing the dried apricots and almonds into smaller pieces. Set these aside for later use.
  2. Cook the Oatmeal: In a medium saucepan, bring the water to a simmer. Add the oatmeal, stirring occasionally, and cook for 5-7 minutes, or until the oats are tender and have absorbed the water.
  3. Toast the Nuts: While the oatmeal is cooking, toast the walnuts and almonds in a dry pan over medium heat for 2-3 minutes, until they become lightly golden and aromatic.
  4. Mix Everything Together: Once the oatmeal is ready, remove it from the heat. Stir in the olive oil, followed by the chopped apples, dried apricots, cranberries, and toasted nuts. Mix well to combine all the ingredients.
  5. Serve and Enjoy: Spoon the mixture into individual serving bowls. Serve warm for a delicious, healthy dessert that’s low in calories but high in flavor.

Nutrients (per serving):

NutrientAmount
Calories320 kcal
Protein8 g
Carbohydrates42 g
Dietary Fiber6 g
Fat15 g
Sugar14 g

Why Choose This Nutty Apple Delight?

There are many reasons to fall in love with this dish. First, it’s incredibly easy to make, requiring only a few minutes of preparation and simple steps. It’s the kind of recipe that anyone—whether an experienced cook or a beginner—can whip up in no time. It’s also an excellent choice for anyone looking for a dessert that’s both satisfying and healthy. Unlike traditional desserts loaded with sugar and heavy fats, this Nutty Apple Delight uses whole, natural ingredients that provide real nourishment.

Furthermore, this recipe is highly customizable. You can switch out the fruits or nuts depending on your preferences or what you have available in your pantry. Feel free to add more spices like cinnamon or nutmeg for an extra layer of warmth, or swap the apples for pears if you prefer a different flavor. The beauty of this recipe is its versatility.

Additionally, the dish is low in calories, making it perfect for those watching their calorie intake. While it provides plenty of nutrients to fuel your day, it’s light enough to enjoy without feeling overly full. It’s a guilt-free treat that can be enjoyed at any time of the day—whether it’s as a healthy breakfast, a mid-afternoon snack, or a light dessert after dinner.

Frequently Asked Questions (FAQs)

  1. Can I use other fruits instead of apples? Yes, you can easily substitute apples with other fruits like pears, peaches, or berries. Just keep in mind that different fruits may affect the texture or sweetness of the dish, so you may need to adjust the quantity of dried fruit to balance the flavor.
  2. Can I make this dish ahead of time? Absolutely! This dish can be prepared ahead of time and stored in the refrigerator for up to 2-3 days. Simply reheat it in the microwave or on the stovetop before serving. It makes a great make-ahead snack or dessert for busy weeks.
  3. Can I use a different type of nut? Yes, you can substitute walnuts and almonds with other nuts such as cashews, pecans, or pistachios. Each nut will give the dish a slightly different flavor and texture, so feel free to experiment.
  4. Is this recipe gluten-free? Yes, this recipe is naturally gluten-free. Just make sure that the oatmeal you use is certified gluten-free if you have dietary restrictions related to gluten.
  5. How can I make this dish sweeter if needed? If you prefer a sweeter dessert, you can add a bit of honey, maple syrup, or stevia to the mixture. Keep in mind that the dried fruit and apples already provide a natural sweetness, so you may not need to add much extra sugar.

Conclusion: A Delicious Way to Celebrate Simplicity and Health

In a world where convenience often trumps quality, it’s refreshing to return to the basics. The Nutty Apple Delight is a dish that embodies the beauty of simplicity—showcasing the natural flavors and health benefits of whole ingredients in a delightful, low-calorie dessert. More than just a recipe, it’s a connection to memories of family and tradition, reminding us that the best things in life are often the simplest.

This recipe is a perfect way to nourish both your body and soul. It’s a delicious treat that doesn’t compromise on flavor, health, or satisfaction. Whether you’re making it for yourself, sharing it with loved ones, or introducing it to your family as part of a new tradition, this Nutty Apple Delight is a beautiful reminder that sometimes, the simplest moments can bring the greatest joy.

The Heartwarming Tradition of Sharing Sweet Moments

Growing up, the kitchen was always the heart of our home. It was where the day began with the warm aromas of breakfast or the comforting sounds of dinner being prepared. There was one dish, in particular, that always stood out: apple fritters. These golden, soft morsels of sweetness would fill the kitchen, tempting me as I walked through the door after a long day at school. My mother would often tell me, as she mixed and stirred, how these fritters were a long-standing family tradition passed down from her grandmother.

One of my fondest memories is of my mother’s apple fritters, warm and crispy, served with a touch of powdered sugar on top. The comforting, familiar taste reminded me of family gatherings, where laughter echoed, and conversations flowed freely. My grandmother’s recipe, simple yet rich in flavor, became a treasured tradition that I continued to pass down to my children. These fritters, although easy to prepare, always seemed to bring people together around the table, connecting us not just through food, but through love, warmth, and shared memories.

Today, I still make these apple fritters for my own family, and every time I do, I’m reminded of the deep emotional connection that food can provide. It’s not just about the ingredients; it’s about the moments and memories created while cooking and sharing a meal. This apple yogurt fritter recipe is more than just a dish—it’s a symbol of love, care, and the joy of creating something beautiful from simple ingredients. Every bite carries with it a piece of my family’s legacy, and I’m excited to share this timeless recipe with you.

The Perfect Combination: Simple Yet Irresistible

Apple fritters are a beloved treat that can be enjoyed in so many ways—whether for breakfast, a snack, or dessert. The beauty of these fritters lies in their simplicity. Made with just a few basic ingredients like eggs, flour, sugar, yogurt, and, of course, apples, they don’t require much time or effort. But despite being so easy to prepare, these fritters offer a satisfying and comforting bite that brings joy with every taste.

What makes this recipe even more special is the use of yogurt, which gives the fritters a slight tanginess that perfectly balances the sweetness of the apples. This twist on the classic apple fritter recipe results in a lighter, fluffier texture that’s irresistibly delicious. The combination of tender apple pieces, the warmth of cinnamon, and the rich flavor of the yogurt creates a treat that’s perfect for any occasion.

Ingredients:

IngredientQuantity
Egg1
Sugar40g (3 tbsp)
Vanilla extract1/2 tsp
Yogurt150g (2/3 cup)
All-purpose flour200g (1 2/3 cups)
Baking powder8g (2 tsp)
Medium apple (peeled, cored, grated)1
CinnamonA pinch

Directions:

  1. Prepare Wet Ingredients: In a large bowl, whisk together the egg and sugar until light and fluffy. Stir in the vanilla extract and yogurt until smooth.
  2. Mix Dry Ingredients: In another bowl, combine the flour, baking powder, and a pinch of cinnamon. Whisk well to ensure they are evenly distributed.
  3. Combine Wet and Dry Ingredients: Gradually add the dry ingredients to the wet mixture, stirring gently until the batter comes together. Be careful not to overmix.
  4. Add the Apple: Fold in the grated apple, ensuring it’s evenly mixed into the batter.
  5. Fry the Fritters: Heat oil in a frying pan over medium heat. Drop spoonfuls of the batter into the pan, flattening them slightly with the back of the spoon. Fry the fritters for 2-3 minutes on each side until they turn golden brown.
  6. Drain and Serve: Once fried, remove the fritters from the oil and place them on a paper towel to drain excess oil. Serve warm, optionally dusted with powdered sugar or drizzled with honey.

Nutrients (per serving):

NutrientAmount
Calories210 kcal
Protein4 g
Carbohydrates30 g
Sugars14 g
Fat7 g
Fiber1 g

Why Apple Fritters Are Timeless: A Taste of Tradition

Apple fritters are not only delicious, but they are also a nostalgic part of many families’ cooking traditions. The simplicity of the dish makes it accessible to cooks of all skill levels, while the ability to customize it with various flavors and fillings ensures it remains a versatile favorite. Throughout history, apple fritters have been a popular way to use up surplus apples during the fall harvest season, turning what could be considered a humble fruit into something extraordinary. The crispy exterior, paired with a soft, warm interior filled with apple chunks, has made them a favorite treat for generations.

For me, apple fritters are a way to connect with the past. They remind me of the generations of women who passed this recipe down, each adding their personal touch to make it their own. It’s not just about the food—it’s about honoring those who came before us, remembering their love and care in the kitchen, and passing on that tradition to the next generation. That’s what makes this recipe so special: it carries a legacy.

Frequently Asked Questions (FAQs)

  1. Can I use a different type of flour for this recipe?

Yes, you can substitute the all-purpose flour with whole wheat flour for a healthier option. The fritters will have a slightly denser texture, but the taste will remain just as delicious.

  1. Can I use a different fruit instead of apples?

Absolutely! You can use pears, peaches, or even berries to create a different flavor profile. Keep in mind that different fruits may alter the moisture content of the batter, so you might need to adjust the flour slightly.

  1. How do I make these fritters gluten-free?

To make this recipe gluten-free, you can use a gluten-free flour blend that is suitable for baking. Ensure that the blend contains a binding agent, such as xanthan gum, to give the fritters structure and texture.

  1. How can I make these fritters vegan?

To make these fritters vegan, substitute the egg with a flax egg (1 tablespoon ground flaxseed mixed with 2.5 tablespoons of water) and replace the yogurt with a non-dairy alternative like almond or coconut yogurt.

  1. Can I prepare the fritters in advance?

While it’s best to fry these fritters fresh for the crispiest texture, you can prepare the batter ahead of time and refrigerate it for up to 12 hours. However, it’s recommended to fry them just before serving to maintain the perfect texture.

  1. Can I freeze these fritters?

Yes, you can freeze the fritters. Allow them to cool completely, then place them in a single layer on a baking sheet. Freeze for 1-2 hours until solid, then transfer to an airtight container or freezer bag. To reheat, simply bake them in a preheated oven at 350°F (175°C) for about 10 minutes.

  1. What should I serve with apple fritters?

Apple fritters are delicious on their own, but they pair wonderfully with a drizzle of honey, maple syrup, or a dusting of powdered sugar. For a more indulgent treat, you can also serve them with a scoop of vanilla ice cream or a dollop of whipped cream.

Conclusion: A Recipe to Cherish

In a world filled with fast-paced living and fleeting moments, it’s important to slow down and savor the simple things. The act of making and sharing food is one of those moments where time stands still. With this apple yogurt fritter recipe, you’re not just preparing a dish—you’re creating memories. It’s a dish that will bring comfort to your home, filling your kitchen with warmth and the promise of shared moments around the table.

As you make these fritters, whether alone or with loved ones, I hope you’ll find joy in the process. Let the sweet aroma fill your home, and allow the crispy, golden bites to remind you of the importance of tradition and togetherness. These fritters are not just about taste—they’re about family, love, and the simple pleasures that make life so rich. So, next time you find yourself with a few apples and some yogurt, remember that you’re not just making a treat, you’re creating a memory.

Introduction: The Comfort of Simplicity

Some recipes stay with us, not just because of the taste, but because of the memories they evoke. One such dish in my life has always been potato patties. As a child, I remember weekends spent in my grandmother’s kitchen, the air filled with the comforting aroma of fried potatoes. No matter what else was on the table, the golden, crispy potato patties would always disappear first. They weren’t fancy or complicated, but they held something far more valuable: love, warmth, and the promise of home.

My grandmother would often tell me stories while she worked, explaining how food, especially simple dishes like these, could bind us to each other and to the traditions of our families. She passed down not just recipes, but a sense of togetherness and the joy that comes from sharing a meal. As she fried those golden patties, we would gather around the table, sharing laughter, stories, and moments that would stay in my heart forever. These potato patties, simple yet satisfying, became a symbol of family, tradition, and the beauty of creating something special out of everyday ingredients.

Now, as I prepare this recipe for my own family, I think back to those days in my grandmother’s kitchen. Each bite of these crispy, cheesy potato patties brings a rush of nostalgia. They’ve become more than just a dish; they’re a tradition I continue to pass on to my children. There’s something magical about how a simple potato, a humble vegetable, can bring people together, warm their hearts, and fill their bellies.

The Perfect Comfort Food: Why Potato Patties Never Go Out of Style

Potato patties, or croquettes as some might call them, are an enduring comfort food for good reason. They’re inexpensive, easy to make, and incredibly versatile. Potatoes, as the foundation of the dish, provide a soft, creamy texture that contrasts beautifully with the crispy golden crust formed during frying. The addition of shredded cheddar cheese and fresh chives elevates the flavor, making these patties irresistible.

While potatoes are often seen as a side dish, in this recipe, they take center stage, offering a hearty, satisfying bite that can easily serve as the main event. The combination of mashed potatoes, cheese, and fresh herbs creates a balanced flavor profile that’s both rich and refreshing. Whether served as a side, a snack, or a light meal, these patties are sure to become a household favorite.

One of the great things about potato patties is their adaptability. You can easily swap the cheese for other varieties, add cooked bacon for a smoky twist, or mix in vegetables like corn or peas for added color and texture. This dish is one that allows for personal creativity, which is why it remains so popular across various cultures.

Ingredients (for the Potato Patties):

IngredientQuantity
Mashed potatoes (leftover or freshly made)2 cups (400g)
Large egg1
All-purpose flour1/4 cup (30g)
Shredded cheddar cheese1/2 cup (100g)
Chopped chives or green onions2 tablespoons (30g)
Salt and black pepperTo taste
Olive oilFor frying

Directions:

  1. Prepare the Potato Mixture: In a large bowl, combine the mashed potatoes, egg, all-purpose flour, shredded cheddar cheese, and chopped chives or green onions. Season with salt and black pepper to taste. Mix everything together until fully combined, forming a thick, sticky dough.
  2. Shape the Patties: Using your hands, form the potato mixture into small patties, roughly 2-3 inches in diameter. If the mixture feels too sticky, dust your hands lightly with flour to make shaping easier.
  3. Heat the Oil: In a large skillet, heat a couple of tablespoons of olive oil over medium heat. You want enough oil to coat the bottom of the pan to ensure the patties fry evenly.
  4. Fry the Patties: Once the oil is hot, carefully place the patties into the skillet. Fry them in batches, cooking for about 3-4 minutes per side, or until they’re golden brown and crispy on the outside.
  5. Drain and Serve: Remove the patties from the skillet and place them on paper towels to drain any excess oil. Serve them hot as a savory snack, side dish, or light meal.

Nutrients (per serving, based on 6 patties):

NutrientAmount
Calories150 kcal
Protein5 g
Carbohydrates18 g
Fiber2 g
Fat8 g
Sodium250 mg
Vitamin A250 IU
Calcium70 mg

How to Make Potato Patties: Simple Yet Delicious

The beauty of potato patties lies in their simplicity. With just a handful of ingredients, you can create something both comforting and flavorful. The key to perfect potato patties lies in the balance of texture and flavor. The mashed potatoes must be creamy, not too runny, so they hold together when shaped into patties. The egg and flour act as binders, giving the patties structure. The cheese not only adds flavor but also creates a slight gooeyness inside the patty that is incredibly satisfying.

When it comes to frying the patties, the goal is to achieve a crisp, golden-brown crust while keeping the inside soft and tender. The oil should be hot enough to fry the patties evenly without absorbing too much grease. A hot skillet is essential to ensure that the patties cook quickly and evenly, leaving a crispy exterior and a creamy interior.

FAQs About Potato Patties

  1. Can I use leftover mashed potatoes for this recipe? Absolutely! Leftover mashed potatoes work perfectly for this recipe. In fact, they might even make the patties a little creamier and more flavorful. Just make sure the mashed potatoes aren’t too watery or runny before using them.
  2. Can I bake these potato patties instead of frying them? Yes, you can bake the patties if you prefer a lighter version. To bake, preheat your oven to 400°F (200°C), place the patties on a baking sheet lined with parchment paper, and bake for about 20 minutes, flipping halfway through, until golden brown and crispy.
  3. Can I freeze potato patties? Yes, potato patties freeze well. After frying and allowing them to cool, place the patties on a baking sheet and freeze them individually. Once frozen, transfer them to a freezer-safe bag or container. To reheat, bake from frozen in a preheated oven at 375°F (190°C) for 15-20 minutes or until crispy.
  4. What can I serve with potato patties? Potato patties are versatile and can be served with a variety of sides. They pair beautifully with a simple salad, some grilled vegetables, or a tangy dipping sauce like sour cream or a spicy ketchup. For a more hearty meal, serve them alongside a protein like chicken or fish.
  5. Can I add other ingredients to these patties? Yes, you can customize the patties by adding ingredients like cooked bacon, sautéed onions, or peas for extra flavor and texture. You can also experiment with different cheeses or spices to create your own unique twist on this classic recipe.

The Joy of Sharing Simple Meals

One of the most beautiful aspects of cooking is the joy that comes from sharing a meal with others. It’s not just about the food – it’s about the connections you create with the people you share it with. These potato patties, while simple, provide an opportunity to gather with loved ones, to slow down, and to savor the small moments of life. Whether it’s a family dinner, a gathering with friends, or a quiet moment with a loved one, these crispy potato patties make every occasion feel special.

When I make these patties, I’m reminded of the power of food to bring us together. In today’s busy world, we often forget the importance of slowing down and sharing a meal with those who matter most. But when we take the time to cook, to sit down together, and to savor each bite, we’re not just feeding our bodies – we’re nourishing our relationships and building memories that will last a lifetime.

Conclusion: A Recipe That Transcends Time

In the end, these cheddar and chive potato patties are more than just a recipe – they are a connection to the past, a celebration of family, and a reminder of the joy that comes from sharing a meal. Whether you make them for a family gathering, a cozy dinner at home, or a quick snack, these potato patties will never disappoint. They offer the perfect balance of comfort, flavor, and nostalgia, making them a timeless dish that will continue to be enjoyed for generations to come.

Food has an incredible ability to bring people together, and this dish exemplifies that. As you prepare these patties, take a moment to reflect on the simple pleasures that food can offer. The crisp golden exterior, the cheesy, tender interior, and the warmth it brings to your heart – this is what makes cooking worthwhile. So, the next time you gather around the table with those you love, make these potato patties, and let them be a part of your own story.

Introduction: The Heartwarming Connection Between Family and Food

Food has a way of connecting us to our roots, our heritage, and to the people we love. Some recipes carry more than just ingredients; they carry memories, stories, and love. For me, one of those dishes is cabbage and egg fritters, a recipe that has been passed down through generations in my family. I can still remember my grandmother standing at the stove, the smell of sizzling fritters filling the kitchen, as she prepared them for our family gatherings. It wasn’t just the taste of the dish that made it special – it was the warmth, the laughter, and the togetherness it represented.

As a child, I would sit at the kitchen table, watching her work, and asking her questions about the ingredients, the method, and why this particular dish was so important to our family. She would explain that this humble recipe was a reflection of how food could take something simple, like cabbage and eggs, and transform it into something extraordinary. It wasn’t about fancy ingredients or elaborate techniques – it was about making the most of what you had, and sharing it with the people you loved.

As I grew older, I carried on this tradition, preparing these cabbage and egg fritters for my own family. Every time I make them, I’m reminded of the love and care that went into each fritter, and how food can serve as a bridge to our past, present, and future. This dish, though simple in nature, has become a symbol of connection for me and my family. It has a place at every family gathering, and I can’t help but feel a sense of nostalgia and gratitude each time I serve it.

A Timeless Dish with a Touch of Comfort

Cabbage and egg fritters may not be the most complex dish in the culinary world, but there is a certain magic in their simplicity. This dish is one of those rare gems that effortlessly blends practicality with comfort. It’s easy to make, requires minimal ingredients, and brings a sense of satisfaction with every bite.

The base of this recipe is, of course, cabbage. Often overlooked as a simple vegetable, cabbage brings a refreshing crunch and subtle sweetness when cooked. It is a humble vegetable that has been a staple in kitchens around the world for centuries. Packed with nutrients like fiber, vitamin C, and antioxidants, cabbage offers numerous health benefits, making these fritters not only a delicious treat but also a nutritious one.

Eggs are the perfect complement to cabbage, binding the vegetables together and giving the fritters a rich, satisfying texture. Combined with a touch of flour and seasoning, the fritters take on a golden, crispy exterior while remaining tender on the inside. The addition of onions, spring onions, and parsley enhances the flavor, creating a savory balance that makes each bite irresistible.

Ingredients (for the Fritters):

IngredientQuantity
Cabbage (finely shredded)1/2 head
Eggs3
Onion (finely chopped)1
Spring onion (chopped)2 tablespoons
Parsley (chopped)2 tablespoons
Flour4 tablespoons
Black pepper1/2 teaspoon
Salt1/2 teaspoon
Cooking oil (for frying)As needed

Directions:

  1. Prepare the Cabbage: Start by shredding the cabbage into fine pieces. Place it in a large bowl and set aside.
  2. Sauté the Onion: In a skillet, heat a bit of oil over medium heat and sauté the finely chopped onion until it becomes soft and translucent. Set aside to cool slightly.
  3. Mix the Ingredients: In the bowl with the shredded cabbage, add the sautéed onion, spring onions, and parsley. Crack in the eggs, then season with black pepper and salt. Add the flour and mix everything together until well combined.
  4. Shape the Fritters: With your hands, form the cabbage mixture into small patties or fritters, ensuring they hold together.
  5. Fry the Fritters: Heat enough oil in a frying pan over medium heat to cover the bottom. Once hot, carefully place the fritters into the pan, cooking in batches if necessary. Fry until golden brown on each side, about 3-4 minutes per side.
  6. Drain and Serve: Once crispy and golden, remove the fritters from the pan and place them on a paper towel to drain excess oil. Serve hot with your favorite dipping sauce or as a side to a main dish.

Nutrients (per fritter, approximately 4 servings):

NutrientAmount
Calories150 kcal
Protein5 g
Carbohydrates10 g
Fiber3 g
Fat10 g
Sodium230 mg
Vitamin A350 IU
Vitamin C20 mg

Why This Recipe Resonates with So Many

There’s something universal about cabbage and egg fritters. This dish is found in many variations across different cultures, from savory cabbage pancakes in Eastern Europe to fritters in parts of Asia. No matter where it’s made, the appeal of cabbage and egg fritters remains the same: they are comforting, flavorful, and incredibly versatile.

For many families, this recipe is not just about the ingredients. It’s about the memories associated with it, the hands that prepare it, and the people who gather around the table to share it. Whether it’s a dish made for breakfast, lunch, or dinner, cabbage and egg fritters have a way of bringing people together in a way that few other dishes can.

FAQs About Cabbage and Egg Fritters

  1. Can I make cabbage and egg fritters ahead of time? Yes, you can make the fritters ahead of time. If you want to prepare them in advance, cook the fritters, let them cool, and then store them in an airtight container in the refrigerator. When you’re ready to serve, simply reheat them in a skillet or oven until crispy.
  2. What can I serve with cabbage and egg fritters? Cabbage and egg fritters are versatile and can be served with a variety of accompaniments. They are delicious on their own but can also be paired with a side salad, a dollop of sour cream or yogurt, or even a tangy tomato chutney for added flavor. Some people even enjoy them with rice or crusty bread.
  3. Can I substitute the cabbage with another vegetable? Absolutely! While cabbage is the traditional choice, you can substitute it with other vegetables such as shredded zucchini, carrots, or even kale. Just make sure to adjust the cooking time based on the vegetable’s moisture content, as some vegetables may release more water than others.
  4. How do I make sure the fritters hold together? The key to making sure your fritters hold together is to use enough binding ingredients like eggs and flour. If the mixture feels too loose, you can add a little more flour to help the fritters firm up. Also, be gentle when flipping the fritters to avoid breaking them.
  5. Are cabbage and egg fritters gluten-free? Traditionally, this recipe is not gluten-free due to the use of flour. However, you can easily make it gluten-free by substituting the flour with a gluten-free flour blend or rice flour.

Nutritional Value: A Healthy Yet Satisfying Dish

Cabbage and egg fritters are not only flavorful but also packed with nutrients. Cabbage, rich in fiber and antioxidants, contributes to digestive health and supports the immune system. The eggs provide a good source of protein, while parsley adds additional vitamins and minerals. This dish is also relatively low in calories, making it a great option for those looking to maintain a balanced diet while still enjoying a satisfying meal.

A typical serving of cabbage and egg fritters offers a well-rounded combination of carbohydrates, healthy fats, and protein, making it a perfect choice for a quick lunch or dinner. It’s filling without being heavy, and the combination of vegetables and eggs ensures you’re getting a good mix of nutrients.

Conclusion: More Than Just a Meal

In the end, cabbage and egg fritters are more than just a meal – they are a connection to our past, a symbol of the love and care we put into cooking, and a reminder that sometimes the simplest dishes are the most meaningful. The next time you make this dish, take a moment to reflect on the memories and stories it brings to the table. Whether it’s your first time making them or a recipe you’ve prepared countless times, cabbage and egg fritters are a dish that will continue to nourish both your body and your soul for years to come.

Food has the power to evoke memories, create bonds, and bring joy to our lives. And in the case of cabbage and egg fritters, it’s the humble, heartwarming nature of the dish that makes it unforgettable. So gather your ingredients, get into the kitchen, and share this simple yet meaningful meal with those you love.

Introduction: The Comfort of Familiar Flavors

There’s something undeniably comforting about dishes that remind us of home. Growing up, I remember the warmth of the kitchen on a chilly evening when my grandmother would prepare a simple yet satisfying meal. One of those meals was a savory ground meat and cabbage dish, a recipe passed down through generations in our family. The combination of tender cabbage, hearty ground beef, and a sprinkle of seasoning brought not only nourishment but also a sense of togetherness.

As the scent of sizzling onions and garlic filled the kitchen, I knew that dinner was just around the corner. Sitting around the table, we would all share stories, laughter, and, of course, the hearty meal my grandmother had lovingly prepared. This dish, which once felt like an ordinary part of our routine, has since become a cherished tradition in my own home.

The simple beauty of this dish lies in its versatility and ability to bring comfort without requiring extravagant ingredients or time-consuming preparation. Whether you’re looking for a quick dinner on a busy weeknight or a dish that evokes memories of family gatherings, this ground meat and cabbage recipe is a testament to the power of food to nourish both the body and the soul.

A Flavorful Foundation: Why Ground Meat and Cabbage Work So Well Together

At first glance, ground meat and cabbage might seem like an unlikely pairing, but when combined, they create a harmonious balance of flavors and textures. The savory richness of ground beef contrasts beautifully with the natural sweetness of cabbage, making each bite a delightful experience. The cabbage softens and wilts as it cooks, absorbing the flavors from the meat and spices, while still maintaining a slight crunch that adds depth to the dish.

Cabbage, often considered a humble vegetable, is a powerhouse of nutrients. High in fiber, vitamins C and K, and antioxidants, it not only enhances the dish’s nutritional profile but also offers a refreshing bite that pairs perfectly with the richness of ground meat. Ground beef, on the other hand, adds a satisfying protein element to the dish, making it a complete and balanced meal.

One of the most appealing aspects of this recipe is its adaptability. Whether you’re using beef, turkey, or even pork, the core idea remains the same: a flavorful, savory filling that comes together in one skillet. This versatility makes the dish suitable for different dietary preferences, and it can easily be customized with various seasonings or added vegetables. The recipe offers a perfect canvas for experimentation while staying true to the essence of comfort food.

Ingredients (for the Filling):

IngredientQuantity
Olive oil1 tablespoon
Sweet onion1, chopped
Ground beef1 lb (450 g)
Salt and black pepperTo taste
Garlic powder1/2 teaspoon
Carrot1, grated
Small cabbage1/2, finely shredded

Directions:

  1. Prepare the Aromatics: Heat the olive oil in a large skillet over medium heat. Add the chopped sweet onion and sauté until soft and translucent, about 3-4 minutes.
  2. Cook the Ground Beef: Add the ground beef to the skillet, breaking it apart as it cooks. Season with salt, black pepper, and garlic powder. Stir occasionally until the beef is fully browned and cooked through, about 6-8 minutes.
  3. Add the Veggies: Stir in the grated carrot and shredded cabbage, mixing well. Cook for an additional 5-7 minutes, until the cabbage is tender but still has a slight crunch. Adjust seasoning to taste.
  4. Serve: Remove from heat and serve hot, enjoying the hearty blend of ground meat and cabbage.

Nutrients (per serving):

NutrientAmount
Calories220 kcal
Protein24 g
Carbohydrates12 g
Fiber3 g
Fat12 g
Sodium290 mg
Vitamin A1500 IU
Vitamin C35 mg

The Nutritional Benefits: More Than Just a Hearty Meal

Not only does this ground meat and cabbage dish fill the stomach, but it also nourishes the body. Cabbage, with its impressive fiber content, aids in digestion and promotes gut health. The high vitamin C content helps strengthen the immune system, while vitamin K plays an essential role in bone health. As a low-calorie vegetable, cabbage is an excellent choice for those looking to maintain a balanced diet.

The addition of ground beef provides a substantial source of protein, which is essential for muscle repair, immune function, and overall health. Protein helps maintain healthy skin, hair, and nails, and it keeps you feeling fuller for longer, preventing unnecessary snacking between meals. In addition, ground beef contains important nutrients like iron and zinc, which are vital for red blood cell production and immune support.

The combination of cabbage and ground meat makes this dish a perfect example of how simple ingredients can come together to provide not only comfort but also essential nutrients. It’s the kind of meal that makes you feel good on the inside and nourishes your body with every bite.

Customizing the Dish: Adding Your Own Touch

One of the joys of cooking is the ability to tailor a dish to your own preferences. While the basic combination of ground meat and cabbage is a winner on its own, there are countless ways to elevate and personalize the recipe.

  • Vegetable Variations: If you’re looking to increase the vegetable content, consider adding some finely chopped bell peppers, zucchini, or even spinach to the mix. These vegetables will add color, texture, and additional nutrients to the dish.
  • Spices and Herbs: The flavor profile can be adjusted depending on your tastes. A pinch of cumin or smoked paprika can add a smoky depth, while a handful of fresh herbs like thyme or parsley can bring a burst of freshness to the dish. Don’t hesitate to experiment with spices you enjoy—this recipe is incredibly flexible and welcomes your creative touch.
  • Protein Alternatives: While ground beef is the classic choice, you can switch it up by using ground turkey, chicken, or even plant-based alternatives like lentils or tofu. Each variation brings its own unique flavor, making this dish suitable for various dietary preferences.
  • Serving Suggestions: This dish pairs wonderfully with a side of rice, quinoa, or even mashed potatoes. If you’re looking to keep the meal lighter, consider serving it with a fresh side salad or a piece of crusty bread to soak up the delicious juices.

The beauty of this recipe lies in its simplicity and flexibility. You don’t need to adhere strictly to one set of ingredients; instead, you can adapt it to suit your tastes or what you have on hand. This adaptability makes it a perfect dish for home cooks of all skill levels and an excellent option for those looking to prepare meals on a budget.

FAQs: Answers to Common Questions

  1. Can I use a different type of ground meat? Absolutely! While ground beef is the most common choice, you can easily swap it for ground turkey, chicken, or pork. Each will offer a slightly different flavor, but the concept remains the same. Ground lamb or plant-based options like lentils or tofu can also be used for a unique twist.
  2. Can I make this dish ahead of time? Yes, this dish is perfect for meal prep. You can cook the filling and store it in an airtight container in the fridge for up to 3 days. It also freezes well, so feel free to prepare a double batch and freeze portions for later use.
  3. Can I make this dish spicier? Absolutely! If you prefer a bit of heat, add some chili flakes, a diced jalapeño, or a dash of hot sauce to the dish while it’s cooking. Adjust the level of spiciness based on your tolerance, and enjoy the extra kick!
  4. Is this dish suitable for a low-carb diet? Yes, this dish is naturally low in carbs, especially if you skip starchy side dishes like rice or potatoes. Serve it with a simple salad or steamed vegetables for a complete low-carb meal.
  5. Can I add more vegetables to this dish? Yes, adding more vegetables is a great way to increase the dish’s nutritional value. Consider adding mushrooms, spinach, bell peppers, or even sweet potatoes for an extra burst of flavor and color.

The Importance of Simplicity in Cooking

Sometimes, the most satisfying meals are the simplest ones. This ground meat and cabbage dish is a testament to the idea that great flavors don’t always require complicated techniques or rare ingredients. With just a handful of basics, you can create a meal that feels both indulgent and nourishing.

The beauty of this dish lies not only in its flavor but in its ability to bring people together. It’s a meal that can be shared with family, friends, or even enjoyed alone after a long day, providing comfort and nourishment in equal measure. In a world where convenience often trumps quality, this dish offers a reminder that the best meals are often the ones that take us back to our roots.

Conclusion: A Recipe Worth Sharing

The beauty of a dish like ground meat and cabbage lies not just in its ability to satisfy hunger but in its emotional connection to tradition and family. It’s the kind of meal that evokes memories of togetherness, laughter, and the simple joys of home-cooked food. Whether you’re making it for the first time or revisiting a beloved recipe, this dish has the power to bring comfort to your table, nourishing both body and soul.

So, the next time you find yourself searching for a hearty, satisfying meal that doesn’t take hours to prepare, look no further than this delicious ground meat and cabbage dish. It’s the perfect balance of flavors, nutrients, and memories—just waiting to be shared.

My Kids’ Favorite Muffins! Easy and Delicious

Every parent knows the struggle of getting kids to eat their vegetables. It can feel like an endless battle—one where you try sneaky tricks, playful presentations, and countless negotiations, all in hopes of convincing your little ones that greens are, in fact, good for them.

That’s exactly how these savory zucchini and cheddar muffins came to life in my kitchen.

I still remember the first time I made them. My youngest had turned his nose up at zucchini for weeks, refusing it in every form. But then, one morning, I decided to grate the zucchini and fold it into a cheesy muffin batter. The moment they came out of the oven, golden brown with crisp edges and a fluffy center, he reached for one without hesitation.

I held my breath as he took his first bite. His eyes widened. He grabbed another.

At that moment, I knew I had found a winner—a recipe that was not only delicious but also packed with hidden nutrition. Since that day, these muffins have been a staple in our home. They’re the perfect breakfast, lunchbox treat, or afternoon snack, and they disappear as quickly as I can make them.

Now, I’m sharing this recipe with you—so that you, too, can have a go-to snack that pleases kids and adults alike.


What Makes These Muffins Special?

1. The Perfect Balance of Healthy and Tasty

Let’s face it: if something doesn’t taste good, kids won’t eat it. These muffins hide the veggies in a way that enhances the flavor, rather than overpowering it. The cheddar cheese adds richness, while the zucchini keeps the muffins soft and moist without tasting like vegetables.

2. Quick and Easy to Make

With just a handful of simple ingredients, these muffins come together in under 30 minutes. Whether you’re preparing breakfast in a rush or need a last-minute snack, they’re fast, foolproof, and require minimal cleanup.

3. Ideal for Meal Prep and Freezing

One of my favorite things about this recipe is that the muffins store beautifully. Make a big batch and freeze them for busy mornings—just reheat in the microwave or toaster oven, and you’re good to go.

4. Kid-Approved and Versatile

These muffins are perfect on their own, but they can also be paired with soups, salads, or served alongside eggs for breakfast. Plus, they’re endlessly customizable—you can add bacon, swap cheeses, or throw in fresh herbs for different variations.

Ingredients

For the Muffins:

IngredientQuantity
Zucchinis, grated2 medium (about 2 cups / 300g)
All-purpose flour1 cup (125g)
Grated cheddar cheese1 cup (100g)
Baking powder1 teaspoon
Salt½ teaspoon
Black pepper¼ teaspoon
Eggs2 large
Milk½ cup (120ml)
Olive oil¼ cup (60ml)

Directions

  1. Preheat the oven to 375°F (190°C) and grease or line a muffin tin.
  2. Grate the zucchinis and squeeze out excess moisture using a clean kitchen towel.
  3. In a bowl, whisk together the flour, baking powder, salt, and black pepper.
  4. In a separate bowl, beat the eggs, milk, and olive oil until well combined.
  5. Add the grated zucchini and cheese to the wet ingredients and mix well.
  6. Gently fold in the dry ingredients, stirring until just combined.
  7. Divide the batter evenly among the muffin cups, filling each about ¾ full.
  8. Bake for 18-22 minutes, or until golden brown and a toothpick inserted in the center comes out clean.
  9. Allow to cool for a few minutes before serving.

Nutritional Information (Per Muffin, Approximate)

NutrientAmount
Calories140 kcal
Protein6g
Carbohydrates12g
Fat8g
Saturated Fat3g
Fiber1g
Sugar1g
Sodium220mg

Creative Variations to Try

Once you’ve mastered the basic recipe, you can experiment with different flavors. Here are a few ways to make these muffins even more exciting:

1. Cheesy Garlic Herb Muffins

Add a teaspoon of garlic powder and some fresh chopped parsley for a savory twist.

2. Bacon & Chive Muffins

Crisp up some bacon, chop it into small pieces, and fold it into the batter with chopped chives for an irresistible smoky flavor.

3. Spiced Up Version

For a hint of heat, add a pinch of cayenne pepper or smoked paprika to the mix.

4. Veggie-Packed Muffins

Want to boost the nutrition even more? Mix in some grated carrots or spinach for extra vitamins and fiber.

Serving Suggestions: How to Enjoy These Muffins

While these muffins are delicious fresh out of the oven, here are a few ways to take them to the next level:

  • Pair with scrambled eggs – A complete, protein-packed breakfast.
  • Serve with soup – Perfect as a side for tomato soup, chicken noodle, or vegetable soup.
  • Turn them into mini sandwiches – Slice them in half and add turkey, ham, or avocado.
  • Drizzle with honey or butter – A simple but tasty way to add extra richness.

FAQs: Everything You Need to Know

1. Can I make these muffins ahead of time?

Yes! These muffins stay fresh for up to 3 days in an airtight container at room temperature. For longer storage, refrigerate them for up to a week or freeze for up to 3 months.

2. Do I need to squeeze the zucchini?

Yes! Zucchini holds a lot of moisture, and if you don’t squeeze out the excess liquid, your muffins may become too wet or dense. Use a clean kitchen towel or paper towel to remove as much moisture as possible.

3. Can I use a different type of cheese?

Absolutely! While cheddar is a classic choice, you can experiment with mozzarella, Parmesan, feta, or Gouda for different flavors.

4. Can I make these gluten-free?

Yes! Substitute the all-purpose flour with a 1:1 gluten-free flour blend, and they’ll turn out just as delicious.

5. Can I make mini muffins instead of regular-sized ones?

Of course! Mini muffins are great for kids’ lunchboxes. Just reduce the baking time to about 12-15 minutes.

6. Can I use whole wheat flour instead of all-purpose flour?

Yes, but keep in mind that whole wheat flour is denser, so the muffins may be slightly heavier. You can use half whole wheat and half all-purpose flour for a balance between flavor and texture.

7. How do I reheat frozen muffins?

Simply microwave them for 20-30 seconds, or warm them in a 350°F (175°C) oven for about 5 minutes.

Conclusion: A Muffin That Makes Everyone Happy

There are few things better than a recipe that’s quick, easy, and loved by the whole family. These savory zucchini and cheddar muffins tick all the boxes:

  • Nutritious – Packed with zucchini and protein-rich cheese.
  • Delicious – Soft, fluffy, and full of flavor.
  • Kid-Friendly – A great way to sneak in veggies without complaints.
  • Perfect for Meal Prep – Freezer-friendly and great for on-the-go snacking.

Whether you’re making them for breakfast, lunchboxes, or an afternoon treat, these muffins are guaranteed to be a hit. Give them a try—you might just find that they become your family’s new favorite snack, too.

Zavarnoy Roulade: A Timeless Pastry of Elegance and Indulgence

There are certain desserts that feel like a warm embrace—soft, delicate, comforting. For me, Zavarnoy Roulade, or the Choux Pastry Roll, is one of them.

Growing up, this dessert wasn’t an everyday indulgence. It was reserved for special occasions—family gatherings, birthdays, and celebrations where the kitchen was filled with laughter, the scent of vanilla, and the rhythmic sounds of a whisk meeting custard. I still remember the anticipation as I watched my grandmother spread the smooth, velvety custard over the golden pastry, rolling it with careful precision, as if she were wrapping a gift.

When the roulade was finally sliced, revealing its perfect spiral of pastry and cream, there was a collective pause—one of admiration before the first bite melted on our tongues. It was soft yet structured, airy yet rich, simple yet deeply indulgent. It tasted of tradition, of effort, of love.

Now, every time I make this dessert, I feel connected—not only to my own childhood but to the generations of bakers before me who have turned simple ingredients into something extraordinary.

What is Zavarnoy Roulade?

Zavarnoy Roulade is a light and delicate rolled choux pastry, filled with a luscious vanilla custard cream. Unlike sponge cake roulades, which are fluffy and spongy, this pastry is made from choux dough—the same dough used for éclairs and cream puffs. This gives it a slightly crisp exterior that softens beautifully when combined with the smooth custard filling.

Its name, Zavarnoy, comes from the Russian word “заварное,” meaning “brewed” or “steamed,” referring to the process of cooking the flour and butter together before adding eggs—a signature step in making choux pastry.

This roulade is celebrated for its contrast of textures:

  • A light, airy pastry shell that remains sturdy enough to roll without cracking.
  • A silky-smooth custard filling that seeps into the pastry, making every bite irresistibly creamy.

A dessert that looks intricate yet is surprisingly simple, Zavarnoy Roulade is the perfect showcase of European pastry craftsmanship.

Ingredients

For the Choux Pastry Roll:

IngredientAmount
Water240ml (1 cup)
Unsalted butter100g (7 tbsp)
All-purpose flour150g (1 ¼ cups)
Large eggs4
Salt¼ tsp

For the Vanilla Custard Cream:

IngredientAmount
Large eggs2
Granulated sugar150g (¾ cup)
Vanilla sugar (or vanilla extract)10g (1 tbsp) or 1 tsp extract
Cornstarch25g (3 tbsp)
Whole milk500ml (2 cups)
Unsalted butter50g (3 tbsp)

Directions

Step 1: Prepare the Choux Pastry

  1. Preheat oven to 180°C (350°F) and line a baking sheet with parchment paper.
  2. In a saucepan, combine water, butter, and salt. Bring to a simmer until the butter melts completely.
  3. Remove from heat, add the flour all at once, and stir vigorously until a smooth dough forms. Return to low heat and cook for 1-2 minutes until the dough pulls away from the sides of the pan.
  4. Let cool slightly, then beat in the eggs one at a time, fully incorporating each before adding the next. The dough should be smooth and glossy.
  5. Spread the dough evenly onto the prepared sheet, forming a thin rectangle.
  6. Bake for 20–25 minutes until golden brown and puffed. Remove and let cool.

Step 2: Make the Vanilla Custard Cream

  1. In a bowl, whisk together the eggs, sugar, vanilla, and cornstarch until smooth.
  2. Heat the milk in a saucepan over medium heat until hot but not boiling.
  3. Slowly pour the hot milk into the egg mixture while whisking constantly.
  4. Return to the pan and cook over medium-low heat, stirring constantly, until thickened (about 5–7 minutes).
  5. Remove from heat, stir in the butter, and let cool completely.

Step 3: Assemble the Roulade

  1. Carefully remove the cooled choux pastry from the parchment paper.
  2. Spread an even layer of vanilla custard cream over the pastry.
  3. Gently roll the pastry into a log shape, using parchment paper to help.
  4. Refrigerate for 30 minutes to set before slicing.

Nutritional Information (Per Slice, Approx. 10 Servings)

NutrientAmount
Calories250 kcal
Carbohydrates30g
Protein5g
Fat12g
Saturated Fat7g
Sugar15g
Fiber1g
Sodium80mg

The Art of Perfecting a Choux Pastry Roll

While the beauty of this dessert lies in its simplicity, mastering the technique ensures the best results. Here are some key tips to make your Zavarnoy Roulade flawless:

1. The Right Dough Consistency

Choux pastry can be tricky—it should be smooth, thick, and pipeable but not runny. Too much egg, and the dough won’t hold its shape. Too little, and it won’t puff up correctly. The key is to add the eggs one at a time, fully incorporating each before adding the next.

2. Even Spreading for an Even Roll

When baking the choux pastry, spread it evenly onto the parchment-lined baking sheet. Any uneven areas can cause cracks when rolling.

3. Timing is Everything

Choux pastry continues cooking even after leaving the oven. Let it cool slightly, but not too much—rolling it while it’s still warm prevents cracks.

4. Custard Perfection

The vanilla custard should be thick enough to hold its shape yet smooth enough to spread easily. If it’s too runny, it may cause the roulade to collapse. If too thick, it won’t seep into the layers, missing that melt-in-your-mouth experience.

5. Chill Before Slicing

Let the roulade rest in the refrigerator before slicing. This allows the flavors to meld, and the pastry to fully absorb the custard’s moisture, making for a perfect bite every time.

Variations on the Classic

While the traditional vanilla custard filling is divine on its own, Zavarnoy Roulade is a versatile canvas for endless flavors. Here are some delicious twists:

1. Chocolate Custard Filling

Add melted dark chocolate or cocoa powder to the custard for a rich, chocolatey version. A pinch of espresso powder enhances the depth of flavor.

2. Citrus-Infused Delight

Brighten up the custard with a hint of lemon zest, orange zest, or a splash of Grand Marnier for a citrus-kissed variation.

3. Caramel Dream

Swirl dulce de leche or salted caramel into the custard for a deeper, more indulgent flavor.

4. Berry Elegance

Layer fresh berries like raspberries, strawberries, or blueberries inside for a burst of fruity freshness.

5. Nutty Indulgence

Sprinkle chopped hazelnuts, almonds, or pistachios over the filling for added crunch and flavor complexity.

These variations can take the roulade from classic to contemporary, making it suitable for any occasion or personal preference.

Serving Suggestions: Elevate the Experience

While Zavarnoy Roulade is stunning on its own, you can elevate the presentation and flavors with these serving ideas:

  • Dust with Powdered Sugar: A light dusting of powdered sugar adds an elegant finish.
  • Drizzle with Chocolate: Melted dark or white chocolate drizzled on top makes it even more decadent.
  • Pair with Fresh Berries: Serve alongside a mix of fresh berries for a refreshing contrast.
  • Whipped Cream Topping: A dollop of lightly sweetened whipped cream adds extra indulgence.
  • Serve with Coffee or Tea: The delicate balance of flavors pairs perfectly with a hot cup of coffee or herbal tea.

FAQs: Everything You Need to Know

1. Is Zavarnoy Roulade difficult to make?

Not at all! While it looks impressive, the technique is straightforward. Just follow the key tips for choux pastry and custard consistency, and you’ll have a perfect roll.

2. Why did my choux pastry crack while rolling?

This could be due to overbaking or allowing the pastry to cool too much before rolling. Try rolling it while it’s still warm and pliable.

3. Can I make the custard ahead of time?

Yes! You can prepare the custard up to 2 days in advance and store it in the refrigerator. Just give it a good stir before using.

4. How long does Zavarnoy Roulade last?

It’s best enjoyed fresh on the day it’s made, but it can be stored in the refrigerator for up to 2 days. The pastry will soften over time, absorbing more of the custard’s moisture.

5. Can I freeze the roulade?

Freezing is not recommended as the custard may separate when thawed, affecting the texture.

6. What if my custard is too runny?

If your custard is too thin, return it to the heat and cook for an additional 2-3 minutes, stirring constantly, until it thickens.

7. Can I use store-bought custard?

You can, but homemade custard gives the best flavor and texture. If using store-bought, opt for a thick, high-quality version.

Conclusion: A Timeless Dessert, A Lasting Memory

Zavarnoy Roulade is more than just a dessert—it’s an experience, a tradition, and a work of art. It carries with it a sense of nostalgia, a connection to the past, and a celebration of simple ingredients transformed into something extraordinary.

Whether you’re making it for a special occasion or simply to indulge in a moment of sweetness, this choux pastry roll will always deliver. From its delicate, golden exterior to its creamy, dreamy filling, every bite is a testament to the magic of baking.

So, gather your ingredients, take your time, and enjoy the process. Because when you bake with heart, every slice tells a story.

Would you like suggestions for pairing it with other desserts or beverages? Let me know, and I’d be happy to add more ideas!

The Puff Pastry Sensation That’s Driving the World Crazy

Some recipes hold a special place in our hearts—not just because they taste amazing, but because they bring us back to moments of warmth, laughter, and togetherness. For me, Ham & Mustard Puff Pastry Rolls are one of those recipes.

I remember my grandmother always keeping a roll of puff pastry in the fridge, ready to create something magical at a moment’s notice. Whenever unexpected guests arrived or we craved something comforting, she would pull it out, spread it with whatever fillings she had on hand, and within minutes, the house would fill with the irresistible aroma of flaky, buttery pastry baking to perfection.

One of my absolute favorites was always the combination of smoky ham and tangy mustard. The contrast between the crisp layers of pastry and the creamy, slightly spicy mustard, paired with the richness of the ham, was pure perfection. It was the kind of snack that disappeared from the table within seconds, leaving only crumbs and satisfied smiles behind.

Today, this recipe remains a go-to favorite for home cooks around the world. Whether you’re making a quick appetizer for guests, a satisfying snack for yourself, or a treat to impress at a brunch gathering, these puff pastry rolls are effortless, elegant, and utterly irresistible.

What Makes This Recipe So Special?

1. The Magic of Puff Pastry

Puff pastry is one of the most versatile ingredients in the kitchen. Its delicate layers, created through a careful lamination process, puff up beautifully in the oven, giving you that crispy, golden exterior with an airy, buttery texture inside.

2. The Perfect Flavor Combination

  • Savory ham brings a rich, smoky depth.
  • Sharp mustard adds a tangy kick that cuts through the richness.
  • Flaky pastry ties everything together in the most satisfying way.

It’s the kind of combination that keeps you reaching for just one more bite.

3. Minimal Ingredients, Maximum Flavor

With just three simple ingredients, you get a dish that looks and tastes like it came from a bakery. It’s proof that you don’t need complicated recipes to create something amazing.

4. Ready in No Time

Sometimes, you need a recipe that’s quick, easy, and guaranteed to impress. Whether you’re hosting a last-minute gathering or just craving something delicious, this puff pastry roll can be prepared and baked in under 30 minutes.

Ingredients:

IngredientQuantity
Puff pastry500g
Mustard50g
Ham (thinly sliced)200g

Directions:

  1. Preheat the oven to 200°C (400°F) and line a baking sheet with parchment paper.
  2. Roll out the puff pastry on a lightly floured surface.
  3. Spread a thin, even layer of mustard over the pastry.
  4. Lay the ham slices evenly over the mustard-covered pastry.
  5. Carefully roll the pastry into a tight log, sealing the edge with a bit of water.
  6. Slice the roll into even pieces (about 2 cm thick) and place them on the baking sheet.
  7. Bake for 15-20 minutes, or until the pastry is golden brown and crispy.
  8. Let cool for a few minutes before serving.

Nutritional Information (Per Serving, Approximate)

NutrientAmount
Calories320 kcal
Protein9g
Carbohydrates30g
Fat18g
Saturated Fat9g
Fiber1g
Sugar2g
Sodium480mg

Creative Variations to Try

One of the best things about this recipe is how adaptable it is. If you love experimenting, try these variations:

1. Cheesy Delight

Add a layer of grated cheese (cheddar, Gruyère, or mozzarella) for a gooey, melty twist.

2. Sweet and Savory Honey Mustard

Swap traditional mustard for honey mustard to add a touch of sweetness.

3. Herb-Infused Elegance

Sprinkle in some fresh thyme, rosemary, or chives to elevate the flavor.

4. Spicy Kick

Love heat? Add a pinch of chili flakes or a drizzle of hot sauce before rolling up the pastry.

5. Veggie Twist

For a vegetarian option, replace ham with sautéed mushrooms, roasted peppers, or caramelized onions.

Serving Suggestions: How to Make This Dish Even More Irresistible

These puff pastry rolls are delicious on their own, but here are some ways to enhance the experience:

  • Serve with dipping sauces – Dijon mustard, garlic aioli, or a balsamic glaze make perfect accompaniments.
  • Pair with a fresh salad – A crisp green salad with a light vinaigrette balances the richness.
  • Enjoy with a glass of wine – A chilled white wine or light-bodied red complements the flavors beautifully.

Whether you’re serving them as an appetizer, a brunch treat, or an afternoon snack, these savory pastries always feel just a little bit indulgent.

FAQs: Everything You Need to Know

1. Can I make these puff pastry rolls ahead of time?

Yes! You can assemble them, cover them with plastic wrap, and store them in the fridge for up to 24 hours before baking. This makes them perfect for entertaining—just pop them in the oven when needed.

2. Can I freeze them?

Absolutely. You can freeze the unbaked rolls for up to 3 months. Just place them on a baking sheet to freeze individually, then transfer them to a freezer bag. Bake straight from frozen, adding a few extra minutes to the baking time.

3. What’s the best way to reheat leftovers?

Reheat them in an oven at 180°C (350°F) for 5-7 minutes to crisp them up again. Avoid using the microwave, as it can make the pastry soggy.

4. Can I use homemade puff pastry instead of store-bought?

Definitely! If you have the time and skill, homemade puff pastry will take this dish to another level. However, high-quality store-bought puff pastry works just as well and saves time.

5. What kind of ham works best?

Thinly sliced deli-style ham works best, as it layers evenly without making the pastry too bulky. You can also use prosciutto or smoked ham for a more gourmet twist.

6. Can I use a different type of mustard?

Yes! While Dijon mustard is a classic choice, you can experiment with whole grain mustard, spicy brown mustard, or honey mustard for a slightly different flavor profile.

7. How do I prevent the pastry from getting soggy?

Make sure to spread only a thin layer of mustard and bake at a high temperature to help the pastry crisp up properly. Also, avoid overloading with fillings.

Conclusion: The Ultimate Crowd-Pleaser

There’s a reason why Ham & Mustard Puff Pastry Rolls have stood the test of time. They’re:

  • Easy to make with just a handful of ingredients
  • Flaky, golden, and packed with flavor
  • Perfect for any occasion, from casual snacks to elegant parties

Whether you’re an experienced baker or a kitchen novice, this recipe is guaranteed to impress. Once you take that first bite—the crispy pastry giving way to the rich, savory filling—you’ll understand why this simple dish has become a worldwide sensation.

So, grab some puff pastry, mustard, and ham, and let the magic begin. Because sometimes, the simplest recipes create the most unforgettable moments.

Bittersweet Bliss: The Story and Magic of Brazilian Chocolate Truffles

The very first time I had a Brigadeiro, I was six years old, standing barefoot on a tile floor at my aunt’s house in São Paulo. The air smelled like chocolate and rain. I didn’t know then that I was being handed something deeply rooted in Brazilian culture — I just knew it was a tiny, shiny, fudgy ball that made my eyes widen and my heart race with excitement.

That single bite was all it took. I remember the slight resistance of the chocolate sprinkles on the outside, the smooth, rich interior that melted on my tongue, and the way the sweetness didn’t just hit — it lingered, like the final note of a beautiful song.

Years later, I learned how to make Brigadeiros myself, using the same pot my mother used, with the same rhythm of stirring, and the same satisfaction when the mixture finally pulled away from the sides of the pan. What I didn’t know then was that I wasn’t just making a treat — I was building a memory.

Brigadeiro: Brazil’s Most Beloved Bite

Brigadeiro (bree-gah-DAY-ro) is more than just a dessert in Brazil — it’s a cultural icon. Found at virtually every child’s birthday party, school gathering, family celebration, and holiday event, these fudgy chocolate truffles are the soul of Brazilian sweets.

Invented in the 1940s, the dessert is believed to have been named after Brigadeiro Eduardo Gomes, a Brazilian Air Force brigadier who ran for president. His campaign supporters made and sold these treats to raise funds, and they quickly became known as “docinhos do Brigadeiro” — the Brigadier’s little sweets. Though he didn’t win the election, the dessert won the hearts of a nation.

What makes Brigadeiros so beloved is their simplicity: sweetened condensed milk, cocoa powder, butter — and time. That’s it. But within those ingredients lies an experience that feels like home for millions of Brazilians, both in the country and abroad.

Ingredients

IngredientAmount
Sweetened condensed milk1 can (397g / 14 oz)
Butter1 tbsp (about 15g)
Unsweetened cocoa powder¼ cup (about 20g)
Salt (optional, to enhance flavor)A pinch
Chocolate sprinkles (for coating)As needed

How to Craft Fudge You Can Roll

1. Blend the Basics

In a nonstick saucepan over medium heat, add sweetened condensed milk, butter, and cocoa powder. Stir well to fully incorporate the cocoa into the mixture. Add a pinch of salt if desired.

2. Stir Like It Matters

Cook the mixture slowly, stirring constantly with a silicone spatula or wooden spoon. Scrape the bottom and edges to prevent sticking. This step takes about 10 to 12 minutes. You’ll know it’s done when the mixture thickens and starts pulling away from the sides of the pan.

3. Cool Before You Roll

Pour the thick chocolate fudge onto a greased plate or sheet of parchment paper. Let it cool completely at room temperature. You can chill it in the fridge to speed things up, but make sure it’s firm before shaping.

4. Shape the Joy

Once cool, grease your hands lightly with butter. Scoop out small portions (around 1 tablespoon each) and roll them into smooth, round balls.

5. Make It Festive

Roll each ball in chocolate sprinkles until completely coated. Place in mini paper cups or on a platter.

6. Serve or Store

Refrigerate for about 15–20 minutes to firm them up before serving, or store in an airtight container at room temperature for up to 2 days.

Nutrition Facts (Per Truffle – Approx. Based on 20 Truffles)

NutrientAmount
Calories~90 kcal
Fat3.5g
Saturated Fat2g
Carbohydrates13g
Sugars11g
Protein1.5g
Sodium25mg
Fiber0.5g

Why We Can’t Get Enough of Them

There’s something about Brigadeiros that goes beyond taste. Sure, they’re rich and chocolatey, but their magic lies in the balance: not quite a truffle, not quite fudge, not too soft, not too firm. Just right.

They’re also incredibly versatile. Want a casual sweet after dinner? Brigadeiros. Need something cute and easy for a party? Brigadeiros. Feeling nostalgic for something warm and homemade? You guessed it.

Unlike cakes or pastries that require precise baking times and temperatures, Brigadeiros are more forgiving. They’re made in a saucepan with constant stirring — a soothing, almost meditative process that encourages you to slow down and be present.

And when they’re done? Rolling them by hand, coating them in sprinkles, placing them in little paper cups — it all feels intentional and joyful.

The Art of Making Brigadeiros: Tips and Tricks

While the ingredients are simple, getting the perfect Brigadeiro takes a little technique. Here are some insider tips:

1. Use a Nonstick Pan

A good nonstick saucepan will save you from burning or sticking. Brigadeiros need constant stirring, and the mixture thickens as it cooks — so a smooth, nonstick surface is essential.

2. Stir Constantly and Mindfully

This isn’t the time to multitask. Use a wooden spoon or silicone spatula and stir the entire time (about 10–12 minutes). Scrape the sides and bottom of the pan continuously.

3. Know When It’s Ready

The mixture should be thick, glossy, and pull away cleanly from the bottom of the pan. You can test it by dragging your spoon through the center — if the gap stays open for a few seconds, it’s done.

4. Cool Before Rolling

Don’t rush the cooling process. Spread the mixture onto a greased plate and let it sit until it reaches room temperature. Refrigerating it for a short time can help if you’re in a hurry.

5. Butter Your Hands

Rolling sticky chocolate into smooth little balls? A little butter on your hands goes a long way. It prevents sticking and gives the truffles a nice finish.

Beyond Chocolate: Creative Variations to Try

Though chocolate Brigadeiros are the most traditional, they’ve evolved into a whole genre of sweets — each with its own twist. Here are some modern spins:

  • White Chocolate Brigadeiro (Beijinho): Made with sweetened condensed milk and shredded coconut.
  • Nutella Brigadeiro: Stir a spoonful of Nutella into the mix for a hazelnut twist.
  • Gourmet Brigadeiros: Roll them in chopped nuts, toasted coconut, freeze-dried raspberries, or crushed cookies.
  • Spiced Brigadeiro: Add a pinch of cinnamon or chili powder for warmth or heat.
  • Boozy Brigadeiro: Add a splash of Baileys, rum, or Kahlúa for an adult version.

With endless topping and flavor options, Brigadeiros can easily be tailored to match holidays, color themes, or flavor profiles.

The Heart of the Celebration

In Brazil, you’ll find Brigadeiros at every celebration — but they hold special importance at children’s birthday parties. Plates filled with dozens of them are arranged alongside cakes and other “docinhos” (little sweets), and it’s not uncommon for people to sneak a few into napkins to take home.

It’s not just about the taste. Making Brigadeiros is often a family activity, with kids helping roll and decorate while parents share stories in the kitchen. It’s a rite of passage, a bonding moment, a tradition passed down generation to generation.

Brigadeiros connect people. They bring comfort to homesick Brazilians abroad. They evoke memories of childhood and joy. And they’re the kind of treat that makes people stop mid-conversation to say, “Oh wow — this is amazing.”

Brigadeiro FAQ: Everything You’ve Wanted to Know

Are Brigadeiros the same as chocolate truffles?

Not exactly. While both are chocolate-based and rolled into balls, traditional truffles are made with chocolate and cream. Brigadeiros use sweetened condensed milk, resulting in a thicker, fudgier texture and a richer, milkier flavor.

Do they need to be refrigerated?

Brigadeiros can be stored at room temperature for up to 2 days, but they last longer in the fridge — up to a week. Just bring them to room temperature before serving for best texture.

Can I freeze Brigadeiros?

Yes! Freeze them in an airtight container with parchment between layers. Thaw in the refrigerator, then bring to room temperature before serving.

What kind of cocoa powder should I use?

Use unsweetened cocoa powder for the best balance of richness and sweetness. Dutch-processed or natural cocoa both work — Dutch gives a smoother, deeper chocolate flavor.

Can I make Brigadeiros in the microwave?

Yes, though the stovetop method gives more control. For a quick version, combine ingredients in a microwave-safe bowl and heat in 30-second increments, stirring each time, until thickened.

What can I use instead of chocolate sprinkles?

Try crushed nuts, desiccated coconut, cookie crumbs, cocoa powder, or even colorful sanding sugar. Just make sure the topping sticks well.

Can I double the recipe?

Absolutely! Just make sure to use a large enough pan and extend the cooking time slightly, stirring constantly to prevent burning.

Why are mine too soft or too hard?

If they’re too soft, they likely needed more time to cook. If they’re too hard or dry, they may have been overcooked. Pay close attention to the consistency as it pulls away from the pan.

A Bite-Sized Memory, Shared Worldwide

Whether you’re from Brazil or just discovering Brigadeiros for the first time, making these chocolate truffles connects you to something timeless. It’s about more than chocolate — it’s about joy, love, and the hands that prepare them.

In a world that often feels too fast, Brigadeiros ask us to slow down: to stir, to share, and to savor. They remind us that sometimes the most meaningful things are the simplest — and that one small bite can carry a lifetime of meaning.

So make a batch. Share them with someone. Tell the story behind them. Because when we cook from the heart, we’re never just making dessert — we’re making connection.