Tropical Paradise Mango Cheesecake: A Slice of Sunshine

Escape to a tropical paradise with every bite of this creamy, dreamy Mango Cheesecake. Featuring a buttery graham cracker crust, velvety mango-infused filling, and a vibrant mango topping, this dessert is the perfect combination of sweet, tangy, and refreshing. Whether you’re celebrating a special occasion or simply indulging your dessert cravings, this cheesecake promises to bring the tropics to your table.

Ingredients

Crust:

  • 2 cups graham cracker crumbs
  • ½ cup unsalted butter, melted
  • ¼ cup granulated sugar

Cheesecake Filling:

  • 24 oz (3 packages) cream cheese, softened
  • 1 cup granulated sugar
  • 1 tsp vanilla extract
  • 1 tbsp fresh lemon juice
  • 1 cup heavy cream
  • 1½ ripe mangoes, peeled and diced

Topping:

  • ½ ripe mango, diced
  • 1 tbsp unflavored gelatin
  • ¼ cup water

Garnish (Optional):

  • Fresh mango slices
  • Mint leaves

Instructions

  1. Prepare the Crust : Preheat the oven to 325°F (165°C). In a mixing bowl, combine graham cracker crumbs, melted butter, and granulated sugar. Mix until evenly moistened. Press the mixture firmly into the bottom of a 9-inch springform pan. Use a flat-bottomed glass to smooth the surface. Bake the crust for 10 minutes. Remove from the oven and let it cool completely.
  2. Make the Cheesecake Filling : In a large mixing bowl, beat the softened cream cheese and sugar until smooth and creamy. Add vanilla extract, lemon juice, and heavy cream. Beat until fully incorporated and fluffy. Purée 1½ mangoes in a blender until smooth. Gently fold the mango purée into the cream cheese mixture.
  3. Prepare the Gelatin : In a small saucepan, combine unflavored gelatin and water. Let it sit for 5 minutes to bloom. Heat over low heat until the gelatin dissolves completely. Allow it to cool slightly, then fold it into the mango cheesecake mixture.
  4. Assemble and Chill : Pour the cheesecake filling over the cooled crust, smoothing the top with a spatula. Sprinkle the remaining diced mango over the top of the cheesecake for a vibrant finish. Refrigerate the cheesecake for at least 6 hours, or until fully set (overnight is best).
  5. Garnish and Serve : Once set, carefully remove the cheesecake from the springform pan. Garnish with fresh mango slices or mint leaves, if desired. Slice and serve chilled, enjoying the tropical flavors in every bite.

Conclusion

This Tropical Paradise Mango Cheesecake is a show-stopping dessert that’s as beautiful as it is delicious. With its silky texture, refreshing mango essence, and buttery crust, it’s a slice of heaven that will transport your taste buds to an island getaway. Serve it at your next gathering, and watch it disappear in no time!
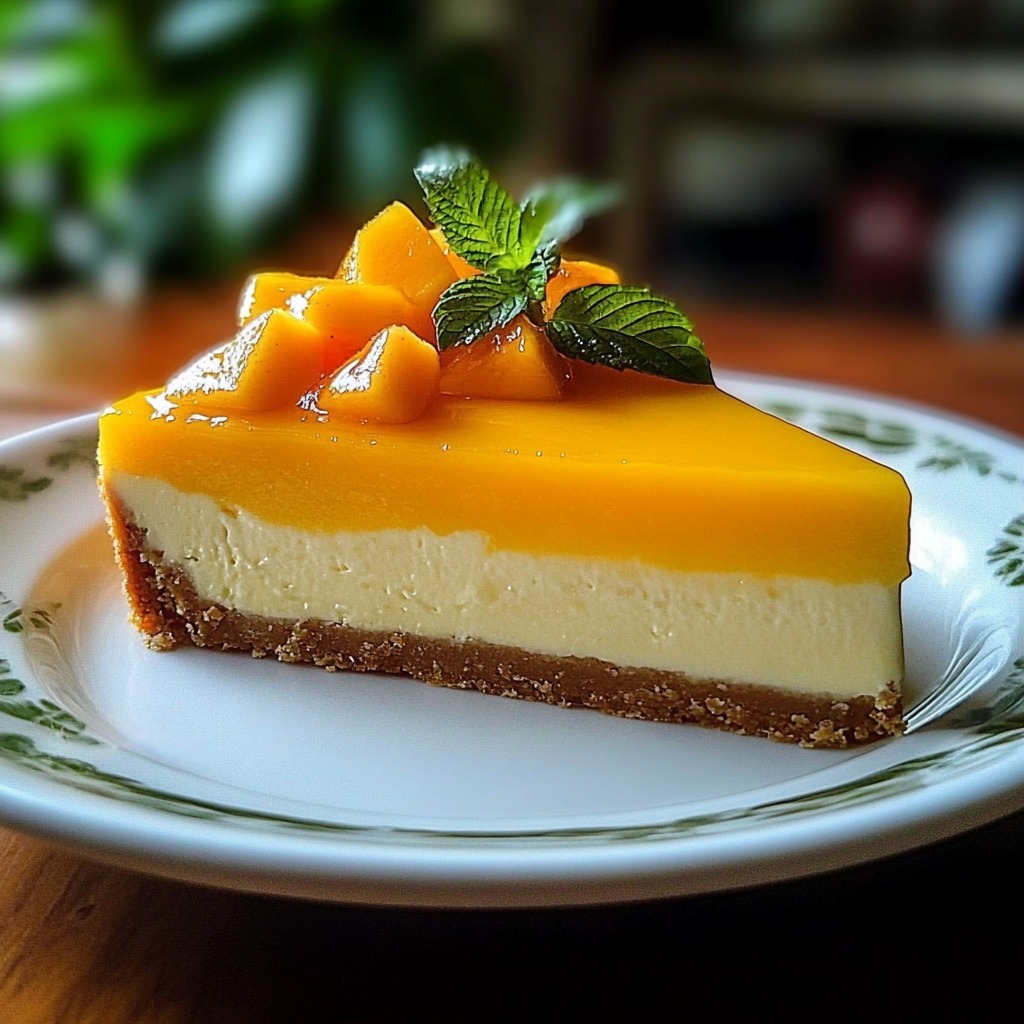
Tropical Paradise Mango Cheesecake: A Slice of Sunshine

A creamy cheesecake infused with ripe mangoes, setatop a graham cracker crust, and topped with a vibrant mango finish.
Prep Time 20 minutes
Cook Time 10 minutes
Resting Time 6 hours
Total Time 6 hours 30 minutes
Servings: 20
Course: Dessert
Cuisine: Tropical-inspired
Calories: 452

Ingredients
  

Crust:
  • 2 cups graham cracker crumbs
  • ½ cup unsalted butter melted
  • ¼ cup granulated sugar
Cheesecake Filling:
  • 24 oz 3 packages cream cheese, softened
  • 1 cup granulated sugar
  • 1 tsp vanilla extract
  • 1 tbsp fresh lemon juice
  • 1 cup heavy cream
  • ripe mangoes peeled and diced
Topping:
  • ½ ripe mango diced
  • 1 tbsp unflavored gelatin
  • ¼ cup water
Garnish Optional:
  • Fresh mango slices
  • Mint leaves

Method
 

  1. Prepare the Crust : Preheat the oven to 325°F (165°C). In a mixing bowl, combine graham cracker crumbs, melted butter, and granulated sugar. Mix until evenly moistened. Press the mixture firmly into the bottom of a 9-inch springform pan. Use a flat-bottomed glass to smooth the surface. Bake the crust for 10 minutes. Remove from the oven and let it cool completely.
  2. Make the Cheesecake Filling : In a large mixing bowl, beat the softened cream cheese and sugar until smooth and creamy. Add vanilla extract, lemon juice, and heavy cream. Beat until fully incorporated and fluffy. Purée 1½ mangoes in a blender until smooth. Gently fold the mango purée into the cream cheese mixture.
  3. Prepare the Gelatin : In a small saucepan, combine unflavored gelatin and water. Let it sit for 5 minutes to bloom. Heat over low heat until the gelatin dissolves completely. Allow it to cool slightly, then fold it into the mango cheesecake mixture.
  4. Assemble and Chill : Pour the cheesecake filling over the cooled crust, smoothing the top with a spatula. Sprinkle the remaining diced mango over the top of the cheesecake for a vibrant finish. Refrigerate the cheesecake for at least 6 hours, or until fully set (overnight is best).
  5. Garnish and Serve : Once set, carefully remove the cheesecake from the springform pan. Garnish with fresh mango slices or mint leaves, if desired. Slice and serve chilled, enjoying the tropical flavors in every bite.
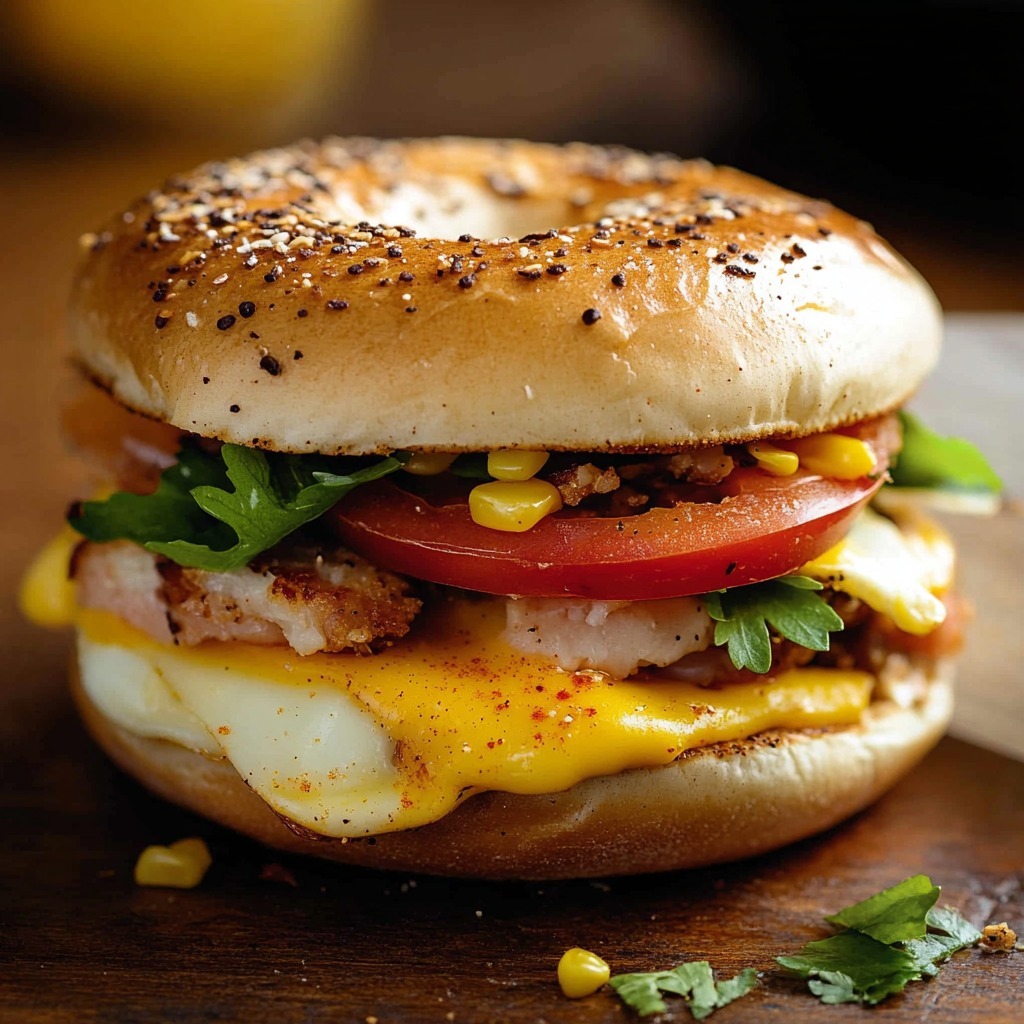
The Ultimate Cowboy Breakfast Bagel: A Hearty Start to Your Day

Start your morning right with a Cowboy Breakfast Bagel—a hearty, flavor-packed meal that combines crispy bacon, savory sausage, creamy cowboy butter, and a touch of zest from homemade pico de gallo. Perfect for weekend brunches or any day you need an energy boost, this breakfast bagel is a delicious fusion of classic ingredients with a Southwestern twist. Ready to satisfy even the hungriest cowboy in your home!

Ingredients

Pico de Gallo:

  • 1 medium tomato, diced
  • 1 small jalapeño pepper, seeded and diced
  • 1 tablespoon lime juice
  • Salt and pepper, to taste

Breakfast Bagel:

  • 8 slices thick-cut bacon, divided
  • 1 pound ground pork sausage
  • 4 slices sharp cheddar cheese, divided
  • 4 large eggs, fried, divided
  • 1 tablespoon unsalted butter
  • 4 onion bagels, toasted
  • ½ cup (113 g) cowboy butter, softened, divided
  • Salt and pepper, to taste

Instructions

  1. Prepare the Pico de Gallo : In a small bowl, mix the diced tomato, jalapeño, lime juice, salt, and pepper. Set aside to let the flavors meld while you prepare the rest of the dish.
  2. Cook the Bacon and Sausage : In a large skillet over medium heat, cook the bacon until crispy. Set aside on a paper towel to drain. Using the same skillet, cook the ground pork sausage, breaking it up into crumbles, until fully browned. Remove from heat.
  3. Toast the Bagels : While the sausage cooks, slice and toast the onion bagels until golden brown. Spread softened cowboy butter on each half for a rich, buttery base.
  4. Assemble the Bagels : Layer 2 slices of bacon on the bottom half of each bagel. Add a generous portion of cooked sausage, followed by a slice of sharp cheddar cheese. Place a freshly fried egg on top and finish with a spoonful of pico de gallo. Cap with the top half of the bagel, pressing gently to secure all the layers.

Conclusion

The Cowboy Breakfast Bagel is not just a meal—it’s an experience. Packed with bold flavors and a medley of textures, it’s sure to keep you satisfied and energized for hours. Whether you’re fueling up for a busy day or treating yourself to a leisurely morning, this recipe delivers comfort and flavor in every bite.

The Ultimate Cowboy Breakfast Bagel: A Hearty Start to Your Day

A hearty bagel layered with crispy bacon, savorysausage, melted cheddar, fried eggs, and zesty pico de gallo.
Prep Time 15 minutes
Cook Time 20 minutes
Total Time 35 minutes
Servings: 4
Course: Breakfast
Cuisine: American
Calories: 700

Ingredients
  

Pico de Gallo:
  • 1 medium tomato diced
  • 1 small jalapeño pepper seeded and diced
  • 1 tablespoon lime juice
  • Salt and pepper to taste
Breakfast Bagel:
  • 8 slices thick-cut bacon divided
  • 1 pound ground pork sausage
  • 4 slices sharp cheddar cheese divided
  • 4 large eggs fried, divided
  • 1 tablespoon unsalted butter
  • 4 onion bagels toasted
  • ½ cup 113 g cowboy butter, softened, divided
  • Salt and pepper to taste

Method
 

  1. Prepare the Pico de Gallo : In a small bowl, mix the diced tomato, jalapeño, lime juice, salt, and pepper. Set aside to let the flavors meld while you prepare the rest of the dish.
  2. Cook the Bacon and Sausage : In a large skillet over medium heat, cook the bacon until crispy. Set aside on a paper towel to drain. Using the same skillet, cook the ground pork sausage, breaking it up into crumbles, until fully browned. Remove from heat.
  3. Toast the Bagels : While the sausage cooks, slice and toast the onion bagels until golden brown. Spread softened cowboy butter on each half for a rich, buttery base.
  4. Assemble the Bagels : Layer 2 slices of bacon on the bottom half of each bagel. Add a generous portion of cooked sausage, followed by a slice of sharp cheddar cheese. Place a freshly fried egg on top and finish with a spoonful of pico de gallo. Cap with the top half of the bagel, pressing gently to secure all the layers.

Pumpkin Streusel Cheesecake Delight

Celebrate the warm and cozy flavors of fall with this Pumpkin Streusel Cheesecake. This dessert combines the creamy richness of cheesecake with spiced pumpkin filling and a buttery, crumbly streusel topping. Perfect for the holiday season or any autumn gathering, this cheesecake is as delicious as it is stunning!

Ingredients:

Crust:

  • 46 Biscoff cookies (finely crushed)
  • 10 tbsp unsalted butter (melted)

Cheesecake Filling:

  • 32 oz cream cheese (softened)
  • 1 cup canned pumpkin puree (Libby’s or equivalent)
  • 1 ¼ cup brown sugar (packed)
  • 1/3 cup sour cream
  • 3 eggs (whole)
  • 2 egg yolks
  • 1 tbsp vanilla extract
  • 1/4 cup cornstarch
  • 2 tsp pumpkin spice

Streusel Topping:

  • 3/4 cup all-purpose flour
  • 1/4 cup powdered sugar
  • 6 tbsp unsalted butter (cold and cubed)
  • 1/4 cup granulated sugar
  • 1/4 tsp pumpkin spice

Whipped Cream Garnish (Optional):

  • 3/4 cup heavy cream
  • 2 tbsp powdered sugar
  • 1/2 tsp vanilla extract

Instructions:

  1. Prepare the Crust: Preheat the oven to 350°F (175°C) and grease a 9-inch springform pan.Mix the crushed Biscoff cookies with the melted butter until well combined.Press the mixture evenly into the bottom of the pan to form a firm crust. Bake for 10 minutes, then set aside to cool.
  2. Make the Cheesecake Filling: In a large mixing bowl, beat the softened cream cheese and brown sugar until smooth and creamy.Add the pumpkin puree, sour cream, vanilla extract, and pumpkin spice. Mix until well combined. Beat in the eggs and egg yolks one at a time, ensuring each is fully incorporated.Sift in the cornstarch and mix until smooth.
  3. Assemble the Cheesecake: Pour the cheesecake filling over the prepared crust and smooth the top with a spatula.Place the pan in a large roasting pan and fill the roasting pan with hot water, creating a water bath to prevent cracking.
  4. Prepare the Streusel Topping: In a medium bowl, mix the flour, powdered sugar, granulated sugar, and pumpkin spice. Cut in the cold butter with a pastry cutter or fork until the mixture resembles coarse crumbs. Sprinkle the streusel evenly over the cheesecake batter.
  5. Bake the Cheesecake: Bake the cheesecake at 325°F (160°C) for 1 hour and 15 minutes, or until the center is slightly set but still jiggles. Turn off the oven, crack the door slightly, and let the cheesecake cool inside for 1 hour. Refrigerate the cheesecake for at least 4 hours or overnight before serving.
  6. Garnish (Optional): Whip the heavy cream, powdered sugar, and vanilla extract until soft peaks form. Pipe or dollop the whipped cream onto the cheesecake before serving for an elegant touch.

Conclusion:

This Pumpkin Streusel Cheesecake is the ultimate autumn dessert, bringing together creamy pumpkin filling, a crisp Biscoff crust, and a sweet, spiced streusel topping. Every bite is a delightful combination of textures and flavors that will have your family and friends asking for seconds. Perfect for any occasion, this cheesecake is a must-try for pumpkin lovers!

Pumpkin Streusel Cheesecake

This Pumpkin Streusel Cheesecake is the ultimate autumn dessert, bringing together creamy pumpkin filling, a crisp Biscoff crust, and a sweet, spiced streusel topping.
Prep Time 30 minutes
Cook Time 1 hour 25 minutes
Resting Time 5 hours 30 minutes
Total Time 7 hours 25 minutes
Servings: 12 Slice
Course: Dessert
Cuisine: American
Calories: 450

Ingredients
  

Crust:
  • 46 Biscoff cookies finely crushed
  • 10 tbsp unsalted butter melted
Cheesecake Filling:
  • 32 oz cream cheese softened
  • 1 cup canned pumpkin puree Libby’s or equivalent
  • 1 ¼ cup brown sugar packed
  • 1/3 cup sour cream
  • 3 eggs whole
  • 2 egg yolks
  • 1 tbsp vanilla extract
  • 1/4 cup cornstarch
  • 2 tsp pumpkin spice
Streusel Topping:
  • 3/4 cup all-purpose flour
  • 1/4 cup powdered sugar
  • 6 tbsp unsalted butter cold and cubed
  • 1/4 cup granulated sugar
  • 1/4 tsp pumpkin spice
Whipped Cream Garnish Optional:
  • 3/4 cup heavy cream
  • 2 tbsp powdered sugar
  • 1/2 tsp vanilla extract

Method
 

  1. Prepare the Crust: Preheat the oven to 350°F (175°C) and grease a 9-inch springform pan. Mix the crushed Biscoff cookies with the melted butter until well combined. Press the mixture evenly into the bottom of the pan to form a firm crust. Bake for 10 minutes, then set aside to cool.
  2. Make the Cheesecake Filling: In a large mixing bowl, beat the softened cream cheese and brown sugar until smooth and creamy. Add the pumpkin puree, sour cream, vanilla extract, and pumpkin spice. Mix until well combined. Beat in the eggs and egg yolks one at a time, ensuring each is fully incorporated. Sift in the cornstarch and mix until smooth.
  3. Assemble the Cheesecake: Pour the cheesecake filling over the prepared crust and smooth the top with a spatula. Place the pan in a large roasting pan and fill the roasting pan with hot water, creating a water bath to prevent cracking.
  4. Prepare the Streusel Topping: In a medium bowl, mix the flour, powdered sugar, granulated sugar, and pumpkin spice. Cut in the cold butter with a pastry cutter or fork until the mixture resembles coarse crumbs. Sprinkle the streusel evenly over the cheesecake batter.
  5. Bake the Cheesecake: Bake the cheesecake at 325°F (160°C) for 1 hour and 15 minutes, or until the center is slightly set but still jiggles. Turn off the oven, crack the door slightly, and let the cheesecake cool inside for 1 hour. Refrigerate the cheesecake for at least 4 hours or overnight before serving.
  6. Garnish (Optional): Whip the heavy cream, powdered sugar, and vanilla extract until soft peaks form. Pipe or dollop the whipped cream onto the cheesecake before serving for an elegant touch.

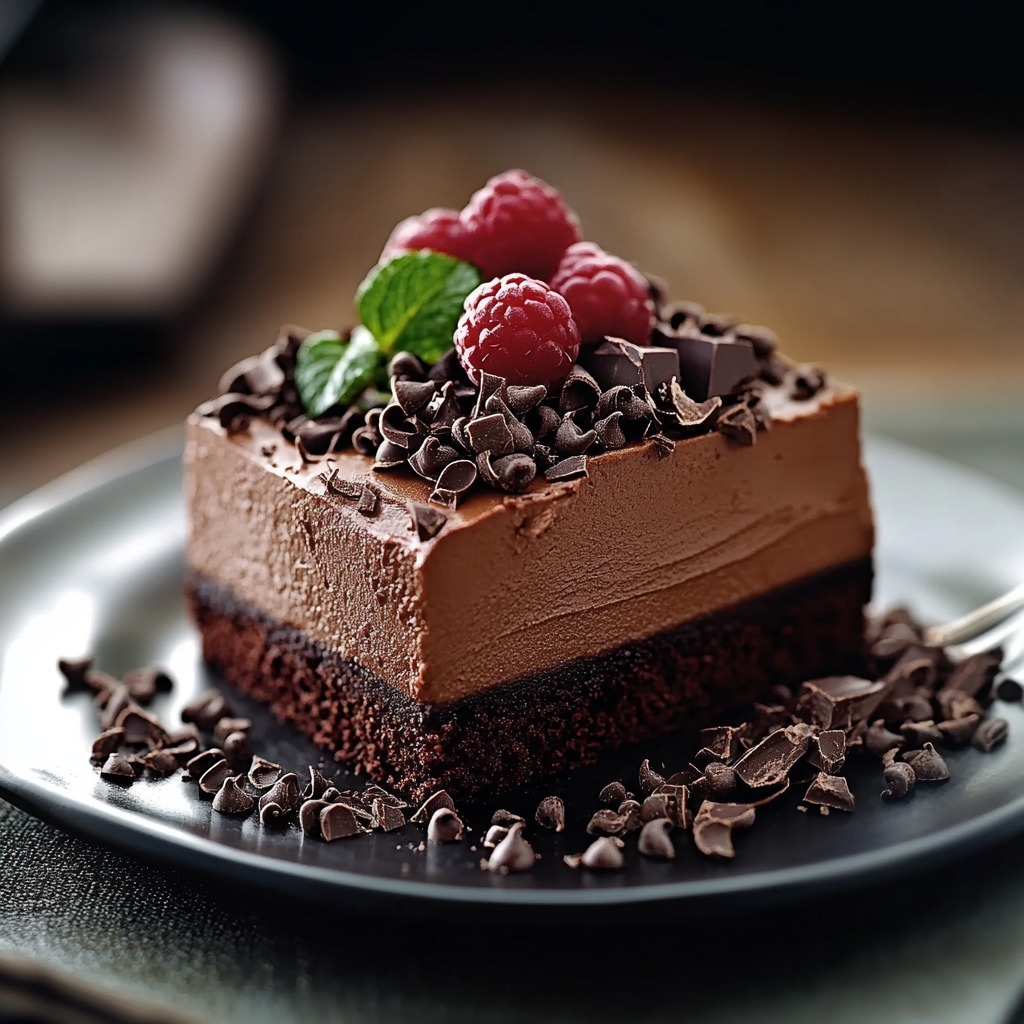
Decadent Chocolate Mousse Cake

Elevate your dessert game with this rich and indulgent Chocolate Mousse Cake. Layers of moist chocolate cake are paired with a luscious chocolate mousse and topped with velvety chocolate whipped cream frosting. For those who love a touch of elegance, a glossy ganache finish takes this cake to the next level. Perfect for celebrations or simply satisfying your sweet cravings, this cake is a true showstopper.

Ingredients:

Chocolate Cake Layers:

  • 2 cups all-purpose flour
  • 1 ¾ cups granulated sugar
  • ¾ cup cocoa powder
  • 1 ½ teaspoons baking powder
  • 1 ½ teaspoons baking soda
  • 1 teaspoon salt
  • 1 cup milk
  • ½ cup vegetable oil
  • 2 teaspoons vanilla extract
  • 2 large eggs
  • 1 cup hot water

Chocolate Mousse Filling:

  • 4 large egg yolks
  • ½ cup granulated sugar
  • 2 ½ cups heavy whipping cream (divided)
  • 8 ounces semi-sweet chocolate (melted and cooled)
  • Optional: 1 teaspoon gelatin (bloomed, for added stability)

Chocolate Whipped Cream Frosting:

  • 1 cup heavy whipping cream
  • ¼ cup powdered sugar
  • 2 tablespoons cocoa powder
  • 1 teaspoon vanilla extract

Ganache (Optional):

  • ½ cup heavy whipping cream
  • 4 ounces chocolate (dark, milk, or semi-sweet)

Instructions:

  1. Prepare the Chocolate Cake Layers: Preheat the oven to 350°F (175°C) and grease and line two 9-inch round cake pans. In a large bowl, whisk together the flour, sugar, cocoa powder, baking powder, baking soda, and salt. Add the milk, vegetable oil, vanilla extract, and eggs to the dry ingredients. Mix until smooth. Gradually stir in the hot water until the batter is well-combined (it will be thin). Divide the batter evenly between the prepared pans and bake for 30–35 minutes or until a toothpick inserted into the center comes out clean. Let the cakes cool completely before removing from pans.
  2. Make the Chocolate Mousse: In a medium saucepan, whisk together the egg yolks, sugar, and ½ cup of heavy cream over medium heat. Stir constantly until thickened (do not boil). Remove from heat and stir in the melted chocolate until smooth. If using gelatin, bloom it in 1 tablespoon of cold water, then stir into the warm chocolate mixture. Let it cool to room temperature. Whip the remaining 2 cups of heavy cream to soft peaks, then fold into the chocolate mixture until fully combined. Refrigerate until ready to use.
  3. Prepare the Chocolate Whipped Cream Frosting: In a chilled bowl, whip the heavy cream, powdered sugar, cocoa powder, and vanilla extract until stiff peaks form. Set aside.
  4. Assemble the Cake: Level the cake layers if necessary. Place one layer on a serving plate or cake board. Spread an even layer of the chocolate mousse over the cake. Top with the second layer of cake. Cover the entire cake with the chocolate whipped cream frosting. Smooth the surface or add decorative swirls.
  5. Add the Ganache (Optional): Heat the heavy whipping cream until steaming, then pour over the chocolate. Let sit for a minute, then stir until smooth. Let the ganache cool slightly, then drizzle over the cake or use for decoration.
  6. Chill and Serve: Refrigerate the cake for at least 2 hours to set before slicing and serving.

Conclusion:

This Decadent Chocolate Mousse Cake is the ultimate dessert for chocolate lovers. The combination of moist cake, airy mousse, and rich frosting makes every bite a heavenly experience. Whether for a special occasion or just because, this cake is guaranteed to impress and delight.

Decadent Chocolate Mousse Cake

This Decadent Chocolate Mousse Cake is the ultimatedessert for chocolate lovers. The combination of moist cake, airy mousse, andrich frosting makes every bite a heavenly experience.
Prep Time 45 minutes
Cook Time 35 minutes
Total Time 1 hour 20 minutes
Servings: 12 Slice
Course: Dessert
Cuisine: American
Calories: 450

Ingredients
  

Chocolate Cake Layers:
  • 2 cups all-purpose flour
  • 1 ¾ cups granulated sugar
  • ¾ cup cocoa powder
  • 1 ½ teaspoons baking powder
  • 1 ½ teaspoons baking soda
  • 1 teaspoon salt
  • 1 cup milk
  • ½ cup vegetable oil
  • 2 teaspoons vanilla extract
  • 2 large eggs
  • 1 cup hot water
Chocolate Mousse Filling:
  • 4 large egg yolks
  • ½ cup granulated sugar
  • 2 ½ cups heavy whipping cream divided
  • 8 ounces semi-sweet chocolate melted and cooled
  • Optional: 1 teaspoon gelatin bloomed, for added stability
Chocolate Whipped Cream Frosting:
  • 1 cup heavy whipping cream
  • ¼ cup powdered sugar
  • 2 tablespoons cocoa powder
  • 1 teaspoon vanilla extract
Ganache Optional:
  • ½ cup heavy whipping cream
  • 4 ounces chocolate dark, milk, or semi-sweet

Method
 

  1. Prepare the Chocolate Cake Layers: Preheat the oven to 350°F (175°C) and grease and line two 9-inch round cake pans. In a large bowl, whisk together the flour, sugar, cocoa powder, baking powder, baking soda, and salt. Add the milk, vegetable oil, vanilla extract, and eggs to the dry ingredients. Mix until smooth. Gradually stir in the hot water until the batter is well-combined (it will be thin). Divide the batter evenly between the prepared pans and bake for 30–35 minutes or until a toothpick inserted into the center comes out clean. Let the cakes cool completely before removing from pans.
  2. Make the Chocolate Mousse: In a medium saucepan, whisk together the egg yolks, sugar, and ½ cup of heavy cream over medium heat. Stir constantly until thickened (do not boil). Remove from heat and stir in the melted chocolate until smooth. If using gelatin, bloom it in 1 tablespoon of cold water, then stir into the warm chocolate mixture. Let it cool to room temperature. Whip the remaining 2 cups of heavy cream to soft peaks, then fold into the chocolate mixture until fully combined. Refrigerate until ready to use.
  3. Prepare the Chocolate Whipped Cream Frosting: In a chilled bowl, whip the heavy cream, powdered sugar, cocoa powder, and vanilla extract until stiff peaks form. Set aside.
  4. Assemble the Cake: Level the cake layers if necessary. Place one layer on a serving plate or cake board. Spread an even layer of the chocolate mousse over the cake. Top with the second layer of cake. Cover the entire cake with the chocolate whipped cream frosting. Smooth the surface or add decorative swirls.
  5. Add the Ganache (Optional): Heat the heavy whipping cream until steaming, then pour over the chocolate. Let sit for a minute, then stir until smooth. Let the ganache cool slightly, then drizzle over the cake or use for decoration.
  6. Chill and Serve: Refrigerate the cake for at least 2 hours to set before slicing and serving.

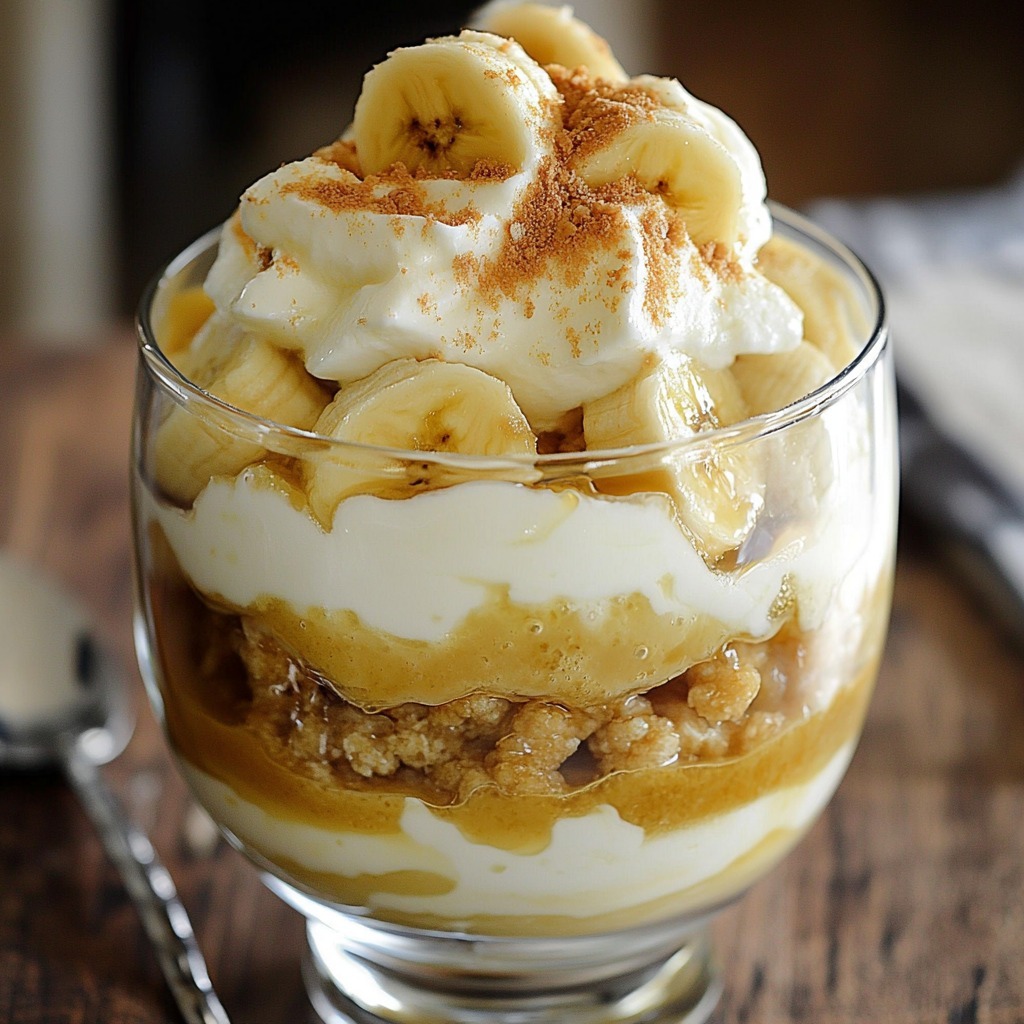
Banana’s Foster Banana Pudding Delight

Experience the rich and indulgent fusion of two iconic desserts: Banana’s Foster and Banana Pudding. This dessert combines the caramelized goodness of bananas with the creamy layers of traditional banana pudding. It’s an unforgettable treat perfect for celebrations or a luxurious sweet finish to any meal. Each bite is a harmony of flavors and textures that will leave everyone wanting more.

Ingredients:

Produce:

  • 3 ripe bananas

Baking & Spices:

  • 1 package instant banana pudding mix
  • 2/3 cup dark brown sugar
  • 1/2 tsp ground cinnamon
  • 2 tbsp powdered sugar
  • 2 tsp vanilla extract
  • 1/4 cup white sugar

Nuts & Seeds:

  • 1/4 cup walnuts (optional, chopped for garnish)

Snacks:

  • 1 3/4 cups graham cracker crumbs

Dairy:

  • 1/2 cup salted butter (for caramelizing bananas)
  • 1/4 cup butter (for graham cracker crust)
  • 8 oz cream cheese (softened)
  • 1 cup heavy whipping cream
  • 1 3/4 cups milk

Beer, Wine & Liquor:

  • 3 1/2 tbsp banana liqueur

Instructions:

  1. Prepare the Graham Cracker Crust: In a bowl, mix the graham cracker crumbs with 1/4 cup melted butter and 2 tbsp powdered sugar.Press the mixture into the bottom of your serving dish or individual jars. Refrigerate for 15 minutes to set.
  2. Make the Banana Pudding: In a medium bowl, whisk together the banana pudding mix, milk, and banana liqueur. Set aside to thicken.
  3. Caramelize the Bananas: Heat 1/2 cup salted butter in a skillet over medium heat. Add the dark brown sugar, ground cinnamon, and vanilla extract. Stir until the sugar dissolves and forms a syrup. Slice the bananas and toss them into the caramel sauce. Cook until the bananas are tender but not mushy, about 2–3 minutes. Remove from heat and allow to cool slightly.
  4. Prepare the Whipped Cream Cheese Layer: In a large mixing bowl, beat the softened cream cheese and white sugar until smooth. In a separate bowl, whip the heavy cream until stiff peaks form. Gently fold the whipped cream into the cream cheese mixture.
  5. Assemble the Layers: Spread a layer of banana pudding over the graham cracker crust. Add a layer of the caramelized bananas. Spread a generous layer of the whipped cream cheese mixture. Repeat the layers, finishing with a dollop of whipped cream or a sprinkle of crushed graham crackers on top.
  6. Garnish and Chill: Sprinkle chopped walnuts and a dusting of cinnamon on top for garnish. Refrigerate for at least 2 hours before serving to allow the flavors to meld together.

Conclusion:

Banana’s Foster Banana Pudding is the ultimate dessert mash-up that combines nostalgia with gourmet flair. With its buttery graham cracker crust, rich caramelized bananas, and layers of creamy goodness, this pudding is destined to be the star of any dessert table. Easy to prepare and endlessly satisfying, it’s a recipe you’ll return to time and time again.

Banana’s Foster Banana Pudding

Experience the rich and indulgent fusion of twoiconic desserts: Banana’s Foster and Banana Pudding. This dessert combines thecaramelized goodness of bananas with the creamy layers of traditional bananapudding.
Prep Time 25 minutes
Cook Time 5 minutes
Resting Time 2 hours
Total Time 2 hours 30 minutes
Servings: 8
Course: Dessert
Cuisine: American

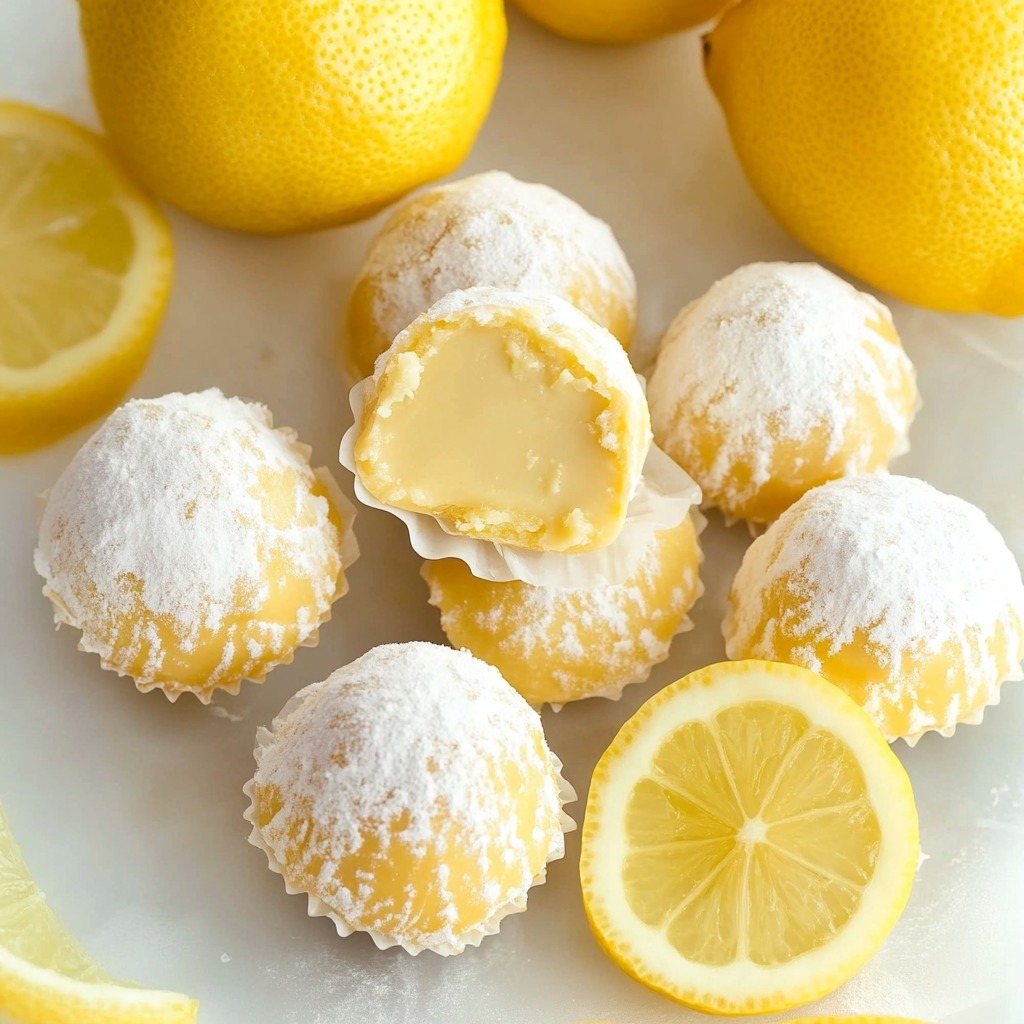
Zesty Lemon Bliss Truffles

Dive into the delightful world of citrusy indulgence with these Zesty Lemon Bliss Truffles. With their creamy, tangy core and a touch of sweetness, these truffles are a bite-sized burst of sunshine! They’re perfect for gifting, entertaining, or simply treating yourself to something special. The recipe is quick, customizable, and can be made with or without white chocolate, making it suitable for a variety of preferences.

Ingredients:

  • 4 oz cream cheese (or coconut butter for a dairy-free option)
  • 2 tbsp butter (or additional coconut butter for vegan adaptation)
  • 3 tbsp powdered sugar (or erythritol for a sugar-free alternative)
  • Zest of one lemon
  • 3 oz white chocolate chips (optional, for a sweet coating or mix-in)
  • Optional: Drop of natural food coloring or a pinch of turmeric for a yellow hue

Instructions:

  1. Prepare the Base: In a medium-sized bowl, blend the cream cheese (or coconut butter) and butter until smooth and creamy. Ensure there are no lumps for the best texture.
  2. Add Sweetness and Zest: Gradually mix in the powdered sugar (or erythritol) and the lemon zest. Taste as you go to balance the tangy and sweet flavors to your liking.
  3. Shape the Truffles: If desired, fold in the optional white chocolate chips. Refrigerate the mixture for 20–30 minutes to firm up slightly, making it easier to shape.
  4. Form the Balls: Using a small spoon or scoop, shape the mixture into bite-sized balls. Place them on a tray lined with parchment paper.
  5. Optional Coating: For an extra layer of sweetness and a professional finish, melt the white chocolate chips and dip each truffle, then let them set on the parchment. Alternatively, roll the truffles in powdered sugar, desiccated coconut, or finely chopped nuts.
  6. Chill and Enjoy: Chill the truffles in the refrigerator for at least an hour to firm up. Serve chilled and store leftovers in an airtight container in the fridge for up to a week.

Conclusion:

These Zesty Lemon Bliss Truffles are a delightful fusion of citrus tang and creamy decadence. Perfect for every occasion, they bring a touch of sunshine to your day with minimal effort. Whip up a batch and savor the zesty goodness – or share them with loved ones and watch them disappear in minutes!

Zesty Lemon Bliss Truffles

A creamy, tangy treat with hints of lemon zest andoptional white chocolate coating, these no-bake truffles are the perfect sweetsnack or dessert.
Prep Time 15 minutes
Cook Time 15 minutes
Total Time 30 minutes
Servings: 12 Truffles
Course: Dessert
Cuisine: American
Calories: 82

Ingredients
  

  • 4 oz cream cheese or coconut butter for a dairy-free option
  • 2 tbsp butter or additional coconut butter for vegan adaptation
  • 3 tbsp powdered sugar or erythritol for a sugar-free alternative
  • Zest of one lemon
  • 3 oz white chocolate chips optional, for a sweet coating or mix-in
  • Optional: Drop of natural food coloring or a pinch of turmeric for a yellow hue

Method
 

  1. Prepare the Base: In a medium-sized bowl, blend the cream cheese (or coconut butter) and butter until smooth and creamy. Ensure there are no lumps for the best texture.
  2. Add Sweetness and Zest: Gradually mix in the powdered sugar (or erythritol) and the lemon zest. Taste as you go to balance the tangy and sweet flavors to your liking.
  3. Shape the Truffles: If desired, fold in the optional white chocolate chips. Refrigerate the mixture for 20–30 minutes to firm up slightly, making it easier to shape.
  4. Form the Balls: Using a small spoon or scoop, shape the mixture into bite-sized balls. Place them on a tray lined with parchment paper.
  5. Optional Coating: For an extra layer of sweetness and a professional finish, melt the white chocolate chips and dip each truffle, then let them set on the parchment. Alternatively, roll the truffles in powdered sugar, desiccated coconut, or finely chopped nuts.
  6. Chill and Enjoy: Chill the truffles in the refrigerator for at least an hour to firm up. Serve chilled and store leftovers in an airtight container in the fridge for up to a week.

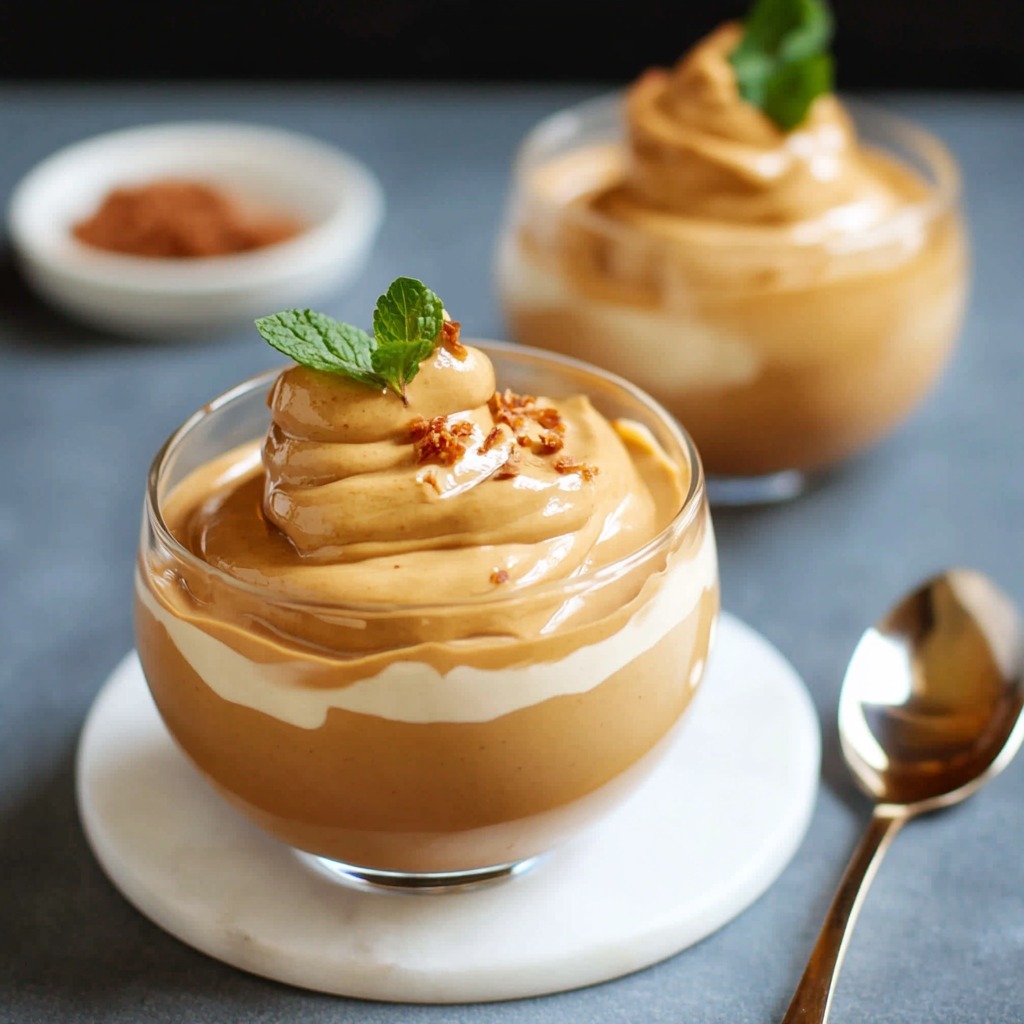
Decadent Dulce de Leche Mousse: A Creamy Delight

This Dulce de Leche Mousse is the epitome of elegance and simplicity. With its rich caramel flavor and light, airy texture, this dessert is a luxurious treat for any occasion. Whether you’re hosting a dinner party or simply craving something indulgent, this mousse comes together effortlessly with just four ingredients. Topped with an extra swirl of dulce de leche, it’s a dessert that’s sure to impress.

Ingredients:

  • 200 grams dulce de leche (plus extra for drizzling, optional)
  • 300 millilitres double cream (fridge-cold)
  • ½ teaspoon cornflour (or 1 teaspoon for a firmer texture)
  • Pinch of salt (optional)

Instructions:

  1. Prepare the Mousse Base: Place the dulce de leche in a mixing bowl. Add a pinch of salt for a balanced caramel flavor, if desired.
  2. Whip the Cream: In a separate bowl, pour the cold double cream. Using an electric mixer, whip the cream until it begins to thicken but is still soft (do not overwhip).
  3. Combine the Ingredients: Add the cornflour to the whipped cream and mix gently for 10-15 seconds to combine. The cornflour helps stabilize the mousse. Gradually fold the whipped cream into the dulce de leche using a spatula. Be gentle to maintain the light, airy texture. Fold until fully incorporated and smooth.
  4. Chill the Mousse: Spoon the mousse into serving glasses, ramekins, or bowls. Smooth the tops with the back of a spoon. Place the mousse in the refrigerator and chill for at least 1 hour to set. For a firmer texture, chill for up to 2 hours.
  5. Serve and Garnish: Before serving, drizzle extra dulce de leche over the top for added indulgence. You can also garnish with a sprinkle of sea salt, chocolate shavings, or a dollop of whipped cream for an elegant presentation.

Conclusion:

This Dulce de Leche Mousse is the perfect blend of richness and lightness, making it a dreamy dessert for any occasion. With its silky texture and irresistible caramel flavor, it’s a treat that comes together in minutes but tastes like it took hours. Serve it chilled and watch as it melts in your mouth, leaving you craving more.

Decadent Dulce de Leche Mousse: A Creamy Delight

A creamy, airy mousse made with rich dulce de lecheand whipped cream, perfect for a simple yet indulgent dessert.
Prep Time 10 minutes
Resting Time 1 hour
Total Time 1 hour 10 minutes
Servings: 4
Course: Dessert
Cuisine: Latin American-inspired
Calories: 320

Ingredients
  

  • 200 grams dulce de leche plus extra for drizzling, optional
  • 300 millilitres double cream fridge-cold
  • ½ teaspoon cornflour or 1 teaspoon for a firmer texture
  • Pinch of salt optional

Method
 

  1. Prepare the Mousse Base: Place the dulce de leche in a mixing bowl. Add a pinch of salt for a balanced caramel flavor, if desired.
  2. Whip the Cream: In a separate bowl, pour the cold double cream. Using an electric mixer, whip the cream until it begins to thicken but is still soft (do not overwhip).
  3. Combine the Ingredients: Add the cornflour to the whipped cream and mix gently for 10-15 seconds to combine. The cornflour helps stabilize the mousse. Gradually fold the whipped cream into the dulce de leche using a spatula. Be gentle to maintain the light, airy texture. Fold until fully incorporated and smooth.
  4. Chill the Mousse: Spoon the mousse into serving glasses, ramekins, or bowls. Smooth the tops with the back of a spoon. Place the mousse in the refrigerator and chill for at least 1 hour to set. For a firmer texture, chill for up to 2 hours.
  5. Serve and Garnish: Before serving, drizzle extra dulce de leche over the top for added indulgence. You can also garnish with a sprinkle of sea salt, chocolate shavings, or a dollop of whipped cream for an elegant presentation.

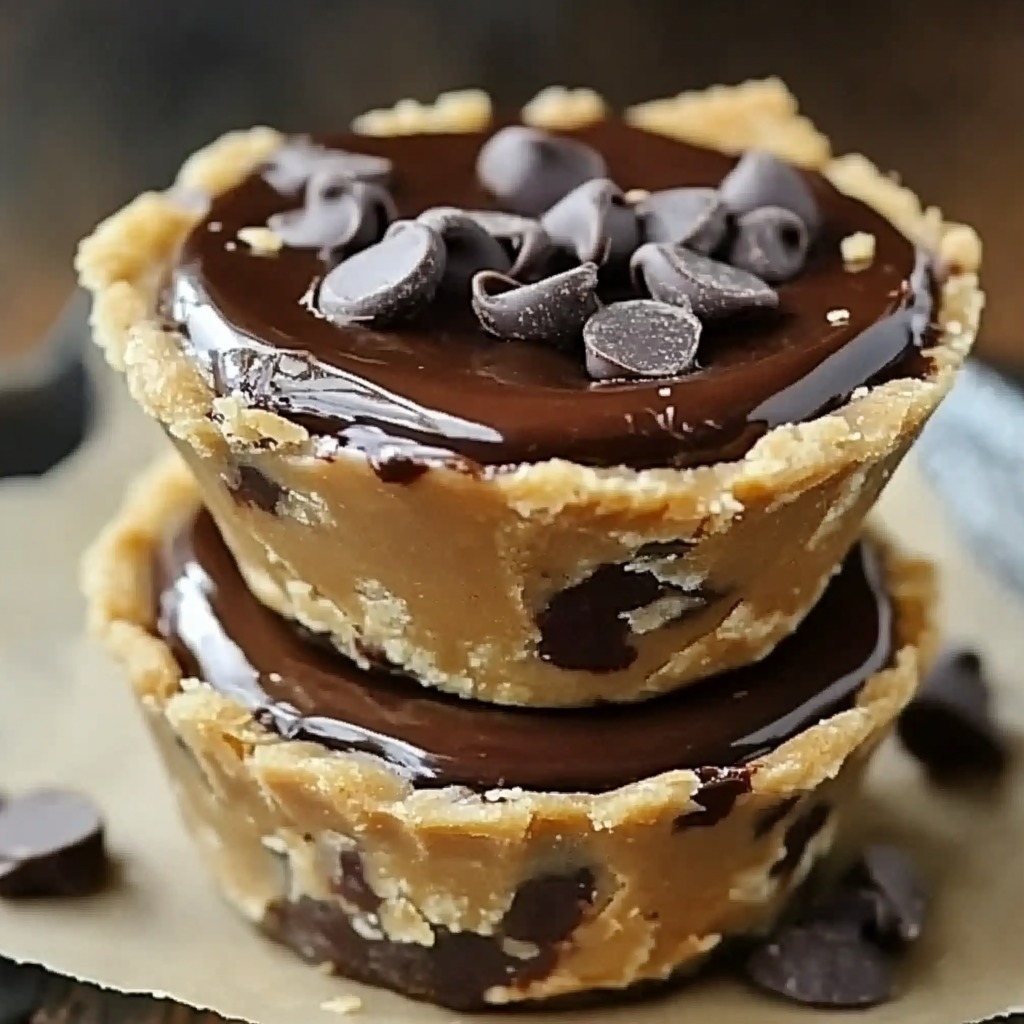
Mini Chocolate Peanut Butter Pies: The Perfect Bite-Sized Treat

Indulge in the perfect combination of rich chocolate and creamy peanut butter with these Mini Chocolate Peanut Butter Pies. These no-bake treats are not only delicious but also incredibly easy to make. With a buttery graham cracker crust, smooth peanut butter filling, and a luscious chocolate topping, they’re ideal for parties, gatherings, or whenever you need a sweet fix. These individual pies are a guaranteed crowd-pleaser and will satisfy even the most intense dessert cravings.

Ingredients:

For the Crust:

  • 1 1/2 cups graham cracker crumbs
  • 1/2 cup butter, melted

For the Peanut Butter Filling:

  • 1 cup creamy peanut butter
  • 8 oz cream cheese, softened
  • 1/2 cup powdered sugar
  • 1 teaspoon vanilla extract
  • 1 pinch salt

For the Chocolate Ganache Topping:

  • 1 cup semi-sweet chocolate chips
  • 1/2 cup heavy cream

For Garnish (Optional):

  • Extra chocolate chips or shavings
  • A sprinkle of powdered sugar
  • Chopped peanuts

Instructions:

  1. Prepare the Crust: In a medium bowl, combine the graham cracker crumbs and melted butter. Mix until the crumbs are evenly coated. Divide the mixture evenly between mini pie tins, muffin cups, or silicone molds, pressing it firmly into the bottom and slightly up the sides to form a crust. Place the crusts in the refrigerator to chill while preparing the filling.
  2. Make the Peanut Butter Filling : In a large bowl, beat the softened cream cheese and powdered sugar until smooth and creamy. Add the creamy peanut butter, vanilla extract, and a pinch of salt. Beat until fully combined and smooth. In a separate bowl, whip the heavy cream until soft peaks form. Gently fold the whipped cream into the peanut butter mixture until light and fluffy. Spoon the peanut butter filling evenly over the chilled crusts, smoothing the tops with a spatula. Place them back into the refrigerator to set.
  3. Prepare the Chocolate Ganache: In a small saucepan, heat the heavy cream over medium heat until it just begins to simmer. Remove the saucepan from heat and pour the cream over the chocolate chips in a bowl. Let it sit for 2 minutes, then stir until the chocolate is completely melted and smooth. Allow the ganache to cool slightly for 5 minutes before pouring.
  4. Assemble the Pies : Spoon or drizzle the cooled chocolate ganache evenly over the peanut butter filling in each mini pie. Use a spatula or spoon to spread the chocolate smoothly. Place the mini pies in the refrigerator for at least 1 hour to fully set.
  5. Garnish and Serve: Once the pies are set, garnish with chocolate shavings, chopped peanuts, or a light dusting of powdered sugar for an elegant touch. Serve chilled and enjoy the creamy, chocolaty goodness!

Conclusion:

These Mini Chocolate Peanut Butter Pies are the ultimate bite-sized indulgence for chocolate and peanut butter lovers alike. With their creamy filling, crunchy crust, and rich ganache topping, they’re a delightful dessert perfect for any occasion. Simple, no-bake, and bursting with flavor, these mini pies are guaranteed to impress your family, friends, or party guests.

Mini Chocolate Peanut Butter Pies: The Perfect Bite-Sized Treat

No-bake mini pies with a graham cracker crust,creamy peanut butter filling, and silky chocolate ganache topping.
Prep Time 20 minutes
Cook Time 1 hour
Total Time 1 hour 20 minutes
Servings: 12 mini pies
Course: Dessert
Cuisine: American
Calories: 350

Ingredients
  

For the Crust:
  • 1 1/2 cups graham cracker crumbs
  • 1/2 cup butter melted
For the Peanut Butter Filling:
  • 1 cup creamy peanut butter
  • 8 oz cream cheese softened
  • 1/2 cup powdered sugar
  • 1 teaspoon vanilla extract
  • 1 pinch salt
For the Chocolate Ganache Topping:
  • 1 cup semi-sweet chocolate chips
  • 1/2 cup heavy cream
For Garnish Optional:
  • Extra chocolate chips or shavings
  • A sprinkle of powdered sugar
  • Chopped peanuts

Method
 

  1. Prepare the Crust: In a medium bowl, combine the graham cracker crumbs and melted butter. Mix until the crumbs are evenly coated. Divide the mixture evenly between mini pie tins, muffin cups, or silicone molds, pressing it firmly into the bottom and slightly up the sides to form a crust. Place the crusts in the refrigerator to chill while preparing the filling.
  2. Make the Peanut Butter Filling : In a large bowl, beat the softened cream cheese and powdered sugar until smooth and creamy. Add the creamy peanut butter, vanilla extract, and a pinch of salt. Beat until fully combined and smooth. In a separate bowl, whip the heavy cream until soft peaks form. Gently fold the whipped cream into the peanut butter mixture until light and fluffy. Spoon the peanut butter filling evenly over the chilled crusts, smoothing the tops with a spatula. Place them back into the refrigerator to set.
  3. Prepare the Chocolate Ganache: In a small saucepan, heat the heavy cream over medium heat until it just begins to simmer. Remove the saucepan from heat and pour the cream over the chocolate chips in a bowl. Let it sit for 2 minutes, then stir until the chocolate is completely melted and smooth. Allow the ganache to cool slightly for 5 minutes before pouring.
  4. Assemble the Pies : Spoon or drizzle the cooled chocolate ganache evenly over the peanut butter filling in each mini pie. Use a spatula or spoon to spread the chocolate smoothly. Place the mini pies in the refrigerator for at least 1 hour to fully set.
  5. Garnish and Serve: Once the pies are set, garnish with chocolate shavings, chopped peanuts, or a light dusting of powdered sugar for an elegant touch. Serve chilled and enjoy the creamy, chocolaty goodness!

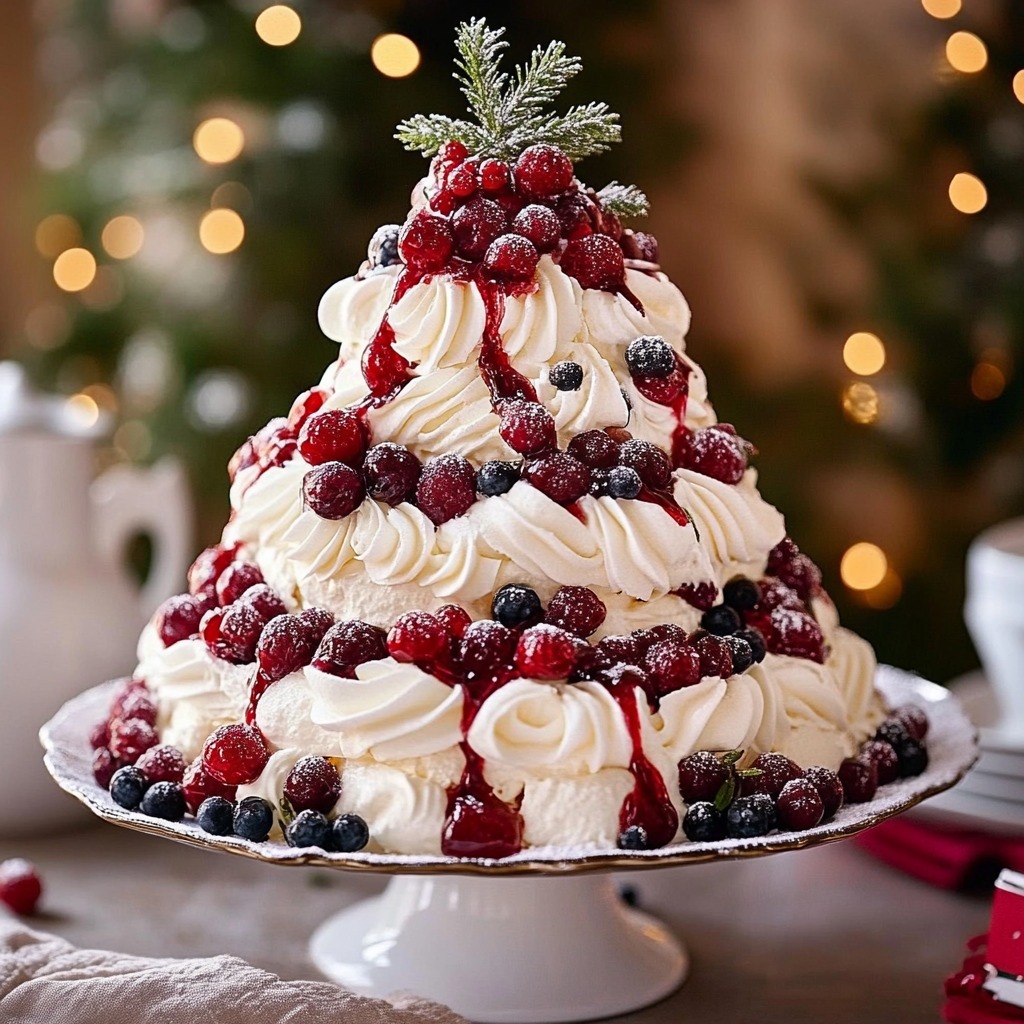
Festive Christmas Tree Pavlova Delight

Celebrate the holiday season with this stunning Christmas Tree Pavlova! A light, airy meringue base is topped with fluffy whipped cream and adorned with fresh berries to resemble a beautiful Christmas tree. This elegant dessert is as delightful to look at as it is to eat, making it the perfect centerpiece for your festive table. It’s a showstopper that combines texture, sweetness, and vibrant flavors to bring joy to every bite.

Ingredients:

For the Pavlova Base:

  • 6 extra-large egg whites (room temperature)
  • 1/2 teaspoon cream of tartar
  • 1 1/2 cups caster sugar
  • 2 teaspoons corn flour

For the Topping:

  • 600ml thickened cream
  • 1 tablespoon icing sugar
  • 2 x 125g punnets of fresh raspberries
  • 250g fresh strawberries, sliced

Optional Decoration:

  • Fresh mint leaves
  • A dusting of icing sugar for a snowy effect

Instructions:

  1. Preheat and Prepare: Preheat your oven to 120°C (250°F). Line a large baking tray with baking paper. Draw a large circle (about 25cm) and two smaller circles (15cm and 10cm) on the paper as a guide for stacking your pavlova layers.
  2. Make the Meringue: In a clean, dry mixing bowl, add the egg whites and cream of tartar. Beat on medium-high speed with an electric mixer until soft peaks form. Gradually add the caster sugar, one tablespoon at a time, beating continuously until the mixture becomes thick, glossy, and holds stiff peaks. This may take 6-8 minutes. Sift in the corn flour and gently fold it into the meringue with a spatula until just combined.
  3. Shape and Bake the Meringue: Spoon the meringue onto the prepared baking paper, forming three distinct circles (large, medium, and small) as drawn earlier. Smooth the tops slightly to make them level. Bake the meringue layers in the oven for 1 hour and 15 minutes, or until crisp but still soft inside. Turn off the oven, leave the door slightly ajar, and allow the meringue to cool completely in the oven (this prevents cracking).
  4. Prepare the Whipped Cream: In a large bowl, whip the thickened cream and icing sugar until soft peaks form. Be careful not to overwhip.
  5. Assemble the Pavlova Tree: Place the largest meringue circle on a serving platter. Spread a layer of whipped cream evenly on top. Add the medium-sized meringue layer and spread more whipped cream. Finally, place the smallest meringue layer on top and spread the remaining whipped cream generously over the top and sides to create a snowy effect.
  6. Decorate: Arrange the raspberries and strawberry slices around the pavlova layers to resemble ornaments and garlands. For a festive touch, add fresh mint leaves and lightly dust the pavlova with icing sugar to mimic fresh snow.
  7. Serve and Enjoy: Serve immediately for a crisp texture or store in the fridge for up to 2 hours before serving.

Conclusion:

This Christmas Tree Pavlova is a visually stunning and irresistibly delicious dessert perfect for the holidays. The crisp meringue, soft whipped cream, and fresh berries come together to create a festive treat that’s light, flavorful, and ideal for any Christmas celebration. A dessert that looks as good as it tastes—guaranteed to impress your guests and make the season even sweeter!

Festive Christmas Tree Pavlova Delight

A festive pavlova shaped like a Christmas tree,with layers of meringue, whipped cream, and fresh berries for the perfectholiday centerpiece.
Prep Time 20 minutes
Cook Time 1 hour 15 minutes
Resting Time 25 minutes
Total Time 2 hours
Course: Dessert
Cuisine: Australian Holiday
Calories: 250

Ingredients
  

For the Pavlova Base:
  • 6 extra-large egg whites room temperature
  • 1/2 teaspoon cream of tartar
  • 1 1/2 cups caster sugar
  • 2 teaspoons corn flour
For the Topping:
  • 600 ml thickened cream
  • 1 tablespoon icing sugar
  • 2 x 125g punnets of fresh raspberries
  • 250 g fresh strawberries sliced
Optional Decoration:
  • Fresh mint leaves
  • A dusting of icing sugar for a snowy effect

Method
 

  1. Preheat and Prepare: Preheat your oven to 120°C (250°F). Line a large baking tray with baking paper. Draw a large circle (about 25cm) and two smaller circles (15cm and 10cm) on the paper as a guide for stacking your pavlova layers.
  2. Make the Meringue: In a clean, dry mixing bowl, add the egg whites and cream of tartar. Beat on medium-high speed with an electric mixer until soft peaks form. Gradually add the caster sugar, one tablespoon at a time, beating continuously until the mixture becomes thick, glossy, and holds stiff peaks. This may take 6-8 minutes. Sift in the corn flour and gently fold it into the meringue with a spatula until just combined.
  3. Shape and Bake the Meringue: Spoon the meringue onto the prepared baking paper, forming three distinct circles (large, medium, and small) as drawn earlier. Smooth the tops slightly to make them level. Bake the meringue layers in the oven for 1 hour and 15 minutes, or until crisp but still soft inside. Turn off the oven, leave the door slightly ajar, and allow the meringue to cool completely in the oven (this prevents cracking).
  4. Prepare the Whipped Cream: In a large bowl, whip the thickened cream and icing sugar until soft peaks form. Be careful not to overwhip.
  5. Assemble the Pavlova Tree: Place the largest meringue circle on a serving platter. Spread a layer of whipped cream evenly on top. Add the medium-sized meringue layer and spread more whipped cream. Finally, place the smallest meringue layer on top and spread the remaining whipped cream generously over the top and sides to create a snowy effect.
  6. Decorate: Arrange the raspberries and strawberry slices around the pavlova layers to resemble ornaments and garlands. For a festive touch, add fresh mint leaves and lightly dust the pavlova with icing sugar to mimic fresh snow.
  7. Serve and Enjoy: Serve immediately for a crisp texture or store in the fridge for up to 2 hours before serving.

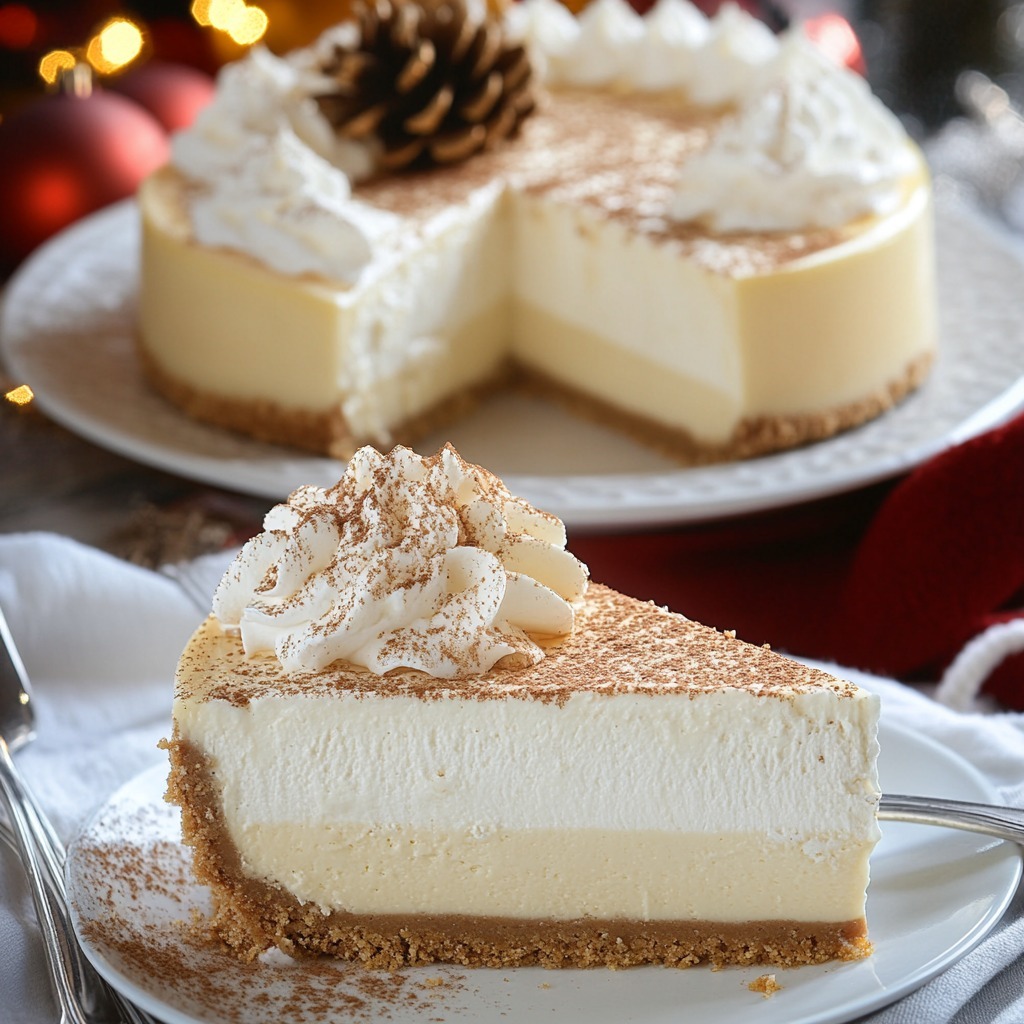
Creamy Holiday Eggnog Cheesecake Delight

Embrace the flavors of the holiday season with this smooth and decadent Eggnog Cheesecake. This creamy dessert combines the rich, spiced flavors of classic eggnog with the velvety texture of cheesecake. Perfect for festive gatherings, it’s a show-stopping treat that will leave your guests craving more. Whether you’re looking to impress at a Christmas dinner or just satisfy your sweet tooth, this cheesecake is a unique addition to your dessert table.

Ingredients:

For the Crust:

  • 2 cups graham cracker crumbs
  • 1/2 cup unsalted butter, melted

For the Filling:

  • 24 ounces cream cheese, softened (3 blocks)
  • 1 cup granulated sugar
  • 4 large eggs
  • 1 cup eggnog
  • 1 teaspoon vanilla extract
  • 1/2 teaspoon ground nutmeg
  • 1/4 teaspoon salt

Optional Garnish:

  • Freshly grated nutmeg
  • Whipped cream
  • Cinnamon sticks for decoration

Instructions:

  1. Prepare the Crust: Preheat your oven to 325°F (160°C). In a mixing bowl, combine the graham cracker crumbs and melted butter. Stir until the crumbs are fully coated and resemble wet sand. Press the mixture evenly into the bottom of a 9-inch springform pan. Use the back of a spoon or the bottom of a glass to compact it firmly.Bake the crust for 8-10 minutes. Remove and set aside to cool slightly.
  2. Make the Filling: In a large mixing bowl, beat the softened cream cheese until smooth and creamy (about 2 minutes). Gradually add the sugar, mixing until fully incorporated. Scrape down the sides of the bowl as needed. Beat in the eggs, one at a time, ensuring each egg is well-mixed before adding the next. Slowly pour in the eggnog, vanilla extract, nutmeg, and salt. Mix on low speed until the batter is smooth and evenly combined.
  3. Assemble and Bake: Pour the cheesecake filling over the prepared crust, spreading it evenly with a spatula. Place the springform pan in a larger baking pan and pour about 1 inch of hot water into the outer pan to create a water bath (this helps prevent cracks). Carefully transfer to the oven and bake for 50-55 minutes. The edges should be set, but the center will have a slight jiggle.
  4. Cool the Cheesecake: Turn off the oven and crack the door slightly, allowing the cheesecake to cool gradually for 1 hour. Remove from the oven, then run a knife gently around the edges to prevent sticking. Let it cool to room temperature. Cover the cheesecake and chill in the refrigerator for at least 4 hours or overnight for best results.
  5. Serve and Garnish: Before serving, garnish with a dollop of whipped cream, a sprinkle of freshly grated nutmeg, and optional cinnamon sticks for a festive touch.

Conclusion:

This Creamy Holiday Eggnog Cheesecake is a perfect harmony of rich, spiced eggnog and indulgent cheesecake. With its silky-smooth texture and festive flavor, this dessert will quickly become a holiday favorite for years to come. Serve it at your next gathering, and watch as everyone falls in love with this seasonal treat!

Creamy Holiday Eggnog Cheesecake Delight

A creamy and decadent eggnog-infused cheesecakewith a buttery graham cracker crust, perfect for holiday celebrations.
Prep Time 20 minutes
Cook Time 55 minutes
Resting Time 5 hours
Total Time 6 hours 15 minutes
Course: Dessert
Cuisine: American
Calories: 380

Ingredients
  

For the Crust:
  • 2 cups graham cracker crumbs
  • 1/2 cup unsalted butter melted
For the Filling:
  • 24 ounces cream cheese softened (3 blocks)
  • 1 cup granulated sugar
  • 4 large eggs
  • 1 cup eggnog
  • 1 teaspoon vanilla extract
  • 1/2 teaspoon ground nutmeg
  • 1/4 teaspoon salt
Optional Garnish:
  • Freshly grated nutmeg
  • Whipped cream
  • Cinnamon sticks for decoration

Method
 

  1. Prepare the Crust: Preheat your oven to 325°F (160°C). In a mixing bowl, combine the graham cracker crumbs and melted butter. Stir until the crumbs are fully coated and resemble wet sand. Press the mixture evenly into the bottom of a 9-inch springform pan. Use the back of a spoon or the bottom of a glass to compact it firmly.Bake the crust for 8-10 minutes. Remove and set aside to cool slightly.
  2. Make the Filling: In a large mixing bowl, beat the softened cream cheese until smooth and creamy (about 2 minutes). Gradually add the sugar, mixing until fully incorporated. Scrape down the sides of the bowl as needed. Beat in the eggs, one at a time, ensuring each egg is well-mixed before adding the next. Slowly pour in the eggnog, vanilla extract, nutmeg, and salt. Mix on low speed until the batter is smooth and evenly combined.
  3. Assemble and Bake: Pour the cheesecake filling over the prepared crust, spreading it evenly with a spatula. Place the springform pan in a larger baking pan and pour about 1 inch of hot water into the outer pan to create a water bath (this helps prevent cracks). Carefully transfer to the oven and bake for 50-55 minutes. The edges should be set, but the center will have a slight jiggle.
  4. Cool the Cheesecake: Turn off the oven and crack the door slightly, allowing the cheesecake to cool gradually for 1 hour. Remove from the oven, then run a knife gently around the edges to prevent sticking. Let it cool to room temperature. Cover the cheesecake and chill in the refrigerator for at least 4 hours or overnight for best results.
  5. Serve and Garnish: Before serving, garnish with a dollop of whipped cream, a sprinkle of freshly grated nutmeg, and optional cinnamon sticks for a festive touch.