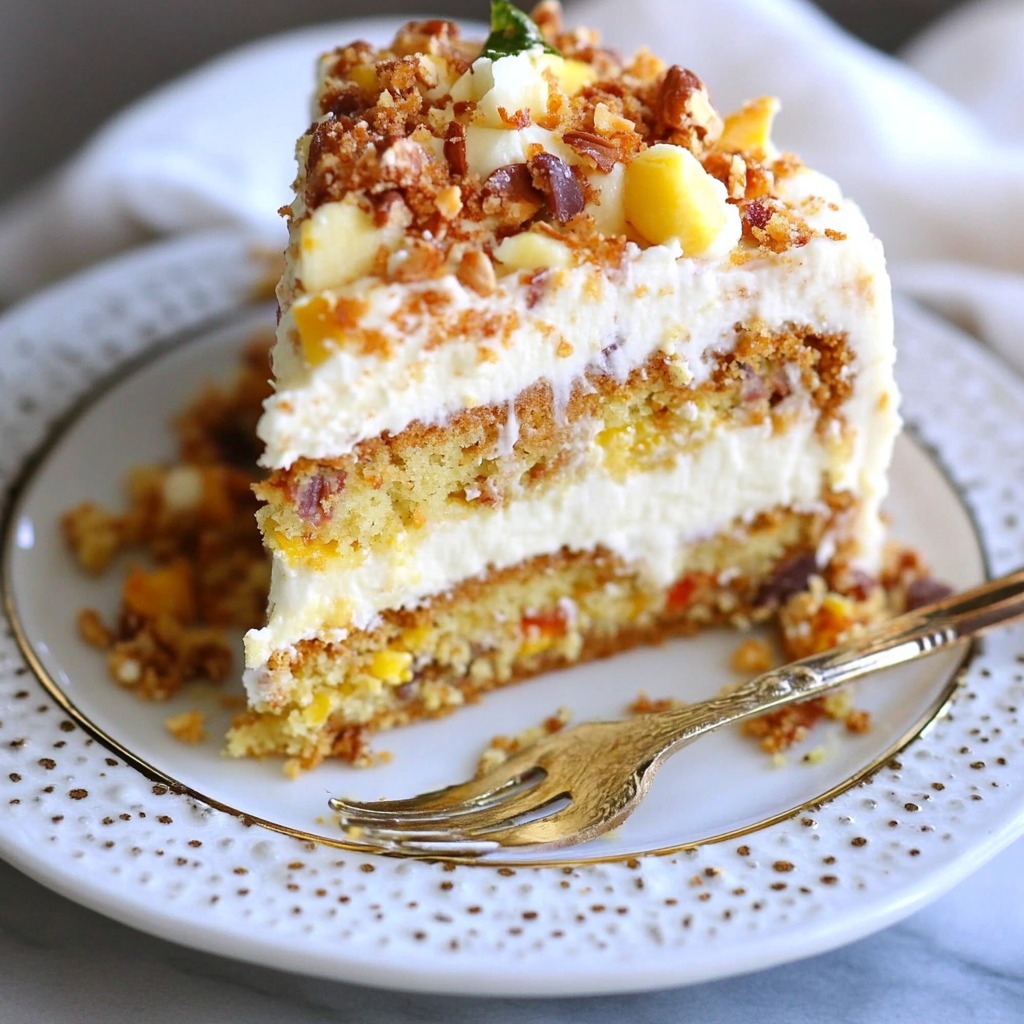
Irresistible Carrot Cake with Cream Cheese Frosting

This “To Die For Carrot Cake” is a classic dessert packed with flavor and texture. Moist and tender, it’s brimming with freshly grated carrots, sweetened coconut, and juicy pineapple, with the perfect balance of spice. Topped with a velvety cream cheese frosting, it’s a treat worthy of every celebration or a cozy afternoon indulgence. Whether you’re a carrot cake connoisseur or a first-timer, this recipe is guaranteed to become a household favorite.

Ingredients

For the Cake :

  • 1 ¼ cups unsweetened applesauce or oil (traditional choice)
  • 2 cups granulated sugar
  • 3 large eggs, room temperature
  • 2 cups all-purpose flour
  • 1 teaspoon baking soda
  • 1 ½ teaspoons baking powder
  • ½ teaspoon salt
  • 1 teaspoon cinnamon
  • 2 cups grated carrots
  • 1 cup shredded sweetened coconut
  • 1 cup chopped nuts (optional)
  • 1 teaspoon vanilla extract
  • 1 cup crushed pineapple (not drained; use pineapple in juice, not syrup)

For the Cream Cheese Frosting:

  • ½ cup butter, softened
  • 8 ounces cream cheese, softened
  • 1 teaspoon vanilla extract
  • 1 pound (16 oz) powdered sugar

Optional Toppings:

  • Toasted pecans
  • Toasted coconut

Instructions

  1. Prepare the Cake Batter : Preheat your oven to 350°F (175°C). Grease and lightly flour two 9-inch round cake pans or a 9×13-inch baking dish.In a large mixing bowl, whisk together the applesauce (or oil), granulated sugar, and eggs until well combined and creamy. In a separate bowl, sift together the flour, baking soda, baking powder, salt, and cinnamon. Gradually add the dry ingredients to the wet mixture, stirring just until combined. Avoid overmixing.Gently fold in the grated carrots, shredded coconut, nuts (if using), vanilla extract, and crushed pineapple, including its juice. Mix until evenly distributed.
  2. Bake the Cake : Pour the batter evenly into the prepared pans. Smooth the tops with a spatula. Bake for 30-35 minutes (round pans) or 40-45 minutes (9×13 pan), or until a toothpick inserted in the center comes out clean. Remove from the oven and let the cake cool in the pans for 10 minutes. Transfer to a wire rack to cool completely before frosting.
  3. Make the Cream Cheese Frosting : In a large bowl, beat the softened butter and cream cheese together until smooth and creamy. Add the vanilla extract and gradually mix in the powdered sugar, beating on low speed until fully incorporated and fluffy.
  4. Frost and Decorate the Cake : If using round pans, level the cake layers if necessary. Place one layer on a serving plate and spread a generous layer of frosting on top. Add the second cake layer and frost the top and sides evenly. For a 9×13 cake, simply frost the top. Sprinkle toasted pecans or coconut on top for added crunch and decoration.

Conclusion

This irresistible carrot cake strikes the perfect balance of moistness, sweetness, and spice. The layers of flavor from the carrots, coconut, and pineapple combined with the creamy frosting create a dessert that’s hard to beat. Whether served at a special occasion or as a delightful everyday treat, this carrot cake is sure to wow everyone who takes a bite.
Irresistible Carrot Cake with Cream Cheese Frosting

The layers of flavor from the carrots, coconut,and pineapple combined with the creamy frosting create a dessert that’s hard tobeat.
Prep Time 20 minutes
Cook Time 40 minutes
Total Time 1 hour
Servings: 12 Slice
Course: Dessert
Cuisine: American
Calories: 450

Ingredients
  

For the Cake :
  • 1 ¼ cups unsweetened applesauce or oil traditional choice
  • 2 cups granulated sugar
  • 3 large eggs room temperature
  • 2 cups all-purpose flour
  • 1 teaspoon baking soda
  • 1 ½ teaspoons baking powder
  • ½ teaspoon salt
  • 1 teaspoon cinnamon
  • 2 cups grated carrots
  • 1 cup shredded sweetened coconut
  • 1 cup chopped nuts optional
  • 1 teaspoon vanilla extract
  • 1 cup crushed pineapple not drained; use pineapple in juice, not syrup
For the Cream Cheese Frosting:
  • ½ cup butter softened
  • 8 ounces cream cheese softened
  • 1 teaspoon vanilla extract
  • 1 pound 16 oz powdered sugar
Optional Toppings:
  • Toasted pecans
  • Toasted coconut

Method
 

  1. Prepare the Cake Batter : Preheat your oven to 350°F (175°C). Grease and lightly flour two 9-inch round cake pans or a 9×13-inch baking dish. In a large mixing bowl, whisk together the applesauce (or oil), granulated sugar, and eggs until well combined and creamy. In a separate bowl, sift together the flour, baking soda, baking powder, salt, and cinnamon. Gradually add the dry ingredients to the wet mixture, stirring just until combined. Avoid overmixing. Gently fold in the grated carrots, shredded coconut, nuts (if using), vanilla extract, and crushed pineapple, including its juice. Mix until evenly distributed.
  2. Bake the Cake : Pour the batter evenly into the prepared pans. Smooth the tops with a spatula. Bake for 30-35 minutes (round pans) or 40-45 minutes (9×13 pan), or until a toothpick inserted in the center comes out clean. Remove from the oven and let the cake cool in the pans for 10 minutes. Transfer to a wire rack to cool completely before frosting.
  3. Make the Cream Cheese Frosting : In a large bowl, beat the softened butter and cream cheese together until smooth and creamy. Add the vanilla extract and gradually mix in the powdered sugar, beating on low speed until fully incorporated and fluffy.
  4. Frost and Decorate the Cake : If using round pans, level the cake layers if necessary. Place one layer on a serving plate and spread a generous layer of frosting on top. Add the second cake layer and frost the top and sides evenly. For a 9×13 cake, simply frost the top. Sprinkle toasted pecans or coconut on top for added crunch and decoration.

Decadent German Chocolate Cheesecake

If you’re a fan of rich, chocolatey desserts, this German Chocolate Cheesecake is the ultimate indulgence. Combining a creamy chocolate cheesecake filling with a buttery Oreo crust and a luxurious coconut-pecan topping, this dessert takes the classic German Chocolate Cake to a whole new level. Perfect for celebrations or to satisfy your sweet tooth, this show-stopping cheesecake will leave everyone asking for seconds.

Ingredients

For the Coconut-Pecan Topping:

  • 4 large egg yolks
  • 12 oz can evaporated milk
  • 1 1/2 tsp vanilla extract
  • 1 1/2 cups sugar
  • 3/4 cup unsalted butter, cubed
  • 2 2/3 cups sweetened shredded coconut
  • 1 1/4 cups pecans, toasted and chopped

For the Crust:

  • 2 1/2 cups Oreo crumbs (about 24 Oreos, finely crushed)
  • 1/4 cup unsalted butter, melted

For the Cheesecake Filling:

  • 24 oz cream cheese, softened to room temperature
  • 1 cup sugar
  • 1 tbsp all-purpose flour
  • 3 tbsp unsweetened cocoa powder
  • 1 cup sour cream, room temperature
  • 1/2 tsp vanilla extract
  • 8 oz German chocolate, melted and cooled
  • 4 large eggs, room temperature

Optional for Garnish:

  • Chocolate ganache or chocolate sauce

Instructions

  1. Prepare the Coconut-Pecan Topping : In a medium saucepan, whisk together the egg yolks, evaporated milk, and vanilla extract. Add the sugar and cubed butter. Cook over medium heat, stirring constantly, until the mixture thickens (about 10 minutes). Remove from heat and stir in the shredded coconut and toasted pecans. Allow the topping to cool completely before using.
  2. Make the Oreo Crust : Preheat the oven to 325°F (163°C). In a medium bowl, mix the Oreo crumbs and melted butter until evenly combined. Press the mixture into the bottom of a 9-inch springform pan, creating an even layer. Bake for 8-10 minutes, then set aside to cool.
  3. Prepare the Cheesecake Filling : In a large mixing bowl, beat the cream cheese and sugar on medium speed until smooth and creamy. Add the flour and cocoa powder, mixing until well combined.Mix in the sour cream and vanilla extract, followed by the melted German chocolate. Add the eggs one at a time, mixing on low speed after each addition. Be careful not to overmix to prevent air bubbles.
  4. Assemble and Bake the Cheesecake : Pour the cheesecake filling over the cooled Oreo crust in the springform pan. Place the pan in a water bath by setting it in a larger baking dish and filling the dish with 1 inch of hot water. This prevents cracks in the cheesecake. Bake at 325°F (163°C) for 75-85 minutes, or until the edges are set and the center has a slight jiggle. Turn off the oven, crack the door slightly, and let the cheesecake cool inside for 1 hour. Remove the cheesecake from the water bath and allow it to cool to room temperature. Refrigerate for at least 4 hours, preferably overnight.
  5. Add the Coconut-Pecan Topping : Once the cheesecake is fully chilled, spread the coconut-pecan topping evenly over the top. Optional: Drizzle with chocolate ganache or sauce for an extra decadent touch.
  6. Serve and Enjoy : Slice the cheesecake with a sharp knife, wiping the blade clean between cuts for neat slices. Serve chilled and enjoy the layers of chocolatey, nutty, and creamy goodness!

Conclusion

This German Chocolate Cheesecake is a dessert like no other, combining the best elements of German Chocolate Cake with the creamy texture of cheesecake. The rich chocolate filling, buttery crust, and irresistible coconut-pecan topping make this a dessert that’s truly unforgettable. Serve it at your next gathering or indulge in a slice all for yourself—either way, it’s pure decadence.

German Chocolate Cheesecake

This German Chocolate Cheesecake is a dessert likeno other, combining the best elements of German Chocolate Cake with the creamytexture of cheesecake.
Prep Time 30 minutes
Cook Time 1 hour 15 minutes
Resting Time 5 hours 30 minutes
Total Time 7 hours 15 minutes
Servings: 12 Slice
Course: Dessert
Cuisine: American
Calories: 600

Ingredients
  

For the Coconut-Pecan Topping:
  • 4 large egg yolks
  • 12 oz can evaporated milk
  • 1 1/2 tsp vanilla extract
  • 1 1/2 cups sugar
  • 3/4 cup unsalted butter cubed
  • 2 2/3 cups sweetened shredded coconut
  • 1 1/4 cups pecans toasted and chopped
For the Crust:
  • 2 1/2 cups Oreo crumbs about 24 Oreos, finely crushed
  • 1/4 cup unsalted butter melted
For the Cheesecake Filling:
  • 24 oz cream cheese softened to room temperature
  • 1 cup sugar
  • 1 tbsp all-purpose flour
  • 3 tbsp unsweetened cocoa powder
  • 1 cup sour cream room temperature
  • 1/2 tsp vanilla extract
  • 8 oz German chocolate melted and cooled
  • 4 large eggs room temperature
Optional for Garnish:
  • Chocolate ganache or chocolate sauce

Method
 

  1. Prepare the Coconut-Pecan Topping : In a medium saucepan, whisk together the egg yolks, evaporated milk, and vanilla extract. Add the sugar and cubed butter. Cook over medium heat, stirring constantly, until the mixture thickens (about 10 minutes). Remove from heat and stir in the shredded coconut and toasted pecans. Allow the topping to cool completely before using.
  2. Make the Oreo Crust : Preheat the oven to 325°F (163°C). In a medium bowl, mix the Oreo crumbs and melted butter until evenly combined. Press the mixture into the bottom of a 9-inch springform pan, creating an even layer. Bake for 8-10 minutes, then set aside to cool.
  3. Prepare the Cheesecake Filling : In a large mixing bowl, beat the cream cheese and sugar on medium speed until smooth and creamy. Add the flour and cocoa powder, mixing until well combined. Mix in the sour cream and vanilla extract, followed by the melted German chocolate. Add the eggs one at a time, mixing on low speed after each addition. Be careful not to overmix to prevent air bubbles.
  4. Assemble and Bake the Cheesecake : Pour the cheesecake filling over the cooled Oreo crust in the springform pan. Place the pan in a water bath by setting it in a larger baking dish and filling the dish with 1 inch of hot water. This prevents cracks in the cheesecake. Bake at 325°F (163°C) for 75-85 minutes, or until the edges are set and the center has a slight jiggle. Turn off the oven, crack the door slightly, and let the cheesecake cool inside for 1 hour. Remove the cheesecake from the water bath and allow it to cool to room temperature. Refrigerate for at least 4 hours, preferably overnight.
  5. Add the Coconut-Pecan Topping : Once the cheesecake is fully chilled, spread the coconut-pecan topping evenly over the top. Optional: Drizzle with chocolate ganache or sauce for an extra decadent touch.
  6. Serve and Enjoy : Slice the cheesecake with a sharp knife, wiping the blade clean between cuts for neat slices. Serve chilled and enjoy the layers of chocolatey, nutty, and creamy goodness!

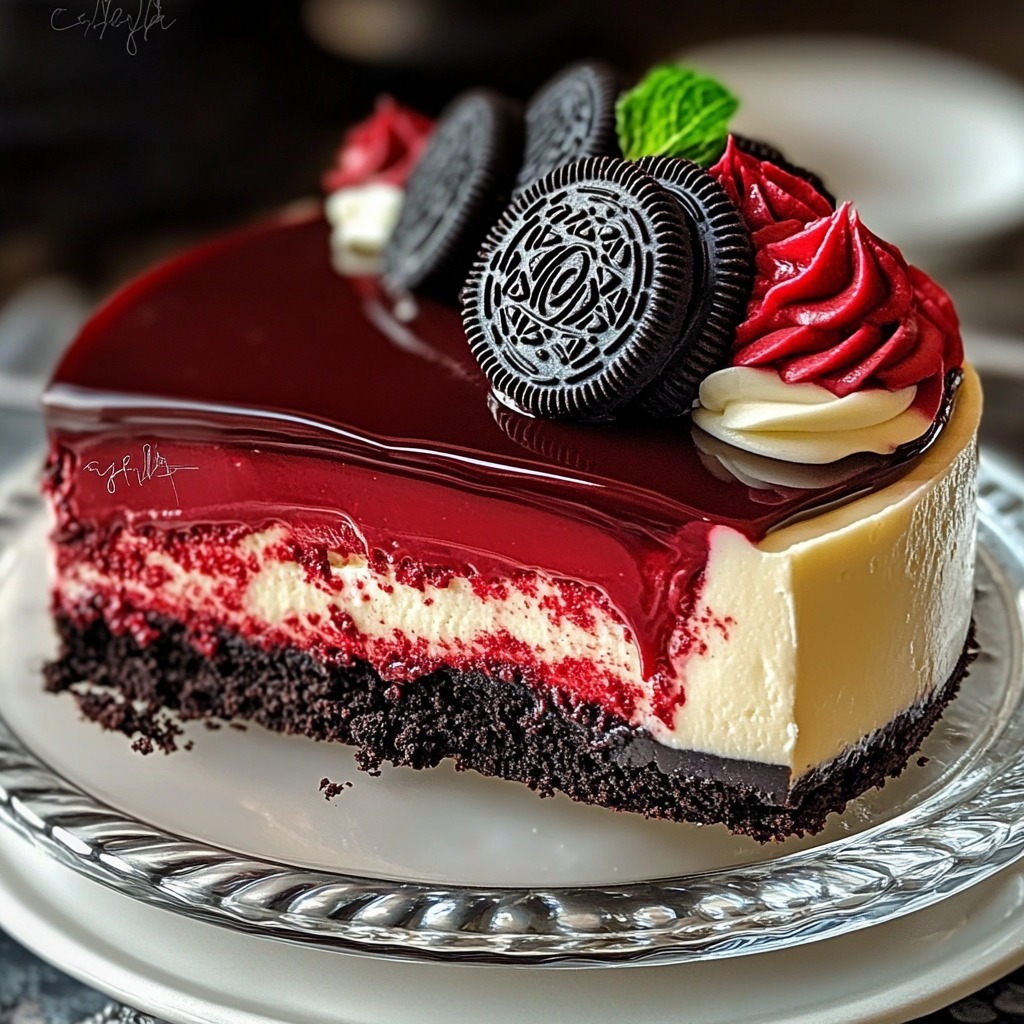
Red Velvet Oreo Cheesecake with Chocolate Ganache

Indulge in the perfect fusion of flavors with this Red Velvet Oreo Cheesecake. Combining the tangy richness of red velvet cake, the creaminess of Oreo-infused cheesecake, and the luxurious smoothness of chocolate ganache, this dessert is a showstopper. Perfect for celebrations or simply treating yourself, this layered masterpiece is as stunning as it is delicious. The crunchy Oreo crust and vibrant red velvet base make every bite an unforgettable experience.

Ingredients

For the Red Velvet Cake Layer:

  • 1 1/2 cups all-purpose flour
  • 2 tsp unsweetened cocoa powder
  • 1/2 tsp salt
  • 1/2 cup unsalted butter, at room temperature
  • 1 cup granulated sugar
  • 1/2 cup sour cream, at room temperature
  • 1/4 cup vegetable oil
  • 2 tsp pure vanilla extract
  • 2 large eggs, at room temperature
  • 4 tsp red food coloring
  • 2/3 cup buttermilk, at room temperature
  • 1 tsp baking soda
  • 1 tsp white vinegar

For the Oreo Cheesecake Layer:

  • 10 Oreo cookies (filling removed, wafers crushed), for the crust
  • 24 oz full-fat cream cheese, softened to room temperature
  • Oreo filling from the above 10 cookies
  • 1 cup granulated sugar
  • 1 tbsp cornstarch or all-purpose flour
  • 1 cup sour cream, at room temperature
  • 1 tbsp pure vanilla extract
  • 2 large eggs + 1 egg yolk, at room temperature
  • 15 Oreos (chopped), for texture

For the Chocolate Ganache:

  • 1 cup dark chocolate chips
  • 1/2 cup heavy cream

For Decoration:

  • 1 can store-bought cream cheese frosting
  • 8 chopped Oreos, for garnish

Instructions

  1. Prepare the Red Velvet Cake Layer : Preheat the oven to 350°F (175°C). Grease and line the bottom of a 9-inch springform pan. In a medium bowl, whisk together flour, cocoa powder, and salt. In a large bowl, beat butter and sugar until light and fluffy. Add sour cream, vegetable oil, and vanilla extract, and mix until smooth. Beat in the eggs, one at a time, followed by the red food coloring. Gradually mix in the dry ingredients, alternating with the buttermilk, starting and ending with the dry ingredients. Stir in the baking soda and vinegar until just combined. Pour the batter into the prepared pan and bake for 20-25 minutes, or until a toothpick comes out clean. Let the cake cool completely in the pan.
  2. Make the Oreo Cheesecake Layer Lower the oven temperature to 325°F (163°C).Spread the crushed Oreo wafers evenly over the cooled cake layer, pressing gently to form a thin crust.In a large bowl, beat the cream cheese, Oreo filling, and sugar until smooth. Add the cornstarch and mix well.Beat in the sour cream and vanilla extract until combined. Add the eggs and egg yolk one at a time, mixing gently to avoid overbeating.Fold in the chopped Oreos.Pour the cheesecake batter over the Oreo crust in the springform pan. Place the pan in a water bath and bake for 55-65 minutes, or until the center is just set.Turn off the oven, crack the door slightly, and let the cheesecake cool for 1 hour. Chill in the refrigerator for at least 4 hours or overnight.
  3. Prepare the Chocolate Ganache : Heat the heavy cream in a small saucepan over medium heat until it begins to simmer. Pour the hot cream over the dark chocolate chips in a bowl. Let sit for 2 minutes, then stir until smooth and glossy. Let the ganache cool slightly before spreading it evenly over the chilled cheesecake.
  4. Decorate and Serve : Pipe cream cheese frosting around the edges of the cheesecake for decoration. Sprinkle chopped Oreos on top as garnish. Slice and serve chilled for the ultimate dessert experience.

Conclusion

This Red Velvet Oreo Cheesecake with Chocolate Ganache is a dessert lover’s dream. With its velvety cake base, creamy Oreo cheesecake layer, and decadent chocolate ganache topping, it’s a showpiece that tastes as good as it looks. Perfect for birthdays, holidays, or any special occasion, this dessert is bound to impress. Try it out and delight your guests with every indulgent bite.

Red Velvet Oreo Cheesecake with Chocolate Ganache

This Red Velvet Oreo Cheesecake with ChocolateGanache is a dessert lover’s dream. With its velvety cake base, creamy Oreocheesecake layer, and decadent chocolate ganache topping, it’s a showpiece thattastes as good as it looks.
Prep Time 30 minutes
Cook Time 1 hour 30 minutes
Resting Time 4 hours
Total Time 6 hours
Servings: 12 Slice
Course: Dessert
Cuisine: American
Calories: 550

Ingredients
  

For the Red Velvet Cake Layer:
  • 1 1/2 cups all-purpose flour
  • 2 tsp unsweetened cocoa powder
  • 1/2 tsp salt
  • 1/2 cup unsalted butter at room temperature
  • 1 cup granulated sugar
  • 1/2 cup sour cream at room temperature
  • 1/4 cup vegetable oil
  • 2 tsp pure vanilla extract
  • 2 large eggs at room temperature
  • 4 tsp red food coloring
  • 2/3 cup buttermilk at room temperature
  • 1 tsp baking soda
  • 1 tsp white vinegar
For the Oreo Cheesecake Layer:
  • 10 Oreo cookies filling removed, wafers crushed, for the crust
  • 24 oz full-fat cream cheese softened to room temperature
  • Oreo filling from the above 10 cookies
  • 1 cup granulated sugar
  • 1 tbsp cornstarch or all-purpose flour
  • 1 cup sour cream at room temperature
  • 1 tbsp pure vanilla extract
  • 2 large eggs + 1 egg yolk at room temperature
  • 15 Oreos chopped, for texture
For the Chocolate Ganache:
  • 1 cup dark chocolate chips
  • 1/2 cup heavy cream
For Decoration:
  • 1 can store-bought cream cheese frosting
  • 8 chopped Oreos for garnish

Method
 

  1. Prepare the Red Velvet Cake Layer : Preheat the oven to 350°F (175°C). Grease and line the bottom of a 9-inch springform pan. In a medium bowl, whisk together flour, cocoa powder, and salt. In a large bowl, beat butter and sugar until light and fluffy. Add sour cream, vegetable oil, and vanilla extract, and mix until smooth. Beat in the eggs, one at a time, followed by the red food coloring. Gradually mix in the dry ingredients, alternating with the buttermilk, starting and ending with the dry ingredients. Stir in the baking soda and vinegar until just combined. Pour the batter into the prepared pan and bake for 20-25 minutes, or until a toothpick comes out clean. Let the cake cool completely in the pan.
  2. Make the Oreo Cheesecake Layer Lower the oven temperature to 325°F (163°C). Spread the crushed Oreo wafers evenly over the cooled cake layer, pressing gently to form a thin crust. In a large bowl, beat the cream cheese, Oreo filling, and sugar until smooth. Add the cornstarch and mix well. Beat in the sour cream and vanilla extract until combined. Add the eggs and egg yolk one at a time, mixing gently to avoid overbeating. Fold in the chopped Oreos. Pour the cheesecake batter over the Oreo crust in the springform pan. Place the pan in a water bath and bake for 55-65 minutes, or until the center is just set. Turn off the oven, crack the door slightly, and let the cheesecake cool for 1 hour. Chill in the refrigerator for at least 4 hours or overnight.
  3. Prepare the Chocolate Ganache : Heat the heavy cream in a small saucepan over medium heat until it begins to simmer. Pour the hot cream over the dark chocolate chips in a bowl. Let sit for 2 minutes, then stir until smooth and glossy. Let the ganache cool slightly before spreading it evenly over the chilled cheesecake.
  4. Decorate and Serve : Pipe cream cheese frosting around the edges of the cheesecake for decoration. Sprinkle chopped Oreos on top as garnish. Slice and serve chilled for the ultimate dessert experience.

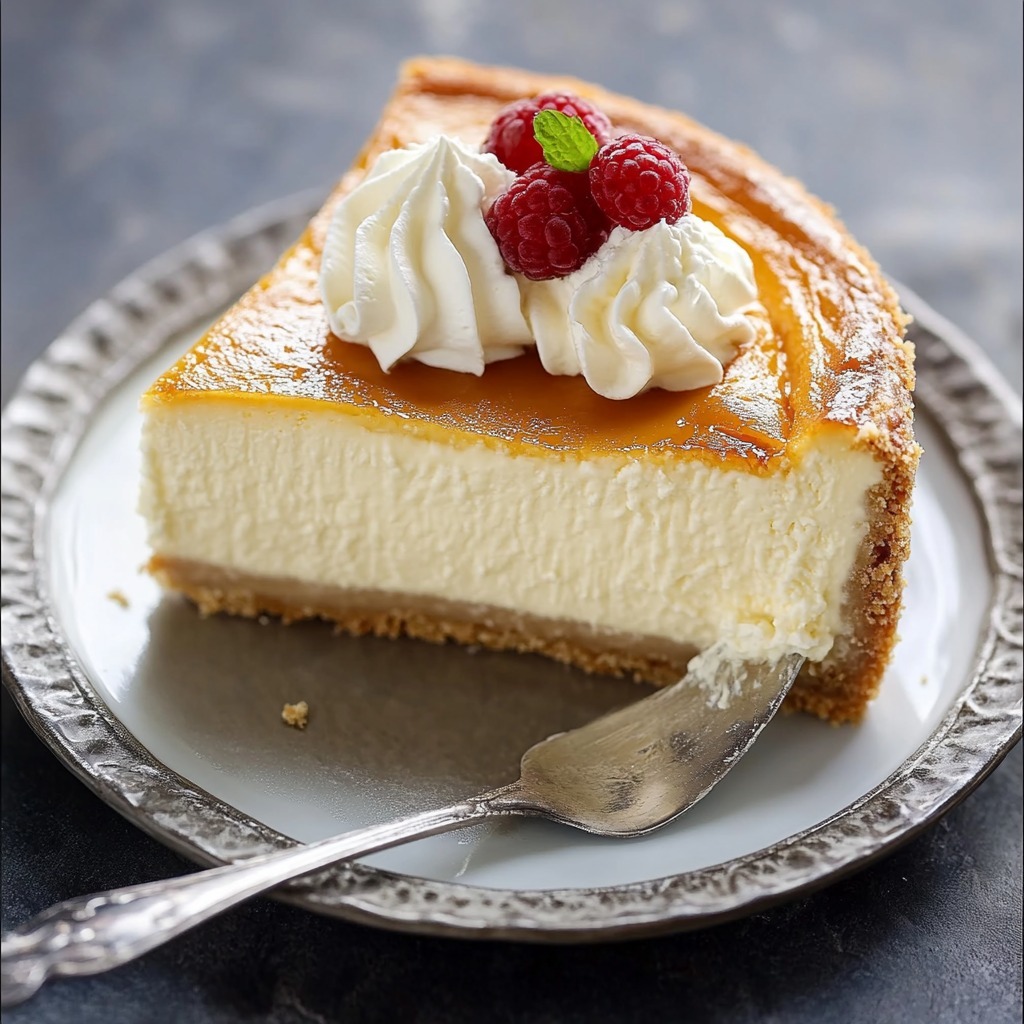
Creamy Indulgence: The Ultimate Cheesecake Recipe

Cheesecake is a timeless dessert, loved for its rich, creamy texture and buttery crust. This ultimate cheesecake recipe combines a smooth, luscious filling with a perfectly crisp graham cracker crust, making it an ideal treat for any occasion. Whether you’re celebrating a birthday, hosting a dinner party, or just indulging in a well-deserved sweet treat, this cheesecake is sure to impress. With a few simple ingredients and a touch of love, you’ll create a dessert that rivals even the best bakeries.

Ingredients

For the Crust :

  • 2 cups (198 grams) graham cracker crumbs
  • 1/3 cup (67 grams) sugar
  • 7 tablespoons (99 grams) butter, melted

For the Creamy Cheesecake Filling :

  • 5 blocks (40 ounces) full-fat cream cheese, softened to room temperature
  • 1 and 1/2 cups (300 grams) granulated sugar
  • 2 teaspoons pure vanilla extract
  • 5 large eggs, room temperature
  • 3 large egg yolks, room temperature
  • 1/2 cup (113 grams) heavy cream, room temperature

Instructions

  1. Prepare the Crust: Preheat your oven to 325°F (163°C).In a mixing bowl, combine graham cracker crumbs, sugar, and melted butter. Mix until the crumbs are evenly coated and the texture resembles wet sand.Press the mixture firmly into the bottom of a 9-inch (23 cm) springform pan to form an even layer.Bake the crust for 10 minutes, then set aside to cool while preparing the filling.
  2. Make the Cheesecake Filling: In a large mixing bowl, beat the softened cream cheese and granulated sugar together using an electric mixer on medium speed until smooth and creamy. Add the vanilla extract, then mix in the eggs one at a time, ensuring each egg is fully incorporated before adding the next. Blend in the egg yolks, followed by the heavy cream. Mix until just combined, avoiding overmixing to prevent air bubbles.
  3. Assemble and Bake: Pour the cheesecake filling over the cooled crust, smoothing the top with a spatula.Place the springform pan in a larger baking dish, then fill the baking dish with about 1 inch of hot water to create a water bath. This helps prevent cracking. Bake the cheesecake at 325°F (163°C) for 75-90 minutes, or until the edges are set and the center jiggles slightly when gently shaken.
  4. Cool and Chill: Turn off the oven, crack the door slightly, and let the cheesecake cool inside for 1 hour. Remove the cheesecake from the water bath and cool completely at room temperature. Cover and refrigerate for at least 4 hours, preferably overnight, to fully set before slicing and serving.

Conclusion

This ultimate cheesecake is the perfect dessert for any sweet lover. Its silky-smooth filling and crunchy graham cracker crust make every bite a heavenly experience. Serve it as is, or pair it with your favorite toppings like fresh berries, chocolate drizzle, or whipped cream for a personal touch. No matter how you slice it, this cheesecake will quickly become a family favorite. Happy baking!

Creamy Indulgence: The Ultimate Cheesecake Recipe

A rich and creamy cheesecake with a buttery grahamcracker crust, perfect for any occasion. This dessert is easy to make and guaranteed to impress.
Prep Time 20 minutes
Cook Time 1 hour 30 minutes
Resting Time 6 hours 20 minutes
Total Time 8 hours 10 minutes
Servings: 12 Slice
Course: Dessert
Cuisine: American
Calories: 350

Ingredients
  

For the Crust :
  • 2 cups 198 grams graham cracker crumbs
  • 1/3 cup 67 grams sugar
  • 7 tablespoons 99 grams butter, melted
For the Creamy Cheesecake Filling :
  • 5 blocks 40 ounces full-fat cream cheese, softened to room temperature
  • 1 and 1/2 cups 300 grams granulated sugar
  • 2 teaspoons pure vanilla extract
  • 5 large eggs room temperature
  • 3 large egg yolks room temperature
  • 1/2 cup 113 grams heavy cream, room temperature

Method
 

  1. Prepare the Crust: Preheat your oven to 325°F (163°C). In a mixing bowl, combine graham cracker crumbs, sugar, and melted butter. Mix until the crumbs are evenly coated and the texture resembles wet sand. Press the mixture firmly into the bottom of a 9-inch (23 cm) springform pan to form an even layer. Bake the crust for 10 minutes, then set aside to cool while preparing the filling.
  2. Make the Cheesecake Filling: In a large mixing bowl, beat the softened cream cheese and granulated sugar together using an electric mixer on medium speed until smooth and creamy. Add the vanilla extract, then mix in the eggs one at a time, ensuring each egg is fully incorporated before adding the next. Blend in the egg yolks, followed by the heavy cream. Mix until just combined, avoiding overmixing to prevent air bubbles.
  3. Assemble and Bake: Pour the cheesecake filling over the cooled crust, smoothing the top with a spatula. Place the springform pan in a larger baking dish, then fill the baking dish with about 1 inch of hot water to create a water bath. This helps prevent cracking. Bake the cheesecake at 325°F (163°C) for 75-90 minutes, or until the edges are set and the center jiggles slightly when gently shaken.
  4. Cool and Chill: Turn off the oven, crack the door slightly, and let the cheesecake cool inside for 1 hour. Remove the cheesecake from the water bath and cool completely at room temperature. Cover and refrigerate for at least 4 hours, preferably overnight, to fully set before slicing and serving.

Polar Bear Paws Candy: A Festive Sweet Treat

Bring the magic of the holidays to your kitchen with these Polar Bear Paws Candies. Combining gooey caramel, crunchy roasted peanuts, and creamy white almond bark, these homemade treats are a delightful mix of textures and flavors. Perfect for gifting or as a crowd-pleasing dessert, this recipe is simple to follow and results in a sweet confection that everyone will love.

Ingredients:

  • 11 ounces caramel squares (1 bag)
  • 3 tablespoons heavy whipping cream
  • 1 tablespoon unsalted butter
  • 1 teaspoon vanilla extract
  • 1 cup roasted salted peanuts
  • 1 pound white almond bark
  • Sprinkles (optional)

Instructions:

  1. Melt the Caramel Mixture: In a microwave-safe bowl, combine the caramel squares, heavy whipping cream, and unsalted butter. Microwave in 20–30 second intervals, stirring between each, until the caramel is fully melted and smooth. Stir in the vanilla extract to enhance the flavor.
  2. Add the Peanuts: Fold the roasted salted peanuts into the caramel mixture, ensuring they are evenly coated.
  3. Form the Candy Clusters: Using a spoon, drop small mounds of the caramel-peanut mixture onto a parchment-lined baking sheet. Leave enough space between each cluster to prevent them from sticking together. Allow the clusters to cool and set for about 15–20 minutes.
  4. Melt the White Almond Bark: In a microwave-safe bowl, melt the white almond bark in 20–30 second intervals, stirring frequently until smooth. Alternatively, you can use a double boiler to melt the almond bark gently.
  5. Coat the Candy Clusters: Dip each caramel-peanut cluster into the melted almond bark, ensuring it is fully coated. Use a fork to lift the cluster out and tap off any excess coating. Return the coated clusters to the parchment-lined baking sheet.
  6. Add Decorative Touches: If desired, sprinkle festive decorations, like holiday sprinkles, over the coated clusters before the almond bark sets.
  7. Set and Serve: Allow the candies to set at room temperature or refrigerate them for about 15–20 minutes until the coating is firm. Once set, transfer the candies to an airtight container for storage.

Conclusion:

These Polar Bear Paws Candies are a delightful homemade treat that combines the chewy, nutty sweetness of caramel and peanuts with the creamy richness of white almond bark. Simple to make and perfect for the holiday season, they’re an excellent addition to your festive celebrations or a thoughtful gift for friends and family.

Polar Bear Paws Candy: A Festive Sweet Treat

A sweet and creamy candy featuring caramel, roastedpeanuts, and white almond bark—ideal for festive occasions.
Prep Time 15 minutes
Cook Time 10 minutes
Cooling Time 30 minutes
Total Time 55 minutes
Servings: 20 candies
Course: Dessert
Cuisine: American-inspired
Calories: 120

Ingredients
  

  • 11 ounces caramel squares 1 bag
  • 3 tablespoons heavy whipping cream
  • 1 tablespoon unsalted butter
  • 1 teaspoon vanilla extract
  • 1 cup roasted salted peanuts
  • 1 pound white almond bark
  • Sprinkles optional

Method
 

  1. Melt the Caramel Mixture: In a microwave-safe bowl, combine the caramel squares, heavy whipping cream, and unsalted butter. Microwave in 20–30 second intervals, stirring between each, until the caramel is fully melted and smooth. Stir in the vanilla extract to enhance the flavor.
  2. Add the Peanuts: Fold the roasted salted peanuts into the caramel mixture, ensuring they are evenly coated.
  3. Form the Candy Clusters: Using a spoon, drop small mounds of the caramel-peanut mixture onto a parchment-lined baking sheet. Leave enough space between each cluster to prevent them from sticking together. Allow the clusters to cool and set for about 15–20 minutes.
  4. Melt the White Almond Bark: In a microwave-safe bowl, melt the white almond bark in 20–30 second intervals, stirring frequently until smooth. Alternatively, you can use a double boiler to melt the almond bark gently.
  5. Coat the Candy Clusters: Dip each caramel-peanut cluster into the melted almond bark, ensuring it is fully coated. Use a fork to lift the cluster out and tap off any excess coating. Return the coated clusters to the parchment-lined baking sheet.
  6. Add Decorative Touches: If desired, sprinkle festive decorations, like holiday sprinkles, over the coated clusters before the almond bark sets.
  7. Set and Serve: Allow the candies to set at room temperature or refrigerate them for about 15–20 minutes until the coating is firm. Once set, transfer the candies to an airtight container for storage.

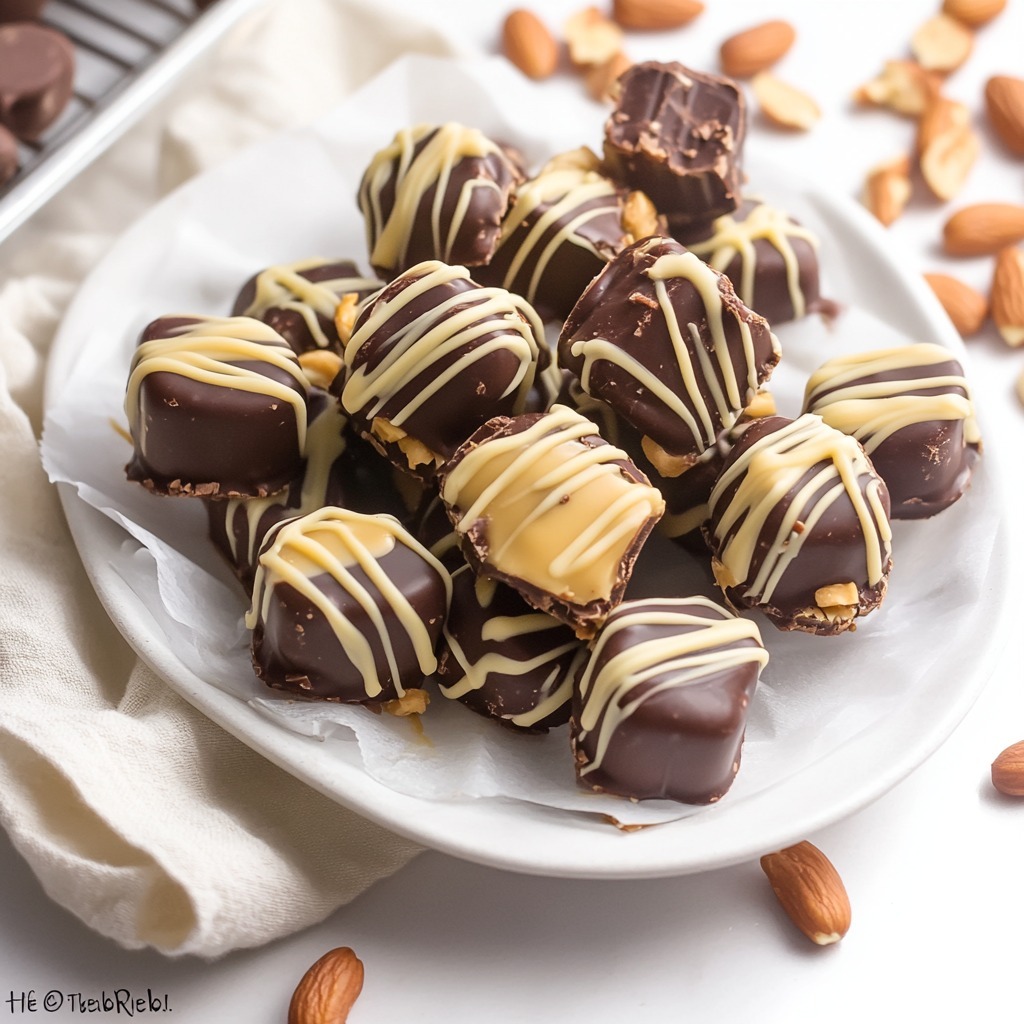
Chocolate Peanut Butter Pretzel Candies: A Sweet and Salty Delight

Indulge in the perfect balance of sweet and salty with these Chocolate Peanut Butter Pretzel Candies. Featuring the creamy richness of peanut butter, the crunch of pretzels, and a luscious chocolate coating, these bite-sized treats are irresistibly delicious. Whether you’re making them for the holidays, a party, or just because, these candies are easy to prepare and guaranteed to satisfy your cravings.

Ingredients:

  • 1 cup peanut butter (creamy or chunky)
  • ½ cup powdered icing sugar
  • 2 tablespoons cream or milk
  • ⅔ cup pretzels, coarsely crushed
  • ½ cup salted peanuts, chopped
  • 1½ cups dark chocolate (about 150g)
  • 1½ cups white chocolate (about 150g)

Instructions:

  1. Prepare the Peanut Butter Filling: In a large mixing bowl, combine the peanut butter, powdered icing sugar, and cream or milk. Mix until smooth and well combined. Gently fold in the crushed pretzels and chopped salted peanuts to create a slightly chunky mixture.
  2. Shape the Candies: Using a spoon or cookie scoop, take small portions of the mixture and roll them into bite-sized balls with your hands. Place the balls on a parchment-lined tray and refrigerate for 30–40 minutes to firm up.
  3. Melt the Chocolate: Melt the dark chocolate and white chocolate separately in heatproof bowls using a microwave in 20-second intervals, stirring after each interval, until smooth. Alternatively, use a double boiler for gentle melting.
  4. Coat the Candies: Dip half of the peanut butter balls in the melted dark chocolate and the other half in the melted white chocolate, ensuring they are fully coated. Place the coated candies back on the parchment-lined tray. For a decorative touch, drizzle the alternate chocolate (dark over white, white over dark) over the top.
  5. Set the Candies: Allow the coated candies to set at room temperature or refrigerate them for 15–20 minutes until the chocolate is firm.
  6. Serve and Enjoy: Once the candies are set, transfer them to a serving dish or store them in an airtight container. Enjoy these sweet and salty treats anytime!

Conclusion:

These Chocolate Peanut Butter Pretzel Candies combine a delightful mix of textures and flavors—creamy, crunchy, sweet, and salty—all in one irresistible bite. Perfect for the holidays, gift-giving, or a snack-time indulgence, these candies are as easy to make as they are to enjoy.

Chocolate Peanut Butter Pretzel Candies: A Sweet and Salty Delight

A sweet and salty treat combining peanut butter,pretzels, peanuts, and chocolate for a crunchy, creamy dessert. Perfect for anyoccasion.
Prep Time 20 minutes
Resting Time 40 minutes
Total Time 1 hour
Servings: 20 candies
Course: Dessert
Cuisine: American-inspired
Calories: 142

Ingredients
  

  • 1 cup peanut butter creamy or chunky
  • ½ cup powdered icing sugar
  • 2 tablespoons cream or milk
  • cup pretzels coarsely crushed
  • ½ cup salted peanuts chopped
  • cups dark chocolate about 150g
  • cups white chocolate about 150g

Method
 

  1. Prepare the Peanut Butter Filling: In a large mixing bowl, combine the peanut butter, powdered icing sugar, and cream or milk. Mix until smooth and well combined. Gently fold in the crushed pretzels and chopped salted peanuts to create a slightly chunky mixture.
  2. Shape the Candies: Using a spoon or cookie scoop, take small portions of the mixture and roll them into bite-sized balls with your hands. Place the balls on a parchment-lined tray and refrigerate for 30–40 minutes to firm up.
  3. Melt the Chocolate: Melt the dark chocolate and white chocolate separately in heatproof bowls using a microwave in 20-second intervals, stirring after each interval, until smooth. Alternatively, use a double boiler for gentle melting.
  4. Coat the Candies: Dip half of the peanut butter balls in the melted dark chocolate and the other half in the melted white chocolate, ensuring they are fully coated. Place the coated candies back on the parchment-lined tray. For a decorative touch, drizzle the alternate chocolate (dark over white, white over dark) over the top.
  5. Set the Candies: Allow the coated candies to set at room temperature or refrigerate them for 15–20 minutes until the chocolate is firm.
  6. Serve and Enjoy: Once the candies are set, transfer them to a serving dish or store them in an airtight container. Enjoy these sweet and salty treats anytime!

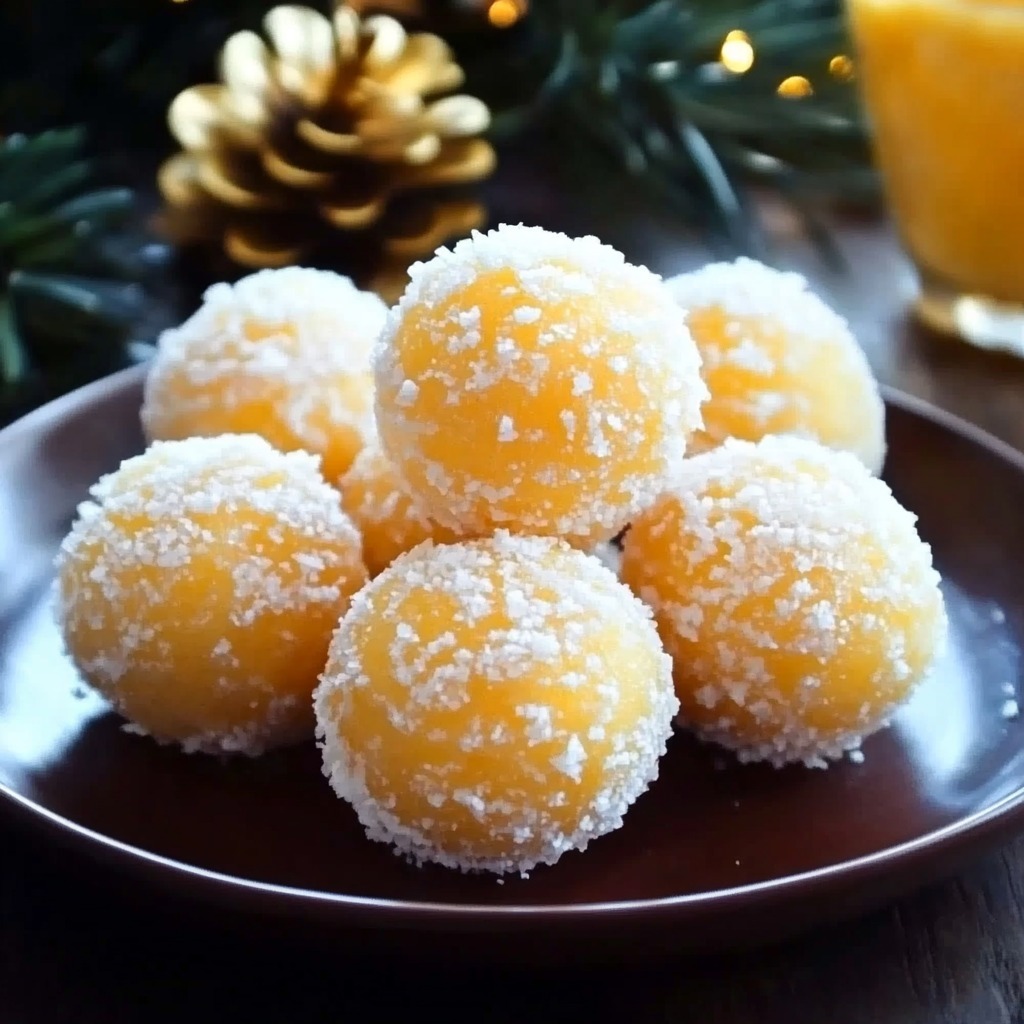
Tropical Pineapple Christmas Balls: A Sweet Holiday Treat

Brighten up your holiday celebrations with these Tropical Pineapple Christmas Balls. Bursting with the tropical flavors of pineapple and coconut, and with a hint of graham cracker sweetness, these no-bake treats are as festive as they are delicious. With their vibrant color and delightful texture, they make a perfect addition to your dessert table or a great edible gift for loved ones.

Ingredients:

  • 398 mL canned crushed pineapple, meticulously drained
  • 8 ounces cream cheese, softened to room temperature
  • 2 cups unsweetened fine desiccated coconut, plus extra for rolling
  • 1/2 cup graham cracker crumbs
  • 3 ounces pineapple-flavored gelatin powder

Instructions:

  1. Prepare the Base Mixture: In a mixing bowl, beat the softened cream cheese until smooth. Gradually add the drained crushed pineapple, ensuring it is fully incorporated and the mixture remains creamy.
  2. Add the Dry Ingredients: Fold in the graham cracker crumbs and 2 cups of desiccated coconut. Sprinkle the pineapple-flavored gelatin powder evenly over the mixture and stir until well blended.
  3. Chill the Mixture: Cover the bowl with plastic wrap and refrigerate for 1–2 hours, or until the mixture is firm enough to shape.
  4. Shape the Balls: Using a small spoon or cookie scoop, take portions of the chilled mixture and roll them into bite-sized balls with your hands.
  5. Coat in Coconut: Roll each ball in the extra desiccated coconut to coat evenly.
  6. Final Chill and Serve: Arrange the coated balls on a parchment-lined tray and refrigerate for an additional 30 minutes to set. Serve chilled for the best flavor and texture.

Conclusion:

These Pineapple Christmas Balls are a refreshing twist on traditional holiday treats. Easy to make and delightfully tropical, they’re a crowd-pleaser that balances creamy, tangy, and sweet flavors. Whether you’re preparing them for a party or as a gift, these festive no-bake desserts are sure to bring holiday cheer.

Tropical Pineapple Christmas Balls: A Sweet Holiday Treat

A no-bake tropical dessert combining pineapple,cream cheese, and coconut for a festive holiday treat. Perfect for entertainingor gifting.
Prep Time 20 minutes
Resting Time 2 hours
Total Time 2 hours 20 minutes
Servings: 20 Balls
Course: Dessert
Cuisine: Tropical-inspired
Calories: 93

Ingredients
  

  • 398 mL canned crushed pineapple meticulously drained
  • 8 ounces cream cheese softened to room temperature
  • 2 cups unsweetened fine desiccated coconut plus extra for rolling
  • 1/2 cup graham cracker crumbs
  • 3 ounces pineapple-flavored gelatin powder

Method
 

  1. Prepare the Base Mixture: In a mixing bowl, beat the softened cream cheese until smooth. Gradually add the drained crushed pineapple, ensuring it is fully incorporated and the mixture remains creamy.
  2. Add the Dry Ingredients: Fold in the graham cracker crumbs and 2 cups of desiccated coconut. Sprinkle the pineapple-flavored gelatin powder evenly over the mixture and stir until well blended.
  3. Chill the Mixture: Cover the bowl with plastic wrap and refrigerate for 1–2 hours, or until the mixture is firm enough to shape.
  4. Shape the Balls: Using a small spoon or cookie scoop, take portions of the chilled mixture and roll them into bite-sized balls with your hands.
  5. Coat in Coconut: Roll each ball in the extra desiccated coconut to coat evenly.
  6. Final Chill and Serve: Arrange the coated balls on a parchment-lined tray and refrigerate for an additional 30 minutes to set. Serve chilled for the best flavor and texture.

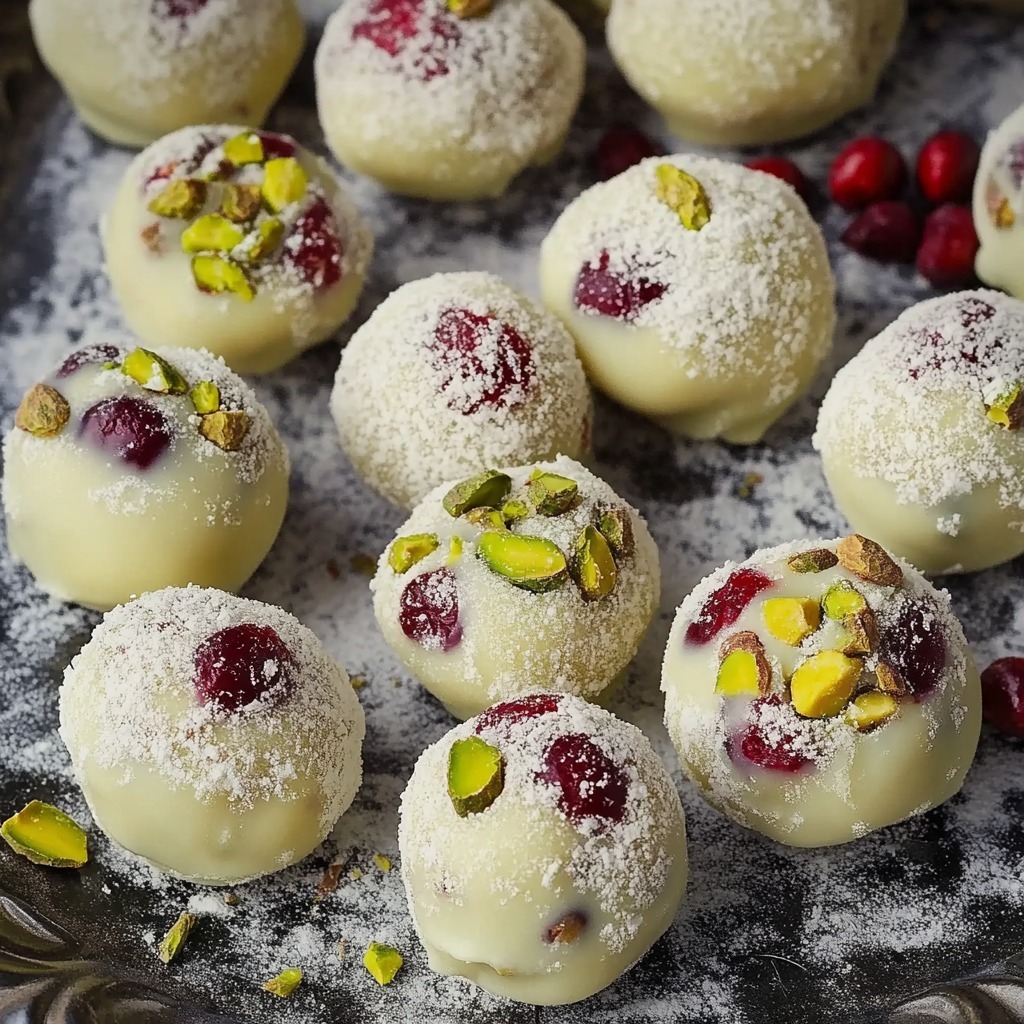
Festive Cranberry Pistachio Truffles with White Chocolate Delight

Looking for the perfect sweet treat to elevate your holiday celebrations? These Festive Cranberry Pistachio Truffles with White Chocolate Delight are a decadent blend of creamy white chocolate, zesty cranberries, and nutty pistachios. With a hint of orange or vanilla extract, these truffles are an irresistible combination of sweet and tangy flavors. Their smooth texture and vibrant colors make them a show-stopping dessert or a thoughtful homemade gift.

Ingredients:

  • 11 oz. white chocolate – chopped into small pieces
  • 5 tablespoons unsalted butter
  • 3 tablespoons heavy cream
  • Pinch of salt
  • 1 teaspoon orange or vanilla extract (optional)
  • 1/3 cup finely chopped dried cranberries
  • 1/3 cup finely chopped toasted pistachios
  • 1/2 cup powdered sugar

Instructions:

  1. Prepare the Ganache: In a heatproof bowl, combine the chopped white chocolate, unsalted butter, heavy cream, and a pinch of salt. Set the bowl over a pot of simmering water (double boiler method) and stir until the mixture is melted and smooth. Stir in the orange or vanilla extract, if using.
  2. Incorporate the Cranberries : Remove the bowl from heat and gently fold in the finely chopped dried cranberries.
  3. Chill the Mixture: Cover the bowl with plastic wrap and refrigerate for 2–3 hours, or until the mixture is firm enough to handle.
  4. Shape the Truffles: Scoop small portions of the mixture using a teaspoon or a small cookie scoop. Roll into bite-sized balls with your hands.
  5. Coat with Pistachios: Roll each truffle in the finely chopped toasted pistachios until fully coated.
  6. Finish with Powdered Sugar: Lightly dust the truffles with powdered sugar for a final touch.
  7. Chill and Serve: Place the truffles on a parchment-lined tray and refrigerate for another 30 minutes to set. Serve chilled or at room temperature.

Conclusion:

These Cranberry Pistachio White Chocolate Truffles are an effortless yet elegant dessert perfect for the holiday season. Their creamy, tangy, and nutty flavors come together in a delightful treat that’s sure to impress. Whether you’re making them as a gift or a festive addition to your table, these truffles are a delicious way to spread cheer.

Festive Cranberry Pistachio Truffles with White Chocolate Delight

A creamy, sweet truffle combining white chocolate,cranberries, and pistachios for a festive holiday treat. Perfect for desserttables or gifting.
Prep Time 15 minutes
Resting Time 3 hours
Total Time 3 hours 15 minutes
Servings: 20 Truffles
Course: Dessert
Cuisine: American
Calories: 110

Ingredients
  

  • 11 oz. white chocolate – chopped into small pieces
  • 5 tablespoons unsalted butter
  • 3 tablespoons heavy cream
  • Pinch of salt
  • 1 teaspoon orange or vanilla extract optional
  • 1/3 cup finely chopped dried cranberries
  • 1/3 cup finely chopped toasted pistachios
  • 1/2 cup powdered sugar

Method
 

  1. Prepare the Ganache: In a heatproof bowl, combine the chopped white chocolate, unsalted butter, heavy cream, and a pinch of salt. Set the bowl over a pot of simmering water (double boiler method) and stir until the mixture is melted and smooth. Stir in the orange or vanilla extract, if using.
  2. Incorporate the Cranberries : Remove the bowl from heat and gently fold in the finely chopped dried cranberries.
  3. Chill the Mixture: Cover the bowl with plastic wrap and refrigerate for 2–3 hours, or until the mixture is firm enough to handle.
  4. Shape the Truffles: Scoop small portions of the mixture using a teaspoon or a small cookie scoop. Roll into bite-sized balls with your hands.
  5. Coat with Pistachios: Roll each truffle in the finely chopped toasted pistachios until fully coated.
  6. Finish with Powdered Sugar: Lightly dust the truffles with powdered sugar for a final touch.
  7. Chill and Serve: Place the truffles on a parchment-lined tray and refrigerate for another 30 minutes to set. Serve chilled or at room temperature.

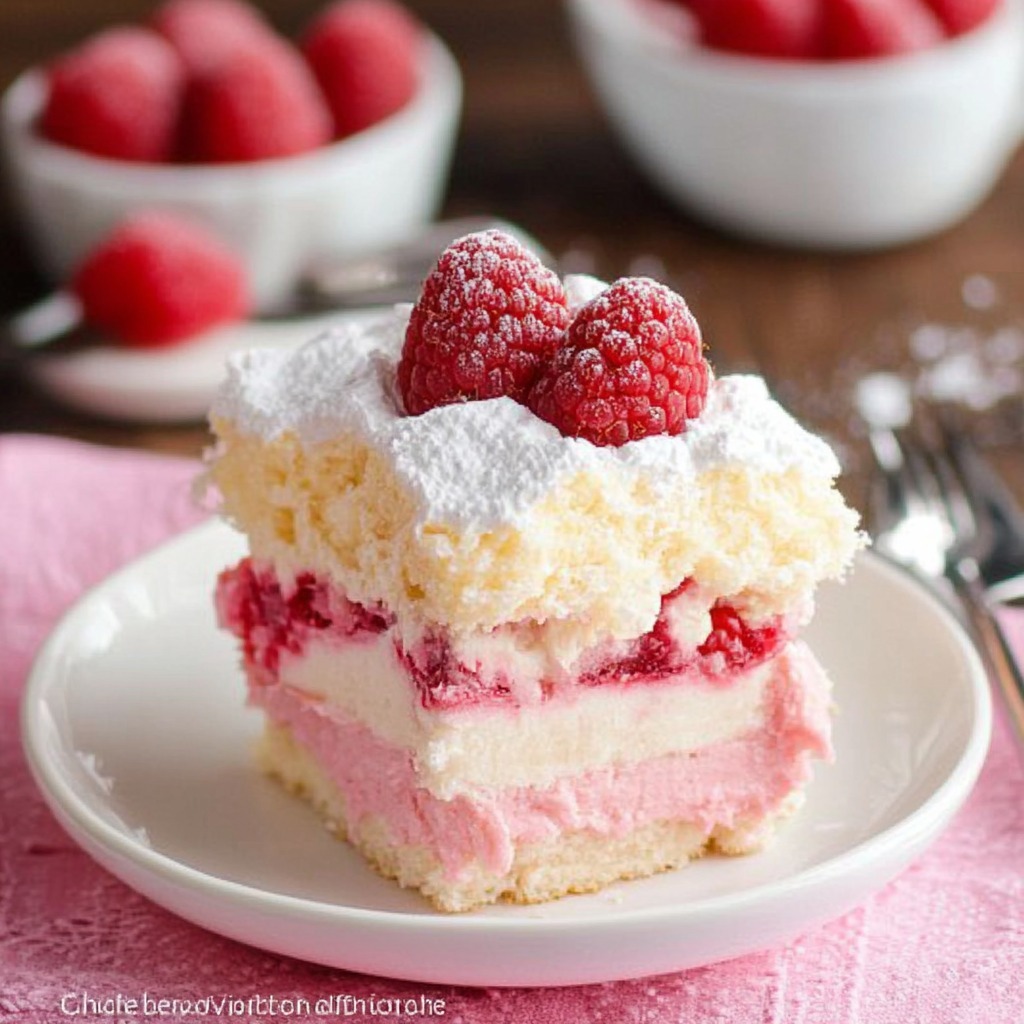
Elegant White Chocolate Raspberry Tiramisu

Transform a classic Italian dessert into a luscious and fruity masterpiece with this White Chocolate Raspberry Tiramisu. Layers of delicate ladyfingers soaked in homemade raspberry syrup, paired with a creamy mascarpone filling, make this dessert a showstopper. Finished with shavings of white chocolate, this tiramisu is a sophisticated treat that’s perfect for holidays, gatherings, or simply when you’re craving something extraordinary!

Ingredients:

Raspberry Syrup:

  • 4 cups raspberries (fresh or frozen)
  • ½ cup water
  • ¾ cup granulated sugar
  • 1 tablespoon lemon juice

Mascarpone Filling:

  • 1 ½ cups heavy cream
  • 16 ounces mascarpone cheese
  • ¾ cup granulated sugar
  • ¾ cup raspberry syrup (from the recipe above)
  • 1 teaspoon vanilla extract

For Assembly:

  • 1 (7 oz) package Savoiardi ladyfingers (about 24)
  • 1 ounce good-quality white chocolate (e.g., Lindt)

Instructions:

  1. Prepare the Raspberry Syrup: In a medium saucepan, combine raspberries, water, and sugar. Bring to a boil over medium heat, stirring occasionally. Reduce the heat and simmer for 10 minutes, mashing the raspberries to release their juices. Strain the mixture through a fine mesh sieve into a bowl, discarding the seeds. Stir in the lemon juice and let the syrup cool completely.
  2. Make the Mascarpone Filling: In a large mixing bowl, whip the heavy cream to soft peaks. Set aside. In another bowl, beat the mascarpone cheese, sugar, raspberry syrup, and vanilla extract until smooth and well combined. Gently fold the whipped cream into the mascarpone mixture to create a light, fluffy filling.
  3. Assemble the Tiramisu: Dip each ladyfinger briefly into the cooled raspberry syrup, ensuring they are coated but not soggy. Arrange a single layer of syrup-dipped ladyfingers in the bottom of a 9×9-inch dish or similar serving dish. Spread half of the mascarpone filling evenly over the ladyfingers. Repeat the layers with the remaining ladyfingers and mascarpone filling.
  4. Decorate with White Chocolate : Grate or shave the white chocolate over the top layer of mascarpone filling to garnish.
  5. Chill and Serve: Cover the tiramisu with plastic wrap and refrigerate for at least 4 hours or overnight to allow the flavors to meld. Serve chilled, slicing into squares or scooping into dessert dishes.

Conclusion:

This White Chocolate Raspberry Tiramisu is a dessert that balances elegance and indulgence. The tangy raspberry syrup complements the creamy mascarpone filling, while the white chocolate adds a touch of decadence. It’s a no-bake masterpiece that’s easy to make yet sophisticated enough to impress any crowd. Perfect for entertaining or treating yourself to something special!

Elegant White Chocolate Raspberry Tiramisu

A fruity twist on a classic tiramisu, featuringraspberry-soaked ladyfingers layered with mascarpone cream and topped withwhite chocolate. This no-bake dessert is light, creamy, and irresistiblydelicious.
Prep Time 30 minutes
Cook Time 10 minutes
Resting Time 4 hours
Total Time 4 hours 40 minutes
Servings: 8
Course: Dessert
Cuisine: Italian-inspired
Calories: 352

Ingredients
  

Raspberry Syrup:
  • 4 cups raspberries fresh or frozen
  • ½ cup water
  • ¾ cup granulated sugar
  • 1 tablespoon lemon juice
Mascarpone Filling:
  • 1 ½ cups heavy cream
  • 16 ounces mascarpone cheese
  • ¾ cup granulated sugar
  • ¾ cup raspberry syrup from the recipe above
  • 1 teaspoon vanilla extract
For Assembly:
  • 1 7 oz package Savoiardi ladyfingers (about 24)
  • 1 ounce good-quality white chocolate e.g., Lindt

Method
 

  1. Prepare the Raspberry Syrup: In a medium saucepan, combine raspberries, water, and sugar. Bring to a boil over medium heat, stirring occasionally. Reduce the heat and simmer for 10 minutes, mashing the raspberries to release their juices. Strain the mixture through a fine mesh sieve into a bowl, discarding the seeds. Stir in the lemon juice and let the syrup cool completely.
  2. Make the Mascarpone Filling: In a large mixing bowl, whip the heavy cream to soft peaks. Set aside. In another bowl, beat the mascarpone cheese, sugar, raspberry syrup, and vanilla extract until smooth and well combined. Gently fold the whipped cream into the mascarpone mixture to create a light, fluffy filling.
  3. Assemble the Tiramisu: Dip each ladyfinger briefly into the cooled raspberry syrup, ensuring they are coated but not soggy. Arrange a single layer of syrup-dipped ladyfingers in the bottom of a 9×9-inch dish or similar serving dish. Spread half of the mascarpone filling evenly over the ladyfingers. Repeat the layers with the remaining ladyfingers and mascarpone filling.
  4. Decorate with White Chocolate : Grate or shave the white chocolate over the top layer of mascarpone filling to garnish.
  5. Chill and Serve: Cover the tiramisu with plastic wrap and refrigerate for at least 4 hours or overnight to allow the flavors to meld. Serve chilled, slicing into squares or scooping into dessert dishes.

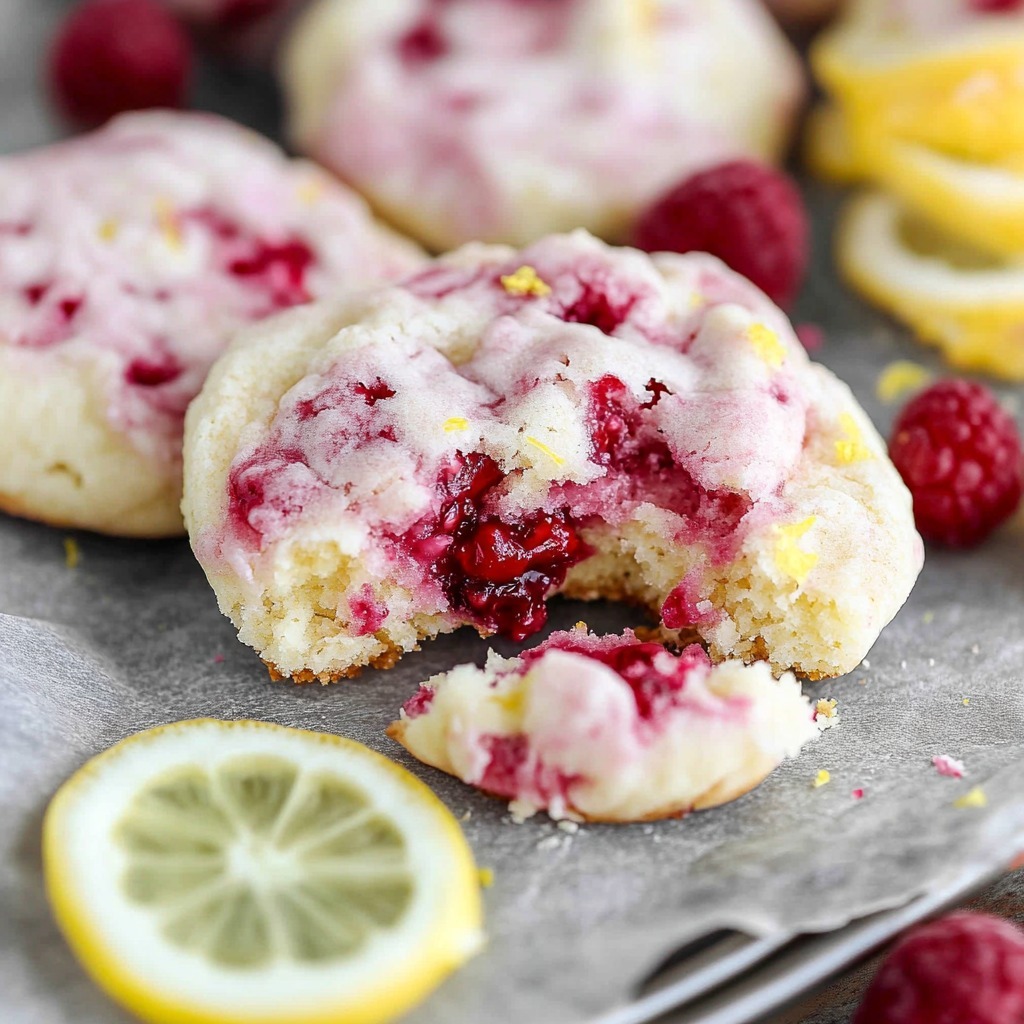
Lemon Raspberry Cookies with a Zesty Glaze

Bright, tangy, and sweet, these Lemon Raspberry Cookies are the perfect treat for any occasion! The gluten-free dough, infused with fresh lemon zest and dotted with chopped raspberries, creates a soft and flavorful cookie that’s as beautiful as it is delicious. Topped with a raspberry-tinted glaze, these cookies bring a burst of sunshine and sweetness to your table. Whether you’re accommodating dietary preferences or just craving something unique, this recipe is a delightful choice.

Ingredients:

For the Cookies:

  • 2 cups gluten-free flour (with xanthan gum, if available)
  • 1 ½ teaspoons baking powder
  • ½ teaspoon kosher salt
  • ½ cup unsalted butter or vegan baking stick, at room temperature
  • 1 ¼ cups granulated sugar
  • 2 heaping tablespoons cornstarch mixed with 3 tablespoons water (vegan egg alternative)
  • 3 tablespoons milk (or plant-based milk for vegan option)
  • 2 tablespoons fresh-squeezed lemon juice (from ~1 medium lemon)
  • 1 tablespoon lemon zest (from ~2 medium lemons)
  • ½ cup frozen raspberries, chopped

For the Lemon Sugar:

  • 3 tablespoons granulated sugar
  • 1 teaspoon lemon zest (from ~1 medium lemon)

For the Glaze:

  • 1 cup confectioners’ sugar
  • 1–2 frozen raspberries
  • 1 tablespoon + 1 teaspoon water

Instructions:

  1. Prepare the Cookie Dough: Preheat your oven to 350°F (175°C) and line a baking sheet with parchment paper. In a medium bowl, whisk together the gluten-free flour, baking powder, and kosher salt. Set aside. In a large mixing bowl, cream the butter and granulated sugar until light and fluffy. Add the cornstarch-water mixture, milk, lemon juice, and lemon zest. Mix until combined. Gradually add the dry ingredients to the wet ingredients, mixing until a soft dough forms. Fold in the chopped frozen raspberries gently to avoid excessive bleeding.
  2. Shape and Bake the Cookies: Scoop tablespoon-sized portions of dough and roll into balls. Flatten slightly and place on the prepared baking sheet, spacing them about 2 inches apart. Bake for 12–15 minutes, or until the edges are set and the cookies are lightly golden. Allow the cookies to cool on the baking sheet for 5 minutes before transferring them to a wire rack to cool completely.
  3. Make the Lemon Sugar: In a small bowl, mix the granulated sugar with the lemon zest. Rub the zest into the sugar with your fingers to release the aromatic oils. Sprinkle the lemon sugar lightly over the warm cookies.
  4. Prepare the Glaze:In a small bowl, mash the frozen raspberries to extract their juice. Mix the confectioners’ sugar with the raspberry juice and water until smooth. Adjust the consistency with additional water or sugar as needed. Drizzle or spread the glaze over the cooled cookies. Allow the glaze to set for 10–15 minutes before serving.

Conclusion:

These Lemon Raspberry Cookies are a delightful combination of zesty citrus and sweet berries, offering a light yet indulgent dessert. With a tender crumb, bursts of raspberry, and a vibrant glaze, they’re sure to impress family and friends. Whether you’re baking for a party, a picnic, or just a cozy day at home, these cookies are a guaranteed hit!

Lemon Raspberry Cookies with a Zesty Glaze

Soft and citrusy gluten-free cookies packed withlemon zest and raspberries, topped with a naturally pink raspberry glaze. Arefreshing and unique treat for any occasion!
Prep Time 15 minutes
Cook Time 25 minutes
Total Time 40 minutes
Servings: 16 Cookies
Course: Dessert
Cuisine: American
Calories: 120

Ingredients
  

For the Cookies:
  • 2 cups gluten-free flour with xanthan gum, if available
  • 1 ½ teaspoons baking powder
  • ½ teaspoon kosher salt
  • ½ cup unsalted butter or vegan baking stick at room temperature
  • 1 ¼ cups granulated sugar
  • 2 heaping tablespoons cornstarch mixed with 3 tablespoons water vegan egg alternative
  • 3 tablespoons milk or plant-based milk for vegan option
  • 2 tablespoons fresh-squeezed lemon juice from ~1 medium lemon
  • 1 tablespoon lemon zest from ~2 medium lemons
  • ½ cup frozen raspberries chopped
For the Lemon Sugar:
  • 3 tablespoons granulated sugar
  • 1 teaspoon lemon zest from ~1 medium lemon
For the Glaze:
  • 1 cup confectioners’ sugar
  • 1 –2 frozen raspberries
  • 1 tablespoon + 1 teaspoon water

Method
 

  1. Prepare the Cookie Dough: Preheat your oven to 350°F (175°C) and line a baking sheet with parchment paper. In a medium bowl, whisk together the gluten-free flour, baking powder, and kosher salt. Set aside. In a large mixing bowl, cream the butter and granulated sugar until light and fluffy. Add the cornstarch-water mixture, milk, lemon juice, and lemon zest. Mix until combined. Gradually add the dry ingredients to the wet ingredients, mixing until a soft dough forms. Fold in the chopped frozen raspberries gently to avoid excessive bleeding.
  2. Shape and Bake the Cookies: Scoop tablespoon-sized portions of dough and roll into balls. Flatten slightly and place on the prepared baking sheet, spacing them about 2 inches apart. Bake for 12–15 minutes, or until the edges are set and the cookies are lightly golden. Allow the cookies to cool on the baking sheet for 5 minutes before transferring them to a wire rack to cool completely.
  3. Make the Lemon Sugar: In a small bowl, mix the granulated sugar with the lemon zest. Rub the zest into the sugar with your fingers to release the aromatic oils. Sprinkle the lemon sugar lightly over the warm cookies.
  4. Prepare the Glaze:In a small bowl, mash the frozen raspberries to extract their juice. Mix the confectioners’ sugar with the raspberry juice and water until smooth. Adjust the consistency with additional water or sugar as needed. Drizzle or spread the glaze over the cooled cookies. Allow the glaze to set for 10–15 minutes before serving.