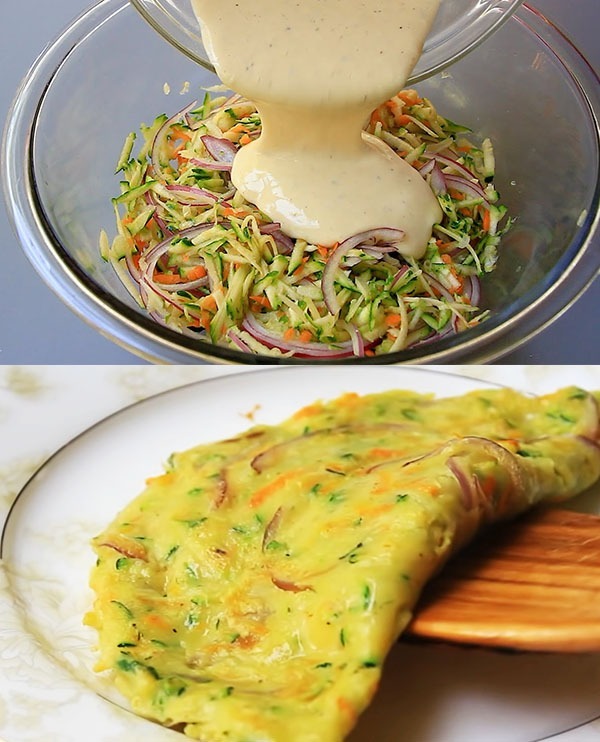
Zucchini-Carrot Savory Pancakes

Uncover the magic of combining simple ingredients to create something surprisingly delightful with this quick and easy recipe. These zucchini-carrot savory pancakes are not only delicious but also a fun way to add more vegetables to your meal. Perfect for a light lunch, dinner, or even a snack, they’re ready in just 10 minutes!

Ingredients:

  • 50g Carrot, grated
  • 1 Zucchini, grated
  • 1/2 Small Onion (50g), finely chopped
  • 1 Egg
  • 100ml Milk
  • 1/2 tsp Salt
  • 1/4 tsp Black Pepper
  • 100g (about 2/3 cup) Flour
  • Grated Cheddar Cheese, to taste

Instructions:

  1. Prepare the Vegetables: Grate the zucchini and carrot into a large mixing bowl. Add the finely chopped onion to the bowl as well.
  2. Create the Batter: Crack the egg into the bowl with the grated vegetables. Pour in the milk and season with salt and black pepper. Mix well to combine.
  3. Add Flour and Cheese: Gradually add the flour to the vegetable and egg mixture, stirring continuously to avoid lumps. The batter should be thick but pourable. Fold in a generous amount of grated cheddar cheese according to your taste, allowing it to blend seamlessly into the mix.
  4. Cook the Pancakes: Heat a non-stick frying pan over medium heat and lightly grease it with oil or butter. Once hot, pour spoonfuls of the batter into the pan, forming small pancakes. Cook for about 2-3 minutes on each side or until they turn golden brown and the cheese melts beautifully inside.
  5. Serve Hot: Transfer the cooked zucchini-carrot pancakes onto a serving plate. They can be enjoyed on their own or with a dollop of sour cream, a sprinkle of fresh herbs, or your favorite dipping sauce for an extra flavor boost.

These zucchini-carrot savory pancakes are a delightful twist on the traditional pancake, offering a savory taste that will surprise and please your palate. Quick to make and packed with the goodness of vegetables, they’re a testament to the fact that delicious meals don’t have to be complicated or time-consuming.

Savory Cheese Egg Toast Recipe

Embark on a morning adventure with this one-pan cheese egg toast, an innovative twist on the traditional omelette sandwich. It’s a quick, delicious, and fulfilling way to start your day, combining the simplicity of toast with the richness of a cheesy omelette, all cooked together in a single pan for minimal cleanup.

Ingredients:

  • 2 slices of your favorite bread
  • 2 large eggs
  • 1/4 cup grated cheese (cheddar, mozzarella, or any preferred cheese)
  • Salt and pepper, to taste
  • Butter or oil, for the pan
  • Optional additions: sliced tomatoes, cooked bacon strips, spinach, or sliced onions

Instructions:

  1. Prep the Pan: Heat a non-stick skillet over medium heat. Add a small amount of butter or oil to lightly grease the surface.
  2. Whisk the Eggs: In a bowl, crack the eggs and beat them well with salt and pepper, ensuring they are fully mixed.
  3. Create the Base: Pour the beaten eggs into the skillet, spreading them out to form a thin omelette layer. Let the eggs cook for a minute until they start to set but are still slightly runny on top.
  4. Add the Bread: Place the two slices of bread side by side on top of the eggs, gently pressing them down so that the egg starts to coat the bottom side of each slice.
  5. Add Cheese and Optional Ingredients: Sprinkle the grated cheese evenly over one slice of bread. If you’re using any optional ingredients like tomatoes, bacon, or spinach, add them on top of the cheese.
  6. Flip and Fold: Carefully flip the other slice of bread (the one without the cheese and toppings) onto the cheese-covered slice, pressing them together gently. Then, using a spatula, fold the excess egg around the bread to encase the sandwich.
  7. Cook to Perfection: Let the sandwich cook for another minute or two until the egg is fully set and the bread is golden brown. Flip the entire sandwich once halfway through to ensure even cooking on both sides.
  8. Serve Warm: Once done, transfer the cheese egg toast to a plate. Slice it in half to reveal the melty cheese and perfectly cooked egg. Serve immediately for a warm, comforting breakfast.

This savory cheese egg toast delight marries the fluffy texture of an omelette with the crispness of toasted bread, enveloped in melted cheese for a heavenly breakfast experience. It’s versatile, easy to make, and sure to please both the young and the old alike, making it a fantastic start to any day.

Potato Flatbread Delight

Unveil the simplicity and richness of flavors with this straightforward, no-oven, no-mixer flatbread recipe. Utilizing just a handful of ingredients, including the humble potato, this dish brings a comforting and satisfying experience to your table. Perfect for those seeking a quick, affordable, yet utterly delicious meal option.

Ingredients:

  • For the Dough:
    • 150ml Water, lukewarm
    • 3g (1 tsp) Active Dry Yeast
    • 12g (1 tbsp) White Sugar
    • 250g (1+2/3 cups) Flour
    • 3g (0.5 tsp) Salt
    • 15g (1 tbsp) Olive Oil
  • For the Topping:
    • 4 Small Potatoes (approx. 320g), thinly sliced
    • 2 tbsp Milk
    • 1/2 tsp Salt
    • 1/4 tsp Black Pepper
    • 1/4 tsp Red Pepper Powder
    • 15g Green Onions or Parsley, chopped
    • 30-50g Cheese (optional), grated

Instructions:

  1. Dough Preparation:
    • In a large bowl, mix the lukewarm water with the active dry yeast and sugar. Let it sit for 5-10 minutes, or until frothy, to activate the yeast.
    • Add the flour and salt to the yeast mixture. Mix until a soft dough forms. Drizzle the olive oil over the dough and knead gently until the oil is fully incorporated.
    • Place a moistened cloth over the dough and allow it to ferment in a cozy spot for approximately one hour, or until it expands twofold in volume.
  2. Potato Topping:
    • While the dough is resting, prepare the potatoes. In a medium bowl, mix the thinly sliced potatoes with milk, salt, black pepper, and red pepper powder. Ensure the potato slices are well coated with the seasoning.
  3. Assembly:
    • After the dough has completed its rise, softly press it down and split it into uniform segments. Utilizing a surface dusted lightly with flour, flatten each segment into a thin circular shape.
    • Place a layer of seasoned potato slices on top of each rolled-out dough, slightly overlapping the slices. Sprinkle with chopped green onions or parsley, and add grated cheese if using.
  4. Cooking:
    • Heat a non-stick pan over medium heat. Carefully transfer one flatbread to the pan. Cover with a lid and cook for about 5-7 minutes on each side, or until the potatoes are tender and the flatbread is golden brown.
  5. Serve Warm:
    • Repeat the process with the remaining flatbreads. Serve warm, directly from the pan, for a comforting and fulfilling meal.

This easy-to-follow recipe not only showcases the versatility of potatoes but also offers a delightful way to enjoy homemade flatbread without the need for an oven or mixer. The creamy texture of the potatoes, combined with the aromatic spices and optional cheese, creates a dish that’s both comforting and indulgent. Perfect for a casual dinner, a side dish, or a creative way to impress your guests with your culinary skills.

Zucchini Oatmeal Bake: A Wholesome Twist on Pizza

Transform your mealtime with this delightful zucchini oatmeal bake, a healthier alternative that’s so savory and satisfying, you might just prefer it over traditional pizza. Packed with the goodness of zucchini, oats, and cheese, it’s a family favorite you’ll want to make on repeat.

Ingredients:

  • 1 Zucchini, grated
  • Salt, to draw out moisture from zucchini
  • 3-4 tablespoons of Oatmeal
  • 100g Cheese, grated
  • 2 Eggs
  • Pepper, to taste
  • Chives, chopped for garnish
  • Cooking spray or a bit of oil for the baking dish

Instructions:

  1. Prep the Zucchini: Grate the zucchini onto a clean kitchen towel or a piece of cheesecloth. Sprinkle a little salt over the grated zucchini and let it sit for about 10 minutes. The salt helps draw out excess moisture. After 10 minutes, wrap the zucchini in the towel and squeeze out as much liquid as you can. This step is crucial for a crispy finish.
  2. Mix the Ingredients: In a large bowl, combine the squeezed zucchini, oatmeal, grated cheese, eggs, and pepper. Stir the mixture until well combined. The oatmeal will absorb any remaining moisture and help bind the ingredients together, while the eggs and cheese add richness and depth to the flavor.
  3. Prepare the Baking Dish: Preheat your oven to 180°C (360°F). Lightly grease a baking dish with cooking spray or a bit of oil to prevent sticking.
  4. Assemble the Bake: Spread the zucchini mixture evenly in the prepared baking dish. Use the back of a spoon or spatula to press the mixture down slightly, creating a compact layer that will bake evenly.
  5. Bake: Place the dish in the preheated oven and bake for about 20 minutes, or until the top is golden and the edges start to crisp up. The bake should be firm in the center and easy to slice.
  6. Garnish and Serve: Once done, remove the bake from the oven and let it cool for a few minutes. Sprinkle chopped chives over the top for a fresh, flavorful finish. Slice and serve warm.

This zucchini oatmeal bake brings a wholesome, nutritious twist to your dining table, combining the comfort of a home-cooked meal with the flavors you love. Whether you’re looking for a healthier alternative to pizza or just want to incorporate more veggies into your meals, this bake is sure to please everyone at the table.

Guilt-Free Energy Bites

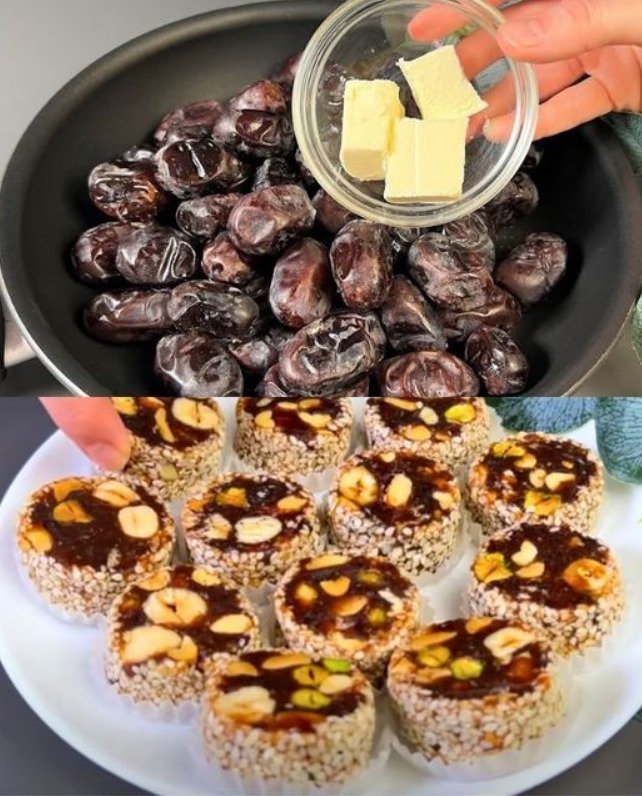
Discover a quick and satisfying way to indulge your sweet tooth without the guilt. These no-bake energy bites are free from added sugar and flour, packed with nuts, seeds, and dates for a natural sweetness and a burst of energy. Perfect for a healthy snack on the go!

Ingredients:

  • 15g Butter, unsalted
  • A pinch of Salt
  • A pinch of Cinnamon
  • A pinch of Cardamom
  • 30g Peanuts
  • 20g Almonds
  • 15g Pistachios
  • 15g Hazelnuts
  • 250g Dates, pitted
  • 30g Sesame Seeds

Instructions:

  1. Prepare the Nuts: Roughly chop the peanuts, almonds, pistachios, and hazelnuts into smaller pieces. This not only makes the texture of your energy bites more enjoyable but also ensures an even distribution of flavors.
  2. Soften the Dates: If your dates are a bit hard, soak them in warm water for about 10 minutes, then drain. This makes them easier to blend into a smooth paste.
  3. Season the Nuts: In a small pan, melt the butter over low heat. Add the chopped nuts to the pan, sprinkling in the salt, cinnamon, and cardamom. Toss gently to coat the nuts in the butter and spices, and cook for about 2-3 minutes until fragrant. Remove from heat.
  4. Blend the Dates: In a food processor, blend the dates until they form a smooth paste. If you do not have a food processor, you can mash the dates with a fork, though this may require more effort.
  5. Mix Ingredients: Transfer the date paste to a large bowl. Add the spiced nut mixture and sesame seeds to the bowl with the date paste. Mix thoroughly until all ingredients are well combined. The mixture should be sticky and hold together when pressed.
  6. Shape the Bites: With clean hands, roll the mixture into small, bite-sized balls. If the mixture sticks to your hands, lightly wetting them can help make the rolling process easier.
  7. Chill and Serve: Place the energy bites on a tray or plate lined with parchment paper. Refrigerate for about 30 minutes to set, making them easier to handle and enjoy.

These energy bites are a powerhouse of nutrients and flavors, with the warmth of cinnamon and cardamom, the richness of nuts, and the natural sweetness of dates and sesame seeds. They’re perfect for a quick snack, a pre-workout energy boost, or a healthy treat to satisfy your sweet cravings.

Rustic Apple-Walnut Oat Porridge

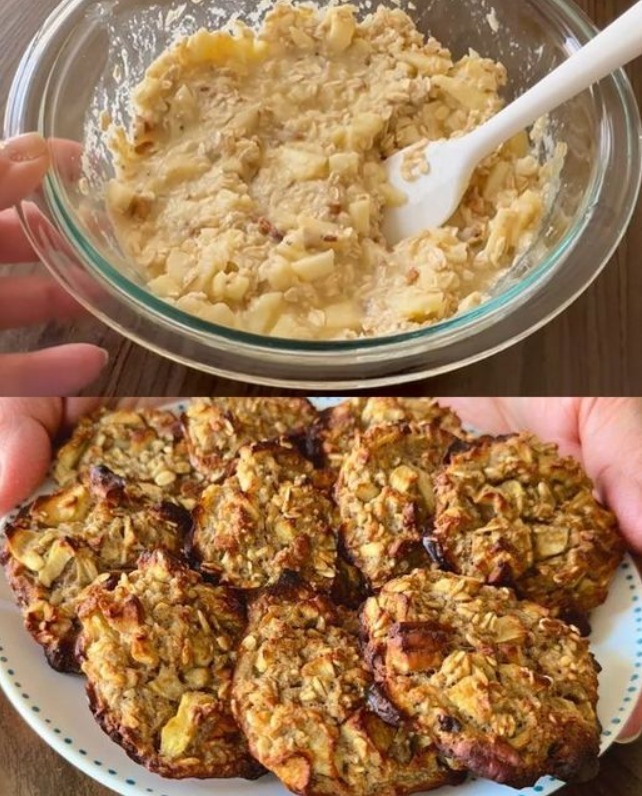
Embark on a culinary journey to the heart of Germany with this simple yet sumptuous recipe, blending the natural sweetness of apples with the earthy crunch of walnuts. A delightful bowl of warmth, perfect for any meal of the day.

Ingredients:

  • 1 cup Rolled Oats
  • 50g Walnuts, roughly chopped
  • 2 Fresh Apples, cored and chopped
  • 60ml Water
  • Vanilla Extract, as preferred
  • Agave Nectar, as desired

Instructions:

  1. Prepare the Apples: Core and chop the apples into small pieces. For added texture and flavor, you can leave the skin on.
  2. Cook the Oatmeal: In a medium saucepan, combine the rolled oats and water. Stir gently on a medium heat until the mixture starts to simmer. Lower the heat and let it cook for a few minutes, stirring occasionally, until the oats are soft and the mixture has thickened to your liking.
  3. Add the Apples: Once the oatmeal is nearly cooked, stir in the chopped apples. Continue to cook for an additional 2-3 minutes, allowing the apples to soften slightly and infuse their natural sweetness into the oatmeal.
  4. Enhance the Flavor: Add a dash of vanilla extract to the oatmeal, stirring well to distribute the flavor throughout the porridge. The amount of vanilla extract can be adjusted according to taste, adding a subtle or pronounced vanilla essence as desired.
  5. Sweeten the Porridge: Drizzle agave nectar over the oatmeal, sweetening it to taste. Agave nectar not only adds sweetness but also a mild, delicate flavor that complements the apples and vanilla beautifully.
  6. Add Crunch with Walnuts: Finally, sprinkle the roughly chopped walnuts over the oatmeal, adding a delightful crunch and nutty flavor to the dish. The walnuts also contribute healthy fats, making the porridge more satisfying.
  7. Serve Warm: Dish out the apple-walnut oat porridge into bowls while it’s still warm. Enjoy as is, or top with additional chopped apples, walnuts, or a drizzle more of agave nectar if desired.

This rustic apple-walnut oat porridge brings a piece of German culinary tradition to your table, combining wholesome ingredients in a simple, yet profoundly comforting dish. Whether you’re starting your day with a nutritious breakfast or need a cozy snack, this recipe is a testament to the joy of simple cooking.

Easy Stovetop Cheese and Green Onion Flatbread

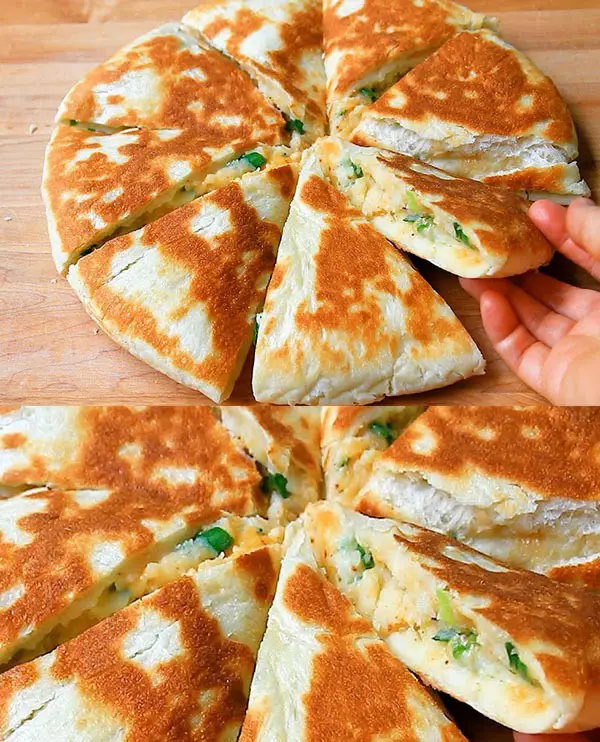
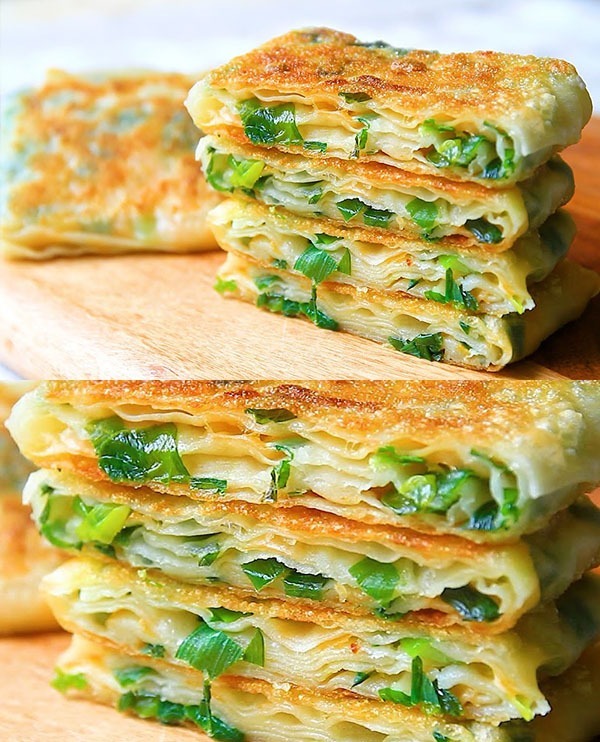
Experience the joy of making this scrumptious cheese and green onion flatbread right on your stovetop! Requiring no yeast or oven, this recipe is wonderfully straightforward, making it accessible for everyone to try at home. The combination of melted cheese and fragrant green onions encased in a crispy, golden exterior is sure to make this flatbread your new favorite go-to snack or side.

Ingredients:

  • 95 ml water
  • 1/4 teaspoon (1.5g) salt
  • 1 cup (150g) all-purpose flour, plus extra 1/4 cup for later
  • 30g green onions, finely chopped
  • A pinch of baking soda
  • 50g cheese, grated (choose your favorite melting variety)
  • 1/4 cup corn starch
  • 20g salted butter, melted
  • Oil for frying

Instructions:

  1. Prepare the Dough: In a large mixing bowl, combine 95 ml of water with 1/4 teaspoon of salt. Gradually add 1 cup of all-purpose flour, mixing until a soft dough forms. Knead the dough gently on a floured surface until smooth.
  2. Incorporate Green Onions: Flatten the dough slightly and sprinkle it with a pinch of baking soda, then add the chopped green onions and grated cheese into the center. Fold the dough over the fillings and knead gently to distribute them evenly throughout the dough.
  3. Roll Out Flatbreads: Divide the dough into smaller portions, depending on the size of flatbreads you prefer. On a lightly floured surface, roll out each portion into a thin circle, about 1/8 inch thick.
  4. Dust with Flour and Cornstarch: Mix the remaining 1/4 cup of all-purpose flour with 1/4 cup of corn starch. Lightly dust both sides of each rolled-out dough with this mixture. This helps to create a crispy texture when fried.
  5. Cook the Flatbreads: Heat a generous amount of oil in a frying pan over medium heat. Once hot, fry each flatbread for 2-3 minutes on each side or until they are golden brown and crispy. Midway through frying, brush the top side of each flatbread with melted salted butter, then flip to ensure both sides are evenly cooked and flavored.
  6. Serve Hot: Once cooked, remove the flatbreads from the pan and place them on paper towels to remove excess oil. Serve these cheese and green onion flatbreads warm for the best flavor and texture.

This no-yeast, no-oven cheese and green onion flatbread is not only easy to make but also incredibly delicious, with a perfect blend of cheesy goodness and the fresh bite of green onions, all wrapped in a crispy, golden crust. Enjoy it as a snack, side dish, or even a light meal with your favorite dipping sauce.

Savory Beef and Bacon Cheese Rolls

Delight in the comforting flavors of these savory beef and bacon cheese rolls, a gourmet twist on the traditional sausage roll. Perfect for gatherings, snacks, or even a hearty meal, this recipe combines rich beef sausage meat with the smoky taste of bacon, all wrapped in a flaky puff pastry.

Ingredients:

  • 2 sheets of frozen puff pastry, thawed
  • 6 thick beef sausages, casings removed
  • 3 slices of bacon, middle cut, rind removed and finely chopped
  • 1 small brown onion, finely chopped
  • 1 cup grated cheddar cheese
  • 1 cup fresh breadcrumbs
  • 1/4 cup milk
  • 1 teaspoon fresh thyme, chopped
  • Freshly cracked black pepper, to taste
  • 1 egg, lightly beaten for glazing

Instructions:

  1. Preheat the Oven: Begin by preheating your oven to 375°F (190°C) and lining a baking sheet with parchment paper.
  2. Prepare the Filling: In a large mixing bowl, combine the beef sausage meat (ensure the casings are removed), finely chopped bacon, and onion. Add the grated cheddar cheese, fresh breadcrumbs, milk, and chopped thyme to the mixture. Season with freshly cracked black pepper according to your taste. Mix everything together until well combined.
  3. Assemble the Rolls: On a lightly floured surface, lay out the thawed puff pastry sheets. Cut each sheet in half to create rectangles. Divide the meat mixture into four equal portions and shape each into a long sausage shape, running down the center of each pastry rectangle.
  4. Roll and Seal: Carefully roll the pastry over the filling, wrapping it completely. Use a little water to moisten the edges and press gently to seal. Cut each long roll into desired sizes, either as individual portions or longer rolls to be sliced after baking.
  5. Glaze and Bake: Place the rolls seam-side down on the prepared baking sheet. Make small incisions on top of each roll to allow steam to escape. Brush the tops of the rolls with the beaten egg to give them a golden glaze.
  6. Bake: Bake in the preheated oven for 25-30 minutes or until the pastry is puffed and golden brown, and the filling is cooked through.
  7. Serve: Allow the rolls to cool slightly on a wire rack before serving. They can be enjoyed warm or at room temperature.

These beef and bacon cheese rolls combine the comforting taste of juicy beef and smoky bacon with melted cheese, all encased in a crispy, golden pastry. Whether you’re looking for a satisfying snack or a hearty addition to your meal, these rolls are sure to impress with their rich flavors and satisfying texture.

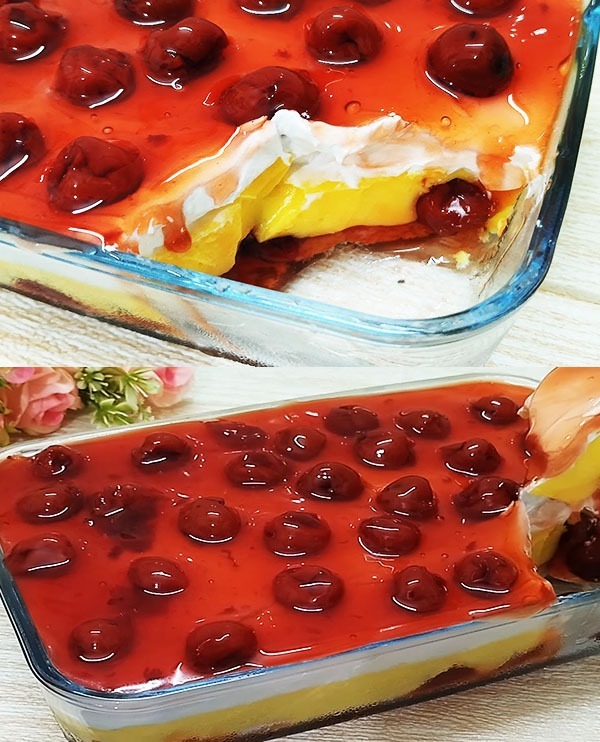
Heavenly No-Bake Cake: A Light and Refreshing Dessert

Delight in the simplicity and exquisite taste of this no-bake cake, perfect for spring or any time you crave a light, refreshing dessert. Follow this straightforward process to create a heavenly treat that requires no oven time.

Ingredients & Preparation:

Base Layer:

  • 200 grams of sponge cake
  • Cherry filling (approximately 1/2 can or 250 grams in total for the recipe)

Custard Layer:

  • 100 ml milk
  • 4 tablespoons vanilla custard powder
  • 400 ml milk
  • 4 tablespoons sugar

Cream Layer:

  • 3/4 cup cool whip or sweetened whipped cream (use heavy cream if preferred)
  • 1 to 1/2 tablespoons powdered sugar (adjust based on sweetness of cream)

Instructions:

  1. Prepare the Base Layer: Start by cutting the sponge cake into 1-inch pieces. Arrange these pieces at the bottom of your serving dish, creating an even layer. Spoon a few tablespoons of cherry filling over the cake, spreading it out to cover the pieces.
  2. Make the Custard: In a small bowl, mix 100 ml of milk with the custard powder. Whisk thoroughly to remove any lumps. In a saucepan, heat 400 ml of milk with the sugar, stirring continuously. Once the sugar dissolves and the milk begins to boil, gradually pour in the custard mixture while whisking. Continue to cook over medium heat, stirring constantly for 2-3 minutes or follow the custard packet instructions. Once cooked, remove from heat, allow it to come to room temperature, then refrigerate until cool.
  3. Prepare the Cream Layer: If using unsweetened cream, add 1/2 cup of powdered sugar; for pre-sweetened cream, 1 tablespoon may suffice. Whip the cream for about 2 minutes until it reaches medium peaks.
  4. Assemble the Cake: Once the custard has cooled, pour it over the cherry-topped cake layer in your serving dish. Smooth it out to an even layer. Top the custard with the whipped cream, spreading it gently to cover the custard entirely.
  5. Final Garnish: Use the remaining cherry filling to garnish the top of the cake. The vibrant cherries will add a beautiful contrast and enhance the flavors.
  6. Chill and Serve: Allow the cake to chill in the refrigerator for a few hours, letting the layers set and flavors meld together. This resting period ensures that each bite is as heavenly as the next.

This no-bake cake combines the softness of sponge cake, the richness of vanilla custard, and the creaminess of whipped cream, all complemented by the sweet tanginess of cherry filling. It’s a dessert that’s as easy to make as it is delightful to eat, perfect for any occasion that calls for a touch of sweetness.

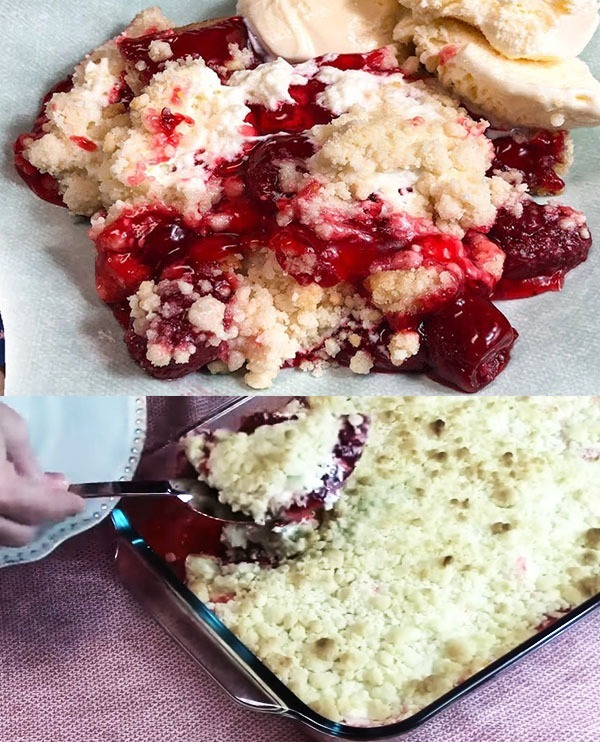
Strawberry Cheesecake Dump Cake Delight

Dive into the simplicity of baking with this four-ingredient strawberry cheesecake dump cake, a dessert that combines the ease of a dump cake with the rich, creamy flavors of a classic cheesecake. Perfect for when you need a delicious dessert without the fuss, this recipe is a surefire way to impress with minimal effort.

Ingredients:

  • 1 (21 oz) can of strawberry pie filling
  • 1 box of cheesecake-flavored cake mix
  • 1/2 cup (1 stick) unsalted butter, melted
  • 1 cup fresh strawberries, sliced (optional for garnish)

Instructions:

  1. Preheat Oven: Begin by preheating your oven to 350°F (175°C). This ensures your cake will bake evenly and come out perfectly golden.
  2. Layer Strawberry Filling: Grease a 9×13 inch baking dish. Spread the strawberry pie filling evenly across the bottom of the dish, creating a juicy base for your dump cake.
  3. Add Cake Mix: Open the box of cheesecake-flavored cake mix and sprinkle it evenly over the strawberry filling. Do not mix. The goal is to create layers that will bake into a delightful texture.
  4. Drizzle with Butter: Pour the melted butter evenly over the top of the cake mix. The butter will help the cake mix moisten and bake into a golden crust.
  5. Bake to Perfection: Place your baking dish in the preheated oven. Bake for 40-45 minutes, or until the top is beautifully golden and the filling is bubbly.
  6. Garnish and Serve: Once baked, allow the cake to cool slightly. Garnish with fresh sliced strawberries for an added touch of freshness and color, if desired.

Serve this indulgent strawberry cheesecake dump cake warm, perhaps with a scoop of vanilla ice cream or a dollop of whipped cream for an extra special treat. This dessert is a testament to the beauty of simple ingredients coming together to create a mouthwatering masterpiece, perfect for any occasion or spontaneous dessert cravings.