

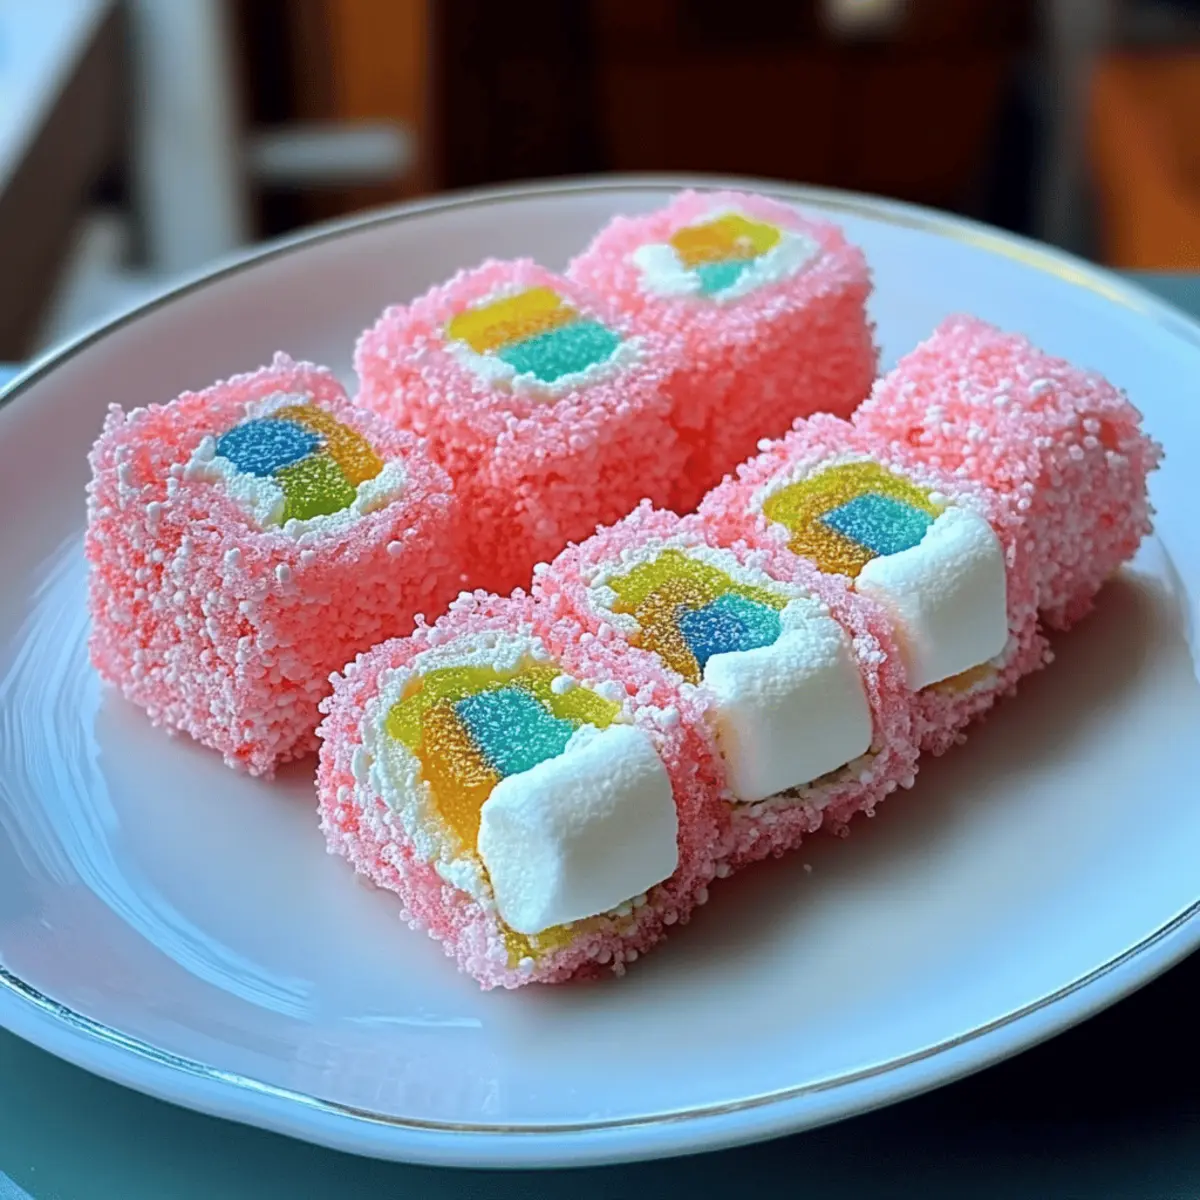
“Can you believe this whimsical dessert exists?” I recently stumbled upon a colorful delight that’s about to take your gatherings to the next level: Cotton Candy Sushi. Instead of the usual fish and rice, this playful no-bake treat swaps in fluffy cotton candy as a sweet wrap, stuffed with chewy marshmallows, vibrant gummy candies, and fresh fruit. It’s as delightful to behold as it is to eat, making it a guaranteed hit at kids’ parties, themed events, or any occasion where you want to impress. Plus, it’s incredibly quick to whip up, so you can spend less time fussing in the kitchen and more time enjoying the festivities. Who wouldn’t want to create a fun twist on dessert that’s just as lovable as it is delicious? Let’s dive into this colorful creation together, shall we?
Why is Cotton Candy Sushi So Fun?
Playful, Eye-Catching Presentation: This dessert is as visually appealing as it is tasty, making it perfect for impressing guests.
Easy No-Bake Preparation: With simple steps and no cooking required, anyone can master this fun treat in no time.
Sweet Flavor Combinations: The blend of cotton candy, fruity filling, and chewy textures creates a burst of deliciousness in every bite.
Adaptable to Personal Tastes: Customize your sushi with different candies and fruits, turning it into a unique creation every time!
Crowd-Pleaser for All Ages: Kids and adults alike will adore this whimsical dessert, adding a spark of joy to any celebration!
This delightful take on sushi offers a new way to experience sweets, ideal for your next gathering or to elevate a simple snack. And if you’re feeling adventurous, make sure to check out other dessert recipes for more inspiration!
Cotton Candy Sushi Ingredients
To create your whimsical Cotton Candy Sushi, gather these delightful ingredients!
For the Wrap
- Cotton Candy – Serves as the outer wrap, providing sweetness and color; using freshly spun cotton candy offers the best texture.
For the Filling
- Marshmallows – Adds a chewy texture and extra sweetness; if desired, substitute with marshmallow fluff for a creamier consistency.
- Gummy Candies – Provides varied textures and flavors; popular choices include gummy bears and sour gummies for an extra zing!
- Fresh Fruit (e.g., strawberries, bananas) – Adds natural sweetness and a refreshing crunch; ensure they are finely chopped to easily fit within rolls.
Step‑by‑Step Instructions for Cotton Candy Sushi
Step 1: Prepare Your Work Area
Begin by setting up a clean, cool, and dry work area to ensure your Cotton Candy Sushi can be made without any moisture interference. Gather your ingredients and have a large, flat surface ready, such as a cutting board. Lay out a parchment paper or silicone mat to prevent sticking while rolling.
Step 2: Shape the Cotton Candy
Take a generous handful of freshly spun cotton candy and gently pull and stretch it into a flat, rectangular sheet about ½ inch thick. Aim for a smooth, even surface that can easily hold the fillings. Ensure the cotton candy retains its light, airy texture, which is crucial for achieving the right balance in your sushi.
Step 3: Add the Fillings
On one edge of the cotton candy sheet, layer your choice of chopped marshmallows, colorful gummy candies, and finely diced fresh fruit. Be generous but ensure the fillings don’t spill over the edges. The vibrant colors and varied textures will create a visually appealing and delicious Cotton Candy Sushi, so arrange them in a fun and inviting way.
Step 4: Roll the Sushi
Carefully lift the edge of the cotton candy with the fillings and begin to roll it towards the opposite edge, gently tucking it in as you go to form your sushi roll. Roll tightly but not so tight that the cotton candy compresses. Watch for the fillings as you roll; they should be encapsulated within, creating a perfect dessert sushi.
Step 5: Slice the Roll
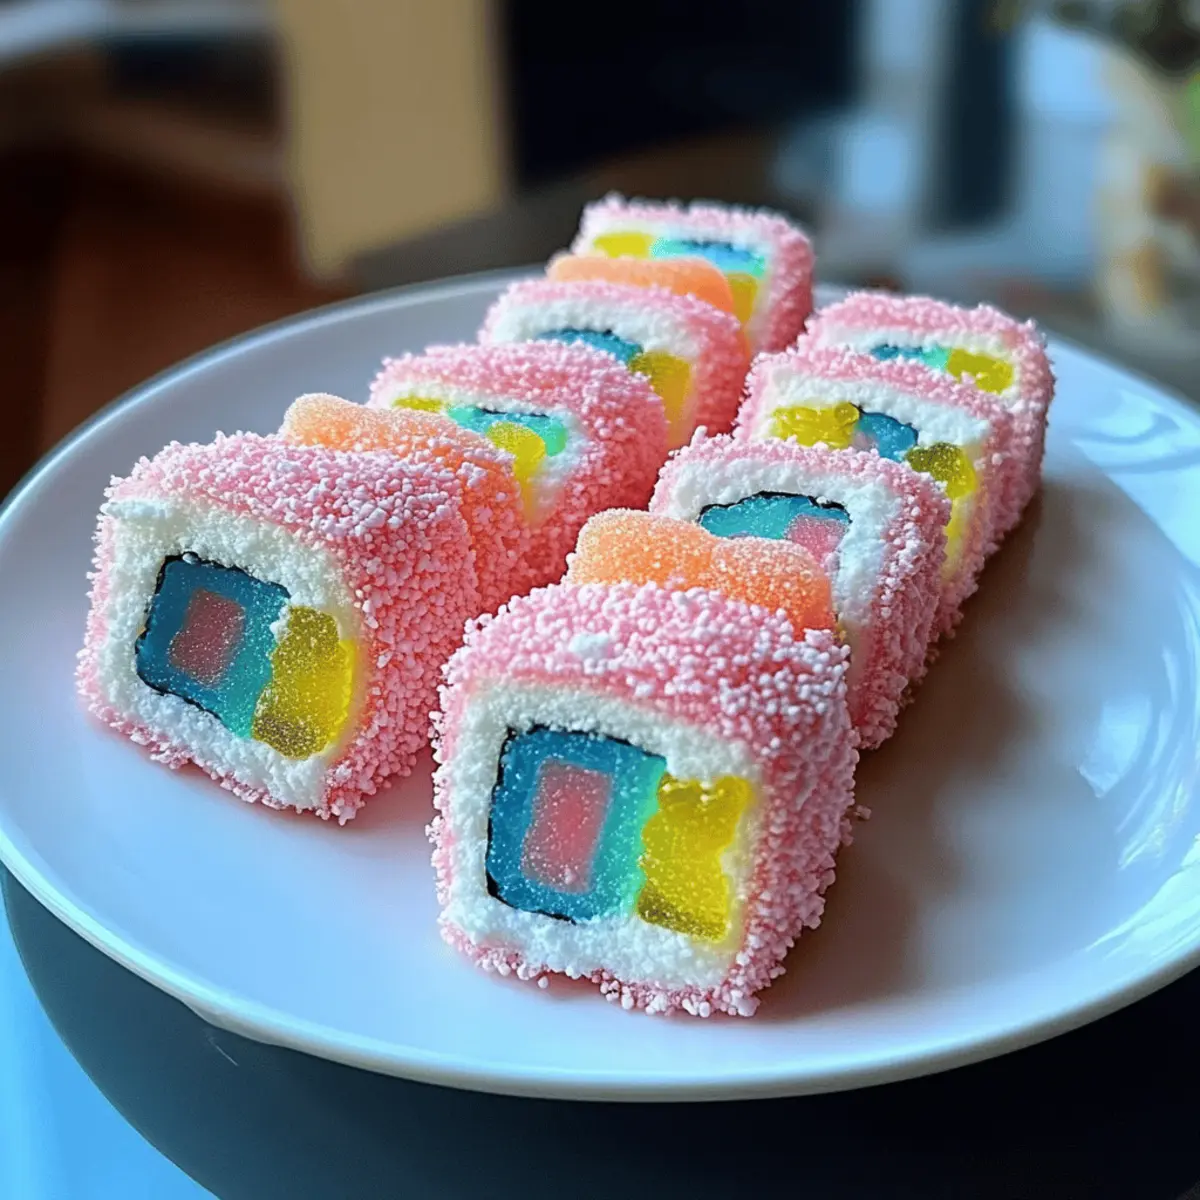
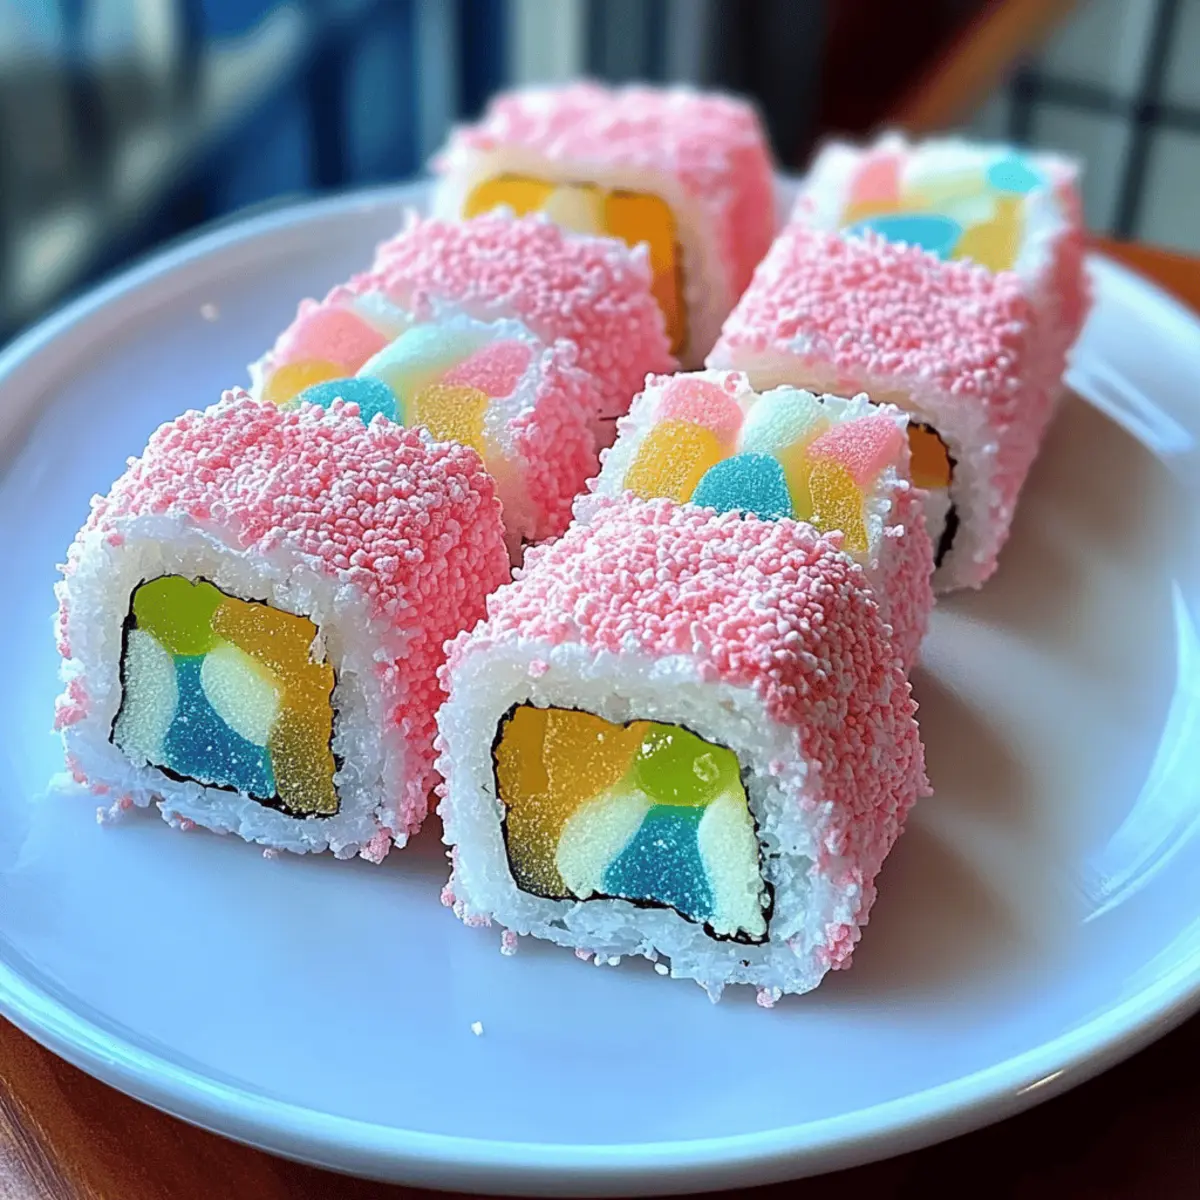
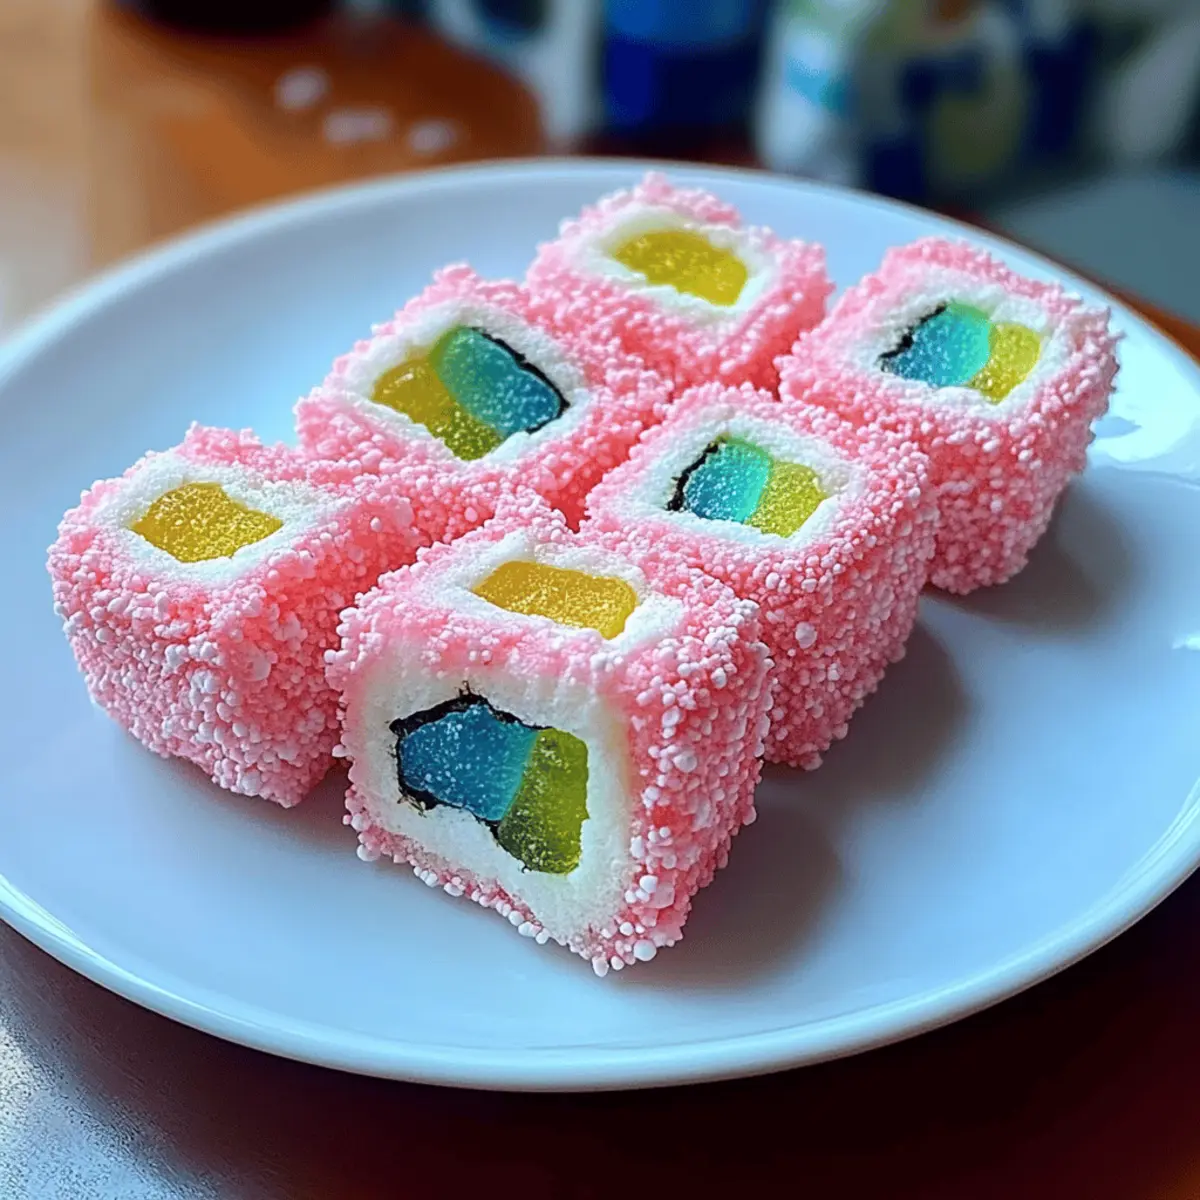
Using a sharp, serrated knife, slice the Cotton Candy Sushi roll into bite-sized pieces, approximately 1–2 inches thick. Press down gently while slicing to ensure the shapes hold together without squishing the cotton candy. Each piece should be colorful and filled with the delightful textures of your chosen fillings.
Step 6: Serve Immediately
To enjoy the best texture and flavor, serve your Cotton Candy Sushi immediately after slicing. Arrange the mini rolls on a beautiful platter for a stunning presentation that will delight your guests. The cotton candy’s melt-in-your-mouth quality combined with the sweet fillings makes this playful dessert irresistible—perfect for any gathering!
What to Serve with Cotton Candy Sushi
Treat your guests to an unforgettable experience by pairing vibrant flavors and textures alongside your delightful dessert.
-
Fruit Skewers: Fresh fruit on skewers not only adds a refreshing crunch, but complements the sweetness of the cotton candy beautifully. Choose colorful fruits for a visually appealing display.
-
Chocolate Dipping Sauce: A rich chocolate dip brings a decadent contrast to the sugary sushi. Its warmth and creamy texture will enhance each sweet bite.
-
Vanilla Ice Cream: Creamy vanilla ice cream balances the sweet flavors of the Cotton Candy Sushi, providing a cool, luscious treat. The scoop adds an element of indulgence to your dessert platter!
-
Popcorn Mix: Sweet and salty popcorn offers a fun textural contrast, adding a playful crunch to your dessert table. Consider mixing in some M&Ms for an extra candy-coated kick!
-
Lemonade: A refreshing glass of lemonade brightens the sweetness of the sushi rolls while offering a tangy touch that balances flavors. Opt for a sparkling version for fun bubbles!
-
Mini Cheesecake Bites: Light and creamy cheesecake bites are the perfect contrasting flavor to the sugary sushi. Top them with fruit or caramel for an extra layer of indulgence.
-
Sparkling Water: Infuse your sparkling water with fresh fruit or herbs for a sophisticated touch. This light drink will cleanse the palate between bites of the Cotton Candy Sushi.
-
Cotton Candy Pops: For those who adore cotton candy, consider serving light and airy cotton candy pops. They keep the theme consistent while providing an unexpected treat!
Create a whimsical dessert experience that tantalizes the taste buds and delights the eyes!
How to Store and Freeze Cotton Candy Sushi
Room Temperature: Keep leftover Cotton Candy Sushi in an airtight container at room temperature for up to 2 hours to maintain its texture and sweetness.
Fridge: If needed, store in an airtight container in the fridge for up to 1 day; however, the cotton candy may lose some of its fluffiness.
Freezer: It’s not recommended to freeze Cotton Candy Sushi, as the texture will change significantly when thawed; enjoy it fresh for the best experience.
Reheating: There’s no need to reheat; serve your Cotton Candy Sushi immediately after preparation for the ultimate sugary delight!
Cotton Candy Sushi Variations & Substitutions
Feel free to get creative and customize your Cotton Candy Sushi to match your taste and preferences!
-
Flavored Cotton Candy: Choose different cotton candy flavors, like grape or strawberry, to add a unique twist and surprise element to your dessert. Each flavor brings its own delightful essence!
-
Dairy-Free Options: Swap marshmallows for vegan marshmallows or use fruit-flavored gummy snacks for a completely dairy-free experience. It’s a simple hack that keeps the treat accessible for more guests.
-
Chocolate Crunch: Add chocolate chips or crushed cookies as a filling to introduce a rich, crunchy texture. Chocolate works wonders with cotton candy, making for an indulgent surprise.
-
Exotic Fruits: Try using seasonal or exotic fruits like kiwi, pineapple, or mango for a refreshing flavor upgrade. The vibrant colors and tastes can transform your sushi into a tropical paradise.
-
Spicy Heat: For a daring twist, incorporate spicy candies like chili mango gummies for a touch of heat that contrasts beautifully with the sweet cotton candy. It’s a bold way to elevate your dessert!
-
Nutty Delight: Introduce crushed nuts into your filling for added crunch and a nutty flavor that complements the sweetness of the cotton candy. Think almonds or pistachios for a sophisticated touch.
-
Zesty Citrus: Add a sprinkle of lemon or lime zest to the fillings for a zesty kick that awakens the palate. This brightness really enhances the overall flavor profile of your sushi.
-
Mini Sushi Rolls: For a fun presentation, create mini rolls with tiny cotton candy wraps and smaller portions of filling. Perfect for a bite-sized treat at parties, these little sushi delights can be a hit among your guests.
As you explore these variations, don’t forget to check out other delightful dessert recipes for more ideas on how to sweeten up your culinary adventures!
Expert Tips for Cotton Candy Sushi
-
Freshness is Key: Serve your Cotton Candy Sushi immediately after preparation to enjoy the best texture. Cotton candy dissolves quickly when exposed to air.
-
Roll Gently: When rolling your cotton candy, do so gently to prevent tearing. A light touch keeps the airy texture intact.
-
Avoid Moisture: Ensure your hands and work surface are dry. Moisture can cause the cotton candy to stick or lose shape.
-
Creative Fillings: Feel free to be adventurous with your fillings! Experiment with various fruits and candies to create your unique Cotton Candy Sushi each time.
-
Slice Carefully: Use a sharp serrated knife to cut the rolls, applying gentle pressure to maintain the integrity of the cotton candy and fillings.
Make Ahead Options
These playful Cotton Candy Sushi rolls are perfect for busy home cooks looking to save time during party preparations! You can prep the fillings, including chopped marshmallows, gummy candies, and fresh fruit, up to 24 hours in advance. Simply store them in airtight containers in the refrigerator to maintain their freshness. However, it’s best to keep the cotton candy separate and only roll it just before serving to prevent it from dissolving. When you’re ready to impress your guests, quickly shape the cotton candy, add your prepped fillings, roll, and slice into delightful pieces. With this make-ahead strategy, you’ll enjoy a stress-free dessert preparation that tastes just as delicious!
Cotton Candy Sushi Recipe FAQs
What type of cotton candy is best for this recipe?
Absolutely! For the best results, I recommend using freshly spun cotton candy. Look for vibrant colors and avoid any that have dark spots or are overly sticky, as they may indicate age or moisture.
How should I store leftover Cotton Candy Sushi?
To maintain its fluffy texture, store leftover Cotton Candy Sushi in an airtight container at room temperature for up to 2 hours. If you need to store it longer, you can refrigerate it, but be aware that it may lose some of its delightful fluffiness. In the fridge, it’s best consumed within 1 day.
Can I freeze Cotton Candy Sushi?
Not really! I never recommend freezing Cotton Candy Sushi, as the texture changes drastically upon thawing. The cotton candy will lose its airy quality and might become soggy, ruining the delightful experience. Enjoy it fresh for the best flavor!
What if my cotton candy tears while rolling?
No worries, it happens! If your cotton candy tears while rolling, just use small pieces to patch the area. Alternatively, you can create a “Sushi Bowl” by layering your fillings in a bowl and topping it with cotton candy, allowing for a fun deconstructed version.
Are there any dietary considerations for Cotton Candy Sushi?
Definitely! If you’re catering to dietary restrictions, ensure that the marshmallows and gummy candies are gluten-free, as some brands may use wheat-based products. For a fun twist, consider using vegan marshmallows if you’re aiming for a plant-based treat!
Cotton Candy Sushi: A Fun & Sweet No-Bake Delight
Ingredients
Equipment
Method
- Begin by setting up a clean, cool, and dry work area. Gather your ingredients and have a large, flat surface ready.
- Take a generous handful of freshly spun cotton candy and gently pull and stretch it into a flat, rectangular sheet about ½ inch thick.
- On one edge of the cotton candy sheet, layer your choice of chopped marshmallows, colorful gummy candies, and finely diced fresh fruit.
- Carefully lift the edge of the cotton candy with the fillings and begin to roll it towards the opposite edge, gently tucking it in as you roll.
- Using a sharp, serrated knife, slice the Cotton Candy Sushi roll into bite-sized pieces, approximately 1–2 inches thick.
- Serve your Cotton Candy Sushi immediately after slicing for the best texture and flavor.