

As I stood in my kitchen, the scent of golden-brown crust wafted through the air, instantly transporting me to sunlit summer picnics. Today, I’m whipping up Crispy Fish Sandwiches, a dish that perfectly balances the crunch of a well-breaded fish fillet with a soft, toasted bun. This recipe isn’t just about great taste; it’s a quick weeknight meal that’s as satisfying as it is easy to make. Plus, with gluten-free options available, you can indulge without the guilt. Whether you’re serving these for a casual lunch or a laid-back dinner, the delightful combination of flavors and textures will leave everyone craving more. Curious about how to achieve that perfect crunch? Let’s dive into the recipe!
Why Choose Crispy Fish Sandwiches?
Irresistible Flavor: The combination of crunchy coating and tender fish creates a mouthwatering experience that rivals your favorite fast food.
Quick & Easy: Ready in just about 30 minutes, these sandwiches make weeknight dinners a breeze!
Versatile Options: Feel free to swap the fish—cod, halibut, or tilapia all work wonderfully. For gluten-free, simply use almond flour!
Healthy Twist: Baking or air-frying the fish reduces oil without sacrificing flavor, making these sandwiches a healthier choice.
Crowd-Pleaser: Perfect for everyone in the family, pair them with Cheesy Fries or a refreshing side like Refreshing Avocado Sandwiches to complete the meal!
Get ready to delight your tastebuds!
Crispy Fish Sandwich Ingredients
For the Fish
• Flaky White Fish – This is the star of the dish; cod, halibut, or tilapia work beautifully!
• Egg – Acts as the binder to hold the crunchy coating in place; ensure it coats evenly for best results.
• Breadcrumbs – Provides that much-loved crisp; opt for panko for extra crunch or gluten-free breadcrumbs for a lighter touch.
For the Coating
• All-Purpose Flour – A must for a fine coating; gives the fish a solid base to adhere to the egg and breadcrumbs.
• Salt & Pepper – Essential seasonings to enhance flavor; adjust the quantities to suit your taste.
• Cayenne Pepper – For a kick of heat; feel free to adjust based on your spice preference.
For Serving
• Buns – A soft vessel to hold all the delicious components; whole wheat or gluten-free variants are excellent options!
• Tartar Sauce – Adds a delightful tang; try chipotle mayo for a zesty twist!
• Lettuce – Brings freshness and crunch, helping balance the richness of the fish; iceberg or romaine are great choices.
Now you’re all set to gather your ingredients for the deliciously crispy fish sandwiches that beat fast food any day!
Step‑by‑Step Instructions for Crispy Fish Sandwiches
Step 1: Preheat Your Cooking Equipment
Begin by preheating your oven to 425°F (220°C) or set your air fryer to 400°F (200°C). This is essential for achieving that golden-brown crunch on your Crispy Fish Sandwiches. Preheating ensures even cooking and perfect crispiness. While that warms up, gather your ingredients and get ready for some breading action!
Step 2: Prepare the Fish Fillets
Next, take your flaky white fish fillets and pat them dry with paper towels to remove excess moisture. Set up a breading station by placing flour, a beaten egg, and breadcrumbs in separate shallow dishes. Coat each fillet first in flour, dip it in the egg until fully covered, then press firmly into the breadcrumbs, ensuring a good coating for that satisfying crunch.
Step 3: Arrange Your Coated Fish
Once your fish fillets are beautifully breaded, carefully arrange them on a parchment-lined baking sheet if you’re baking, or place them in the air fryer basket if using that method. Make sure each piece has space around it to allow for even cooking and crispiness on all sides.
Step 4: Cook to Perfection
For baking, pop your prepared fish into the oven and bake for 15–18 minutes until golden brown and flaky inside. If air-frying, cook for 12–15 minutes, checking for a crispy exterior. The fish should be golden and reach an internal temperature of 145°F (63°C) for optimal safety and flavor.
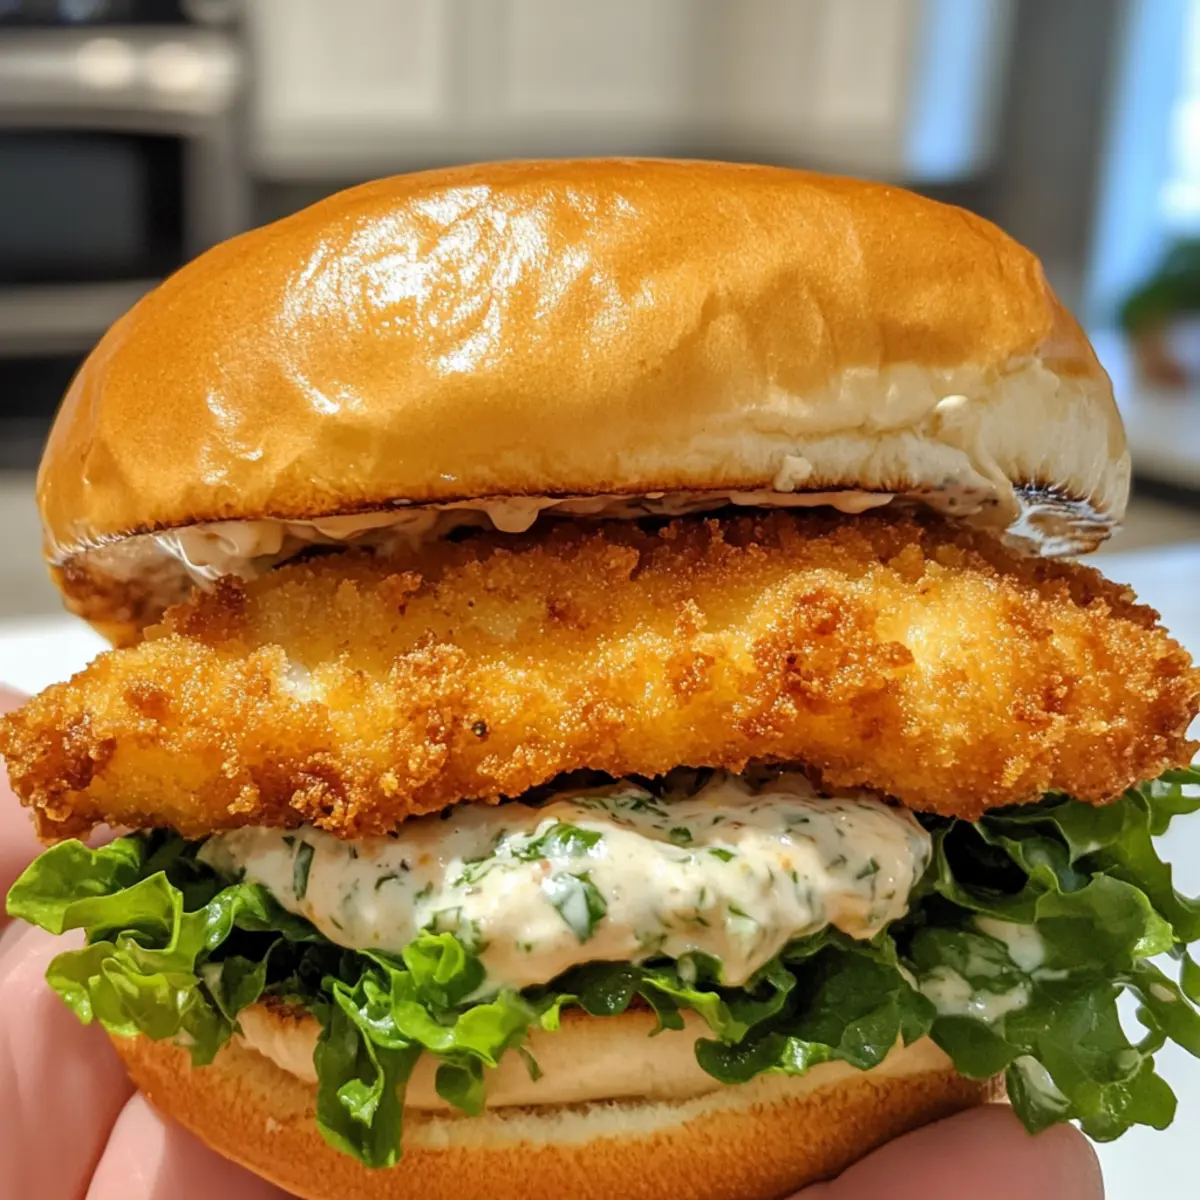
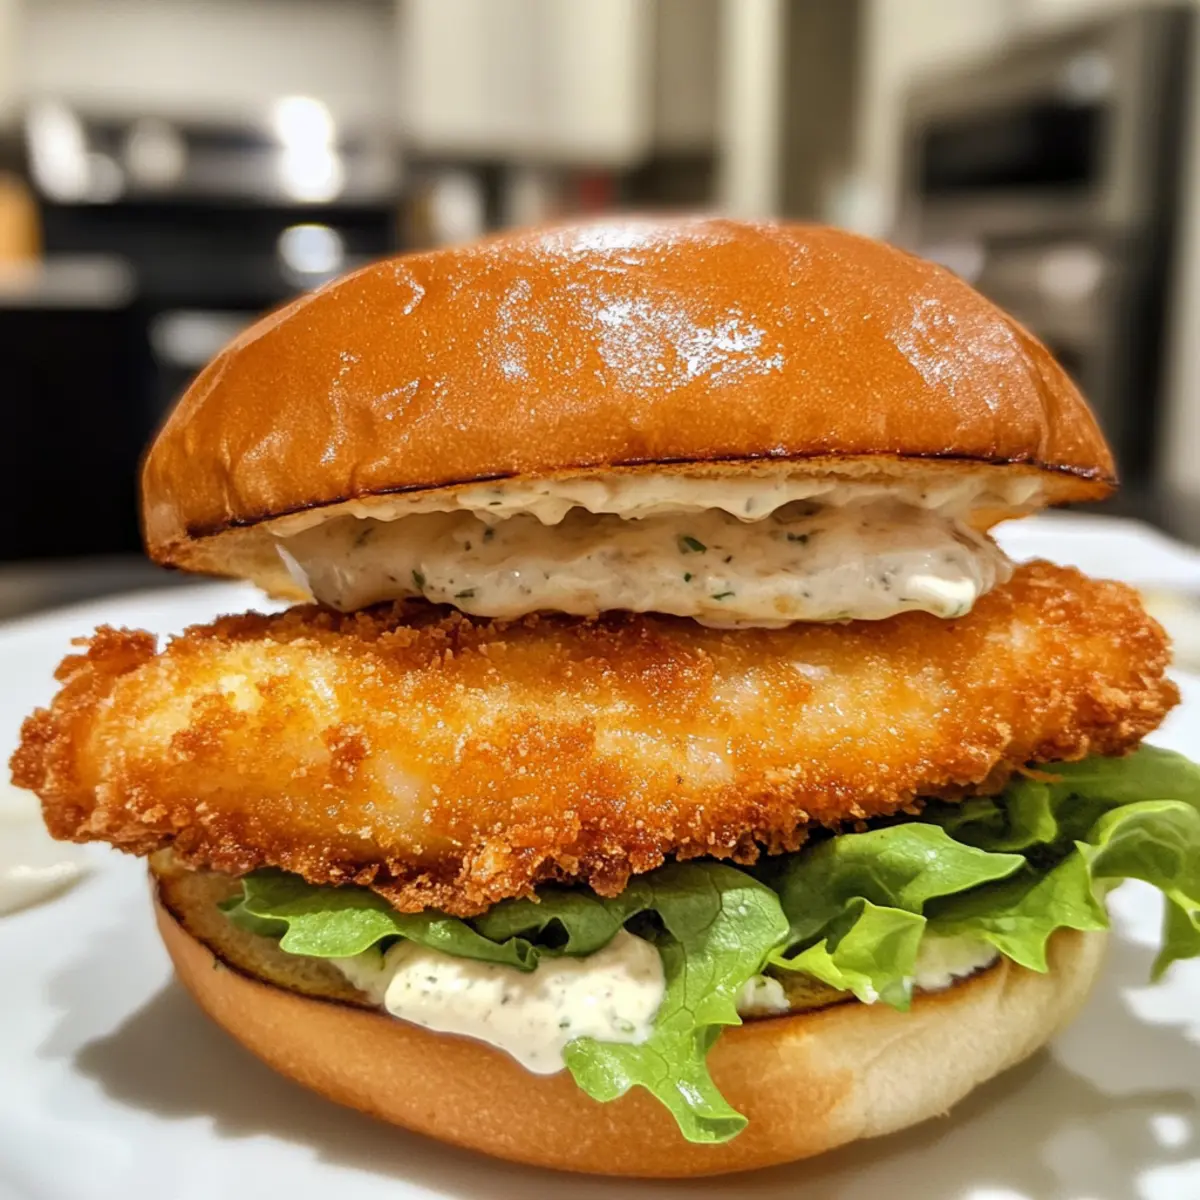
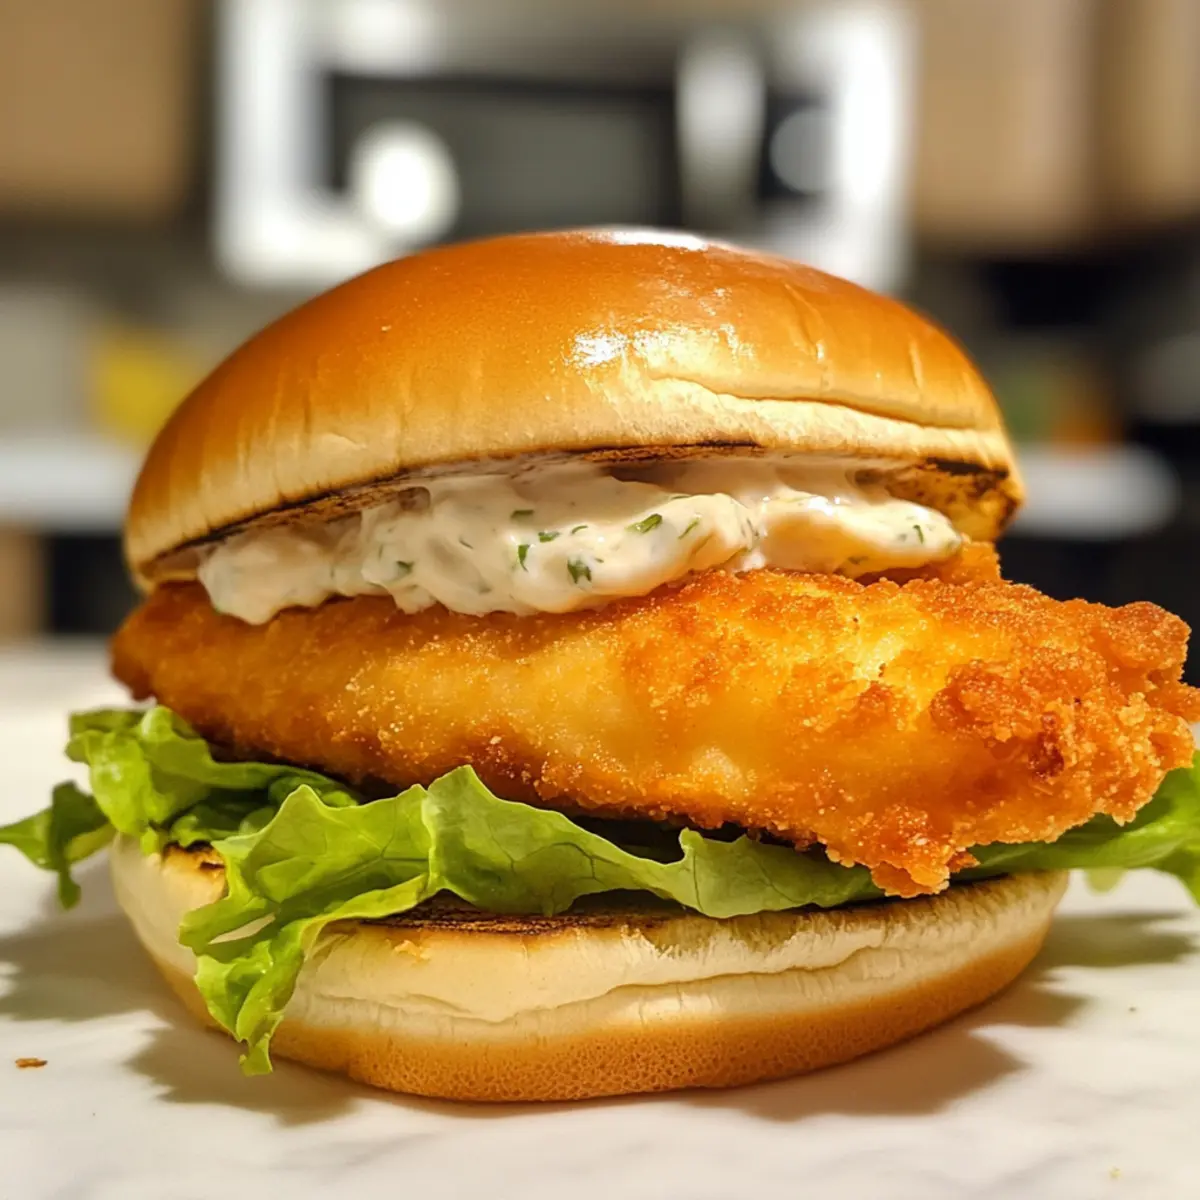
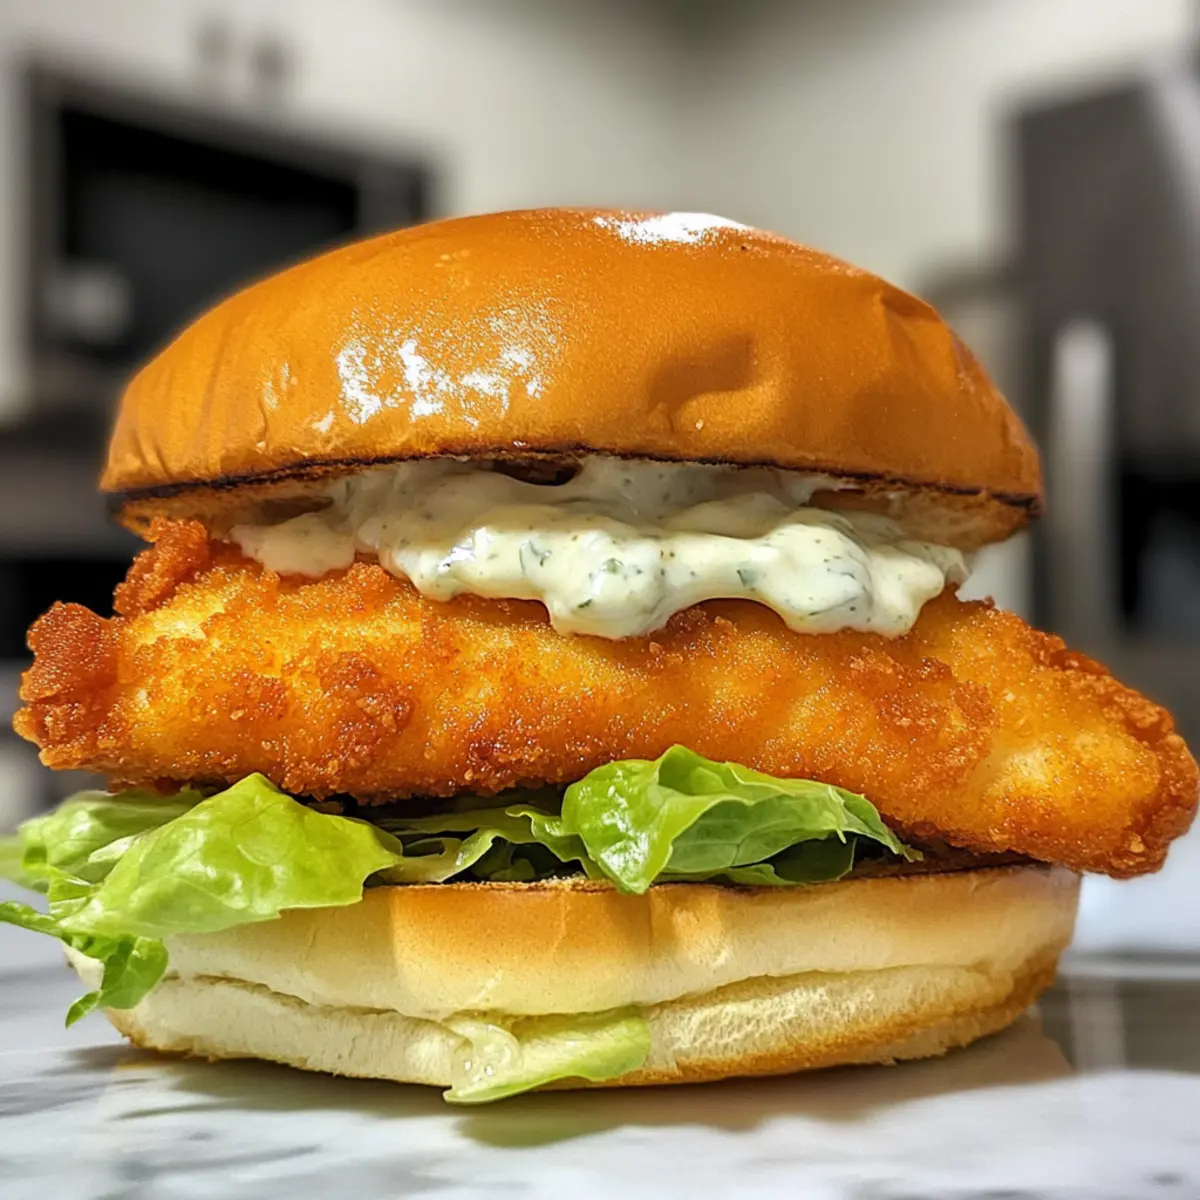
Step 5: Assemble the Sandwiches
Now that your Crispy Fish is ready, it’s time to assemble the sandwiches! Take your soft buns and layer on a generous spread of tartar sauce or chipotle mayo for that zing. Place a golden fish fillet on each bun, then top with crisp lettuce. Give it a gentle press to keep everything snugly in place.
Step 6: Serve and Delight
Your Crispy Fish Sandwiches are now ready to be devoured! Serve them hot with your favorite side, such as crispy fries or a vibrant salad for a complete meal. Enjoy the satisfying crunch and tender fish that makes this dish a delightful alternative to fast food!
What to Serve with Crispy Fish Sandwiches
Serve your loved ones a delightful meal filled with flavors and textures that perfectly complement the satisfying crunch of your Crispy Fish Sandwiches.
-
Creamy Coleslaw: A classic pairing that adds a crunchy, tangy bite; its creaminess contrasts beautifully with the crispy fish.
-
Seasoned French Fries: Golden and crispy, these fries are a hearty side that enhances the overall comfort food experience.
-
Zesty Potato Wedges: Crispy on the outside and fluffy inside, these seasoned wedges offer a delightful alternative to traditional fries.
-
Refreshing Cucumber Salad: A light, crunchy salad with tangy vinaigrette adds freshness to balance the richness of the fish sandwiches.
-
Grilled Asparagus: Tender and slightly charred, grilled asparagus adds a lovely earthy element while being healthy and vibrant.
-
Lemon Garlic Aioli: A zesty dip that’s perfect for enhancing the fish flavors, making each bite intriguing and fresh.
-
Sparkling Lemonade: A bubbly drink to wash it all down, its brightness complements the savory elements of the meal.
-
Chocolate Chip Cookies: For dessert, the sweetness of warm cookies with a hint of nostalgia rounds out this joyful meal perfectly.
The combination of these accompaniments will elevate your Crispy Fish Sandwiches into a feast everyone will remember!
How to Store and Freeze Crispy Fish Sandwiches
Fridge: Store any leftover crispy fish sandwiches in an airtight container for up to 2 days. This keeps the fish somewhat crispy, but a quick reheat is recommended before serving.
Freezer: For longer storage, freeze the assembled sandwiches individually wrapped in plastic wrap and then in aluminum foil for up to 3 months. This retains flavor and texture.
Reheating: To reheat, bake thawed sandwiches in a preheated oven at 375°F (190°C) for 10-15 minutes, or air fry at 400°F (200°C) for about 5 minutes until heated through and crispy again. Enjoy your Crispy Fish Sandwiches fresh!
Crispy Fish Sandwiches Variations
Feel free to tweak these Crispy Fish Sandwiches to suit your taste and dietary needs! Each variation invites creativity in the kitchen, allowing your flavors to shine.
- Fish Swap: Use halibut or tilapia instead of cod for different flavor profiles that still deliver on that flaky texture.
- Gluten-Free: Substitute breadcrumbs with almond flour or gluten-free breadcrumbs to keep these sandwiches crispy without the gluten.
- Spicy Kick: Add finely chopped jalapeños to the tartar sauce for an extra layer of heat and flavor that’ll excite your taste buds.
- Avocado Addition: Top your sandwich with fresh avocado slices or guacamole for a creamy twist that complements the crunchy fish beautifully.
- Cheesy Delight: Sprinkle shredded cheddar or pepper jack cheese atop the fish before it bakes or air-fries for a gooey, melty surprise.
- Crunchy Slaw: Replace lettuce with a tangy coleslaw to add an unexpected crunch and flavor explosion—perfect alongside a side of Cheesy Fries.
- Wrap It Up: For a low-carb option, serve your fish in lettuce wraps instead of buns for a refreshing twist that’s still delightful.
- Herb Infusion: Mix fresh herbs like dill or parsley into your tartar sauce for an aromatic boost that brightens each bite, making this dish even more enjoyable.
Feel free to explore these variations, and don’t forget to pair your Crispy Fish Sandwiches with a side of Refreshing Avocado Sandwiches for a complete meal!
Expert Tips for Crispy Fish Sandwiches
Breading Basics: Ensure your fish fillets are dry before breading to help the coating stick better. This prevents any sogginess and ensures a crispy finish.
Egg Coating: Don’t rush the egg bath! Make sure the fish is entirely covered in beaten egg to achieve optimal breadcrumb adherence.
Space It Out: When arranging your breaded fish on the baking sheet or air fryer basket, give each piece some breathing room. This helps them cook evenly without steaming.
Cooking Times: Keep an eye on your Crispy Fish Sandwiches; ovens and air fryers can vary. Fish should be golden brown and reach an internal temperature of 145°F (63°C) for safety.
Topping Variation: Feel free to get creative with toppings—adding slices of avocado or a sprinkle of pickles can elevate the flavor and make each sandwich unique!
Make-Ahead Tip: If you want to prep in advance, bread the fish fillets and store them covered in the fridge for up to two days before cooking.
Make Ahead Options
These Crispy Fish Sandwiches are a lifesaver for busy weeknights! You can prep the fish fillets by breading them up to 24 hours in advance. After coating the fish in flour, egg, and breadcrumbs, place them in an airtight container and refrigerate to lock in that freshness. Just before serving, bake or air-fry the prepped fish directly from the fridge to achieve that perfect crunch without any hassle. To maintain quality, ensure the fish is fully cooled before storing and avoid overcrowding when cooking. This way, you’ll enjoy delicious, homemade fish sandwiches with minimal effort, just as delightful as if made fresh!
Crispy Fish Sandwiches Recipe FAQs
How do I choose the best white fish for my sandwiches?
Absolutely! Look for flaky white fish that has a clean scent and firm texture. Cod is a popular choice for its mild flavor, but halibut and tilapia are also excellent substitutes that lend a different depth of taste. When selecting, ensure the fish has a bright, translucent appearance without any dark spots.
How should I store leftover crispy fish sandwiches?
To maintain their deliciousness, store any leftover crispy fish sandwiches in an airtight container in the fridge for up to 2 days. This method helps keep the fish relatively crispy. When ready to enjoy, reheat them in the oven or air fryer for the best results!
Can I freeze the crispy fish sandwiches?
Yes, indeed! To freeze, individually wrap the sandwiches in plastic wrap, then place them in a zip-top bag or aluminum foil for added protection. They can be frozen for up to 3 months without losing flavor. When you’re ready to enjoy them, simply thaw in the fridge overnight and reheat in the oven or air fryer.
What should I do if the coating doesn’t stick to the fish?
Very good question! If your coating isn’t adhering well, it’s often due to excess moisture on the fish. Make sure to pat the fillets dry with paper towels before breading. Additionally, ensure you’re fully coating the fish in the egg to create a good bond for the breadcrumbs, and press firmly when applying the coating.
Are there any dietary considerations I should be aware of?
For those with gluten sensitivities, simply swap out traditional breadcrumbs for gluten-free options, such as almond flour or store-bought gluten-free breadcrumbs. Additionally, check the buns for gluten-free varieties. Always verify that the fish you purchase is sourced from facilities that do not cross-contaminate with gluten-containing products if you’re serving this to someone with celiac disease.
Crispy Fish Sandwiches That Beat Fast Food Any Day
Ingredients
Equipment
Method
- Preheat your oven to 425°F (220°C) or air fryer to 400°F (200°C).
- Pat the fish fillets dry and set up a breading station with flour, beaten egg, and breadcrumbs.
- Coat each fillet first in flour, dip it in the egg, then press firmly into breadcrumbs.
- Arrange breaded fish on a parchment-lined baking sheet or in the air fryer basket.
- Bake for 15–18 minutes or air fry for 12–15 minutes until golden brown and flaky.
- Assemble the sandwiches with tartar sauce on buns, and place the fish and lettuce on top.
- Serve hot with your favorite side.