

Easter has always been a time of joy, renewal, and, of course, sweet treats. I vividly remember waking up on Easter morning as a child, running down the stairs, and finding a basket brimming with colorful candies, chocolate bunnies, and—my absolute favorite—homemade Rice Krispie treats shaped like Easter eggs. My grandmother made them every year, pressing the warm, gooey marshmallow mixture into egg-shaped molds with her flour-dusted hands. She would let me help, my tiny fingers sticking together as I eagerly packed the mixture into plastic eggs, impatiently waiting for them to set.
The best part? Biting into one and discovering a hidden surprise inside—a little chocolate candy or a peanut butter filling that made each bite even more special. These weren’t just desserts; they were edible memories, infused with love, tradition, and the simple pleasure of creating something beautiful.
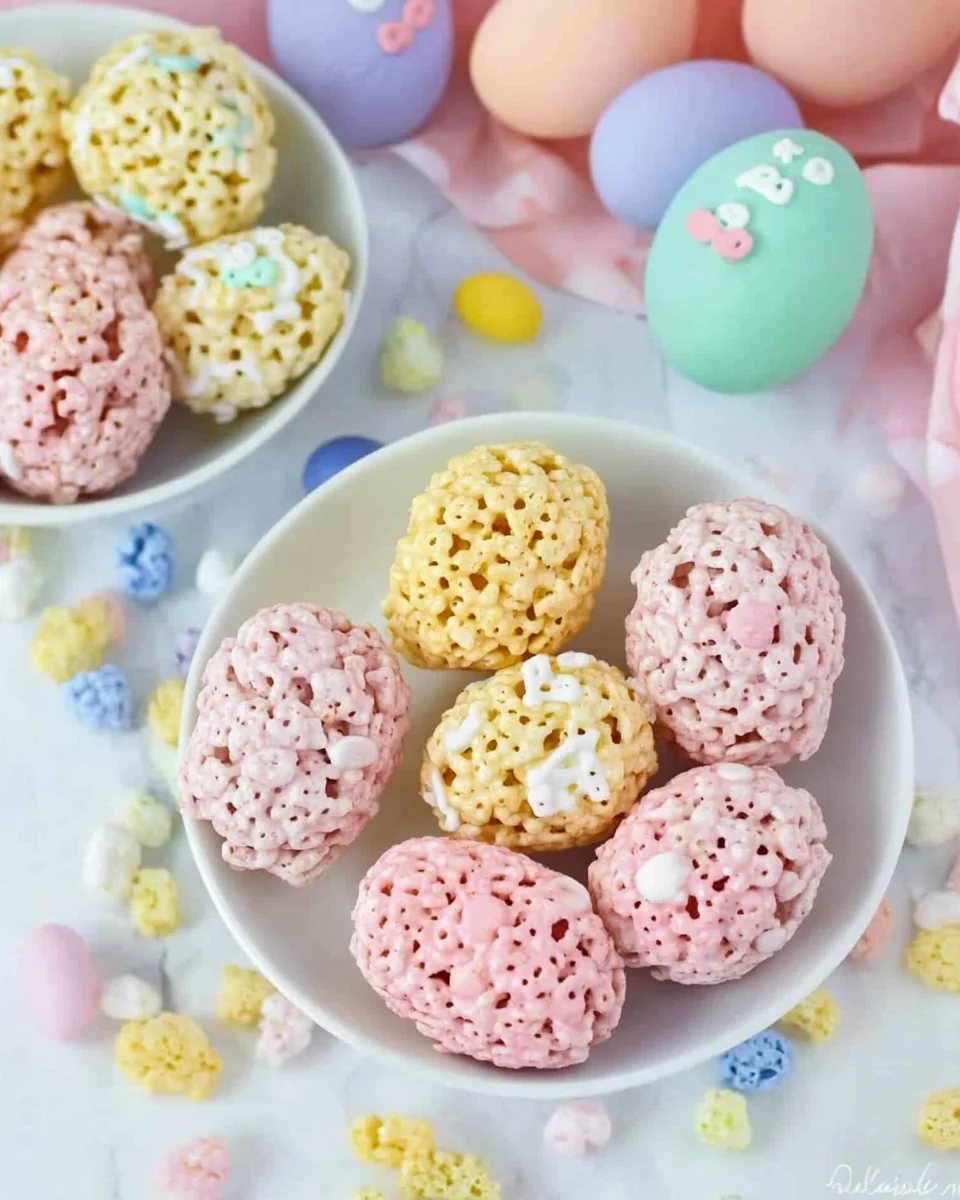
Now, I carry on that tradition with my own family, making these Rice Krispie Treat Easter Eggs every year. The process is simple, but the result is magical—crispy, chewy, and bursting with pastel colors that brighten up any Easter table. Whether you’re making them for your kids, a holiday gathering, or just to relive childhood nostalgia, these treats bring a sense of warmth and togetherness that only homemade desserts can provide.
Why Rice Krispie Treat Easter Eggs Are a Must-Try
Easter is filled with classic treats, from chocolate eggs to sugar-dusted marshmallow Peeps. But there’s something uniquely delightful about Rice Krispie Treat Easter Eggs. Here’s why they deserve a spot in your Easter traditions:
1. A Fun and Festive Twist on a Classic
Traditional Rice Krispie treats are delicious on their own, but shaping them into eggs adds a playful touch. The bright colors make them eye-catching, and their soft, chewy texture pairs perfectly with a light crunch. They’re great for Easter baskets, dessert tables, or even as a fun activity for kids.
2. Quick and Easy to Make
Unlike baked goods that require precise measurements and oven time, these treats come together in under an hour. A few ingredients, a microwave, and a little molding, and you’ve got a batch of festive Easter goodies.
3. Customizable for Every Taste
One of the best parts of this recipe is its versatility. You can change up the colors, add mix-ins, drizzle with melted chocolate, or even hide small candies inside. The possibilities are endless, allowing you to make them as simple or extravagant as you like.
4. Perfect for Kids and Family Bonding
Easter is all about family, and this recipe is a wonderful way to get kids involved in the kitchen. They’ll love mixing the colors, shaping the eggs, and—of course—eating them! Plus, since the recipe doesn’t involve an oven or sharp tools, it’s a safe and fun activity for little hands.
5. A Nostalgic Treat That Brings Back Memories
For many of us, Rice Krispie treats are tied to childhood. Whether they remind you of school bake sales, sleepovers, or holiday gatherings, they carry a sense of nostalgia. Making them in the shape of Easter eggs adds another layer of sentimental value, making them a wonderful tradition to pass down through generations.
Creative Variations to Try
While the classic Rice Krispie Treat Easter Eggs are delicious on their own, here are some creative ways to take them up a notch:
Chocolate-Dipped Krispie Eggs
Leave the crispy eggs uncolored and dip half of each one in melted chocolate or colored candy melts. Sprinkle with crushed nuts, coconut flakes, or festive sprinkles for added texture and flavor.
Stuffed Surprise Eggs
Before sealing the plastic eggs, press a small chocolate candy, mini marshmallow, or even a peanut butter cup into the center. When someone takes a bite, they’ll get a sweet surprise inside!
Speckled Egg Design
For a more natural look, mix in a tiny amount of cocoa powder or black gel food coloring with a toothbrush to “speckle” the eggs. This creates a beautiful, pastel speckled effect similar to real Easter eggs.
Marbled Easter Eggs
Instead of fully mixing in the food coloring, lightly swirl multiple colors together before pressing the mixture into the molds. This will create a marbled effect that looks artistic and unique.
Cereal Mix-Ins
Experiment with different types of cereals—fruity-flavored rice cereal for a burst of flavor, or even a chocolate version for a richer taste.
Drizzle and Decorate
Once the eggs have set, drizzle them with white or dark chocolate and top with crushed candies, edible glitter, or shredded coconut for a decorative touch.
Ingredients – The Magic Mix
- Butter – 6 tablespoons, divided
- Marshmallows – 5 cups, divided (mini works best)
- Rice Krispie Cereal – 6 cups, divided
- Gel Food Coloring – Neon pink, neon green, purple, and yellow
- Plastic Easter Eggs – For shaping the treats
- Non-Stick Spray – To prevent sticking
Directions – Crafting the Crispy Eggs
- Melt the Marshmallow Magic
- In a microwave-safe bowl, melt 1 ½ tablespoons of butter with 1 ¼ cups of marshmallows for 45 seconds.
- Stir until smooth, then add 3 drops of your chosen gel food coloring and mix well.
- Coat the Crunch
- Stir 1 ½ cups of Rice Krispie cereal into the marshmallow mixture until fully coated.
- Shape the Eggs
- Lightly spray the plastic Easter eggs with non-stick spray.
- Tightly pack the coated cereal into each side of the egg mold, close it, and let it sit for 10 minutes.
- Unveil the Treats
- Gently remove the treats from the plastic eggs and set them aside.
- Repeat and Customize
- Repeat steps 1-4 for each color variation.
Nutritional Breakdown – A Sweet Indulgence (Per batch total)
- Calories: 2435 kcal
- Carbohydrates: 448g
- Protein: 19g
- Fat: 72g
- Saturated Fat: 44g
- Trans Fat: 3g
- Cholesterol: 181mg
- Sodium: 1785mg
- Potassium: 249mg
- Fiber: 1g
- Sugar: 232g
- Vitamin A: 13275 IU
- Vitamin C: 106mg
- Calcium: 40mg
- Iron: 52mg
These colorful, crispy Easter eggs are an easy and fun treat that adds a festive touch to any celebration!
Frequently Asked Questions (FAQs)
Can I make these treats without plastic eggs?
Yes! If you don’t have plastic Easter eggs, simply grease your hands with butter or non-stick spray and shape the treats into eggs by hand. You can also use silicone molds for a more uniform shape.
How do I prevent the marshmallow mixture from sticking?
The key is to lightly coat your hands and any molds with non-stick cooking spray or butter before handling the mixture. This prevents it from sticking and makes shaping much easier.
Can I make these ahead of time?
Absolutely! These treats stay fresh for up to 3 days when stored in an airtight container at room temperature. If you need them to last longer, refrigerate them, but be sure to let them sit at room temperature for a few minutes before serving to soften.
Can I use regular marshmallows instead of mini marshmallows?
Yes, but they may take longer to melt. If using large marshmallows, cut them into smaller pieces for easier melting.
How do I make them extra gooey?
For softer, extra-gooey treats, slightly increase the amount of marshmallows and butter in the recipe. This will make them more chewy and less firm.
Are these treats gluten-free?
Rice Krispie cereal is often made with malt flavoring, which contains gluten. However, there are gluten-free rice cereals available that can be used as a substitute. Always check ingredient labels if making these for someone with dietary restrictions.
Can I add different flavors?
Yes! A few drops of vanilla extract, almond extract, or even a pinch of cinnamon can enhance the flavor. If you’re a chocolate lover, mix in cocoa powder or chocolate chips for a richer taste.
What’s the best way to store leftovers?
Keep them in an airtight container at room temperature for up to three days. If stacking them, place a sheet of wax paper between layers to prevent sticking. Avoid refrigerating for long periods, as they can become too hard.
Conclusion – A Treat That Creates Lasting Memories
Easter is a time of celebration, and what better way to make it extra special than with homemade Rice Krispie Treat Easter Eggs? They’re more than just a dessert; they’re a symbol of creativity, tradition, and family bonding. Whether you’re making them with your children, surprising a loved one, or simply indulging in a nostalgic treat, these crispy, marshmallowy delights are guaranteed to bring smiles.
So gather your ingredients, put on some festive music, and start shaping your own batch of colorful Easter eggs. And who knows? Maybe years from now, someone in your family will be carrying on this same tradition, remembering the joy of making these sweet treats together.
Easter Memories and the Magic of Rice Krispie Treat Eggs
Ingredients
Method
- Melt the Marshmallow Magic
- In a microwave-safe bowl, melt 1 ½ tablespoons of butter with 1 ¼ cups of marshmallows for 45 seconds.
- Stir until smooth, then add 3 drops of your chosen gel food coloring and mix well.
- Coat the Crunch
- Stir 1 ½ cups of Rice Krispie cereal into the marshmallow mixture until fully coated.
- Shape the Eggs
- Lightly spray the plastic Easter eggs with non-stick spray.
- Tightly pack the coated cereal into each side of the egg mold, close it, and let it sit for 10 minutes.
- Unveil the Treats
- Gently remove the treats from the plastic eggs and set them aside.
- Repeat and Customize
- Repeat steps 1-4 for each color variation.
Notes
- For extra fun, drizzle melted chocolate or sprinkles over the finished eggs.
- If you don’t have plastic eggs, shape the treats by hand using buttered hands or silicone molds.
- Store in an airtight container at room temperature for up to 3 days.
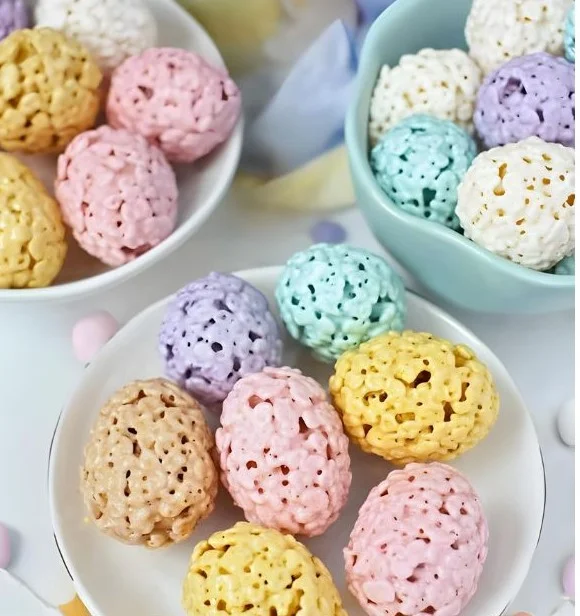
- Mix and match colors for a vibrant Easter display!