

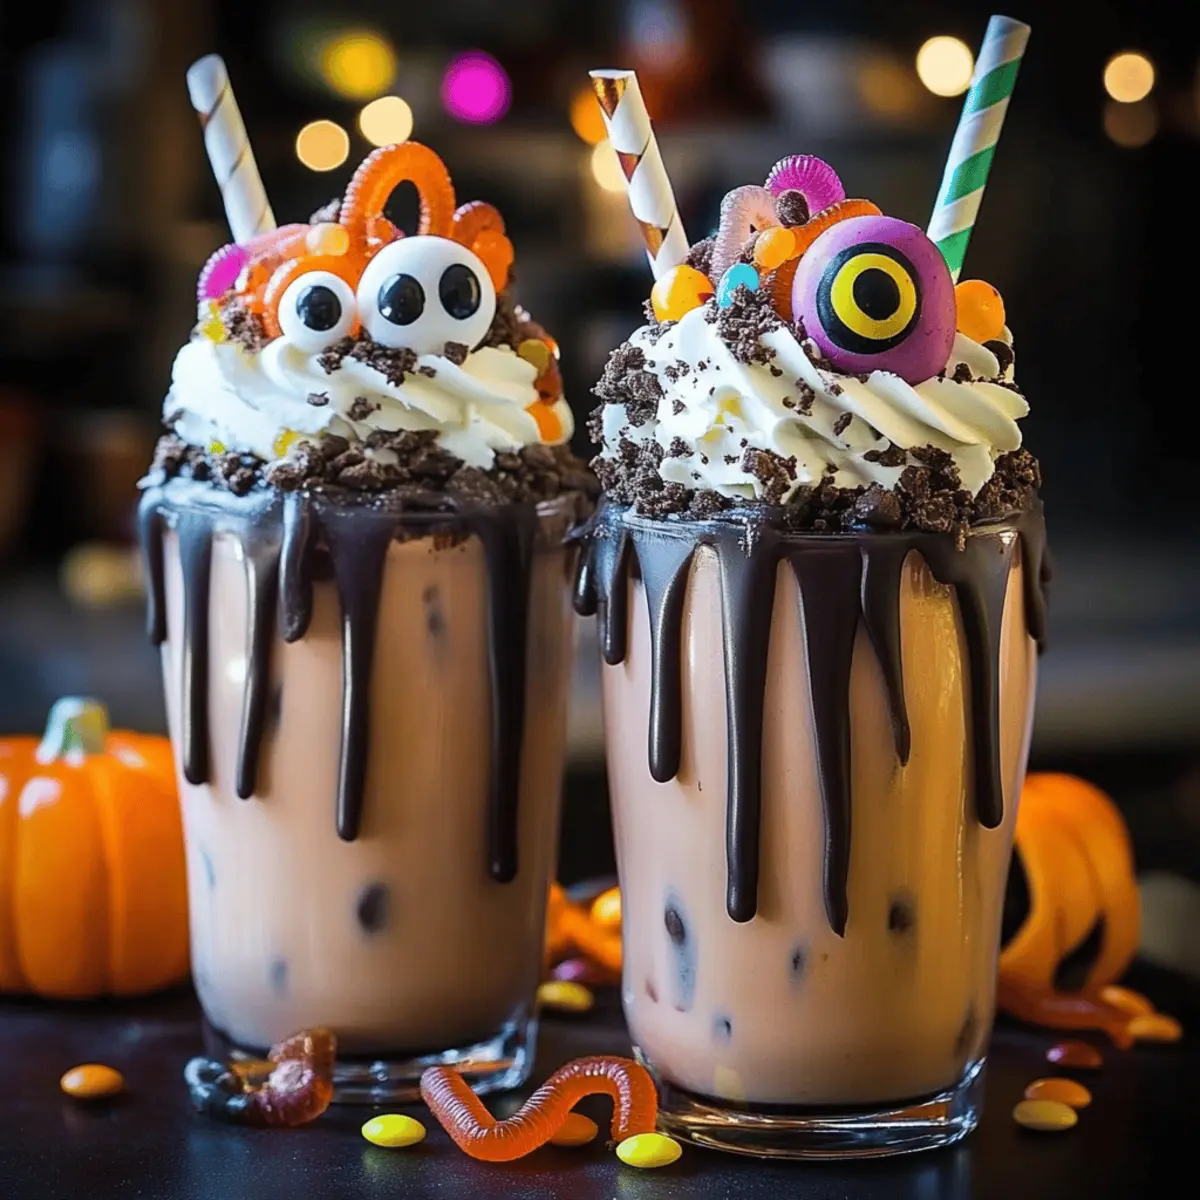
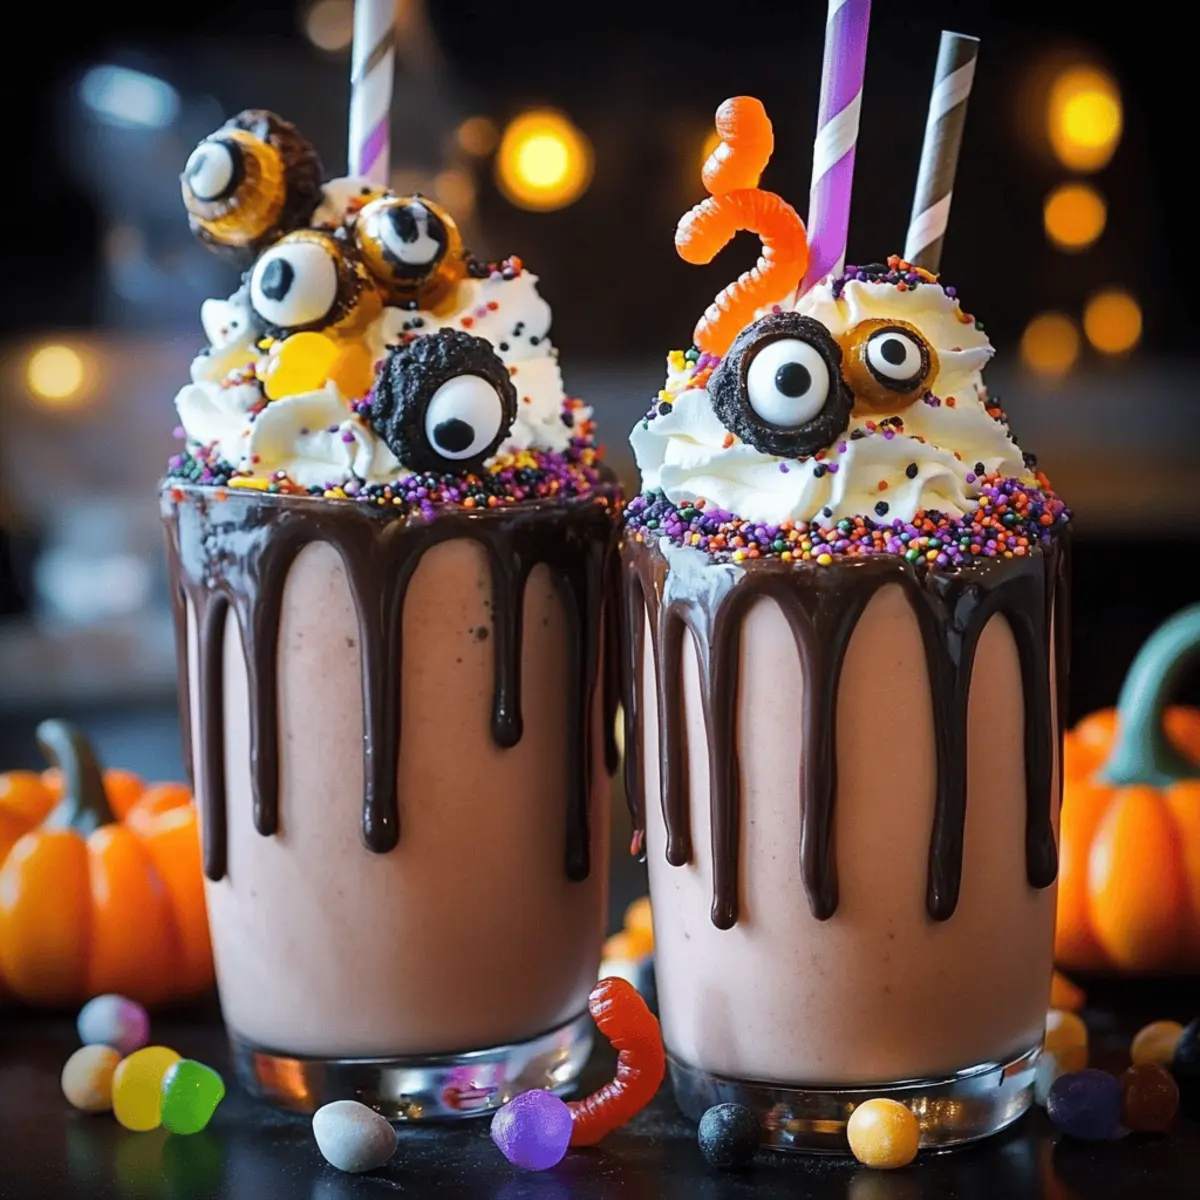
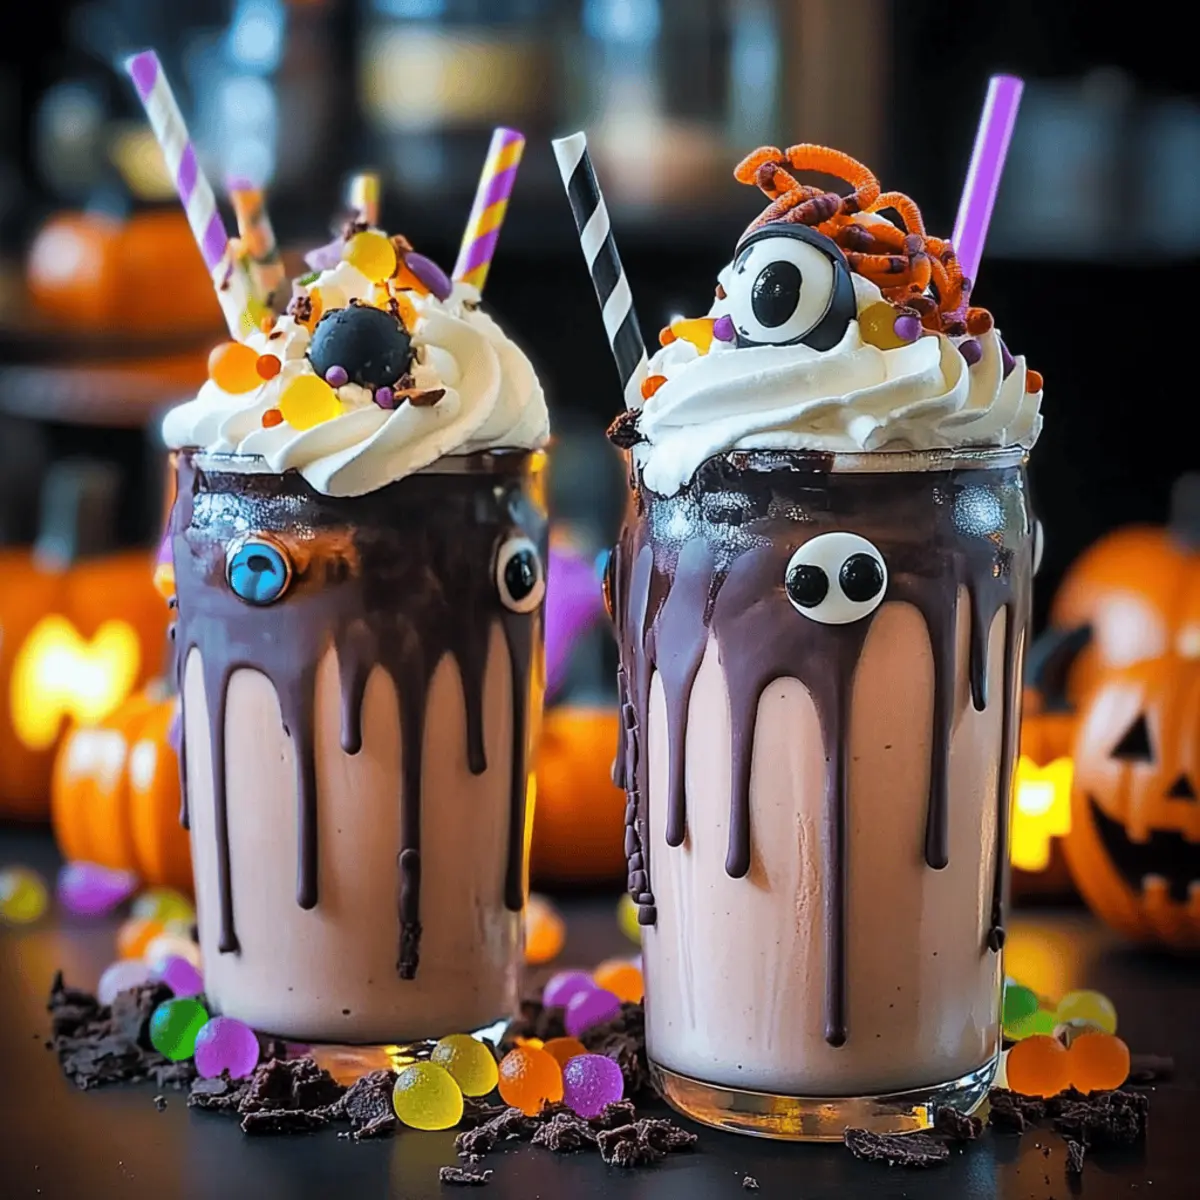
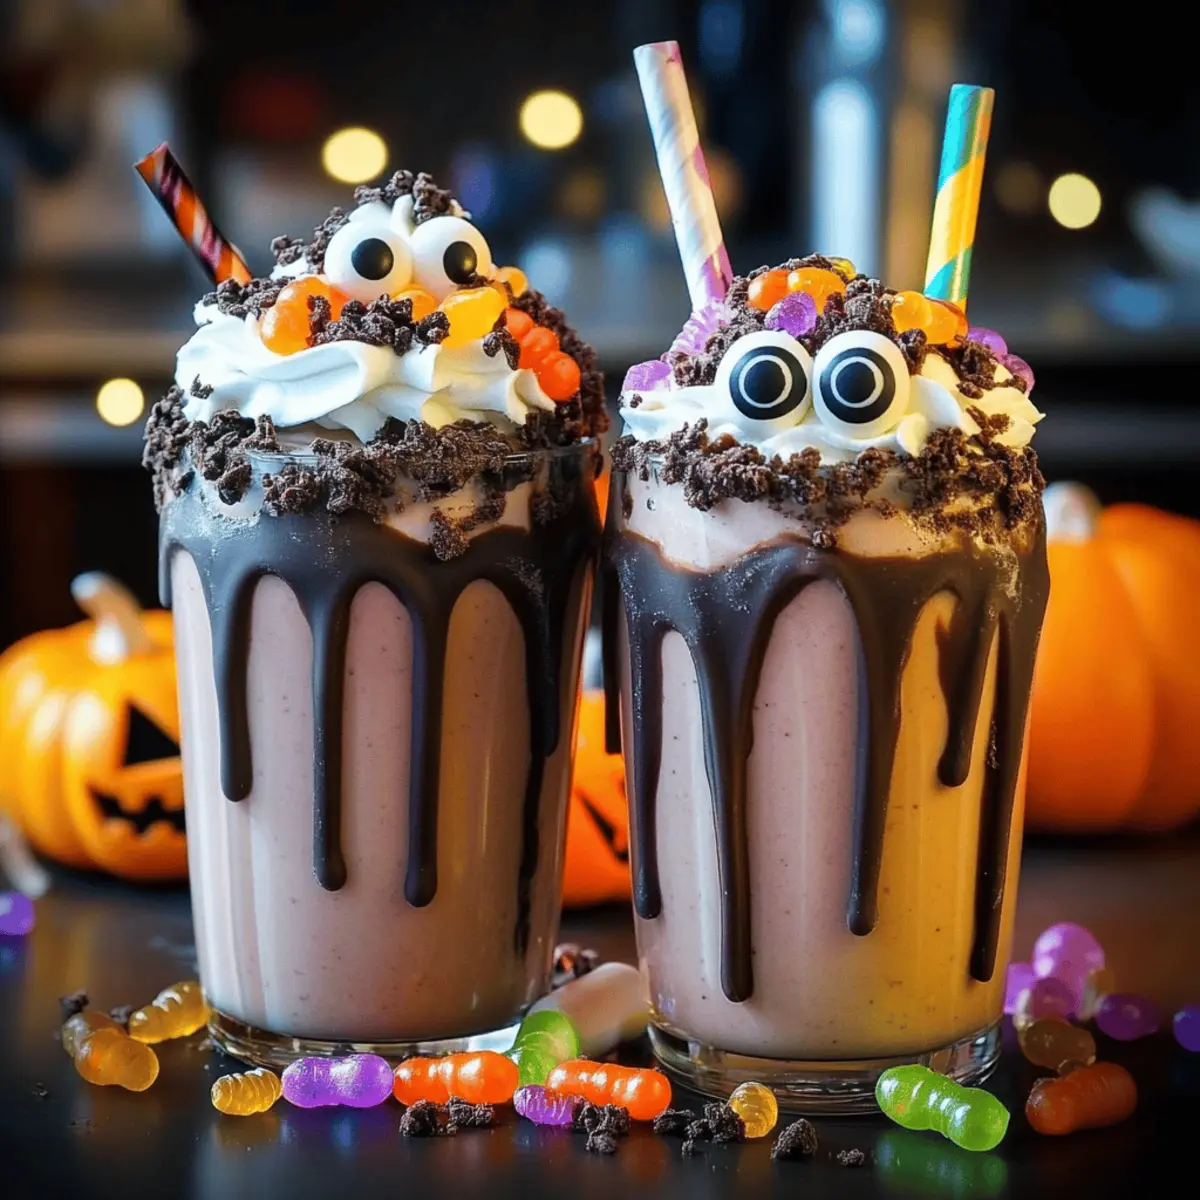
As the air turns crisp and the leaves begin to dance in vibrant hues, it’s time to embrace all things spooky and delicious. Enter the realm of Halloween Milkshakes, where creamy vanilla ice cream meets playful chaos—think generous chocolate drizzles and a rainbow of festive toppings that beckon all dessert lovers. These delightful shakes are not only a visual treat but also a quick and easy option for your Halloween gatherings, making them a hit with kids and adults alike. With just a few simple ingredients and a dash of creativity, you can whip up a delightful concoction that captures the essence of the season. Ready to make this Halloween unforgettable? Let’s dive into the fun!
Why are Halloween Milkshakes a Must-Try?
Irresistible Fun: These Halloween milkshakes bring joy and excitement to any celebration, becoming the highlight of your spooky gatherings.
Quick & Easy: With just a few simple ingredients, you can whip these up in no time, making entertaining a breeze.
Creative Toppings: The playful use of gummy worms, candy eyes, and sprinkles allows everyone to customize their shake, ensuring every glass is unique.
Crowd-Pleasing Delight: Perfect for kids and adults alike, these shakes will impress your guests and satisfy their sweet cravings.
Visual Appeal: Their vibrant colors and whimsical decorations make them a perfect centerpiece for your Halloween festivities.
Get ready to elevate your spooky dessert game! For more festive ideas, check out our tips on spooky treats.
Halloween Milkshake Ingredients
For the Milkshake Base
- Vanilla Ice Cream – The creamy foundation of your shake, offering a sweet delight that can be switched out for chocolate or pumpkin spice ice cream for a twist.
- Whole Milk – Helps achieve your desired shake consistency; non-dairy milk works beautifully for a vegan option.
- Chocolate Syrup – Adds a rich chocolate flavor, allowing you to adjust the sweetness to your liking.
- Vanilla Extract – Provides an extra layer of flavor; feel free to leave it out if preferred.
For the Toppings
- Chocolate Sandwich Cookies (crushed) – Adds a delightful crunch and chocolatey goodness; substitute with graham crackers or Oreo crumbs if you wish.
- Gummy Worms – A fun, chewy decoration that enhances the spooky vibe; swap them out for any favorite candy if desired.
- Whipped Cream – A luscious topping giving an airy feel; consider a dairy-free alternative for those with dietary needs.
- Halloween Sprinkles – Perfect for a pop of color and festive flair; seasonal sprinkles can be used as a fun alternative.
- Candy Eyes – An amusing way to bring your shake to life; chocolate chips or other candies can serve as playful substitutes.
- Colored Sugar – Enlivens the glass rims for a fun presentation; you can use regular sugar mixed with food coloring as an alternative.
- Large Glasses – Ensure sturdiness to hold all those delicious layers and toppings in place.
These ingredients embody the spirit of Halloween Milkshakes, creating a whimsical and delightful treat that will surely keep your spooky celebrations vibrant and fun!
Step‑by‑Step Instructions for Halloween Milkshakes
Step 1: Blend the Base
In a blender, combine 3 cups of vanilla ice cream, 1 cup of whole milk, ¼ cup of chocolate syrup, and 1 teaspoon of vanilla extract. Blend on high for about 30 seconds, or until the mixture is smooth and creamy, resembling soft serve. If it’s too thick, add more milk a splash at a time until you reach your desired consistency.
Step 2: Prepare the Glasses
While your milkshake base is blending, take 4 large glasses and prepare them for serving. Dip the rims into water or corn syrup to help colored sugar stick, then roll the rims in a plate filled with colored sugar. This adds a delightful visual touch to your Halloween milkshakes, making them extra enticing.
Step 3: Pour the Milkshakes
Once blended, carefully pour the creamy Halloween milkshake mixture evenly into the prepared glasses. Fill each glass about three-quarters full, allowing room for the delightful toppings that will come next. The thick, inviting texture of the shake should beautifully contrast with the colorful rimmed glasses.
Step 4: Add Whipped Cream
Generously top each milkshake with a dollop of whipped cream, creating a fluffy cloud on top for that added festive flair. Allow the whipped cream to cascade over the sides slightly, creating a deliciously inviting presentation. This topping is essential for giving your Halloween milkshakes a dreamy, creamy finish.
Step 5: Sprinkle the Cookies
Next, take 1 cup of crushed chocolate sandwich cookies and generously sprinkle them on top of the whipped cream. The layers of cookie crumbs will mimic dirt, enhancing the spooky theme. Ensure every glass gets a nice layer, adding an exciting crunch that complements the shake’s smoothness.
Step 6: Decorate with Fun Toppings
Now it’s time for the fun! Decorate each milkshake with gummy worms, candy eyes, and a sprinkle of Halloween sprinkles for a burst of color. Place the gummy worms draped over the edge and let them wiggle for added effect. Be creative; this is what makes each Halloween milkshake uniquely delightful!
Step 7: Serve Immediately
Your Halloween milkshakes are now ready to be devoured! Serve them immediately with fun straws or spoons for a whimsical touch. As you present these spooky delights, get ready for the smiles and excitement, making them the perfect treat for your festive gathering.
Make Ahead Options
These Halloween Milkshakes are not only a fun treat but also perfect for meal prep! You can prepare the milkshake base—combining the vanilla ice cream, whole milk, chocolate syrup, and vanilla extract—up to 24 hours in advance; simply store it in an airtight container in the refrigerator. This ensures the mix stays fresh and creamy until you’re ready to serve. When it’s time to delight your guests, pour the chilled mixture into your prepared glasses, add whipped cream, sprinkle with crushed cookies, and adorn with your playful toppings. This approach makes serving effortlessly quick, resulting in deliciously spooky Halloween Milkshakes with minimal last-minute effort!
Expert Tips for the Best Halloween Milkshakes
-
Ice Cream Temperature: Slightly soften the vanilla ice cream for easier blending. This ensures a smoother, creamier Halloween milkshake that’s a joy to sip.
-
Glass Preparation: Make sure the rims of your glasses are well-coated with colored sugar; using a corn syrup dip helps the sugar adhere perfectly for a stunning presentation.
-
Creative Toppings: Don’t be afraid to get creative with your decorations! Use different candies or themed treats to personalize each shake, making your Halloween milkshakes truly unique.
-
Consistent Texture: If the milkshake is too thick, add milk a splash at a time until you reach your desired consistency, ensuring it’s easy to sip and enjoy.
-
Serve Fresh: For the best experience, create your Halloween milkshakes just before serving. This keeps the toppings fresh and the shakes at their optimal creamy texture.
Halloween Milkshakes Variations & Substitutions
Feel free to unleash your creativity and customize these delightful Halloween milkshakes, adding your personal flair for a spooky twist!
- Chocolate Ice Cream: Swap the vanilla ice cream for chocolate ice cream for a rich, decadent flavor that enhances the Halloween vibe.
- Pumpkin Spice Ice Cream: For a seasonal touch, use pumpkin spice ice cream to infuse your milkshake with warm fall flavors. It perfectly complements festive gatherings!
- Nut Milk: Choose almond or oat milk instead of whole milk for a dairy-free, vegan option, ensuring everyone can enjoy your spooky creations.
- Gummy Bats: Instead of gummy worms, use gummy bats for an extra spooky element, or even sour candies for an unexpected twist.
- Spiced Whipped Cream: Add a sprinkle of cinnamon or nutmeg to your whipped cream for a hint of fall spice that elevates each sip.
- Candy Corn: Include candy corn as a colorful topping that adds a fun, chewy texture to your Halloween milkshakes. Kids will love the addition!
- Flavored Syrups: Experiment with caramel or strawberry syrup in addition to or instead of chocolate syrup for a unique flavor that surprises your taste buds.
- Personalized Sprinkles: Use themed sprinkles that match your Halloween party, like orange and black, or even edible glitter for an enchanting touch!
By mixing and matching these variations, you’ll create a unique experience with each batch. For additional sweet inspiration, dive into our delicious collection of spooky treats or explore more about crafting mesmerizing Halloween desserts!
What to Serve with Spooky Halloween Milkshakes
As you prepare for an enchanting Halloween gathering, consider some delightful accompaniments to elevate your celebration.
-
Crispy Pumpkin Spice Cookies: These fall-themed treats provide a soft, spiced contrast that pairs beautifully with the creamy milkshake. Their warm flavors will enchant your taste buds.
-
Spooky Cheese Platter: An assortment of cheeses, crackers, and seasonal fruit can offer a savory balance to the sweetness of your shakes. Add spider-themed toothpicks for a festive touch!
-
Mummy Hot Dogs: These fun and easy-to-make snacks can be the perfect savory addition. Wrap hot dogs in crescent roll dough to resemble mummies—kids will love them!
-
Creepy Cupcake Decor: Whip up some chocolate or vanilla cupcakes, then adorn them with Halloween-themed frosting and decorations. Their light texture complements the thickness of the milkshakes while adding festive flair.
-
Ghostly Fruit Punch: Serve a refreshing fruit punch in a cauldron, complete with floating gummy eyeballs or rubber spiders. The fruity flavors will contrast delightfully with the rich milkshake.
-
Chilling Chocolate Cake: A decadent chocolate cake enhances the indulgence of your meal and provides a comforting and familiar dessert option to accompany your spooky shakes.
Storage Tips for Halloween Milkshakes
-
Room Temperature: Halloween milkshakes are best enjoyed immediately for that fresh taste and creamy texture. If left out, consume within 30 minutes.
-
Fridge: If you have leftover milkshake base, store it in an airtight container in the fridge for up to 2 hours. However, it’s best to add toppings right before serving for maximum enjoyment.
-
Freezer: If frozen, place the unassembled milkshake in a container for up to 1 month. Thaw in the fridge before blending with toppings again for a deliciously spooky treat.
-
Reheating: Avoid reheating, as milkshakes don’t hold up well. Instead, remix the shake in a blender if it’s too thick after storage for a smooth consistency again.
Halloween Milkshakes Recipe FAQs
How do I choose the right vanilla ice cream for Halloween milkshakes?
Absolutely! Look for premium vanilla ice cream with a smooth and creamy texture, as it will create a rich base for your Halloween milkshakes. If you prefer unique flavors, I often suggest trying chocolate or pumpkin spice ice cream for a seasonal twist. Check for freshness by avoiding ice crystals or a grainy texture, which can compromise the shake’s consistency.
What’s the best way to store leftover Halloween milkshakes?
If you have any leftovers, store the unassembled milkshake base in an airtight container in the fridge for up to 2 hours. However, for the best experience, re-blend it with fresh toppings just before serving to maintain that delightful texture. For any leftovers you plan to freeze, place the shake base in a container for up to 1 month; remember to thaw it in the fridge and then blend again for a creamy experience!
Can I use non-dairy milk for my Halloween milkshakes?
Very! Non-dairy milk like almond, oat, or coconut milk can work beautifully in your Halloween milkshakes. Just make sure to choose an unsweetened option for better control of the sweetness level. You might also want to consider that these alternatives can slightly change the flavor, so pick one that complements your toppings and adds a lovely twist to this spooky treat!
What do I do if my Halloween milkshake turns out too thick?
No worries! If your milkshake ends up thicker than preferred, simply add milk slowly, just a splash at a time, while blending until you reach your desired consistency. This gentle approach helps keep the flavor balanced while achieving that perfect creamy texture. I always recommend tasting along the way to ensure the sweetness and texture are to your liking!
Can I make Halloween milkshakes in advance for a party?
Certainly! You can prepare the milkshake base ahead of time and store it in the fridge for up to 2 hours to chill. When you’re ready to serve, just add the fun toppings for a fresh look! If you’re thinking of making them several hours in advance, I suggest preparing the base in advance and storing it separately to keep each layer vibrant and fresh. This is the key to an impressive presentation!
Deliciously Spooky Halloween Milkshakes for Festive Fun
Ingredients
Equipment
Method
- In a blender, combine 3 cups of vanilla ice cream, 1 cup of whole milk, ¼ cup of chocolate syrup, and 1 teaspoon of vanilla extract. Blend on high for about 30 seconds until smooth and creamy.
- While blending, prepare 4 large glasses by dipping the rims in water or corn syrup, then roll in colored sugar.
- Pour the blended milkshake mixture evenly into the prepared glasses, filling them about three-quarters full.
- Top each milkshake generously with whipped cream, allowing it to cascade slightly over the sides.
- Sprinkle 1 cup of crushed chocolate sandwich cookies on top of the whipped cream for texture.
- Decorate with gummy worms, candy eyes, and Halloween sprinkles for a colorful, fun presentation.
- Serve immediately with fun straws or spoons for a whimsical touch.