

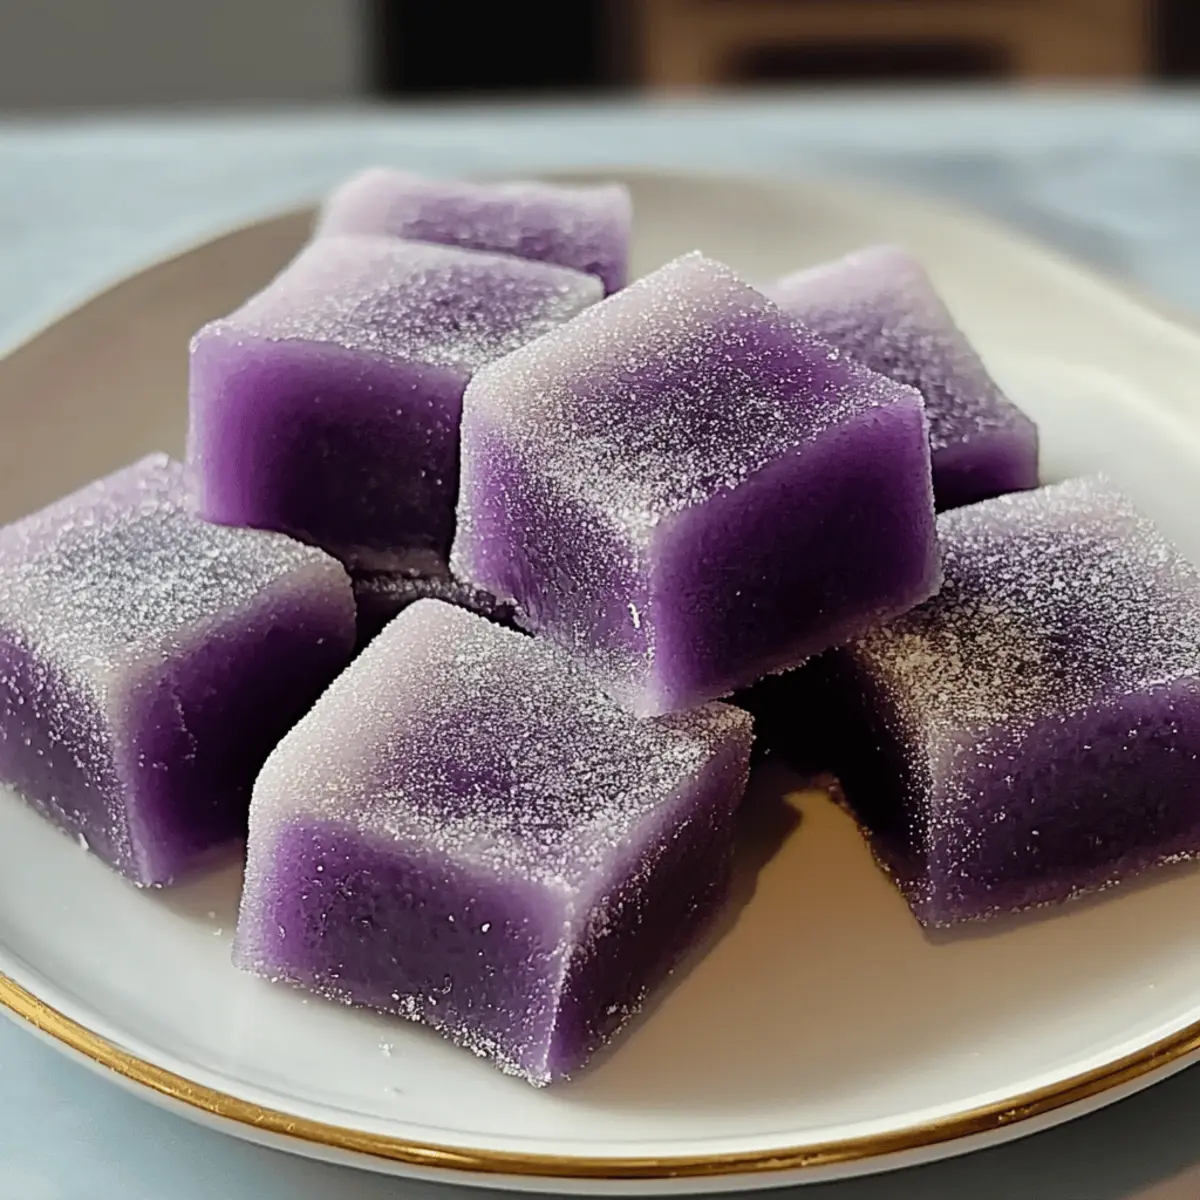
One bite of Hawaiian Butter Mochi with Ube takes me straight to a sun-soaked island paradise, where the waves gently kiss the shore. This gluten-free dessert is not just a treat; it’s a tropical adventure wrapped in chewy bliss. The combination of sweet rice flour and rich ube creates a texture that’s delightfully soft and satisfying, making it the perfect dessert for any occasion. Plus, it’s incredibly easy and quick to whip up, so you can impress your friends and family without spending hours in the kitchen. Whether you’re seeking a comforting night in or a standout dish for your next potluck, this Hawaiian Butter Mochi is sure to elevate your dessert game. Are you ready to dive into this vibrant experience?
Why is Hawaiian Butter Mochi Irresistible?
Chewy Texture: The signature soft and chewy texture of Hawaiian Butter Mochi with Ube is simply addictive, leaving you wanting more with each bite.
Tropical Flavor: Bursting with the rich, sweet flavor of ube, this delightful dessert takes you on a tropical vacation without leaving your kitchen.
Quick and Easy: With minimal prep time, you can whip up this gluten-free treat easily, even on a busy weeknight.
Crowd-Pleaser: Perfect for gatherings, potlucks, or simply indulging at home, this dessert is sure to impress your friends and family.
Versatile Pairings: Serve it warm or at room temperature, and consider pairing it with a scoop of ice cream or fresh fruit for a refreshing contrast. Check out our Garlic Butter French fries for a savory side!
Hawaiian Butter Mochi Ingredients
• Unlock the secrets to this delightful dessert with these essential ingredients.
For the Mochi Base
- Sweet Rice Flour (Mochi Flour) – Essential for that signature chewy texture; no substitutions recommended.
- Granulated Sugar – Adds the perfect amount of sweetness; try coconut sugar for a richer flavor.
- Baking Powder – Aids in leavening for that light and tender texture; make sure it’s fresh!
- Salt – Enhances the overall flavor; fine sea salt works best for even mixing.
For the Creaminess
- Coconut Milk – Brings a wonderful tropical flair; substitute with almond or full-fat dairy milk if needed.
- Whole Milk – Adds moisture and richness; feel free to use any milk, dairy or non-dairy.
- Unsalted Butter (Melted) – Infuses richness and buttery flavor; coconut oil is a great dairy-free option.
For Flavor and Color
- Ube Puree or Extract – Provides that nostalgic ube flavor and beautiful color; sweet potato puree or matcha can also work well.
- Eggs – Essential for structure and moisture; for a vegan twist, try flax eggs or aquafaba.
- Vanilla Extract – Enhances the overall taste; swap for almond extract to change things up.
Now that you have all the ingredients lined up, you’re just a few steps away from enjoying this Hawaiin Butter Mochi with Ube! Prepare for a flavor experience that truly transports you to paradise.
Step‑by‑Step Instructions for Hawaiian Butter Mochi with Ube
Step 1: Preheat Your Oven
Begin by preheating your oven to 350°F (175°C). While the oven heats, prepare a 9×13 inch baking dish by greasing it with a little butter or cooking spray to ensure easy removal of the mochi later. This is a crucial step to achieve the perfect texture for your Hawaiian Butter Mochi with Ube.
Step 2: Mix Dry Ingredients
In a large mixing bowl, whisk together 2 cups of sweet rice flour, 1 cup of granulated sugar, 1 tablespoon of baking powder, and a pinch of salt until well combined. This ensures even distribution of the leavening agent and eliminates clumps. The mixture should be light and fluffy, setting a solid base for your mochi.
Step 3: Combine Wet Ingredients
In a separate bowl, pour in 1 cup of coconut milk, followed by 1 cup of whole milk, and ½ cup of melted unsalted butter. To this, add 1 cup of ube puree or extract, 2 large eggs, and 1 teaspoon of vanilla extract. Stir these wet ingredients together until the mixture is smooth and creamy, free of lumps, which will contribute to the creamy texture of the Hawaiian Butter Mochi.
Step 4: Incorporate Dry with Wet Ingredients
Slowly add the wet mixture to the bowl with the dry ingredients. Gently fold the two together until just combined; be cautious not to overmix, as that can affect the chewy texture of your Hawaiian Butter Mochi with Ube. A few small lumps are perfectly fine—this is the key to achieving that delightful chewiness.
Step 5: Pour and Spread the Batter
Carefully pour the mochi batter into the greased baking dish, using a spatula to spread it evenly. This ensures uniform baking and a beautifully cooked top once it emerges from the oven. At this point, you’ll start to see the rich color of the ube beginning to shine through—such a treat for the eyes!
Step 6: Bake to Perfection
Place the baking dish in your preheated oven and bake for 45-50 minutes. You’ll know it’s done when the top turns a lovely golden brown and a toothpick inserted in the center comes out clean. The aroma that fills your kitchen during baking is simply irresistible, heralding the delicious Hawaiian Butter Mochi with Ube that awaits.
Step 7: Cool and Slice
Once baked, remove the dish from the oven and let it cool in the pan for about 10 minutes. This cooling step is essential for easier slicing. Afterward, cut the mochi into squares or rectangles, and let them cool further if you prefer. Serving them warm or at room temperature enhances that delightful chewy texture, making every bite a blissful experience.
Make Ahead Options
These Hawaiian Butter Mochi with Ube are perfect for busy weeknights or gatherings! You can prepare the batter up to 24 hours in advance by mixing the dry and wet ingredients separately, then combining them just before baking. Store the mixed batter in the refrigerator, ensuring it’s covered tightly to maintain moisture and prevent any drying out. Alternatively, you can bake the mochi and allow it to cool completely, then store it in an airtight container for 3-4 days at room temperature or up to a week in the fridge. When ready to serve, slice into squares and enjoy them warm or at room temperature for that irresistible chewy texture, just as delicious as when freshly baked!
How to Store and Freeze Hawaiian Butter Mochi with Ube
Room Temperature: Store in an airtight container for up to 3-4 days to keep the Hawaiian Butter Mochi moist and chewy.
Fridge: For longer freshness, refrigerate the mochi in a sealed container for up to a week; it may firm up slightly but can be revived with gentle reheating.
Freezer: Wrap cut squares tightly in plastic wrap and freeze for up to three months. To enjoy them again, simply thaw at room temperature before serving.
Reheating: To bring back that delightful chewiness, warm individual pieces in the microwave for 10-15 seconds or until just warmed through.
What to Serve with Hawaiian Butter Mochi with Ube
Indulging in Hawaiian Butter Mochi with Ube opens the door to a world of exquisite pairings that can elevate this tropical delight into a truly unforgettable meal.
-
Coconut Ice Cream: The creamy sweetness of coconut ice cream offers a delightful contrast to the chewy texture of the mochi, creating a blissful bite every time.
-
Fresh Tropical Fruits: Sliced mango, pineapple, and berries add a refreshing burst of flavor, enhancing the tropical experience and balancing the richness of the dessert.
-
Matcha Tea: The earthy bitterness of matcha provides a perfect counterpoint to the sweetness of the mochi, making each sip a pleasant complement to your dessert.
-
Chocolate Drizzle: A light drizzle of melted dark chocolate adds decadence, harmonizing beautifully with the ube’s natural sweetness for a richer flavor profile.
-
Toasted Coconut Flakes: Sprinkle toasted coconut on top for added crunch and a hint of nuttiness that pairs wonderfully with the tropical notes of the mochi.
-
Fruit-Dipped Yogurt: Serve small bowls of Greek yogurt topped with honey and fresh fruit for a tangy contrast that enhances the overall dessert experience.
-
Lemonade or Iced Tea: These refreshing beverages provide a delightful zest and balance, cutting through the richness of the mochi for a refreshing palate cleanser.
-
Chocolate-Covered Almonds: Their crunchy texture and nutty flavor add an exciting element, enhancing the overall experience with each tasty bite alongside the mochi.
-
Espresso or Coffee: The robust flavors of coffee provide a cozy companion, making this combo a perfect option for a cozy dessert moment after dinner.
Expert Tips for Hawaiian Butter Mochi
Mixing Method: Avoid Overmixing: Stir the batter until just combined; a few lumps will ensure the perfect chewy texture in your Hawaiian Butter Mochi with Ube.
Oven Watch: Keep an Eye on Baking: Baking times may vary; watch for a golden brown top and perform a toothpick test for doneness.
Flavor Boost: Spice It Up: For added richness, consider incorporating a pinch of cinnamon or nutmeg into the batter for a delightful twist.
Ingredient Freshness: Use Fresh Ingredients: Ensure your baking powder is fresh to achieve optimal leavening for light and tender mochi.
Cool Down: Be Patient: Allow the mochi to cool in the pan for about 10 minutes before slicing for easier handling and an improved texture.
Hawaiian Butter Mochi with Ube Variations
Feel free to unleash your creativity in the kitchen by customizing this already delightful dessert in ways that excite your taste buds.
-
Coconut Sugar: Swap granulated sugar for coconut sugar to enhance the flavor with deeper caramel notes that beautifully complement the ube.
-
Almond Milk: If you prefer a nutty twist, substitute coconut milk with almond milk for a different yet deliciously creamy base.
-
Dairy-Free Version: Replace the unsalted butter with coconut oil for a fully dairy-free dessert that still retains that rich taste.
-
Matcha Variance: Use matcha powder instead of ube for a vibrant green version that adds earthy notes while still being irresistibly chewy.
-
Flavor Extracts: Experiment with different extracts like almond, coconut, or even hazelnut to elevate the flavors and create a unique sensation.
-
Nutty Crunch: Top with chopped nuts or shredded coconut before baking to introduce a delightful crunchy texture against the chewy base.
-
Chili Powder: For those who enjoy a twist of heat, try adding a sprinkle of chili powder into the batter for a surprising kick that balances well with the sweetness.
-
Fresh Fruits: Serve with a side of tropical fruits like mango or pineapple to add a fresh burst of flavor and enhance the island vibes of this dish.
Each variation can take your Hawaiian Butter Mochi with Ube to new heights, making it even more memorable for your family or guests. And if you’re in the mood for savory, consider pairing it with some delightful Garlic Butter French fries or a refreshing Cucumber Salad with a Twist. Happy cooking!
Hawaiian Butter Mochi with Ube Recipe FAQs
What type of sweet rice flour should I use?
Absolutely, for making Hawaiian Butter Mochi with Ube, you need to use sweet rice flour, also known as mochi flour. This ingredient is essential as it gives the mochi its signature chewy texture. Avoid using regular rice flour, as it will not provide the same results.
How should I store leftover Hawaiian Butter Mochi?
To keep your Hawaiian Butter Mochi delicious and moist, store it in an airtight container at room temperature for 3-4 days. If you want to extend its shelf life, place it in the fridge for up to a week. Just note that the mochi may firm up a little, but you can easily bring back its delightful texture with gentle reheating.
Can I freeze Hawaiian Butter Mochi?
Absolutely! You can freeze your cut squares of Hawaiian Butter Mochi with Ube. Just wrap them tightly in plastic wrap to prevent freezer burn and store them in a freezer-safe bag for up to three months. When you’re ready to enjoy them, simply thaw at room temperature or pop them in the microwave for 10-15 seconds for that soft, chewy goodness once again.
How can I troubleshoot if my mochi didn’t turn out well?
If your Hawaiian Butter Mochi is too dense or hasn’t baked properly, the problem might be in the mixing process or baking time. Ensure you mixed the batter just until combined; overmixing can lead to a tougher texture. Additionally, keep an eye on your baking time, as ovens can vary. If necessary, do the toothpick test to check doneness.
Is Hawaiian Butter Mochi suitable for people with allergies?
Make sure to check all labels and ingredients for allergies, especially if you’re serving guests. While Hawaiian Butter Mochi is generally gluten-free (thanks to sweet rice flour), it does contain eggs and dairy. For a vegan option, you can use flax eggs and coconut oil instead of butter. Always communicate with your guests to ensure their dietary needs are met!
What is the best way to serve Hawaiian Butter Mochi?
For the ultimate enjoyment, serve the Hawaiian Butter Mochi either warm or at room temperature. You can enhance its tropical flavor by pairing it with a scoop of vanilla ice cream or a drizzle of coconut cream. Feel free to get creative with toppings, such as toasted coconut or fresh fruits, to elevate this delightful dessert even further!

Hawaiian Butter Mochi with Ube: A Chewy Tropical Treat
Ingredients
Equipment
Method
- Preheat your oven to 350°F (175°C) and prepare a 9x13 inch baking dish by greasing it with butter or cooking spray.
- In a large mixing bowl, whisk together sweet rice flour, granulated sugar, baking powder, and salt until well combined.
- In a separate bowl, combine coconut milk, whole milk, melted unsalted butter, ube puree, eggs, and vanilla extract. Stir until smooth.
- Slowly add the wet mixture to the dry ingredients and gently fold until just combined.
- Carefully pour the mochi batter into the greased baking dish, spreading it evenly.
- Bake in the preheated oven for 45-50 minutes until the top is golden brown and a toothpick comes out clean.
- Allow the mochi to cool in the pan for about 10 minutes, then slice into squares or rectangles.