

For years, I thought that making homemade bread was something only expert bakers could master. I loved the idea of fresh bread straight from my own oven, but the process always seemed intimidating—kneading, rising times, and the fear that it wouldn’t turn out right. So, like most people, I settled for store-bought bread, never questioning if there was a better way.
That all changed on a rainy afternoon when I visited my grandmother. She had always been the kind of person who made everything from scratch—pasta, jams, pastries, and of course, bread. That day, as I stepped into her warm kitchen, I was met with the incredible aroma of fresh bread cooling on the counter. The crust was golden and crisp, the inside soft and airy. One bite, and I was hooked.
“Making bread isn’t hard,” she told me with a smile. “You just need patience and good ingredients.”
She handed me her simple recipe—a no-fuss method that didn’t require fancy tools or complicated techniques. Just flour, water, yeast, a little sugar, and salt. That evening, I made my first loaf, expecting failure but hoping for the best. When I pulled it out of the oven, I couldn’t believe it—I had baked a perfect loaf of bread on my first try. From that moment on, I never bought bread again.
Now, this recipe is part of my weekly routine. It’s quick, easy, and always turns out delicious. Whether you’re a beginner or an experienced baker, this homemade bread will change the way you think about baking forever.
Why You’ll Love This Recipe
1. Simple Ingredients, No Preservatives
Store-bought bread is often filled with unnecessary additives and preservatives. With this recipe, you know exactly what’s going into your bread—just a few pantry staples and nothing artificial.
2. Crisp Crust and Soft Interior
This bread has the perfect balance of textures. The outside bakes into a crisp, golden crust, while the inside remains light, airy, and full of flavor.
3. Beginner-Friendly and Foolproof
Even if you’ve never baked bread before, this recipe is incredibly forgiving. It doesn’t require fancy techniques or complicated shaping—just mix, knead, let it rise, and bake.
4. Perfect for Any Occasion
This bread can be used for anything—sandwiches, toast, dipping in soup, or simply enjoying with butter. It’s versatile enough to suit any meal.
5. Budget-Friendly and Satisfying
Making your own bread costs significantly less than buying artisan loaves from a bakery. Plus, the satisfaction of baking it yourself is priceless!
Ingredients
| Ingredient | Quantity |
|---|---|
| Bread flour | 2 ½ cups (320 grams) |
| Water | ¾ cup + 2 tbsp. (210 ml) |
| Brewer’s yeast | 1 tsp. (3g) or dry yeast: ½ tsp. (2g) |
| Sugar | 1 tsp. |
| Salt | 1 tsp. |
Directions
1. Activate the Yeast
- In a small bowl, dissolve the yeast and sugar in lukewarm water.
- Let it sit for about 10 minutes until foamy.
2. Prepare the Dough
- In a large bowl, combine the bread flour and salt.
- Gradually add the activated yeast mixture while stirring.
- Knead the dough until smooth and elastic (about 8-10 minutes).
3. Let It Rise
- Cover the dough with a clean cloth and let it rest in a warm place for 1 to 2 hours, or until doubled in size.
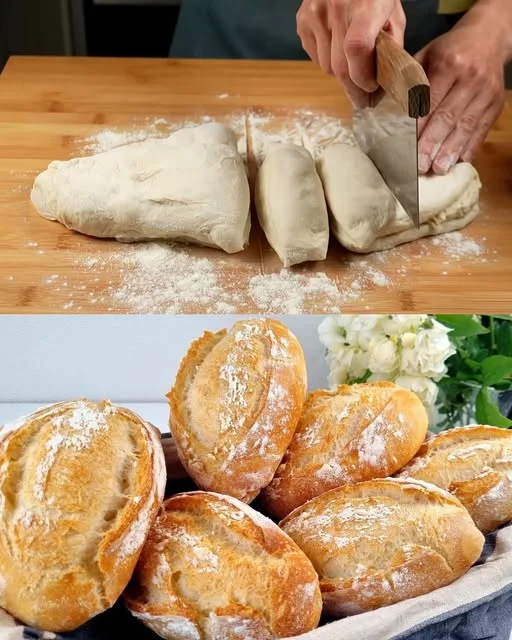
4. Shape and Bake
- Preheat the oven to 220°C (430°F).
- Shape the dough into a loaf or rolls and place it on a baking sheet.
- Bake for 20-25 minutes until golden brown with a crisp crust.
5. Cool and Enjoy
- Let the bread cool before slicing for the best texture.
Nutritional Information (Per Serving – Approximate)
| Nutrient | Amount per Serving |
|---|---|
| Calories | ~150 kcal |
| Protein | ~4 g |
| Carbohydrates | ~30 g |
| Fats | ~0.5 g |
| Fiber | ~1 g |
| Sodium | ~250 mg |
Frequently Asked Questions
1. Can I Use All-Purpose Flour Instead of Bread Flour?
Yes, but bread flour is recommended because it has a higher protein content, which helps create a chewier texture and better structure. If using all-purpose flour, your bread may be slightly softer but still delicious.
2. How Can I Tell If My Dough Has Risen Enough?
A simple trick is to gently press the dough with your finger. If it slowly springs back, it’s ready. If it bounces back too quickly, it needs more time to rise. If it doesn’t bounce back at all, it may have overproofed.
3. Do I Need a Bread Machine or Special Tools?
Not at all! This recipe can be made entirely by hand. A large mixing bowl, a wooden spoon, and your hands are all you need. If you have a stand mixer with a dough hook, that can make kneading easier, but it’s not required.
4. How Do I Get a Crispier Crust?
For an extra-crispy crust, place a small dish of water in the oven while baking. The steam helps create a beautiful, crunchy exterior.
5. How Do I Store Homemade Bread?
Once cooled, store your bread in a paper bag or wrapped in a clean kitchen towel. Avoid plastic bags, as they trap moisture and make the crust soft. If you need to keep it longer, slice and freeze it in an airtight container.
6. Can I Add Extra Flavors or Ingredients?
Absolutely! Here are some great variations:
- Herb & Garlic: Add dried rosemary, thyme, or minced garlic to the dough.
- Cheesy Bread: Mix in shredded cheddar or Parmesan before kneading.
- Whole Wheat Version: Substitute half the bread flour with whole wheat flour for a denser, heartier loaf.
- Seeded Crust: Brush the top with water and sprinkle sesame or poppy seeds before baking.
7. What If I Don’t Have Brewer’s Yeast?
You can use dry yeast instead—just adjust the quantity as mentioned in the recipe. Both work well and produce a light, fluffy loaf.
8. Can I Make This Recipe Without Sugar?
Sugar helps activate the yeast, but if you prefer, you can leave it out. The bread may take slightly longer to rise but will still turn out great.
9. Why Didn’t My Bread Rise?
Several factors can affect the rise:
- Your yeast might be expired or inactive. Always check the expiration date.
- The water temperature might have been too hot (which kills the yeast) or too cold (which slows down activation). Lukewarm water works best.
- The dough might not have had enough time to rise. Be patient and let it double in size.
10. Can I Double the Recipe?
Yes! This recipe scales up easily. Just make sure to divide the dough into separate loaves for even baking.
Conclusion: The Only Bread Recipe You’ll Ever Need
Baking bread at home is one of the most rewarding experiences. Not only do you get to enjoy the warm, fresh aroma filling your kitchen, but you also get the satisfaction of creating something from scratch.
This recipe is proof that making bread doesn’t have to be complicated. With just a few ingredients and a little patience, you can achieve bakery-quality bread right in your own oven.
Once you try it, you may find yourself baking a fresh loaf every week—just like I do. And who knows? You might never want to buy bread again.
Homemade Artisan Bread – The Only Recipe You’ll Ever Need
Ingredients
Method
- Prepare the Yeast
- In a small bowl, dissolve the yeast and sugar in lukewarm water.
- Let it sit for about 10 minutes until foamy.
- Make the Dough
- In a large bowl, mix the flour and salt.
- Gradually add the activated yeast mixture while stirring.
- Knead the dough for about 8-10 minutes until smooth and elastic.
- Let the Dough Rise
- Cover the bowl with a clean cloth and let the dough rest in a warm place for 1 to 2 hours, or until it doubles in size.
- Shape and Bake
- Preheat the oven to 220°C (430°F).
- Shape the dough into a loaf or rolls and place it on a baking sheet.
- Bake for 20-25 minutes until golden brown with a crispy crust.
- Cool and Serve
- Let the bread cool completely before slicing for the best texture.
Notes
- For a crispier crust: Place a small dish of water in the oven while baking to create steam.
- Flour substitution: You can use all-purpose flour, but the texture may be slightly softer.
- Storing the bread: Keep in a paper bag or wrap in a clean kitchen towel to maintain freshness.
- Freezing: Slice and freeze for up to 2 months. Toast or reheat in the oven before serving.