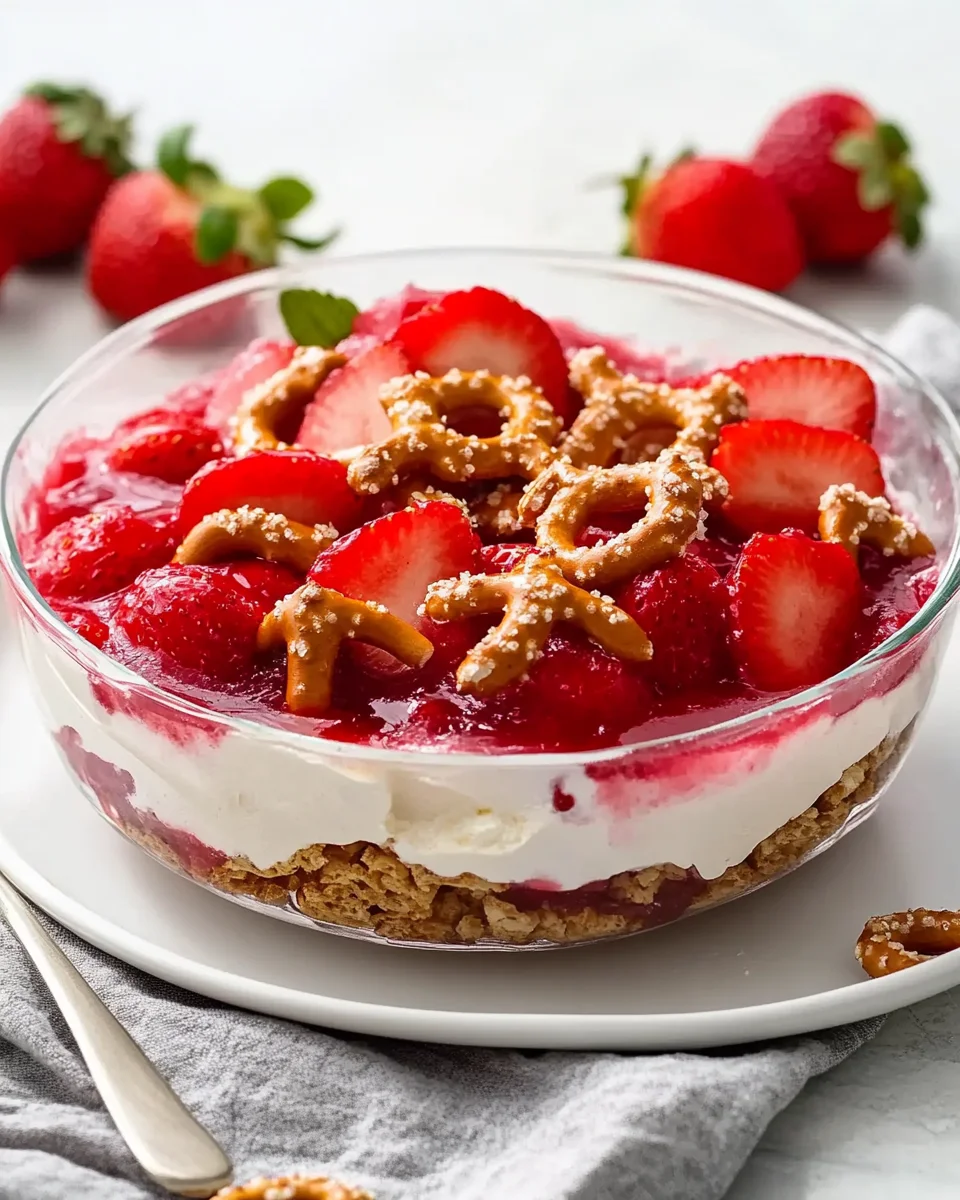
Strawberry Pretzel Salad: The Perfect Blend of Sweet and Salty

If you’re looking for a dessert that’s both nostalgic and unique, Strawberry Pretzel Salad might just be your new favorite treat. This layered dessert combines sweet, salty, and creamy flavors in a way that feels like a hug for your taste buds. Whether you’re preparing it for a family gathering, a potluck, or simply to treat yourself, it’s bound to become a crowd-pleaser.

But what makes this dish so special? Let’s dive into the delightful world of Strawberry Pretzel Salad, starting with its origins and why it’s loved by so many.

What Is Strawberry Pretzel Salad?

Despite its name, this dish isn’t a salad in the traditional sense. It’s a dessert made up of three distinct layers: a crunchy pretzel crust, a creamy middle layer, and a fruity strawberry topping. The combination of flavors and textures makes it irresistibly good.

Why You’ll Love Strawberry Pretzel Salad

  • Perfect Balance: The saltiness of the pretzel crust contrasts beautifully with the sweetness of the cream cheese layer and strawberry topping.
  • Versatile: It’s ideal for any occasion, from casual get-togethers to festive celebrations.
  • Simple Ingredients: You probably have most of the ingredients in your pantry or fridge.

Ingredients You’ll Need

Here’s a breakdown of everything you need to prepare Strawberry Pretzel Salad.

IngredientQuantity
Crushed Pretzels2 cups
Butter (melted)¾ cup
White Sugar (for crust)3 tablespoons
Cream Cheese (softened)1 (8-ounce) package
White Sugar (for filling)1 cup
Whipped Topping (thawed)1 (8-ounce) container
Strawberry Jell-O2 (3-ounce) packages
Boiling Water2 cups
Frozen Strawberries2 (10-ounce) packages

How to Make Strawberry Pretzel Salad

1. Preparing the Pretzel Crust

  1. Preheat your oven to 350°F (175°C).
  2. Crush the pretzels using a rolling pin or food processor until you have 2 cups of crumbs.
  3. In a medium bowl, combine the crushed pretzels, melted butter, and 3 tablespoons of sugar. Mix well.
  4. Press the mixture firmly into the bottom of a 9×13-inch baking dish.
  5. Bake for 10 minutes and let it cool completely.

2. Creating the Creamy Middle Layer

  1. In a large mixing bowl, beat the softened cream cheese and 1 cup of sugar until smooth.
  2. Gently fold in the whipped topping until evenly combined.
  3. Spread the mixture over the cooled pretzel crust, ensuring it reaches the edges to prevent the strawberry layer from seeping through.

3. Making the Strawberry Topping

  1. Dissolve the strawberry Jell-O in 2 cups of boiling water. Stir until completely dissolved.
  2. Add the frozen strawberries to the Jell-O mixture and let it cool slightly.
  3. Once the mixture begins to thicken, pour it over the cream cheese layer.

4. Setting and Serving

  1. Refrigerate the dessert for at least 4 hours, or until fully set.
  2. Slice into squares and serve chilled.

Pro Tips for the Best Strawberry Pretzel Salad

  • Crust Perfection: Press the crust firmly into the dish to ensure it holds together.
  • Prevent Seepage: Make sure the cream cheese layer completely seals the crust to prevent the Jell-O from leaking through.
  • Chill Time: Don’t rush the refrigeration step; the layers need time to set properly.

Variations of Strawberry Pretzel Salad

1. Mixed Berry Version

Substitute the frozen strawberries and strawberry Jell-O with mixed berries and raspberry Jell-O for a tangy twist.

2. Tropical Delight

Try pineapple chunks and pineapple-flavored gelatin for a summery treat.

3. Low-Sugar Option

Use sugar-free Jell-O and a sugar substitute for the crust and filling to make a lighter version.

Nutritional Information

NutrientPer Serving (Approx.)
Calories290
Total Fat18g
Saturated Fat10g
Cholesterol40mg
Sodium230mg
Total Carbohydrates30g
Sugars20g
Protein3g

Why Strawberry Pretzel Salad Is Perfect for Any Occasion

Strawberry Pretzel Salad is versatile and appeals to all ages. Its bright red top layer and creamy middle make it visually stunning, while the flavor combination ensures it’s always a hit. It’s perfect for:

  • Holidays: A festive addition to Thanksgiving or Christmas spreads.
  • Potlucks: A guaranteed crowd-pleaser.
  • Birthday Parties: A unique alternative to traditional cake.

Frequently Asked Questions

1. Can I make Strawberry Pretzel Salad ahead of time?
Yes! In fact, it tastes better when made a day in advance, as the flavors have time to meld.

2. How do I store leftovers?
Cover the dish tightly with plastic wrap and refrigerate for up to 3 days.

3. Can I use fresh strawberries instead of frozen?
Absolutely! Just slice fresh strawberries thinly and use them in place of the frozen ones.

4. Can I freeze Strawberry Pretzel Salad?
Freezing is not recommended, as the texture of the creamy layer can change.

5. What can I use instead of whipped topping?
You can substitute homemade whipped cream if you prefer a more natural option.

6. How do I prevent the crust from becoming soggy?
Ensure the cream cheese layer is spread all the way to the edges to create a barrier between the crust and the Jell-O.

Final Thoughts

Making Strawberry Pretzel Salad is a journey of blending contrasting flavors and textures into a harmonious dessert. Whether you’re new to this dish or revisiting an old favorite, it’s sure to bring smiles to everyone who tastes it.

Now it’s your turn to try this recipe! Gather your ingredients, follow the steps, and enjoy the sweet success of creating a classic dessert loved by all.

Recipe Card for Strawberry Pretzel Salad

Strawberry Pretzel Salad is the perfect blend of sweet, salty, and creamy! This layered dessert combines a crunchy pretzel crust, a luscious cream cheese filling, and a fruity strawberry topping. It’s an irresistible treat for any occasion.
Prep Time 20 minutes
Cook Time 10 minutes
Total Time 4 hours 30 minutes
Servings: 12
Course: Dessert
Cuisine: American

Ingredients
  

2 cups crushed pretzels

3/4 cup butter, melted

3 tablespoons white sugar.

For the Creamy Filling:

1 (8-ounce) package cream cheese, softened

1 cup white sugar

1 (8-ounce) container whipped topping, thawed

For the Strawberry Topping:

2 (3-ounce) packages strawberry Jell-O

2 cups boiling water

2 (10-ounce) packages frozen strawberries

Method
 

  1. Ensure the cream cheese layer completely seals the crust to prevent sogginess.
    For variations, substitute strawberries with mixed berries or tropical fruits.
    Use sugar-free Jell-O and sweeteners for a lighter version.
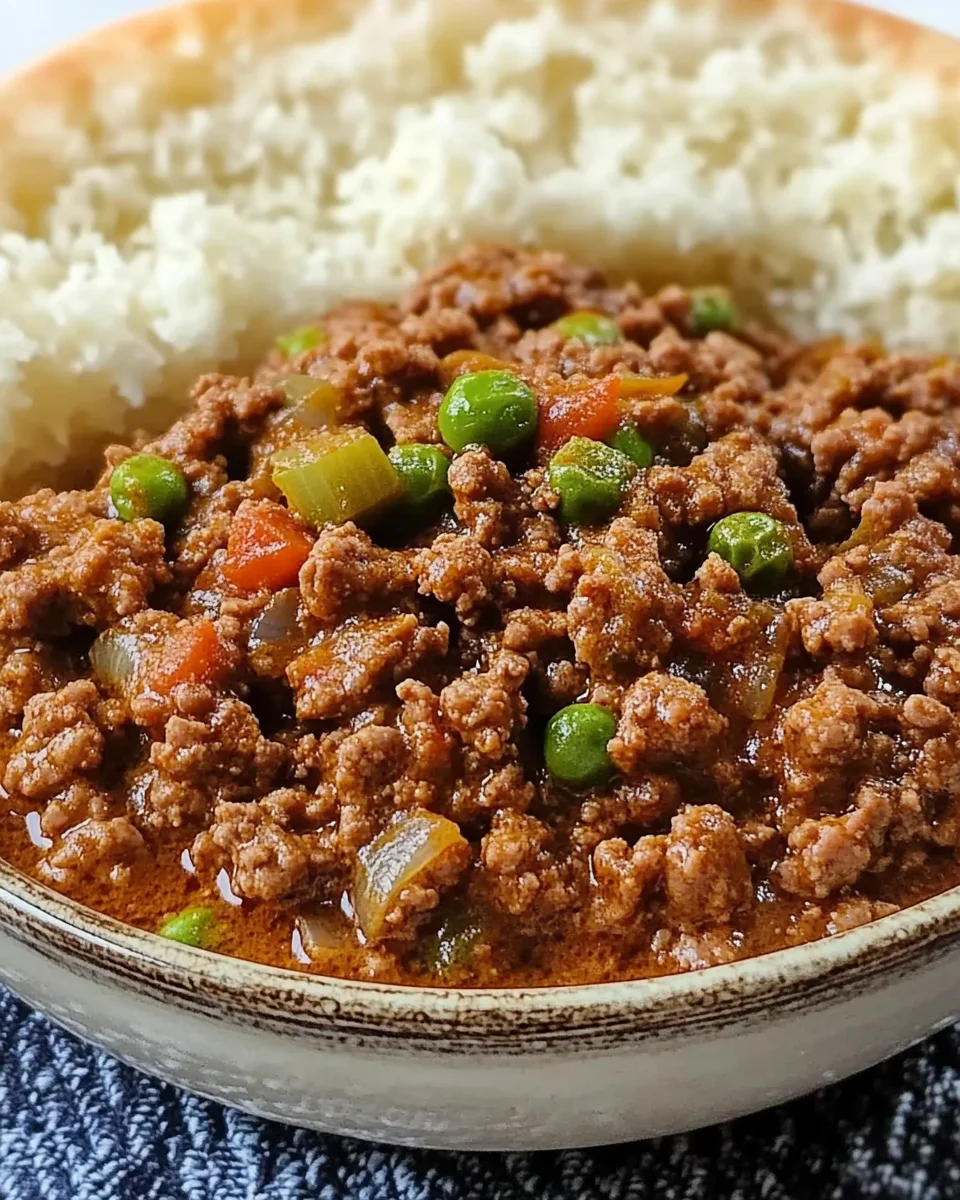
How to Make Ground Beef Curry: A Flavorful, Easy-to-Make Dish

There’s something magical about a steaming bowl of curry. It’s hearty, full of rich spices, and packed with bold flavors that transport you to another world. If you’re looking for a quick and satisfying way to experience that magic, Ground Beef Curry is the perfect recipe for you. It’s simple, budget-friendly, and endlessly customizable, making it a fantastic option for weeknight dinners or casual get-togethers.

Let’s explore how you can make this delicious dish step by step.

Why Ground Beef Curry is a Must-Try Recipe

Imagine tender ground beef simmered with tomatoes, onions, and a fragrant blend of spices. It’s a comforting dish that delivers layers of flavor in every bite. Ground Beef Curry stands out because it’s:

  • Easy to Make: You only need one skillet and under an hour to prepare.
  • Versatile: Serve it with rice, naan, or even over pasta for a fun twist.
  • Customizable: Adjust the spice level, add vegetables, or use plant-based meat for a vegetarian version.

Ingredients for Ground Beef Curry

Here’s everything you’ll need to whip up this flavorful dish:

IngredientQuantity
Olive oil6 tablespoons
Small onion, diced1
Ground beef1 pound
Medium tomatoes, chopped2
Curry powder1 tablespoon
Paprika1 teaspoon
Salt1 teaspoon
Black pepper¾ teaspoon
Chile powder½ teaspoon
Cayenne pepper¼ teaspoon
Peas, including liquid (Optional)1 (8.5-ounce) can

These ingredients combine to create a perfectly spiced curry with just the right balance of heat and savoriness.

Step-by-Step Instructions for Ground Beef Curry

Step 1: Sauté the Onion

  1. Heat 6 tablespoons of olive oil in a large skillet over medium heat.
  2. Add the diced onion and sauté until soft and golden, about 5 minutes.

Step 2: Brown the Ground Beef

  1. Add the ground beef to the skillet.
  2. Cook, breaking it apart with a spoon, until browned and fully cooked through.

Step 3: Add the Tomatoes and Spices

  1. Stir in the chopped tomatoes, allowing them to soften and release their juices.
  2. Sprinkle in the curry powder, paprika, salt, black pepper, chile powder, and cayenne pepper.
  3. Mix well to coat the beef and tomatoes evenly with the spices.

Step 4: Simmer the Curry

  1. Reduce the heat to low and let the curry simmer for 10–15 minutes. This allows the flavors to meld together.
  2. If using canned peas, add them (including the liquid) during the last 5 minutes of cooking.

Step 5: Adjust Seasoning and Serve

  1. Taste the curry and adjust the seasoning as needed.
  2. Serve hot over steamed rice, with naan, or alongside your favorite side dishes.

Tips for the Perfect Ground Beef Curry

  1. Use Fresh Spices: Fresh, high-quality spices will make a noticeable difference in the flavor of your curry.
  2. Control the Heat: Adjust the cayenne pepper and chile powder to your preferred spice level.
  3. Add Vegetables: Consider adding diced potatoes, carrots, or bell peppers for extra nutrition and texture.
  4. Use a Non-Stick Skillet: This prevents sticking and makes cleanup easier.

Nutritional Information

NutrientPer Serving
Calories320
Protein20g
Fat20g
Carbohydrates12g
Fiber3g
Sodium620mg

This dish is a good source of protein and offers a balance of carbs and fats to keep you satisfied.

Serving Suggestions for Ground Beef Curry

Ground Beef Curry pairs beautifully with a variety of sides. Here are some ideas:

  • Rice: Serve over fluffy basmati or jasmine rice for a traditional pairing.
  • Naan Bread: Use naan or roti to scoop up the curry.
  • Salad: A fresh cucumber or green salad adds a refreshing contrast.
  • Quinoa: For a healthier option, pair the curry with quinoa.

Variations to Try

1. Vegetarian Version

Swap the ground beef for plant-based meat or cooked lentils for a vegetarian-friendly option.

2. Coconut Curry Twist

Stir in ½ cup of coconut milk during the simmering step for a creamier curry with a hint of sweetness.

3. Spicy Beef Curry

Increase the cayenne pepper or add fresh chopped chilies for an extra kick of heat.

4. Ground Chicken or Turkey Curry

Use ground chicken or turkey as a leaner alternative to beef.

Frequently Asked Questions (FAQs)

1. Can I make Ground Beef Curry ahead of time?

Yes! Ground Beef Curry tastes even better the next day. Store it in an airtight container in the fridge for up to 3 days.

2. Can I freeze Ground Beef Curry?

Absolutely. Let the curry cool completely before transferring it to a freezer-safe container. It can be frozen for up to 3 months.

3. What’s the best way to reheat this dish?

Reheat the curry on the stovetop over low heat, adding a splash of water or broth if needed to loosen the sauce.

4. Can I make this dish less spicy?

Yes! Reduce or omit the cayenne pepper and chile powder to create a milder version of the curry.

5. Can I use fresh peas instead of canned?

Of course. Fresh or frozen peas work well, but you may need to add a bit of water or broth if skipping the liquid from the canned peas.

6. What other spices can I add?

Consider adding garam masala, ground coriander, or ground cumin for additional layers of flavor.

Closing Thoughts and Call to Action

Ground Beef Curry is a recipe you’ll want to make again and again. It’s quick, easy, and packed with bold flavors that will satisfy any craving for comfort food. Whether you’re feeding your family or looking for a delicious meal prep option, this dish fits the bill perfectly.

Now it’s your turn! Gather your ingredients, follow these simple steps, and enjoy the delicious results. Share your experience or variations in the comments—we’d love to hear from you!

How to Make Cheddar Bay Ground Beef Cobbler: The Ultimate Comfort Food

When life calls for comfort food, few dishes can compete with the warm, hearty goodness of Cheddar Bay Ground Beef Cobbler. This recipe combines the savory flavors of ground beef, rich soups, and melted cheese with the fluffy, cheesy topping of Cheddar Bay Biscuits. It’s a dish that feels like a hug on a plate, perfect for family dinners, potlucks, or a cozy evening at home.

Let’s dive into how you can make this soul-satisfying meal, step by step.

Why You’ll Love Cheddar Bay Ground Beef Cobbler

Picture this: tender ground beef cooked with onions and garlic, smothered in creamy cheddar and mushroom soups, and topped with golden, cheesy biscuits. It’s a dish that brings together comfort, flavor, and a little nostalgia. Whether you’re feeding a crowd or just looking to treat yourself, this recipe delivers every time.

Ingredients for Cheddar Bay Ground Beef Cobbler

Here’s what you’ll need to make this indulgent dish:

For the Filling

IngredientQuantity
Lean ground beef1.5 lbs
Yellow onion, diced1
Chopped garlic1 tablespoon
Condensed cheddar soup10.5 oz
Condensed cream of mushroom soup10.5 oz
Milk½ cup
Salt½ teaspoon
Pepper½ teaspoon
Shredded cheddar cheese2 cups

For the Topping

IngredientQuantity
Cheddar Bay Biscuit mix1 box
Shredded cheddar cheese1 cup
Milk2 cups
Butter, melted¼ cup
Fresh chopped parsleyFor garnish

With these ingredients on hand, you’re ready to create a dish that’s equal parts comforting and delicious.

Step-by-Step Instructions for Cheddar Bay Ground Beef Cobbler

Step 1: Prepare the Ground Beef Mixture

  1. Heat a large skillet over medium heat. Add the ground beef and cook until browned, breaking it into crumbles with a wooden spoon.
  2. Add the diced onion and chopped garlic to the skillet. Cook until the onion is soft and translucent, about 3–4 minutes.
  3. Drain any excess grease from the skillet.

Step 2: Make the Filling Sauce

  1. In the skillet with the ground beef mixture, stir in the condensed cheddar soup, cream of mushroom soup, and ½ cup of milk.
  2. Season the mixture with salt and pepper, stirring until everything is well combined.
  3. Simmer the mixture on low heat for 5 minutes to allow the flavors to meld together.

Step 3: Transfer to a Baking Dish

  1. Preheat your oven to 375°F (190°C).
  2. Pour the ground beef mixture into a 9×13-inch baking dish, spreading it out evenly.
  3. Sprinkle 2 cups of shredded cheddar cheese over the beef mixture.

Step 4: Prepare the Biscuit Topping

  1. In a mixing bowl, combine the Cheddar Bay Biscuit mix, 1 cup of shredded cheddar cheese, and 2 cups of milk. Stir until just combined.
  2. Carefully pour or spoon the biscuit batter over the beef mixture in the baking dish, spreading it out evenly.

Step 5: Bake the Cobbler

  1. Place the baking dish in the preheated oven and bake for 30–35 minutes, or until the biscuit topping is golden brown and cooked through.
  2. Remove from the oven and brush the topping with melted butter for an extra layer of flavor.

Step 6: Garnish and Serve

  1. Sprinkle fresh chopped parsley over the baked cobbler for a pop of color.
  2. Serve warm and enjoy the delicious combination of flavors and textures.

Tips for the Best Cheddar Bay Ground Beef Cobbler

  1. Use Fresh Ingredients: Freshly shredded cheese and a good-quality biscuit mix will elevate the flavor.
  2. Don’t Overmix the Batter: Overmixing can make the biscuits dense instead of fluffy.
  3. Customize the Flavors: Add diced bell peppers, mushrooms, or a splash of hot sauce to the beef mixture for extra flavor.
  4. Check for Doneness: Make sure the biscuit topping is fully cooked by inserting a toothpick into the center. If it comes out clean, it’s ready!

Nutritional Information

NutrientPer Serving
Calories480
Protein28g
Fat26g
Carbohydrates35g
Fiber2g
Sodium980mg

This dish is rich and indulgent, making it perfect for a treat-yourself meal or a special occasion.

Serving Suggestions for Cheddar Bay Ground Beef Cobbler

  1. With a Side Salad: Balance the richness of the cobbler with a fresh green salad tossed in a light vinaigrette.
  2. Pair with Vegetables: Roasted broccoli, green beans, or steamed carrots make excellent side dishes.
  3. Serve with Bread: A slice of crusty bread is perfect for soaking up the cheesy, savory sauce.

Variations to Try

1. Spicy Version

Add chopped jalapeños or a dash of cayenne pepper to the beef mixture for a spicy twist.

2. Loaded Cobbler

Incorporate cooked bacon, diced tomatoes, or even corn into the filling for added flavor and texture.

3. Vegetarian Option

Replace the ground beef with cooked lentils or plant-based meat for a vegetarian-friendly version.

Frequently Asked Questions (FAQs)

1. Can I make this dish ahead of time?

Yes! Prepare the beef mixture and spread it in the baking dish. Cover and refrigerate for up to 24 hours. When ready to bake, add the biscuit topping and bake as directed.

2. Can I use a different biscuit mix?

Absolutely! While Cheddar Bay Biscuit mix adds a unique flavor, any biscuit mix will work.

3. How do I store leftovers?

Store leftovers in an airtight container in the refrigerator for up to 3 days. Reheat in the oven or microwave until warmed through.

4. Can I freeze Cheddar Bay Ground Beef Cobbler?

Yes, you can freeze this dish before baking. Cover tightly with foil and freeze for up to 2 months. Thaw in the fridge overnight before baking.

5. Can I use a different type of meat?

Certainly! Ground turkey, chicken, or even sausage can be used instead of ground beef.

6. What can I do with leftover biscuit mix?

Use leftover biscuit mix to make individual biscuits or as a topping for other casseroles.

Closing Thoughts and Call to Action

Cheddar Bay Ground Beef Cobbler is more than just a recipe—it’s a celebration of comfort food at its finest. Whether you’re serving it to your family, bringing it to a potluck, or indulging on a quiet evening, this dish is sure to be a hit.

Now it’s your turn! Gather your ingredients, follow these simple steps, and treat yourself to a delicious homemade meal. Don’t forget to share your experience or variations in the comments below—we’d love to hear from you!

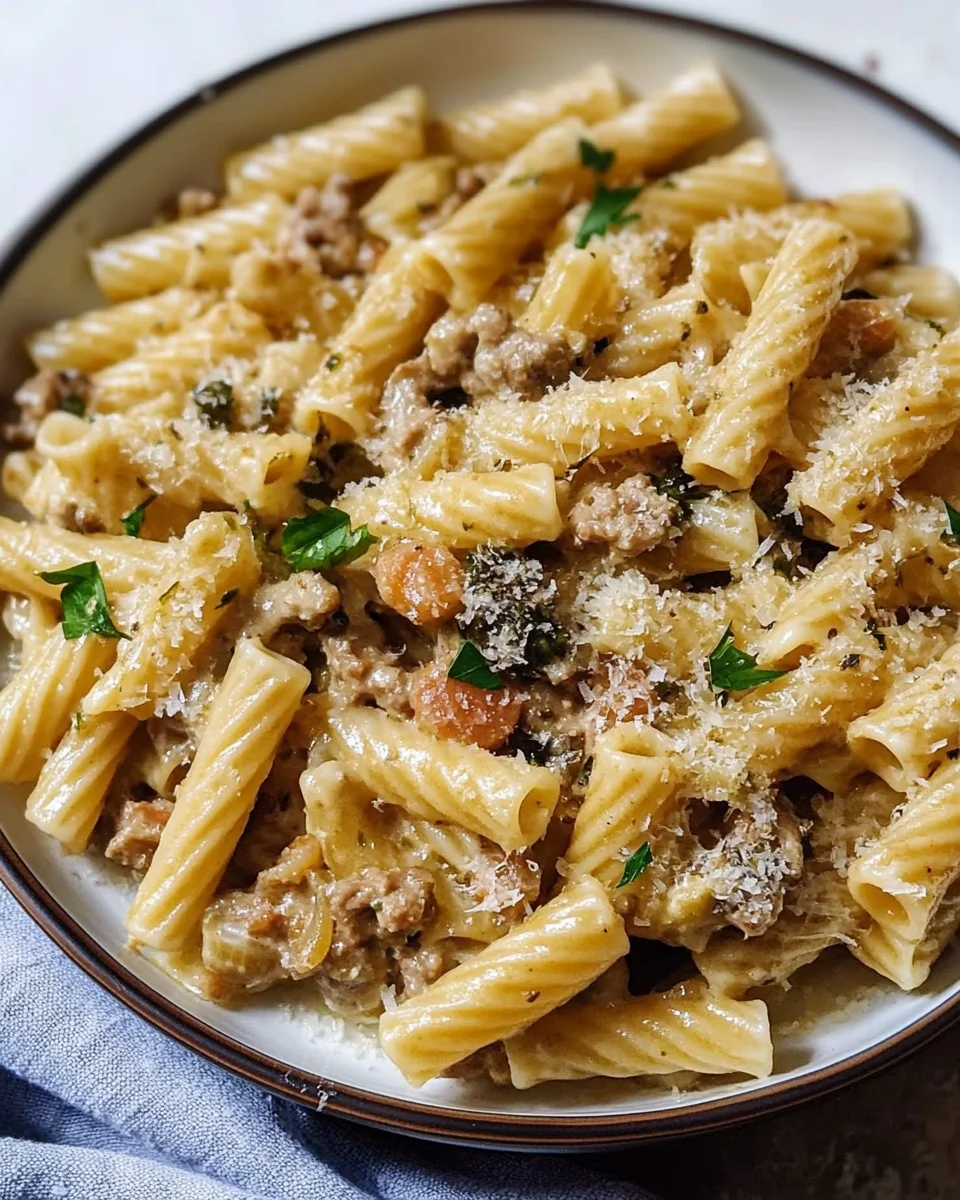
How to Make Pasta alla Norcina: A Delicious Journey Through Umbrian Cuisine

Close your eyes and imagine yourself in the heart of Italy, surrounded by rolling hills and medieval towns. The air is filled with the aroma of fresh herbs, savory meats, and creamy sauces. That’s the magic of Umbrian cuisine, and Pasta alla Norcina is one of its shining stars. This dish is rich, comforting, and packed with flavor—a perfect way to bring a little taste of Italy to your table.

What is Pasta alla Norcina?

Pasta alla Norcina hails from Norcia, a town in Umbria famous for its high-quality pork and black truffles. This dish traditionally combines fresh sausage, cream, Pecorino Romano, and often a touch of white wine to create a luxurious, hearty meal. It’s a recipe that’s simple yet elegant, perfect for any pasta lover.

Ingredients for Pasta alla Norcina

Let’s start with the essentials. Here’s what you’ll need for this mouthwatering recipe:

IngredientQuantity
Cremini mushrooms8 ounces
Medium shallot1
Garlic cloves, divided4
Fresh rosemary sprig1
Pecorino Romano cheese2 ounces (about 1 cup grated)
Ground pork12 ounces
Kosher salt2 teaspoons, divided
Freshly ground black pepper1 teaspoon, divided
Freshly grated or ground nutmeg1/2 teaspoon, divided
Dried short pasta (penne, rigatoni, etc.)1 pound
Olive oil2 tablespoons
Dry white wine1/2 cup
Heavy cream1 cup

With these ingredients, you’re ready to create a dish that’s both flavorful and authentic.

Step-by-Step Guide to Making Pasta alla Norcina

Step 1: Prepare the Ingredients

  • Mushrooms: Clean and slice the cremini mushrooms.
  • Shallot and Garlic: Finely dice the shallot and mince two cloves of garlic. Keep the other two cloves whole for later.
  • Cheese: Grate the Pecorino Romano cheese for a sharp, salty flavor.

Step 2: Cook the Pasta

Bring a large pot of salted water to a boil and cook your pasta according to the package instructions. Reserve about 1 cup of pasta water before draining.

Step 3: Sauté the Aromatics

Heat 2 tablespoons of olive oil in a large skillet over medium heat. Add the minced garlic and shallot, cooking until fragrant, about 2 minutes. Toss in the rosemary sprig for an extra layer of flavor.

Step 4: Add the Mushrooms

Add the sliced mushrooms to the skillet, cooking until they’re tender and golden brown. Season with a pinch of salt and pepper, then set aside.

Step 5: Cook the Pork

In the same skillet, add the ground pork. Break it up with a wooden spoon and cook until browned. Season with 1 teaspoon of kosher salt, 1/2 teaspoon of pepper, and 1/4 teaspoon of nutmeg.

Step 6: Deglaze with White Wine

Pour in 1/2 cup of dry white wine to deglaze the skillet, scraping up any flavorful bits stuck to the bottom. Let the wine reduce by half.

Step 7: Combine the Ingredients

Reduce the heat to low and stir in the heavy cream. Return the cooked mushrooms to the skillet and mix well.

Step 8: Add the Pasta

Toss the drained pasta into the skillet, coating it thoroughly with the creamy sauce. If needed, add some reserved pasta water to adjust the consistency.

Step 9: Finish with Cheese

Sprinkle the grated Pecorino Romano over the pasta and stir until it’s melted and well combined. Remove the rosemary sprig and serve immediately.

Tips for the Perfect Pasta alla Norcina

  1. Use Fresh Ingredients: Freshly ground nutmeg and grated Pecorino Romano will make a world of difference.
  2. Balance the Sauce: The reserved pasta water is your best friend for achieving the perfect sauce consistency.
  3. Customize the Recipe: Add a touch of truffle oil for a luxurious twist or substitute ground turkey for a lighter version.
  4. Serve Immediately: Pasta alla Norcina is best enjoyed fresh and hot.

Nutritional Information

NutrientPer Serving
Calories650
Protein28g
Fat32g
Carbohydrates58g
Fiber4g
Sodium850mg

This hearty dish offers a balanced mix of protein, carbs, and fat, making it a satisfying meal.

Variations on Pasta alla Norcina

1. Vegetarian Version

Skip the pork and use sautéed mushrooms as the main protein. Add a splash of soy sauce for depth.

2. Spicy Norcina

Add red pepper flakes or a drizzle of hot chili oil for a spicy kick.

3. Truffle Norcina

Incorporate a touch of truffle oil or shaved black truffles for a luxurious, earthy flavor.

Frequently Asked Questions (FAQs)

1. Can I make Pasta alla Norcina ahead of time?

While it’s best served fresh, you can prepare the sauce ahead of time and reheat it before combining it with freshly cooked pasta.

2. What type of pasta works best for this recipe?

Short pasta like penne, rigatoni, or cavatappi is ideal because it holds the sauce well.

3. Can I substitute the pork?

Yes, you can use ground turkey, chicken, or even a plant-based alternative.

4. What wine should I use?

A dry white wine, such as Pinot Grigio or Sauvignon Blanc, works perfectly.

5. How do I store leftovers?

Store in an airtight container in the refrigerator for up to 3 days. Reheat gently on the stove with a splash of water or cream.

6. Can I make it gluten-free?

Absolutely! Use your favorite gluten-free pasta to make this dish gluten-free.

Serving Suggestions for Pasta alla Norcina

  • With Bread: Serve with a side of crusty Italian bread to soak up the creamy sauce.
  • With Salad: Pair with a light arugula or mixed green salad dressed with lemon vinaigrette.
  • With Wine: A glass of dry white wine complements the dish beautifully.

Closing Thoughts and Call to Action

Pasta alla Norcina is more than just a dish; it’s a taste of Umbrian tradition and culinary excellence. With its rich flavors and creamy texture, it’s sure to become a favorite in your home.

Now it’s your turn! Gather your ingredients, follow these steps, and experience the joy of making authentic Pasta alla Norcina. Share your creation or variations in the comments below—we’d love to hear from you!

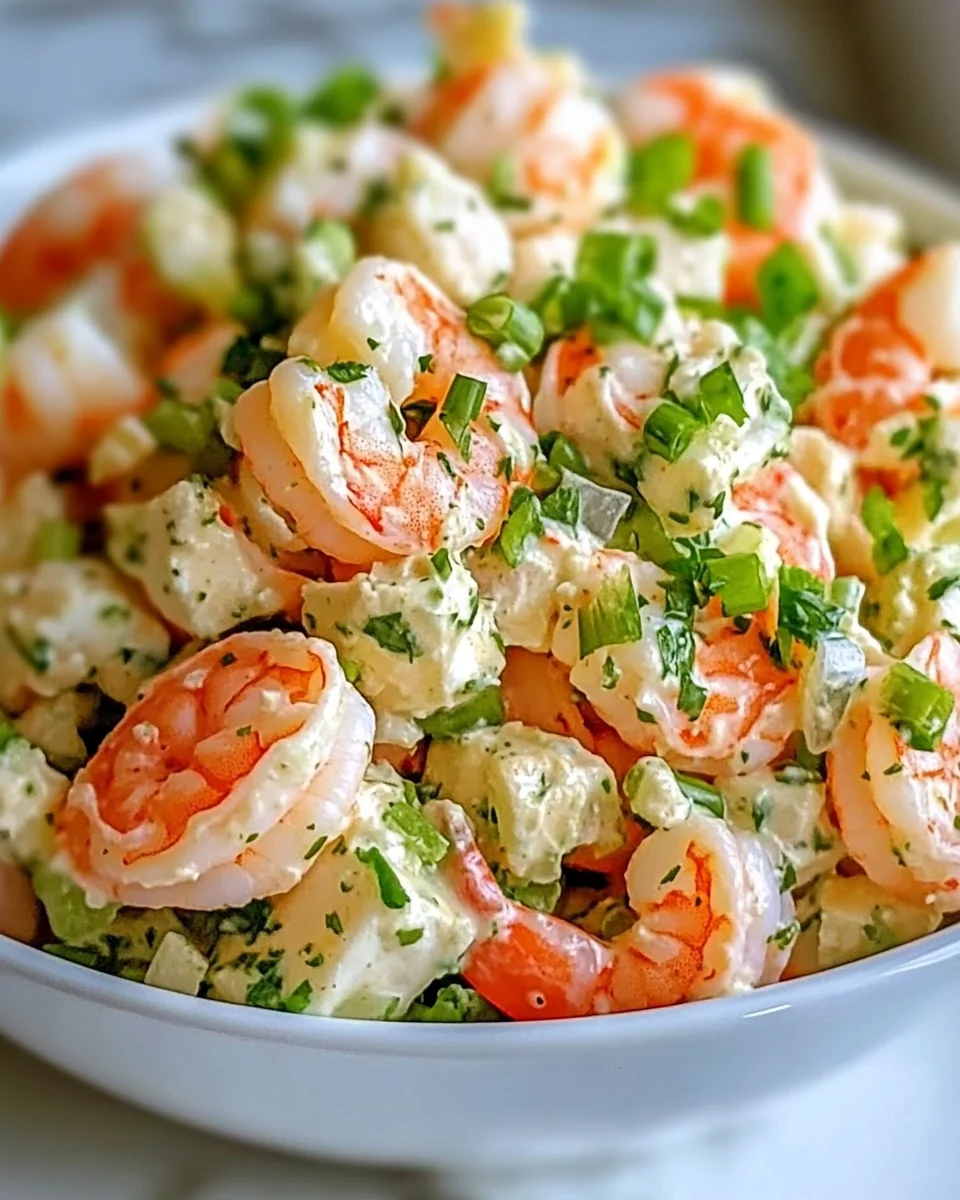
How to Make the Perfect Shrimp Salad: A Refreshing Delight for Every Occasion

When it comes to light, refreshing, and versatile meals, few dishes can rival the simplicity and flavor of shrimp salad. It’s the ultimate go-to recipe when you want something elegant yet easy to prepare. Whether you’re planning a summer picnic, a quick lunch, or an appetizer for guests, shrimp salad never disappoints. Let’s dive into the world of shrimp salad and learn how you can create this delightful dish at home.

Why Shrimp Salad is the Ultimate Crowd-Pleaser

Picture this: tender shrimp, crisp vegetables, and creamy dressing, all combined to create a medley of textures and flavors that feels like a bite of summer. Shrimp salad is a dish that brings people together. It’s not just delicious but also healthy, easy to customize, and quick to whip up. Plus, it can be served as a standalone meal, on a bed of greens, or tucked into a sandwich for an on-the-go option.

Ingredients for Shrimp Salad

Here’s what you’ll need to create this delectable shrimp salad:

IngredientQuantity
Poached shrimp (see directions below)1 pound
Finely diced red bell pepper1/2 cup
Finely diced celery1/2 cup
Thinly sliced green onion1/2 cup
Mayonnaise (try homemade for freshness)1/2 cup
Fresh lemon juice2 tablespoons
Roughly chopped fresh dill1/4 cup
Fine sea salt1/4 teaspoon
Freshly ground black pepper4 twists of the grinder

These simple ingredients come together to make a shrimp salad that’s bursting with flavor and freshness.

How to Poach Shrimp for Salad

Step-by-Step Poaching Instructions

The secret to tender, juicy shrimp lies in poaching them perfectly. Follow these easy steps:

  1. Prepare the Water: Fill a large pot with water and add a few slices of lemon, a clove of garlic, and a pinch of salt for flavor.
  2. Bring to a Simmer: Heat the water until it’s just simmering—avoid boiling, as it can make the shrimp tough.
  3. Cook the Shrimp: Add your shrimp to the simmering water and cook for 2–3 minutes, or until they turn pink and opaque.
  4. Cool Quickly: Transfer the cooked shrimp to an ice bath to stop the cooking process and maintain their texture.

Once your shrimp are cooled and peeled, they’re ready to be used in your salad.

Mixing the Perfect Shrimp Salad

Step 1: Prep the Vegetables

Dice the red bell pepper and celery into small, even pieces for consistent texture. Thinly slice the green onion for a mild, fresh bite.

Step 2: Combine the Ingredients

In a large bowl, mix the poached shrimp, diced vegetables, and fresh dill.

Step 3: Make the Dressing

In a small bowl, whisk together mayonnaise and fresh lemon juice until smooth. Season with fine sea salt and freshly ground black pepper.

Step 4: Toss and Chill

Pour the dressing over the shrimp mixture and gently toss to coat. Refrigerate for at least 30 minutes to allow the flavors to meld together.

Tips for the Best Shrimp Salad

  1. Use Fresh Ingredients: Opt for fresh shrimp, crisp veggies, and good-quality mayonnaise for the best results.
  2. Chill Before Serving: Letting the salad chill enhances its flavor and texture.
  3. Adjust Seasoning to Taste: Taste the salad before serving and adjust the salt, pepper, or lemon juice as needed.
  4. Customize the Recipe: Add other ingredients like avocado, cucumber, or a splash of hot sauce for extra flavor.

Serving Suggestions for Shrimp Salad

Shrimp salad is incredibly versatile. Here are a few ways to serve it:

  • On Greens: Place the shrimp salad over a bed of fresh greens for a light, healthy meal.
  • In a Sandwich: Scoop the salad into a toasted bun or between slices of crusty bread for a satisfying shrimp salad sandwich.
  • As an Appetizer: Serve in lettuce cups or atop crackers for a stylish appetizer.
  • With Pasta: Mix shrimp salad into cooked pasta for a hearty shrimp pasta salad.

Nutritional Information

NutrientPer Serving
Calories250
Protein20g
Fat15g
Carbohydrates5g
Fiber1g
Sodium400mg

This shrimp salad is not only delicious but also packed with protein and low in carbs, making it a great option for those watching their diet.

Frequently Asked Questions (FAQs)

1. Can I make shrimp salad ahead of time?

Yes! Shrimp salad can be made up to 24 hours in advance. Store it in an airtight container in the fridge, but hold off on adding the dressing until just before serving for maximum freshness.

2. Can I use frozen shrimp?

Absolutely. If you’re using frozen shrimp, thaw them overnight in the fridge or under cold running water before poaching.

3. What can I substitute for mayonnaise?

If you’re not a fan of mayo, you can use Greek yogurt, sour cream, or a mix of olive oil and Dijon mustard for a lighter dressing.

4. How long does shrimp salad last in the fridge?

Shrimp salad stays fresh for 2–3 days when stored properly in an airtight container in the fridge.

5. Can I use pre-cooked shrimp?

Yes, pre-cooked shrimp works well in this recipe. Be sure to rinse and pat them dry before adding them to the salad.

6. What other herbs can I use besides dill?

Fresh parsley, chives, or tarragon make excellent substitutes for dill in shrimp salad.

Variations to Try

1. Spicy Shrimp Salad

Add diced jalapeños or a dash of hot sauce to the dressing for a spicy kick.

2. Mediterranean Shrimp Salad

Incorporate kalamata olives, feta cheese, and cherry tomatoes for a Mediterranean twist.

3. Asian-Inspired Shrimp Salad

Swap the mayo for sesame oil and soy sauce, and add shredded carrots and chopped cilantro.

Closing Thoughts and Call to Action

Shrimp salad is the perfect combination of simplicity and elegance. With its fresh ingredients and customizable options, it’s a dish that fits any occasion, from casual lunches to fancy dinner parties. Now it’s your turn to bring this recipe to life in your kitchen.

Gather your ingredients, follow these easy steps, and enjoy the satisfaction of creating a delicious homemade shrimp salad. We’d love to hear how your dish turned out—share your experience or favorite variations with us!

Happy cooking, and don’t forget to savor every bite!

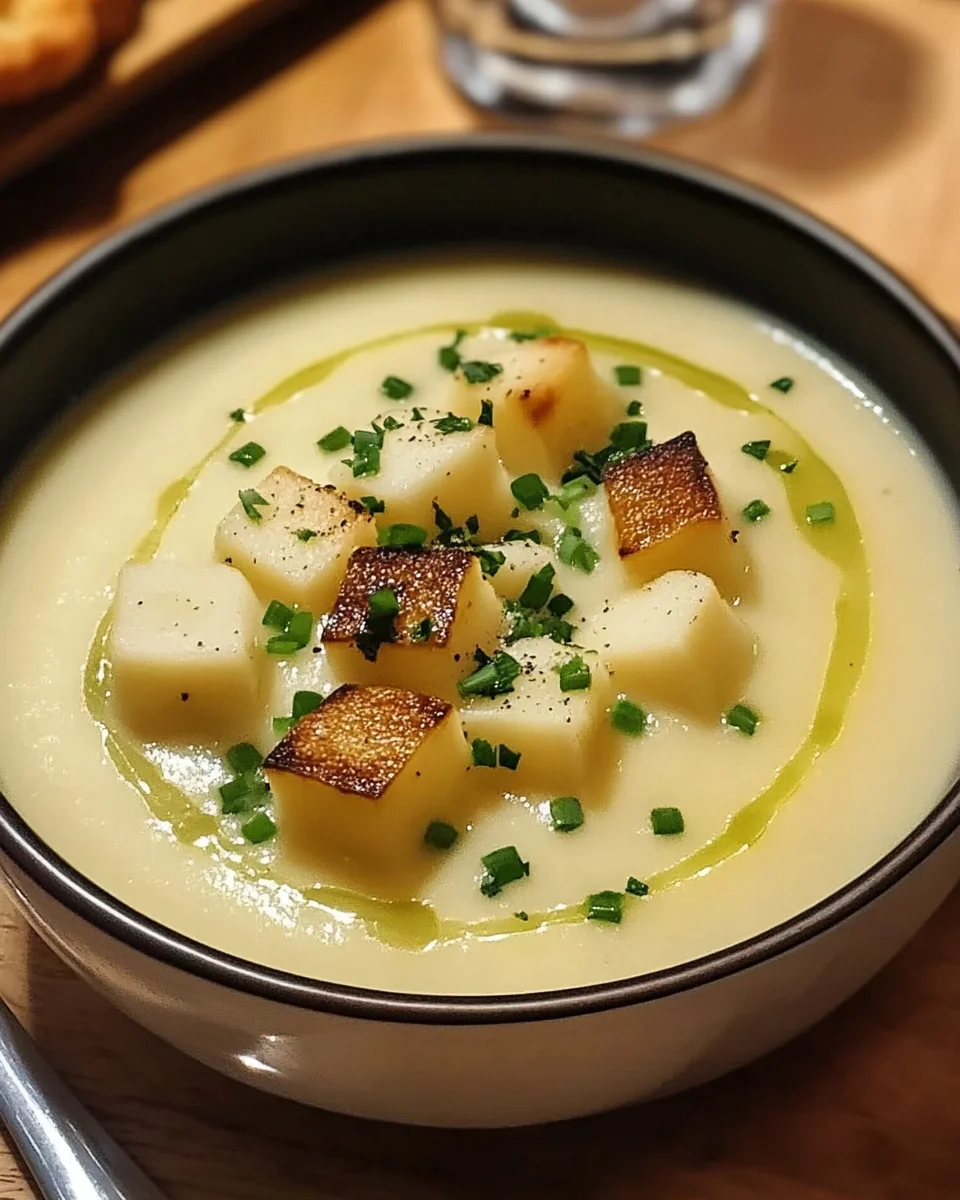
The Ultimate Guide to Making Potato Leek Soup That Will Warm Your Soul

There’s something magical about a warm, comforting bowl of potato leek soup. It’s hearty, flavorful, and easy to make. Whether you’re looking to impress guests or simply whip up a cozy dinner for your family, potato leek soup is the perfect choice. With just a handful of simple ingredients, you can create a dish that’s as nutritious as it is delicious. Let’s dive in and master the art of making potato leek soup together.

Why You’ll Love Potato Leek Soup

Imagine a soup that combines the creamy richness of Yukon Gold potatoes with the mild, sweet flavor of leeks, all elevated by fresh herbs and a drizzle of olive oil. Potato leek soup is not just a dish—it’s a hug in a bowl. It’s versatile, easy to prepare, and can be adjusted to suit your dietary needs. Plus, it’s naturally gluten-free and can easily be made vegan or vegetarian.

Ingredients for the Perfect Potato Leek Soup

Here’s what you’ll need to gather for this recipe:

IngredientQuantity
Extra-virgin olive oil2 tablespoons
Large leeks (white and light green parts), cleaned and sliced3
Garlic cloves, minced2
Vegetable broth (or more for thinner texture)4 cups
Yukon Gold potatoes, peeled and diced into ½-inch pieces2 pounds
Kosher salt1 teaspoon
Bay leaf1
Fresh thyme sprigs2
Freshly chopped chivesFor garnish
Black pepperTo taste

This simple list of ingredients ensures that you’ll achieve the best flavor and texture for your soup.

Preparing Your Ingredients

Step 1: Cleaning and Slicing the Leeks

Leeks are the star of this soup, but they can hide dirt between their layers. Here’s how to clean them:

  1. Cut off the dark green tops and roots.
  2. Slice the leeks lengthwise.
  3. Rinse them thoroughly under cold water, fanning out the layers to remove any dirt.

Step 2: Prepping the Potatoes

For the creamiest soup, use Yukon Gold potatoes. Peel them and dice into ½-inch cubes to ensure even cooking.

Step-by-Step Instructions

Step 1: Sauté the Aromatics

Heat 2 tablespoons of extra-virgin olive oil in a large pot over medium heat. Add the sliced leeks and a pinch of salt. Cook, stirring occasionally, until the leeks are soft and fragrant, about 5–7 minutes. Add the minced garlic and cook for an additional 1–2 minutes.

Step 2: Add the Potatoes and Broth

Stir in the diced potatoes, followed by 4 cups of vegetable broth. Add the bay leaf, thyme sprigs, and kosher salt. Bring the mixture to a gentle boil, then reduce the heat and simmer for 20–25 minutes, or until the potatoes are tender.

Step 3: Blend the Soup

Once the potatoes are fully cooked, remove the bay leaf and thyme sprigs. Use an immersion blender to puree the soup directly in the pot for a smooth consistency. If you prefer a chunkier texture, blend only part of the soup and leave some chunks intact.

Step 4: Adjust Seasoning and Texture

Taste your soup and adjust the seasoning with additional salt and black pepper. If the soup is too thick, stir in more vegetable broth, a little at a time, until you reach your desired consistency.

Tips for the Best Potato Leek Soup

  1. Choose Fresh Ingredients: Fresh leeks and potatoes will give your soup the best flavor.
  2. Don’t Overdo the Salt: Add salt gradually, especially if your broth is already seasoned.
  3. Customize the Texture: Blend fully for a creamy soup or leave some chunks for a rustic feel.
  4. Enhance with Toppings: Garnish with chopped chives, a drizzle of olive oil, or croutons for added texture and flavor.

Variations to Try

1. Vegan Potato Leek Soup

Replace olive oil with vegan butter and ensure your vegetable broth is completely plant-based.

2. Creamy Potato Leek Soup

Add ½ cup of heavy cream or coconut cream after blending for extra richness.

3. Herbed Potato Leek Soup

Experiment with herbs like parsley, dill, or tarragon for a unique flavor twist.

Nutritional Information

NutrientPer Serving
Calories210
Total Fat6g
Saturated Fat1g
Carbohydrates37g
Protein4g
Sodium540mg
Fiber5g

Frequently Asked Questions (FAQs)

1. Can I make potato leek soup ahead of time?

Yes! Potato leek soup tastes even better the next day. Store it in an airtight container in the fridge for up to 4 days.

2. Can I freeze potato leek soup?

Absolutely! Let the soup cool completely before transferring it to freezer-safe containers. Freeze for up to 3 months. Thaw overnight in the fridge before reheating.

3. What’s the best way to reheat potato leek soup?

Reheat it on the stove over low heat, stirring occasionally. Add a splash of broth or water if it’s too thick.

4. Can I use a regular blender instead of an immersion blender?

Yes, but let the soup cool slightly before blending in batches to avoid splattering.

5. What pairs well with potato leek soup?

Crusty bread, a simple green salad, or roasted vegetables make excellent sides.

6. How do I prevent the soup from tasting bland?

Season gradually as you cook and use fresh, high-quality ingredients. Don’t skip the garnish—it adds a burst of flavor.

Serving Suggestions

Serve your potato leek soup in warm bowls and top with freshly chopped chives, a sprinkle of black pepper, or a swirl of olive oil. Pair with crusty bread or a side of garlic toast for a complete meal.

Closing Thoughts and Call to Action

Potato leek soup is a timeless recipe that delivers comfort and satisfaction in every spoonful. With this easy-to-follow guide, you’re equipped to make a soup that’s not only delicious but also nourishing. Whether you’re a seasoned cook or a beginner, this recipe will become a go-to favorite in your kitchen.

Now it’s your turn! Gather your ingredients, follow these steps, and enjoy the magic of homemade potato leek soup. Share your experience or variations with us in the comments below!

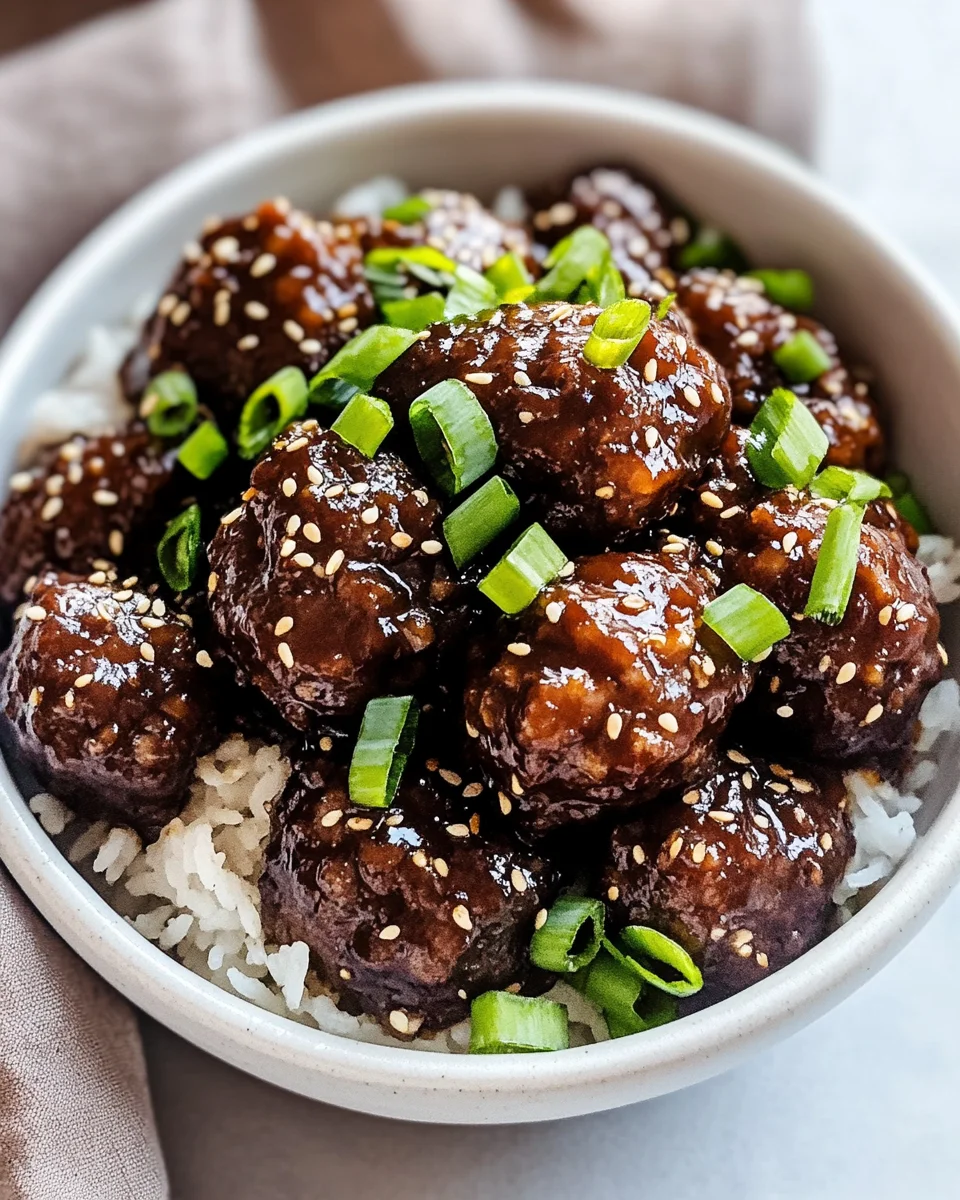
Sticky Mongolian Beef Meatballs: A Flavor-Packed Delight

Few dishes are as satisfying as tender, juicy meatballs coated in a sticky, flavorful sauce. Sticky Mongolian Beef Meatballs are a game-changer for your dinner table. Combining the savory umami flavors of soy sauce, garlic, ginger, and hoisin with a hint of spice, this dish is sure to impress your family or guests. Whether you serve them as an appetizer, over rice, or alongside steamed veggies, these meatballs are a guaranteed crowd-pleaser.

This guide will walk you through the process of making these irresistible meatballs, provide tips for perfecting the recipe, and even answer common questions to ensure your cooking experience is seamless.

Ingredients for Sticky Mongolian Beef Meatballs

Here’s what you’ll need to prepare these delicious meatballs and their signature sauce:

For the Meatballs:

IngredientQuantity
Panko breadcrumbs½ cup
Thinly sliced green onions (white part only)½ cup
Large egg1
Minced garlic1 tablespoon
Low sodium soy sauce1 tablespoon
Salt½ teaspoon
Red pepper flakes¼ teaspoon
White pepper¼ teaspoon
Ground beef1 pound

For the Mongolian Sauce:

IngredientQuantity
Water½ cup
Brown sugar⅓ cup
Low sodium soy sauce¼ cup
Garlic (grated)4 cloves
Sesame oil2 teaspoons
Ginger (grated)2 teaspoons
Oyster sauce1 tablespoon
Hoisin sauce1 tablespoon
Red pepper flakes⅛ teaspoon
White pepper⅛ teaspoon
Toasted sesame seeds2 teaspoons

Why You’ll Love Sticky Mongolian Beef Meatballs

  • Bold Flavors: A perfect balance of sweet, savory, and spicy.
  • Easy to Make: Simple ingredients and straightforward steps.
  • Versatile Dish: Serve as an appetizer, main course, or part of a meal prep plan.
  • Crowd-Pleaser: Both kids and adults will adore these meatballs.

Step-by-Step Guide to Making Sticky Mongolian Beef Meatballs

1. Gather and Prepare Your Ingredients

Start by organizing your ingredients. Measure everything out to streamline the cooking process and ensure you’re ready to go.

2. Make the Meatball Mixture

  • In a large mixing bowl, combine the panko breadcrumbs, green onion whites, egg, minced garlic, soy sauce, salt, red pepper flakes, and white pepper.
  • Add the ground beef and mix until just combined. Be careful not to overmix, as this can make the meatballs tough.

3. Shape the Meatballs

  • Use your hands or a small cookie scoop to form the mixture into meatballs, about 1–1.5 inches in diameter.
  • Place them on a parchment-lined baking sheet for easy cleanup.

4. Cook the Meatballs

  • Heat a large skillet over medium heat with a drizzle of oil.
  • Brown the meatballs on all sides, working in batches if necessary.
  • Transfer the browned meatballs to a plate while you prepare the sauce.

5. Make the Mongolian Sauce

  • In the same skillet, combine the water, brown sugar, soy sauce, grated garlic, sesame oil, ginger, oyster sauce, hoisin sauce, red pepper flakes, and white pepper.
  • Simmer the sauce over medium heat, stirring occasionally, until it thickens slightly (about 5 minutes).

6. Combine Meatballs and Sauce

  • Return the meatballs to the skillet, tossing them gently to coat with the sauce.
  • Simmer for another 5–7 minutes, allowing the flavors to meld and the meatballs to cook through completely.

7. Garnish and Serve

  • Sprinkle the meatballs with toasted sesame seeds and the reserved green onion tops.
  • Serve immediately, either as an appetizer or with rice or noodles for a complete meal.

Tips for Perfect Sticky Mongolian Beef Meatballs

1. Don’t Overmix the Meatball Mixture

Overmixing can make the meatballs dense. Mix until the ingredients are just combined.

2. Use Fresh Ingredients

Freshly grated ginger and garlic enhance the flavor and make a noticeable difference.

3. Control the Heat

If you prefer less spice, reduce the red pepper flakes in both the meatballs and sauce.

4. Thicken the Sauce

If your sauce isn’t thick enough, mix 1 teaspoon of cornstarch with 1 tablespoon of water and stir it into the sauce while it simmers.

What to Serve with Sticky Mongolian Beef Meatballs

Side DishWhy It Pairs Well
Steamed white riceAbsorbs the flavorful sauce beautifully.
Stir-fried vegetablesAdds a fresh, crunchy contrast.
Garlic noodlesComplements the savory-sweet flavors.
Cucumber saladOffers a refreshing, tangy side.
DumplingsPerfect for an Asian-inspired feast.

Nutritional Information

NutrientPer Serving (4 meatballs)
Calories320
Protein18g
Fat18g
Carbohydrates20g
Sugar8g
Sodium600mg

Creative Variations for Sticky Mongolian Beef Meatballs

  • Turkey or Chicken: Substitute ground turkey or chicken for a lighter option.
  • Plant-Based: Use a plant-based ground meat alternative to make the recipe vegan.
  • Spicier Kick: Add Sriracha or chili paste to the sauce for more heat.
  • Gluten-Free: Replace panko breadcrumbs with gluten-free breadcrumbs and use tamari instead of soy sauce.

FAQs About Sticky Mongolian Beef Meatballs

1. Can I make these meatballs ahead of time?

Yes, you can prepare and brown the meatballs a day in advance. Store them in the refrigerator and reheat in the sauce when ready to serve.

2. How do I store leftovers?

Store any leftovers in an airtight container in the refrigerator for up to 4 days. Reheat gently in the microwave or on the stovetop.

3. Can I freeze Mongolian beef meatballs?

Absolutely! Freeze cooked meatballs (with or without sauce) in a freezer-safe container for up to 3 months. Thaw overnight in the fridge before reheating.

4. What’s the best substitute for oyster sauce?

If you don’t have oyster sauce, you can use more hoisin sauce or a mix of soy sauce and a touch of sugar.

5. Can I bake the meatballs instead of frying?

Yes! Bake the meatballs at 400°F (200°C) for 15–20 minutes, flipping halfway through for even browning.

6. What’s the secret to a thick sauce?

Simmer the sauce over low heat until it reduces, or add a cornstarch slurry to achieve your desired consistency.

Conclusion: Bring Bold Flavors to Your Table Tonight

Sticky Mongolian Beef Meatballs are an easy, delicious way to elevate your dinner routine. With their perfect balance of sweet, savory, and spicy, these meatballs are sure to impress even the pickiest eaters. Whether you’re hosting a dinner party, preparing a special weeknight meal, or just treating yourself, this recipe will quickly become a household favorite.

So, roll up your sleeves, gather your ingredients, and get ready to create a dish that’s as fun to make as it is to eat. Once you try these, you’ll wonder how you ever lived without them!

Vegan Italian Penicillin Soup: A Warm Hug in a Bowl

When life gets busy or you feel under the weather, there’s nothing more comforting than a bowl of warm, hearty soup. Vegan Italian Penicillin Soup is a plant-based twist on the traditional “cure-all” chicken soup. Packed with vibrant flavors, nutrient-rich ingredients, and an Italian flair, this soup is perfect for soothing both the body and soul.

Not only is it a comfort food staple, but it’s also easy to make and loaded with immune-boosting goodness. Whether you’re recovering from a cold or simply craving a nourishing meal, this soup will leave you feeling cozy and cared for.

Ingredients for Vegan Italian Penicillin Soup

Here’s a breakdown of what you’ll need to prepare this hearty soup:

Base Ingredients:

IngredientQuantity
Water8 cups
Low-sodium vegetable broth2 cups
Yellow onion (quartered)1 large
Carrots (chunked)3
Celery ribs (chunked)2
Garlic cloves (smashed)4

Soup Base Spice/Herb Ingredients:

IngredientQuantity
Garlic powder1 teaspoon
Onion powder1 teaspoon
Bay leaves2
Sea salt½ to 1 ½ teaspoons

Added Spice/Herb Ingredients:

IngredientQuantity
Italian seasoning¼ teaspoon
Dried crushed thyme leaves¼ teaspoon
Dried parsley2 teaspoons
Poultry seasoning (vegan)1/8 teaspoon
Sweet paprika1/8 teaspoon
Dried rosemaryPinch
Black pepper1/8 teaspoon

Other Ingredients:

IngredientQuantity
Vegan Parmesan Cheese¼ cup
Miso (optional)2 tablespoons
Lemon juice1 tablespoon
Cooked small pastaAs needed (pastina, orzo, couscous)

Optional Toppings:

IngredientUsage
Vegan Parmesan CheeseGenerous sprinkle
Freshly chopped parsleyGarnish

Why You’ll Love Vegan Italian Penicillin Soup

  • Immune-Boosting Ingredients: Packed with garlic, veggies, and herbs to support your health.
  • Customizable Flavors: You can adjust spices and toppings to suit your taste.
  • Comforting and Nourishing: Perfect for cold days, sick days, or any day you need a pick-me-up.
  • Easy to Prepare: No complicated techniques, just wholesome ingredients simmered to perfection.

Step-by-Step Guide to Making Vegan Italian Penicillin Soup

1. Gather and Prep Your Ingredients

  • Wash and chop the vegetables into chunks for easy cooking.
  • Measure out the spices, herbs, and other ingredients to streamline the process.

2. Start the Broth Base

  • In a large pot, combine water, vegetable broth, onion, carrots, celery, and garlic.
  • Bring the mixture to a boil, then reduce the heat to a simmer.

3. Add the Soup Base Spices

  • Stir in garlic powder, onion powder, bay leaves, and sea salt.
  • Let the broth simmer for 20–30 minutes, allowing the flavors to meld together.

4. Enhance the Flavor

  • Add the Italian seasoning, thyme, parsley, poultry seasoning, paprika, rosemary, and black pepper.
  • Simmer for another 10 minutes, stirring occasionally.

5. Incorporate Other Ingredients

  • Stir in the vegan Parmesan cheese, miso (if using), and lemon juice.
  • Taste and adjust the seasoning, adding more salt or herbs as needed.

6. Cook the Pasta

  • Prepare your choice of small pasta, such as pastina, orzo, or couscous, according to package instructions.
  • Drain and set aside.

7. Assemble the Soup

  • Remove the bay leaves and larger vegetable chunks from the broth.
  • Add the cooked pasta to the soup just before serving.

8. Serve and Garnish

  • Ladle the soup into bowls and top with a generous sprinkle of vegan Parmesan cheese and freshly chopped parsley.

Tips for the Perfect Vegan Italian Penicillin Soup

1. Use High-Quality Broth

Opt for a low-sodium vegetable broth to control the saltiness and let the herbs shine.

2. Adjust to Taste

If you prefer a stronger flavor, increase the Italian seasoning or add more lemon juice for a zesty kick.

3. Keep It Fresh

Add fresh parsley or a squeeze of lemon juice just before serving for a burst of brightness.

4. Make It Heartier

Add chickpeas, white beans, or extra vegetables like zucchini or spinach for a more filling soup.

Nutritional Information

NutrientPer Serving (1 bowl, with pasta)
Calories200
Protein7g
Fat4g
Carbohydrates35g
Fiber5g
Sodium450mg

Creative Variations for Vegan Italian Penicillin Soup

  • Spicy Twist: Add a pinch of red chili flakes for some heat.
  • Mediterranean Flavor: Toss in olives and sun-dried tomatoes.
  • Creamy Option: Blend a portion of the soup for a creamier consistency.
  • Grain Swap: Substitute pasta with quinoa, farro, or barley for a whole-grain option.

FAQs About Vegan Italian Penicillin Soup

1. Can I make this soup ahead of time?

Absolutely! The flavors deepen as the soup sits. Store it in an airtight container in the refrigerator for up to 5 days.

2. Can I freeze this soup?

Yes, but omit the pasta before freezing. Add freshly cooked pasta when reheating to avoid mushiness.

3. What can I use instead of miso?

If you don’t have miso, you can skip it or use nutritional yeast for a similar umami flavor.

4. Is this soup gluten-free?

It can be! Use gluten-free pasta or grains like rice or quinoa.

5. How can I add more protein?

Add cooked lentils, chickpeas, or vegan chicken substitutes to boost protein.

6. What if I don’t have vegan Parmesan?

Try nutritional yeast or make your own vegan Parmesan using ground nuts and seasonings.

Conclusion: A Bowl of Comfort and Care

Making Vegan Italian Penicillin Soup is more than just cooking—it’s an act of love and self-care. Whether you’re under the weather or simply seeking a nourishing meal, this soup delivers warmth, flavor, and comfort in every spoonful.

So grab your pot, gather your ingredients, and whip up a batch of this wholesome, plant-based goodness. Your body and taste buds will thank you!

When life gets busy or you feel under the weather, there’s nothing more comforting than a bowl of warm, hearty soup. Vegan Italian Penicillin Soup is a plant-based twist on the traditional “cure-all” chicken soup. Packed with vibrant flavors, nutrient-rich ingredients, and an Italian flair, this soup is perfect for soothing both the body and soul.

Not only is it a comfort food staple, but it’s also easy to make and loaded with immune-boosting goodness. Whether you’re recovering from a cold or simply craving a nourishing meal, this soup will leave you feeling cozy and cared for.

Ingredients for Vegan Italian Penicillin Soup

Here’s a breakdown of what you’ll need to prepare this hearty soup:

Base Ingredients:

IngredientQuantity
Water8 cups
Low-sodium vegetable broth2 cups
Yellow onion (quartered)1 large
Carrots (chunked)3
Celery ribs (chunked)2
Garlic cloves (smashed)4

Soup Base Spice/Herb Ingredients:

IngredientQuantity
Garlic powder1 teaspoon
Onion powder1 teaspoon
Bay leaves2
Sea salt½ to 1 ½ teaspoons

Added Spice/Herb Ingredients:

IngredientQuantity
Italian seasoning¼ teaspoon
Dried crushed thyme leaves¼ teaspoon
Dried parsley2 teaspoons
Poultry seasoning (vegan)1/8 teaspoon
Sweet paprika1/8 teaspoon
Dried rosemaryPinch
Black pepper1/8 teaspoon

Other Ingredients:

IngredientQuantity
Vegan Parmesan Cheese¼ cup
Miso (optional)2 tablespoons
Lemon juice1 tablespoon
Cooked small pastaAs needed (pastina, orzo, couscous)

Optional Toppings:

IngredientUsage
Vegan Parmesan CheeseGenerous sprinkle
Freshly chopped parsleyGarnish

Why You’ll Love Vegan Italian Penicillin Soup

  • Immune-Boosting Ingredients: Packed with garlic, veggies, and herbs to support your health.
  • Customizable Flavors: You can adjust spices and toppings to suit your taste.
  • Comforting and Nourishing: Perfect for cold days, sick days, or any day you need a pick-me-up.
  • Easy to Prepare: No complicated techniques, just wholesome ingredients simmered to perfection.

Step-by-Step Guide to Making Vegan Italian Penicillin Soup

1. Gather and Prep Your Ingredients

  • Wash and chop the vegetables into chunks for easy cooking.
  • Measure out the spices, herbs, and other ingredients to streamline the process.

2. Start the Broth Base

  • In a large pot, combine water, vegetable broth, onion, carrots, celery, and garlic.
  • Bring the mixture to a boil, then reduce the heat to a simmer.

3. Add the Soup Base Spices

  • Stir in garlic powder, onion powder, bay leaves, and sea salt.
  • Let the broth simmer for 20–30 minutes, allowing the flavors to meld together.

4. Enhance the Flavor

  • Add the Italian seasoning, thyme, parsley, poultry seasoning, paprika, rosemary, and black pepper.
  • Simmer for another 10 minutes, stirring occasionally.

5. Incorporate Other Ingredients

  • Stir in the vegan Parmesan cheese, miso (if using), and lemon juice.
  • Taste and adjust the seasoning, adding more salt or herbs as needed.

6. Cook the Pasta

  • Prepare your choice of small pasta, such as pastina, orzo, or couscous, according to package instructions.
  • Drain and set aside.

7. Assemble the Soup

  • Remove the bay leaves and larger vegetable chunks from the broth.
  • Add the cooked pasta to the soup just before serving.

8. Serve and Garnish

  • Ladle the soup into bowls and top with a generous sprinkle of vegan Parmesan cheese and freshly chopped parsley.

Tips for the Perfect Vegan Italian Penicillin Soup

1. Use High-Quality Broth

Opt for a low-sodium vegetable broth to control the saltiness and let the herbs shine.

2. Adjust to Taste

If you prefer a stronger flavor, increase the Italian seasoning or add more lemon juice for a zesty kick.

3. Keep It Fresh

Add fresh parsley or a squeeze of lemon juice just before serving for a burst of brightness.

4. Make It Heartier

Add chickpeas, white beans, or extra vegetables like zucchini or spinach for a more filling soup.

Nutritional Information

NutrientPer Serving (1 bowl, with pasta)
Calories200
Protein7g
Fat4g
Carbohydrates35g
Fiber5g
Sodium450mg

Creative Variations for Vegan Italian Penicillin Soup

  • Spicy Twist: Add a pinch of red chili flakes for some heat.
  • Mediterranean Flavor: Toss in olives and sun-dried tomatoes.
  • Creamy Option: Blend a portion of the soup for a creamier consistency.
  • Grain Swap: Substitute pasta with quinoa, farro, or barley for a whole-grain option.

FAQs About Vegan Italian Penicillin Soup

1. Can I make this soup ahead of time?

Absolutely! The flavors deepen as the soup sits. Store it in an airtight container in the refrigerator for up to 5 days.

2. Can I freeze this soup?

Yes, but omit the pasta before freezing. Add freshly cooked pasta when reheating to avoid mushiness.

3. What can I use instead of miso?

If you don’t have miso, you can skip it or use nutritional yeast for a similar umami flavor.

4. Is this soup gluten-free?

It can be! Use gluten-free pasta or grains like rice or quinoa.

5. How can I add more protein?

Add cooked lentils, chickpeas, or vegan chicken substitutes to boost protein.

6. What if I don’t have vegan Parmesan?

Try nutritional yeast or make your own vegan Parmesan using ground nuts and seasonings.

Conclusion: A Bowl of Comfort and Care

Making Vegan Italian Penicillin Soup is more than just cooking—it’s an act of love and self-care. Whether you’re under the weather or simply seeking a nourishing meal, this soup delivers warmth, flavor, and comfort in every spoonful.

So grab your pot, gather your ingredients, and whip up a batch of this wholesome, plant-based goodness. Your body and taste buds will thank you!

Soft Cut Out Sugar Cookies: A Sweet Tradition for Any Occasion

There’s something so comforting about baking cookies, especially when the whole family gathers around to roll, cut, and decorate them. Soft Cut Out Sugar Cookies are a timeless favorite, perfect for holidays, birthdays, or any time you want to add a little sweetness to your day. They’re soft, buttery, and hold their shape beautifully, making them ideal for creative decorations.

In this guide, you’ll learn everything you need to create these delicious cookies, from perfecting the dough to adding a finishing touch with icing. Whether you’re a seasoned baker or a beginner, this recipe will quickly become your go-to for soft, delightful sugar cookies.

Ingredients for Soft Cut Out Sugar Cookies

Here’s what you’ll need to make these irresistible cookies:

For the Cookies:

IngredientQuantity
All-purpose flour2 ¾ cups
Baking powder1 teaspoon
Salt½ teaspoon
Salted butter (softened)¾ cup
Granulated sugar1 cup
Eggs (room temperature)2 large
Vanilla extract1 teaspoon
Almond extract½ teaspoon (or ¼ teaspoon for subtlety)

For the Icing (Optional):

IngredientQuantity
Powdered sugar3 cups (sifted)
Milk3–4 tablespoons
Light corn syrup2 tablespoons
Vanilla extract½ teaspoon
Gel food coloringOptional

Why You’ll Love Soft Cut Out Sugar Cookies

  • Soft Texture: The perfect balance of buttery and soft, with a slight chew.
  • Holds Shape: These cookies don’t spread, making them ideal for intricate cut-out shapes.
  • Customizable: Decorate with icing, sprinkles, or leave them plain for a classic treat.
  • Family-Friendly: A fun activity for kids and adults alike.

Step-by-Step Guide to Making Soft Cut Out Sugar Cookies

1. Gather and Prepare Your Ingredients

  • Ensure all ingredients, especially butter and eggs, are at room temperature.
  • Measure the flour accurately using the spoon-and-level method to avoid dense cookies.

2. Mix the Dry Ingredients

In a medium bowl, whisk together the all-purpose flour, baking powder, and salt. Set aside.

3. Cream Butter and Sugar

  • In a large mixing bowl, use a hand or stand mixer to cream the softened butter and granulated sugar until light and fluffy (about 2–3 minutes).
  • This step incorporates air, ensuring soft and tender cookies.

4. Add Eggs and Flavorings

  • Beat in the eggs one at a time, ensuring each is fully incorporated.
  • Mix in the vanilla and almond extracts for a deliciously fragrant dough.

5. Combine Dry and Wet Ingredients

  • Gradually add the dry ingredients to the wet ingredients, mixing on low speed until just combined.
  • Avoid overmixing, as this can make the cookies tough.

6. Chill the Dough

  • Divide the dough in half, flatten into discs, and wrap in plastic wrap.
  • Chill for at least 1–2 hours, or up to overnight, to make rolling easier and prevent spreading during baking.

7. Roll Out the Dough

  • Preheat your oven to 350°F (175°C) and line baking sheets with parchment paper.
  • On a lightly floured surface, roll the dough to about ¼-inch thickness.
  • Use cookie cutters to create your desired shapes, and transfer them to the prepared baking sheets.

8. Bake and Cool

  • Bake the cookies for 8–10 minutes, or until the edges are just beginning to turn golden.
  • Let the cookies cool on the baking sheet for 5 minutes before transferring them to a wire rack to cool completely.

How to Make and Use Icing for Sugar Cookies

1. Prepare the Icing

  • In a medium bowl, whisk together powdered sugar, milk, light corn syrup, and vanilla extract until smooth.
  • Adjust the consistency by adding more powdered sugar (for thicker icing) or milk (for thinner icing).

2. Add Food Coloring

  • Divide the icing into separate bowls and add gel food coloring to each, if desired.
  • Stir until the colors are evenly distributed.

3. Decorate Your Cookies

  • Use piping bags, squeeze bottles, or a simple spoon to decorate your cookies.
  • Allow the icing to set completely before storing or stacking the cookies.

Tips for Perfect Soft Cut Out Sugar Cookies

1. Don’t Skip the Chilling Step

Chilling the dough ensures the cookies hold their shape and prevents over-spreading in the oven.

2. Use Quality Extracts

Pure vanilla and almond extracts enhance the flavor, making your cookies taste bakery-quality.

3. Test for Doneness

Cookies should look set but not browned on top. Overbaking can make them dry.

4. Experiment with Shapes

Use themed cookie cutters for holidays, birthdays, or special occasions to make your cookies stand out.

5. Store Properly

Keep the cookies in an airtight container at room temperature for up to a week, or freeze for longer storage.


Nutritional Information

NutrientPer Serving (1 Cookie)
Calories150
Protein2g
Fat6g
Carbohydrates21g
Sugar12g
Sodium80mg

Creative Decorating Ideas for Sugar Cookies

  • Holiday Themes: Snowflakes, Christmas trees, or hearts for Valentine’s Day.
  • Kid-Friendly Designs: Animals, cartoon characters, or initials.
  • Edible Glitter and Sprinkles: Add sparkle and fun to your cookies.
  • Personalized Messages: Write names or short phrases with icing for special events.

FAQs About Soft Cut Out Sugar Cookies

1. Can I make the dough ahead of time?

Yes, you can refrigerate the dough for up to 3 days or freeze it for up to 3 months. Thaw frozen dough in the fridge before rolling.

2. How do I prevent the cookies from spreading?

Chill the dough thoroughly and avoid using too much butter. Baking at the correct temperature is also key.

3. What if I don’t have almond extract?

You can omit it or replace it with extra vanilla extract for a simpler flavor.

4. Can I use this recipe without cookie cutters?

Yes! Roll the dough into balls and flatten slightly with a glass for round cookies.

5. Is the icing necessary?

The cookies are delicious on their own, but icing adds extra flavor and makes them look festive.

6. How do I thin the icing for flooding?

Add a small amount of milk to the icing and mix until it reaches a runny consistency, ideal for flooding the cookie surface.

Conclusion: Bake Memories with Soft Cut Out Sugar Cookies

Making Soft Cut Out Sugar Cookies is more than just a recipe—it’s an experience that brings people together. Whether you’re baking with kids, preparing for a holiday, or simply indulging in some kitchen therapy, this recipe guarantees soft, flavorful cookies every time.

So grab your ingredients, preheat that oven, and let your creativity shine as you decorate these delightful treats. You’ll not only bake cookies but also create cherished memories to savor for years to come.

Strawberry Danish: A Perfect Treat to Savor and Share

There’s nothing quite like a homemade pastry to brighten your day. Imagine sinking your teeth into a buttery, flaky puff pastry filled with sweet cream cheese and topped with luscious strawberries. Whether you’re planning a special breakfast, brunch, or simply craving something indulgent, Strawberry Danish is the perfect choice. Not only is it incredibly delicious, but it’s also surprisingly simple to make with just a few ingredients.

In this article, we’ll guide you step-by-step through making a stunning Strawberry Danish from scratch. You’ll also learn tips for perfecting the recipe, pairing suggestions, and answers to common questions about this classic pastry.

Ingredients for Strawberry Danish

Here’s what you’ll need to create this delightful pastry:

ComponentIngredientsQuantity
Puff Pastry BaseFrozen sheet puff pastry (thawed slightly)1
Cream Cheese FillingCream cheese (room temperature)4 oz
White granulated sugar3 tablespoons
Pure vanilla extract1 teaspoon
Strawberry ToppingStrawberries (washed, dried, thinly sliced)2 cups
Cornstarch½ tablespoon
White granulated sugar½ tablespoon
Egg WashLarge egg1
Water2 teaspoons
Lemon IcingPowdered sugar (sifted)½ cup
Zest of half a lemon–
Lemon juice2–3 teaspoons

Why Strawberry Danish is the Perfect Pastry

  • Versatile: It works as a quick breakfast, a fancy dessert, or an afternoon snack.
  • Fresh and Sweet: The combination of strawberries and cream cheese is irresistible.
  • Easy to Customize: You can switch up the fruit or adjust the sweetness to suit your taste.
  • Beginner-Friendly: Even if you’re new to baking, this recipe is easy to follow.

Step-by-Step Instructions to Make Strawberry Danish

1. Prepare Your Ingredients

Start by thawing the puff pastry until it’s slightly softened but still cool. Preheat your oven to 400°F (200°C) and line a baking sheet with parchment paper.

2. Make the Cream Cheese Filling

  • In a mixing bowl, combine the cream cheese, granulated sugar, and vanilla extract.
  • Mix until smooth and creamy. Set aside.

3. Create the Strawberry Mixture

  • In a separate bowl, toss the sliced strawberries with cornstarch and sugar.
  • This step helps the strawberries stay juicy while preventing the pastry from becoming soggy.

4. Roll and Cut the Puff Pastry

  • Gently roll out the puff pastry on a lightly floured surface.
  • Cut the sheet into 4–6 rectangles or squares, depending on your preferred size.

5. Assemble the Danish

  • Place the pastry pieces on the prepared baking sheet.
  • Add a dollop of cream cheese filling in the center of each piece, spreading slightly but leaving the edges clear.
  • Layer the sugared strawberries on top of the cream cheese.

6. Brush with Egg Wash

  • Beat the egg with water to create an egg wash.
  • Brush the edges of the puff pastry to ensure a golden, glossy finish when baked.

7. Bake to Perfection

  • Bake the pastries in the preheated oven for 18–20 minutes or until golden brown and puffed.
  • Allow them to cool slightly before adding the icing.

How to Make Lemon Icing

The tangy lemon icing adds a burst of flavor and a professional touch to your Strawberry Danish.

  • In a small bowl, whisk the powdered sugar, lemon zest, and lemon juice until smooth.
  • Adjust the consistency by adding more powdered sugar or lemon juice as needed.
  • Drizzle the icing over the cooled pastries using a spoon or piping bag.

Tips for the Best Strawberry Danish

1. Keep the Puff Pastry Cold

Warm puff pastry can become sticky and difficult to work with. Keep it cool until you’re ready to use it.

2. Don’t Overfill

Using too much filling can cause the pastry to overflow during baking. Stick to recommended amounts for the best results.

3. Use Fresh Strawberries

Fresh, ripe strawberries make all the difference in flavor and texture.

4. Adjust Sweetness to Taste

If your strawberries are naturally sweet, reduce the sugar in the topping slightly.

5. Serve Fresh

While you can store leftovers, Strawberry Danish tastes best fresh from the oven.

Nutritional Information

NutrientPer Serving (1 Danish)
Calories320
Protein5g
Fat17g
Carbohydrates38g
Sugar20g
Sodium220mg

Pairing Suggestions for Strawberry Danish

Strawberry Danish pairs wonderfully with a variety of beverages and sides:

  • Beverages: Coffee, black tea, or a glass of sparkling water with lemon.
  • Sides: Fresh fruit salad, yogurt parfait, or a savory dish like scrambled eggs to balance the sweetness.

Common Mistakes and How to Avoid Them

1. Puff Pastry Not Puffing

Ensure your oven is fully preheated before baking, and don’t open the door during the process.

2. Soggy Bottoms

Using cornstarch in the strawberry mixture prevents the pastry from getting soggy.

3. Uneven Cooking

Spread your pastries out on the baking sheet to ensure even heat distribution.

FAQs About Strawberry Danish

1. Can I use frozen strawberries?

Yes, but thaw and drain them thoroughly to avoid excess moisture.

2. How do I store leftovers?

Store them in an airtight container at room temperature for up to two days or refrigerate for up to four days.

3. Can I freeze Strawberry Danish?

Yes, freeze unbaked pastries on a tray, then transfer to a freezer bag. Bake from frozen, adding a few extra minutes.

4. What other fruits can I use?

Try blueberries, raspberries, or even thinly sliced peaches or apples for variety.

5. Can I make this recipe without puff pastry?

You can use crescent roll dough or make your own pastry dough if preferred.

6. Is it okay to skip the icing?

Yes, but the lemon icing adds a delicious finishing touch that complements the strawberries beautifully.

Conclusion: Bake Joy Into Every Bite

Making a Strawberry Danish is more than just preparing a pastry—it’s about creating a moment of indulgence, joy, and connection. Whether you’re treating yourself or sharing with loved ones, this easy recipe is guaranteed to bring smiles to the table.

So, roll up your sleeves, preheat that oven, and let the magic happen. Once you’ve tried it, you’ll see why Strawberry Danish is a timeless favorite.

Stay Connected

Get recipes via email: