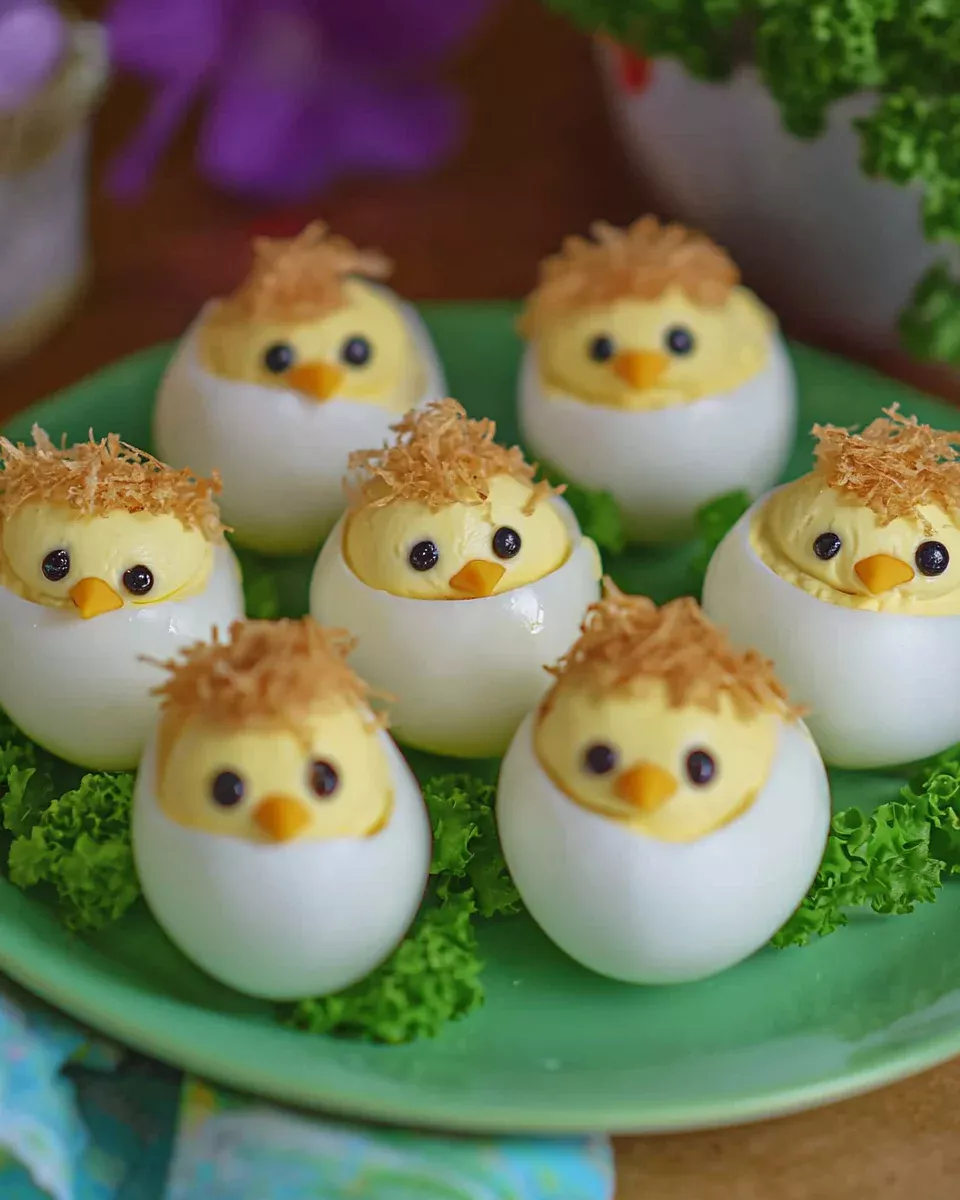
Ah, the joy of Easter gatherings! There’s something magical about bringing a dish that not only tastes divine but also sparks a smile. Enter Peepin’ Chickies Deviled Eggs, a delightful treat that transforms the classic deviled egg into adorable little chicks. Perfect for busy moms and professionals, this recipe is a quick solution for those bustling days when you want to impress without the stress. Imagine the delight on your loved ones’ faces as they peep at these charming creations. Let’s dive into this culinary adventure and make your Easter table the talk of the town!
Why You’ll Love This Peepin’ Chickies Deviled Eggs
These Peepin’ Chickies Deviled Eggs are a breeze to whip up, making them perfect for those hectic days when time is of the essence. With their adorable appearance and delightful taste, they’re sure to be a hit with both kids and adults alike. Plus, they add a touch of whimsy to your Easter spread, turning a simple appetizer into a festive centerpiece. What’s not to love?
Ingredients Peepin’ Chickies Deviled Eggs
Creating these charming Peepin’ Chickies Deviled Eggs is a delightful experience, and it all starts with the right ingredients. You’ll need large eggs, the stars of the show, which provide a creamy base for our filling. Mayonnaise adds a rich, smooth texture, while a touch of Dijon mustard brings a subtle tanginess. A splash of white vinegar enhances the flavors, making them pop. Season with salt and pepper to taste, ensuring a balanced flavor profile.
For a sunny hue, a few drops of yellow food coloring can be added, though it’s entirely optional. To bring our little chicks to life, black olives serve as the perfect eyes, and carrot sticks make adorable beaks. If you’re feeling adventurous, consider a pinch of smoked paprika for a smoky twist. For a lighter version, swap mayonnaise with Greek yogurt. Exact quantities are listed at the bottom of the article, ready for printing.
How to Make Peepin’ Chickies Deviled Eggs
Boil the Eggs
Start by placing your eggs in a saucepan, ensuring they’re snug but not overcrowded. Cover them with cold water, about an inch above the eggs. Bring the water to a rolling boil over medium-high heat. Once you see those bubbles dancing, cover the pot, remove it from the heat, and let it sit for 12 minutes. This method ensures perfectly cooked eggs every time.
After the timer dings, transfer the eggs to a bowl of ice water. This icy bath halts the cooking process and makes peeling a breeze. Let them chill for about 5 minutes. Once cooled, gently tap and roll each egg on the counter to crack the shell, then peel them under running water for ease.
Prepare the Yolk Mixture
With your eggs peeled, slice them in half lengthwise. Carefully scoop out the yolks and place them in a mixing bowl. Add mayonnaise, Dijon mustard, and a splash of white vinegar to the yolks. Season with salt and pepper to taste. For a cheerful yellow hue, add a few drops of yellow food coloring, but that’s entirely up to you.
Advertisement
Using a fork, mash the yolk mixture until it’s smooth and creamy. This is where the magic happens, as the flavors meld into a delightful filling. If you’re feeling adventurous, a pinch of smoked paprika can add a smoky depth to the mix.
Assemble the Chicks
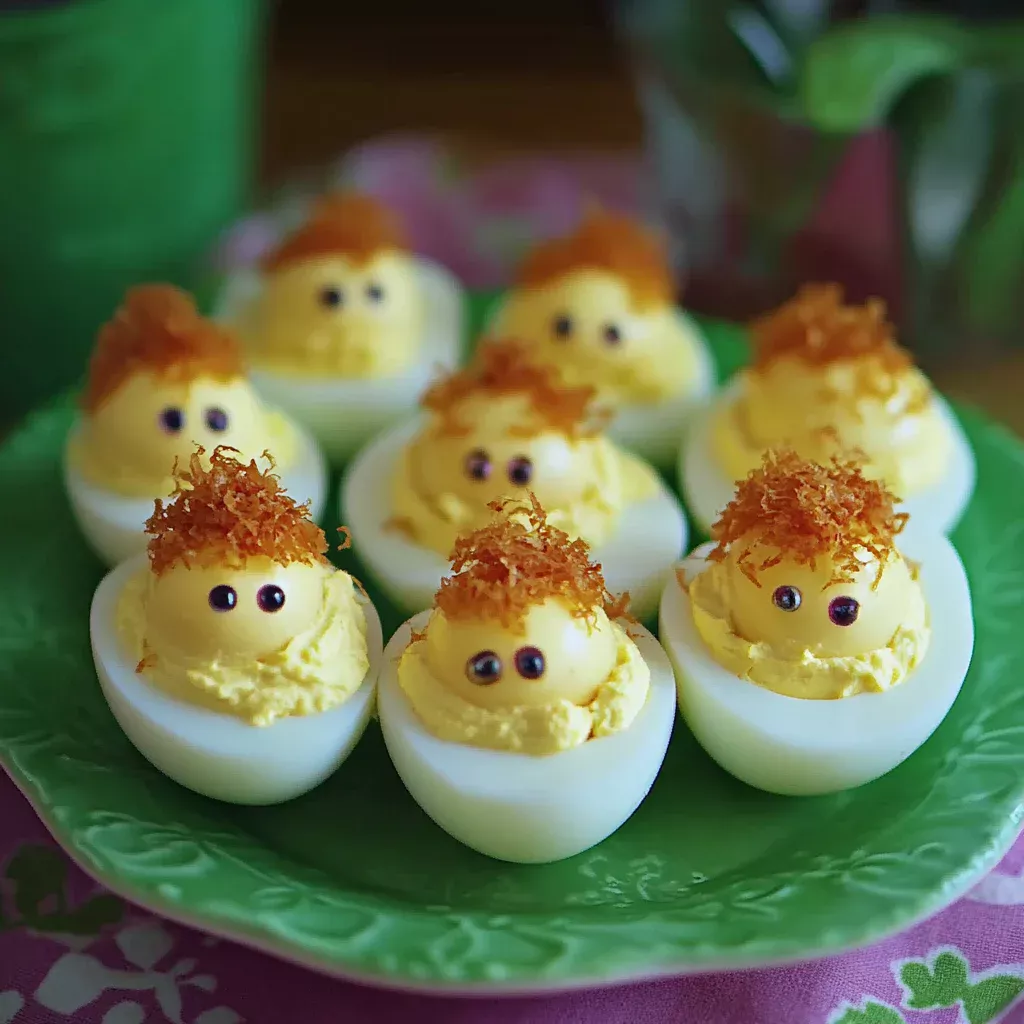
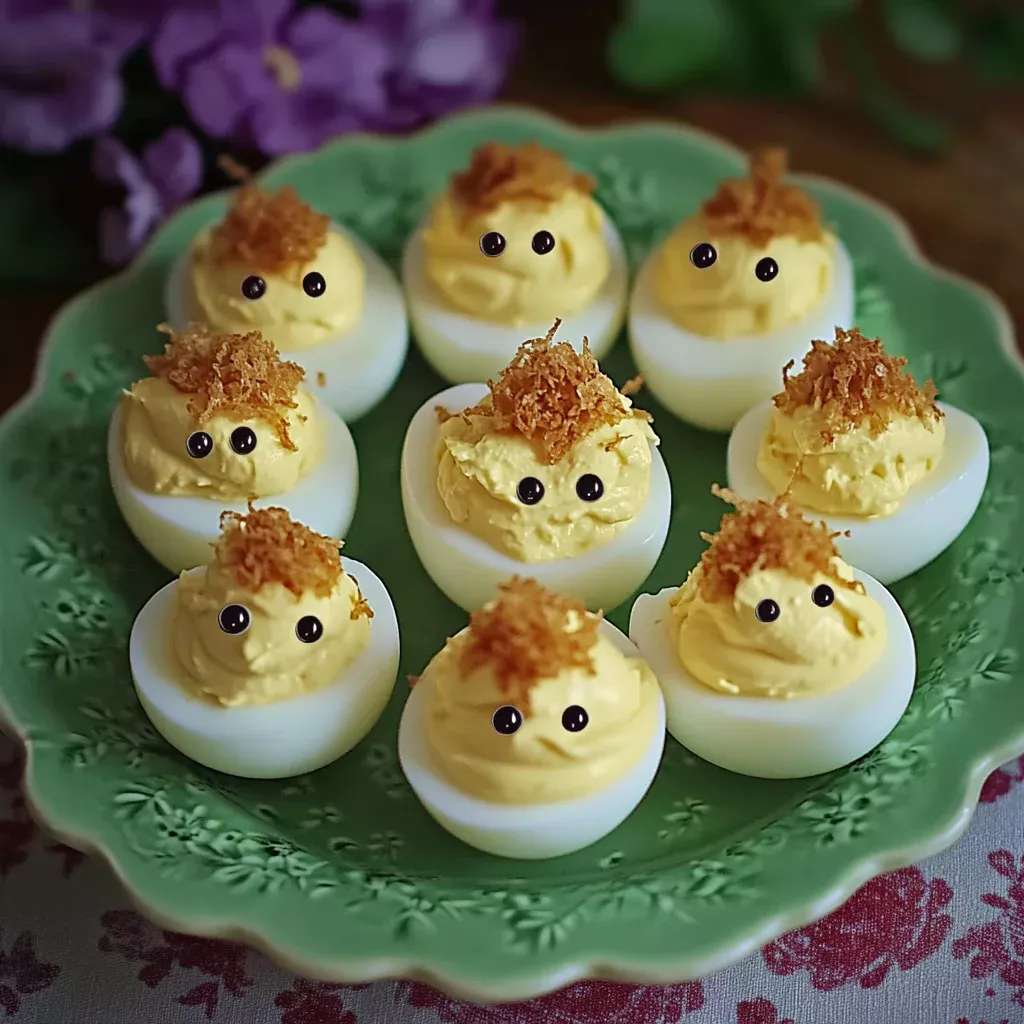
Now, it’s time to bring your little chicks to life! Spoon or pipe the yolk mixture back into the egg whites, creating a generous mound. For the eyes, cut small pieces of black olives and gently press them into the yolk filling. Carrot sticks, cut into tiny triangles, make perfect beaks.
Arrange your Peepin’ Chickies Deviled Eggs on a platter, and watch as they transform into the stars of your Easter table. Serve them immediately, or refrigerate until you’re ready to dazzle your guests. These charming appetizers are best enjoyed the same day, ensuring their freshness and flavor.
Tips for Success
Use fresh eggs for easier peeling; older eggs can be stubborn.
Chill eggs in ice water immediately after boiling to prevent overcooking.
For a smoother yolk mixture, use a food processor instead of a fork.
Experiment with different mustards for unique flavor profiles.
Prepare the yolk mixture a day ahead to save time on busy days.
Equipment Needed
Saucepan: A medium-sized one works best for boiling the eggs.
Mixing Bowl: For combining the yolk mixture.
Fork or Food Processor: To mash the yolks smoothly.
Knife: For slicing eggs and cutting decorations.
Piping Bag or Spoon: To fill the egg whites with the yolk mixture.
Variations
For a spicy kick, add a dash of hot sauce or a pinch of cayenne pepper to the yolk mixture.
Swap the mayonnaise with avocado for a creamy, dairy-free alternative.
Incorporate finely chopped herbs like dill or chives for a fresh, aromatic twist.
Use pickled jalapeños instead of black olives for a zesty eye decoration.
Try adding crumbled bacon bits to the yolk mixture for a savory, smoky flavor.
Serving Suggestions
Pair with a crisp, refreshing salad to balance the richness of the eggs.
Serve alongside a chilled glass of sparkling lemonade for a zesty contrast.
Arrange on a bed of fresh greens for a vibrant presentation.
Complement with a platter of assorted cheeses and crackers.
Garnish with fresh herbs like parsley or dill for an aromatic touch.
FAQs about Peepin’ Chickies Deviled Eggs
How far in advance can I make Peepin’ Chickies Deviled Eggs?
You can prepare the yolk mixture a day ahead and store it in the fridge. Assemble the chicks on the day of serving for the freshest taste and appearance. This ensures your Peepin’ Chickies Deviled Eggs are as delightful as they are delicious.
Can I make these deviled eggs without mayonnaise?
Advertisement
Absolutely! You can substitute mayonnaise with Greek yogurt or mashed avocado for a lighter, creamy alternative. Both options maintain the delightful texture while offering a unique twist to your Peepin’ Chickies Deviled Eggs.
What can I use instead of black olives for the eyes?
If black olives aren’t your thing, try using capers or small pieces of pickled jalapeños. These alternatives add a zesty touch to your Peepin’ Chickies Deviled Eggs, keeping them both cute and flavorful.
How do I prevent the eggs from cracking while boiling?
To avoid cracks, start with cold water and bring it to a gentle boil. Adding a pinch of salt or a splash of vinegar to the water can also help keep the eggs intact, ensuring your Peepin’ Chickies Deviled Eggs are picture-perfect.
Advertisement
Can I add other flavors to the yolk mixture?
Of course! Feel free to experiment with flavors like smoked paprika, hot sauce, or fresh herbs. These additions can elevate your Peepin’ Chickies Deviled Eggs, making them a unique and tasty treat for your Easter gathering.
Final Thoughts
Creating Peepin’ Chickies Deviled Eggs is more than just a culinary task; it’s a joyful experience that brings a smile to everyone involved. These little chicks are not only a feast for the eyes but also a delight for the taste buds. As you place them on your Easter table, watch as they become the centerpiece of conversation and laughter. Whether you’re a busy mom or a professional juggling life’s demands, this recipe offers a moment of creativity and connection. So, gather your loved ones, share the joy, and let these charming chicks peep their way into your heart.
Peepin’ Chickies Deviled Eggs are a delightful Easter treat, featuring deviled eggs decorated to look like little chicks, perfect for festive gatherings.
Ingredients
Scale
6 large eggs
3 tablespoons mayonnaise
1 teaspoon Dijon mustard
1 teaspoon white vinegar
Salt and pepper to taste
Yellow food coloring (optional)
Black olives (for decoration)
Carrot sticks (for decoration)
Instructions
Place the eggs in a saucepan and cover them with cold water. Bring the water to a boil over medium-high heat. Once boiling, cover the pot, remove it from heat, and let it sit for 12 minutes.
After 12 minutes, transfer the eggs to a bowl of ice water and let them cool for about 5 minutes. Once cooled, peel the eggs and slice them in half lengthwise.
Remove the yolks from the egg whites and place them in a mixing bowl. Add the mayonnaise, Dijon mustard, white vinegar, salt, and pepper. If desired, add a few drops of yellow food coloring to achieve a cheerful yellow hue.
Mash the yolk mixture with a fork until smooth and well combined. Spoon or pipe the yolk mixture back into the egg whites.
To create the ‘chick’ look, cut small pieces of black olives for eyes and use carrot sticks for beaks. Place them on the yolk filling to resemble little chicks.
Serve immediately or refrigerate until ready to serve. These deviled eggs are best enjoyed the same day.
Notes
For a fun twist, try adding a pinch of smoked paprika to the yolk mixture for extra flavor.
You can also substitute the mayonnaise with Greek yogurt for a lighter version.