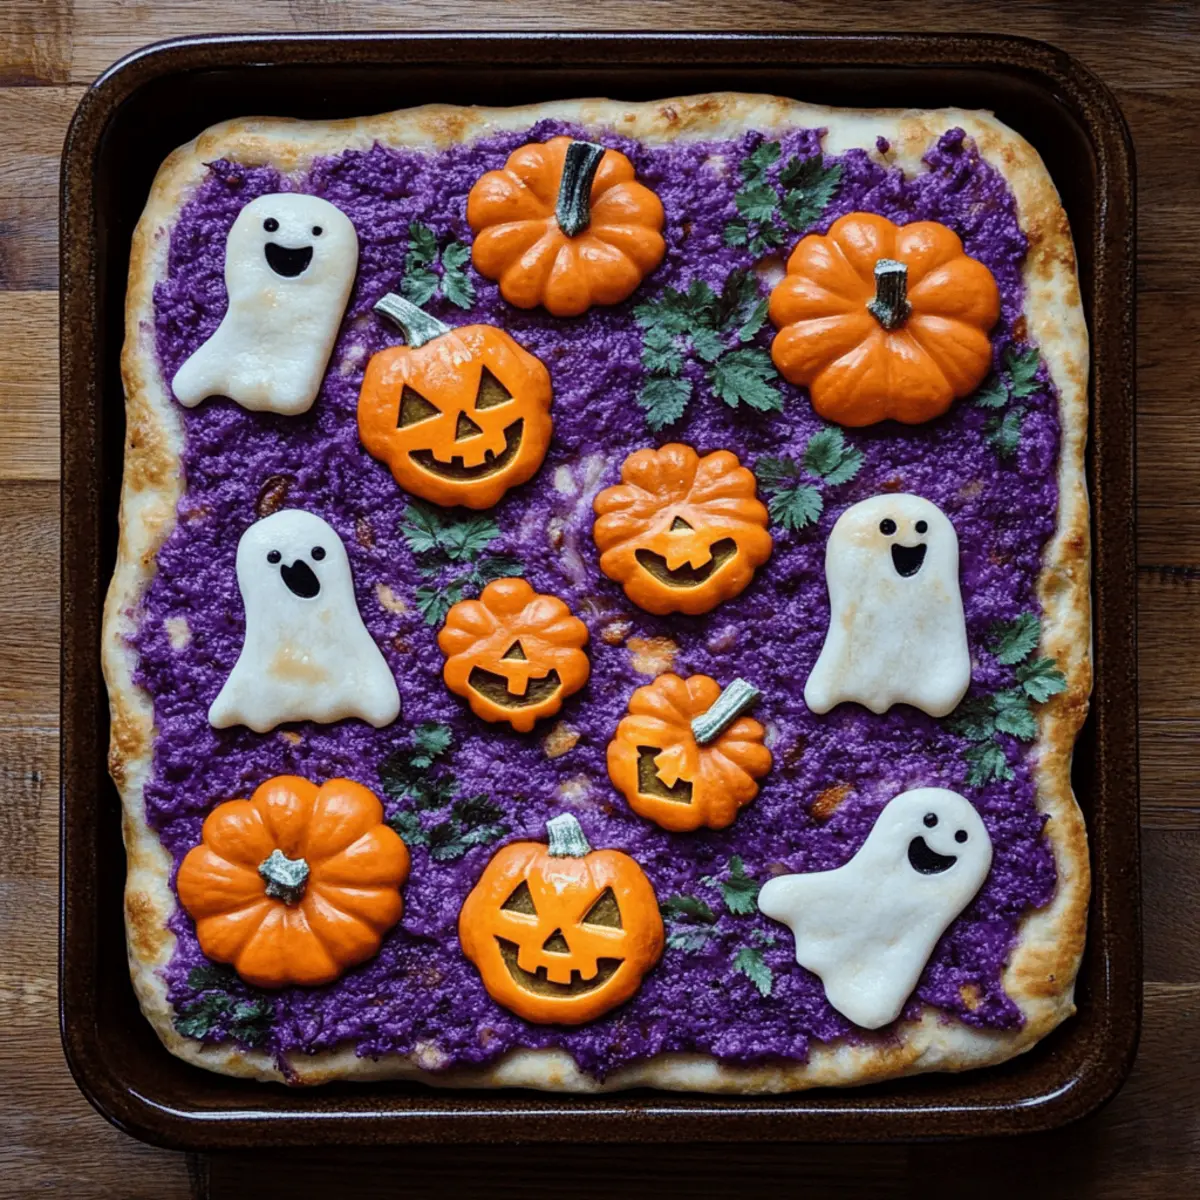
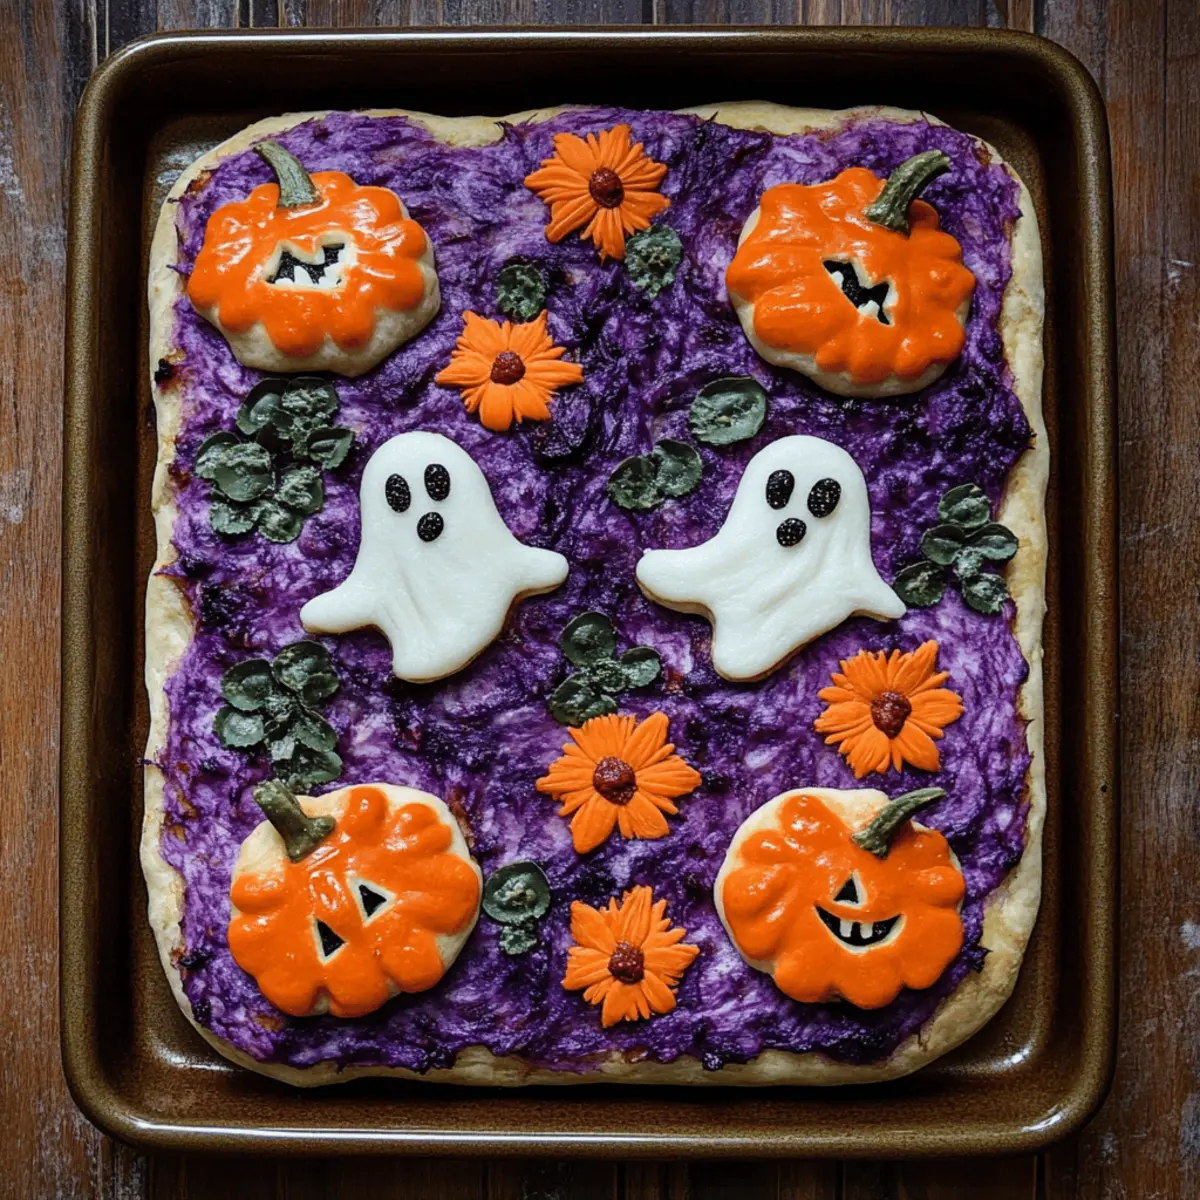
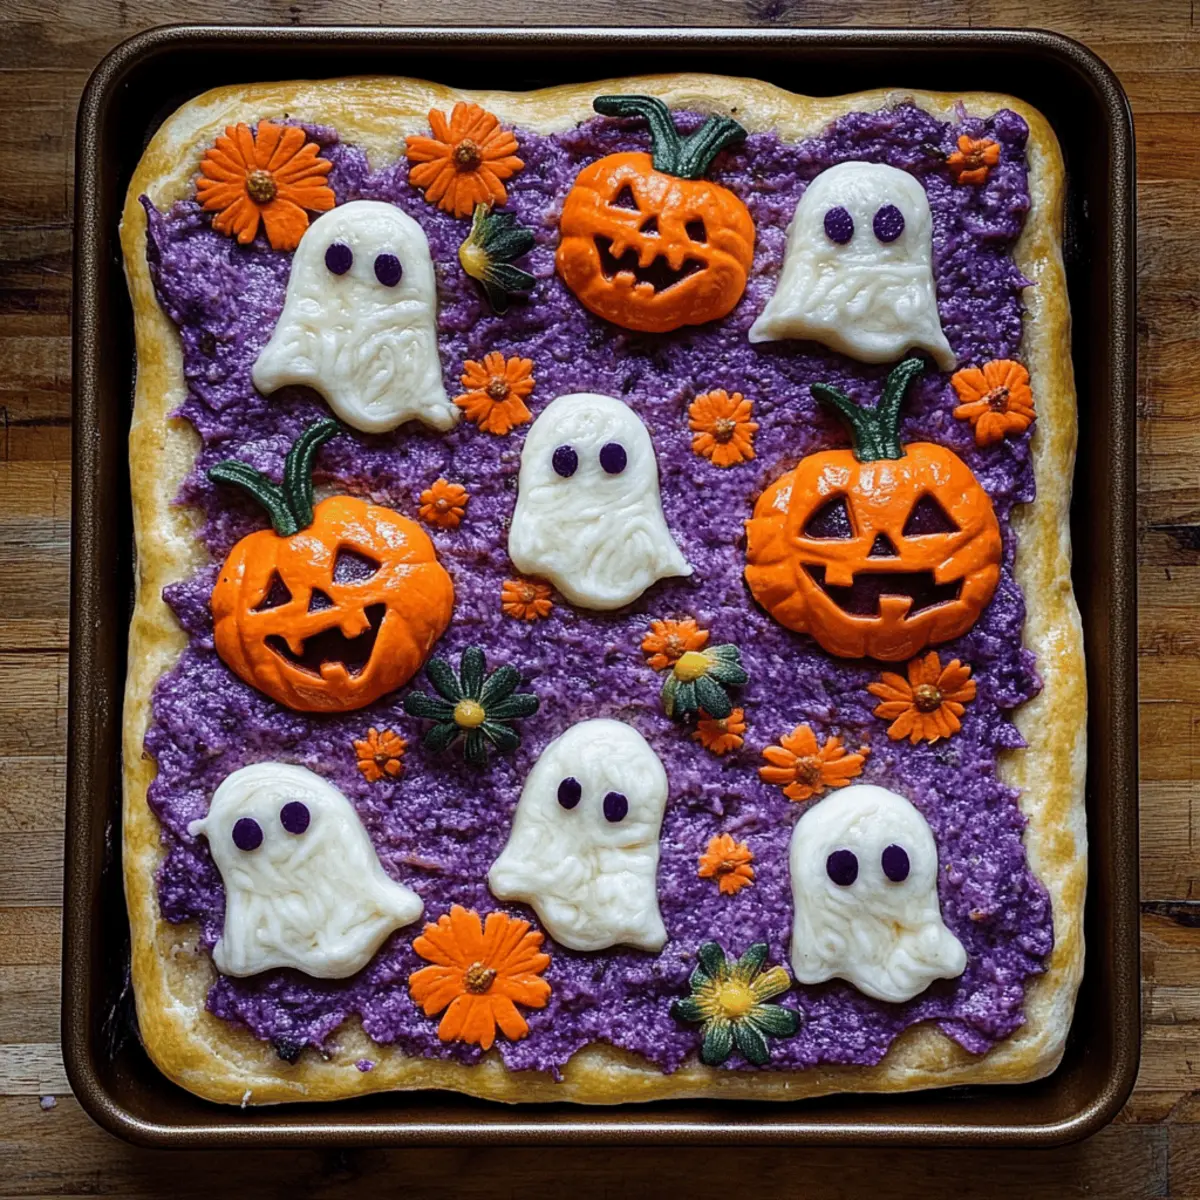
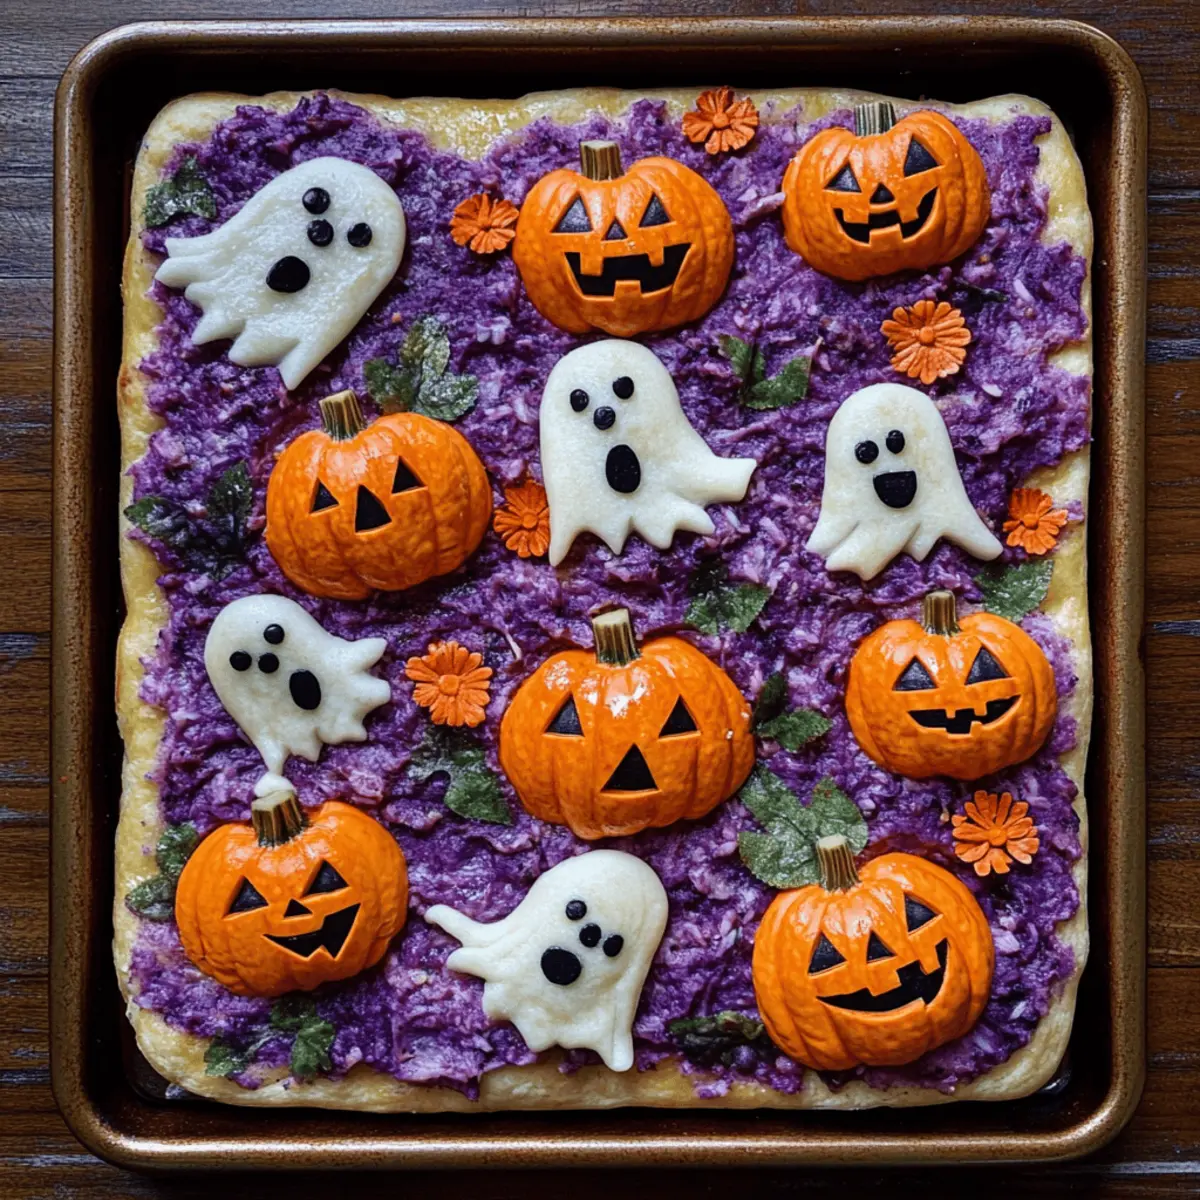
As I carefully sliced into the warm, fluffy Spooky Halloween Focaccia, the enticing aroma of herbs and roasted vegetables wafted through my kitchen, instantly transporting me to festive family gatherings. This whimsical creation isn’t just a treat for the eyes; it’s also a delightful way to blend fun and nutrition, turning everyday ingredients into playful decorations with root veggies. The perfect combination of flavors and textures makes this focaccia not only a crowd-pleaser but also an extraordinary vegetarian dish for your Halloween celebrations. Not to mention that it’s an excellent canvas for sharing joyful kitchen moments with loved ones. Are you ready to unlock the secret to a deliciously spooky treat that the whole family will love?

Why Is This Focaccia So Special?
Texture: This Spooky Halloween Focaccia boasts a fluffy, pillowy interior that perfectly complements its crunchy golden crust. Visual Appeal: Each creation comes alive with vibrant root veggie decorations, transforming your table into a colorful Halloween masterpiece. Versatility: Use it as a stand-alone snack, a sandwich base, or served alongside marinara sauce for dipping. Family-Friendly Fun: Involve your little ones in the decorating process for beautiful bonding moments. Time-Saving: Despite its festive flair, this focaccia is quick to prepare, letting you spend more time enjoying the festivities! Whether you’re looking to impress guests or simply treat your family, this focaccia will be a Halloween hit!
Spooky Halloween Focaccia Ingredients
For the Dough
• Instant Yeast – 2 1/4 teaspoons, the leavening star that helps your focaccia rise beautifully. Substitute with 1 standard packet of active dry yeast if needed.
• Sugar – 2 teaspoons, nourishing the yeast while aiding in that lovely golden-brown crust.
• Warm Water – 1 1/3 cups, the key to activating the yeast and hydrating the dough for perfect fluffiness.
• Flour – 4 cups, which provides structure; all-purpose or bread flour works best for this festive bread.
• Kosher Salt – 2 teaspoons + more for topping, enhancing flavors and keeping the yeast in check.
• Olive Oil – 1/2 cup + more for greasing, adding moisture and richness for that lovely texture.
• Ube Powder or Liquid – 1+ tablespoon, for a pop of color and delightful flavor; purple sweet potato powder is a great substitute.
For Decorating
• Edible Toppings – As desired; use root vegetables like sweet potatoes (cut into pumpkin shapes) and turnips (cut into ghost shapes) to create a spooky visual feast.
Get ready for a baking adventure with this Spooky Halloween Focaccia that combines delightful flavors and creativity in every bite!
Step‑by‑Step Instructions for Spooky Halloween Focaccia
Step 1: Activate the Yeast
In a small bowl, combine 2 1/4 teaspoons of instant yeast, 2 teaspoons of sugar, and 1 1/3 cups of warm water. Stir gently and let the mixture sit for about 15 minutes, until it becomes frothy and bubbly. This ensures your yeast is alive and ready to help your Spooky Halloween Focaccia rise beautifully.
Step 2: Mix the Dry Ingredients
In a large mixing bowl, combine 4 cups of flour and 2 teaspoons of kosher salt. Make a well in the center and add 1/2 cup of olive oil along with the prepared yeast mixture. Stir with a wooden spoon until the ingredients start to form a shaggy dough, noticing the lovely aromas wafting up from the blend.
Step 3: Knead the Dough
Transfer the shaggy dough to a floured surface and knead for about 10 minutes, or until it becomes smooth and elastic. If using a stand mixer, fit it with the dough hook and mix on medium speed until the dough pulls away from the sides of the bowl, giving you that perfect texture for your focaccia.
Step 4: First Rise
Form the kneaded dough into a ball and place it in a greased bowl, rolling it to coat. Cover the bowl with a clean kitchen towel or plastic wrap, and let it rise in a warm spot for 1.5 to 2 hours, or until it has doubled in size. This step is essential for achieving light and fluffy Spooky Halloween Focaccia.
Step 5: Preheat the Oven
Once the dough has risen, preheat your oven to 400ºF (200ºC). This ensures a hot environment for baking that will help create that wonderful golden crust during the final baking of your focaccia.
Step 6: Prepare the Toppings
While the oven heats, prepare your decorative toppings. Using cookie cutters, create fun shapes from thinly sliced root vegetables like sweet potatoes and turnips. Aim for a variety of shapes to make your Spooky Halloween Focaccia truly festive and visually captivating.
Step 7: Shape the Dough
Gently deflate the risen dough and transfer it to a greased baking pan. Use your fingers to stretch and spread the dough evenly across the bottom of the pan, making sure the edges rise slightly to hold in those spooky toppings. Let it rest for another 30 minutes, allowing it to puff up once more.
Step 8: Decorate the Focaccia
Once rested, it’s time to have fun! Press the prepared decorative vegetables onto the surface of the dough in a playful pattern. Brush generously with olive oil and sprinkle with extra kosher salt for added flavor, making your Spooky Halloween Focaccia savory and delicious.
Step 9: Bake the Focaccia
Place the decorated focaccia in the preheated oven and bake for 25-30 minutes, or until it’s golden brown and the edges are crispy. Keep an eye on it; the aroma will fill your kitchen as it bakes, making it hard to resist!
Step 10: Cool and Serve
Once baked, remove the focaccia from the oven and let it cool in the pan for a few minutes. Then transfer it to a wire rack to cool slightly before slicing. Serve your Spooky Halloween Focaccia warm, perfect for dipping into marinara or crafting delightful sandwiches!

What to Serve with Spooky Halloween Focaccia
The warm, inviting aroma of your freshly baked focaccia opens the door to a world of delicious pairings to complete your eerie feast.
- Creamy Garlic Dip: This rich and savory dip elevates the flavors of the focaccia, making each bite unforgettable.
- Marinara Sauce: A classic pairing that adds a tangy kick, perfect for dipping slices and creating flavorful spooky sandwiches.
- Roasted Vegetable Platter: A colorful array of roasted seasonal veggies complements the focaccia’s texture, enhancing your Halloween spread.
- Salad with Citrus Vinaigrette: A zesty, refreshing salad brightens your meal, balancing the bread’s rich flavors while providing a burst of freshness.
- Autumn Spice Sangria: This delightful drink mixes fruity notes with warm spices, creating a festive beverage that perfectly matches the holiday spirit.
- Pumpkin Soup: Creamy and comforting, pumpkin soup adds a seasonal touch, perfect for dipping your spooky focaccia into its velvety goodness.
- Chilled Apple Cider: Its sweet and tart profile is a refreshing counterpart to the focaccia, welcoming autumn in every sip.
- Chocolate-Covered Pretzels: For a sweet and salty snack, these treats are perfect for rounding out your Halloween spread, while delighting those with a sweet tooth.
- Bone-Shaped Cheese Crackers: A fun and whimsical addition, offering a crunchy contrast that kids and adults alike will love.
Spooky Halloween Focaccia Variations
Customize your Spooky Halloween Focaccia to create a festive masterpiece that tantalizes both the eyes and taste buds!
- Root Vegetable Swaps: Use purple potatoes, beets, or even carrots for unique colors and flavors. Each option adds a distinct sweetness that transforms your focaccia into a vibrant work of art.
- Herb-Infused Dough: Mix dried or fresh herbs like rosemary or thyme into the dough for an aromatic kick. This little twist elevates the overall flavor profile and pairs perfectly with your festive decorations.
- Sweet Surprise: Add a sprinkle of cinnamon or nutmeg for a hint of warmth and sweetness. This unexpected flavor can turn your focaccia into a delightful dessert option, making it twice as versatile.
- Cheesy Delight: Sprinkle shredded cheese on top before baking to add a gooey, melty layer. A blend of mozzarella and parmesan gives a savory contrast to the sweet root vegetable designs.
- Spicy Kick: Incorporate crushed red pepper flakes into the dough for a touch of heat. The warmth balances well with the sweetness of the veggies, creating a grown-up version that’s still fun for the whole family.
- Dairy-Free Twist: Opt for a plant-based oil for greasing and a dairy-free cheese alternative for your toppings. This variation ensures everyone can enjoy the Spooky Halloween Focaccia without missing out on flavor.
- Colorful Ube Variations: Switch out Ube for other colorful powders such as spirulina or turmeric to experiment with different flavors and hues. This not only enhances its appearance but adds nutritional benefits too, making it even more family-friendly.
- Mini Focaccia Bites: Roll small pieces of dough into balls, flatten, and decorate each one individually for bite-sized treats! This interactive approach allows everyone to get creative, making snack time even more enjoyable.
Want to turn this spooky treat into a full meal? Serve your focaccia alongside some delicious garlic confit or a bowl of warm marinara sauce for dipping!
Helpful Tricks for Spooky Halloween Focaccia
Warm Water: Make sure your water is warm, not hot, to avoid killing the instant yeast. This step is crucial for a fluffy focaccia.
Don’t Rush the Rise: Allow the dough to rise adequately. Rushing this step can lead to a dense texture, so let it double in size for the best Spooky Halloween Focaccia!
Decorative Placement: Space out your vegetable decorations to avoid overcrowding. They should enhance the look without interfering with the dough’s ability to rise.
Kneading Technique: Knead the dough until smooth and elastic; this helps develop gluten for that light, airy texture. Over-kneading can lead to a tough bread.
Baking Time: Keep an eye on the focaccia while it bakes; ovens can vary. Baking until golden brown ensures a crispy crust and delicious flavor!
Serving Style: Serve the focaccia warm for the best taste experience. It’s delightful on its own or paired with marinara sauce for dipping!
Storage Tips for Spooky Halloween Focaccia
Room Temperature: Keep your Spooky Halloween Focaccia wrapped in a clean kitchen towel or placed in an airtight container at room temperature for up to 2 days for optimal flavor.
Fridge: If you need to store it longer, you can refrigerate the focaccia. Just wrap it tightly in plastic wrap to prevent it from drying out. Consume within 3-4 days for best taste.
Freezer: For longer storage, slice the focaccia and align the pieces in a single layer on a baking sheet. Freeze until firm, then transfer to a freezer bag. It can be stored for up to 2 months.
Reheating: To enjoy your focaccia, preheat the oven to 350ºF (175ºC). Place the focaccia on a baking sheet and warm it for about 10-15 minutes, bringing back its delightful fluffiness and crispness.
Make Ahead Options
These Spooky Halloween Focaccia are perfect for busy home cooks looking to streamline meal prep! You can prepare the dough up to 24 hours in advance by following the first rise step and then refrigerating it. Simply shape the dough and decorate with your root vegetable toppings just before baking. To maintain quality, wrap the risen dough tightly in plastic wrap after its initial rise and place it in the fridge to prevent it from drying out. When ready to bake, allow it to come to room temperature for about 30 minutes before decorating and baking as directed. This way, you’ll have a festive and delicious focaccia ready to go with minimal last-minute effort!

Spooky Halloween Focaccia Recipe FAQs
How do I select the right vegetables for decorating my focaccia?
Absolutely! When picking root vegetables, choose ones that are firm and free of blemishes. Look for sweet potatoes and turnips that are vibrant in color and have no dark spots all over them. For the best results, pick vegetables that can hold their shape when cut into fun Halloween shapes. The more colorful, the better for a festive look!
What is the best way to store leftover focaccia?
Very! To keep your Spooky Halloween Focaccia fresh, store it in an airtight container or wrap it in a clean kitchen towel at room temperature for up to 2 days. If not consumed by then, consider refrigerating it wrapped tightly in plastic wrap for 3 to 4 days. However, for maximum taste, enjoy it sooner rather than later!
Can I freeze the focaccia for later use?
Absolutely! To freeze your Spooky Halloween Focaccia, allow it to cool completely. Then, slice it into pieces and arrange the slices in a single layer on a baking sheet. Freeze until firm, about 1-2 hours, and then transfer the pieces to a zip-top freezer bag. It can be stored for up to 3 months. This makes it super convenient for a quick snack or meal later on!
What if my focaccia dough isn’t rising?
Very! If your dough isn’t rising, ensure that your yeast is fresh and that the water was warm, not hot—about 110°F (43°C) is perfect. If you’re still having trouble, make sure the dough is in a warm environment, free from drafts, to encourage rising. Sometimes, covering the bowl with a damp cloth can help create a warm, cozy atmosphere for your dough to thrive!
Are there any dietary considerations for this focaccia?
Absolutely! This Spooky Halloween Focaccia is vegetarian-friendly, but for those with dietary restrictions, it’s essential to check your toppings. If using root vegetables, ensure they meet any specific dietary needs (like allergies). For a dairy-free version, you can replace olive oil with plant-based oil and skip any dairy products in your toppings. Enjoy a spooky treat that’s safe for everyone at the table!

Spooky Halloween Focaccia: Fun, Fluffy, and Family-Friendly!
Ingredients
Equipment
Method
- Activate the yeast by combining yeast, sugar, and warm water. Let sit for 15 minutes.
- Mix flour and kosher salt in a bowl, then add olive oil and yeast mixture.
- Knead the dough on a floured surface for about 10 minutes until smooth.
- Place dough in a greased bowl, cover, and let rise for 1.5 to 2 hours.
- Preheat oven to 400ºF (200ºC).
- Prepare decorative toppings using cookie cutters on root vegetables.
- Deflate the dough, transfer to a greased baking pan, and stretch evenly.
- Press decorative vegetables onto the dough, brush with olive oil, and sprinkle salt.
- Bake in oven for 25-30 minutes, until golden brown.
- Cool slightly before slicing and serve warm.

