

Some of the best desserts aren’t the ones that take hours to prepare, but the ones that come together effortlessly, yet taste like they took all day. Growing up, my family always had a love for sweet treats, but with busy schedules, making elaborate desserts wasn’t always an option.
One of my fondest memories is of my mother whipping up a quick, creamy dessert whenever we had unexpected guests or when my siblings and I craved something sweet. She never needed a recipe—just a few pantry staples, a touch of creativity, and within minutes, a rich, indulgent treat was ready. It was the kind of dessert that felt fancy, even though it was made in just a few steps.
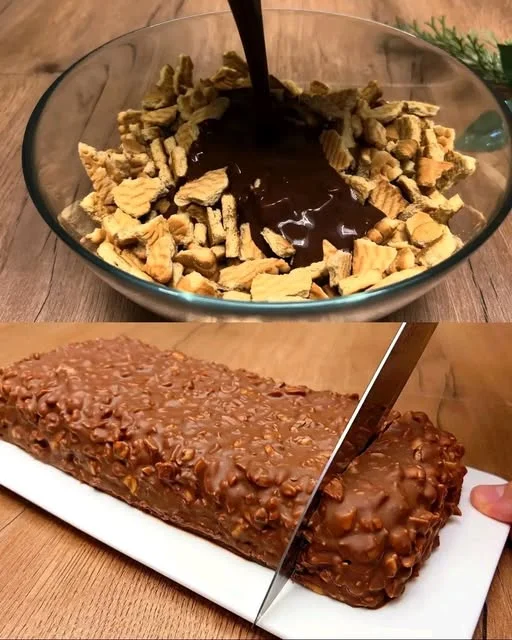
Now, every time I make this no-bake 5-minute dessert, it takes me back to those moments. The simplicity of crushed biscuits, smooth cream cheese, and a luscious chocolate topping creates a harmony of textures and flavors that feels both nostalgic and luxurious. It’s proof that you don’t need an oven, gelatin, or fancy techniques to make something truly delightful.
This recipe is perfect for those times when you want a sweet fix without the hassle. Whether you’re making it for yourself, sharing it with family, or impressing last-minute guests, this dessert is a lifesaver.
Why You’ll Love This No-Bake Dessert
There are countless reasons to fall in love with this dessert, but here are just a few:
- Quick & Easy – Takes just 5 minutes to put together, with no baking required.
- Minimal Ingredients – Uses simple pantry staples that you likely already have.
- No Gelatin Needed – Achieves a perfectly creamy texture without any stabilizers.
- Versatile & Customizable – Can be adapted with different flavors and toppings.
- Perfect for Any Occasion – Great for last-minute gatherings, meal prepping, or a midnight snack.
Ingredients
| Ingredient | Quantity |
|---|---|
| Biscuits (crushed) | 200g |
| Butter (melted) | 100g |
| Cream cheese | 250g |
| Heavy cream | 200ml |
| Powdered sugar | ½ cup |
| Vanilla extract | 1 teaspoon |
| Chocolate (melted) | 100g |
| Cocoa powder | 2 tablespoons |
| Honey | 1 tablespoon |
| Salt | A pinch |
Directions
- Prepare the Base:
- Crush the biscuits into fine crumbs.
- Mix with melted butter until fully combined.
- Press the mixture into a serving dish or individual dessert cups to create the base.
- Make the Creamy Filling:
- In a bowl, whisk together the cream cheese, heavy cream, powdered sugar, vanilla extract, and salt until smooth and fluffy.
- Spread the cream mixture evenly over the biscuit base.
- Add the Chocolate Layer:
- Combine the melted chocolate with cocoa powder and honey, stirring until smooth.
- Drizzle the chocolate over the creamy layer and spread evenly.
- Chill & Serve:
- Let the dessert chill in the refrigerator for at least 5 minutes.
- Serve immediately or leave it to set for a firmer texture.
Nutritional Information (Per Serving)
| Nutrient | Amount (Approx.) |
|---|---|
| Calories | 300-350 kcal |
| Carbohydrates | 35g |
| Protein | 4g |
| Fats | 18g |
| Sugar | 20g |
Secrets to Making the Perfect No-Bake Dessert
1. Use High-Quality Ingredients
Because this dessert is made with just a handful of ingredients, their quality makes all the difference. Use real butter, fresh cream cheese, and good-quality chocolate for the best results.
2. Crush the Biscuits Properly
The texture of the base depends on how finely the biscuits are crushed. For a firmer base, process them into fine crumbs. If you prefer a bit of crunch, leave some larger pieces.
3. Adjust the Sweetness to Your Liking
Some like their desserts sweeter, while others prefer a more balanced flavor. You can adjust the amount of powdered sugar in the cream filling or even use a natural sweetener like honey or maple syrup.
4. Let It Chill for the Best Texture
Although this dessert can be enjoyed immediately, letting it sit in the fridge for at least 30 minutes enhances the texture and flavor, making it even more indulgent.
5. Add a Creative Twist
You can elevate this dessert by adding layers of fruit, chopped nuts, or a drizzle of caramel for extra decadence.
Serving Suggestions: Elevate Your Dessert Experience
This no-bake treat is delicious on its own, but you can make it even better with these ideas:
- Top with Fresh Berries – A handful of strawberries, raspberries, or blueberries adds a fresh contrast to the creamy texture.
- Drizzle with Caramel or Honey – For an extra layer of sweetness, a light drizzle of caramel or honey works beautifully.
- Sprinkle with Crushed Nuts – Almonds, walnuts, or hazelnuts add crunch and complement the rich flavors.
- Pair with Coffee or Tea – Enjoy alongside a cup of espresso, chai, or green tea for a perfectly balanced treat.
- Serve in Individual Cups – Layering the ingredients in small jars or glasses makes for an elegant presentation.
FAQs: Everything You Need to Know
1. Can I Make This Dessert Ahead of Time?
Yes! This dessert actually gets better with time as the flavors meld together. You can prepare it a day in advance and store it in the fridge until ready to serve.
2. Can I Use a Different Type of Biscuit?
Absolutely. Graham crackers, digestive biscuits, or even chocolate cookies work well in this recipe.
3. How Do I Store Leftovers?
Store leftovers in an airtight container in the refrigerator for up to 3 days. If layering in individual cups, simply cover each one with plastic wrap before storing.
4. Can I Freeze This Dessert?
Yes! You can freeze it for up to a month. Just thaw in the refrigerator before serving.
5. What Can I Use Instead of Cream Cheese?
If you don’t have cream cheese, you can substitute it with mascarpone, ricotta, or Greek yogurt for a slightly different texture.
6. Can I Make a Dairy-Free Version?
Yes! Use dairy-free butter, coconut cream instead of heavy cream, and a plant-based cream cheese alternative.
7. Can I Make This Dessert Less Sweet?
Of course! Reduce the powdered sugar in the cream filling or use dark chocolate instead of milk chocolate for a richer, less sweet flavor.
8. What If I Don’t Have Powdered Sugar?
You can blend regular granulated sugar into a fine powder using a food processor or blender.
9. Can I Add Other Flavors to the Cream Filling?
Yes! A splash of coffee, a bit of orange zest, or even a drop of almond extract can add a unique twist to the flavor.
10. How Do I Make the Chocolate Topping Shinier?
Mix a teaspoon of melted butter or coconut oil into the melted chocolate to give it a glossy finish.
Conclusion: A Dessert You’ll Make Again and Again
In a world where time is precious, finding a dessert that’s quick, easy, and incredibly delicious is a true win. This 5-minute no-bake dessert is proof that you don’t need complicated techniques or fancy equipment to create something indulgent.
With its creamy, velvety layers, crunchy biscuit base, and rich chocolate topping, this treat delivers everything you love about a homemade dessert—without the hassle. Whether you’re making it for a family gathering, a quick weeknight treat, or a special occasion, it’s bound to impress.
So next time you’re craving something sweet, skip the store-bought desserts and whip up this effortless masterpiece. Because sometimes, the simplest recipes bring the greatest joy.
The No-Bake 5-Minute Dessert Everyone Is Talking About
Ingredients
Method
- Crush the biscuits into fine crumbs and mix with melted butter.
- Press the mixture into a serving dish or individual cups to form the base.
- In a bowl, whisk together the cream cheese, heavy cream, powdered sugar, vanilla extract, and a pinch of salt until smooth and fluffy.
- Spread the cream mixture evenly over the biscuit base.
- Combine the melted chocolate with cocoa powder and honey, stirring until smooth.
- Drizzle the chocolate mixture over the creamy layer and spread evenly.
- Let the dessert chill in the refrigerator for at least 5 minutes.
- Serve immediately for a soft texture or let it set longer for a firmer consistency.
Notes
- For extra texture: Add chopped nuts, coconut flakes, or fruit layers.
- Make it less sweet: Reduce the powdered sugar or use dark chocolate.
- Storage: Keep in the fridge for up to 3 days in an airtight container.
- Dairy-free option: Use coconut cream and plant-based cream cheese.