


Tiramisu and cheesecake are two of the most beloved desserts in the world. Combining the best of both, this No-Bake Tiramisu Cheesecake is the ultimate indulgence for coffee lovers and dessert enthusiasts alike. With a rich mascarpone filling, espresso-soaked ladyfingers, and a buttery Oreo crust, each bite delivers a luscious blend of creamy, chocolaty, and coffee-infused flavors.
Whether you’re looking for a show-stopping dessert for a special occasion or simply want to satisfy your sweet tooth, this recipe is the perfect balance of elegance and ease. Plus, since it’s a no-bake recipe, you can prepare it ahead of time without ever turning on the oven.
In this guide, we’ll explore what makes this cheesecake special, tips for achieving the perfect texture, storage options, and frequently asked questions to ensure your dessert turns out flawless.
Why This No-Bake Tiramisu Cheesecake Stands Out
A Perfect Marriage of Flavors
Traditional tiramisu is known for its bold espresso flavor and airy mascarpone filling, while cheesecake is famous for its creamy richness and decadent texture. This recipe seamlessly blends the two, offering the best of both worlds. The deep coffee notes from the espresso-soaked ladyfingers cut through the sweetness, while the mascarpone and cream cheese filling provides an irresistibly smooth contrast.
No-Bake Simplicity
Unlike traditional cheesecakes that require baking and careful monitoring to prevent cracks, this no-bake version is stress-free. The filling sets beautifully in the refrigerator, allowing all the flavors to meld together while maintaining a velvety consistency.
A Dreamy Texture
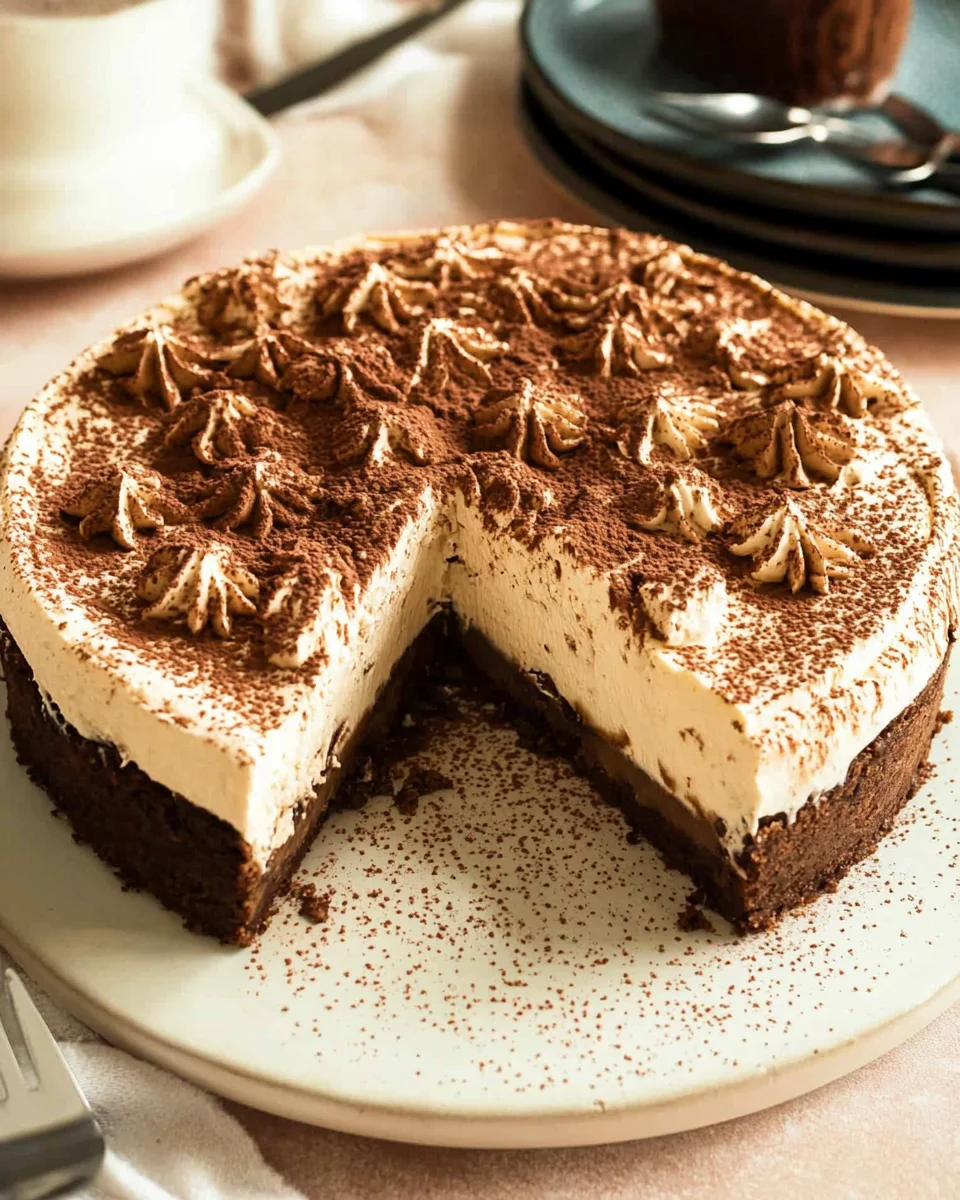
One of the standout elements of this dessert is its layered texture. The Oreo crust adds a firm yet slightly crunchy base, while the mascarpone filling is luxuriously creamy. The soaked ladyfingers in the center bring a soft, sponge-like consistency, ensuring that every bite is a delightful combination of textures.
A Stunning Presentation
This cheesecake is not just a treat for the taste buds but also a visual delight. Topped with a generous dusting of cocoa powder and delicate piping, it looks like a dessert straight out of a high-end patisserie. It’s a guaranteed crowd-pleaser for birthdays, holidays, or dinner parties.
Expert Tips for a Perfect Tiramisu Cheesecake
1. Use High-Quality Ingredients
Since this dessert relies on just a few core ingredients, using high-quality mascarpone cheese, real vanilla extract, and freshly brewed espresso makes all the difference. The better the ingredients, the richer and more authentic the final flavor.
2. Keep Your Dairy Ingredients at the Right Temperature
- Mascarpone and cream cheese should be room temperature to prevent lumps in the filling.
- Heavy cream should be cold when whipping to achieve a stable and fluffy texture.
3. Dip Ladyfingers Quickly
Ladyfingers soak up liquid extremely fast. A quick dip (less than a second) is enough to infuse them with espresso flavor without making them soggy. Over-soaked ladyfingers can lead to a mushy cheesecake.
4. Allow Proper Chilling Time
Patience is key with a no-bake cheesecake. Refrigerate for at least 4 hours, but preferably overnight, to let the flavors develop and the filling set properly.
5. Don’t Overmix the Filling
Overmixing can cause the mascarpone and cream cheese to break down, resulting in a grainy texture instead of a silky smooth filling. Mix just until the ingredients are combined.
6. Use a Springform Pan for Easy Removal
A springform pan ensures a neat release, preventing any damage to the cheesecake’s layers. Lining the base with parchment paper also helps for a cleaner presentation.
Ingredients: A Symphony of Flavor
For the Crust:
- 30 Oreo cookies (crushed into fine crumbs)
- 7 tbsp unsalted butter (melted)
- ½ tsp espresso powder
For the Cheesecake Filling:
- 20.1 oz full-fat cream cheese (room temperature)
- 10.5 oz mascarpone cheese (room temperature)
- 1 ¼ cup heavy cream (cold)
- 1 ⅓ cup powdered sugar
- 2 tsp vanilla extract
- 2 tbsp instant vanilla pudding mix
- ⅓ cup sour cream
For the Assembly:
- 10 ladyfingers
- 1 cup espresso coffee
- 1 tbsp Kahlua (optional; substitute with more espresso if avoiding alcohol)
- 1-2 tbsp cocoa powder (for dusting)
Directions: A Step-by-Step Guide to Indulgence
1. Crafting the Perfect Crust
- Crush the Oreo cookies into fine crumbs using a food processor or by placing them in a ziplock bag and crushing them with a rolling pin.
- In a mixing bowl, combine the crushed Oreos with espresso powder and melted butter. Mix until well coated.
- Press the mixture evenly into a 9-inch springform pan lined with parchment paper.
- Place the crust in the freezer while you prepare the filling.
2. Preparing the Creamy Cheesecake Filling
- In a large mixing bowl, beat the softened cream cheese, mascarpone cheese, sour cream, cold heavy cream, powdered sugar, vanilla extract, and instant pudding mix using an electric hand mixer.
- Mix until the batter is smooth, creamy, and fully combined.
3. Assembling the Tiramisu Layers
- Remove the crust from the freezer and spread ⅓ of the cheesecake filling evenly over it.
- Quickly dip the ladyfingers in espresso (and Kahlua if using), ensuring they are soaked for less than a second to avoid sogginess.
- Arrange the soaked ladyfingers in a single layer over the cheesecake filling.
- Spread a thin layer of cheesecake filling over the ladyfingers and smooth it out with a spatula.
- Transfer the remaining cheesecake filling to a piping bag with a star tip and pipe decorative dollops over the top.
4. Chilling & Finishing Touches
- Cover the cheesecake with plastic wrap and refrigerate for at least 4 hours (or overnight for best results).
- Before serving, remove from the pan and generously dust the top with cocoa powder.
Nutritional Information: A Guilt-Free Indulgence?
- Calories: 627 kcal
- Carbohydrates: 48g
- Protein: 8g
- Fat: 51g
- Saturated Fat: 29g
- Cholesterol: 143mg
- Sodium: 374mg
- Sugar: 18g
- Calcium: 118mg
- Iron: 4mg
Enjoy this heavenly no-bake tiramisu cheesecake, where the richness of mascarpone meets the boldness of espresso in a dessert that melts in your mouth!
Storage and Make-Ahead Tips
Refrigeration
This tiramisu cheesecake should be stored in the refrigerator, covered with plastic wrap or in an airtight container, for up to 4 days. The flavors continue to develop over time, making it even more delicious the next day.
Freezing Instructions
If you want to make this cheesecake in advance, it freezes beautifully:
- Let the cheesecake set completely in the fridge for at least 4-6 hours before freezing.
- Wrap the entire cheesecake (still in the pan) tightly with plastic wrap and then aluminum foil to prevent freezer burn.
- Label it with the date and freeze for up to 3 months.
- To serve, thaw it overnight in the refrigerator.
Make-Ahead Option
For special occasions, this dessert can be made 1-2 days in advance. Simply dust with cocoa powder right before serving to keep the topping fresh and vibrant.
Frequently Asked Questions
1. What is Tiramisu Cheesecake Made Of?
Tiramisu cheesecake combines elements of both traditional cheesecake and classic tiramisu. It consists of an Oreo crust, a mascarpone and cream cheese filling, a layer of coffee-soaked ladyfingers, and a cocoa-dusted top.
2. Can I Make This Without Alcohol?
Yes! While some tiramisu recipes include coffee liqueur (like Kahlua or Baileys), it is completely optional. You can substitute it with additional espresso for a completely alcohol-free version.
3. What Can I Use Instead of Mascarpone?
If you don’t have mascarpone, you can substitute it with an equal amount of cream cheese mixed with heavy cream. However, mascarpone has a richer, more buttery texture that makes a noticeable difference in taste.
4. Can I Use Instant Coffee Instead of Espresso?
Yes! If you don’t have an espresso machine, dissolve 1-2 tablespoons of instant coffee in hot water to create a strong coffee substitute.
5. Can I Use a Different Crust?
Absolutely! While Oreo cookies add a deep chocolate flavor, you can swap them for graham crackers, digestive biscuits, vanilla wafers, or even a store-bought chocolate crust.
6. Can I Use Homemade Ladyfingers?
Yes! If you prefer making everything from scratch, homemade ladyfingers will work wonderfully in this recipe. They tend to be softer than store-bought versions, so be extra careful not to oversoak them in coffee.
7. What’s the Best Way to Slice This Cheesecake?
For clean, beautiful slices:
- Use a sharp knife and wipe it clean after each cut.
- Run the knife under hot water before slicing to glide through the cheesecake smoothly.
8. Can I Add a Chocolate Twist?
If you’re a chocolate lover, you can:
- Drizzle melted chocolate over the top before serving.
- Mix cocoa powder into the cheesecake filling for a deeper chocolate flavor.
- Add chocolate shavings on top for an elegant finish.
Conclusion: The Ultimate Dessert for Any Occasion
No-bake tiramisu cheesecake is more than just a dessert—it’s an experience. From its creamy mascarpone filling to its rich espresso-infused center, every bite is a perfect blend of flavors and textures. Whether you’re celebrating a special occasion or simply indulging in a sweet treat, this cheesecake is guaranteed to impress.
Its easy, no-bake method makes it a fail-proof recipe, perfect for beginners and seasoned bakers alike. Plus, with its ability to be made ahead of time, it’s an ideal dessert for dinner parties, holidays, or even just a weekend indulgence.
Now that you know all the tips, tricks, and secrets to making this show-stopping tiramisu cheesecake, it’s time to get in the kitchen and create your own masterpiece. Enjoy!
Ultimate Guide to No-Bake Tiramisu Cheesecake
Ingredients
Method
- Step 1: Crafting the Perfect Crust
- Crush the Oreo cookies into fine crumbs using a food processor or by placing them in a ziplock bag and crushing them with a rolling pin.
- In a mixing bowl, combine the crushed Oreos with espresso powder and melted butter. Mix until well coated.
- Press the mixture evenly into a 9-inch springform pan lined with parchment paper.
- Place the crust in the freezer while you prepare the filling.
- Step 2: Preparing the Creamy Cheesecake Filling
- In a large mixing bowl, beat the softened cream cheese, mascarpone cheese, sour cream, cold heavy cream, powdered sugar, vanilla extract, and instant pudding mix using an electric hand mixer.
- Mix until the batter is smooth, creamy, and fully combined.
- Step 3: Assembling the Tiramisu Layers
- Remove the crust from the freezer and spread ⅓ of the cheesecake filling evenly over it.
- Quickly dip the ladyfingers in espresso (and Kahlua if using), ensuring they are soaked for less than a second to avoid sogginess.
- Arrange the soaked ladyfingers in a single layer over the cheesecake filling.
- Spread a thin layer of cheesecake filling over the ladyfingers and smooth it out with a spatula.
- Transfer the remaining cheesecake filling to a piping bag with a star tip and pipe decorative dollops over the top.
- Step 4: Chilling & Finishing Touches
- Cover the cheesecake with plastic wrap and refrigerate for at least 4 hours (or overnight for best results).
- Before serving, remove from the pan and generously dust the top with cocoa powder.
Notes
- Use high-quality espresso for the best coffee flavor.
- Let the cheesecake chill overnight for an even firmer texture.
- Store leftovers in an airtight container in the fridge for up to 3 days.