

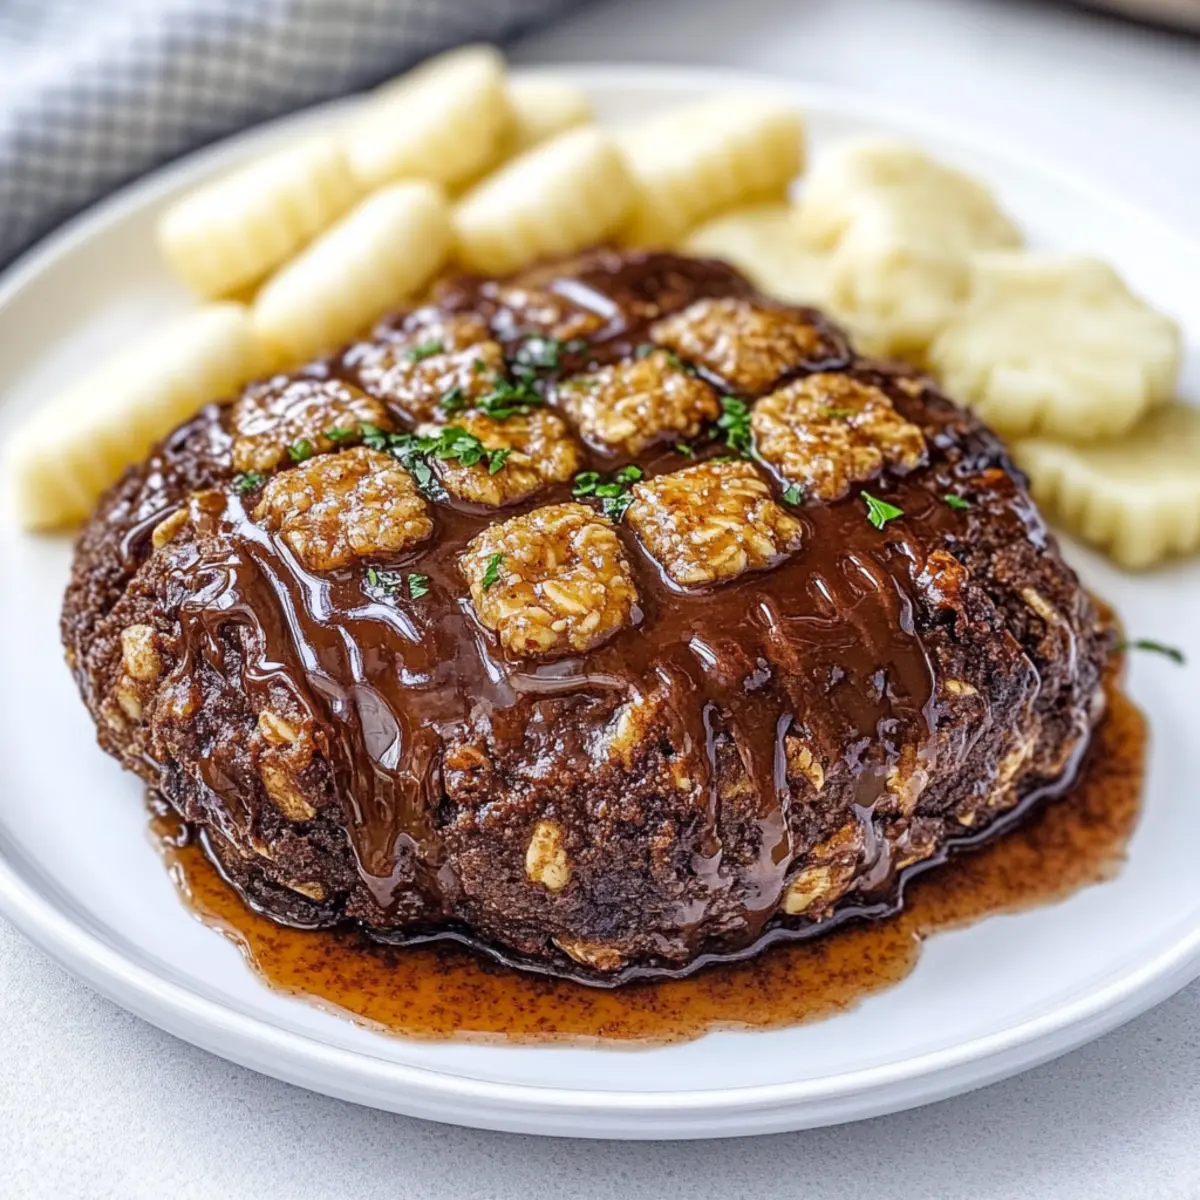
Walking into my kitchen, the familiar aroma of chocolate and oats dancing together always feels like a warm embrace. Today, I’m excited to share my recipe for 4-Ingredient Crispy Chocolate Oat Cookies. These delightful treats not only satisfy your sweet tooth but also offer a healthy twist that makes indulging guilt-free. With just four simple ingredients, they’re perfect for when you’re craving something quick and easy, and they’re gluten-free to boot! Imagine serving these cookies at your next gathering—everyone will love the satisfying crunch, and you’ll love how effortlessly they come together. Ready to bring some joy into your kitchen? Let’s dive in!
Why are these cookies so irresistible?
Simplicity reigns supreme! With just four ingredients, your baking experience is hassle-free and quick. Crispy texture combined with a chewy center creates the perfect bite that keeps everyone coming back for more. Nutritious yet indulgent, they satisfy sweet cravings without guilt. Versatile options allow you to swap ingredients based on your pantry—try adding chocolate chips or dried fruit for an extra twist! For more delightful ideas, don’t miss the Savory Beef Bacon or Mini Beef Pies that will complement your cookie feast! These cookies not only please the palate but also spark creativity in your cooking adventures.
Chocolate Oat Cookie Ingredients
• Discover the simplest way to indulge!
For the Cookies
- Oats – A great source of fiber, providing structure and a chewy texture; be sure to use gluten-free oats if needed.
- Cocoa Powder – Rich chocolate flavor that elevates your cookies; opt for unsweetened cocoa for a healthier touch.
- Maple Syrup – Adds sweetness and moisture; for a different sweetener, feel free to use honey or agave syrup.
- Nut Butter – Serves as a binder while adding creaminess; choose almond or peanut butter, or swap for sunflower seed butter for nut-free options.
Remember: With just these four simple ingredients, you’ll create crispy chocolate oat cookies that are both delicious and healthy!
Step‑by‑Step Instructions for 4-Ingredient Crispy Chocolate Oat Cookies
Step 1: Preheat the Oven
Begin by preheating your oven to 350°F (175°C). This crucial step ensures that your cookies bake evenly and achieve that delightful crispiness. While the oven heats up, take out a baking sheet and line it with parchment paper for easy clean-up and to prevent sticking.
Step 2: Mix the Dry Ingredients
In a large mixing bowl, combine 1 cup of oats and 1/3 cup of cocoa powder. Use a whisk or spoon to thoroughly mix these dry ingredients, ensuring that the cocoa powder is evenly distributed. This will create a perfect chocolate base that complements the heartiness of the oats, giving your cookies a rich flavor.
Step 3: Add Nut Butter
Next, incorporate 1/2 cup of nut butter into the dry mixture. Using a spatula or wooden spoon, mix until everything is well combined and forms a sticky dough. Make sure the nut butter is at room temperature for easier mixing. The nut butter serves as a binder and adds a creamy texture, crucial for these 4-Ingredient Crispy Chocolate Oat Cookies.
Step 4: Sweeten with Maple Syrup
Pour in 1/4 cup of maple syrup into the mixture. Stir thoroughly until the syrup is fully blended into the dough. This step adds the necessary sweetness and moisture to balance the dry ingredients. The result should be a cohesive dough that you can easily scoop out and shape.
Step 5: Scoop and Shape the Dough
Using a tablespoon or cookie scoop, portion out the dough onto the prepared baking sheet. Leave about 2 inches of space between each scoop, as they will spread slightly while baking. Gently flatten each cookie with the back of the scoop or your fingers to ensure they bake evenly into crispy edges.
Step 6: Bake to Perfection
Slide your baking sheet into the preheated oven and bake for 10-12 minutes. Keep an eye on the cookies; they’re ready when the edges look firm and slightly crisp, while the centers may appear a bit soft. This slight under-baking ensures a chewy center, perfect for your 4-Ingredient Crispy Chocolate Oat Cookies.
Step 7: Cool Down
Once baked, remove the cookies from the oven and allow them to cool on the baking sheet for about 5 minutes. This step helps them set before transferring. After that, carefully move each cookie to a wire rack to cool completely, allowing the crispy texture to fully develop as they finish cooling.
Chocolate Oat Cookies Variations & Substitutions
Feel free to get creative with your cookie making—there are so many exciting ways to customize these treats!
- Nut-Free: Substitute almond butter with sunflower seed butter for a delicious, nut-free version.
- Sweetener Switch: Experiment with honey or agave syrup instead of maple syrup for a different flavor profile.
- Flavor Boost: Add a pinch of cinnamon or vanilla extract to elevate the taste and aroma of your cookies.
- Chocolate Lover’s Delight: Toss in chocolate chips or chunks for an extra chocolaty experience that will satisfy even the most intense cravings.
- Texture Twist: Incorporate dried fruits like cranberries or raisins for an unexpected chewy element that complements the crunch.
- Cocoa Variation: Swap out cocoa powder with carob powder for a unique alternative that brings a slightly sweeter taste.
- Spicy Kick: Add a dash of cayenne pepper to the mix for a surprising twist that brings a subtle heat to the dessert.
- Oaty Alternative: Use a mix of rolled oats and quinoa flakes to change the texture while still keeping that crunchy goodness.
With these variations, you’ll never get bored of your 4-Ingredient Crispy Chocolate Oat Cookies! And if you’re looking for some savory options to accompany your sweet treats, consider the Heirloom Beef Pancakes or tantalizing flavors from Chili Chicken Roasted recipes to round out your culinary adventure!
Storage Tips for 4-Ingredient Crispy Chocolate Oat Cookies
-
Room Temperature: Keep your cookies in an airtight container at room temperature for up to 1 week to maintain their delightful crunch and chewy texture.
-
Fridge: If you prefer them chilled, you can store your cookies in the fridge for up to 2 weeks. Just remember to seal them tightly to prevent drying out.
-
Freezer: For longer storage, freeze your cookies in a single layer on a baking sheet, then transfer them to a freezer-safe bag or container. They can last for up to 3 months!
-
Reheating: To enjoy them warm, reheat your cookies in the microwave for about 10-15 seconds, or in a toaster oven until just warmed through. This will revive their crispiness and make them even more delightful!
What to Serve with 4-Ingredient Crispy Chocolate Oat Cookies
Walking into my kitchen, the familiar aroma of chocolate and oats dancing together always feels like a warm embrace.
-
Creamy Almond Milk: A smooth, nutty beverage that perfectly complements the rich chocolate flavors of your cookies.
-
Fresh Berries: Their natural sweetness and juiciness provide a refreshing contrast to the crispy texture of the cookies.
-
Hearty Yogurt Parfait: Layering your cookies with yogurt and fruit creates a delightful combination of crunch and creaminess, making for a wholesome snack.
-
Simple Ice Cream Sundae: Top your cookies with a scoop of vanilla ice cream for a delicious warm-and-cold treat; the chocolate harmonizes beautifully.
-
Rich Coffee: A cup of freshly brewed coffee enhances the chocolate notes, making your treat an indulgent afternoon pick-me-up.
-
Dark Chocolate Dipping Sauce: A drizzle of warm, melted dark chocolate takes your cookies to the next level of decadence.
Imagine savoring these delightful pairings as you enjoy your cookies—each bite brings a new layer of flavor that feels just right at any time of day!
Expert Tips for 4-Ingredient Cookies
-
Room Temperature Nut Butter: Ensure your nut butter is at room temperature for easier mixing. This helps create a smoother dough and avoids clumping.
-
Avoid Overbaking: Watch your cookies closely; they should be firm at the edges yet slightly soft in the center. Overbaking will lead to a hard texture as they cool.
-
Cooling Time Matters: Let the cookies cool on the baking sheet for a few minutes before transferring them to a wire rack. This helps maintain their crispy edges while ensuring a chewy center.
-
Ingredient Substitutions: Don’t hesitate to experiment with different nut butters or sweeteners based on what you have on hand, but using quality ingredients will elevate your 4-ingredient crispy chocolate oat cookies!
-
Storage Solutions: Store your cookies in an airtight container at room temperature to keep them fresh. If you make a big batch, they freeze well for later indulgence.
Make Ahead Options
These 4-Ingredient Crispy Chocolate Oat Cookies are perfect for meal prep, making your week ahead easier! You can mix the dry ingredients—oats and cocoa powder—up to 3 days in advance and store them in an airtight container to keep them fresh. Additionally, you can combine the nut butter and maple syrup ahead of time; simply refrigerate until you’re ready to bake. When you want to enjoy the cookies, mix the prepped dry and wet ingredients, scoop them onto a baking sheet, and bake as directed. This way, you’ll have delicious cookies ready in no time, allowing you to savor homemade treats with minimal effort!
4-Ingredient Crispy Chocolate Oat Cookies Recipe FAQs
What kind of oats should I use?
For the best results, I recommend using gluten-free oats if you’re catering to a gluten-sensitive audience. Just be sure to check the packaging to confirm they’re certified gluten-free, as this ensures no cross-contamination from other grains.
How should I store my cookies?
To keep your cookies fresh and delicious, store them in an airtight container at room temperature for up to 1 week. If you’re not planning to eat them all within that time, freezing is a great option!
Can I freeze these cookies?
Absolutely! To freeze, first allow the cookies to cool completely. Arrange them in a single layer on a baking sheet and freeze for about 1-2 hours until firm. Then, transfer them to a freezer-safe container or zip-top bag, separating layers with parchment paper to prevent sticking. They can be stored for up to 3 months. When you’re ready to enjoy, simply thaw at room temperature or warm them in the microwave for a quick treat!
What if my cookies come out too hard?
If your cookies harden too much, it’s likely they were overbaked. To achieve that perfect chewy texture, remove them from the oven when the edges are crisp, but the center still appears slightly soft. Let them cool on the baking sheet for a few minutes—this will help them firm up without becoming too hard.
Are there any allergy considerations with this recipe?
If you’re concerned about allergies, the primary ingredient to watch out for is the nut butter. Substitute with sunflower seed butter to ensure a nut-free alternative. Additionally, make sure your cocoa powder and oats don’t contain allergens. Always read labels for any packaged ingredients to be safe!
Can I modify the ingredients for different dietary preferences?
Definitely! You can substitute maple syrup with honey for a vegan option, or even use agave syrup. If nut-free, sunflower seed butter is a perfect alternative. You can also switch out the cocoa powder with carob powder for a different flavor profile. The more you experiment, the more delicious variations you’ll uncover!
Tender Beef Chuck Roast That Melts in Your Mouth
Ingredients
Equipment
Method
- Preheat your oven to 275°F (135°C).
- Rub the roast with olive oil, salt, and pepper.
- Sear the roast in a hot skillet until browned on all sides.
- Transfer the roast to a baking dish and add beef broth, garlic, thyme, and rosemary.
- Cover the dish with foil and bake in the preheated oven for 2 hours.
- Remove from the oven and let it rest for 15 minutes before slicing.