

Strolling through the farmers’ market, I was greeted by a vibrant display of plump, sweet strawberries that instantly transported me back to my childhood. It made me think of creating a delightful Strawberry Pop-Tart Pie—a whimsical twist on a nostalgic favorite. This recipe merges the juicy goodness of fresh (or frozen) strawberries with a rich, buttery homemade crust. One of the best perks? It’s not just a stylish centerpiece for gatherings; it’s also effortless to whip up, making it perfect for both novice and seasoned bakers. And trust me, a slice of this pie paired with a scoop of vanilla ice cream will have everyone reminiscing about their own fond memories. Curious to learn how to bring this pie to life? Let’s dive into making your own delicious Frosted Strawberry Pop-Tart Pie!
Why Make Strawberry Pop-Tart Pie?
Nostalgic Flavor: This pie brings back memories of childhood with its sweet strawberry filling and flaky crust that captures the essence of a classic dessert.
Versatile Ingredients: Whether you opt for fresh or frozen strawberries, this recipe accommodates whatever you have on hand.
Easy to Prepare: With simple steps, even beginner bakers can create a stunning dessert that wows friends and family without fuss.
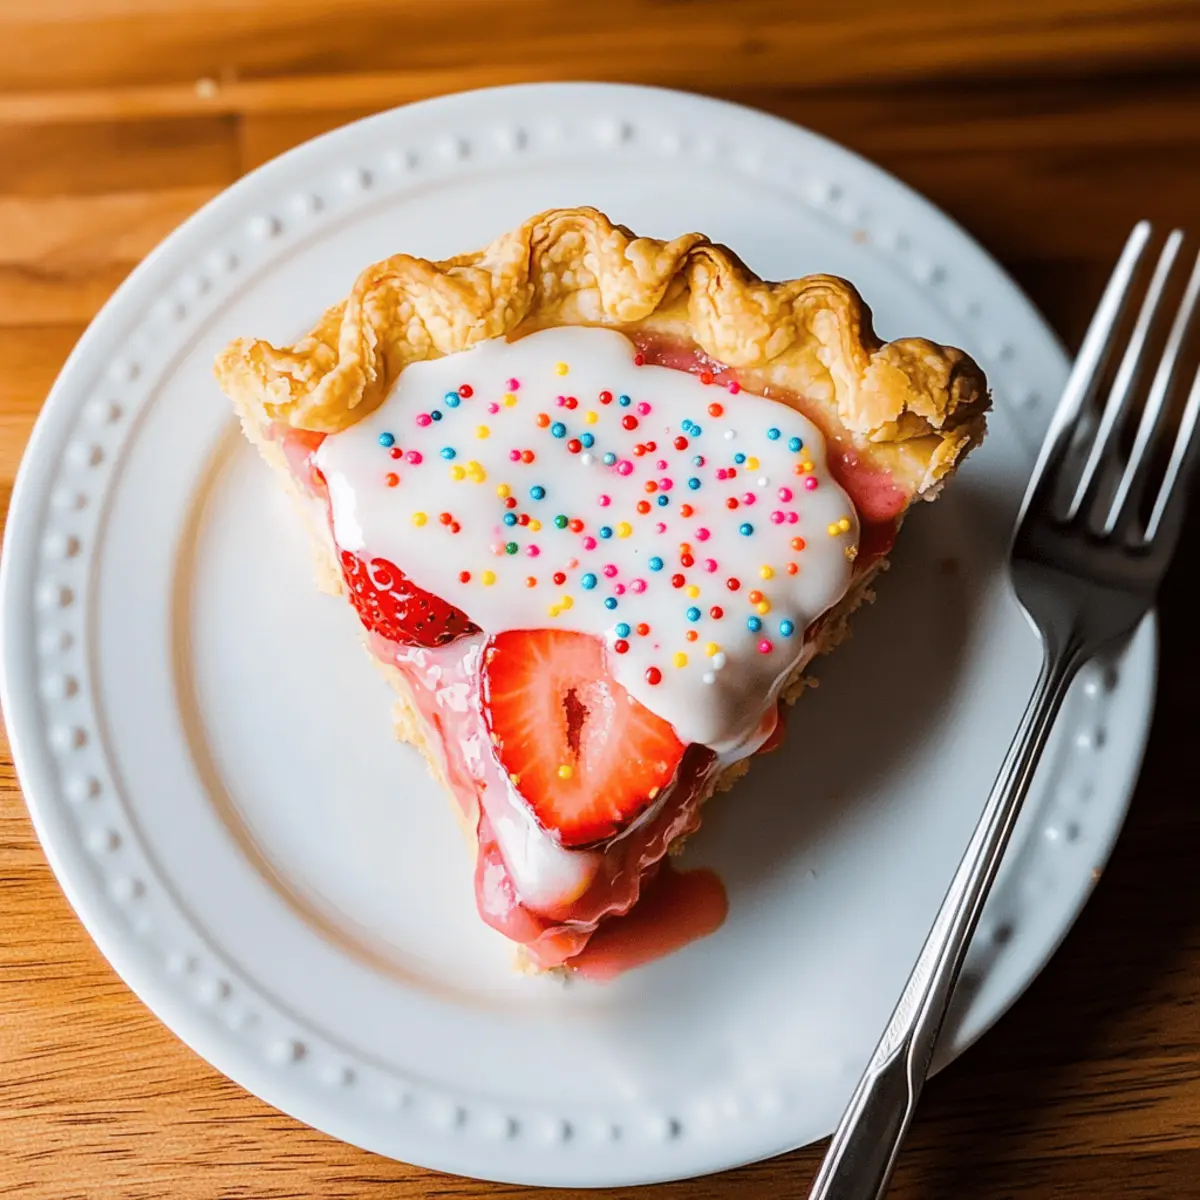
Impressive Presentation: Topped with royal icing and colorful sprinkles, this pie not only tastes amazing but looks fantastic on any dessert table, just like a classic Apple Pie.
Perfect for Sharing: Cut into generous slices, it’s ideal for gatherings, making you the star of your next brunch or family dinner.
Make-Ahead Friendly: You can bake it in advance and freeze it for later, simplifying your hosting duties, similar to how I manage with my Chicken Pot Pie preparation.
Strawberry Pop-Tart Pie Ingredients
• Gather your essentials for a scrumptious bake!
For the Filling
- Strawberries – Fresh strawberries bring vibrant flavor and sweetness; feel free to use frozen strawberries in a pinch.
- Sugar – Adjust the sweetness to taste, depending on how ripe your strawberries are.
For the Pie Crust
- Pie Crust – A homemade crust lends rich flavor; if you’re short on time, a store-bought version works just fine!
For Frosting and Decoration
- Royal Icing – This adds a glossy finish that captures the eye, making your Strawberry Pop-Tart Pie feel like a true treat!
- Sprinkles – They’re optional but provide a fun pop of color that enhances the nostalgia.
- Egg (for egg wash) – Brush on the crust for a beautiful golden color when baked.
Step‑by‑Step Instructions for Strawberry Pop-Tart Pie
Step 1: Prepare Strawberries
Begin by washing and trimming your fresh strawberries, removing the stems. Par cook the strawberries in a pot of simmering water for about 5 minutes, until they soften slightly but remain intact. Drain the strawberries well and let them cool while you prepare the pie crust. This process will make your filling easier to eat and enhance the flavors in your Strawberry Pop-Tart Pie.
Step 2: Make Pie Crust
If you’re making a homemade crust, combine flour, butter, sugar, and a pinch of salt in a mixing bowl. Use a pastry cutter or your fingers to mix until it resembles coarse crumbs. Add cold water, one tablespoon at a time, until a dough forms. Chill the dough for 30 minutes, then roll it out to fit your pie dish, leaving some excess for the top. A well-made crust is essential for your Strawberry Pop-Tart Pie.
Step 3: Layer Strawberries & Sugar
Take your chilled pie crust and fill it with the prepared strawberries. Evenly sprinkle sugar over the strawberries, adjusting the amount based on their sweetness. Spread them out gently to ensure every slice has a burst of berry goodness. This layering is crucial for creating delicious pockets of flavor in your Strawberry Pop-Tart Pie, making it irresistible to your family and friends.
Step 4: Cover Pie
Roll out the second crust for the top and gently lay it over the filled pie. Pinch the edges to seal securely, preventing any filling from leaking during baking. Use a sharp knife to cut several slits in the top crust, allowing steam to escape while baking. This step not only helps with even cooking but also adds a charming homemade touch to your Strawberry Pop-Tart Pie.
Step 5: Bake
Preheat your oven to 375°F (190°C). Once heated, place the pie on the middle rack and bake it for 45 minutes or until the crust is golden brown and flaky. Keep an eye on it during the last 10 minutes; if the edges brown too quickly, cover them with foil to prevent burning. The smell of the baking Strawberry Pop-Tart Pie will surely tempt your taste buds!
Step 6: Cool & Frost
After baking, remove the pie from the oven and allow it to cool on a wire rack for at least 30 minutes. This cooling period will help the filling set, making it easier to slice. Once cooled, prepare your royal icing by mixing powdered sugar with water until smooth. Spread the icing over the top of the pie and decorate with colorful sprinkles for a nostalgic finish that perfectly complements your Strawberry Pop-Tart Pie.
Expert Tips for Strawberry Pop-Tart Pie
-
Berry Selection: Choose sweet, ripe strawberries for the best flavor. If using frozen, ensure they’re thawed and well-drained to prevent a watery filling in your Strawberry Pop-Tart Pie.
-
Crust Technique: Avoid overly warm dough when making pie crust; it should be cold to create the flaky texture you desire. This is key in ensuring a beautiful, crispy crust.
-
Sealing Edges: Properly seal the edges of the pie to prevent the filling from bubbling over. Dampen the edges with a bit of water before crimping for a secure hold.
-
Baking Temperature: Always preheat your oven fully before baking. This helps the crust bake evenly and achieve that golden-brown perfection.
-
Cooling Time: Be patient and allow the pie to cool completely before slicing. This helps the filling to set, ensuring cleaner slices of your Strawberry Pop-Tart Pie.
-
Creative Customization: Don’t hesitate to experiment with various fruit fillings or flavor the icing. This way, you can create different versions of your delightful Strawberry Pop-Tart Pie for every occasion.
How to Store and Freeze Strawberry Pop-Tart Pie
Room Temperature: Allow the pie to cool completely before covering it with foil or plastic wrap. It can be stored at room temperature for up to 2 days.
Fridge: Store any leftover Strawberry Pop-Tart Pie in an airtight container in the fridge for up to 5 days. This helps maintain the freshness of the filling.
Freezer: For longer storage, slice the pie and wrap each piece tightly in plastic wrap, then place in a freezer-safe container. It can be frozen for up to 3 months. To enjoy, thaw in the fridge overnight and reheat in the oven for best results.
Reheating: Preheat the oven to 350°F (175°C) and place the pie slice on a baking sheet. Heat for about 10-15 minutes until warmed through, keeping that flaky crust crisp.
Strawberry Pop-Tart Pie Variations & Substitutions
Feel free to let your creativity shine and customize your pie with these fun twists and substitutions!
-
Frozen Strawberries: If fresh strawberries aren’t available, use thawed frozen ones for a quick and easy option that still packs a fruity punch.
-
Dairy-Free Crust: Swap butter for coconut oil or a vegan butter alternative in your pie crust to create a deliciously rich dairy-free version.
-
Different Fruits: Experiment with blueberries, raspberries, or cherries; these fruits add unique flavors that give your pie a delightful twist.
-
Lemon Zest: Add a teaspoon of lemon zest to your filling for a citrus kick that enhances the strawberry sweetness with bright, zesty notes.
-
Chocolate Drizzle: Melt some chocolate and drizzle it over the iced pie for an extra touch of indulgence that pairs beautifully with the fruity filling.
-
Nutty Crust: Mix ground almonds or walnuts into your pie crust for a crunchy texture that complements the soft filling; it adds an extra layer of flavor.
-
Cinnamon Sugar Topping: Sprinkle cinnamon sugar over the crust before baking to infuse warm spice notes that elevate the nostalgic flavors of your Strawberry Pop-Tart Pie.
-
Mini Tarts: Make individual mini tarts using muffin tins for easy-to-serve portions, perfect for gatherings or to satisfy sweet cravings throughout the week, just like a tasty Chicken Pot Pie!
Don’t be shy—mix and match these variations to create a Strawberry Pop-Tart Pie that’s uniquely yours!
What to Serve with Strawberry Pop-Tart Pie
Elevate your dessert experience with delightful accompaniments that will delight every palate at your table.
-
Vanilla Ice Cream: The creamy sweetness of vanilla ice cream creates a heavenly contrast to the tart strawberry filling.
-
Whipped Cream: Light and fluffy, whipped cream adds an airy texture that enhances the pie’s rich flavors.
-
Fresh Berries: A medley of fresh berries brightens up the plate and adds a refreshing burst of color and taste.
-
Chocolate Sauce: Drizzling warm chocolate sauce over each slice offers a decadent twist, perfect for chocolate lovers.
-
Mint Leaves: A sprinkle of fresh mint leaves not only adds a splash of color but also elevates the taste with a hint of freshness.
-
Sparkling Water: Serve with a bubbly drink to cleanse the palate and make your dessert feel extra special.
-
Lemonade: The refreshing tartness of lemonade pairs wonderfully, bringing a citrus zing that complements the strawberries beautifully.
-
Shortbread Cookies: Crunchy shortbread cookies add an additional layer of texture, making each bite of pie even more delightful.
-
Coffee or Tea: A warm cup of coffee or fragrant tea pairs perfectly, balancing the sweetness of the pie and inviting cozy conversation.
Make Ahead Options
These Strawberry Pop-Tart Pies are perfect for meal prep enthusiasts! You can prepare the pie crust and filling up to 24 hours in advance. Simply par cook the strawberries and layer them in the crust, then cover with plastic wrap and refrigerate until you’re ready to bake. This will keep the crust fresh and the flavors vibrant. Additionally, you can freeze the unbaked pie for up to 3 months; just make sure to wrap it tightly to prevent freezer burn. When ready to bake, simply pop the pie into the oven straight from the freezer, adding a few extra minutes to the baking time. With these make-ahead options, you’ll have a delightful dessert ready with minimal last-minute effort!
Strawberry Pop-Tart Pie Recipe FAQs
How do I choose the best strawberries for my pie?
Absolutely! Look for bright red, plump strawberries with a natural shine. They should be firm with no dark spots or mushy areas. If you’re buying frozen strawberries, ensure they aren’t clumped together, which indicates thawing and refreezing. Ripe strawberries are the key to a delicious filling in your Strawberry Pop-Tart Pie!
How should I store my Strawberry Pop-Tart Pie after baking?
Once your pie has cooled completely, store it at room temperature covered with foil or plastic wrap for up to 2 days. For longer freshness, transfer any leftovers to an airtight container and refrigerate for up to 5 days. This keeps the filling fresh and tasty, just like when you first baked it!
Can I freeze my Strawberry Pop-Tart Pie?
Absolutely! You can freeze the pie before baking. Wrap it tightly in plastic wrap, then in aluminum foil to protect it from freezer burn. When you’re ready to bake it, you can go straight from freezer to oven—just add an extra 10-15 minutes to the baking time. Alternatively, for convenience, slice the baked pie into individual portions and freeze each piece in plastic wrap for up to 3 months.
What if my pie crust turns out soggy?
Very! This can happen if the filling is too watery. To avoid this, be sure to drain your strawberries well and limit the amount of liquid in the filling. Additionally, pre-baking your crust for a few minutes before adding the filling—also known as blind baking—can help keep it nice and crisp.
Are there any allergens I should be aware of?
Yes, the main ingredients in this recipe include eggs and gluten. If you’re looking for alternatives, consider using egg substitutes for the wash, like almond milk or plant-based options. If you or someone you’re serving has gluten sensitivities, you can also find gluten-free pie crusts available in most grocery stores.
Can I make this recipe ahead of time?
Definitely! You can prepare the pie a day in advance, bake it, and let it cool completely before storing it in the fridge. Alternatively, if you plan on serving it later in the week, consider freezing it, as mentioned earlier—just remember to reheat carefully to restore that lovely flaky crust when serving!
Delicious Strawberry Pop-Tart Pie for Nostalgic Sweet Cravings
Ingredients
Equipment
Method
- Wash and trim fresh strawberries, removing the stems. Par cook strawberries in simmering water for about 5 minutes.
- If making homemade crust, combine flour, butter, sugar, and salt. Mix until coarse. Add cold water until dough forms. Chill dough for 30 minutes.
- Fill the chilled pie crust with strawberries and sprinkle sugar over them, adjusting the amount as needed.
- Roll out the second crust for the top and lay over the filled pie. Seal edges, cut slits in top crust.
- Preheat oven to 375°F (190°C). Bake pie for 45 minutes until golden brown.
- Cool pie on a wire rack for at least 30 minutes. Prepare royal icing, spread on pie, and add sprinkles.