

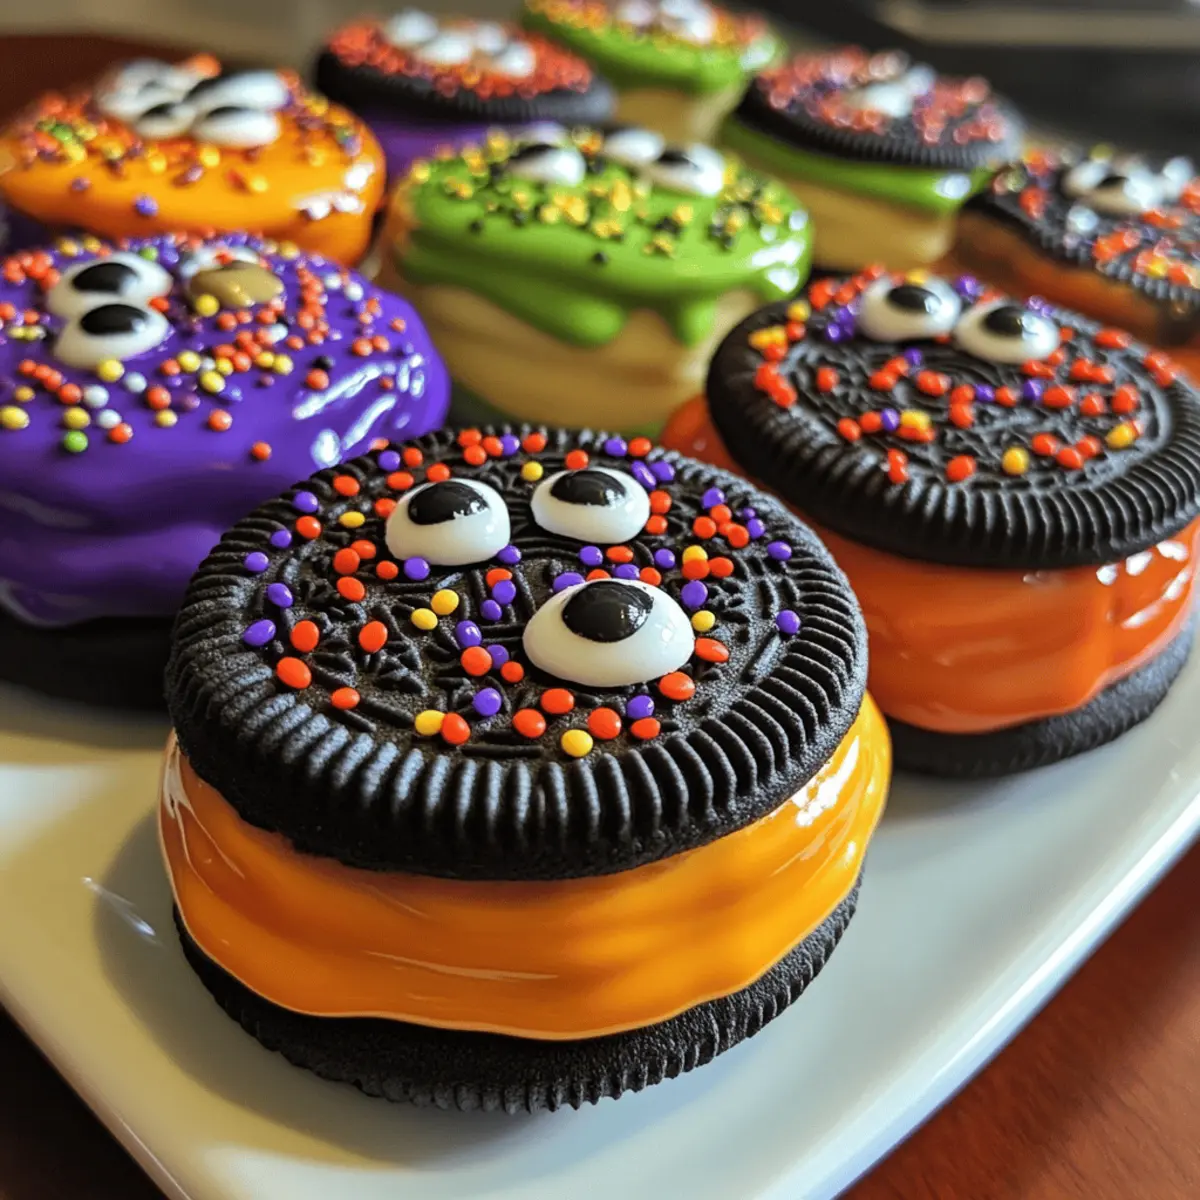
As the leaves turn and the air fills with the scent of autumn, it’s the perfect time to unleash your inner child with Easy Spooky Halloween Dipped Oreo Cookies! There’s something undeniably magical about transforming ordinary cookies into fun, spooky treats, isn’t there? This recipe is not only a breeze to whip up but also allows for some creative flair—whether you want to craft cute mummies or cheeky monsters, you’ve got options! Plus, these chocolate-covered cookies can easily be adapted to meet gluten-free and dairy-free needs, making them a crowd-pleaser for all your friends and family. Are you ready to add a little spooky cheer to your kitchen?
Why Are These Cookies So Fun?
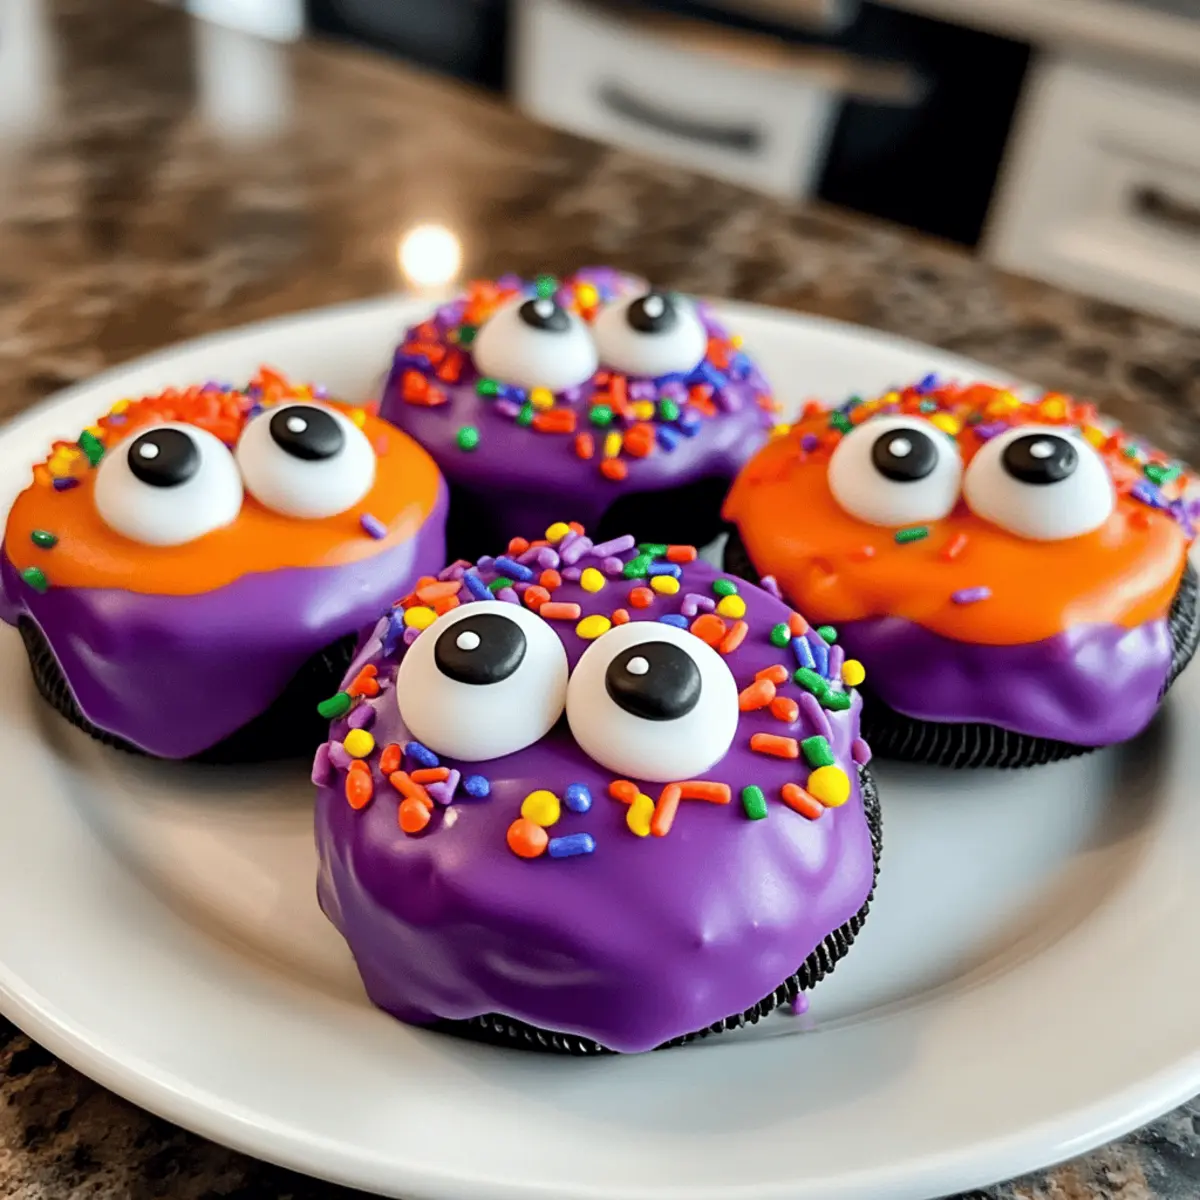
Endless creativity: With various designs like mummies and silly monsters, every cookie becomes a unique masterpiece.
Quick and easy: The simple process makes them accessible for bakers of all skill levels—perfect for a last-minute treat!
Versatile options: Customize with chocolate melting wafers of your choice or even use Coconut Chocolate Rolls for a tropical twist.
Diet-friendly: Gluten-free and dairy-free options ensure everyone can indulge in these delicious cookies.
Perfect for sharing: Great for parties, school lunches, or adorable gifts this Halloween! Whether paired with Coffee Chocolate Truffles or enjoyed solo, they’re sure to impress.
Chocolate Covered Halloween Dipped Oreos
-
For the Base
• Halloween Oreos or any type of sandwich cookie – These are the perfect foundation for your spooky treats; opt for gluten-free versions if needed. -
For the Coating
• Chocolate melting wafers – Essential for that glossy, chocolate-covered exterior; choose your favorite type—dark, milk, or white.
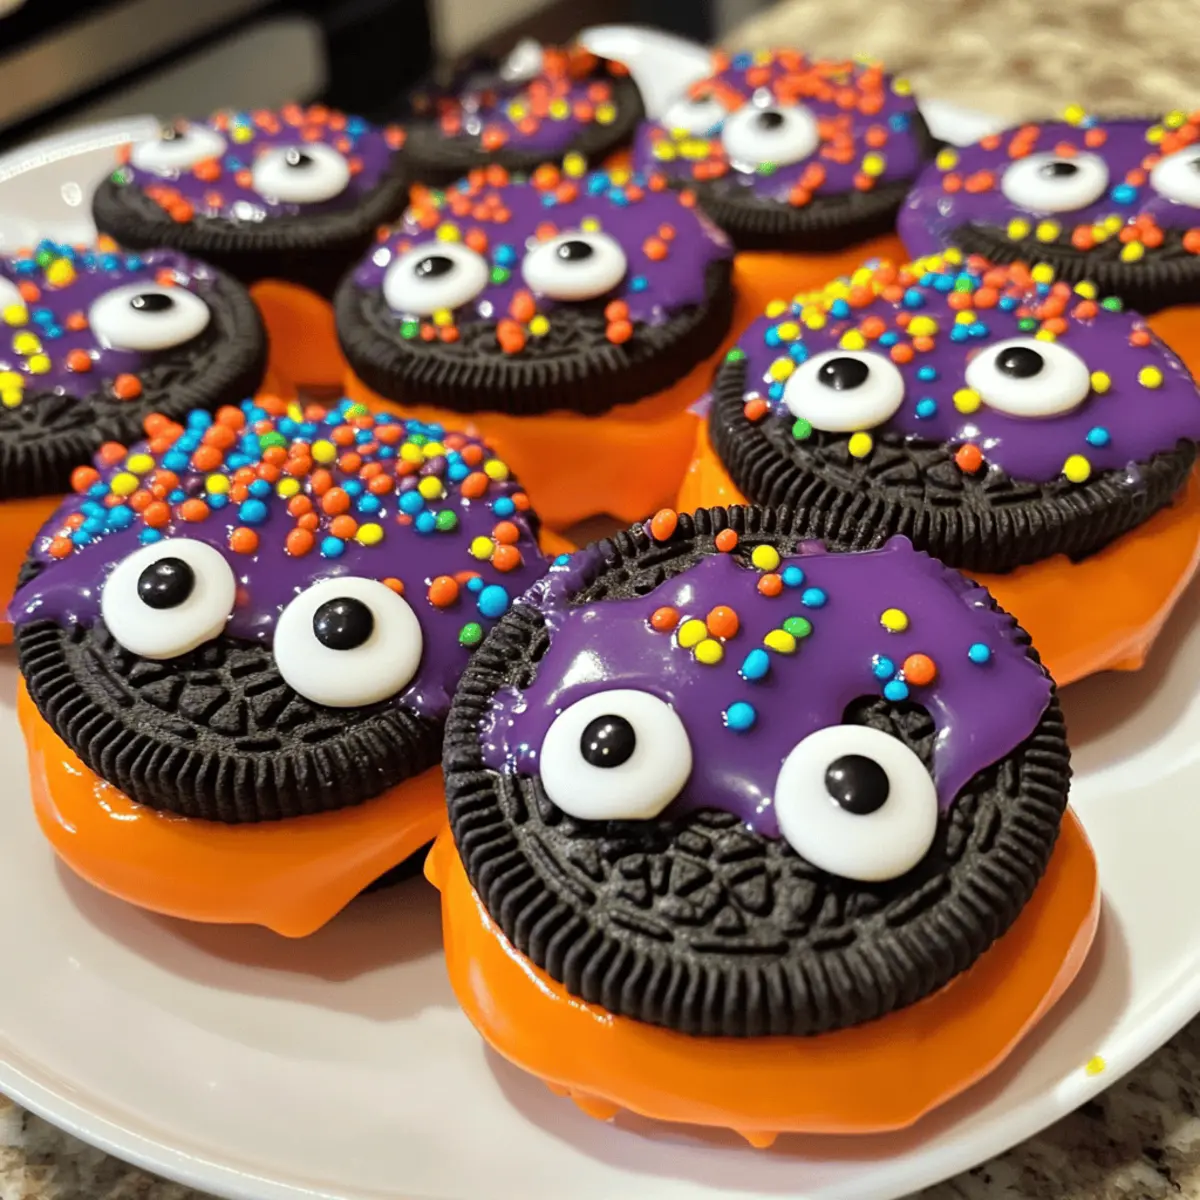
• Orange candy melting wafers – These add a vibrant Halloween touch for your designs.
• White candy melting wafers – Ideal for classic mummies or bright accents to your cookies.
• Purple candy melting wafers – Provides another colorful option to make your cookies truly pop. -
For the Fun Decorations
• Sprinkles – Use festive Halloween-themed sprinkles for a spooky effect; make sure they’re gluten-free if necessary.
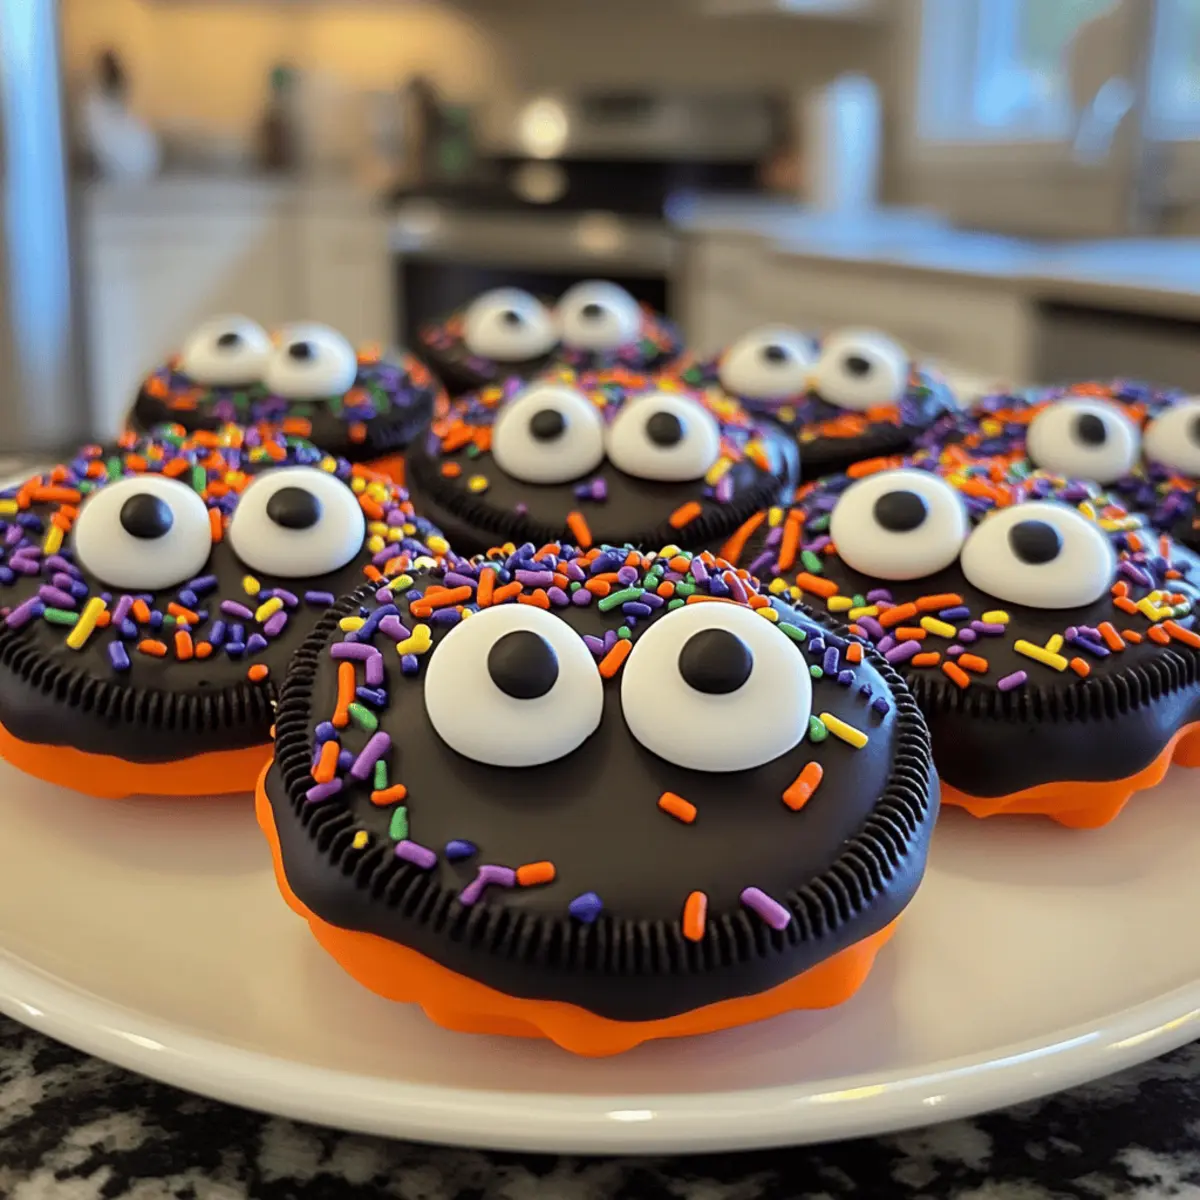
• Candy eyes – These little guys bring your creations to life and make them even more fun!
These delightful Chocolate Covered Halloween Dipped Oreos are sure to be a hit at your gatherings, sparking joy and creativity in every bite!
Step‑by‑Step Instructions for Chocolate Covered Halloween Dipped Oreos
Step 1: Prep Your Workspace
Begin by lining a cookie sheet with wax or parchment paper to create a non-stick surface for your Chocolate Covered Halloween Dipped Oreos. This will help ensure your cookies come off easily once they’re set. Gather all your ingredients, including the various candy melts, sprinkles, and any decorations that you plan to use, so everything is within reach.
Step 2: Melt the Candy Coating
In separate microwave-safe bowls, add each color of chocolate melting wafers. Microwave the wafers in 30-second increments, stirring in between, until each color is completely smooth—this usually takes about 1 minute. Be mindful not to overheat; if the melts become too thick, add a teaspoon of vegetable oil to achieve a pourable consistency.
Step 3: Dip the Oreos
Choose your favorite sandwich cookies, like Halloween Oreos, and using a fork, dip each cookie into the melted candy wafers. Make sure to completely cover the cookie, allowing the excess coating to drip back into the bowl, ensuring a nice, even layer of chocolate.
Step 4: Remove Excess Coating
Once coated, lift the Oreo with the fork and gently tap the side of the bowl to remove any excess melted candy. This step is crucial for achieving a smooth finish on your Chocolate Covered Halloween Dipped Oreos. After tapping, let the cookie rest on the fork for a moment to allow the coating to settle.
Step 5: Add Festive Decorations
While the candy coating is still wet, release the Oreo onto the lined cookie sheet and immediately sprinkle with festive decorations, like candy eyes or colorful sprinkles. This is the time to let your creativity shine, building spooky or festive designs on each cookie.
Step 6: Let Them Set
Allow the decorated cookies to sit on the lined sheet for about 1 hour, giving the chocolate coating ample time to harden. If you’d like to add more intricate designs—like mummy wraps using white chocolate—this is the perfect time to do so using a piping bag.
Step 7: Store or Serve
Once your Chocolate Covered Halloween Dipped Oreos have fully set and hardened, transfer them into an airtight container. Store them at room temperature for up to 2 weeks, or for a longer shelf life, freeze them for up to 2 months. Now they’re ready to be shared at parties, festive gatherings, or enjoyed as spooky treats!
What to Serve with Easy Spooky Halloween Dipped Oreo Cookies
Elevate your spooky celebrations with unforgettable sides and drinks that perfectly complement these delightful treats!
-
Chilled Milk: The classic pairing with cookies, a glass of cold milk enhances the sweetness and balances chocolatey flavors perfectly.
-
Halloween Fruit Platter: Fresh fruit shaped like bats or ghosts adds a vibrant and refreshing contrast to the rich cookies, making for a complete festive experience.
-
Spooky Rice Krispie Treats: Easy to make and fun to decorate, these treats provide an added crunch and sweetness, delighting both kids and adults!
-
Pumpkin Spice Cupcakes: The warm spices in these cupcakes harmonize beautifully with the flavors of chocolate, creating a cozy autumnal treat.
-
Hot Cocoa Bar: Create a cozy drink station with hot cocoa, mini marshmallows, and whipped cream. It’s a warm way to enjoy the spooky season!
-
Gummy Worms & Creepy Crawlies: Add some playful fun with gummy candies that tie in with the Halloween theme, offering a chewy contrast to your crispy cookies.
For a truly festive touch, consider serving these delicious cookies alongside a Halloween-themed drink to enhance the spooky spirit of your celebration!
Chocolate Covered Halloween Dipped Oreos Variations
Feel free to get creative and make these festive cookies your very own with fun and exciting twists!
-
Colorful Melting Wafers: Experiment with different colored melting wafers to match various holidays throughout the year. Think pink for Valentine’s day or green for St. Patrick’s Day—for endless festive fun!
-
Flavored Cookies: Replace regular Oreos with flavored sandwich cookies like peppermint or pumpkin spice to add a surprising taste to each bite. A twist on flavor keeps everyone guessing and delighted!
-
Nutty Crunch: Add a sprinkle of crushed nuts on top before the chocolate sets to introduce a delightful crunch. Almonds or pecans complement the chocolate beautifully. Your Halloween Dipped Oreos will become luscious bites of delight!
-
Drizzle Decor: Use a piping bag to drizzle contrasting melted chocolate over the cookies for an elegant touch. A white drizzle over dark chocolate or vice versa creates a beautiful contrast that will catch everyone’s eye.
-
Halloween Shapes: Use cookie cutters to shape sugar cookies and dip them in the same melting wafers for a whimsical treat. Think of ghostly shapes alongside your dipped Oreos for a festive platter!
-
Spicy Kick: Add a pinch of cayenne or chili powder to your chocolate melts for a fun heat that surprises the palate. Sweet and spicy combinations make for exciting new flavor profiles!
-
Coconut Coating: For a tropical twist, roll the finished cookies in unsweetened shredded coconut after dipping. The coconut adds a chewy bite that harmonizes with the chocolate—just like a treat from the tropics!
-
Mummy Wraps: Utilize strips of melted white chocolate to create mummy designs on the cookies. Pair them with candy eyes for extra cute, spooky fun—these are perfect for little goblins to help with!
Don’t forget to keep it festive; these playful additions pair wonderfully with other treats, like Homemade Bake Chocolate or Nutty Chocolate Date. Happy baking!
Make Ahead Options
These Easy Spooky Halloween Dipped Oreo Cookies are perfect for meal prep enthusiasts looking to save time! You can prepare the dipped cookies up to 24 hours in advance by coating the Oreos and decorating them as desired. To maintain quality, store the decorated cookies in an airtight container at room temperature, ensuring they are kept away from moisture. When you’re ready to serve, you can add any additional touches, like fresh sprinkles or candy eyes, before revealing your delightful treats. This way, you’ll have these festive snacks ready to impress your guests with minimal effort!
How to Store and Freeze Chocolate Covered Halloween Dipped Oreos
Room Temperature: Store in an airtight container at room temperature for up to 2 weeks. This keeps them fresh while allowing convenient access for snacking.
Fridge: For longer shelf life, refrigerate for up to 3 weeks. Ensure they’re sealed tightly to prevent them from absorbing nearby odors and to maintain their delightful chocolate flavor.
Freezer: Freeze the cookies in a single layer on a baking sheet for about 1 hour, then transfer them to a freezer-safe container, where they can last up to 2 months.
Reheating: When ready to enjoy, simply thaw them at room temperature. Avoid microwaving as this can cause the chocolate coating to melt or lose its texture. Keep these Chocolate Covered Halloween Dipped Oreos spooky and delicious!
Expert Tips for Chocolate Covered Halloween Dipped Oreos
-
Use Quality Melts: Choose high-quality melting wafers to ensure a smooth, glossy finish. Cheap melts can clump and ruin your coating.
-
Work in Batches: To avoid burning the candy melts, work in small batches of about 6-8 ounces each. This keeps them at the right consistency while you dip.
-
Timing is Key: Add sprinkles and decorations immediately after dipping. If you wait too long, they won’t stick, and you’ll miss out on a festive touch.
-
Reheat Only as Needed: If the chocolate thickens while dipping, add a teaspoon of vegetable oil and heat in 10-second intervals, mixing until smooth. Avoid using water as it can cause seizing.
-
Customization: Make these Chocolate Covered Halloween Dipped Oreos even more fun by swapping in flavored sandwich cookies, like mint or peanut butter, to surprise your family and friends!
Easy Spooky Halloween Dipped Oreo Cookies Recipe FAQs
How do I select the right Oreos for this recipe?
Absolutely! You can use any type of sandwich cookie, but for a true Halloween vibe, select Halloween-themed Oreos. When picking gluten-free options, always check the packaging to ensure they’re marked as gluten-free.
What is the best way to store my dipped cookies?
For optimal freshness, store your Chocolate Covered Halloween Dipped Oreos in an airtight container at room temperature for up to 2 weeks. If you’d like them to last longer, you can refrigerate them for up to 3 weeks. Just make sure they’re tightly sealed to keep their delightful chocolate flavor intact!
Can I freeze these Halloween cookies?
Yes! Freezing is a great way to extend the shelf life. To freeze, lay the cookies in a single layer on a baking sheet for about 1 hour until they firm up. Then, transfer them to a freezer-safe container, where they can be stored for up to 2 months. When you’re ready to eat, simply let them thaw at room temperature. Avoid microwaving as it can affect the texture.
What should I do if my chocolate coating isn’t smooth?
If your melted candy wafers are thick or clumpy, don’t fret! Just add 1 teaspoon of vegetable oil to the melted mixture and reheat in 10-second intervals until smooth. This should restore that glossy finish! Also, work in smaller batches to keep the melts from burning.
Are there any allergy or dietary concerns I should consider?
Very much! These cookies can be adapted to suit various dietary needs. For gluten-free options, ensure you choose gluten-free Sandwich cookies and sprinkles. If you want to make them dairy-free, select dairy-free chocolate melting wafers and check all labels. Always be mindful of cross-contamination if anyone has severe allergies.
Can I customize the decorations on my cookies?
The more the merrier! You can absolutely get creative with the decorations. Consider adding colored sprinkles, different candies, or even edible glitter to give your cookies a unique flair. Just remember to apply them right after dipping while the coating is still wet for the best adhesion.
Chocolate Covered Halloween Dipped Oreos for Spooky Fun
Ingredients
Equipment
Method
- Line a cookie sheet with wax or parchment paper.
- Gather all ingredients within reach.
- In separate bowls, add each color of melting wafers.
- Microwave each color in 30-second increments, stirring until smooth.
- Dip each Oreo into the melted wafers, ensuring complete coverage.
- Remove excess coating and let cookies rest on the fork.
- Release cookies onto the lined sheet and add decorations immediately.
- Allow cookies to sit for about 1 hour to harden.
- Store in an airtight container at room temperature or freeze.