

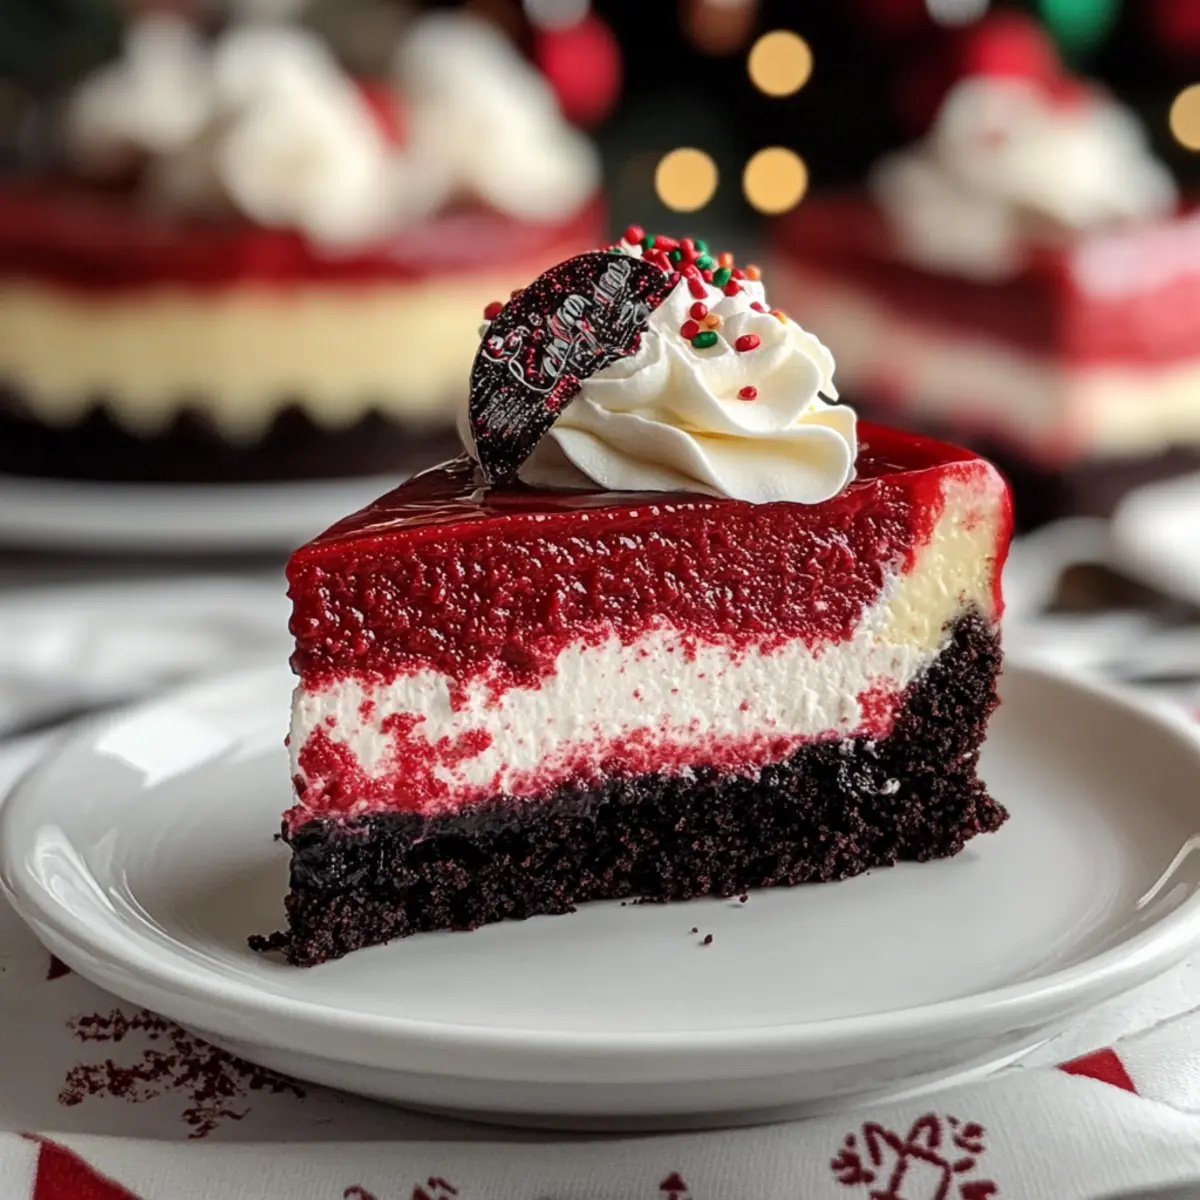
The aroma of freshly baked treats wafting through the kitchen is enough to transport anyone back to the warmth of childhood holiday memories. My Christmas Red Velvet Cheesecake captures that nostalgia perfectly, with its rich, creamy filling and vibrant hue making it a stunning centerpiece for any festive gathering. This irresistible dessert not only provides a show-stopping visual display but also delivers an indulgent taste that leaves everyone wanting more. Perfect for both seasoned bakers and enthusiastic newcomers, this recipe captures the essence of holiday joy with a quick prep that fits seamlessly into your busy schedule. Are you ready to impress your loved ones with a dessert that looks as delightful as it tastes? Let’s dive into the delicious details!

Why Is This Cheesecake a Must-Try?
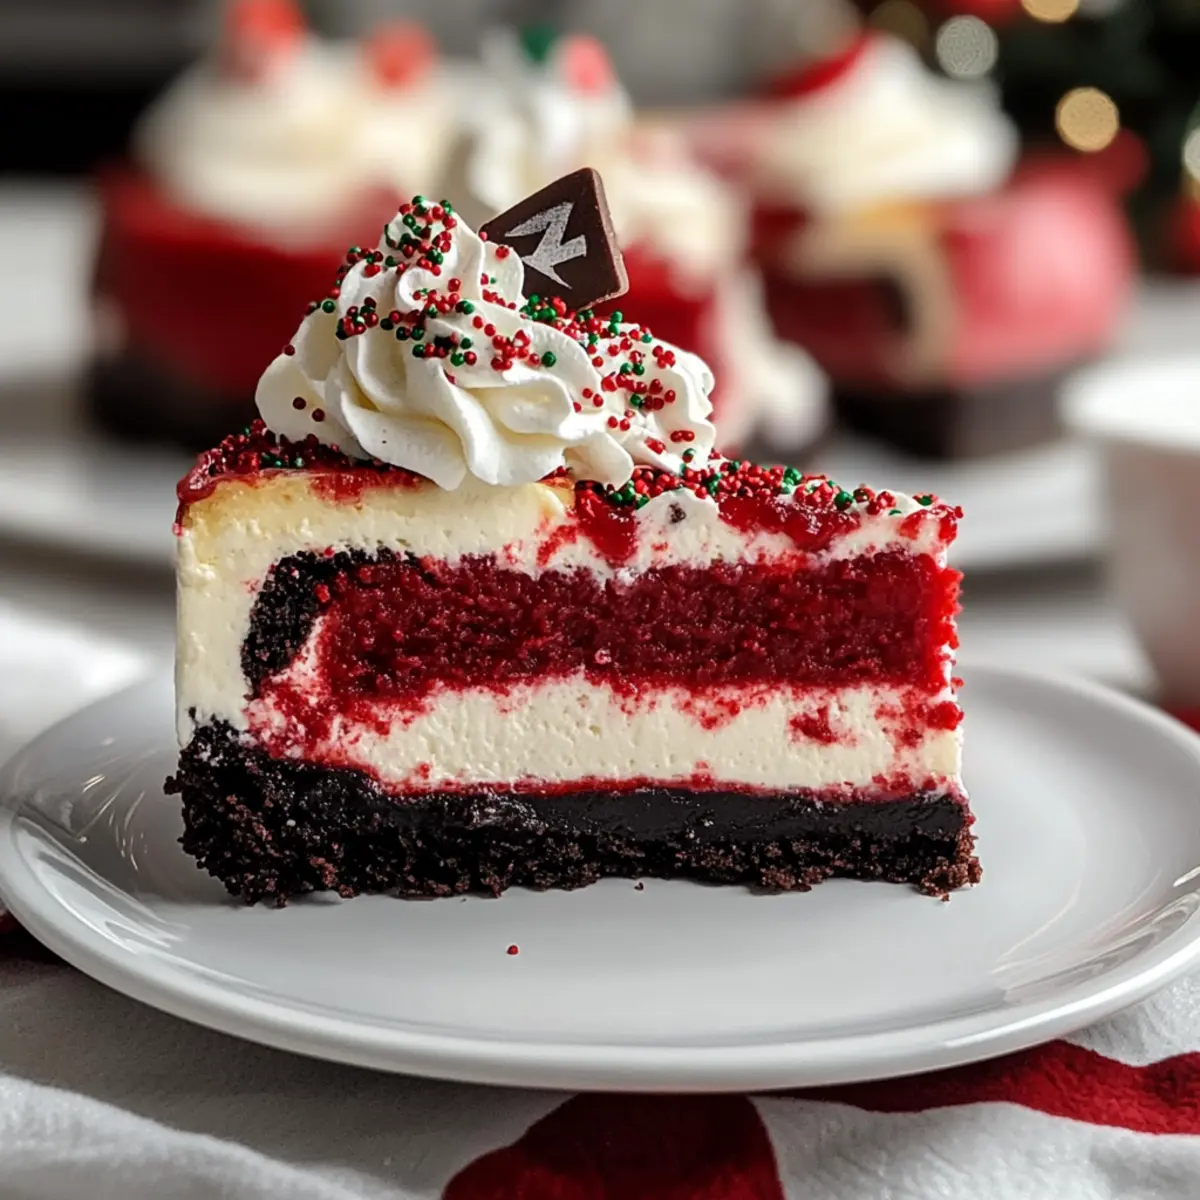
Indulgent Flavor: This Christmas Red Velvet Cheesecake is a stunning fusion of rich, creamy cheesecake and classic red velvet cake, bringing a festive sweetness that’s simply irresistible.
Simple Steps: With just a few straightforward steps, even novice bakers can create a dessert that shines at any gathering.
Visual Appeal: The vibrant red hue and elegant whipped cream topping provide a show-stopping presentation, ensuring it’s the highlight of your holiday table.
Versatile Variations: Feel free to switch up the crust or toppings—try a ginger snap crust or fresh fruit for an exciting twist.
Perfect Pairing: Serve it alongside a cup of coffee or dessert wine for a delightful end to your festive meal. For more quick, crowd-pleasing options, check out our Asian Inspired Cabbage or Two Ingredient Omelet.
Bring joy to your holiday celebrations with this show-stopping dessert that everyone will adore!
Christmas Red Velvet Cheesecake Ingredients
• Get ready to bake a festive delight!
For the Crust
- Oreo Cookies – A delicious base crust; substitute with graham crackers for a different flavor.
- Butter – Binds the crust together; use unsalted for perfect flavor balance.
For the Filling
- Cream Cheese – The star of the filling; ensure it’s at room temperature for a smooth mix.
- White Sugar – Sweetens the cheesecake; caster sugar can be used for a finer finish.
- Heavy Whipping Cream – Adds a lightness to the cheesecake; whip well for airy texture.
- Vanilla Extract – Elevates the overall flavor; always choose pure for the best results.
- Cocoa Powder – Provides rich flavor and depth; use unsweetened varieties to control the sweetness.
- Red Food Coloring – Achieve that classic festive hue; gel forms work best for vibrant color.
- Christmas Sprinkles – Optional, but they add a fun holiday touch!
For the Toppings
- Whipped Cream – Adds creaminess and elegance; fresh and homemade is always better.
- Mini Oreos – Perfect for garnishing; they’ll bring an extra festive charm to your dessert!
Elevate your holiday celebrations with this Christmas Red Velvet Cheesecake that’s not only stunning to look at but also a delightful treat for the tastebuds!
Step‑by‑Step Instructions for Christmas Red Velvet Cheesecake
Step 1: Preheat & Prepare
Preheat your oven to 350°F (175°C) to get the ideal baking temperature for your Christmas Red Velvet Cheesecake. While the oven warms, wrap a 9-inch springform pan in aluminum foil to prevent water from seeping in during the water bath baking method. This step is crucial for a smooth, creamy texture, so take your time to ensure it’s securely wrapped.
Step 2: Make the Crust
Crush the Oreo cookies into fine crumbs using a food processor or by placing them in a sealed bag and rolling over them with a rolling pin. Combine these crumbs with melted unsalted butter until they resemble wet sand. Press this mixture firmly and evenly into the bottom of the prepared springform pan, creating a solid foundation. Bake for 8-10 minutes until firm, then let it cool completely before adding the filling.
Step 3: Prepare the Cheesecake Filling
In a large mixing bowl, beat the softened cream cheese until it’s smooth and creamy, ensuring there are no lumps. Gradually add white sugar, vanilla extract, cocoa powder, and red food coloring, mixing well until fully combined. In a separate bowl, whip the heavy cream until soft peaks form, then gently fold it into the cream cheese mixture along with festive Christmas sprinkles. This will give your filling a light, airy texture.
Step 4: Bake
Lower the oven temperature to 325°F (160°C) for the baking phase of your Christmas Red Velvet Cheesecake. Place the springform pan inside a larger pan filled with hot water to create a water bath. Bake for 1 to 1.25 hours, or until the edges are set, but the center still jiggles slightly when you gently shake the pan. This ensures a creamy consistency without cracks.
Step 5: Cool & Chill
After baking, turn off the oven and leave the cheesecake inside with the door ajar for 1 hour, allowing it to cool gradually. This method prevents sudden temperature changes that might cause cracking. Afterward, transfer it to a wire rack to cool completely for 2-3 hours. Once cooled, refrigerate for at least 6-8 hours, or preferably overnight, to firm up the cheesecake completely.
Step 6: Decorate & Serve
Once your Christmas Red Velvet Cheesecake has chilled thoroughly, carefully remove it from the pan. Top with freshly whipped cream, and then sprinkle mini Oreos and festive sprinkles over the top for a delightful presentation. Use a hot knife to slice through the cheesecake, ensuring clean cuts. Serve immediately and watch delight light up the faces of your family and friends!
Expert Tips for Christmas Red Velvet Cheesecake
-
Use Room Temperature Ingredients: Make sure your cream cheese is at room temperature for a smooth, lump-free filling. Cold cream cheese can lead to an uneven texture.
-
Perfect Water Bath: Using a water bath prevents cracking in your cheesecake. Wrap the pan tightly in aluminum foil to ensure no water seeps in.
-
Check for Doneness: The cheesecake should be set at the edges with a slight jiggle in the center. Overbaking can result in a dry texture, so keep an eye on it!
-
Chill Overnight: For the best flavor and texture, refrigerate your Christmas Red Velvet Cheesecake overnight. This allows the flavors to meld beautifully.
-
Decorate Just Before Serving: Whipped cream and sprinkles are best added just before serving to maintain their freshness and presentation.
Make Ahead Options
These Christmas Red Velvet Cheesecake bites are perfect for those busy holiday weeks! You can prepare the crust up to 3 days in advance by making it, pressing it into the pan, and storing it covered in the refrigerator. The cheesecake filling can also be made 24 hours ahead; simply mix, pour over the crust, and bake as directed. To maintain the cheesecake’s creamy texture, allow it to cool completely before refrigerating it overnight. When ready to serve, just add the whipped cream topping and festive decorations. This way, you’ll have a stunning dessert ready to impress your guests with minimal last-minute effort!
What to Serve with Christmas Red Velvet Cheesecake
The perfect holiday cheesecake deserves a delightful array of accompaniments that elevate your festive gathering.
- Rich Coffee: Perfectly balances the sweetness, creating a comforting end to your meal that warms the heart.
- Spiced Apple Cider: Offers a cozy, seasonal touch, enhancing the flavors of the cheesecake while adding a spiced warmth.
- Creamy Mashed Potatoes: Their comforting texture complements the lightness of the cheesecake, making for a satisfying meal.
- Fresh Berries: Tart raspberries or sweet strawberries provide a refreshing contrast, enhancing your cheesecake’s grandeur visually and tastefully.
- Chocolate Ganache: A drizzle of rich ganache on top adds an indulgent touch while accentuating the cocoa flavor in the cheesecake.
- Christmas Cookies: Offering a variety of textures and flavors, these sweet treats can add even more festive cheer to your dessert table.
- Dessert Wine: A glass of dessert wine will harmoniously blend with the cheesecake, enhancing its sweet and creamy notes.
- Nutty Biscotti: Provides an excellent texture contrast, perfect for sublime dipping into a cup of coffee or enjoying alongside the cheesecake.
- Mini Fruit Tarts: Their bright colors and fresh flavors not only make for a charming presentation but also cleanse the palate beautifully.
- Chocolate Mousse: Light and airy, this dessert pairs delightfully with the cheesecake, highlighting its festive essence and providing an elegant finish.
Christmas Red Velvet Cheesecake Variations
Feel free to let your creativity shine with these exciting twists on the classic cheesecake that will elevate your festive dessert game!
- Alternative Crust: Swap out the Oreo base for a ginger snap crust for a delightful spicy kick that complements the rich flavors beautifully.
- Fruit Fusion: Add fresh raspberries or strawberries to the filling for a fruity burst of flavor that balances the sweetness of the cheesecake perfectly.
- Citrus Zest: Incorporate a teaspoon of orange zest into the filling for a refreshing citrus note that enhances the overall flavor profile.
- Chocolate Chip Delight: Stir in some semi-sweet chocolate chips into the cheesecake filling for added texture and a decadent chocolatey touch.
- Dairy-Free Option: Replace cream cheese with vegan cream cheese, and use coconut whipped cream for a delightful dairy-free version of this indulgent treat.
- Nutty Crunch: Top the cheesecake with chopped pecans or walnuts for a delightful crunch that contrasts wonderfully with the smooth filling.
- Spiced Up: For those who love a kick, sprinkle some cayenne pepper or cinnamon into the filling for an unexpected yet delightful warmth.
- Layered Indulgence: Create a layered cheesecake by making a batch of Strawberry Cheesecake Dump filling and layering it with this red velvet cheesecake for a show-stopping combination!
Let these variations inspire you, and don’t hesitate to experiment! This Christmas Red Velvet Cheesecake is your canvas—paint it with your favorite flavors!
Storage Tips for Christmas Red Velvet Cheesecake
Fridge: Store your cheesecake in an airtight container in the refrigerator for up to 3-4 days to keep it fresh and delicious.
Freezer: If you want to save it for later, wrap individual slices tightly in plastic wrap and then in aluminum foil. It can be frozen for up to 2 months.
Thawing: To enjoy your frozen Christmas Red Velvet Cheesecake, transfer it to the fridge 6-8 hours before serving to thaw slowly for the best texture.
Reheating: If desired, allow slices to come to room temperature before serving to enhance the rich flavors of this indulgent dessert.

Christmas Red Velvet Cheesecake Recipe FAQs
What kind of Oreos should I use for the crust?
I recommend using classic Oreo cookies for their rich chocolate flavor and ideal texture for the crust. If you’d like to switch things up, feel free to use chocolate wafer cookies or graham crackers for a different taste!
How should I store leftovers?
To keep your Christmas Red Velvet Cheesecake fresh, store it in an airtight container in the refrigerator for up to 3-4 days. This will help maintain its creamy texture and delightful flavor. If you prefer it to be at room temperature when serving, just let it sit out for about 30 minutes before indulging.
Can I freeze the cheesecake?
Absolutely! You can freeze your Christmas Red Velvet Cheesecake for up to 2 months. Wrap individual slices tightly in plastic wrap, then cover with aluminum foil to prevent freezer burn. When you’re ready to enjoy a slice, transfer it to the fridge and allow it to thaw slowly for 6-8 hours for the best texture.
What if my cheesecake cracks while baking?
No worries! If you notice cracks forming, it might be because of two reasons: it was baked at too high a temperature or not cooled properly. To avoid this, always bake in a water bath to keep moisture levels high, and remember to leave the cheesecake in the turned-off oven with the door ajar for an hour post-baking before transferring it to a wire rack.
Is this cheesecake suitable for those with dietary restrictions?
While this Christmas Red Velvet Cheesecake includes dairy and gluten, you can modify it for dietary restrictions. For a gluten-free version, use gluten-free cookie alternatives for the crust. If someone has a dairy allergy, explore dairy-free cream cheese and whipped topping options available on the market to create a version that fits their needs.
Irresistible Christmas Red Velvet Cheesecake You'll Love
Ingredients
Equipment
Method
- Preheat your oven to 350°F (175°C) and wrap a 9-inch springform pan with aluminum foil.
- Crush the Oreo cookies into fine crumbs and mix with melted unsalted butter. Press into the bottom of the springform pan.
- Bake the crust for 8-10 minutes and let it cool completely.
- Beat cream cheese until smooth, then add sugar, vanilla, cocoa powder, and red food coloring. Mix well.
- Whip the heavy cream until soft peaks form and fold into the cheesecake mixture with sprinkles.
- Lower the oven temperature to 325°F (160°C) and bake in a water bath for 1 to 1.25 hours.
- Turn off the oven and let the cheesecake cool inside with the door ajar for an hour, then cool on a wire rack for 2-3 hours.
- Refrigerate for at least 6-8 hours or overnight.
- Decorate with whipped cream, mini Oreos, and sprinkles before serving.
- Slice with a hot knife and serve.